

Page 1

De’Longhi Appliances
via Seitz, 47
31100 Treviso Italia
5711010441/04.13_00
Page 2
Instructions for use
DRAGON 4 OIL FILLED RADIATOR
TRD4 0820T TRD4 0615T TRD4 1025T
Page 3
2
A
B
C
H
G
E
F
D
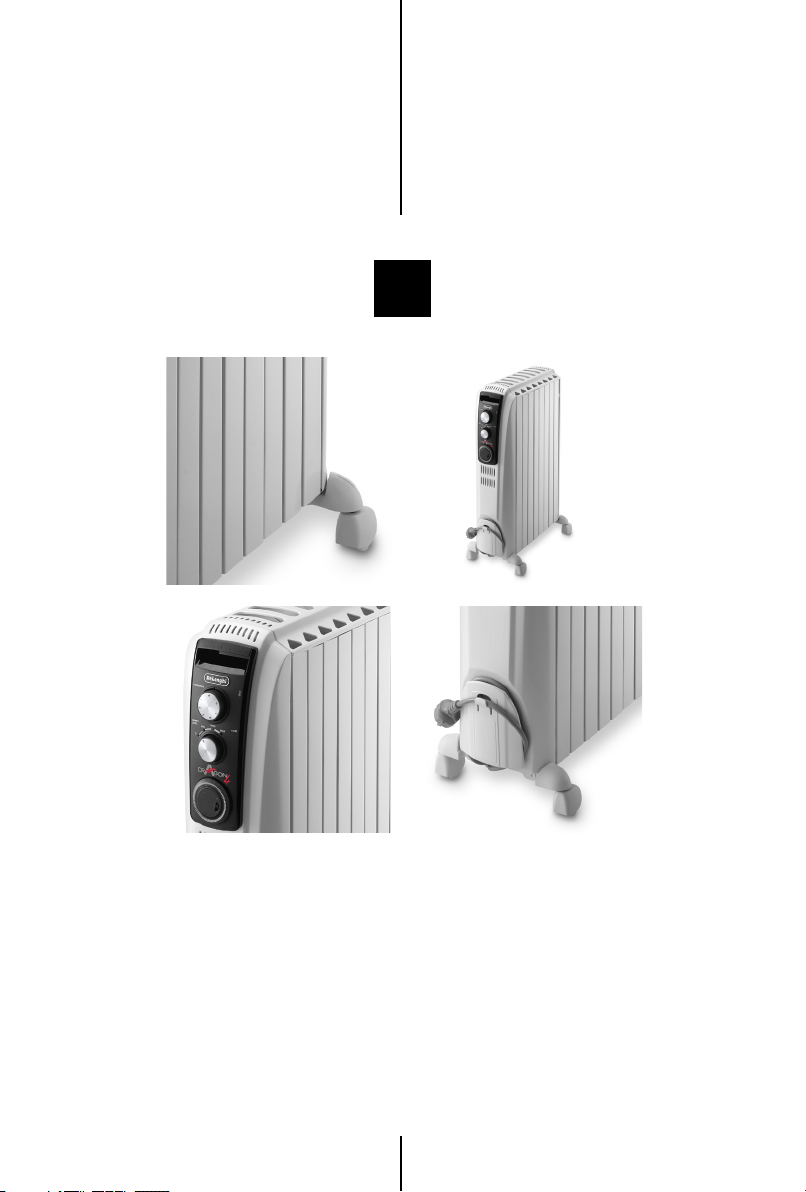
Description of Appliance
Page 4

3
Important warnings
en
INSTRUCTIONS FOR USE
Read these instructions carefully before using the appliance.
Failure to comply with these instructions can lead to injury
to persons and damage to the machine.
The manufacturer is not liable for damage deriving from the
failure to comply with the user instructions.
Symbols used in these instructions
Important warnings are identied by the symbols below.
It is important to respect the warnings.
Failure to respect the warnings could lead to electric shock,
serious injury, burns, re or damage to the appliance.
Danger!
Failure to observe the warning may result in life threatening
injury by electric shock.
Important!
Failure to observe the warning could result in injury or
damage to the appliance.
Danger of burns!!
Failure to observe the warning could result in burns or
scalds.
Please note:
This symbol indicates recommendations and important
information for the user.
Fundamental recommendations regarding safety
Dear Customer – The plug on this appliance will get ‘warm’
during use, this is per fectly normal. This product is A HIGH
POWER HEATING APPLIAN CE d esigned to our usual high
standards but please make sure your wall sockets are in good
condition and the plug is inserted correctly to avoid any
accidental overheating. We suggest that you check the plug
AND THE SOCKET regularly if the heater is in prolonged use, if
you are in any doubt please consult an electrician.
SAFETY WARNINGS
Danger!
As the appliance operates using electricity, electric shocks
can not be excluded.
Therefore, follow the safety recommendations given:
- To avoid ris k o f c able overheat ing, exten sion
le ads mu st n ot b e u sed in p ower ing thi s
appliance.
- If the power cable is damaged, it must be replaced by the
manufacturer or an authorised service centre in order to
eliminate all risk. Please contact Customer Experience,
see enclosed guarantee.
- Do not use the heater in a bathroom or in the vicinity of
bathtubs, washbasins, showers or swimming pools.
Important!
The appliance is not intended for use by persons
(including children) with reduced physical, sensory or
mental capabilities, or lack of experience and knowledge,
unless they have been given supervision or instruction
concerning use of the appliance by a person responsible
for their safety. Children should be supervised to ensure
that they do not play with the appliance.
- The heater must be positioned at least 50cm from
furniture or other objects.
- Do not use this appliance in rooms measuring less than
4m.
- Do not place items over the radiator (such as to dry
washing).
- In order to avoid a hazard due to inadvertent resetting of
the thermal cutout, this appliance must not be supplied
through an external switching device such as a timer, or
connected to a circuit that is regularly switched on and
o by the utility.
Danger of burns!!
- Do not rest the power cable on hot elements.
WARNING: In order to avoid overheating, never
under any circumstances cover the appliances
during operation, as this would lead to dangerous
overheating.
Please note:
- The appliance must not be placed immediately under a
xed power socket.
- Always use the radiator in the vertical position.
- When you turn the appliance on for the rst time,
operate it at maximum for at least two hours.
- It is normal for the appliance to make "creaking" noises
when rst turned on.
Page 5

4
Description/Use
en
- This appliance is lled with a precise quantity
of oil and repairs requiring it to be opened
must be carried out by the manufacturer or
an authorised technical assistance centre only. In the
event of oil leaks, please contact Customer Experience,
see enclosed guarantee.
- As with any elec trical appliance, whilst the instructions
aim to cover as many eventualities as possible, caution
and common sense should be applied when operating
your appliance, particularly in the vicinity of young
children.
Use in compliance with intended use
Use this heater only as described in this manual. All other
use is considered improper. This appliance is not suitable for
commercial use. The manufacturer is not liable for damage
deriving from impro per use of the ap plianc e. This i s a
household appliance only. It is not intended to be used in:
• staffkitchenareasin shops, offices and other working
environments;
• farmhouses;
• byclients in hotels, motelsandotherresidential type
environments;
• bedandbreakfasttypeenvironments.
Use in this manner will invalidate the manufacturers warranty.
Disposing of the appliance
In compliance with European directive 2002/96/EC,
the appliance must not be disposed of with household waste, but taken to an authorised waste separation and recycling centre.
Introduction
Thank you for choosing the TRD Oil Filled Radiator. We hope
you enjoy using your new appliance. Take a few minutes to
read these instructions. This will avoid all risks and damage
to the appliance.
DESCRIPTION
(see figure on pag. 2).
The termino logy below w ill be used repeatedly in t he
following pages.
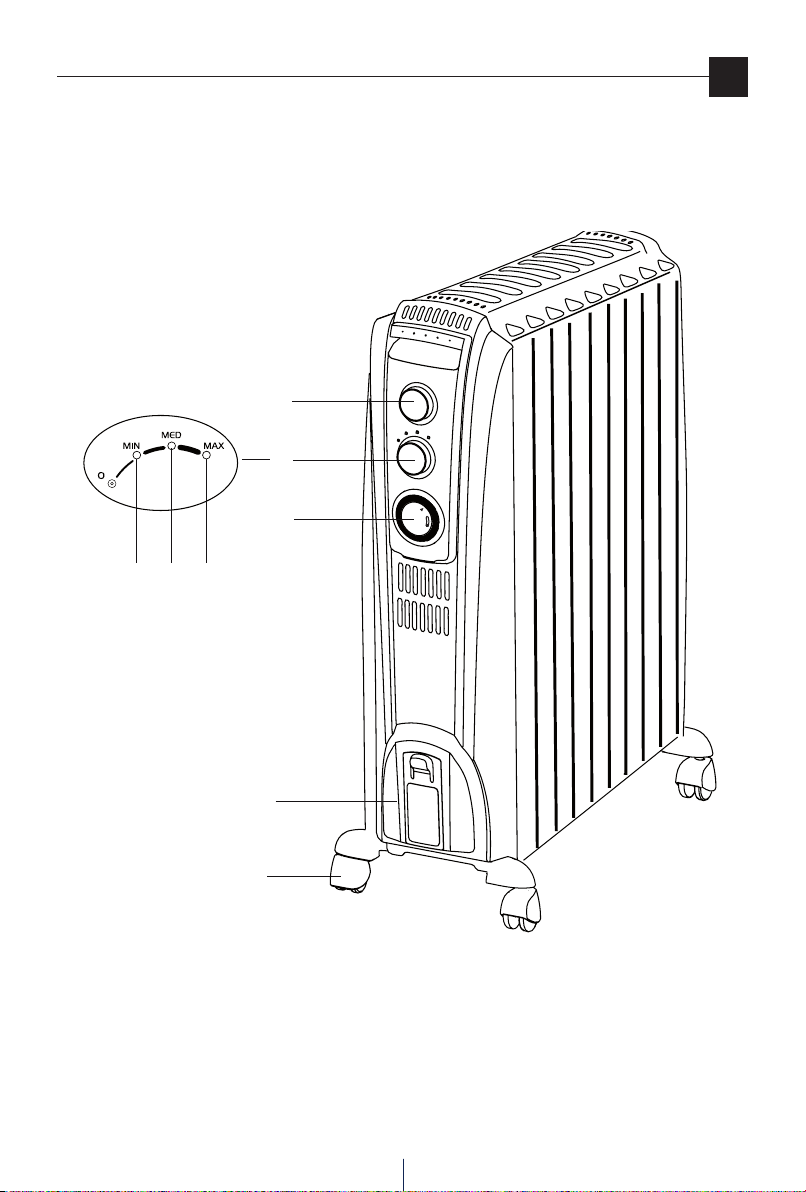
A Thermostat
B Power selector
C/D/E Power indicator lights (MIN, MED, MAX)
F Timer
G Cord holder
H Wheel
USE
Fitting the wheels
Turn the radiator upside down on a rug or soft surface to
prevent damaging the paint nish. Fully unfold the wheels
by turning them outwards (Fig. 1). Turn the radiator back to
its upright position.
Fig. 1
Caution
Always operate the heater in upright position only (wheels
on the bottom, controls on top).
Any other position could create a hazardous situation.
Location
The heater should not be placed immediately below a power
outlet. Do not use this radiator in rooms with a oor area of
less than 4 m2 (43 sq. ft. ).
Connection
- Before using the appliance check that your supply
voltage is the same of that shown on the rating label of
the unit and that the power socket and power supply
line correspond to the load specied.
- Check also the current capacity of your fuses. CONNECT
YOUR HEATER TO EARTH PROVIDED SOCKET ONLY.
- This appliance complies with directive 2004/108/ec on
electromagnetic compatibility.
Keep loose clothing or bedding, furniture and ammable
material away from the heater's wall outlet.
Turning on
Insert the plug into an electrical outlet, rotate the thermostat
knob to maximum and turn the unit on as follows using the
power selector:
- Turn the power selector to position MIN to select
minimum output (the min light will be on).
Page 6

5
Heater o
Timer operation
Manual (timer override)
Units with timer
en
- Turn the power selector to position MED to select
medium output (the min/med light will be on).
- Turn the power selector to position MAX to select
maximum output (the lights will be on).
Adjusting the thermostat
When the room has reached the desired temperature,
turn the thermostat knob slowly in a clockwise direction
until you hear a "click" and not beyond it. The thermostat
will then adjust the set temperature automatically and
keep it constant. If your unit is a three-output version, in
intermediate seasons or on days when temperatures are not
particularly cold, select minimum output to optimize savings
and consumption.
Antifreeze function
Turn the thermostat dial to the position and the power
selector to position MAX. The appliance will maintain a
minimum room temperature of approximately 5°C, thus
preventing freezing while conserving energy. In models that
come with a timer, tabs must be set in the inward position.
Reminder
To completely shut the appliance o, turn the power selector to
the "0" position and then unplug the appliance from the outlet.
UNITS WITH TIMER
How to use the timer
teeth (1) inward.
Each tooth (1) corresponds to a period of 15 minutes.
This will leave visible sectors which correspond to
the periods of operation (2). When set, the radiator
will operate automatically each day during the times
programmed (impor tant: the radiator must always be
plugged into the socket).
- To change the programming, move the teeth back
into the initial position and set the new periods of
operation.
- To turn the appliance o completely, as well as turning
the knob to the o position, you must also unplug it
from the power outlet to avoid continued operation of
the timer.
IMPORTANT: DO NOT ROTATE CLOCK DIAL COUNTERCLOCKWISE.
The timer is like an electric clock, and will only work when
plugged into a power supply. When unplugged, the timer
stops and must be later re-set.
Timer override
If you wish to override the timer settings, push the timer
switch to position I (g.2) manual (timer override). To return
to timed operation push the switch back to the middle
position (g.2).
NOTE: if the timer switch is at the 0 position (g. 2),
the heater is o and will not operate).
To program heating, proceed as follows:
- Look at the time on your clock or watch. If it is 10 p.m.,
turn the numbered timer disk clockwise until the
number 22 (10 p.m.) on the disk coincides with the
pointer s (3) on the timer. Set the periods of time
when you want the appliance to work by pushing the
Fig. 2
Safety device
A safety device shuts the radiator down in the case of
overheating. To start the radiator up again, contact Customer
Experience. See enclosed guarantee leaet.
Page 7

6
Maintenance and service/Troubleshooting
MAINTENANCE AND SERVICE
Always unplug the heater from the power outlet and allow
the radiator to cool.
Wipe radiator with a soft damp cloth; do not use detergents
or abrasives. Should the radiator not be in use over a certain
length of time, wind the cord around the holder and store it
in a dr y place. This appliance has been built to last for many
years of trouble-free service. In case of malfunction or doubt,
do not try to repair the heater by yourself: this might increase
the risk of re and electric shock. Please refer to the enclosed
guarantee leaet for service and assistance details.
TROUBLESHOOTING
PROBLEM CAUSE SOLUTION
The appliance doesn't work - Be sure it is plugged in and that the
electrical outlet is working.
en
- Plug into the power outlet.
- Check for any obstruction.
- The temperature may be set too low.
- Remove the obstruc tion and let the
appliance cool down. If the appliance
doesn't work please contact Customer
Experience.
- Set the temperature to a higher
position.
Page 8

7
Electrical requirements
Before using this appliance ensure that the voltage indicated on the product corresponds with the main voltage in your home,
if you are in any doubt about your supply contact your local electricity company.
The exible mains lead is supplied connected to a B.S. 1363 fused plug having a fuse of 13 amp capacity.
Should this plug not t the socket outlets in your home, it should be cut o and replaced with a suitable plug, following the
procedure outlined below.
Note: Such a plug cannot be used for any other appliance and should therefore be properly disposed of and not left where
children might nd it and plug it into a supply socket - with the obvious consequent danger.
Please note: We recommend the use of good quality plugs and wall sockets that can be switched o when the machine is
not in use.
IMPORTANT: The wires in the mains lead tted to this appliance are coloured in accordance with the following code:
Green and Yellow to Earth
en
GREEN AND YE LLOW EARTH
BLUE NEUTRAL
BROWN LIVE
Blue to
neutral
As the colours of the wires in the mains lead of this appliance may not correspond with the coloured markings identifying the
terminals in your plug, proceed as follows:
- The wire which is coloured green and yellow must be connected to the terminal in the plug which is marked with the
letter E or by the earth symbol or coloured green or green and yellow.
- The wire which is coloured blue must be connected to the terminal which is marked with the letter N or coloured black.
- The wire which is coloured brown must be connected to the terminal which is marked with the letter L or coloured red.
When wiring the plug, ensure that all strands of wire are securely retained in each terminal. Do not forget to tighten the
mains lead clamp on the plug. If your electricity supply point has only two pin socket outlets, or if you are in doubt, consult a
qualied electrician.
Should the mains lead ever require replacement, it is essential that this operation be carried out by a qualied electrician and
should only be replaced with a exible cord of the same size.
After replacement of a fuse in the plug, the fuse cover must be retted. If the fuse cover is lost, the plug must not be used until
a replacement cover is obtained. The colour of the correct replacement fuse cover is that of the coloured insert in the base of
the fuse recess or elsewhere on the plug. Always state this colour when ordering a replacement fuse cover.
Only 13amp replacement fuses which are asta approved to B.S. 1362 should be tted.
This appliance conforms to the Norms EN 55014 regarding the suppression of radio interference.
Warning - this appliance must be earthed
13 amp Fuse
Brown to live
Cord Clamp
 Loading...