


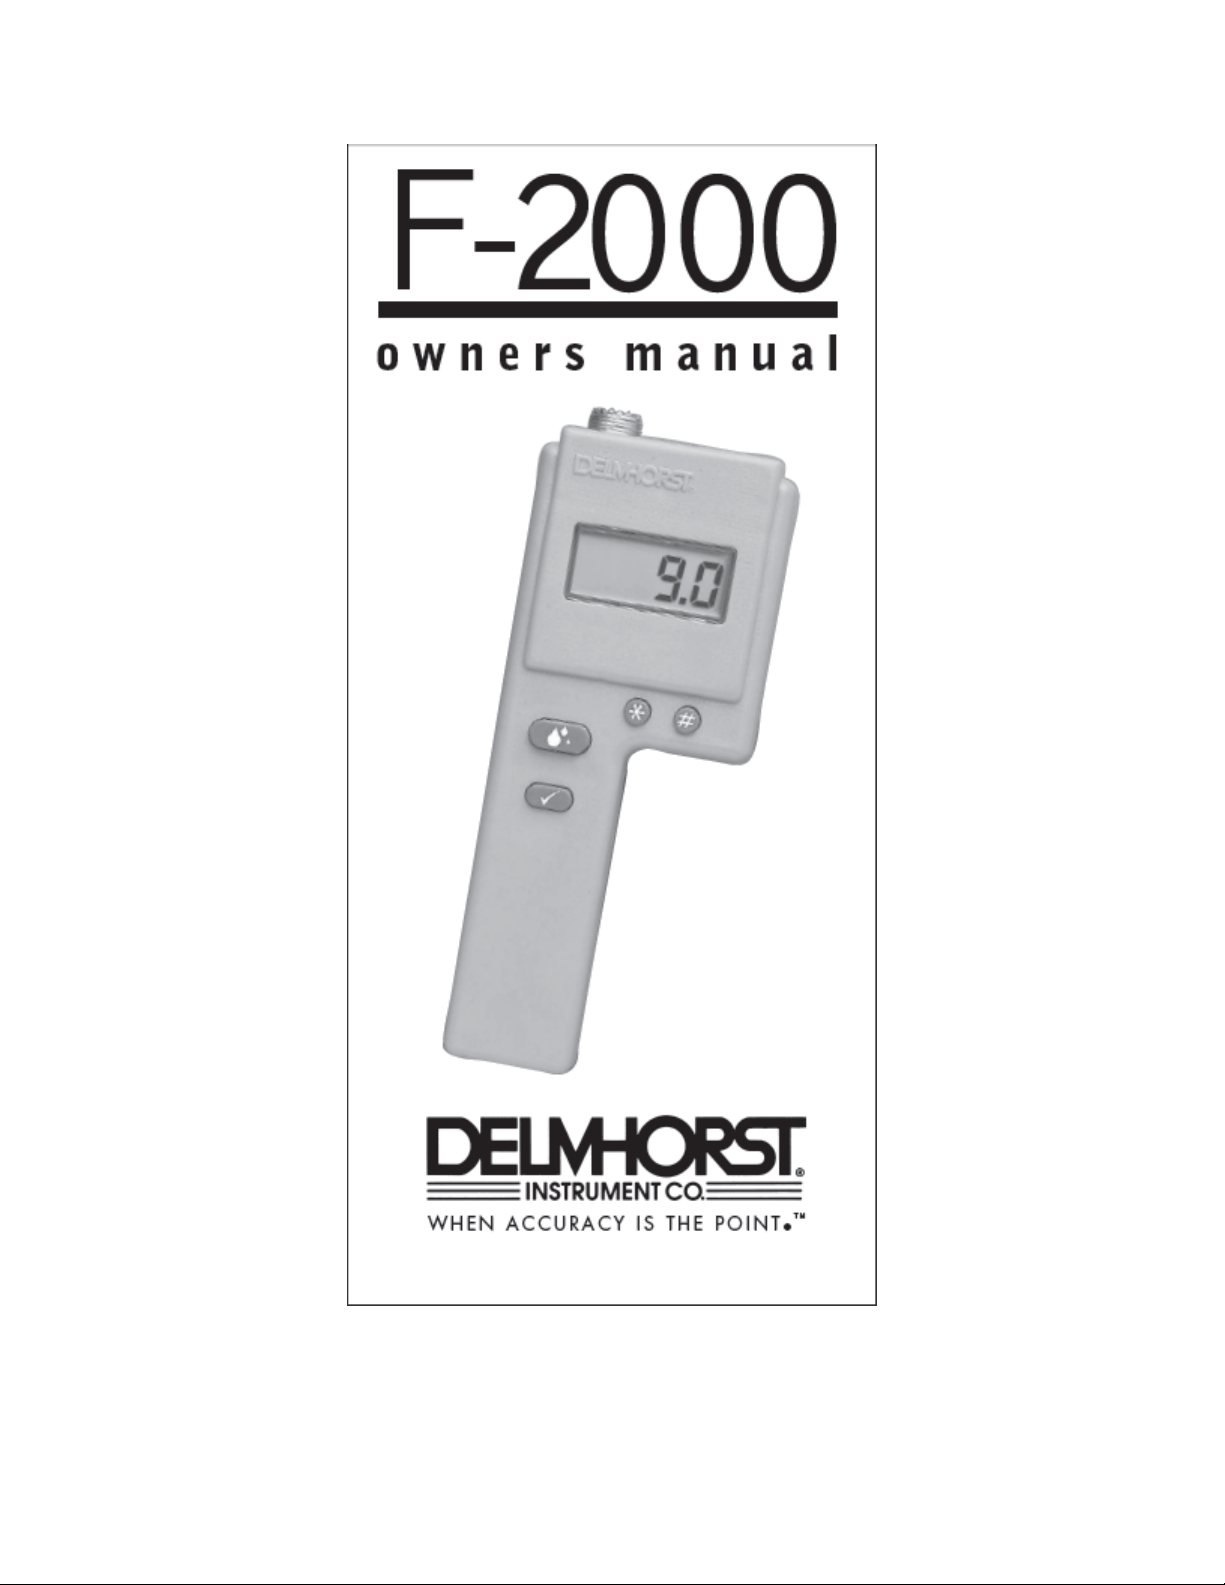
OWNERS MANUAL FOR F-2000T
(VERSION 4.2 FOR BURLEY TOBACCO)
This addendum is to be used in conjunction with the Owners Manual for the F-2000 Hay
Moisture Meter (attached). This addendum contains information specific to the tobacco
applications. We recommend the user read the Owner’s Manual and addendum completely,
before using the F-2000T.
The meter reads moisture in TOBACCO between 8.0 and 37.0%. It also stores the
reading and displays the average and maximum of up to 100 accumulated readings.
The meter also has a set point and a buzzer. Whenever the displayed reading is
above the set point value, the buzzer will sound. The meter will automatically correct
the input reading for sample temperature, provided that the user has entered the
correct temperature in the meter.
Whenever the battery is removed and then reconnected (i.e when power is applied),
the meter will display the software version number (4.2) for one second and then shut
off if no key is pressed.
The meter has FOUR keys - the “READ” key, the “CHECK” key, the “SET” key and
the “TEMP” key (see the attached diagram).
1. TO RESET THE METER
Resetting the meter will restore the default settings and erase all the stored readings.
Press the “CHECK” key immediately, followed by the “SET” key. The meter will
display “200” for two seconds and then shut off.
2. TO CHANGE THE SET POINT VALUE
The default set point value for the meter is 20.0%. The user can change the value
between 8.0 and 37.0.
Press the “SET” key. The meter will display the current set point value. To increase
the set point, keep the “SET” key pressed. The value will increase in steps of 1.0.
To decrease the value, press the “TEMP” key within two seconds after pressing the
“SET” key. The value will decrease in steps of 1.0.
3. TO CHANGE THE TEMPERATURE SETTING
The meter will automatically correct the moisture reading for sample temperature,
provided the user has entered the correct SAMPLE TEMPERATURE in the meter.
The user can set the temperature between 0º and 255º F.
The default temperature setting is 80º F. The meter will correct the moisture value by
0.05% for every degree change in the sample temperature.
1

Press the “TEMP” key. The meter will display the current temperature setting. To
increase the setting, keep the “TEMP” key pressed. The temperature value will
increase in steps of 5º. To decrease the value, press the “SET” key within two
seconds after pressing the “TEMP” key. The value will decrease in steps of 5.0.
4. READING THE %MC VALUE
Press the “READ” key. Within 1 or 2 seconds, the meter will display the %MC
between 8.0 and 37.0. The meter will automatically correct the reading for the
sample temperature. The reading will be displayed for 2 seconds and if the “READ”
key is still pressed, then the cycle will be repeated. The buzzer will sound if the
displayed reading is above the set point value entered in the meter (default is 20.0).
The meter will “store” the reading, provided that the user releases the “READ” key,
otherwise the meter will initiate another “READ” cycle without “storing” the previous
reading. This feature lets the user take a number of readings in sequence and only
“keep” the readings of his choice.
When the “READ” key is released, the meter will add the last displayed value to the
sum of the previous readings (up to 100), provided the value is within the range.
When all the 100 readings are taken, the meter will automatically display their
average before turning off. No new value will be added to the sum unless the user
erases the readings.
NOTE: The reading below 8.0% will be displayed as “.0” and above 37.0% as “99.9”.
These are not considered valid readings and will not be stored.
5. CHECKING THE AVERAGE AND MAXIMUM VALUE OF THE ACCUMLATED
READINGS (And erasing them)
As mentioned before, the meter adds the value of the new reading (provided that the
“READ” key is released) to the sum of the previous readings. The meter holds this
sum, as well as the number of readings added so far and the HIGHEST reading. Up
to 100 readings can be accumulated. After that, the meter will stop adding the new
reading and display the average every time a new reading is taken to remind the user
to erase the readings to start accumulating the new ones.
At any time, the user can check the AVERAGE of the accumulated readings by
pressing the “CHECK” key. The meter will display the number of readings
accumulated for one second, followed by the AVERAGE value (displayed as “A xx.x”)
for two seconds and the MAXIMUM value for another two seconds. If at the end of
the total period, the meter finds the “CHECK” key pressed, it will erase the
2

accumulated readings. Hence, the user must release the key before four seconds if
he wants to retain the readings. However, if all 100 readings are accumulated, then
he should keep the key pressed to erase the readings so that the meter can
accumulate the new ones.
6. TO CHECK THE METER CALIBRATION
To check the meter calibration, the user must PRESS first the “READ” key,
immediately followed (within one second) by the “CHECK” key. The meter should
display “12.0” +/- 0.2. Since a relay disconnects the external input when checking
calibration, there is no need to disconnect the external electrode.
3

Connector For external
electrode
Digital Readout
Temperature Button
(TEMP)
%MC Read Button (READ)
Calibration Check Button (CHECK)
Set Point Button (SET)
4

Delmhorst Instrument Co.
51 Indian Lane East
Towaco, NJ 07082-1025
Tel: 973-334-2557 / 877-DELMHORST
Fax: 973-334-2657
E-Mail: info@delmhorst.com 10/95
Web Site: www.delmhorst.com rev October, 2011
5


 Loading...