

Dell W-AP204, W-AP205 Owner's Manual
AP-200-MNT-W2 Mounting Kit
Installation Guide
The AP-200-MNT-W2 mounting kit supports 103 and 204/205 AP models. To ensure proper installation, refer to
sections corresponding to the AP model.
Package Contents
Mount Housing
Mounting Bracket
Drill Template
RJ45 Cable Adapters (2)
#6 Machine Screws (4)
Pan Head Screws (2)
T8 Torx Security Screw
AP-200-MNT-W2 Mounting Kit Installation Guide
Introduction
The AP-200-MNT-W2 mounting kit provides a secure solution for mounting your AP to flat surfaces such as
a wall or ceiling, and is also compatible with single and dual gang wall boxes. The mounting bracket can be
rotated within the mount housing to accommodate both the 103 and 204/205 AP models.
Attaching the Mount Housing
To install the mount housing onto a flat surface, refer to the “Installing the Mount Housing onto a Flat Surface”
section. To install the mount housing onto a wall box, refer to the “Installing the Mount Housing onto a Wall Box”
section.
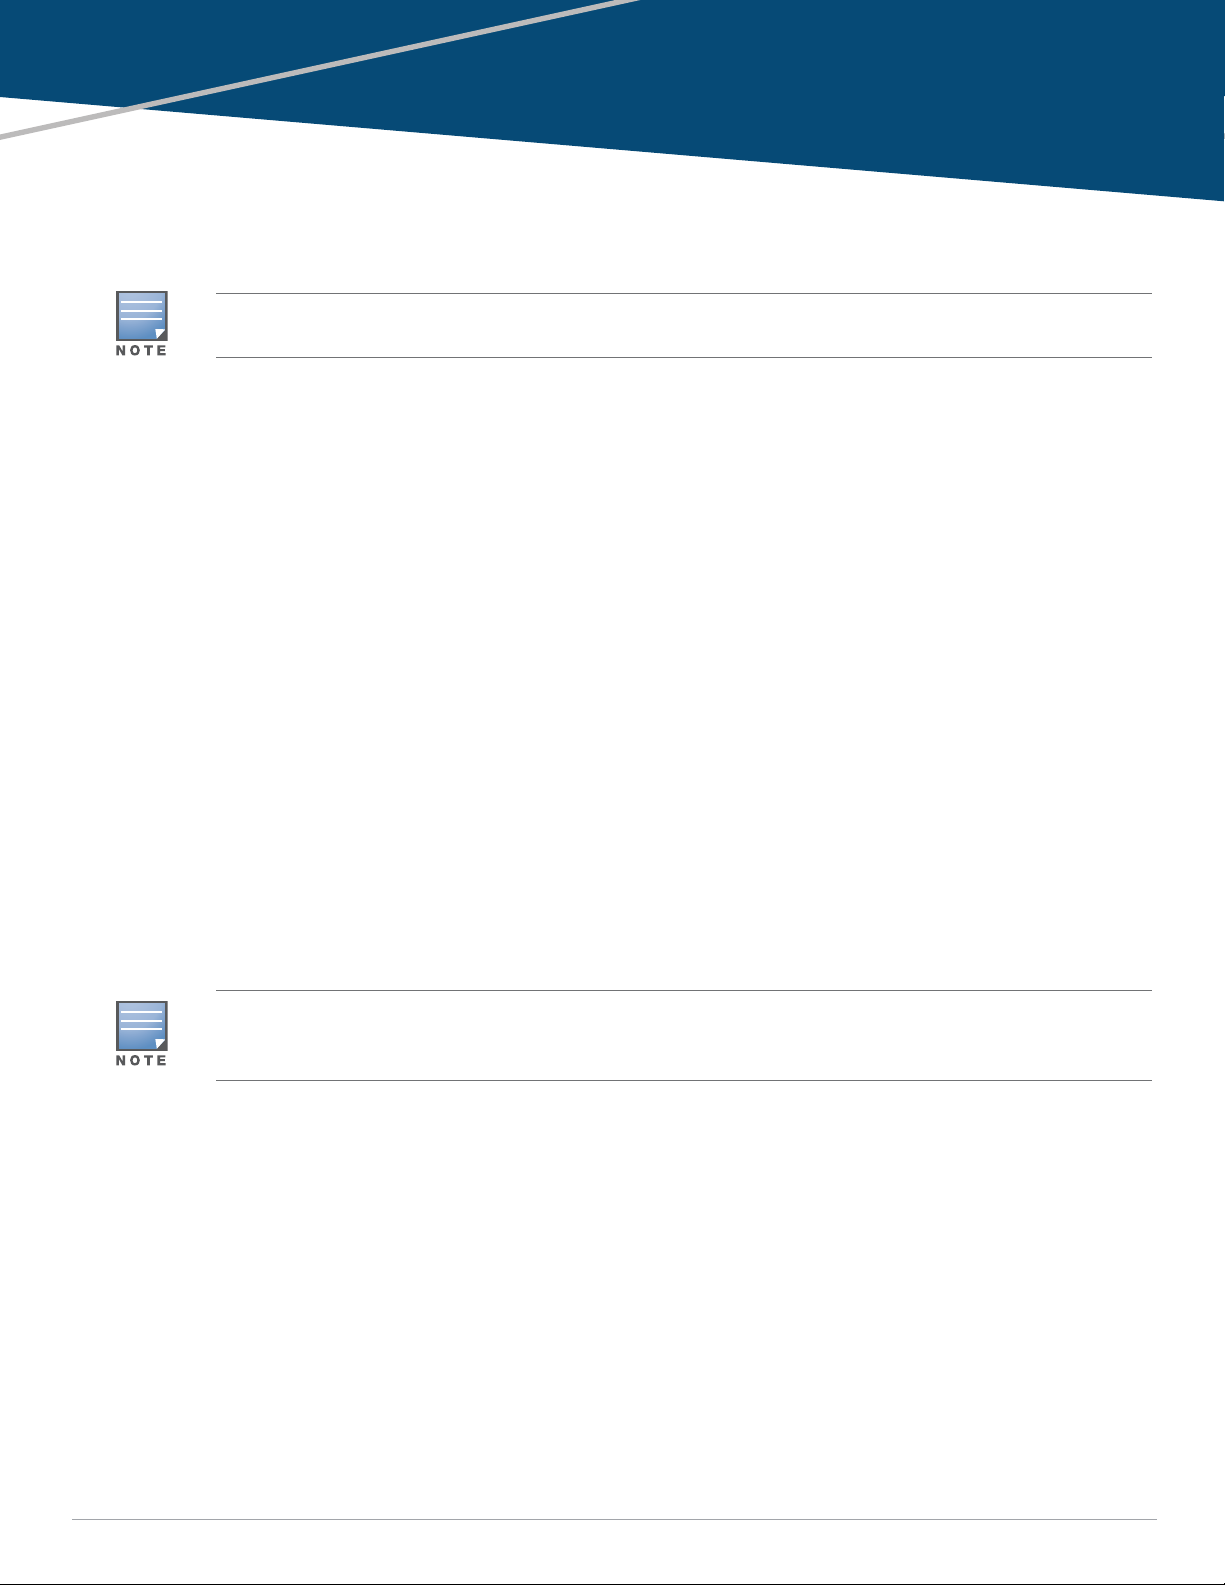
Installing the Mount Housing onto a Flat Surface
1. Tape the drill template to the desired location and drill holes at the points indicated.
2. Remove the template and position the housing flat, matching the holes with those on the housing and
screw into place. Refer to Figure 1.
0511650-01 | August 2014 1
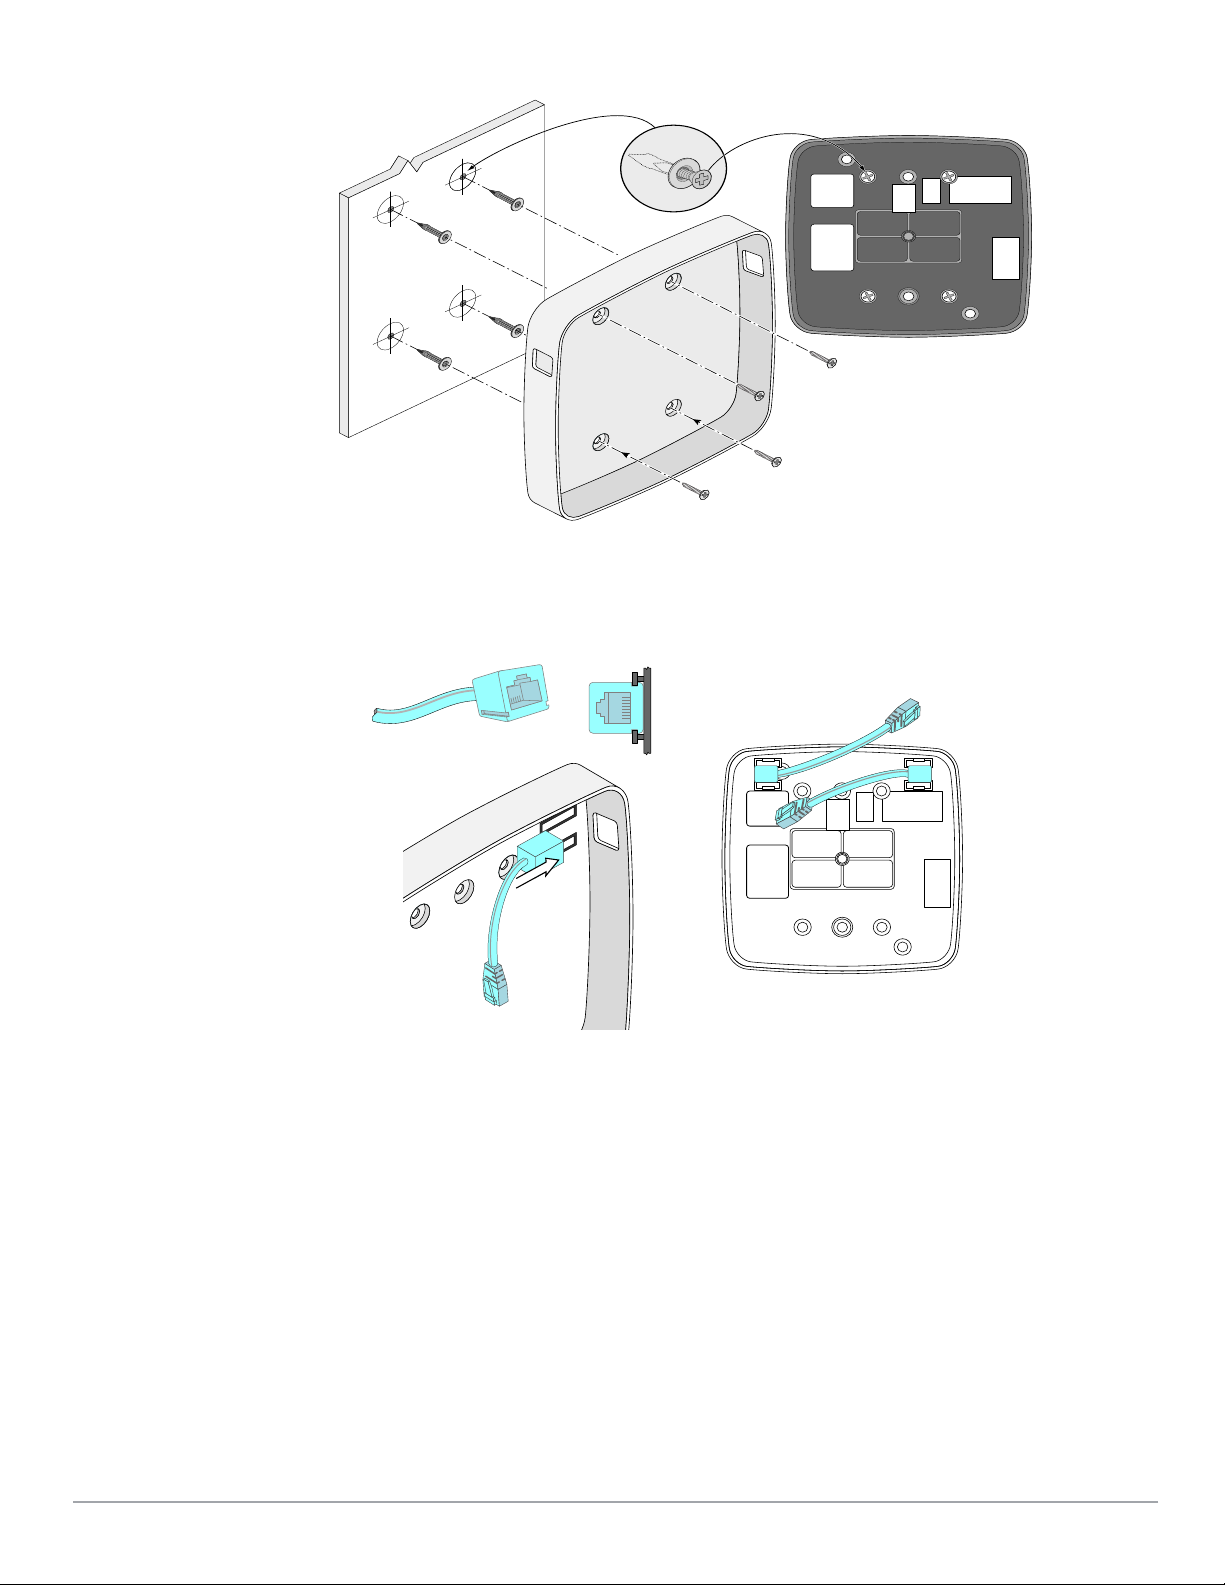
Figure 1 Securing Mount Housing to a Flat Surface
3. (Optional) Remove the RJ45 cable adapters from their bag, match the female connectors to the tracks at
the upper corners of the housing and slide until the cables lock into place. Refer to Figure 2.
Figure 2 Attaching Cable Adapters
Installing the Mount Housing onto a Wall Box
1. Route Ethernet cable(s) from the wall box and through the back of the mount housing using the
openings indicated in Figure 3.
2 AP-200-MNT-W2 | Installation Guide
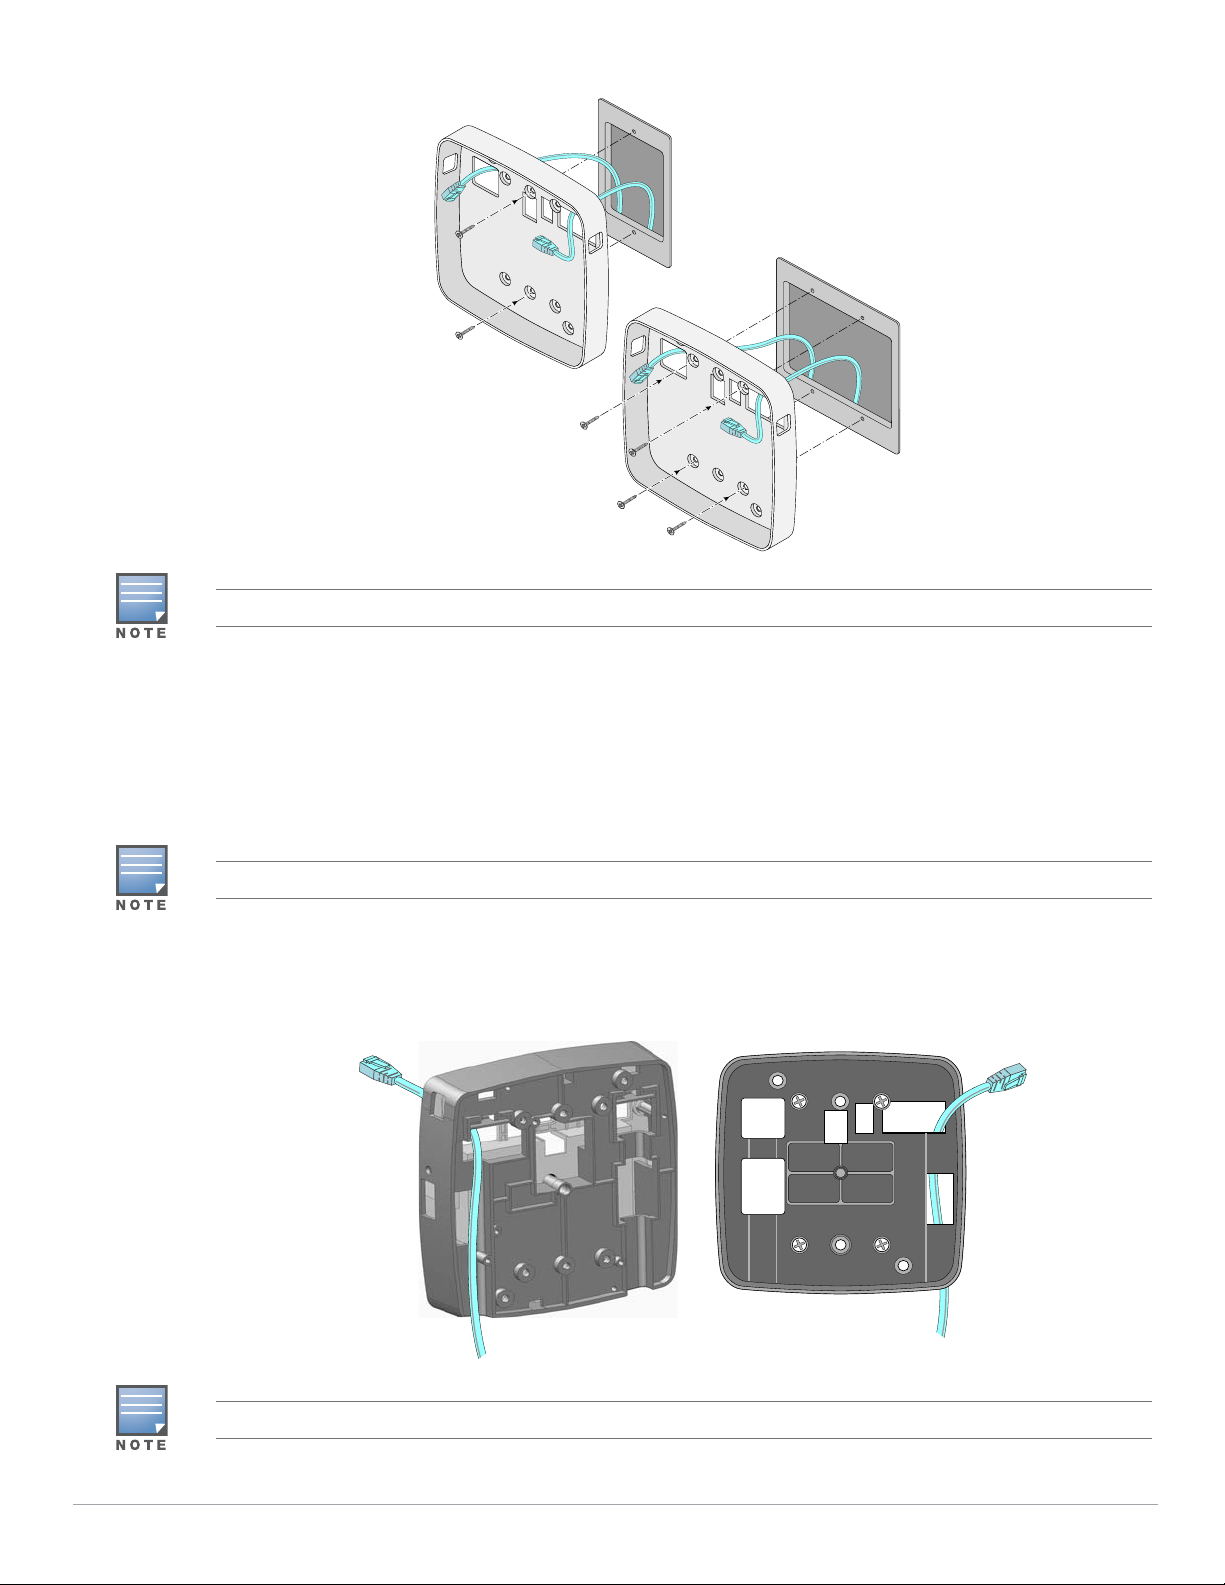
Figure 3 Aligning Mount Housing to Fit Single (Left) and Dual Gang (Right) Wall Boxes
If Ethernet cable(s) are routed directly from source, the RJ45 cable adapters will not be used.
2. Align the screw holes on the back of the mount housing with the corresponding holes on the wall box
and screw into place. Depending on the specific type of wall box, the Pan Head screws provided may be
used to install the mount housing.
Installation for 103 AP Models
If Ethernet cable(s) are routed directly from a wall box skip Step 6.
1. Route the Ethernet cable through the bottom-right opening of the mount housing and guide through the
upper-right opening at the back of the housing as shown in Figure 4.
Figure 4 Routing Ethernet Cable through Mount Housing
If AP is supported by a DC power source, route power cable through the bottom-right opening of the housing.
AP-200-MNT-W2 | Installation Guide 3
 Loading...