

Dell W-7200, PSU-350-AC Installation Manual
Dell PowerConnect W-7200 Series PSU-350-AC
Installation Guide
This document describes how to install a 350W AC Power Supply (PSU-350-AC) into a Dell PowerConnect W7200 Series Controller. In this document, the W-7200 controller is referred to as the “device.”
Installing a Power Supply
CAUTION: Never insert or remove a power supply while the power cord is connected. Verify that cord has been disconnected
from the power supply before installation or removal.
NOTE: Use standard ESD precautions when installing or removing a power supply module.
The power supply modules are hot-swappable. Hot swapping allows you to replace a failed power supply without
powering down the device during the replacement process. This makes it unnecessary to shut down the device
during the replacement procedure.
NOTE: If you are adding an additional power supply module, removing the pre-installed power supply module blanking plate. If you
are replacing a failed power supply, see “Removing a Power Supply” on page2 before you continue.
1. With a Phillips Head screwdriver, turn the hinged captive screw counter-clockwise until it is loose (they
cannot be completely removed).
2. Firmly grasp both of the hinged captive screws and pull the spring loaded hinge down until you are sure the
hinges are disengaged.
3. Grasp the power supply blanking plate by the hinged captive screw and slide the plate out.
4. Align the new power supply module with opening in the device, as shown in Figure 1.
5. Pull down the hinged captive screw on the power supply module and align its tab with the slot on the left side
of the opening.
6. Slide the power supply module into the device.
7. Lift the hinged captive screw and secure the power supply module by tightening the screw with a Phillips
Head screwdriver. Take care not to over-tighten the screw.
0511261-01 | January 2013 1
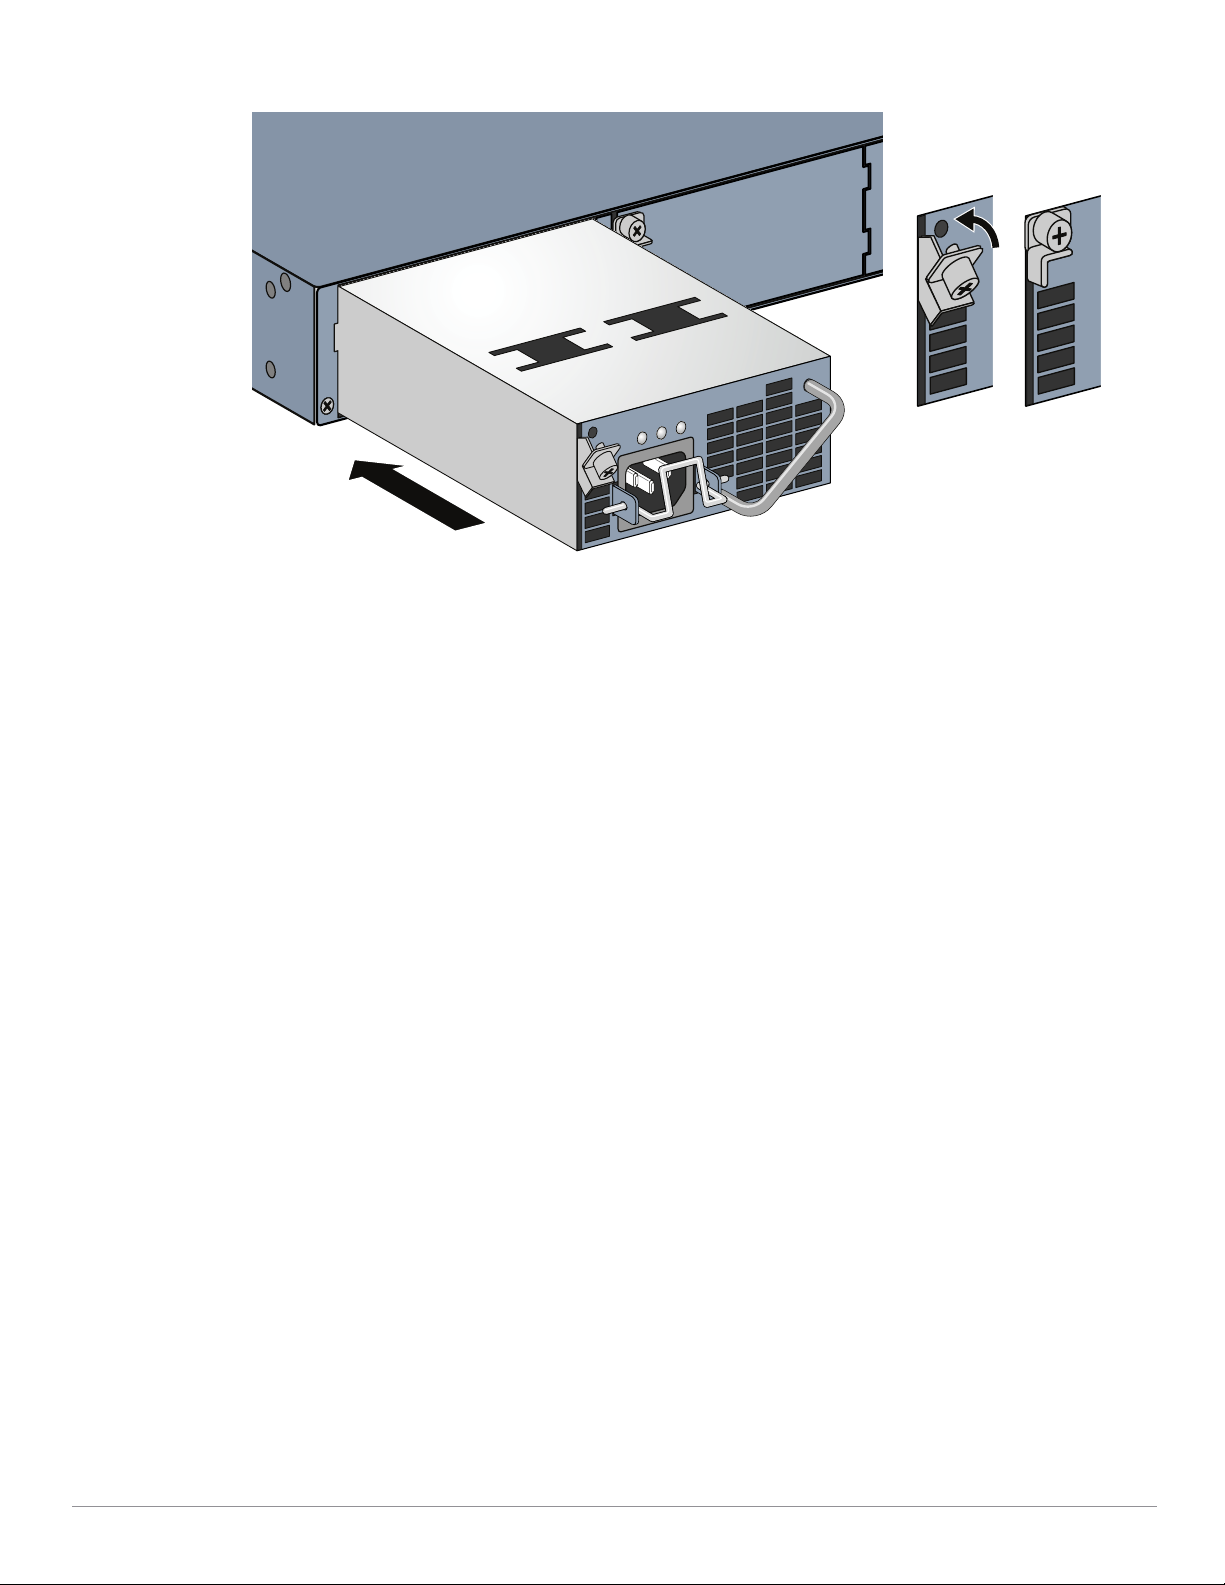
Figure 1
8. Insert the power cord and secure it by lowering the power cord retaining clip over the power cord.
Installing a Power Supply
Removing a Power Supply
1. Lift the power cord retaining clip from the power cord.
2. Remove the power cable connected to the power supply module.
3. Using a Phillips head screwdriver, loosen the hinged captive screw on the front of the power supply module.
4. Lower the hinged captive screw as far as it can go.
5. Using the power supply module’s handle, pull the module out.
6. If you are not replacing the removed power supply module, install a blanking plate that was include with your
device by following the installation procedure under “Installing a Power Supply” on page1.
2 Dell PowerConnect W-7200 Series PSU-350-AC | Installation Guide
 Loading...