

Dell Vostro 330 User Manual
Dell Vostro 330
Setup And Features Information
About Warnings
WARNING: A WARNING indicates a potential for property damage, personal injury,
or death.
Front And Back View
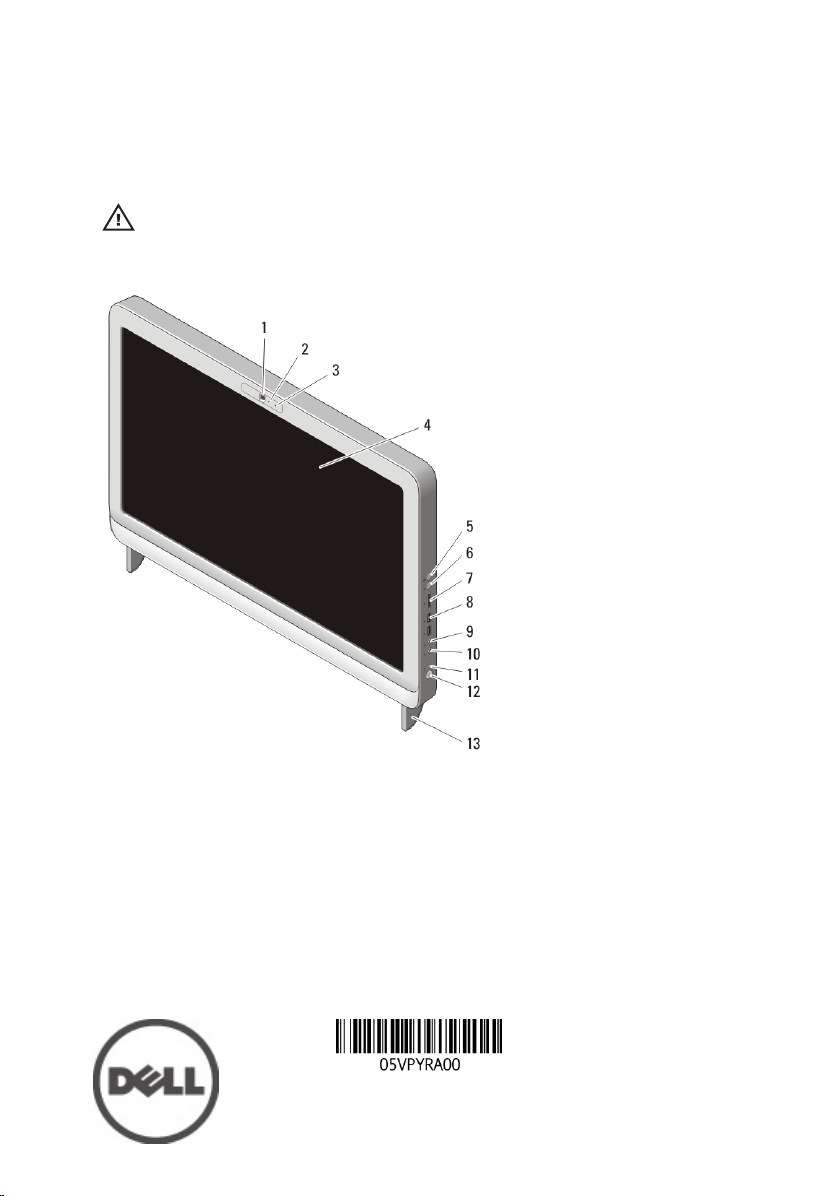
Figure 1. Front View
1. camera
2. camera activity light
3. microphone
4. display
5. volume increase button
6. volume decrease button
7. 7-in-1 media card reader
8. USB 2.0 connectors (2)
9. headphone connector
10. microphone connector
11. drive activity light
12. power button
13. stand
Regulatory Model: W02C
Regulatory Type: W02C001
January 2011
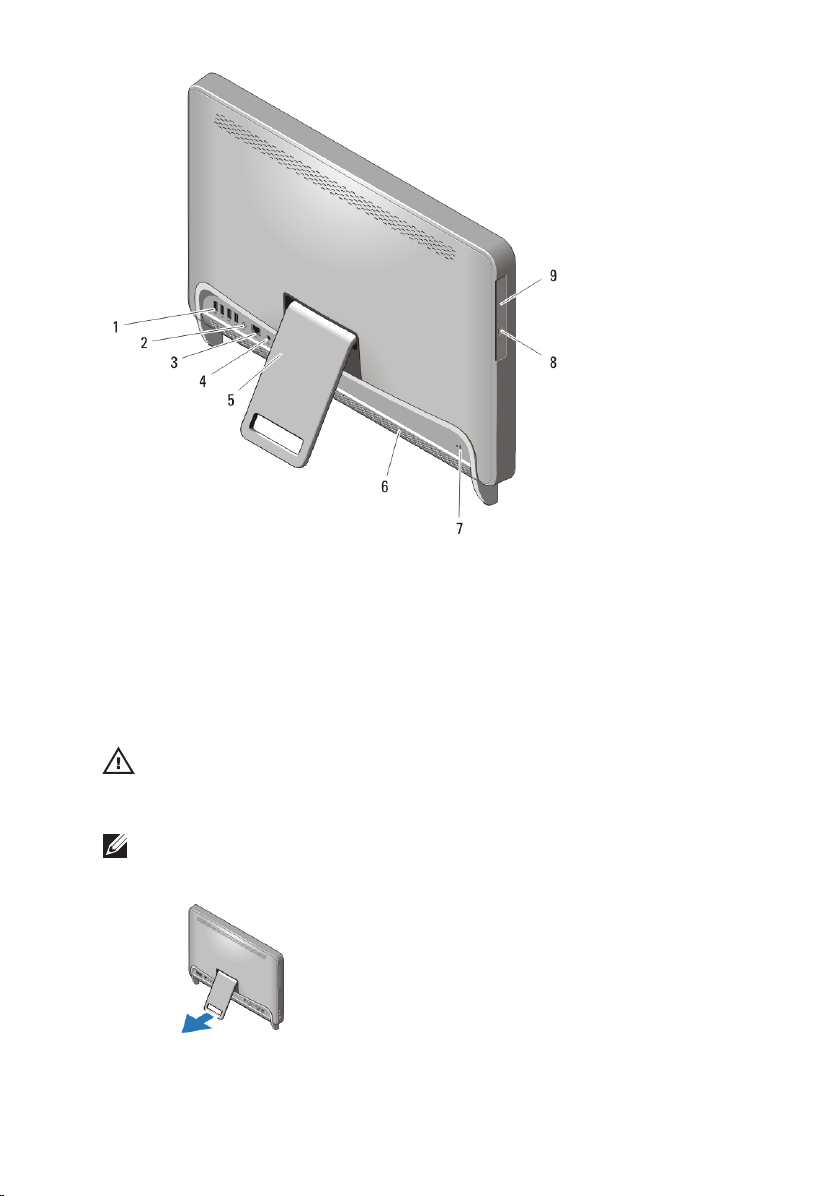
Figure 2. Back View
1. USB 2.0 connectors (4)
2. line-out connector
3. network connector
4. power connector
5. rear stand
6. cooling vents
7. security cable slot
8. optical-drive eject button
9. optical drive
Quick Setup
WARNING: Before you begin any of the procedures in this section, read the safety
information that shipped with your computer. For additional best practices
information, see www.dell.com/regulatory_compliance.
NOTE: Some devices may not be included if you did not order them.
1. Set up the rear stand.
Figure 3. Rear Stand setup
2
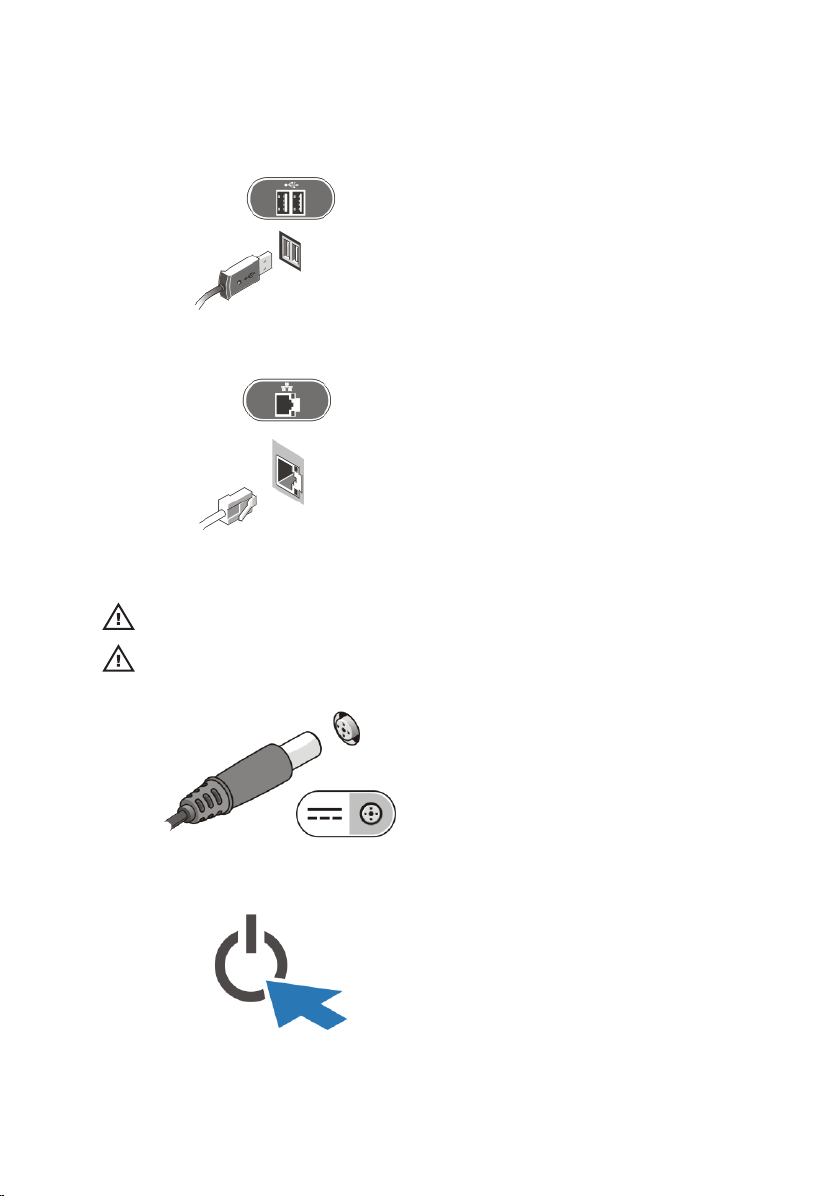
2. Connect the USB keyboard or mouse. To connect a wireless keyboard
and mouse, see Setting Up Your Dell Cordless Mouse, Keyboard, and
USB Receiver tech sheet that shipped with your wireless keyboard and
mouse.
Figure 4. USB Connection
3. Connect the network cable (optional).
Figure 5. Network Connection
4. Connect the power cable.
WARNING: Connect the power adapter to the nearest power outlet.
WARNING: Extension cords or power strips should never be used as a substitute
for permanent electrical wiring.
Figure 6. Connecting Power
5. Press the power button on the computer.
Figure 7. Turning On Power
3
 Loading...