

Dell Vostro 260s User Manual
Dell Vostro 260/260S
Setup And Features Information
About Warnings
WARNING: A WARNING indicates a potential for property damage, personal injury,
or death.
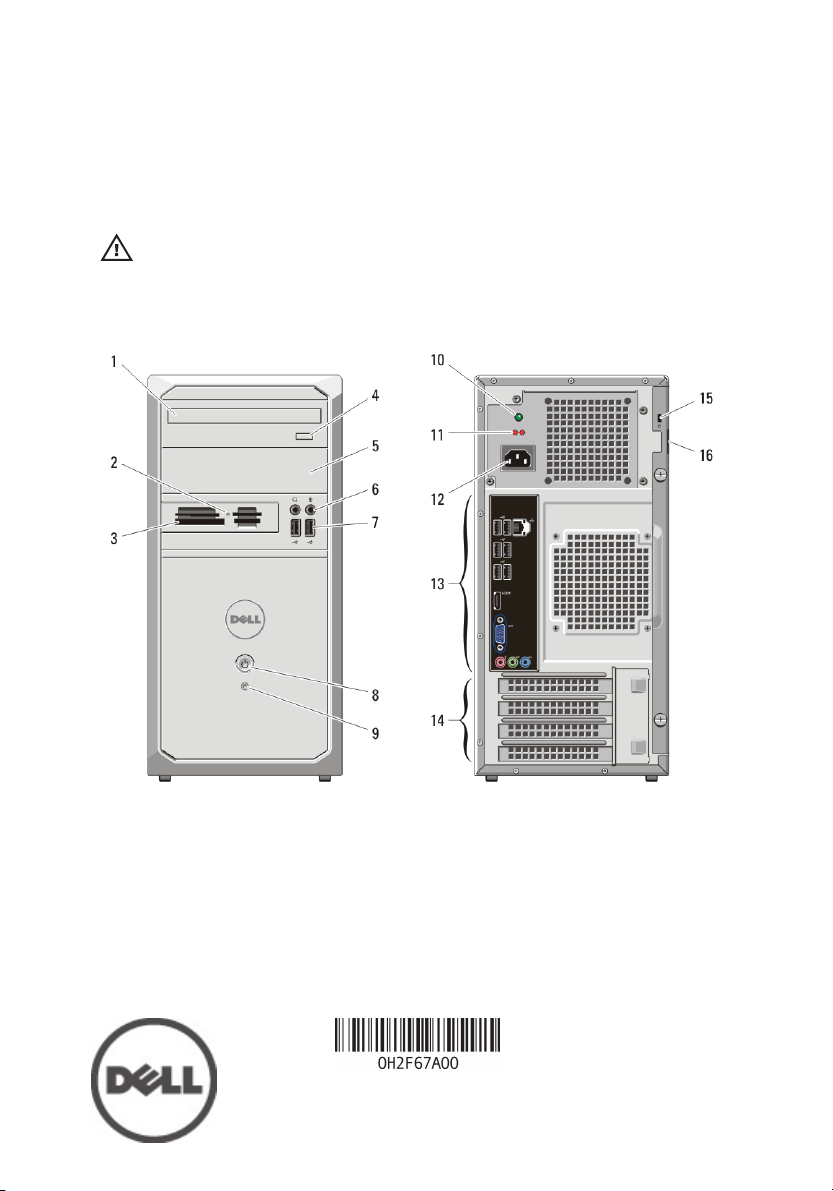
Mini Tower — Front And Back View
Figure 1. Front And Back View Of Mini Tower
1. optical drive
2. media-card reader status light
3. 19-in-1 media-card reader (optional)
4. optical drive eject button
5. optical drive bay
6. microphone and headphone
connectors
7. USB 2.0 connectors (2)
8. power button
9. hard-drive activity light
10. power-supply diagnostic light
Regulatory Model: D11M, D06D
Regulatory Type: D11M001, D06D001
2011–05
11. voltage selector switch
12. power cable connector
13. back panel connectors
14. expansion card slots (4)
15. security cable slot
16. padlock ring
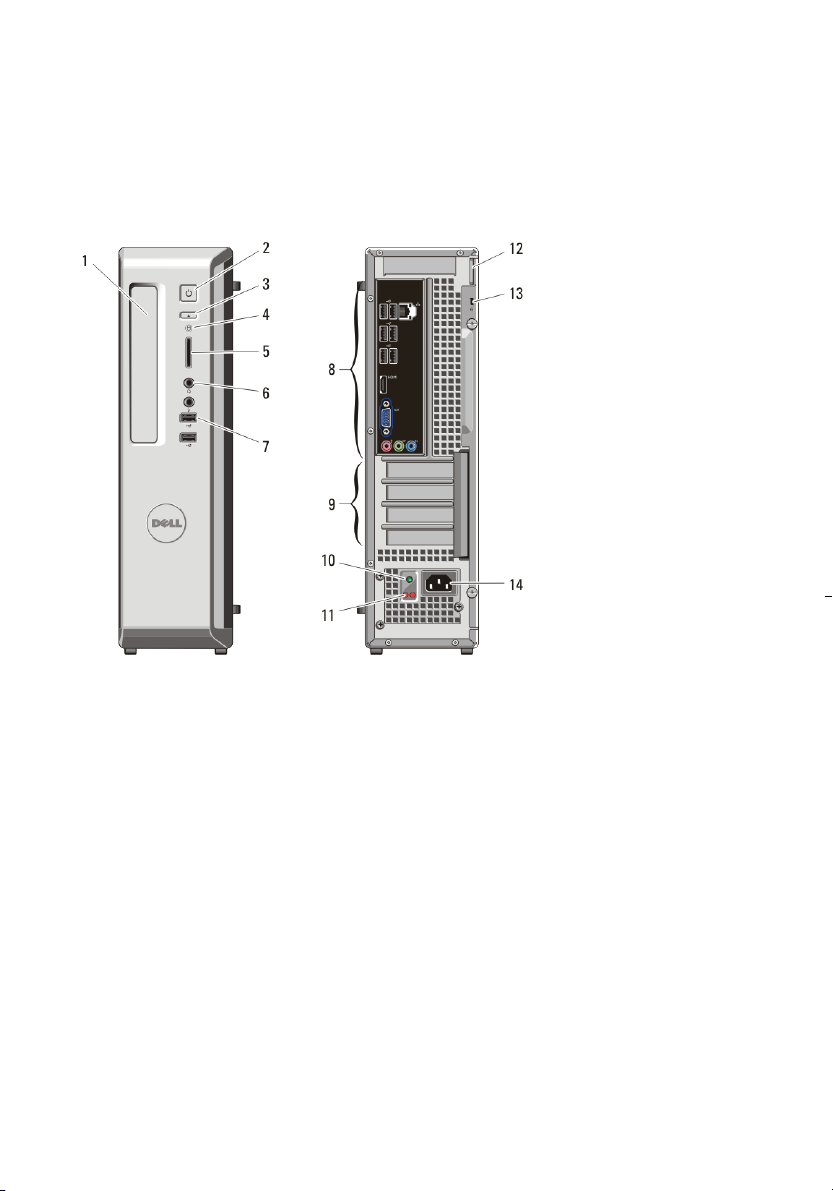
Slim Tower — Front And Back View
Figure 2. Front And Back View Of Slim Tower
1. optical drive bay
2. power button
3. optical drive eject button
4. hard-drive activity light
5. 8-in-1 media-card reader
6. headphone and microphone
connectors
7. USB 2.0 connectors (2)
8. back panel connectors
9. expansion card slots (4)
10. power-supply diagnostic light
11. power-supply diagnostic button
12. padlock ring
13. security cable slot
14. power cable connector
2
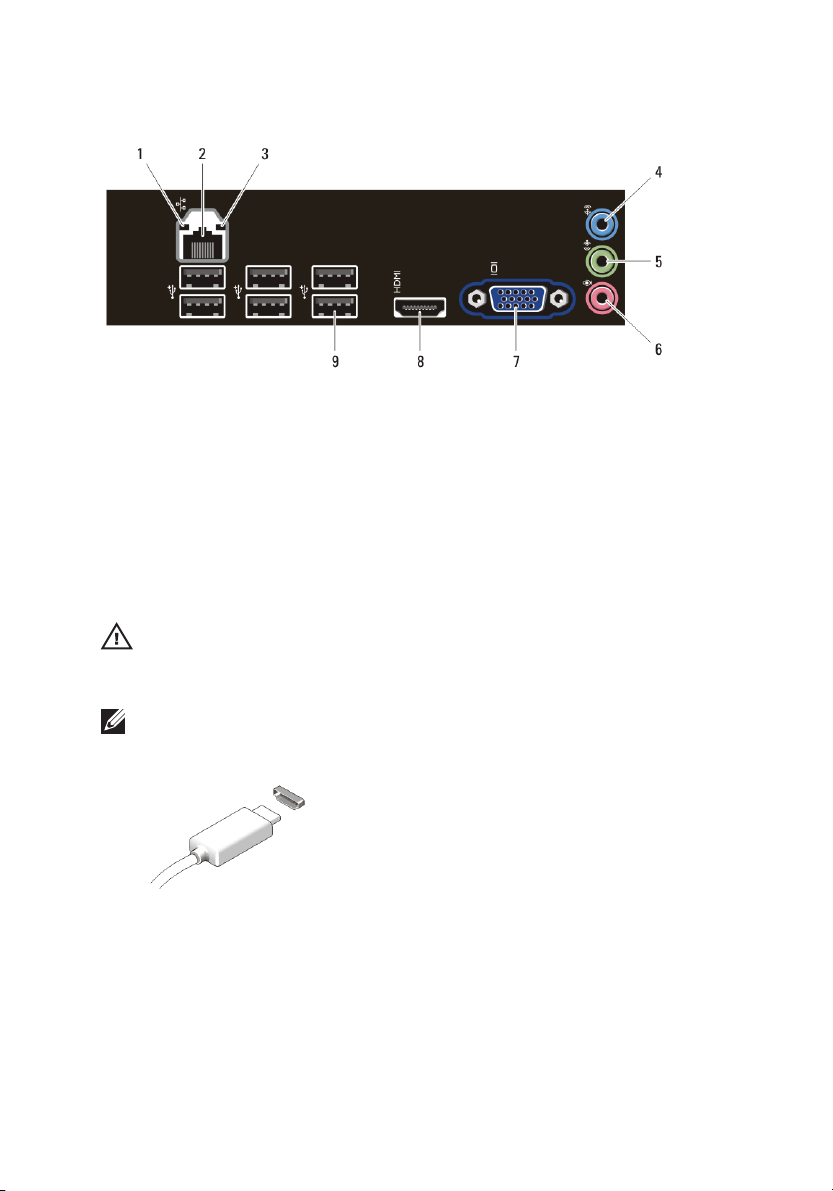
Mini Tower/Slim Tower — Back Panel
Figure 3. Back Panel View of Mini Tower And Slim Tower
1. link-integrity light
2. network adapter connector
3. network-activity light
4. line-in connector
5. line-out connector
6. microphone connector
7. VGA connector
8. HDMI connector
9. USB 2.0 connectors (6)
Quick Setup
WARNING: Before you begin any of the procedures in this section, read the safety
information that shipped with your computer. For additional best practices
information, see www.dell.com/regulatory_compliance.
NOTE: Some devices may not be included if you did not order them.
1. Connect the monitor using only one of the following cables:
Figure 4. HDMI Connector
3
 Loading...