

Page 1
Page 2

© 2008 Vizioncore, Inc. ALL RIGHTS RESERVED.
This guide contains proprietary information protected by copyright. The software described in this guide is furnished
under a software license or nondisclosure agreement. This software may be used or copied only in accordance with
the terms of the applicable agreement. No part of this guide may be reproduced or transmitted in any form or by any
means, electronic or mechanical, including photocopying and recording for any purpose other than the purchaser's
personal use without the written permission of Vizioncore, Inc.
If you have any questions regarding your potential use of this material, contact:
Vizioncore, Inc.
975 Weiland Road, Suite 200
Buffalo Grove, IL 60089
www.vizioncore.com
Email: info@vizioncore.com
Refer to our Website for regional and international office information.
Trademarks
Vizioncore, the Vizioncore logo, and vReplicator are trademarks and registered trademarks of Vizioncore, Inc in
the United States of America and other countries. Other trademarks and registered trademarks used in this guide
are property of their respective owners.
Disclaimer
The information in this document is provided in connection with Vizioncore products. No license, express or implied,
by estoppel or otherwise, to any intellectual property right is granted by this document or in connection with the sale
of Vizioncore products. EXCEPT AS SET FORTH IN VIZIONCORE'S TERMS AND CONDITIONS AS SPECIFIED
IN THE LICENSE AGREEMENT FOR THIS PRODUCT, VIZIONCORE ASSUMES NO LIABILITY WHATSOEVER
AND DISCLAIMS ANY EXPRESS, IMPLIED OR STATUTORY WARRANTY RELATING TO ITS PRODUCTS
INCLUDING, BUT NOT LIMITED TO, THE IMPLIED WARRANTY OF MERCHANTABILITY, FITNESS FOR A
PARTICULAR PURPOSE, OR NON-INFRINGEMENT. IN NO EVENT SHALL VIZIONCORE BE LIABLE FOR ANY
DIRECT, INDIRECT, CONSEQUENTIAL, PUNITIVE, SPECIAL OR INCIDENTAL DAMAGES (INCLUDING,
WITHOUT LIMITATION, DAMAGES FOR LOSS OF PROFITS, BUSINESS INTERRUPTION OR LOSS OF
INFORMATION) ARISING OUT OF THE USE OR INABILITY TO USE THIS DOCUMENT, EVEN IF VIZIONCORE
HAS BEEN ADVISED OF THE POSSIBILITY OF SUCH DAMAGES. Vizioncore makes no representations or
warranties with respect to the accuracy or completeness of the contents of this document and reserves the right to
make changes to specifications and product descriptions at any time without notice. Vizioncore does not make any
commitment to update the information contained in this document.
vReplicator User Manual
07/18/08
Version 2.5d
Page 3
Document Revision History
Document
Version
Number
2.5a 04/09/08 Initial document
2.5b 05/23/08 Chapter 1
2.5c 06/12/08 Chapter 1
Issue Date Description of Change
• In the Snapshots and Hybrid Replication sections of vReplicator
Overview, added a warning against running a differential backup of a
VM that is undergoing hybrid replication.
Chapter 2
Chapter 2
• Updated list of OSs in the Location Requirements section.
• In the Interoperability Requirements section, updated lists and added
support policy statement.
• Added these sections: Installation Support, Guest VSS Support, and
Guest OS for Replication Support.
• In the vReplicator Overview section, included a description of the
encryption scheme used in the software.
• Updated the upgrade to new version information in the Installing
vReplicator section.
2.5d 07/18/08 Chapter 1
• Updated the vReplicator Licensing section.
Chapter 2
• Updated VSS Guest Support table: Windows 2000 SP4/SP5 for 32-bit
Chapter 4
• Updated the Status Bar section.
OSs is no longer supported.
Page 4

Table of Contents
1INTRODUCTION.....................................................................................................................4
VirtualizationandVMwareOverview....................................................................................................5
vReplicatorOverview............................................................................................................................7
Snapshots...................................................................................................................................................7
VC...............................................................................................................................................................7
vzBoost......................................................................................................................................................8
DifferentialReplication..............................................................................................................................8
HybridReplication.....................................................................................................................................8
ReplicationtoMultipleDestinations.........................................................................................................9
SkippingVMDKs.........................................................................................................................................9
PerformanceMonitoring...........................................................................................................................9
Encryption..................................................................................................................................................9
UsingthisManual................................................................................................................................10
TermsandAcronyms...............................................................................................................................10
IconsandButtons....................................................................................................................................12
vReplicatorLicensing...........................................................................................................................12
Technical/CustomerSupport...............................................................................................................13
ContactingDell....................................................................................................................................13
2INSTALLATION....................................................................................................................25
SystemRequirements..........................................................................................................................26
LocationRequirements............................................................................................................................26
VMwareESXServerRequirements..........................................................................................................27
InteroperabilityRequirements................................................................................................................28
DatabaseRequirements..........................................................................................................................29
InstallationSupport.................................................................................................................................30
GuestOSforReplicationSupport............................................................................................................31
UninstallOldVersionofvReplicator........................................................................................................32
DatabaseSelection..................................................................................................................................33
InstallvReplicatorUsingSQLExpress2005(NewInstance)....................................................................34
UpgradetoNewVersionofvReplicator..................................................................................................43
GeneralPasswordSecurityGuidelines....................................................................................................49
3CONFIGURATION................................................................................................................50
GettingStarted....................................................................................................................................51
InitialConfiguration............................................................................................................................52
NotificationSetup....................................................................................................................................52
FirstTimeSetup............................................................................................................................... ........52
ConnectionsSetup...................................................................................................................................62
vReplicator v2.5 Table of Contents i
Page 5

ConfigurevReplicator..............................................................................................................................67
4USINGVREPLICATOR........................................................................................................79
vReplicatorUserInterface...................................................................................................................80
MenuBar.................................................................................................................................................81
Toolbar.....................................................................................................................................................83
HostsandContainersPane......................................................................................................................84
VirtualMachinesPane.............................................................................................................................85
ReplicationManagementPane................................................................................................................86
ReplicationLog........................................................................................................................................90
StatusBar.................................................................................................................................................91
EmailNotification................................................................................................................................99
AddaNotificationRecipient....................................................................................................................99
RemoveEmailAddress..........................................................................................................................101
TestEmailNotification..........................................................................................................................102
VCandHostConfiguration.................................................................................................................103
ConfigureaVC.......................................................................................................................................103
ConnecttoVCs.......................................................................................................................................105
ConfigureaHost....................................................................................................................................107
ConnecttoHosts...................................................................................................................................109
Replication........................................................................................................................................111
ReplicateVMUsingtheWizard(HybridorDifferential,Fixed).............................................................111
ReplicateVMUsingtheWizard(HybridorDifferential,Sliding)...........................................................120
ReplicateaVMUsingDragandDrop.....................................................................................................125
ReplicateVMtoMultipleDestinations..................................................................................................126
ReplicateVM(SkippingVMDKs)............................................................................................................135
EditaReplicationJob............................................................................................................................. 140
StopaReplicationJob............................................................................................................................141
DisableaReplicationJob.......................................................................................................................142
EnableaReplicationJob........................................................................................................................144
TestFailover...........................................................................................................................................145
Failover..................................................................................................................................................147
RemoveReplicationJob.........................................................................................................................150
DatastoreSummaries............................................................................................................................152
ViewStorageSummary..........................................................................................................................154
VSSOptions............................................................................................................................................160
InstallVizioncoreVSSAgent..................................................................................................................162
Reports.............................................................................................................................................164
CompileReplicationHistoryReport.......................................................................................................169
PrintReplicationHistoryReport............................................................................................................171
ExportReplicationHistoryReporttoPDF..............................................................................................172
ExportReplicationHistoryReporttoXML.............................................................................................174
ExportReplicationHistoryReporttoExcel............................................................................................176
APPENDIX...............................................................................................................................177
vReplicator v2.5 Table of Contents ii
Page 6

ErrorMessages..................................................................................................................................178
Installation.............................................................................................................................................178
Notification............................................................................................................................................179
Configuration............................................................................................................................... ..........180
Replication.............................................................................................................................................183
General..................................................................................................................................................185
vReplicator v2.5 Table of Contents iii
Page 7

1 Introduction
vReplicator v2.5 Chapter 2 Installation 4
Page 8

vReplicator™ software is a powerful real-time replication solution for the VMware®
ESX Server environment. vReplicator is designed to perform replication specifically for
virtual machines (VMs.)
In this manual, you will learn how to install and configure vReplicator. You will also
learn how to use these components:
• Notification
• Alerts
• Hybrid and differential replication
• Reports
First, some background on the context in which vReplicator was developed.
Virtualization and VMware Overview
As companies and industries grow, their technology needs change. These changes are
often implemented within complex systems running business-critical applications.
Usually there is an increased demand for shared hardware and software resources. To
manage this demand, many companies establish virtual environments. Doing so can
increase an organization’s agility and efficiency while lowering its costs.
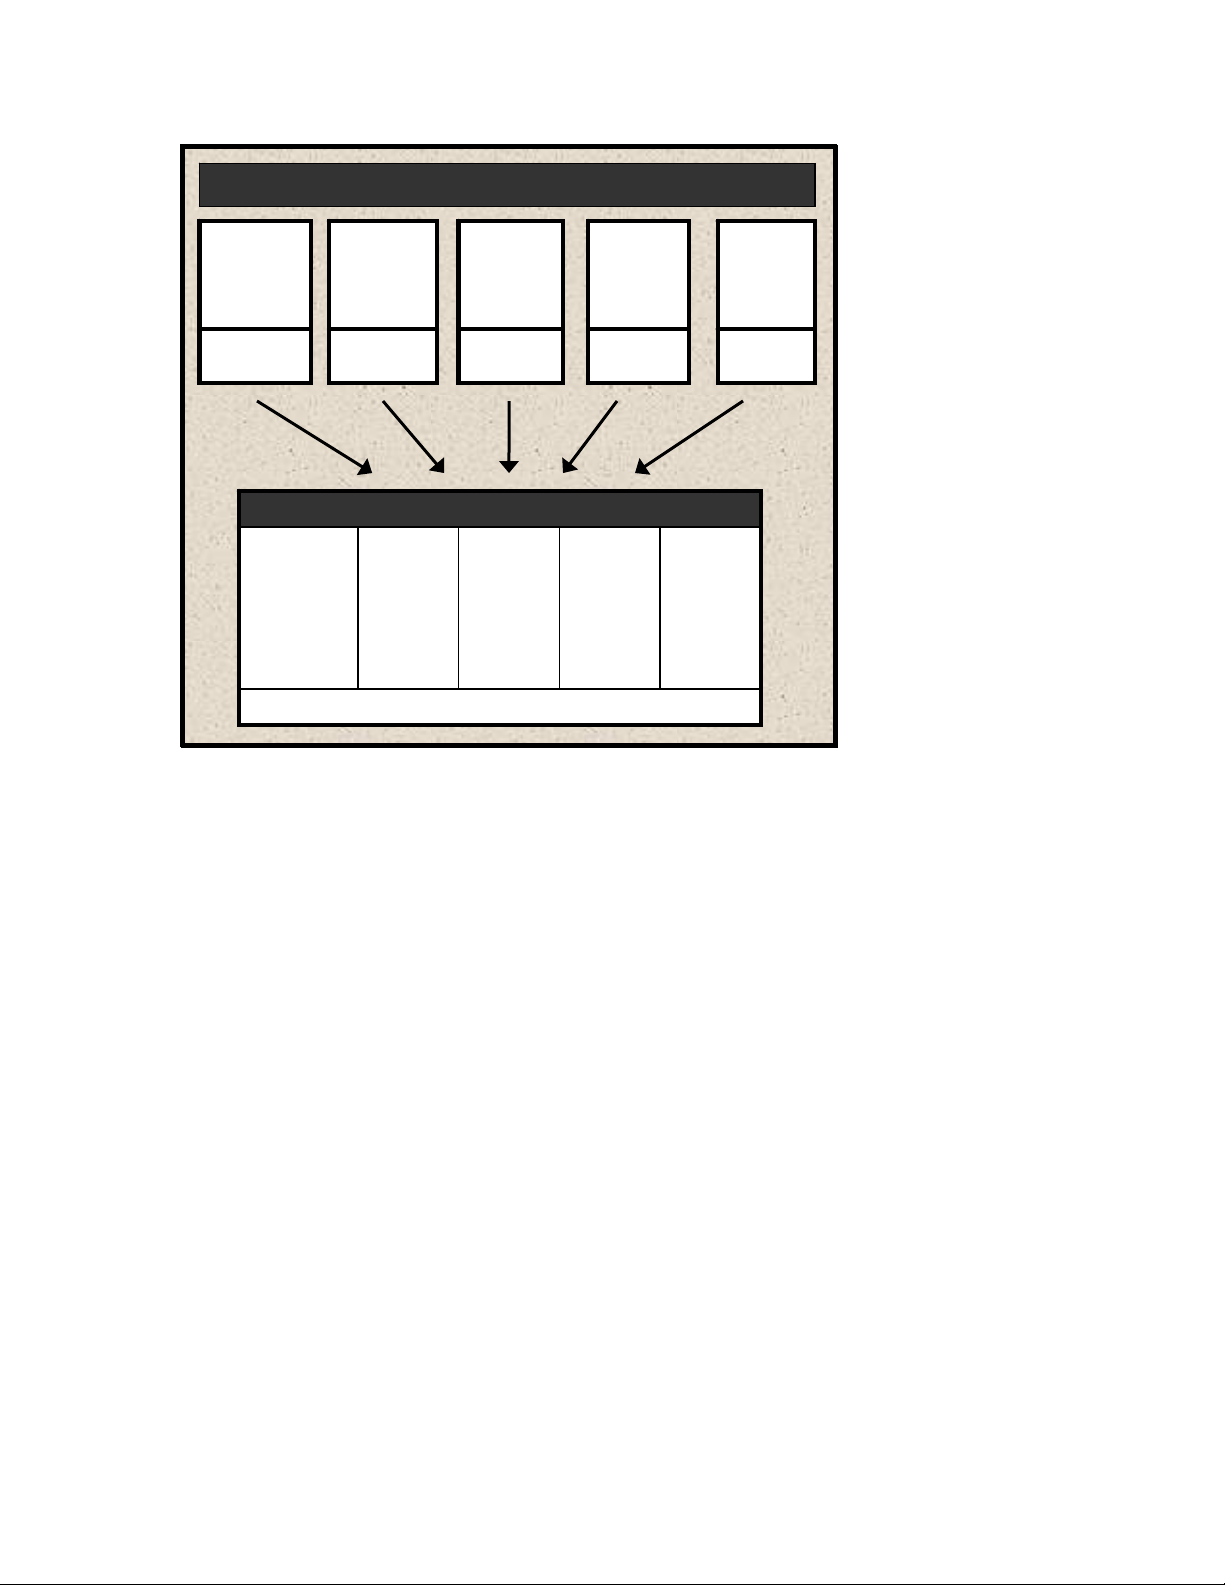
Most companies have a number of specialized physical servers and workstations that are
underutilized. Virtualizing such an environment increases and balances utilization by
consolidating the physical machines into a single physical host that runs multiple VMs.
The VMs share the resources—processor, memory, network cards, and disks—of one
physical host. The work that the physical machines did previously continues, but with
greater efficiency. The host runs a layer of virtualization software that manages the
environment. Each VM’s operating system (OS)—usually Windows or Linux—functions
as if the hardware were physical. Guest software can see only x processor, y memory, and
so forth.
vReplicator v2.5 Chapter 2 Installation 5
Page 9
Multiple Physical Machines
Multiple Physical Machines
Windows XP
Windows XP
Development
Development
Test Machine
Test Machine
Machine 1
Machine 1
Hardware
Hardware
VM
VM
Windows XP
Windows XP
Development
Development
Test Machine
Test Machine
Windows
Windows
Server
Server
Exchange
Exchange
Server
Server
Machine 2
Machine 2
Hardware
Hardware
Single ESX Server with Multiple VMs
Single ESX Server with Multiple VMs
VM
VM
Windows
Windows
Server
Server
Exchange
Exchange
Server
Server
Pooled hardware shared by all VMs.
Pooled hardware shared by all VMs.
Windows
Windows
Server
Server
VPN
VPN
Machine 3
Machine 3
Hardware
Hardware
VM
VM
Windows
Windows
Server
Server
VPN
VPN
Linux
Linux
SQL Server
SQL Server
Machine 4
Machine 4
Hardware
Hardware
VM
VM
Linux
Linux
SQL Server
SQL Server
…
…
…
…
…
…
A virtual infrastructure affords maximum flexibility, allowing you to treat VMs as if they
were physical hardware and software. VMs can be moved easily between hosts. They can
be run in isolation or in groups. Their workloads can be reconfigured as demand requires.
This flexibility is supported by management tools. VMware VirtualCenter (VC) and ESX
Server are, respectively, the management server and software components that lend order
to flexibility in a virtual environment.
As a management server, VC orchestrates the configuring and provisioning of all VMs.
VC’s database stores all of the shared information between the physical hosts and the
VMs. Without compromising security, VC makes it possible to connect to a host
remotely from a standard Windows computer.
As its own host OS, ESX Server allows you to establish VMs, configure and manage
their shared resources, and make ongoing adjustments to increase performance. Each VM
is configured with its own virtual hardware—for example, central processing unit (CPU),
random access memory (RAM), and universal serial bus (USB) ports. The work of the
VM’s physical counterpart is run in its native OS. Because VMs require neither
redundant hardware nor physical space, virtualization can mean significant cost savings.
The transition from physical to virtual is seamless. To achieve optimum utilization in a
virtualized environment, it must be maintained well. To do this, data and other assets
must be monitored, protected, and preserved.
vReplicator v2.5 Chapter 2 Installation 6
Page 10

vReplica tor Overview
Reliable business continuity and disaster recovery (DR) strategies deliver comprehensive
and consistent results. Replication plays a key role in this process. If done well,
replication can restore systems securely while enhancing performance and minimizing
interruption.
VMware Infrastructure 3 (VI3) provides a solid platform for replication. vReplicator 2.5
was designed to be the definitive replication solution for VI3. vReplicator captures the
complete VM image—OS, configuration settings, applications, and data. vReplicator’s
Windows-based interface offers easy access and navigation. All potential source and
destination machines display in a tree structure.
There are two replication methods and schedules from which to choose. Once a job is
configured, you can run it at any time—even off-schedule. You can run jobs between
hosts, VMs, or dissimilar hardware platforms. With the help of vzBoost, vReplicator does
its work quickly—while the source machine is running—without compromising system
resources. vReplicator monitors VM and host performance patterns. You can use this
information to improve replication job scheduling.
Snapshots
vReplicator uses VMware snapshots during replications to ensure that the entire VM
image is captured. Snapshots keep each replication job current by allowing you to revert
to a previous point in time, merging that data with the current data.
vReplicator does not support third party tools that use snapshots. vRanger Pro is an
exception because it shares a file-locking mechanism with vReplicator that prevents
failures and data loss, even when the applications are running concurrently against the
same VM. When vReplicator attempts a replication, it needs access to the source VM’s
disk files. For vRanger Pro to create a backup, it requires similar access. If a replication
job is in process when vRanger Pro attempts a backup, vRanger Pro will pause until the
replication pass has completed. Alternately, if a backup job is in process when
vReplicator attempts a replication, the replication pass will pause to allow the backup to
complete.
Warning: During hybrid replication, a snapshot remains open continuously. This can
compromise vRanger Pro’s ability to complete differential backups of a VM being
replicated. When you initiate a hybrid replication, you should not use vRanger Pro to
perform a differential backup of that VM. In this case, it is best to complete a full backup
of the machine.
VC
vReplicator can connect with the source and destination machines directly or through
VC. There are several advantages to integrating VC with vReplicator. VC serves as a host
management interface, organizing data stores, hosts, VMs, and other objects in a tree
structure. VC makes it possible for vReplicator to monitor the movement of VMs
vReplicator v2.5 Chapter 2 Installation 7
Page 11

between hosts. Even after a vMotion event occurs, replication activities can continue
unabated.
VSS
The Microsoft® Volume Shadow Copy Service (MS VSS) driver in vReplicator works in
conjunction with Vizioncore’s VSS agent to ensure reliable remote API call
communication. By alternately freezing and thawing application writes, MS VSS and
Vizioncore VSS provide consistent results during each replication process. VSS enables
quiescing—or pausing—of application writes when database servers such as SQL and
Oracle are being replicated.
vzBoost
In vReplicator, vzBoost is an optional driver that improves write speeds to the Virtual
Machine File System (VMFS). vzBoost manages Service Console traffic; it has no
input/output (I/O) impact on running VMs. The driver is enabled through
Tools→Preferences→ESX Server and is installed on the destination ESX host.
vReplicator activates the driver when a write to VMFS is initialized. The driver remains
activated only for the duration of the write. As soon as the data transfer completes, the
driver becomes inactive and no longer taxes system resources.
Differential Replication
In differential replication, the source Virtual Machine Disk Format (VMDK) is scanned.
A data map is created during the first replication pass. When the first snapshot is taken,
disk writes are suspended temporarily. The snapshot remains open. An empty virtual
disk—called the delta file—is added. As data is replicated, this file grows. These changes
are merged back into the VMDK and the snapshot is closed. During the second
replication pass, a snapshot is opened. On the vReplicator box, the source VM’s current
data is compared to the changed data stored in the data map. These changes are
replicated, block by block, and committed to the destination machine. Then, the snapshot
is closed and the VMDK is opened. The entire source VM image is replicated to the
destination machine.
Hybrid Replication
Using the hybrid approach, replication is done as a function of change over time rather
than change to data. Snapshots can be taken at shorter intervals with no loss of data.
There is no need to scan during each replication pass. The differentials engine
resynchronizes the source and destination VMs selectively. Therefore, there is no need to
replicate the entire source image again, just to capture the data that changed between
snapshots.
During hybrid replication, two snapshots are created. One snapshot remains open
continuously. While the second snapshot is usually not visible to the user, it plays an
important role in replication. As time passes, the second snapshot fills with data.
vReplicator v2.5 Chapter 2 Installation 8
Page 12

Ultimately, this data is copied to the destination VM and then merged into the first
snapshot.
This method allows for a very fast process, in part because no scanning is required.
Nonetheless, the continuously open snapshot can decrease I/O temporarily. Because this
method replicates as a function of change over time, snapshots can grow rather large and
cumbersome. For this reason, it is important to confirm sufficient free disk space in
advance of initiating a hybrid replication.
Warning: During hybrid replication, a snapshot remains open continuously. This can
compromise vRanger Pro’s ability to complete differential backups of a VM being
replicated. When you initiate a hybrid replication, you should not use vRanger Pro to
perform a differential backup of that VM. In this case, it is best to complete a full backup
of the machine.
Replication to Multiple Destinations
vReplicator 2.5 offers replication from a single source to multiple destinations. Having
this additional flexibility enhances your ability to recover from a disaster. You can
schedule two jobs to execute in the same timeframe from one source VM to more than
one destination. The first job that you create will execute as scheduled and the second job
will be queued to run when the first job completes. Replication to multiple destinations
can be done for either replication type—hybrid or differential.
Skipping VMDKs
Using vReplicator’s Job Wizard, you can specify which hard disks to replicate from a
single source datastore. One benefit of excluding disks that do not need to be replicated is
that in doing so you conserve resources—from time and effort to disk space and
bandwidth.
Performance Monitoring
As you try to establish a replication schedule that does not compromise system
performance, monitoring information becomes vital. To help you assess the impact of
replication jobs on your environment, vReplicator provides real-time performance
statistics that indicate the load on each host. These statistics— Service Console CPU,
memory, disk, and network usage—display in the Replication Management pane.
Encryption
vReplicator 2.5 uses Triple Data Encryption Standard (Triple DES) cryptology to provide
password and data protection functionality. All configuration settings such as User Name,
Root, and SMTP are encrypted automatically and stored securely in a disk file.
vReplicator v2.5 Chapter 2 Installation 9
Page 13

Using this Manual
Terms and Acronyms
These terms and acronyms are used in this manual.
Term or Acronym Definition
API Application Programming Interface
CPU Central Processing Unit
delta file An empty virtual disk file that is added during a replication
pass. As data is replicated, this file grows.
DNS Domain Name System
DR Disaster Recovery
FQDN Fully Qualified Domain Name
GB Gigabyte
Guest A VM that runs on an ESX Server.
Host A physical ESX Server that runs VMs.
Hot replication A replication that is performed while the source VM is
running.
I/O Input/Output
IP address Internet Protocol address
LUN Logical Unit Number
MB Megabyte
Mb Megabit
MMC Microsoft Management Console
MS VSS Microsoft Volume Shadow Copy Service works with
Vizioncore VSS to make remote API call communication
possible. Works to freeze and thaw application writes during
replication.
NIC Network Interface Card
OS Operating System
PDF Portable Document Format
Quiescing Pauses a running process. Disables the VMware Tools Sync
Driver when replicating database servers such as SQL,
Exchange, Active Directory, Oracle, or any database that uses
a service to write.
vReplicator v2.5 Chapter 2 Installation 10
Page 14

Term or Acronym Definition
RAM Random Access Memory
SA System Administrator
SAN Storage Area Network
SCSI Small Computer System Interface
SMTP Simple Mail Transfer Protocol
SQL server A sequel server
SQL database Structured Query Language; an SQL database.
SSH Secure Shell Access; a network protocol used to exchange data
between CPUs across a secure channel.
Su switch user
Triple DES Triple Data Encryption Standard
USB Universal Serial Bus
vReplicator.msi Installer file for vReplicator.
VC VMware VirtualCenter; a management server within a
virtualized environment
VCB VMware Consolidated Backup
Vizioncore VSS An agent that works with MS VSS to make remote API call
communication possible in vReplicator.
vzBoost An optional driver installed on the destination ESX host;
improves write speeds to the VMFS.
VI3 VMware Infrastructure 3 (including ESX Server v3.x)
VM Virtual Machine
VMDK Virtual Machine Disk Format; a disk files that stores a VM’s
hard drive contents.
VMFS Virtual Machine File System; VMware’s cluster file system,
which stores VM disk images.
VPN Virtual Private Network
XML Extensible Markup Language
vReplicator v2.5 Chapter 2 Installation 11
Page 15
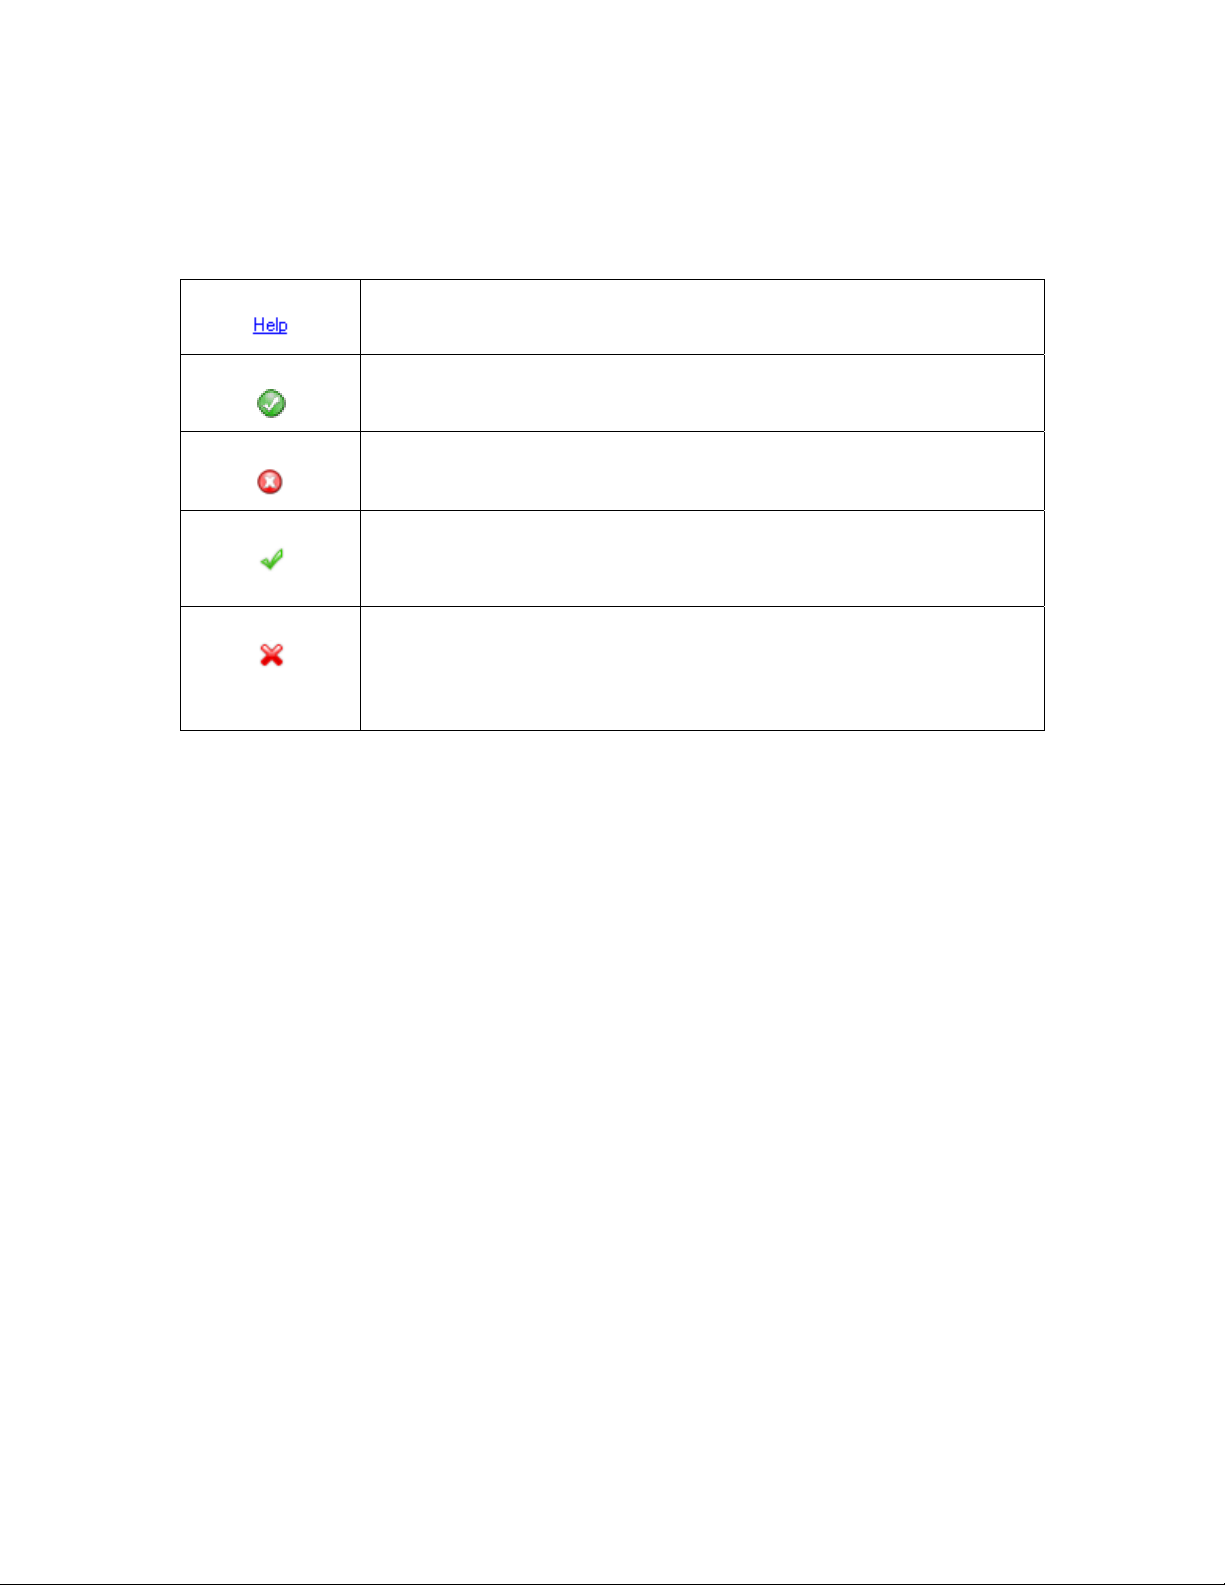
Icons and Buttons
Within the vReplicator interface, there are several icons and buttons that display
repeatedly. They are described below.
Clicking this link displays a window containing additional
information about the adjacent field.
A closed green checkmark icon displays to the right of a field to
confirm that it has been populated with a valid value.
A closed red X icon displays to the right of a field to indicate that it
contains an invalid value.
An open green checkmark icon displays on the Add VirtualCenter
and Add Host dialogs to indicate progress in IP address and/or API
connection resolution.
An open red X icon displays on the Add VirtualCenter and Add
Host dialogs to indicate that IP address and/or API connection
resolution could not be completed. To the right of the icon, a
message displays indicating why the process failed.
vReplica tor Licensing
In vReplicator, licensing is job-based rather than CPU-based. Each vReplicator license
allows for one replication job from one source to one target. For each job that is
scheduled, you will need a license. For example, if you replicate one VM to two remote
sites, you will need two licenses if one job is in process when you add the second job. If,
instead, the first job completes before you add the second job, the first license will be
available to apply to the second job. Licensing applies only to source VMs. Target VMs
do not require licensing.
If you do not have a permanent license, a trial license will be generated automatically for
you. Each trial license allows for four replication jobs; the license expires after 30 days.
vReplicator v2.5 Chapter 2 Installation 12
Page 16

m
Technical/Customer Support
Contacting Dell
Note: If you do not have an active Internet connection, you can find contact information on your
purchase invoice, packing slip, bill, or Dell product catalog.
Dell provides several online and telephone-based support and service options. Availability varies
by country and product, and some services may not be available in your area. To contact Dell for
sales, technical support, or customer service issues:
1. Visit
2. Verify your country or region in the Choose A Country/Region drop-down menu at the
3. Click Contact Us on the left side of the page.Note: Toll-free numbers are for use within
4. Select the appropriate service or support link based on your need.
5. Choose the method of contacting Dell that is convenient for you.
http://support.dell.com.
bottom of the page.
the country for which they are listed.
Country (City)
International Access
Code
Country Code
City Code
Anguilla
Antigua and
Barbuda
Aomen
Argentina (Buenos
Aires)
International Access
Code: 00
Country Code: 54
City Code: 11
Aruba
Australia (Sydney)
International Access
Code: 0011
Country Code: 61
City Code: 2
Austria (Vienna)
Service Type Area Codes,
Local Numbers, and
Toll-Free Numbers
Web and E-Mail Addresses
Web Address
E-Mail Address
Technical Support., Customer Service, Sales
Web Address
E-Mail Address
Technical Support., Customer Service, Sales
Technical Support
™
Dimension™, Dell Inspirion™, Dell Optiplex™, Dell
Dell
Lattitude
Servers and Storage
Web Address
E-Mail Address for Desktop and Portable Computers
E-Mail Address for Servers and EMC
Customer Service
Technical Support
Technical Support Services
Sales
Web Address
E-Mail Address
Technical Support., Customer Service, Sales
Web Address
Contact Dell Web Address
Technical Support., Customer Service, Sales
Web Address Support.euro.dell.co
™
, and Dell Precision™
®
Storage Products
la-techsupport@dell.com
la-techsupport@dell.com
la-techsupport@dell.com
la-techsupport@dell.com
support.ap.dell.com/contactus
www.Dell.com/ai
toll-free: 800-335-0031
www.Dell.com.ag
1-800-805-5924
0800-105
0800-105
www.dell.com.ar
la_enterprise@dell.com
toll-free: 0-800-444-0730
toll-free: 0-800-444-0733
toll-free: 0-800-444-0724
0-800-444-3355
www.Dell.com/aw
toll-free: 800-1578
support.ap.dell.com
13DELL-133355
vReplicator v2.5 Chapter 2 Installation 13
Page 17

m
g
International Access
Code: 900
Country Code: 43
City Code: 1
Bahamas
Barbados
Belgium (Brussels)
Bolivia
Brazil
International Access
Code: 00
Country Code: 55
City Code: 51
British Virgin
Islands
Brunei
Country Code: 673
Canada (North
York, Ontario)
International Access
Code: 011
E-Mail Address
Home/Small Business Sales
Home/Small Business Fax
Home/Small Business Customer Service
Home/Small Business Support
Preferred Accounts/Corporate Customer
Service Preferred Accounts/Corporate Customer
Switchboard
Web Address
E-Mail Address
Technical Support., Customer Service, Sales
Web Address
E-Mail Address
Technical Support., Customer Service, Sales
Web Address
General Support
General Support Fax
Customer Service
Corporate Sales
Fax
Switchboard
Web Address
E-Mail Address
Technical Support., Customer Service, Sales
Web Address
E-Mail Address
Customer Service and Tech Support
Technical Support Fax
Customer Service Fax
Sales
Technical Support, Customer Service, Sales toll-free: 1-866-278-6820
Technical Support (Penan
Customer Service (Penang, Malaysia)
Transaction Sales (Penang, Malaysia)
Online Order Status Web Address
AutoTech (automated Hardware and Warranty Support)
Customer Service
Home/Home Office
Small Business
Medium/Large Business, Government, Education
Hardware Warranty Phone Support
Computers for Home/Home Office
Computers for Small/Medium/Large Business
Government
Printers, Projectors, Televisions, Handheld, Digital
Jukebox, and Wireless Sales
Home and Home Office Sales
Small Business
, Malaysia)
Tech_support_central_europe@dell.com
0820 240 530 00
0820 240 530 49
0820 240 530 14
0820 240 530 17
0820 240 530 16
0820 240 530 17
0820 240 530 00
www.dell.com/bs
la-techsupport@dell.com
toll-free: 1-866-874-3038
www.dell.com/bb
la-techsupport@dell.com
1-800-534-3142
Support.euro.dell.co
02 481 92 88
02 481 92 95
02 713 15 65
02 481 91 00
02 481 91 99
02 481 91 00
www.dell.com/bo
la_techsupport@dell.com
toll-free: 800-10-0238
www.dell.com/br
BR_TechSupport@dell.com
0800 970 3355
51 2104 5470
51 2104 5480
0800 722 3498
604 633 4966
604 633 4888
604 633 4955
www.dell.ca/ostatus
support.ca.dell.com
toll-free:1-800-247-9362
toll-free:1-800-847-4096
toll-free:1-800-906-3355
toll-free:1-800-387-5757
toll-free:1-800-847-4096
toll-free:1-800-387-5757
1-877-335-5767
toll-free:1-800-999-3355
toll-free:1-800-387-5752
toll-free:1-800-387-5755
vReplicator v2.5 Chapter 2 Installation 14
Page 18

m
m
Cayman Islands
Chile (Santiago)
Country Code: 56
City Code: 2
China (Xiamen)
Country Code: 86
City Code: 592
Columbia
Costa Rica
Czech Republic
(Prague)
International Access
Code: 00
Country Code: 420
Denmark
(Copenhagen)
International Access
Medium/Large Business, Government
Spare Parts and Extended Service
E-Mail Address
Technical Support, Customer Service, Sales
Web Address
E-Mail Address
Sales and Customer Support
Technical Support Web Address
Technical Support E-Mail Address
Customer Service E-Mail Address
Technical Support Fax
Technical Support – Dimension and Inspiron
Technical Support – OptiPlex, Lattitude and Dell
Precision
Technical Support – Servers and Storage
Technical Support – Projectors, PDAs, Switches, Routers,
etc
Technical Support – Printers
Customer Service
Customer Service Fax
Home and Small Business
Preferred Accounts Division
Large Corporate Accounts GCP
Large Corporate Accounts Key Accounts
Large Corporate Accounts North
Large Corporate Accounts North Government and
Education
Large Corporate Accounts East
Large Corporate Accounts East Government and
Education
Large Corporate Accounts Queue Team
Large Corporate Accounts South
Large Corporate Accounts West
Large Corporate Accounts Spare Parts
Web Address
E-Mail Address
Technical Support, Customer Service, Sales
Web Address
E-Mail Address
Technical Support, Customer Service, Sales
Web Address
E-Mail Address
Technical Support
Customer Service
Fax
Technical Fax
Switchboard
Web Address
Technical Support
1 866 440 3355
la-techsupport@dell.com
1-877-262-5415
www.dell.com/cl
la-techsupport@dell.com
toll-free: 1230-020-4823
support.dell.com.cn
support.dell.com.cn/email
customer_cn@dell.com
592 818 14350
toll-free: 800 858 2969
toll-free: 800 858 0950
toll-free: 800 858 0960
toll-free: 800 858 2920
toll-free: 800 858 2311
toll-free: 800 858 2060
592 818 1308
toll-free: 800 858 2222
toll-free: 800 858 2557
toll-free: 800 858 2055
toll-free: 800 858 2628
toll-free: 800 858 2999
toll-free: 800 858 2955
toll-free: 800 858 2020
toll-free: 800 858 2669
toll-free: 800 858 2572
toll-free: 800 858 2355
toll-free: 800 858 2811
toll-free: 800 858 2621
www.dell.com/co
la-techsupport@dell.com
01-800-915-4755
www.dell.com/cr
la-techsupport@dell.com
0800-012-0231
support.euro.dell.co
czech_dell@dell.com
22537 2727
22537 2707
22537 2714
22537 2728
22537 2711
Support.euro.dell.co
7023 0182
vReplicator v2.5 Chapter 2 Installation 15
Page 19

m
m
Code: 00
Country Code: 45
Dominica
Dominican
Republic
Ecuador
El Salvador
Finland (Helsinki)
International Access
Code: 990
Country Code: 358
City Code: 9
France (Paris)
(Montpellier)
International Access
Code: 00
Country Code: 33
City Codes: (1) (4)
Germany
(Frankfurt)
International Access
Code: 00
Country Code: 49
City Code: 69
Customer Service – Relational
Home/Small Business Customer Service
Switchboard – Relational
Switchboard Fax – Relational
Switchboard – Home/Small Business
Switchboard Fax – Home/Small Business
Web Address
E-Mail Address
Technical Support, Customer Service, Sales
Web Address
E-Mail Address
Technical Support, Customer Service, Sales
Web Address
E-Mail Address
Technical Support, Customer Service, Sales (Calling from
Quito)
Technical Support, Customer Service, Sales (Calling from
Guayaquil)
Web Address
E-Mail Address
Technical Support, Customer Service, Sales
Web Address
E-Mail Address
Technical Support
Customer Service
Switchboard
Sales under 500 employees
Fax
Sales over 500 employees
Fax
Web Address
Home and Small Business
Technical Support
Customer Service
Switchboard
Switchboard (calls from outside of France)
Sales
Fax
Fax (calls from outside of France)
Corporate
Technical Support
Customer Service
Switchboard
Sales
Web Address
E-mail Address
Technical Support
Home/Small Business Customer Service
Global Segment Customer Service
Preferred Accounts Customer Service
7023 0184
3287 5505
3287 1200
3287 1201
3287 5000
3287 5001
www.dell.com/dm
la-techsupport@dell.com
toll-free: 1-866-278-6821
www.dell.com/do
la-techsupport@dell.com
1-800-156-1588
www.dell.com/ec
la-techsupport@dell.com
toll-free: 999-119-877-655-3355
toll-free: 1800-999-119-877-655-
3355
www.dell.com/sv
la-techsupport@dell.com
800-6132
support@euro.dell.com
fi_support@dell.com
0207 533 555
0207 533 538
0207 533 533
0207 533 540
0207 533 530
0207 533 533
0207 533 530
Support.euro.dell.co
0825 387 270
0825 832 833
0825 004 700
04 99 75 40 00
0825 004 700
0825 004 701
04 99 75 40 01
0825 004 719
0825 338 339
01 55 94 71 00
01 55 94 71 00
support.euro.dell.co
tech_support_central_europe@dell.com
069 9792-7200
0180-5-224400
069 9792-7320
069 9792-7320
vReplicator v2.5 Chapter 2 Installation 16
Page 20

m
Greece
International Access
Code: 00
Country Code: 49
Grenada
Guatemala
Guyana
Hong Kong
International Access
Code: 001
Country Code: 852
India
Large Accounts Customer Service
Public Accounts Customer Service
Switchboard
Web Address
Technical Support
Gold Service Technical Support
Switchboard
Gold Service Switchboard
Sales
Fax
Web Address
E-Mail Address
Technical Support, Customer Service, Sales
Web Address
E-Mail Address
Technical Support, Customer Service, Sales
E-Mail Address
Technical Support, Customer Service, Sales
Web Address
Technical Support E-mail Address
Technical Support - Dimension and Inspiron
Technical Support - OptiPlex, Latitude, and Dell
Precision
Technical Support - Servers and Storage
Technical Support - Projectors, PDAs, Switches, Routers,
etc .
Customer Service
Large Corporate Accounts
Global Customer Programs
Medium Business Division
Home and Small Business Division
Dell Support Website
Portable and Desktop Support
Desktop Support E-mail Address
Portable Support E-mail Address
Phone Numbers
Server Support
E-mail Address
Phone Numbers
Gold Support Only
E-mail Address
Phone Numbers
069 9792-7320
069 9792-7320
069 9792-7000
Support.euro.dell.co
00800-44 14 95 18
00800-44 14 00 83
2108129810
2108129811
2108129800
2108129812
www.dell.com/gd
la-techsuppo@dell.com
toll-free: 1-866-540-3355
www.dell.com/gt
la-techsupport@dell.com
1-800-999-0136
la-techsupport@dell.com
toll-free: 1-877-270-4609
support.ap.dell.com
support.dell.com.cn/email
00852-2969 3188
00852-2969 3191
00852-2969 3196
00852-3416 0906
00852-3416 0910
00852-3416 0907
00852-3416 0908
00852-3416 0912
00852-2969 3105
support.ap.dell.com
india_support_desktop@dell.
com
india_support_notebook@de
ll.com
080-25068032 or 080-25068034
or
your city STD code + 60003355
or
toll-free: 1-800-425-8045
india_support_Server@dell.c
om
080-25068032 or 080-25068034
or
your city STD code + 60003355
or
vReplicator v2.5 Chapter 2 Installation 17
Page 21

m
m
Ireland
(Cherrywood)
International Access
Code: 00
Country Code: 353
City Code: 1
Italy (Milan)
International Access
Code: 00
Country Code: 39
City Code: 02
Customer Service
Home and Small Business
Large Corporate Accounts
Sales
Large Corporate Accounts
Home and Small Business
Web Address
Technical Support
E-mail Address
Business computers
Home computers
At Home Support
Sales
Home
Small Business
Medium Business
Large Business
E-mail Address
Customer Service
Home and Small Business
Business (greater than 200 employees)
General
Fax/Sales fax
Switchboard
U.K. Customer Service (dealing with U.K.only)
Corporate Customer Service (dial within U.K. only)
U.K. Sales (dial within U.K. only)
Web Address
Home and Small Business
Technical Support
Customer Service
Fax
Switchboard
Corporate
Technical Support
Customer Service
Fax
Switchboard
toll-free: 1-800-425-8045
eec_ap@dell.com
080-25068033 or your city STD
code + 60003355 or
toll-free: 1-800-425-9045
India_care_HSB@dell.com
toll-free : 1800-4254051
India_care_REL@dell.com
toll free : 1800-4252067
1600 33 8044
1600 33 8046
Support.euro.dell.co
dell_direct_support@dell.c
om
1850 543 543
1850 543 543
1850 200 889
1850 333 200
1850 664 656
1850 200 646
1850 200 646
Dell_IRL_Outlet@dell.com
01 204 4014
1850 200 982
01 204 0103
01 204 4444
0870 906 0010
0870 907 4499
0870 907 4000
Support.euro.dell.co
02 577 826 90
02 696 821 14
02 696 821 13
02 696 821 12
02 577 826 90
02 577 825 55
02 575 035 30
02 577 821
vReplicator v2.5 Chapter 2 Installation 18
Page 22

m
m
Jamaica
Japan (Kawasaki)
International Access
Code: 001
Country Code: 81
City Code: 44
Korea (Seoul)
International Access
Code: 001
Country Code: 82
City Code: 2
Latin America
Luxemborg
International Access
Code: 00
Country Code: 352
E-mail Address
Technical Support, Customer Service, Sales
(dial from within Jamaica only)
Web Address
Technical Support - Dimension and Inspiron
Technical Support outside of Japan - Dimension and
Inspiron
Technical Support - Dell Precision, OptiPlex, and
Latitude
Technical Support outside of Japan - Dell Precision,
OptiPlex, and Latitude
Technical Support - Dell PowerApp™, Dell
PowerEdge™, Dell PowerConnect™, and Dell
PowerVault™,
Technical Support outside of Japan - PowerApp,
PowerEdge, PowerConnect, and PowerVault
Technical Support - Projectors, PDAs, Printers, Routers
Technical Support outside of Japan - Projectors, PDAs,
Printers, Routers
Faxbox Service
24-Hour Automated Order Status Service
Customer Service
Business Sales Division - up to 400 employees
Preferred Accounts Division Sales - over 400 employees
Public Sales - government agencies, educational
institutions, and medical institutions
Global Segment Japan
Individual User
Individual User Online Sales
Individual User Real Site Sales
Switchboard
Web Address
Technical Support, Customer Service
Technical Support - Dimension, PDA, Electronics, and
Accessories
Sales
Fax
Switchboard
Customer Technical Support (Austin, Texas, U.S.A.)
Customer Service (Austin, Texas, U.S.A.)
Fax (Technical Support and Customer Service) (Austin,
Texas, U.S.A.)
Sales (Austin, Texas, U.S.A.)
SalesFax (Austin, Texas, U.S.A.)
Web Address
Support
Home/Small Business Sales
Corporate Sales
Customer Service
la-techsupport@dell.com
1-800-440-9205
support.jp.dell.co
toll-free: 0120-198-
26
81-44-520-1435
toll-free: 0120-198-
433
81-44-556-3894
toll-free: 0120-198-498
81-44-556-4162
toll-free: 0120-981-690
81-44-556-3468
044-556-3490
044-556-3801
044-556-4240
044-556-1465
044-556-3433
044-556-5963
044-556-3469
044-556-1657
044-556-2203
044-556-4649
044-556-4300
Support.ap.dell.com
toll-free: 080-200-3800
toll-free: 080-200-3801
toll-free: 080-200-3600
2194-6202
2194-6000
512 728-4093
512 728-3619
512 728-3883
512 728-4397
512 728-4600 or 512 728-3772
Support.euro.dell.co
3420808075
+32 (0)2 713 15 96
26 25 77 81
+32 (0)2 481 91 19
vReplicator v2.5 Chapter 2 Installation 19
Page 23

m
Macao
Country Code: 83
Malaysia (Penang)
International Access
Code: 00
Country Code: 60
City Code: 4
Mexico
International Access
Code: 00
Country Code: 52
Montserrat
Netherlands
Antilles
Netherlands
(Amsterdam)
International Access
Code: 00
Country Code: 31
City Code: 20
New Zealand
International Access
Code: 00
Country Code: 64
Nicaragua
Norway (Lysaker)
International Access
Code: 00
Country Code: 47
Panama
Fax 26 25 77 82
Technical Support
Customer Service (Xiamen, China)
Transaction Sales (Xiamen, China)
Web Address
Technical Support - Dell Precision, OptiPlex, and
toll-free: 0800 105
34 160 910
29 693 115
Support.ap.dell.com
toll-free: 1800 880 193
Latitude
Technical Support - Dimension, Inspiron, and Electronics
toll-free: 1800 881 306
and Accessories
Technical Support - PowerApp, PowerEdge,
toll-free: 1800 881 386
PowerConnect, and PowerVault
Customer Service
Transaction Sales
Corporate Sales
Web Address
E-mail Address
Customer Technical Support
Sales
Customer Service
Main
E-mail Address
Technical Support, Customer Service, Sales
E-mail Address
Web Address
Technical Support
Technical Support Fax
Home/Small Business Customer Service
Relational Customer Service
Home/Small Business Sales
Relational Sales
Home/Small Business Sales Fax
Relational Sales Fax
Switchboard
Switchboard Fax
Web Address
E-mail Address
Technical Support, Customer Service, Sales
Web Address
E-mail Address
Technical Support, Customer Service, Sales
Web Address
Technical Support
Relational Customer Service
Home/Small Business Customer Service
Switchboard
Fax Switchboard
Web Address
E-mail Address
toll-free: 1800 881 306 (option 6)
toll-free: 1800 888 202
toll-free: 1800 888 213
www.dell.com/mx
la-techsupport@dell.com
001-877-384-8979 or 001-877-269-
3383
50-81-8800 or 01-800-888-3355
001-877-384-8979 or 001-877-269-
3383
50-81-8800 or 01-800-888-3355
la-techsupport@dell.com
Toll-free: 1-866-278-6822
la-techsupport@dell.com
support.euro.dell.com
020 674 45 00
020 674 47 66
020 674 42 00
020 674 43 25
020 674 55 00
020 674 50 00
020 674 47 75
020 674 47 50
020 674 47 75
020 674 47 50
020 674 50 00
020 674 47 50
Support.ap.dell.com
Support.ap.dell.com/contactus
0800 441 567
www.dell.com/ni
la-techsupport@dell.com
001-800-220-1377
Support.euro.dell.co
671 16882
671 17575
231 62298
671 16800
671 16865
www.dell.com/pa
la-techsupport@dell.com
Technical Support, Customer Service, Sales
vReplicator v2.5 Chapter 2 Installation 20
Page 24

m
m
Peru
Poland (Warsaw)
International Access
Code: 011
Country Code: 48
City Code: 22
Portugal
International Access
Code: 00
Country Code: 351
Puerto Rico
St. Kitts and Nevis
St. Lucia
St. Vincent and the
Grenadines
Singapore
International Access
Code: 005
Country Code: 65
Slovakia (Prague)
International Access
Code: 00
Country Code: 421
Web Address
E-mail Address
Technical Support, Customer Service, Sales
Web Address
E-mail Address
Customer Service Phone
Customer Service
Sales
Customer Service Fax
Reception Desk Fax
Switchboard
Web Address
Technical Support
Customer Service
Sales
Fax
Web Address
E-mail Address
Technical Support, Customer Service, Sales
Web Address
E-mail Address
Technical Support, Customer Service, Sales
Web Address
E-mail Address
Technical Support, Customer Service, Sales
Web Address
E-mail Address
Technical Support, Customer Service, Sales
NOTE: The phone numbers in this section should be
called from within Singapore or Malaysia only.
Web Address
Technical Support - Dimension, Inspiron, and
Electronics and Accessories
Technical Support - OptiPlex, Latitude,
and Dell Precision
Technical Support - PowerApp, PowerEdge,
PowerConnect, and PowerVault
Customer Service
Transaction Sales
Corporate Sales
Web Address
E-mail Address
Technical Support
Customer Service
Fax
Tech Fax
011-800-507-1264
www.dell.com/pe
la-techsupport@dell.com
0800-50-669
support.euro.dell.co
pl_support_tech@dell.com
57 95 700
57 95 999
57 95 999
57 95 806
57 95 998
57 95 999
Support.euro.dell.co
707200149
800 300 413
800-300-410 or 800-300 -411 or
800-300-412 or 21-422-07-10
21-424-01-12
www.dell.com/pr
la-techsupport@dell.com
1-877-537-3355
www.dell.com/kn
la-techsupport@dell.com
toll-free: 1-866-540-3355
www.dell.com/lc
la-techsupport@dell.com
toll-free: 1-866-464-4352
www.dell.com/vc
la-techsupport@dell.com
toll-free: 1-866-464-4353
support.ap.dell.com
toll-free: 1 800 394 7430
toll-free: 1 800 394 7488
toll-free: 1 800 394 7478
toll-free: 1 800 394 7430 (option
6)
toll-free: 1 800 394 7412
toll-free: 1 800 394 7419
support.euro.dell.com
czech_dell@dell.com
02 5441 5727
420 22537 2707
02 5441 8328
02 5441 8328
vReplicator v2.5 Chapter 2 Installation 21
Page 25

m
m
m
South Africa
(Johannesburg)
International Access
Code: 09/091
Country Code: 27
City Code: 11
Spain (Madrid)
International Access
Code: 00
Country Code: 34
City Code: 91
Sweden (Upplands
Vasby)
International Access
Code: 00
Country Code: 46
City Code: 8
Switzerland
(Geneva)
International Access
Code: 00
Country Code: 41
City Code: 22
Taiwan
International Access
Code: 002
Country Code: 886
Thailand
International Access
Code: 001
Country Code: 66
Switchboard (Sales) 02 5441 8328
02 5441 7585
Web Address
E-mail Address
Gold Queue
Technical Support
Customer Service
Sales
Web Address
Home and Small Business
Technical Support
Customer Service
Sales
Switchboard
Fax
support.euro.dell.co
dell_za_suppor@dell.com
011 709 7713
011 709 7710
011 709 7707
011 709 7700
Support.euro.com
902 100 130
902 118 540
902 118 541
902 118 541
902 118 539
Corporate
Technical Support
Customer Service
Switchboard
Fax
Web Address
Technical Support
Relational Customer Service
Home/Small Business Customer Service
Employee Purchase Program (EPP) Support
Technical Support Fax
Web Address
E-mail Address
Technical Support – Home and Small Business
Technical Support – Corporate
Customer Service – Home and Small Business
Customer Service – Corporate
Fax
Switchboard
Web Address
E-mail Address
Technical Support - OptiPlex, Latitude, Inspiron,
support.euro.dell.co
Support.euro.dell.co
Tech_support_central_Europe@dell.co
support.ap.dell.com
support.dell.com.cn/email
toll-free: 0080 186 1011
902 100 130
902 115 236
91 722 92 00
91 722 95 83
08 590 05 199
08 590 05 642
08 587 70 527
020 140 14 44
08 590 05 594
0844 811 411
0844 822 844
0848 802 202
0848 821 721
022 799 01 90
022 799 01 01
Dimension, and Electronics and Accessories
Technical Support - Servers and Storage
Customer Service
toll-free: 0080 160 1250 (option
toll-free: 0080 160 1256
Transaction Sales
Corporate Sales
toll-free: 0080 165 1228
toll-free: 0080 165 1227
Web Address
Technical Support (OptiPlex, Latitude, and Dell
Support.ap.dell.com
toll-free: 1800 0060 07
Precision)
Technical Support (PowerApp, PowerEdge,
toll-free: 1800 0600 09
PowerConnect, and PowerVault)
Customer Service
Corporate Sales
Transaction Sales
toll-free: 1800 006 007 (option 7)
toll-free: 1800 006 009
toll-free: 1800 006 006
m
5)
vReplicator v2.5 Chapter 2 Installation 22
Page 26

m
Trinidad/Tobago
Turks and Caicos
Islands
U.K.(Bracknell)
International Access
Code: 00
Country Code: 44
City Code: 1344
Uruguay
U.S.A. (Austin,
Texas)
International
Access Code: 011
Country Code: 1
Web Address
E-mail Address
Technical Support, Customer Service, Sales
Web Address
E-mail Address
Technical Support, Customer Service, Sales
Web Address
E-mail Address
Customer Service Website
Sales
Home and Small Business Sales
Corporate/Public Sector Sales
Customer Service
Home and Small Business
Corporate
Preferred Accounts (500-5000 employees)
Global Accounts
Central Government
Local Government & Education
Health
Technical Support
Corporate/Preferred Accounts/PCA (1000+ employees)
Other Dell Products
General
Home and Small Business Fax
Web Address
E-mail Address
Technical Support, Customer Service, Sales
Automated Order-Status Service
AutoTech (portable and desktop computers)
Hardware and Warranty Support (Dell TV, Printers, and
Projectors ) for Relationship customers
Consumer (Home and Home Office) Support for Dell
products
Customer Service
Employee Purchase Program (EPP) Customers
Financial Services Web Address
Financial Services (lease/loans)
Financial Services (Dell Preferred Accounts [DPA])
Business
Customer Service
Employee Purchase Program (EPP)
Customer s Support for printers, projectors, PDAs, and
MP3 players
Public (government, education, and healthcare)
Customer Service and Support
Employee Purchase Program (EPP) Customers
Dell Sales
www.dell.com/tt
la-techsupport@dell.com
toll-free: 1-888-799-5908
www.dell.com/tc
la-techsupport@dell.com
toll-free: 1-877-441-4735
upport.euro.dell.co
dell_direct_support@dell.co
m
support.euro.dell.com/uk/en/
ECare/form/home.asp
0870 907 4000
01344 860 456
0870 906 0010
01344 373 185
0870 906 0010
01344 373 186
01344 373 196
01344 373 199
01344 373 194
0870 908 0500
0870 353 0800
0870 907 4006
www.dell.com/uy
la-techsupport@dell.com
toll-free: 000-413-598-2521
toll-free: 1-800-433-9014
toll-free: 1-800-247-9362
toll-free: 1-877-459-7298
toll-free: 1-800-624-9896
toll-free: 1-800-624-9897
toll-free: 1-800-695-8133
www.dellfinancialservices.com
toll-free: 1-877-577-3355
toll-free: 1-800-283-2210
toll-free: 1-800-624-9897
toll-free: 1-800-695-8133
toll-free: 1-877-459-7298
toll-free: 1-800-456-3355
toll-free: 1-800-695-8133
toll-free: 1-800-289-3355 or
toll-free: 1-800-879-3355
vReplicator v2.5 Chapter 2 Installation 23
Page 27

Dell Outlet Store (Dell refurbished computers)
Software and Peripherals Sales
Spare Parts Sales
Extended Service and Warranty Sales
Fax
Dell Services for the Deaf, Hard-of-Hearing, or SpeechImpaired
U.S. Virgin Islands
Venezuela
Web Address
E-mail Address
Technical Support, Customer Service, Sales
Web Address
E-mail Address
Technical Support, Customer Service, Sales
toll-free: 1-888-798-7561
toll-free: 1-800-671-3355
toll-free: 1-800-357-3355
toll-free: 1-800-247-4618
toll-free: 1-800-727-8320
toll-free: 1-877-DELLTTY
(1-877-335-5889)
www.dell.com/vi
la-techsupport@dell.com
toll-free: 1-877-702-4360
www.dell.com/ve
la-techsupport@dell.com
0800-100-4752
vReplicator v2.5 Chapter 2 Installation 24
Page 28

2 Installation
vReplicator v2.5 Chapter 2 Installation 25
Page 29

The vReplicator installation process is simple. After you confirm that all requirements
and pre-requisites have been met, identify the following:
• VCs and/or hosts that you want to configure.
• Default settings for replication type and frequency.
• Default limits for simultaneous replications.
• Default recipients for replication job notification.
• Users who should receive alerts when storage is low.
System Requirements
This section describes the hardware and software requirements for vReplicator
installation.
Location Requirements
vReplicator requires a physical or virtual machine running Windows 2000 SP4, Windows
2003 SP1 or SP2, and .NET Framework version 2.0. For optimal performance, it is best
to install vReplicator on a physical machine. If you install the software on a VM, it is best
to do so on one that is running Windows 2003 rather than XP. For the Vizioncore VSS
agent to work, you must have MS VSS installed. For MS VSS to work, the machine must
be running Windows 2003 R2, SP1, SP2, or SP4 and .NET 2.0.
You can confirm that you have .NET Framework v2.0 installed by accessing Start→Add
or Remove Programs. You can install .NET Framework v2.0 through Internet
Explorer→Tools→Windows Update. Alternately, you can download it from the
Microsoft website.
The physical or virtual machine must also meet the following criteria:
• Pentium III class CPU or greater
• 256 MB RAM (512 MB recommended)
• 2 GB free hard disk space (4 GB or greater recommended)
• 1024x768 video resolution (1280x1024 or greater recommended)
• 100 Mb/sec or greater network adapter
• Unimpeded network secure shell access (SSH)—port 22—from vReplicator to
both the source and destination servers
vReplicator v2.5 Chapter 2 Installation 26
Page 30

VMware ESX Server Requirements
User Accounts and Passwords
For each replication source and destination VM, you must use a login with appropriate
permissions. vReplicator requires the use of root, non-root, and system administrator
(SA) IDs and non-root and SA passwords. This section contains information specific to
vReplicator password requirements. For additional information, see the General
Password Security Guidelines section at the end of this chapter.
Switch User/Root Access
vReplicator requires root access. For security reasons, many ESX Servers are configured
so that a root user cannot log in directly from another computer. To gain root access,
vReplicator must connect with a non-root user ID and then switch user (su) to the root
account. For the non-root ID and password, it is best to use the same ID and password
that you selected for VC.
System Administrator Access
vReplicator also requires SA access; for example, when you install a new instance of MS
SQL Express 2005. The SA password must meet SQL Server password policy
requirements. In general, SA passwords should be complex but memorable. The
passwords should be written down and adequately protected, but accessible to those who
need them.
Password Security Setting Policy
Weak passwords compromise system security. The MS Windows security setting policy
has been enabled and configured for vReplicator passwords. When you create and update
passwords in vReplicator, follow as many of these guidelines as your environment
allows:
• A password should not include a significant portion of a user or account name.
• Each password should be at least six characters long.
• Passwords should contain characters from several of these categories:
-Uppercase letters in English (A-Z)
-Lowercase letters in English (a-z)
-Digits 0-9
-Non-alphabetic characters (for example, $, !, #, %)
Source
These are the requirements for the source machine:
• You do not need to complete any installations on the source VMFS.
• The source VMFS must be formatted for ESX 3.
vReplicator v2.5 Chapter 2 Installation 27
Page 31

• To perform a hot replication, vReplicator requires 6 GB of free space on the
source VMFS.
Destination
These are the requirements for the destination machine:
• You do not need to complete any installations on the destination VMFS.
• The destination VMFS must be formatted for ESX 3 and have enough free disk
space to store the replicated VM.
Note: For larger VMs (i.e., larger than 256 GB), confirm that the destination machine can
support the file size.
Interoperability Requirements
vReplicator and vRanger Pro share a unique interoperability. For their snapshot file
locking mechanism to function properly, certain environment requirements must be met.
vRanger Pro 3.15-3.2.3 is compatible with vReplicator 2.0-2.5. If you are using vRanger
Pro to enhance VMware Consolidated Backup (VCB), consult the list below as a
general guideline.
vReplicator 2.5 works with the following:
• VMware ESX Server 3.5, Update 1
• VMware ESX Server 3.5
• VMware ESX Server 3.0.2
• VMware ESX Server 3.0.1
• VMware VirtualCenter 2.5, Update 1
• VMware VirtualCenter 2.5
• VMware VirtualCenter 2.0.2, Update 3
• VMware VirtualCenter 2.0.2, Update 2
• VMware VirtualCenter 2.0.2, Update 1
• VMware VirtualCenter 2.0.2
• VMware VirtualCenter 2.0.1
The following are not supported at this time:
• VMware ESX Server 2.5.4
• VMware ESX Server 2.5.3
vReplicator v2.5 Chapter 2 Installation 28
Page 32

• VMware ESX Server 2.5.2
• VMware ESX Server 2.5.1
• VMware ESX Server 2.5.0
• VMware ESX Server 2.1.3
• VMware ESX Server 2.1.2
• VMware ESX Server 2.0.2
Vizioncore Support Policy
Vizioncore attempts to support all .dot versions of ESX Server within 60-90 days of
release. However, changes to the platform can create unforeseen circumstances, causing
an unexpected delay in providing support.
Support for all major versions of ESX Server is to be determined. Vizioncore has the
right to change this policy without prior notice or notification.
Database Requirements
vReplicator requires a SQL database to record replication job information. The process
below describes installing a new instance of SQL Express 2005 to configure the product
database.
Port Requirements
Before beginning the installation, confirm that the ports listed below are available. If your
environment includes any component (e.g., a firewall) that might restrict communication
between the machines involved in replication, make certain that these ports allow for
unimpeded access.
Port Direction Function
22 TCP vReplicator: outgoing
Host servers: incoming and
outgoing
443 TCP vReplicator: outgoing Used for VI3 host communications and
902 TCP vReplicator: outgoing Used for VI3 host communications and
Unimpeded network SSH access from
vReplicator to both VI3 hosts.
Bidirectional access between source VI3 and
destination VI3.
VC 2.x.
VC 2.x.
Note: Root SSH access is disabled by default in ESX Server 3.0. Setting up a non-root account
and providing vReplicator with the root password allows for replication with root disabled over
SSH. Otherwise, you can enable root over SSH by editing the PermitRootLogin value in
sshd_config on this unit: vi /etc/ssh/sshd_config
vReplicator v2.5 Chapter 2 Installation 29
Page 33

Installation Support
The following are supported:
OS Service Pack Bit Level
Windows 2000 SP4 32
Windows XP SP1 and SP2 32
Windows 2003 SP1 and SP2 32
Windows 2003 R2 SP1 and SP2 32
The following are not supported at this time:
OS Service Pack Bit Level
Windows Vista N/A 32 and 64
Windows Vista SP1 32 and 64
Windows 2003 SP1 and SP2 64
Windows 2003 R2 SP1 and SP2 64
Windows 2008 N/A 32 and 64
Guest VSS Support
The following are supported:
OS Service Pack Bit Level
Windows 2003 SP1 and SP2 32
The following are not supported at this time:
OS Service Pack Bit Level
Windows 2000 SP4 and SP5 32
Windows 2003 R2 SP1 and SP2 64
Windows XP Pro SP1 and SP2 32 and 64
Windows Vista N/A N/A
Windows 2008 N/A N/A
vReplicator v2.5 Chapter 2 Installation 30
Page 34

Guest OS for Replication Support
The software can replicate any guest OS that any VMware ESX Server supports as long
as vReplicator supports that underlying version of ESX. Snapshots must be fully
functional against the VM guest OS that the VM virtual server supports. That is, there
must be no known VMware snapshot issues. Please refer any snapshot issues to
VMware Customer Support.
vReplicator v2.5 Chapter 2 Installation 31
Page 35

Installing vReplicator
This section will guide you through installing vReplicator on a workstation or server.
Since network latency can compromise vReplicator performance, the software should not
be installed on a network drive.
Pre-requisites:
• You must have administrator privileges on the workstation or server on which you
install the software.
• You must remove any previously installed version of vReplicator before
beginning a new installation. See the instructions below.
• You must have access to the installer file—vReplicator.msi.
• Internet Protocol (IP) addresses must be registered to a Domain Name System
(DNS) entry. Confirm that all host names are registered within DNS.
Uninstall Old Version of vReplicator
To uninstall any version of vReplicator, do the following:
1. Access Windows Control Panel→Add or Remove Programs.
2. Click Change/Remove in the Add or Remove Programs window.
This message displays:
3. Click Yes or No.
A confirmation message displays:
vReplicator v2.5 Chapter 2 Installation 32
Page 36

You will know that the process is complete when this desktop icon displays:
Database Selection
vReplicator requires an SQL database to record job information.
Install on new instance
of SQL Express 2005
(radio button)
Install on an existing
SQL Server
2000/2005
(radio button)
Install manually
(not recommended)
(radio button)
This method is preferred. If you select this option, a new
instance of SQL Express 2005 will be installed on the
vReplicator machine and all necessary product database
configurations will be completed.
Note: This method is not recommended if you plan to install
vReplicator on the same machine where VC is installed.
Select this option only if you have access to a SQL Server and
have the necessary privileges to create a database on that
server.
This method allows you to create the databases manually, if
necessary. During the configuration process, sufficient
guidance is provided.
vReplicator v2.5 Chapter 2 Installation 33
Page 37

Install vReplicator Using SQL Express 2005 (New Instance)
1. From the desktop, double-click the installer file—vReplicator.msi—to run it.
The vReplicator Setup Wizard dialog displays.
2. Click Next.
The License Agreement dialog displays.
vReplicator v2.5 Chapter 2 Installation 34
Page 38

3. Read the license agreement. If you agree to its terms, click I Agree. Then,
click Next.
The Select Installation Folder dialog displays.
Note: Both the available and required disk space are indicated on the Select
Installation Folder dialog.
4. In the Folder field, specify the location where vReplicator should be installed. The
default is C:\Program Files\Vizioncore\vReplicator\.
If you want to change the location, edit the path directly. Or, click Browse to
select a path. Click to highlight the location and then click OK.
Warning: vReplicator cannot be installed on a network drive.
5. Click Install.
The file copy process begins.
vReplicator v2.5 Chapter 2 Installation 35
Page 39

When the process is complete, the Completed dialog displays.
6. Click Next.
The Installation Complete dialog displays.
vReplicator v2.5 Chapter 2 Installation 36
Page 40

7. Click Close.
The vReplicator icon displays on the desktop.
8. On the Database Setup Wizard dialog, click Next.
The Install Database dialog displays.
vReplicator v2.5 Chapter 2 Installation 37
Page 41

9. On the Install Database dialog, select the Install on new instance of SQL
Express 2005 radio button. Then, click Next.
The Microsoft SQL Express Install dialog displays.
10. In the Password and Confirm Password fields, enter the password for the SA
account for this server. Click OK.
The Setup Progress dialog displays.
vReplicator v2.5 Chapter 2 Installation 38
Page 42

11. Click Next.
The Database user Credentials dialog displays. The system auto-populates the
Database Server field with (existing SQL database name)\VIZIONCORE and the
User Name field with vizioncoreuser. Enter the SA password in the Password
field. Click Next.
Note: You can change the value in the User Name field.
vReplicator v2.5 Chapter 2 Installation 39
Page 43

12. Click the Automatic Setup icon at the center of the Install Database dialog.
13. When the Next button is enabled, click it.
vReplicator v2.5 Chapter 2 Installation 40
Page 44

14. Click Next.
A confirmation of completion dialog displays.
15. Click Finish.
The Completed dialog displays.
vReplicator v2.5 Chapter 2 Installation 41
Page 45

16. Click Next.
The Installation Complete dialog displays.
17. Click Close.
Installation is complete.
vReplicator v2.5 Chapter 2 Installation 42
Page 46

Upgrade to New Version of vReplicator
To upgrade to a new version of vReplicator, you must first uninstall any previous version
of the software.
complete a full uninstall. Since you are upgrading to a new version, it is best to click No
to retain settings and data from the previous version.
Uninstall vReplicator
To uninstall any version of vReplicator, do the following:
1. Access Windows Control Panel→Add or Remove Programs.
During this process, you will be prompted about whether you want to
2. Click Change/Remove in the Add or Remove Programs window.
This message displays:
3. Click No. To the confirmation message, click OK.
vReplicator v2.5 Chapter 2 Installation 43
Page 47

The application will no longer display in the Add or Remove Programs window.
vReplicator v2.5 Chapter 2 Installation 44
Page 48

Upgrade to a New Version vReplicator
1. From the desktop, double-click the installer file—vReplicator.msi—to run it.
2. Click Run.
vReplicator v2.5 Chapter 2 Installation 45
Page 49

3. Click Next.
4. Read the license agreement. If you agree to its terms, click I Agree.
5. Click Install.
vReplicator v2.5 Chapter 2 Installation 46
Page 50

6. Wait while the files are copied. Then, click Next.
Installation is complete.
7. Click Close.
vReplicator v2.5 Chapter 2 Installation 47
Page 51

The vReplicator desktop icon displays.
8. Double-click the desktop icon.
The vReplicator window and Notification Recipients dialog display.
You are now ready to configure vReplicator. To continue, see the Initial
Configuration section in Chapter 3.
vReplicator v2.5 Chapter 2 Installation 48
Page 52

General Password Security Guidelines
In general, it is best to make each password significantly different than previous
passwords. A unique password that contains uppercase and lowercase characters as well
as numerals and symbols is ideal. Never share passwords across applications—that is, a
password that you use in vReplicator should be distinct from a vRanger Pro password. It
is best to avoid incremental passwords. Do not create passwords that include user or
company names. Avoid using complete words within passwords. Longer passwords tend
to be more secure than shorter ones. Change the password often. Write down each
password and store it in a secure place. Discard old passwords.
Before you create a password that includes ASCII characters, confirm that they are
compatible with vReplicator. The following ASCII characters are not compatible with
vReplicator:
“ ‘ ~ { } [ ] -
The following ASCII characters may not be compatible with vReplicator:
! @ # $ % ^ * | \ / ?
vReplicator v2.5 Chapter 2 Installation 49
Page 53

3 Configuration
vReplicator v2.5 Chapter 3 Configuration 50
Page 54

There are a few configurations that you can make when you access vReplicator for the
first time. It can be useful to complete this process so that your default settings are in
place for your first replication jobs. The initial configuration process includes:
• Adding notification recipients.
• Selecting interface preferences.
• Defining alerts.
• Establishing replication job defaults.
• Adding and connecting to VCs and hosts.
Getting Started
Now that vReplicator is installed, you can launch it by double-clicking the desktop icon
or by accessing the software through the Start menu. When you first access vReplicator,
this window might display for up to 60 seconds. Then, the vReplicator window and the
Notification Recipients dialog display.
To bypass the initial configuration process, click OK on the Notification Recipients and
First Time Setup dialogs upon start up. If you defer the initial configuration process, you
can complete all of the tasks associated with configuring the software by following the
instructions in Chapter 4.
vReplicator v2.5 Chapter 3 Configuration 51
Page 55

Initial Configuration
Notification Setup
The configuration process begins with setting up an email notification list. The users on
this list can be notified when a replication job is completed or when errors are
encountered during replication. One recipient on the list will be designated to receive all
notifications by default. For each replication job, you can override this recipient by
entering another email address. Notifications contain information about the replication
jobs, such as the names of the source and destination servers and the VMs. Each
replication job’s notification emails can be sent to a different list of addresses, but every
potential recipient must be added through the Notification Recipients dialog. On the
Email tab, both Default Recipients Email and From Email Address are required fields.
After you set up email notification, vReplicator requires that at least one email address is
retained in the system. To read more about this, see the Remove Email Address section in
Chapter 4.
Email Enter an email address in this field to include the recipient in the
notifications list. One address on the list—which you will select on
the Email tab of the Options dialog—will be the default recipient
for all notifications.
Email Address
(text box)
This text box displays all of the email addresses of the recipients
currently configured to receive notifications.
First Time Setup
The First Time setup dialog features several tabs that allow you to establish default
settings for replication jobs. If you use the drag and drop replication method, these
settings will be triggered automatically. If you use the Replication Job Wizard, the
system will prompt you to override these settings from job to job. If you decide to skip
the initial configuration, you can define default settings later through the Options dialog
by selecting Tools→Options from the Menu Bar or by clicking Options in the Toolbar.
The First Time Setup and the Options dialogs are identical. See Chapter 4 for specific
instructions.
The First Time Setup/Options dialog features these tabs, all of which are described in
more detail below.
• Email—Use the fields on this tab to configure mail servers, email notification
recipients, and to test email transmission.
• View—Use these fields to define interface preferences such as tree structure
expansion level and menu labels for the Toolbar icons.
vReplicator v2.5 Chapter 3 Configuration 52
Page 56

• Alerts—Configure storage alert options using the fields on this tab.
• Job—On this tab, you can set default replication job options that include
replication type and frequency.
• Resources—This tab features several fields that allow you to manage
simultaneous replication jobs.
Email Tab
SMTP Name or IP The name or IP address of the Simple Mail Transfer Protocol
(SMTP) server used to send the email.
Default Recipients
Email
(dropdown)
This field is auto-populated with the email addresses that you
entered in the Notification Recipients dialog. The address
that you select in this field will receive notifications
pertaining to all replication jobs.
Edit List Click this button to access the Notification Recipients dialog,
where you can update existing email address information and
add recipients.
From Email Address This email address displays in the From line of the
notifications sent to the address selected in the Default
Recipients Email field.
Click here to send a test
email.
(link)
Clicking this link initiates a required process that tests the
connection to the address selected in the Default Recipients
Email field. When you click the link, a confirmation message
displays, indicating that the email was sent and requesting
that you confirm receipt.
vReplicator v2.5 Chapter 3 Configuration 53
Page 57

View Tab
VC Tree Expand
Level
(spin box)
Show Menu Text
Labels
(checkmark button)
The value in this field indicates the level of expansion for the
VC tree in the Hosts and Containers pane. You can select a
value between 2 and 100. By default, the expansion level is 2.
The icon adjacent to the field indicates that the value is
valid. If a displays, the value is invalid.
This field controls whether the text labels in the Toolbar of the
vReplicator window display. By default, this field is selected.
If you do not want to display the Toolbar text that corresponds
to the icons, clear this field.
vReplicator v2.5 Chapter 3 Configuration 54
Page 58

Alerts Tab
Inform me on low
storage?
(checkmark button)
Warn me when storage
has gone below_______
(% or GB)
(spin box and radio
buttons)
Inform me only on new
alerts?
(checkmark button)
Send me a email if there
low storage?
(checkmark button)
Email to
(dropdown)
If this field is selected, an alert displays in the Replication
Management pane when storage space goes below the setting
defined on this tab—as a percentage (%) or in gigabytes
(GB). In addition, an email notification is sent to the user
selected in the Default Recipients Email field.
In this field, you define the storage level threshold for the
alert. Using the spin box, enter a numerical value up to 100
(%) or between 0 and 9999 (GB). Select a threshold type to
measure storage levels—% or GB. The default values for this
field are set at 10 and %.
By default, this field is selected. The user who is currently
logged in will receive alerts via the interface.
Use this checkmark button to indicate whether an email
notification should be sent when storage is low. If this field is
selected, the Email to field will become enabled. The
notification can be sent only if an email address has been
added through the Notification Recipients dialog.
This field is auto-populated with the email addresses entered
through the Notification Recipients dialog. The field
becomes enabled only if the Send me a email if there low
storage field is selected.
vReplicator v2.5 Chapter 3 Configuration 55
Page 59

vReplicator can be configured to display an alert or send an email notification when a
defined storage threshold has been crossed. The software pulls storage data from VC to
create a datastore summary. No manual entry is required. For additional information on
datastore summaries, see Chapter 4.
If you request an interface-based alert, this message displays in the Replication
Management pane:
If you request an email notification to trigger when storage is low, a message similar to
this one is sent to the address selected in the Email to field on the Alerts tab:
Job Tab
vReplicator v2.5 Chapter 3 Configuration 56
Page 60

VM DisplayName
Template
Need space between
display and name.
Default Replication
Type
(radio buttons)
This is the template that vReplicator uses to name destination
VMs. When you view a VC environment, the value in this field
is appended to the VC display name of the replicated VM. For
example, a replicated VM named TestVM2 will display as
TestVM2_VzReplicate on the destination host.
This field is pre-populated with %VMNAME%_VzReplicate.
A icon displays next to the field when the value is valid.
Warning: %VMNAME% is a variable that should not be
altered or deleted. If you attempt to do either, your settings will
not be retained until you restore the variable. In this case, the
icon adjacent to the field will change to a icon.
You can change this portion of the template name:
_VzReplicate.
Using this field, you can set a default replication type. For each
job initiated through the Replication Job Wizard, you can
override this setting.
Hybrid (the default): This replication type combines snapshots
and differential replication without initiating a scan of the
source VM. The snapshot is sent to the destination and
committed. The source and destination VMs are
resynchronized using a method that does not require the entire
VM image to be resent. During hybrid replication, a snapshot
is always left open on the source VM. During a pass, a
snapshot count is taken to confirm that the source VM has only
one snapshot open and the destination VM has none. If there is
a loss of connection during a pass, any open snapshots will
remain so. Until the connection is restored, all future
replications will fail—due either to the host being down or the
number of open snapshots surpassing the maximum. For a
source VM, the maximum is two; for the destination VM, the
maximum is one.
Differential: During this type of replication, the source VMDK
is scanned for changes. The changes are recorded, transferred
to the destination, and then committed. A snapshot is left open
only during the replication pass.
Adjacent to this field, there is a Help link. Click it to access a
window that contains additional information about the
replication types.
vReplicator v2.5 Chapter 3 Configuration 57
Page 61

Default Job Frequency
(radio buttons and spin
boxes)
Use these options to set the default replication job schedule.
For each job initiated through the Replication Job Wizard, you
can override this setting.
Fixed: This frequency type defines a set interval between the
time the first job starts and the time the next job starts. For
example, if a VM requires 10 minutes to replicate and you set
the fixed interval to 1 hour, the first job will begin at 7:00 and
complete at 7:10. The next job will begin at 8:00. If a VM
takes 70 minutes to replicate and you set the interval to 1 hour,
the first job begins at 7:00 and finishes at 8:10. The next job
will begin at the next scheduled interval (10:00).
Sliding: This frequency type defines a set interval between the
time the first job ends and the time the next job starts. For
example, if a VM requires 10 minutes to replicate and you set
the sliding interval to 1 hour, the first job will begin at 7:00
and complete at 7:10. The next job will begin an hour later, at
8:10.
In this field, there are three spin boxes—Days, Hours, and
Minutes. A icon displays next to the spin boxes to indicate
that the values are valid. By default, Fixed is selected at 0
Days, 1 Hours, and 0 Minutes.
When you drag and
drop a VM to a host
this is the default
replication frequency
given to that job.
(link)
Adjacent to the field, there is a Help link. Click it to access a
window that contains additional information about the
replication frequency types.
Clicking this link accesses a window that describes the options
for initiating a replication job. You can initiate a job through
the Replication Job Wizard or you can drag and drop VMs
between hosts.
vReplicator v2.5 Chapter 3 Configuration 58
Page 62

Help Windows
There are several help windows that can be accessed through the Job tab.
Default Replication Type Help Window
Default Job Frequency Help Window
vReplicator v2.5 Chapter 3 Configuration 59
Page 63

Drag and Drop Replication Jobs Help Window
vReplicator v2.5 Chapter 3 Configuration 60
Page 64

Resources Tab
Limit total simultaneous
replications to:
_________ at a time.
(spin box)
Limit per host
simultaneous
replications to:
________ at a time.
(spin box)
Limit per LUN
simultaneous
replications to:
________ at a time.
(spin box)
The value in this field indicates the maximum number of
total simultaneous replication jobs that are allowed to run at
once. A value between 1 and 100 is acceptable. Default is 10.
The value in this field indicates the maximum number of
total simultaneous replication jobs per host that are allowed
to run at once. A value between 1 and 100 is acceptable.
Default is 4.
The value in this field indicates the maximum number of
total simultaneous replication jobs per Logical Unit Number
(LUN) that are allowed to run at once. A value between 1
and 100 is acceptable. Default is 2.
vReplicator v2.5 Chapter 3 Configuration 61
Page 65

Connections Setup
After you define your settings on the First Time Setup dialog, you can add a VC or host,
connect to it, or remove it through the Connection Setup dialog. You can also set a
default VC or host to load automatically upon startup. If you skip the initial configuration
process when you first access vReplicator, you can define these settings later through
Connect on the Menu Bar of the vReplicator window. For instructions on configuring a
VC or host, see Chapter 4.
VirtualCenter(s) Tab
In vReplicator, you must configure each VC that manages source or destination servers.
That is, you must add each VC individually and connect to it.
Default Start Up
Connection
When vReplicator boots, it will automatically attempt to
connect to configured VCs or hosts. vReplicator can only
connect to one at a time—VCs or hosts—not to both
simultaneously. This field indicates the default VC to which
vReplicator will connect.
You will know that the VC default has been set if this
message displays below the field: Load VirtualCenter(s) on
start up.
Configured VC List
(text box)
vReplicator v2.5 Chapter 3 Configuration 62
Each VC that has been configured in this instance of
vReplicator is listed in this text box.
Page 66

Add New VC When you click this button, the Add VirtualCenter dialog
displays. From this dialog, you can add a VC.
Remove VC When you click this button, you can delete any VC that
displays in the Configured VC List.
Set As Default Sets the Default Start Up Connection to the selected VC.
Connect to VCs Click this button to connect to any VC that displays on the
Configured VC List. If vReplicator is connected to a host
when you click this button, the host connection will be
closed before vReplicator connects to the VC.
When you click Add New VC on the VirtualCenter(s) tab, the Add VirtualCenter dialog
displays.
Add VirtualCenter Dialog
Host Name or IP This field contains the host name or IP address of the server used
to connect to the VC. The icon adjacent to the field will
change to a icon when a valid value is entered in this field.
Port The default value in this field is 443. The field is enabled, so you
can change this value if, for example, you have configured your
VC server to communicate through a different port.
User This field should contain the ID of the user who is currently
logged into vReplicator. The icon adjacent to the field will
change to a icon when a valid ID is entered in this field.
User Password This field should contain the password that corresponds to the ID
entered in the User field.
vReplicator v2.5 Chapter 3 Configuration 63
Page 67

When you click Connect on the Add VirtualCenter dialog, text displays in the lower-left
to indicate progress in processing.
Host(s) Tab
You can configure hosts to connect directly to vReplicator. If you are not using VC, you
must add and connect to each host that might serve as a source or destination.
Warning: If you connect to hosts directly, and a VM is moved through a vMotion event,
you must initiate a new replication job for that VM. Otherwise, the VM will not replicate
correctly.
vReplicator v2.5 Chapter 3 Configuration 64
Page 68

Default Start Up
Connection
When vReplicator boots, it will automatically attempt to
connect to any configured VCs or hosts. vReplicator can only
connect to one at a time—VCs or hosts—not to both
simultaneously. This field indicates the default host to which
vReplicator will connect.
You will know that the host default has been set if this
message displays below the field: Load Host(s) on start up.
Configured Host List
(text box)
Each host that has been configured in this instance of
vReplicator is listed in this text box.
Add New Host When you click this button, the Add Host dialog displays.
From this dialog, you can add a host.
Remove Host When you click this button, you can remove any host that
displays in the Configured Host List.
Set As Default Sets the Default Start Up Connection to the selected host.
Connect to Hosts Click this button to connect to any host that displays in the
Configured Host List. If vReplicator is connected to a VC
when you click this button, the VC connection will be closed
before vReplicator connects to the host.
Enable vzBoost
(checkmark button)
What is vzBoost?
(link)
Select this checkmark button to improve write speeds to
VMFS. When you enable vzBoost, a driver is installed on the
ESX host. This driver is only active during a vReplicator
write and can be removed without rebooting the server.
Click this link to access a window that contains a general
definition of vzBoost.
vReplicator v2.5 Chapter 3 Configuration 65
Page 69

Add Host Dialog
Host Name or IP This field contains the host name or IP address of the server used
to connect to the host. The icon adjacent to the field will
change to a icon when a valid value is entered in this field.
Port This is the SSH port on the host that will be used to
communicate with vReplicator. The default value in this field is
22. The field is enabled, so you can change this value.
User This field should contain the ID of the user who is currently
logged into vReplicator. The icon adjacent to the field will
change to a icon when a valid value is entered in this field.
Add user?
(checkmark button)
This field, selected by default, is adjacent to the User field.
Unless you clear this field, any ID entered in the User field will
be added to the database. If you do not want an SSH user created
with the credentials that you provided, it is best to clear this
field.
User Password In this field, enter the password that corresponds to the ID listed
in the User field.
Root Password Root user access to the host server is required to perform a
replication. To gain root access to the host, vReplicator connects
using another ID and then performs a switch user to the root
account.
vReplicator v2.5 Chapter 3 Configuration 66
Page 70

Configure vReplicator
1. Double-click the vReplicator icon on the desktop.
The vReplicator window and Notification Recipients dialog display.
2. In the Email field on the Notification Recipients dialog, enter an email address.
Click Add.
The address is copied to the Email Address text box.
vReplicator v2.5 Chapter 3 Configuration 67
Page 71

3. Clear the Email field.
4. Repeat steps 2 and 3 for every email address that you want to include. Then,
click OK.
The First Time Setup dialog displays. The email addresses that you entered
display in the Default Recipients Email field.
5. On the Email tab, populate these fields:
-In the SMTP Name or IP field, enter the name or IP address of the mail server.
-From the Default Recipients Email dropdown, select the address of the user who
should be the default recipient.
-In the From Email Address field, enter the address that should display in the
From field on each notification.
vReplicator v2.5 Chapter 3 Configuration 68
Page 72

6. Click the Click here to send a test email link.
A confirmation message displays.
7. Click OK. Without closing the First Time Setup dialog, access the mailbox to
which the email was sent. Confirm receipt of the test message.
8. On the First Time Setup dialog, click the View tab.
-In the VC Tree Expand Level spin box, enter a value between 2 and 100 or leave
the default (2) as is.
-By default, the Show Menu Text Labels field is selected. Clear the field if you do
not want the icon text labels to display in the Toolbar.
9. Click the Alerts tab.
-Select the Inform me on low storage checkmark button if you want an alert to
display in the Replication Management pane when storage is low.
-In the Warn me when storage has gone below field, select % or GB and enter a
numerical value in the adjacent spin box.
-By default, the Inform me only on new alerts field is selected.
-If you want notification alerts to be sent via email, select the Send me a email if
there low storage checkmark button.
-In the Email to dropdown, select the address to which the alerts should be sent.
vReplicator v2.5 Chapter 3 Configuration 69
Page 73

Note: To enter a new address, click the Email tab and add the address before
returning to the Alerts tab to select it.
10. Click the Job tab.
-By default, the VM DisplayName Template field is populated. Do not alter the
%VMNAME% variable. You can alter _VzReplicate. The icon remains
displayed next to the field if the value is valid.
-In the Default Replication Type field, select a radio button—Hybrid or
Differential.
-In the Default Job Frequency field, select a radio button—Fixed or Sliding.
-In the Days, Hours, and Minutes spin boxes, set the timeframe for the
replication job.
A icon displays next to the spin boxes if the values are valid.
vReplicator v2.5 Chapter 3 Configuration 70
Page 74

11. Click the Resources tab.
-In the Limit total simultaneous replications to _______at a time field, use the
spin boxes to define a limit or leave the default (10) as is.
-In the Limit per host simultaneous replications to _______at a time field, use the
spin boxes to define a limit or leave the default (4) as is.
-In the Limit per LUN simultaneous replications to _______at a time field, use the
spin boxes to define a limit or leave the default (2) as is.
12. Click OK.
The Connections Setup dialog displays.
13. To add a VC and connect to it, continue in this sequence. To add a host and
connect to it, proceed to step 20.
Warning: You can configure vReplicator to connect to both VCs and hosts, but
you can only connect using one method at a time.
14. To connect to a VC: On the Virtual Center(s) tab, click Add New VC.
The Add VirtualCenter dialog displays.
vReplicator v2.5 Chapter 3 Configuration 71
Page 75

15. Enter a value in the Host Name or IP field. In the User and User Password fields,
enter the account information for the user currently logged in.
The icons that display adjacent to these fields will change to icons if the
values are valid.
16. Leave the default value—443—in the Port field as is. Click Connect.
When processing is complete, the VC that you added displays in the Configured
VC List on the VirtualCenter(s) tab.
vReplicator v2.5 Chapter 3 Configuration 72
Page 76

17. If you would like this VC to load upon startup, click Set As Default.
The field label just above the text box changes to Load VirtualCenter(s)
on start up.
vReplicator v2.5 Chapter 3 Configuration 73
Page 77

18. Click Connect to VCs.
The VC that you added displays in the Hosts and Containers pane.
19. In the Hosts and Containers pane, click to highlight an object within the VC that
you added.
Data for that VC loads into the Virtual Machines and Replication Management
panes.
vReplicator v2.5 Chapter 3 Configuration 74
Page 78

20. To add a host and connect to it, click the Host(s) tab on the Connections
Setup dialog.
21. Click Add New Host.
The Add Host dialog displays.
22. In the Host Name or IP field, enter a value. In the User field, enter the su ID.
Deselect the Add user checkmark button if you do not want this ID added to the
database.
The icons that display adjacent to these fields will change to icons if the
values are valid.
23. Leave the default (22) in the Port field as is.
24. In the User Password field, enter the password for the su ID.
vReplicator v2.5 Chapter 3 Configuration 75
Page 79

25. In the Root Password field, enter the password for the root account.
26. Click Connect.
When processing is complete, the host that you added displays in the Configured
Host List on the Host(s) tab.
27. To enable vzBoost, select the checkmark button of the same name.
28. If you would like this host to load upon startup, click Set As Default.
The field label just above the text box changes to Load Host(s) on start up.
vReplicator v2.5 Chapter 3 Configuration 76
Page 80

29. Click Connect to Hosts.
The host that you added displays in the Hosts and Containers pane of the
vReplicator window.
vReplicator v2.5 Chapter 3 Configuration 77
Page 81

30. In the Hosts and Containers pane, click to highlight the host that you added.
Data for that host loads into the Virtual Machines and Replication Management
panes.
vReplicator v2.5 Chapter 3 Configuration 78
Page 82

4 Using vReplicator
vReplicator v2.5 Chapter 4 Using vReplicator 79
Page 83

vReplica tor User Interface
The vReplicator window is the central navigational area of the software. This is where
you can view the components of the system, such as VCs, hosts, and VMs. It is through
this window that you can access the commands that allow you to configure and execute
replication jobs and monitor their progress. The vReplicator window features these areas:
• Menu Bar
• Toolbar
• Hosts and Containers Pane
• Virtual Machines Pane
• Replication Management Pane
• Replication Log
• Status Bar
vReplicator v2.5 Chapter 4 Using vReplicator 80
Page 84

Menu Bar
At the top of the vReplicator window there is a Menu Bar. The commands available
through the Menu Bar are described below.
File Menu
Exit Select this command to close the window and exit vReplicator.
Edit Menu
Search Opens a search window at the top of the Replication Management pane. Use
this window to search for VMs, hosts, and VC objects.
Connect Menu
to VC Accesses the VirtualCenter(s) tab of the Connections Setup dialog. Use this
dialog to add, configure, and connect to VCs.
to Host Select this command to access the Host(s) tab of the Connections Setup
dialog. On this tab you can add, configure, and connect to hosts.
Tools Menu
There is additional information about the Datastore Summary, Event Viewer, and VSS
Options commands later in this chapter. You will find information about the Options
dialog in the First Time Setup section in Chapter 2.
Datastore
Summary
Use this command to access the Datastore Summary dialog, which
features information about the datastores—hosts and VCs—configured in
vReplicator. The data includes the total disk space available (in GB), the
amount of free space (in GB), and the percentage of free space. You can
make changes to the threshold level (in % or GB) and refresh the screen
for a real-time update.
Event
Viewer
Selecting Event Viewer from the Tools menu accesses the Event Viewer
dialog, where you can monitor events using application, system, and
security logs. You can complete administrative tasks as well—from
customizing the view to exporting data.
VSS
Options
The VSS Command accesses the VSS Summary window, which features
these columns: Enabled, Host, VM Name, IP Address, Status, and
Service. Use the fields on this dialog to install the Vizioncore VSS agent.
vReplicator v2.5 Chapter 4 Using vReplicator 81
Page 85

Options Opens the Options window through which you can change notification
and interface settings, configure alerts, and set job defaults and limits.
Reports Menu
There is only one command in the Reports menu—Replication History. The Replication
History window gives you access to general information about the replication jobs that
have been run, both those that succeeded and failed. From this window, you can print
reports as well as export data to Portable Document Format (PDF), Extensible Markup
Language (XML), and MS Excel. There is additional information about reports later in
this chapter.
Help Menu
About Displays data about vReplicator, including version number and
licensing information.
Documentation Provides a link to access the vReplicator User Manual on the
Vizioncore site.
vReplicator v2.5 Chapter 4 Using vReplicator 82
Page 86

Toolbar
On the vReplicator window just below the Menu Bar there is a Toolbar. All Toolbar
commands are described below. Some of them are duplicates of those found on the Menu
Bar.
Note: You can configure vReplicator to display only icons—without text—in the
Toolbar. To do this, clear the Show Menu Text Labels checkmark button on the View tab
of the Options dialog.
Configure VirtualCenter(s): Accesses the VirtualCenter(s) tab of the
Connections Setup dialog, from which you can add, delete, and connect
to VCs. On this dialog, you can also set a default VC to load on start up.
Configure Host(s): Accesses the Host(s) tab of the Connections Setup
dialog, from which you can add, delete, and connect to hosts. On this
dialog, you can set a default host to load when you access the software.
Refresh Hosts and Containers (F5): When you click this icon, the entire
vReplicator window refreshes.
Options: Click this icon to access the Options dialog. Using the Email,
View, Alerts, Job, and Resources tabs, you can configure interface
settings, notifications, and alerts. In addition, you can define replication
type, frequency, and limits for replication jobs.
vReplicator v2.5 Chapter 4 Using vReplicator 83
Page 87

Hosts and Containers Pane
On the left of the vReplicator window there is a Hosts and Containers pane. If you are not
using VC, this pane displays all of the hosts to which you are connecting directly through
your environment. If you are using VC, this pane features a tree structure that includes
these objects:
Folder
Expanded Folder
Datacenter
Cluster
Host
All of the hosts whose VMs are available for replication are listed in this pane. Each
node with a corresponding plus sign (+) can be expanded to display subfolders and
other objects.
vReplicator v2.5 Chapter 4 Using vReplicator 84
Page 88

When you first access vReplicator, a Select Service button displays in the Hosts and
Containers pane. Click it to open the Connections Setup dialog. Using the tabs on this
dialog, you can connect to any VC or host that you configured. Once the connection is
established, the Select Service button no longer displays.
Virtual Machines Pane
At the center of the vReplicator window there is a Virtual Machines pane. When you
select a host in the Hosts and Containers pane, all of the VMs residing on that host
display in the Virtual Machines pane. In addition, all of the available templates are listed.
A VM that is running features a green arrow icon. A VM that is not running has a
corresponding red box icon. You can replicate to or from any VM, whether or not it
is running.
vReplicator v2.5 Chapter 4 Using vReplicator 85
Page 89

Replication Management Pane
On the right of the vReplicator window, there is a Replication Management pane. It
features detailed information about replication jobs. During a replication, this pane
displays a tree structure of tasks associated with the process. You can monitor replication
jobs based on the progress bars that display for each task.
On the left side of the pane there is status information for the selected host, including host
name, the number of VMs residing on the host, and the number of replication jobs
currently running. On the right side, there are several icons that capture performance
statistics for the host—CPU, memory, disk, and network usage. You can hover over these
icons to identify them. In addition, there are two icons that correspond to VM activity
(running and not running) and a button and link that you can use to initiate replication
jobs. They are all described below.
Service Console CPU Usage: Measured as a percentage of overall
capacity, this value indicates CPU usage.
Service Console Memory Usage: Measured as a percentage of
overall capacity, this value indicates memory usage.
Service Console Disk Usage: The value in this field indicates the
disk usage in MBs.
Service Console Network Usage: The value in this field indicates
the network usage in Mbs.
Click this button to access the Replication Job Wizard dialog to
initiate a job.
This icon displays next to a VM name. It indicates that the VM is
running.
vReplicator v2.5 Chapter 4 Using vReplicator 86
Page 90

This icon displays next to a VM name. It indicates that the VM is
not running.
Located below the Toolbar, this link accesses the Replication Job
Wizard dialog, where you can initiate a replication job.
This link displays below the Toolbar. Click it to access the
Replication Job Wizard for the job that is currently displayed in the
Replication Management pane.
When you select a VM in the Virtual Machines pane, this view displays in the
Replication Management pane:
vReplicator v2.5 Chapter 4 Using vReplicator 87
Page 91

When you select a template in the VMs pane, this view displays in the Replication
Management pane:
When disk space is low, an alert message displays in red on the right side of the
vReplicator Management pane.
vReplicator v2.5 Chapter 4 Using vReplicator 88
Page 92

Replication Management Pane: Job Views
Before a replication starts, details about the job display in the Replication Management
pane. Several additional icons display as well.
When you click this icon, the Replication Job Wizard dialog displays.
Using this wizard, you can add a new replication job. vReplicator
automatically assumes that the source machine is the VM currently
selected in the VMs pane.
This icon allows you to initiate a replication job at any time, even if
the job is not scheduled to run. The job can complete even if the
source and destination VMs are not running. When you click this icon,
a message displays, asking you to confirm that you want to run the
job now.
When you click the Edit icon, the Replication Job Wizard dialog
displays. It features all of the settings that were defined for the
selected job. Using the wizard, you can make configuration changes to
the job.
If you want to stop a job from running but not delete it, use the
Disable command. It suspends current activity and prevents future
replication passes from running. This command must be executed
prior to initiating Test Failover, Failover, and Remove.
When you click Disable, this confirmation message displays: “Are
you sure you would like to Disable this job? Disabling this job will
remove any vReplicator snapshots.”
Failover testing powers on the destination replica with the Network
Interface Card (NIC) disabled to prevent conflicts. You can analyze
the VM and then shut it off. On the next replication pass, changes to
the destination VM are reverted. After you complete the DR test, you
must enable the VM. When you click Test Failover, a message
displays that instructs you to disable the job before proceeding.
Initiating the Failover command brings up the destination VM in an
operational state. A message displays, instructing you to disable the
job before proceeding. A second message displays, offering you the
option of synchronizing before failing over.
When you use this command, you delete the job that currently
displays in the Replication Management pane. When you click
Remove, two messages display. The first instructs you to disable the
job that you intend to delete. The second informs you that in removing
the job, you delete all snapshots that were generated during
previous runs.
vReplicator v2.5 Chapter 4 Using vReplicator 89
Page 93

While a replication job is in process, job progress details display as well as two
additional icons:
As an alternative to removing a job, you might decide to disable it
instead. Doing this prevents current and future replications but
allows you to retain the job. A confirmation message displays,
indicating that if you disable the job, all snapshots that were
generated during previous jobs will be removed.
If you click this icon, the job will pause temporarily and this
confirmation message will display:
“Are you sure you want to stop this process? (Note: This procedure
can take a few minutes.)”
Replication Log
The lower horizontal pane of the vReplicator window is called the Replication Log. It
features a complete list of all replication jobs, including summarized information on job
progress. You can monitor multiple replication jobs easily through this pane. You can
sort the data by clicking column headings. These columns are featured in the
Replication Log:
Source VM This is the name of the VM that is being replicated.
Job Name This field is auto-populated with the value that you entered in the
Name field of the Replication Job Wizard dialog.
Scheduled
Interval
This field is auto-populated with the value that you entered in the
Perform this job every field of the Replication Job Wizard dialog.
Last Result This column contains status information about the last replication job
completed. Statuses include Failed, Cancelled, Successful, and
Unknown. If the replication job is running for the first time, None
displays in this column.
Next Run
Time
Last Start
Time
Last
Completed
Time
This field is auto-populated with the value that you entered in the Next
Start Time field of the Replication Job Wizard dialog.
This column features the date and time that the last replicated job was
initiated. Format is yyyy-mm-dd hh:mm.
In this field, the date and time that the last replicated job was
completed are listed. If the replication job is running for the first time,
Never displays in this column. Format is yyyy-mm-dd hh:mm.
vReplicator v2.5 Chapter 4 Using vReplicator 90
Page 94

Source The Source field contains the name of the host on which the source
VM resides.
Target This field is populated with the name of the host on which the
destination VM resides.
Description This field is auto-populated with the information that you entered in
the Description field of the Replication Job Wizard dialog.
When a replication job is in process, the column headings in the Replication Log update.
An additional column displays:
Job Progress The data in this field indicates the stage to which a replication job has
progressed. Statuses include Failed, Queued, and Replicating.
Status Bar
Below the Replication Log there is a Status Bar. This area of the interface displays the
type of license issued for that machine, the number of replication jobs (VMs) allowed by
that license, and a link to the Vizioncore site.
vReplicator v2.5 Chapter 4 Using vReplicator 91
Page 95

Replication Job Wizard
Through the Replication Job Wizard dialog you can configure replication jobs by
defining type, frequency, notifications, alerts, timeframes, source machines, and
destination machines. Some of the defaults that you set during the initial configuration
will populate the corresponding fields in this dialog. For each replication job that you
initiate, you can leave the default settings in place or you can override them.
Replication Job Wizard Step 1
Name This field is auto-populated with the name of the VM that you
selected in the Virtual Machines pane, followed by the word Job.
You can alter the value in this field.
Description Populating this field makes it easier to distinguish between
replication jobs. This description is included in email notifications
for this job.
vReplicator v2.5 Chapter 4 Using vReplicator 92
Page 96

Replication Type
(radio buttons)
Perform this job
every
(radio buttons)
There are two replication types—Hybrid and Differential.
Hybrid: A faster method of replication, hybrid replicates as a
function of change over time. No scanning is needed and snapshots
can be taken at shorter intervals. Using this method, a snapshot
remains open continuously.
Differential: Using this method, two replication passes are
completed. The source VM’s current data is compared to the
changed data that is stored on the data map. These changes are
replicated block by block and committed to the destination
machine. During differential replication, a snapshot is left open
only during a replication pass.
Fixed replication refers to jobs that are executed at specified points
on a timeline.
Sliding replication refers to jobs that are executed at a sliding
frequency.
Use the Days, Hours, and Minutes spin boxes to set a timeframe for
the job. These values refer to the period between replications. The
shorter the timeframe, the more up-to-date the VM will be as a
result of the replication. A shorter timeframe requires more host
resources, which can compromise VM performance temporarily.
Note: The replication job will start automatically as soon as the
initial copying completes.
Next Start Time
Refers to the time that the replication job will begin.
(spin box)
Next Start Date
Refers to the date that the replication job will begin.
(dropdown)
Exit Setup Click this button to cancel the replication job and close the wizard.
vReplicator v2.5 Chapter 4 Using vReplicator 93
Page 97

Replication Job Wizard Step 2
Unlabeled
(text box)
This text box is populated with the email addresses that were added
through the Email tab on the Options dialog. Any address that is
displayed in this text box can be moved to the Notify text box for
individual jobs. This field is disabled.
Notify list
(text box)
This text box contains the default email address that was added to
vReplicator during initial configuration.
vReplicator v2.5 Chapter 4 Using vReplicator 94
Page 98

Replication Job Wizard Step 3
Target VM
This field is auto-populated with: (source VM name)_VzReplicate.
Name
Disable Guest
Quiescing
(checkbox)
Quiescing pauses or alters running processes during replication to
ensure consistency in results. When you disable quiescing, the
VMware Tools Sync driver is disabled during replication. It is
important to do this when you replicate a database server that uses a
service to write. This includes SQL Exchange, Active Directory, and
Oracle. Selected by default.
What is Guest
Quiescing?
Click this link to access a help file that clarifies when you should
disable quiescing.
(link)
Target Host
(dropdown)
Add New
Host
This field is auto-populated with the names of each host available to
be the destination for this replication job.
Click this button to initiate the process of adding a new host to
vReplicator. Opens the Add Host dialog.
vReplicator v2.5 Chapter 4 Using vReplicator 95
Page 99

Replication Job Wizard Step 4
Source
The virtualized NIC adapter configured for the VM.
Adapter
Source
Virtualized network for the source VM.
Network
Target
Network
vReplicator v2.5 Chapter 4 Using vReplicator 96
Virtualized network for the destination VM. Right-click this column
to select another value.
Page 100

Replication Job Wizard Step 5
Primary
Datastore
(dropdown)
This field is auto-populated with data from the ESX host. This
dropdown includes the following information about the primary
datastore listed:
Datastore Name: The name of the primary target datastore is listed in
this column.
Total Space: The total amount of space (in GB) that the target
datastore requires.
Free Space: The total amount of free space remaining (in GB) on the
target disk destination.
vReplicator v2.5 Chapter 4 Using vReplicator 97
 Loading...