

Page 1

Dell Visor with Controllers VRP100
Dell Visor VR118
Dell Visor Controllers VRC100
User`s Guide
Page 2

Notes, cautions, and warnings
NOTE: A NOTE indicates important information that helps you make better use of your product.
CAUTION: A CAUTION indicates either potential damage to hardware or loss of data and tells you how to avoid the problem.
WARNING: A WARNING indicates a potential for property damage, personal injury, or death.
© 2018 Dell Inc. or its subsidiaries. All rights reserved. Dell, EMC, and other trademarks are trademarks of Dell Inc. or its subsidiaries. Other trademarks
may be trademarks of their respective owners.
2018 - 05
Rev. A01
Page 3

Contents
1 Introduction....................................................................................................................................................4
2 Important Information....................................................................................................................................5
3 Box Contents.................................................................................................................................................6
4 Windows Mixed Reality — Minimum System Specications.......................................................................... 8
5 Quick Setup of Hardware (Dell Visor VR118)................................................................................................ 10
6 Setting up the Windows Mixed Reality experience.......................................................................................13
Alternative Visor Controller Pairing Method: ................................................................................................................17
Room Calibration Process .........................................................................................................................................18
7 Technical Specications............................................................................................................................... 19
8 Frequently Asked Questions.........................................................................................................................21
9 Troubleshooting........................................................................................................................................... 23
Bluetooth Best Practices................................................................................................................................................ 23
10 Statutory information................................................................................................................................. 26
Warranty............................................................................................................................................................................26
11 Contacting Dell............................................................................................................................................27
For Dell Visor VR118:........................................................................................................................................................ 27
For Dell Visor Controllers VRC100:................................................................................................................................ 28
Contents 3
Page 4

Introduction
The Dell Visor VR118 Mixed Reality Headset is a head-mounted device that enables you to experience an immersive Virtual/Mixed Reality
when connected to a compatible Dell Desktop/Laptop/Gaming system.
NOTE: You can also pair the Dell Visor VR118 with the Dell Visor Controllers VRC100 (sold separately) for a more immersive and
interactive experience.
The Windows Mixed Reality is a platform of experiences, where you can:
• Easily set up the headset in 10 minutes or less
• Pick up and move the PC and headset to a dierent room
• Listen to high-quality audio (headphones required)
• Navigate the virtual world using the Dell Visor Controllers VRC100 (sold separately)
• Play VR games
• Watch 360° videos
• Interact and play games with friends and family in social applications (separate software application purchase required)
• Watch Live events
• Talk to Cortana as a personal assistant (Cortana with voice-certied microphone required)
• Take Mixed Reality capture and share experiences with friends and family (separate software application purchase required)
• Watch commercially available, professional-quality Virtual Reality experiences (separate software application purchase required)
1
4 Introduction
Page 5

Important Information
Ensure you read and understand the personal and product safety instructions in the Safety, Environmental, and Regulatory Information
(SERI) document before you use the Dell Visor VR118.
CAUTION:
The Mixed Reality headset should not be used by children under the age of 13 as they are in a critical period of visual development.
Children above the age of 13 can use the headset under adult supervision, closely monitored during and after use, for any decrease in
multi-tasking abilities, hand-eye coordination, balance, and/or disorientation.
2
Important Information 5
Page 6
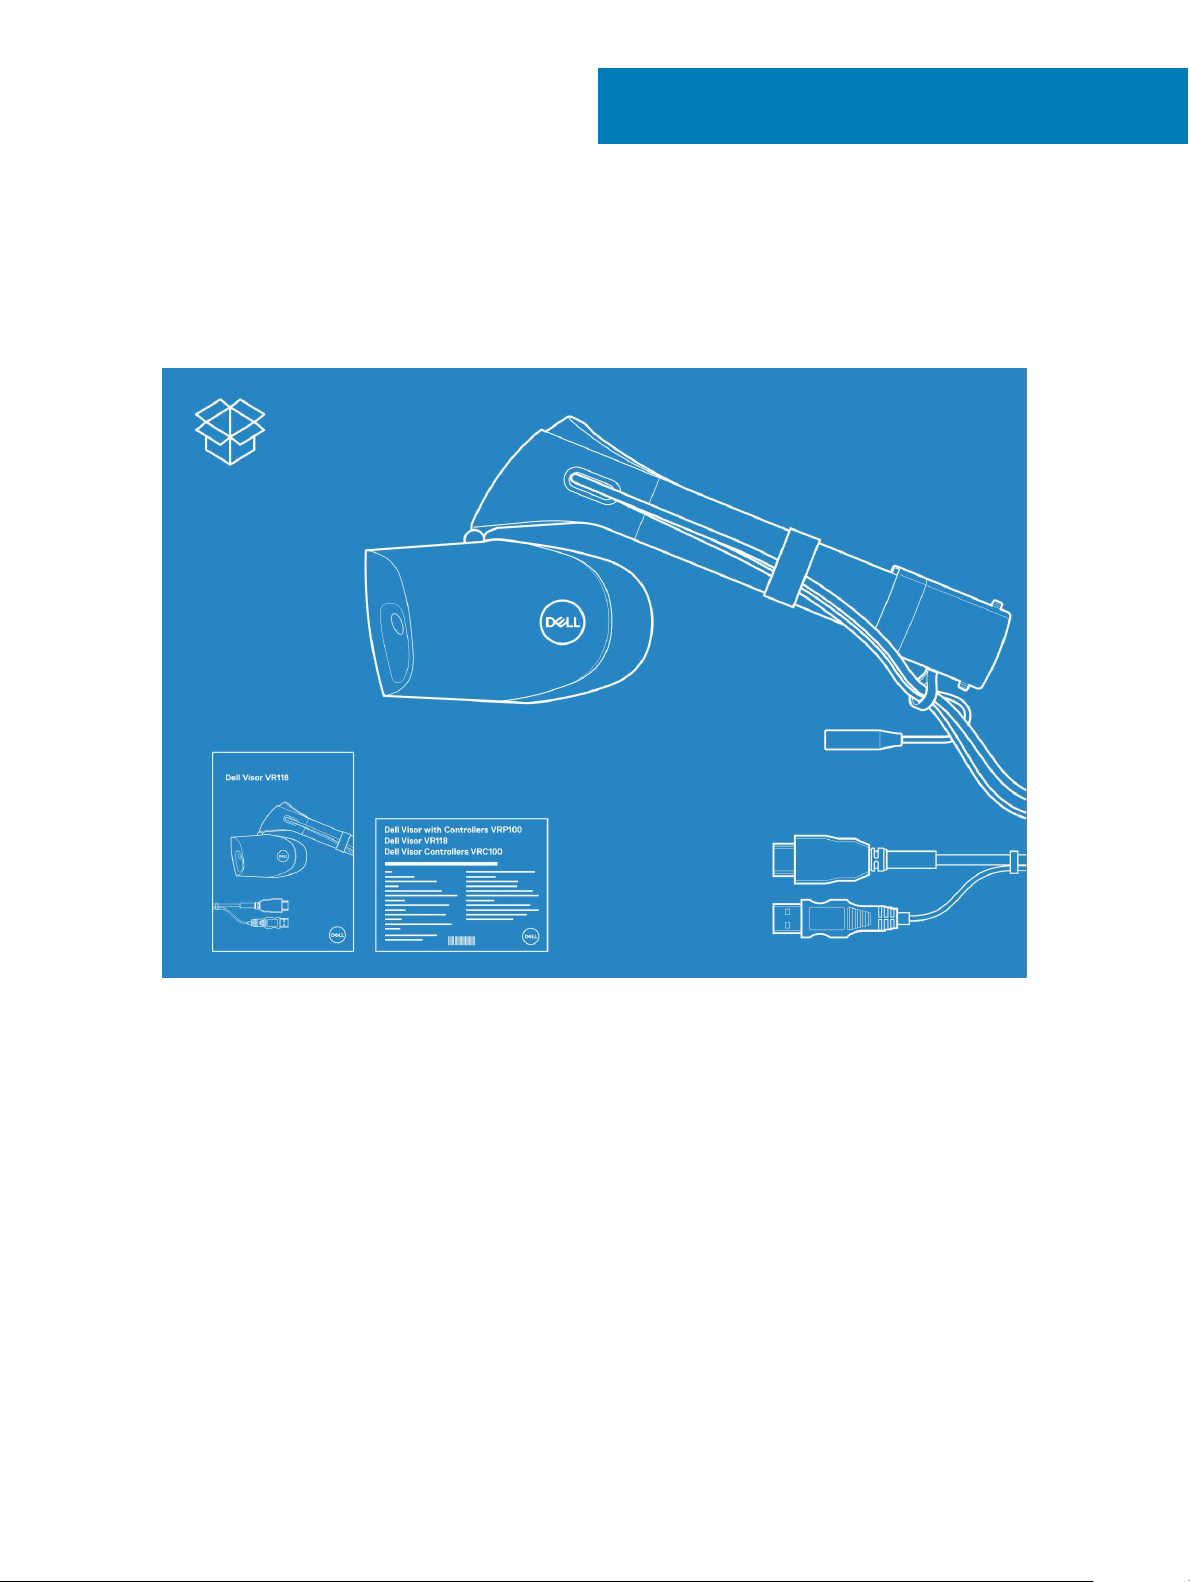
Box Contents
Dell Visor VR118
The Dell Visor VR118 ships with the components shown below. Ensure that you have received all the components and contact Dell (see
your invoice for contact information) if something is missing.
3
Figure 1. Box contents of VR118
• Dell Visor VR118
• Quick Setup Guide
• Safety, Environmental, and Regulatory Information (SERI)
Dell Visor Controllers VRC100
The Dell Visor Controllers VRC100 ships with the components shown below. Ensure that you have received all the components and contact
Dell (see your invoice for contact information) if something is missing.
6 Box Contents
Page 7

• Dell Visor Controllers VRC100 (2)
• Batteries (4)
• Lanyards (2)
• Quick Setup Guide
• Safety Environmental and Regulatory Information (SERI)
Dell Visor with Controllers VRP100
The Dell Visor with Controllers VRP100 ships with all of the components of Dell Visor VR118 and Dell Visor Controllers VRC100, as shown
above.
Box Contents 7
Page 8

4
Windows Mixed Reality — Minimum System
Specications
The Dell VR118 is designed to work best at a 90 Hz refresh rate and Windows Mixed Reality Ultra systems are recommended. Before using
the Dell Visor VR118, ensure that your laptop or PC meets the following minimum requirements:
Table 1. Minimum hardware requirements for Windows Mixed Reality Ultra
Type Specications
Processor
• Intel Core i5 4590 (4th generation) CPU with 4 or more physical
cores
• AMD Ryzen 5 1400 3.4 Ghz (desktop) with 4 or more physical
cores
GPU
Display
Memory
Connectivity
Software
• Nvidia GeForce GTX 1060 or greater DX12-capable discrete
GPU
• AMD Radeon RX 470/570 or greater DX12-capable discrete
GPU
• Windows Display Driver Model (WDDM) 2.2 or later
• Thermal Design Power: 15 W or greater
• Resolution: HDMI 2.0 or DisplayPort 1.2
• Bit depth: 32 bits of color per pixel
• Monitor: VGA (800x600) connected external or integrated
display required for setup and while using the headset.
• 8 GB DDR3 or greater (with 10 GB additional free space in the
hard drive)
• 1x available USB port for headset (USB 3.0 Type-A or USB 3.0
Type-C)
NOTE: USB must supply a minimum of 900 mA.
Connector adapter required for USB 3.0 Type-C ports.
• Bluetooth 4.0 (for accessory connectivity)
• Windows 10 Fall Creators Update or later
Bluetooth (for controllers)
Table 2. Operating system compatibility matrix
Windows Edition Mixed Reality Included
Windows 10 Home Yes
Windows 10 Pro Yes
Windows 10 Enterprise Yes
8 Windows Mixed Reality — Minimum System Specications
• Bluetooth 4.0
Page 9

Windows Edition Mixed Reality Included
Windows 10 Education Yes
Windows 10 Pro Education Yes
Windows 10 S No
NOTE: Windows 10 S must switch to Windows 10 Pro for
Windows Mixed Reality Functionality
NOTE: Windows 10 (Home, Pro, Enterprise, Education,
Pro Education to be updated with Windows 10 Fall Creator
Update or later)
Windows Mixed Reality — Minimum System Specications 9
Page 10

Quick Setup of Hardware (Dell Visor VR118)
1 Connect the USB 3.0 and HDMI cables to their respective ports on your system. Connect your headphones (sold separately) to the
audio connector.
5
2 Wait for the Dell Companion App (DCA) to start the Windows Mixed Reality Welcome Screen. Click Get started.
10 Quick Setup of Hardware (Dell Visor VR118)
Page 11

3 Place the headset on the head (A) so that it sits comfortably on the bridge of the nose and then pull the exible headband to x rmly
at the back of the head (B) as shown.
4 Use the thumbwheel at the back of the headband to obtain a proper t (clockwise tightens the headband and anti-clockwise loosens
it).
Quick Setup of Hardware (Dell Visor VR118) 11
Page 12

NOTE: Ensure you route the cable to lie on your back to avoid entangling yourself when moving about.
NOTE: The ip-up design of the headset also enables users wearing spectacles to enjoy the Mixed Reality experience.
CAUTION: When wearing the headset, ensure you move hair away from your forehead for better sensor detection.
5 Follow the on-screen instructions to set up and calibrate your headset for optimal performance.
12 Quick Setup of Hardware (Dell Visor VR118)
Page 13
6
Setting up the Windows Mixed Reality experience
1 Connect the USB and HDMI cables to the respective ports on your computer.
WARNING: Ensure you read and understand the personal and product safety instructions in the Safety, Environmental, and
Regulatory Information (SERI)
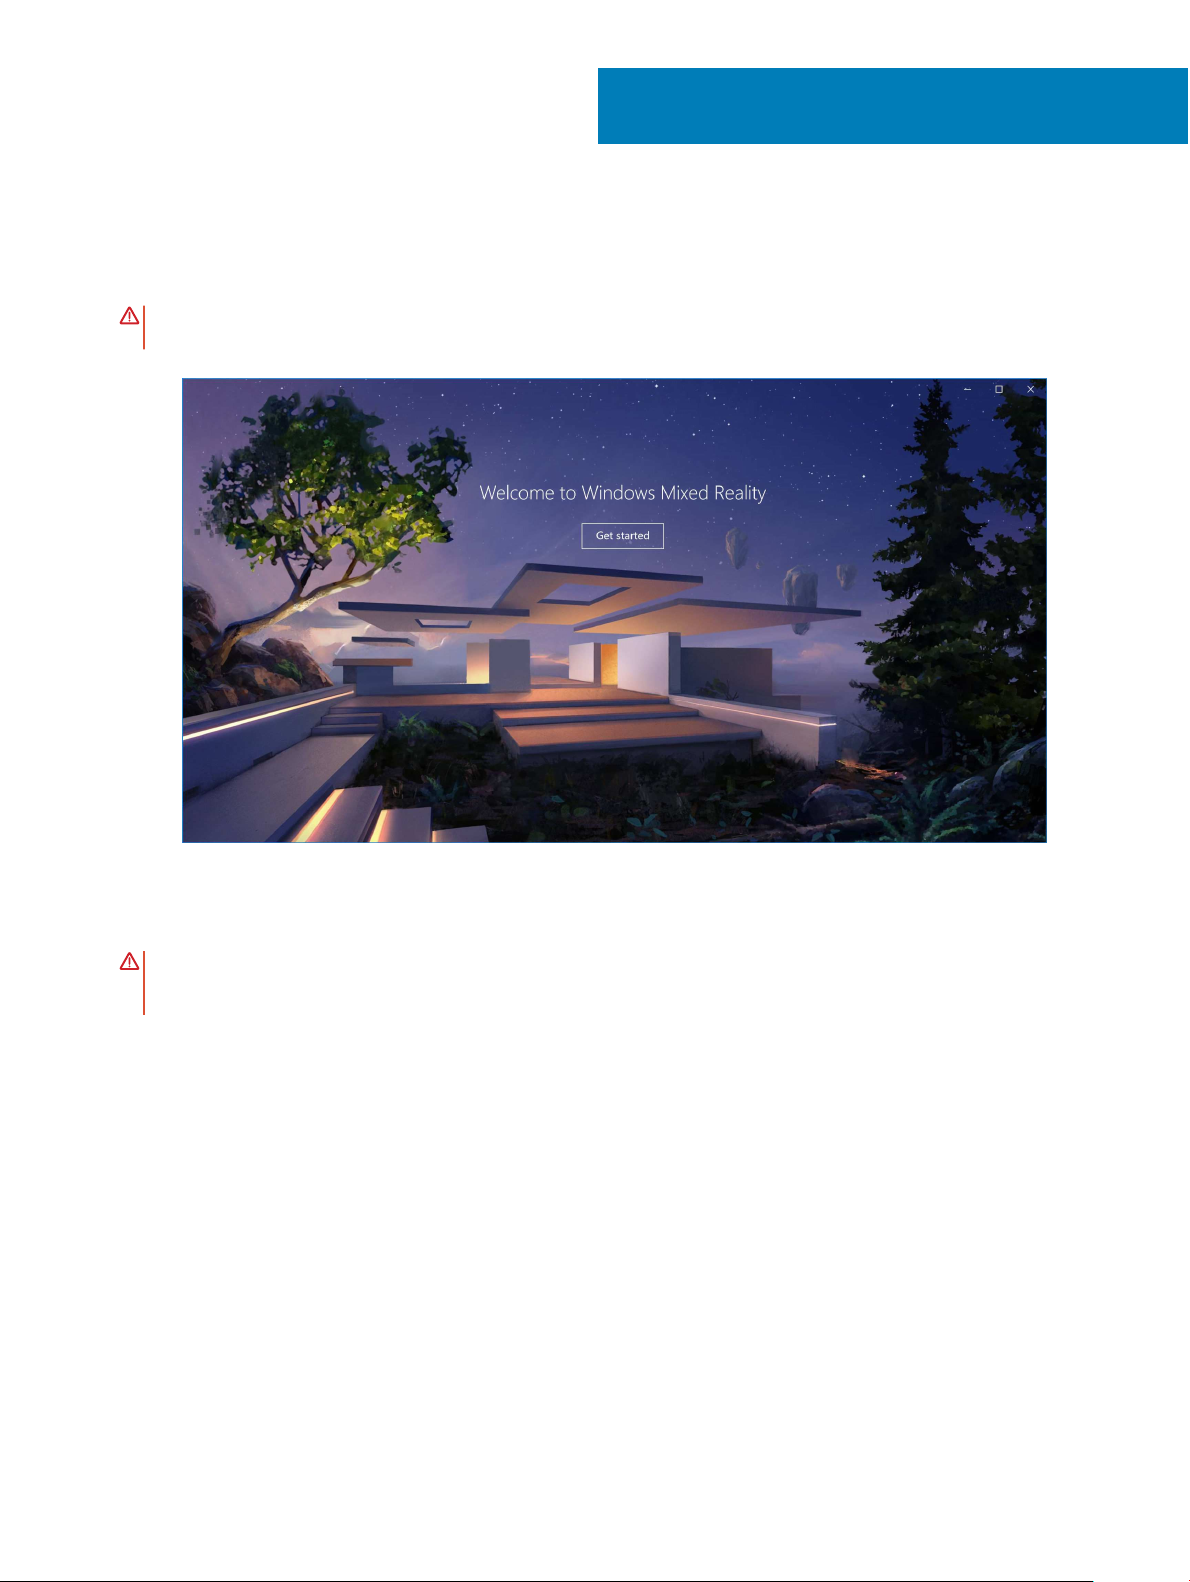
2 The Welcome to Windows Mixed Reality screen appears. Click Get started.
before
you use the Dell Visor VR118.
Figure 2. Welcome screen
3 Click I agree to accept the Microsoft Privacy Statement and Terms of Service.
WARNING: To reduce the risk of serious or fatal injury, use a space with plenty of room and no obstacles. Headsets and
apps may have additional safety instructions or set age limits for use. Be sure anyone who uses your device follows all the
safety and health guidelines.
Setting up the Windows Mixed Reality experience 13
Page 14
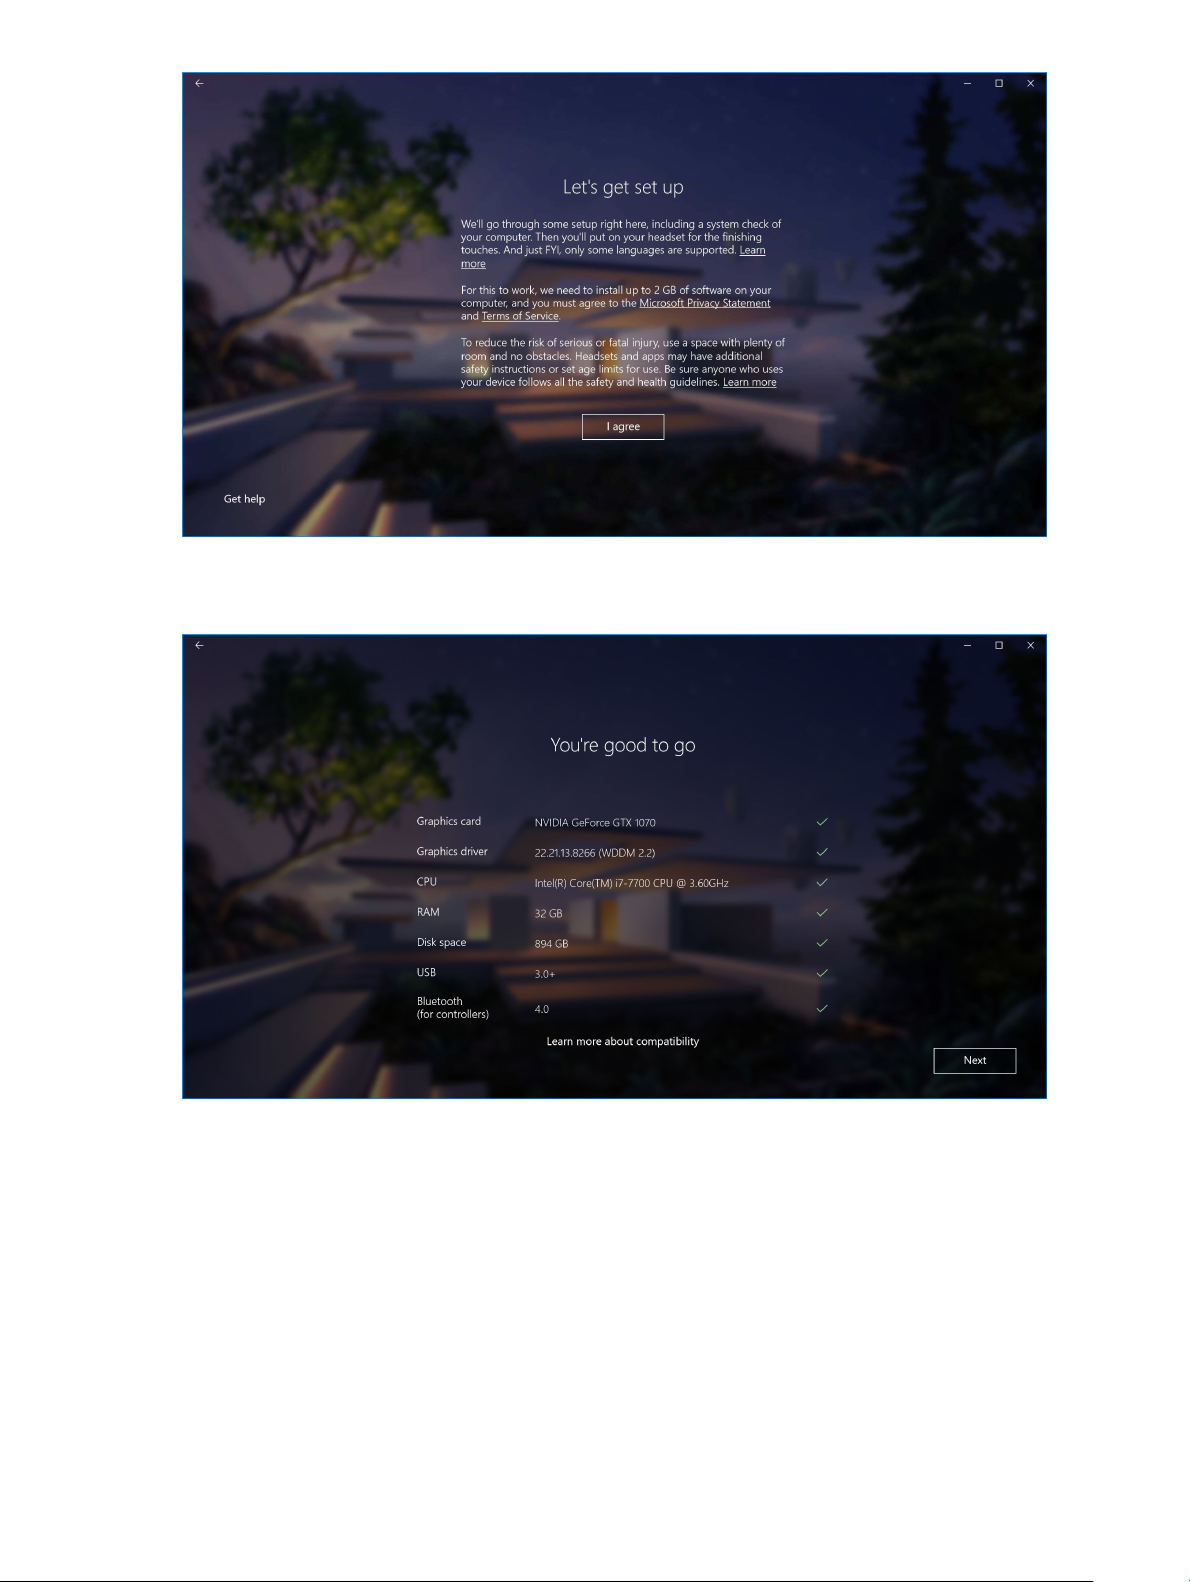
Figure 3. Agree to terms and conditions
4 Wait for the system compatibility check to complete.
Figure 4. Compatibility check
5 Windows Mixed Reality works best with Dell Visor Controllers VRC100 ( controllers sold separately). If available, select Next to set
them up. Alternately, click Use a gamepad or mouse instead if you do not have visor controllers available at this time.
14 Setting up the Windows Mixed Reality experience
Page 15

Figure 5.
6 Familiarize yourself with the various features of your controllers. Click Next to pair the controllers via Bluetooth.
Figure 6. Get to know your controllers
7 To pair the visor controllers, press and hold the Windows button for 2 seconds to turn on your controllers. Then, remove the battery
compartment cover and press and hold the Bluetooth pairing button, as shown, until the LED constellation lights ash. Wait till both
the controllers nish the pairing process.
Setting up the Windows Mixed Reality experience 15
Page 16

Figure 7. Pairing the visor controllers
8 Click Next once the left controller pairing is nished (a green check mark appears if the pairing is successful).
Figure 8. Pairing the left controller
9 Click Next once the right controller pairing is nished (a green check mark appears if the pairing is successful).
16 Setting up the Windows Mixed Reality experience
Page 17

Figure 9. Pairing the right controller
10 You are now ready to use the Dell Visor VR118 and enjoy the Windows Mixed Reality experience!
Alternative Visor Controller Pairing Method:
1 Go to Windows Settings -> Devices -> Bluetooth -> Bluetooth & other devices tab.
2 Remove earlier paired controllers.
3 Press and hold the Windows button for 2 seconds to turn on your controllers.
4 Remove the battery compartment cover and press and hold the Bluetooth pairing button until the LED constellation lights ash.
5 Identify Visor Controllers Left & Right from the List of devices.
6 Then pair the controllers.
7 Both controllers should be connected now.
• Verify your controllers work properly:
a Launch Mixed Reality Portal and enter the Cli House.
b Move your controllers and verify tracking, test buttons, and verify
teleportation works.
Setting up the Windows Mixed Reality experience 17
Page 18
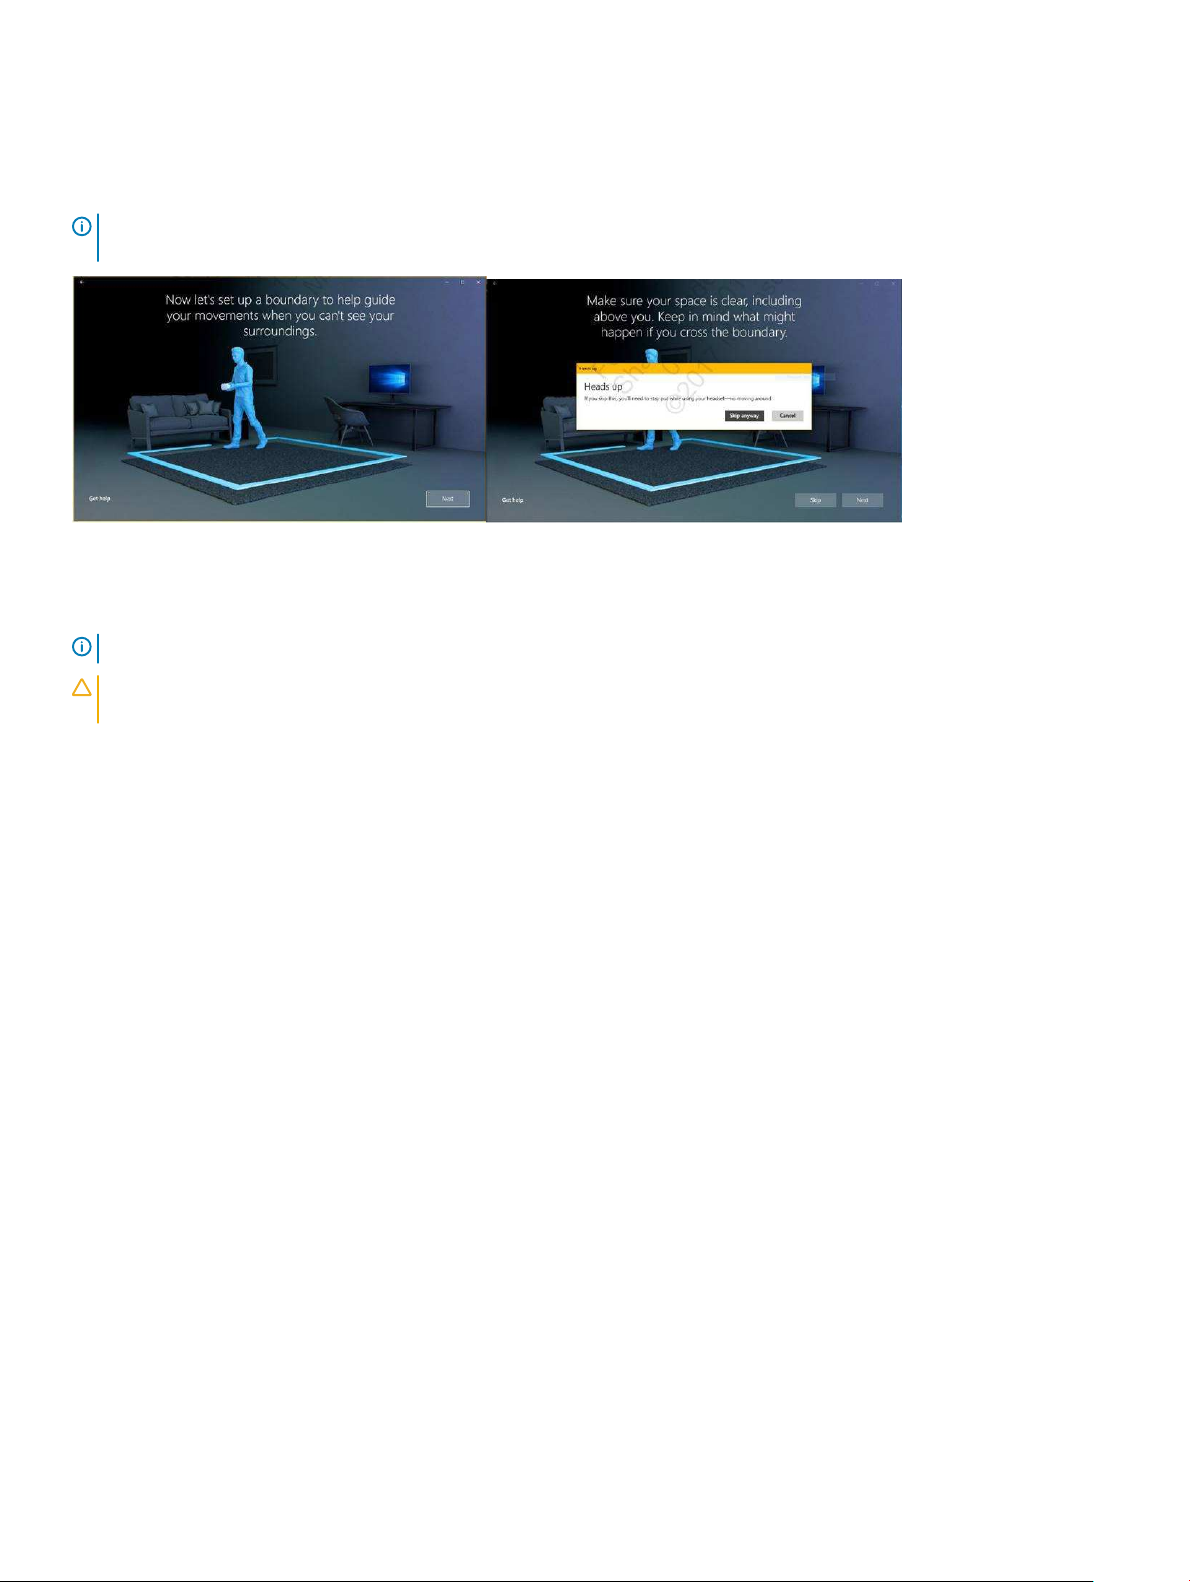
Room Calibration Process
Before you use the headset, you can set up a boundary to help guide your movements when you cannot see your surroundings.
NOTE: Skipping this step will not impact your ability to interact with the HMD. However, in case you choose to skip it, it is
encouraged that you remain seated or otherwise remain stationary when using the HMD.
1 Follow the room boundary instructions as shown above. 2 Begin at your computer and walk around the perimeter of
your space with your headset.
3 Complete the perimeter and come back to where you started.
NOTE: To make adjustments to your dened boundary, you must start all over again.
CAUTION: Upon completion of the boundary setup, ensure you do not place any objects such as a chair or table since this may
cause you to trip or strike against the objects when in the Mixed Reality experience.
Interpupillary Distance (IPD) Calibration
The Dell Visor VR118 Headset does not have a mechanical Interpupillary Distance adjustment. The Windows Mixed Reality comes with
software IPD adjustment which improves image distortion and depth accuracy based on your IPD. To change IPD within your headset, open
the Settings app and navigate to Mixed Reality > Headset Display and move the slider control. You will see changes in real time in your
headset. If you know your IPD, maybe from a visit to an optometrist, you can enter it directly as well. You can also adjust this setting by
going to Settings > Mixed Reality > Headset Display on your computer.
18 Setting up the Windows Mixed Reality experience
Page 19

Table 3. Dell Visor VR118
7
Technical Specications
Product name
Model #
Power source
Cable connectors
Display:
Panel
Resolution
Refresh rate 90 Hz
Optics:
Lens type Fresnel
Field of view 110 degrees
Lens adjustment Software Interpupillary Distance (IPD)
Tracking Technology:
Dell Visor
VR118
USB bus powered
• 1 x HDMI
• 1 x USB Type-A
2 x 2.89" LCD (RGB subpixel)
1440 x 1440 per eye, 706 ppi
Tracking architecture 6DoF, ‘Inside-out’ tracking
Tracking sensors Gyroscope, Accelerometer, Magnetometer
Headset tracking hardware Dual B+W VGA camera for mapping
Operating systems
Box content
PCs/Laptops with Windows 10 Fall Creators Update
• Dell Visor VR118
• Quick Setup Guide
• Safety, Environmental, and Regulatory Information
Technical Specications 19
Page 20

Table 4. Dell Controllers VRC100
Product Name Dell Controllers VRC100
Tracking
Sensors
Inputs
Connectivity Bluetooth
Battery 4x AA batteries
• Visible light constellation LEDs
• 6DOF tracking within HMD camera FOV
• IMU + Magnetic sensor
• Haptic feedback
• Power/charging LED
• Thumbstick
• Touchpad
• Trigger button
• Grab button
• Windows button
• Menu button
• Pairing button
20 Technical Specications
Page 21

Frequently Asked Questions
1 How to enable USB wake function:
• In Device Manager > USB Wake Support > Enable USB Wake Support
8
• The "Allow the device to wake the computer" option will auto uncheck after resuming from S3 by USB wake.
2 Does Dell Visor support Augmented Reality?
Frequently Asked Questions 21
Page 22

• Dell Visor is a Windows Mixed Reality headset. It does not support Augmented Reality.
3 Can the Dell Visor be used by people with glasses?
• Yes, Dell Visor can be used by people wearing distance viewing glasses, the ones that people wear to have good vision when
driving or for distance viewing. The Windows Mixed Reality experience might not be optimal if people wear up-close viewing
glasses. The headset is focused at a distance that is further away, while reading glasses are for 'close up' or 'less than 10 feet to
innity' - thus they would not work well.
4 Is the face mask washable?
• Face mask material is not washable.
22 Frequently Asked Questions
Page 23

9
Troubleshooting
Bluetooth Best Practices
Visor Controllers use the same Bluetooth technology found in many consumer devices. Visor Controllers are designed to work with
Bluetooth capability included in any recent computer.
If your computer does not have Bluetooth, we recommend you purchase a plugable USB Bluetooth 4.0 Low Energy Micro Adapter.
Visor Controllers should work with other Bluetooth keyboards, mice, and game controllers, but the experience will vary depending on the
model of the keyboard, mouse or game controller you use.
If you are using a USB Bluetooth Adapter:
• Please ensure the USB Bluetooth Adapter is connected to a USB 2.0 port (black) if available
• Please plug the USB Bluetooth Adapter into a port that is physically separated from the HMD USB connector, ash drives, hard drives,
or wireless USB receivers like those for keyboards/mice. Plugging the USB Bluetooth Adapter into the opposite side of the computer as
far as possible from these other connectors is ideal.
Close the Bluetooth settings window if it's open. Leaving it open in the background means that a lot of extra calls are made to the
Bluetooth protocol.
Please remove, un-pair, and power o Bluetooth headphones and speakers. These are not supported with Windows Mixed Reality. You can
use the headphone jack or built-in speakers on your Mixed Reality headset for the best audio experience.
If your computer has Bluetooth already, but you are still having problems with the Visor Controllers, consider replacing your Bluetooth radio
with an external Bluetooth Adapter plugged into USB.
NOTE: You will need to disable your existing Bluetooth radio in Device Manager and un-pair / re-pair all of your previous
Bluetooth devices.
Device recovery
If the controller is not working correctly and you are unable to update the device, you can always restore the device to factory conditions.
To recover your device:
1 Unplug and power o the controllers.
2 Open the battery cover.
3 Insert batteries (ensure you have good batteries when performing device recovery).
4 Press and hold the pairing button (tab at the bottom under the batteries).
5 While holding the pairing button, power on the controller by pressing and holding the Windows button for 5 seconds (keep both
buttons held).
6 Release the buttons and wait for the controller to power on. This takes up to 15 seconds and there are no indicators when the device
recovery is happening. If device powers on immediately on button release, recovery button sequence did not get registered and you
need to try again.
7 Remove the old controller associations from the Bluetooth settings (Settings > Bluetooth & other devices, and select Visor
controller - Left or Visor controller - Right and Remove device. After that, pair the controller to the computer again.
8 After connecting with the host and Dell Visor, the device will update the rmware to the latest available.
9 After the rmware has been updated, you need to unpair and pair the controllers again to get it to work properly.
Lights and Indicators
Troubleshooting 23
Page 24

Table 5. Lights and Indicators
Visor controller state How you get into this state Visor controller light and vibration behavior
associated with state
Power on Press and hold the Windows button on the controller
for 2 seconds to turn on the controller.
Power o Press and hold the Windows button on the controller
for 4 seconds to turn o the controller.
Sleeping Controller enters sleeping state automatically when it
is motionless for 30 seconds.
Controller automatically wakes when it detects
motion (except when the device is not paired with
host computer, a button press will be required to
wake-up).
Pairing Press and hold the pairing button inside the battery
case for 3 seconds.
Controller connects to/
disconnects from the
computer
Low Battery Level When battery level is low. No LED or vibration indication when battery is low. If
Controller successfully connects to the computer
after you turned it on.
Controller disconnects from the computer during use
for some reason.
LEDs turn on and the controller vibrates once.
LEDs turn o and the controller vibrates twice.
LEDs turn o, blink every 3 seconds while in sleeping
state.
LEDs slowly pulse while in pairing mode.
LEDs go solid when exiting the pairing mode. The
controller vibrates once if pairing was successful or
vibrates 3 times if pairing is unsuccessful and times
out.
Controller vibrates once on computer connection or
disconnection.
you look at the representation of the controller in the
headset, there is a battery indicator icon on the
handle. When battery is low, the indicator icon will be
red.
Critical Battery Level During power on when battery level is "Critical".
"Critical" battery level means there is insucient
power for controller to stay on and the controller will
turn o automatically.
Device Update This happens when you turn the controller on and a
rmware update is required.
Mixed Reality Portal cannot detect headset
• Make sure your HDMI cable is connected to an HDMI port to your discrete graphics card.
• Ensure that your headset is connected to a USB 3.0 port.
– Double check that your computer's USB controller driver is running the Microsoft USB driver stack.
– Certain computers may have USB ports that do not supply enough power. Please try a powered USB 3.0 hub.
Controller vibrates 3 times when you turn it on, then
automatically turns o.
During controller rmware update, the controller will
be unresponsive, though you will still be able to turn it
o. If you turn it o during rmware update, the
controller will simply try to update again the next time
you turn it on and it connects to the computer.
When a controller rmware update starts, you will see
a Windows notication telling you that the controller
is being updated.
During rmware update, the LEDs will blink in an
alternating pattern of half of the outer ring lights,
then half of the inner ring lights.
24 Troubleshooting
Page 25

– Avoid using a USB extension cable unless a powered USB 3.0 hub is also used. Make sure all segments are USB 3.0 capable.
• Ensure that, if any adapters are used to connect the HDMI cable to your computer, you are using a recommended adapter.
• Do not use HDMI extension cables.
• If your machine has two discrete GPUs, you may need to update settings (e.g. disable SLI, activate all displays) to send output to the
immersive headset.
Other things you can try:
• Ensure that the latest Mixed Reality driver is installed. With your headset connected, check for Windows Updates.
• Unplug and re-plug the USB and HDMI cables.
• Restart your machine.
Mixed Reality Portal setup is stuck
• Make sure your HDMI cable is connected to a HDMI port of your discrete graphics card.
• Unplug and re-plug the USB and HDMI cables.
• Restart your machine.
Immersive headset displays are blank
• Graphics driver outdated or other graphics driver issues: make sure your video drivers are up-to-date.
• Ensure, if any adapters are used to connect the HDMI cable to your computer, that you are using a recommended adapter.
Floor setup issues
• Check that your headset is plugged in.
• Ensure the sensor is not blocked and there is enough light.
• Stand in the middle of your space and face your monitor.
• Be sure to hold the headset at eye level.
Mixed Reality Portal is stuck on "scanning for boundaries"
• Run Setup again from the Mixed Reality Portal.
• Click on the hamburger icon (upper right) and then Run Setup
Cannot trace the boundary
• Don’t get too close to a wall or other obstruction.
• Ensure the sensor is not blocked and there is enough light.
• The space you are tracing should be larger than 3 square meters.
• The space should not be too large or too complicated—stick to a simple geometric shape without a lot of twists and turns.
• Do not intersect your own path as you are tracing.
• If you get stuck in a corner, start over.
I want to skip boundary tracing
• If you choose not to set up a boundary, you will need to stay in place while using your headset; it may not be safe to move around.
Troubleshooting 25
Page 26

10
Statutory information
Warranty
Limited warranty and return policy
Dell-branded products carry a 1-year limited hardware warranty. If purchased together with a Dell system, it will follow the system warranty.
For U.S. customers:
This purchase and your use of this product are subject to Dell’s end user agreement, which you can nd at Dell.com/terms. This document
contains a binding arbitration clause.
For European, Middle Eastern and African customers:
Dell-branded products that are sold and used are subject to applicable national consumer legal rights, the terms of any retailer sale
agreement that you have entered into (which will apply between you and the retailer) and Dell’s end user contract terms.
Dell may also provide an additional hardware warranty—full details of the Dell end user contract and warranty terms can be found by going
to Dell.com, selecting your country from the list at the bottom of the “home” page and then clicking the “terms and conditions” link for the
end user terms or the “support” link for the warranty terms.
For non-U.S. customers:
Dell-branded products that are sold and used are subject to applicable national consumer legal rights, the terms of any retailer sale
agreement that you have entered into (which will apply between you and the retailer) and Dell’s warranty terms. Dell may also provide an
additional hardware warranty—full details of Dell’s warranty terms can be found by going to Dell.com, selecting your country from the list
at the bottom of the “home” page and then clicking the “terms and conditions” link or the “support” link for the warranty terms.
26 Statutory information
Page 27

11
Contacting Dell
NOTE: If you do not have an active Internet connection, you can nd contact information on your purchase invoice, packing slip,
bill, or Dell product catalog.
Dell provides several online and telephone-based support and service options. Availability varies by country and product, and some services
may not be available in your area. To contact Dell for sales, technical support, or customer service issues:
1 Go to Dell.com/support.
2 Select your support category.
3 Verify your country or region in the
4 Select the appropriate service or support link based on your need.
Topics:
• For Dell Visor VR118:
• For Dell Visor Controllers VRC100:
For Dell Visor VR118:
Choose a Country/Region drop-down list at the bottom of the page.
Contacting Dell 27
Page 28

For Dell Visor Controllers VRC100:
28 Contacting Dell
 Loading...