


Venue 8 Pro
User’s Manual

Notes, Cautions, and Warnings
NOTE: A NOTE indicates important information that helps you make
better use of your tablet PC.
CAUTION: A CAUTION indicates potential damage to hardware or loss
of data if instructions are not followed.
WARNING: A WARNING indicates a potential for property damage,
personal injury, or death.
_______________________
© 2013 Dell Inc. All rights reserved.
Information in this document is subject to change without notice. Reproduction of
these materials in any manner whatsoever without the written permission of Dell Inc. is
strictly forbidden.
Trademarks used in this text: Dell™, the DELL logo, and Venue™ are trademarks of Dell
Inc.; Bluetooth® is a registered trademark owned by Bluetooth SIG, Inc. and is used by
Dell under license; Apple is a trademark of Apple Inc., registered in the U.S. and other
countries. Other trademarks and trade names may be used in this document to refer to
either the entities claiming the marks and names or their products. Dell Inc. disclaims
any proprietary interest in trademarks and trade names other than its own.
December 2013 Rev. A00

Contents
Features ........................................................................... 5
Accessories ..................................................................... 8
Setting Up Your Tablet ................................................. 9
Charging the Tablet .................................................................... 9
Turning On Your Tablet ............................................................. 11
Turning Off Your Tablet .............................................................12
Turning Off the Screen .............................................................12
Inserting a microSD Card .........................................................13
Removing the microSD Card ..................................................14
Inserting a Micro‑SIM Card ......................................................15
Removing the Micro‑SIM Card ...............................................16
Using Headphones ....................................................................17
Using Your Tablet ........................................................ 18
Wi‑Fi Setting ................................................................................18
Mobile broadband Setting ........................................................18
Bluetooth Setting ...................................................................... 20
Gestures .......................................................................................21
Screen Orientation ................................................................... 24
Windows 8 Start Screen .......................................................... 24
Synchronizing Your Tablet ...................................................... 27
Refreshing Your Tablet ............................................................. 28
Resetting Your Tablet ............................................................... 29
Cleaning Your Tablet ................................................................ 30
Troubleshooting .......................................................... 31
Contacting Dell ........................................................... 35
Contents | 3

Locating Your Service Tag and
ExpressServiceCode ................................................. 36
Specifications ............................................................... 37
Glossary ........................................................................ 39
Index ............................................................................. 43
4 | Contents
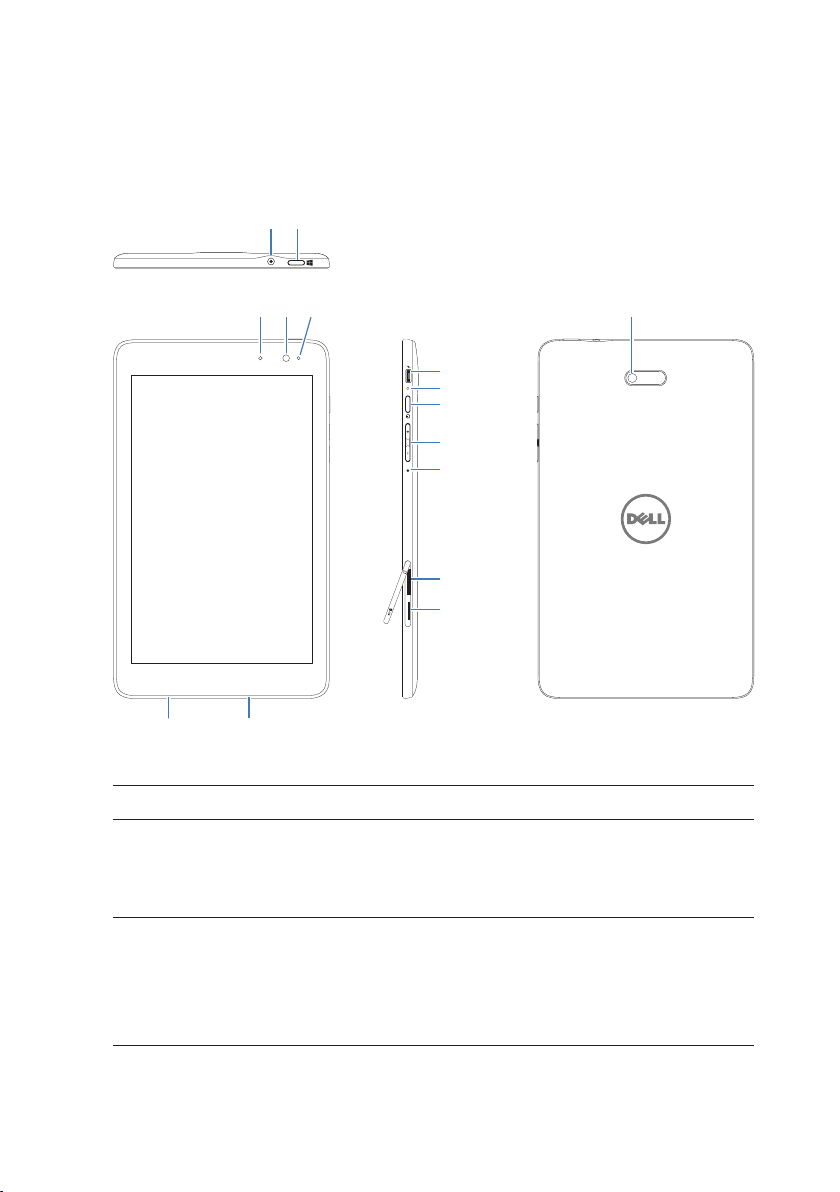
Features
345
67
1152
8
9
10
11
12
13
14
Feature Functionality
1 Audio port (3.5 mm) Connect a headset, headphones,
microphone, or other audio equipment
to listen to stereo sound, record audio, or
make calls.
2 Windows button • Press to open the Windows Start
screen.
• Press for quick access to the most
recently used app or most recently
viewed screen.
Features | 5
Feature Functionality
3 Status light • Lights up to indicate when either the
front or rear camera is activated.
• Flashes when the tablet is powering on
or shutting down.
4 Front‑facing camera • Capture a front view picture or record
videos.
• Use while making video calls.
5 Ambient‑light sensor Automatically adjusts the brightness of the
display’s backlight based on surrounding
light levels.
6 Service Tag label
7 Speaker Provides audio output.
8 Micro‑USB port • Connect the supplied power adapter to
9 Battery‑status light Indicates the battery‑charge status.
10 Power button • Press and hold to turn the tablet on
11 Volume buttons Press to increase/decrease volume.
12 Microphone • Records sounds.
Provides the Service Tag/Express Service
code needed for contacting Dell for
customer service or technical support.
provide power to the tablet and charge
the battery.
• Connect USB devices, using an optional
USB On‑The‑Go (OTG) dongle, for
transferring data, music, photos, videos,
and so on.
or off.
• Press to turn the display on or off.
• Provides sound input while making calls
using web‑based apps.
6 | Features

Feature Functionality
13 Micro‑SIM card slot Insert a micro‑SIM card for mobile
broadband connectivity.
14 microSD‑card slot Insert a microSD card to expand the
tablet’s storage capacity.
15 Rear camera Captures pictures or videos.
NOTE: The front camera does not support zoom, face tracking, or the
touch‑to‑focus feature.
NOTE: The rear camera supports continuous auto‑focus and
touch‑to‑focus, but does not support zoom or the face tracking feature.
NOTE: The micro‑USB port does not support connecting to a computer,
or power sharing to connected USB devices.
Regulatory model: Venu 8 Pro
Features | 7
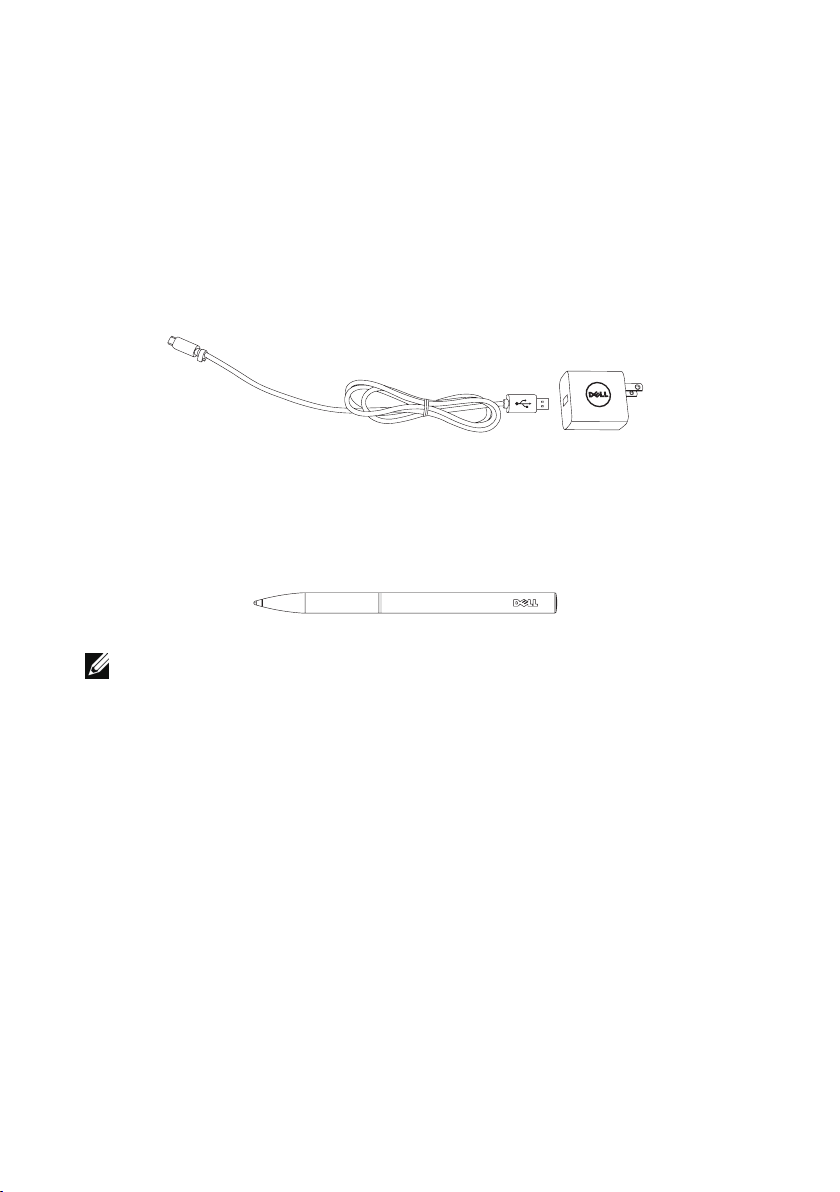
Accessories
Your tablet supports the following accessories:
10 W power adapter and micro-USB cable
Provides power to your tablet and charges the battery.
Stylus (optional)
Allows you to draw shapes, select items and text, turn pages, write or
sign documents, as well as use touch gestures on the touchscreen.
NOTE: The stylus is sold separately and is not shipped with the tablet.
8 | Accessories
Setting Up Your Tablet
WARNING: Before you begin any of the procedures in this section, read
the safety information that shipped with your tablet. For additional
best practices information, see dell.com/regulatory_compliance.
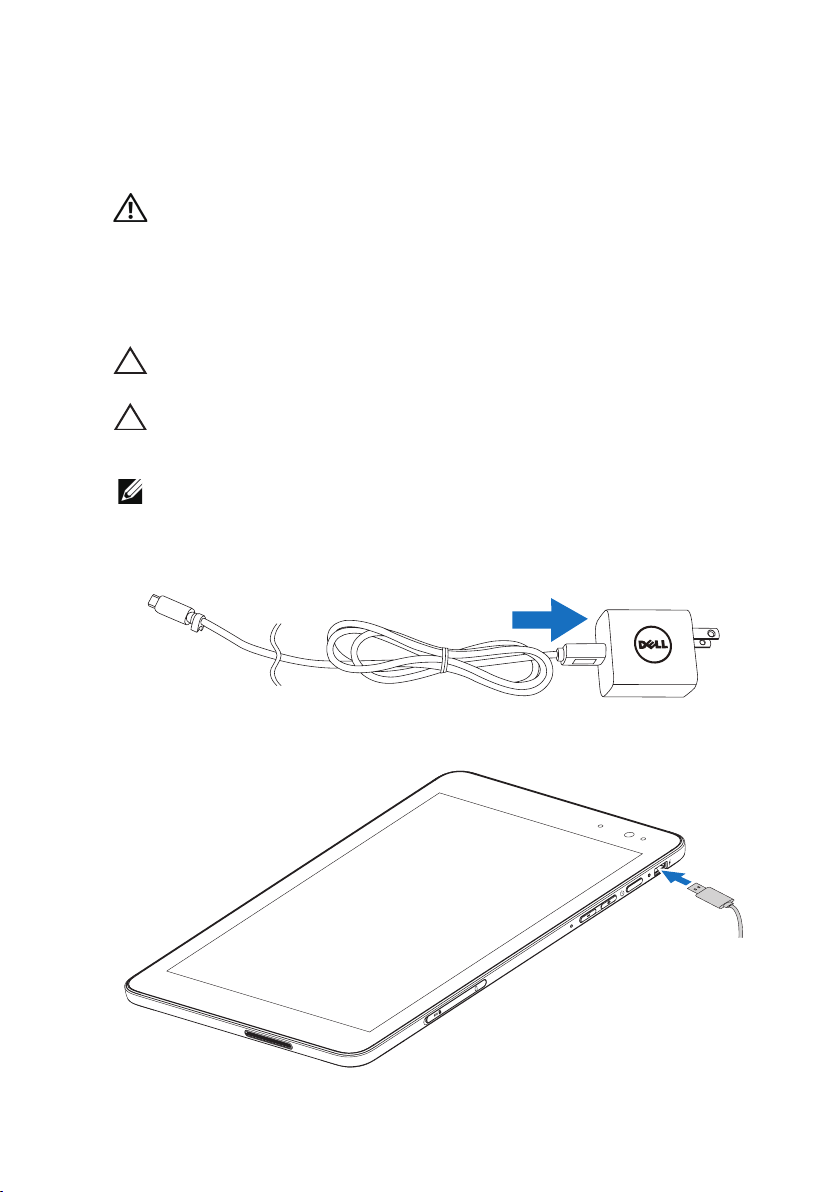
Charging the Tablet
CAUTION: Charge the battery in an ambient temperature of 0°C to
35°C.
CAUTION: Use only the supplied power adapter to charge your tablet.
Using unauthorized power adapters or micro‑USB cables may severely
damage your tablet.
NOTE: The battery is not fully charged when you unpack your tablet.
1 Connect the power cable into the power adapter.
2 Connect the micro‑USB cable to the micro‑USB port on the tablet.
Setting Up Your Tablet | 9
3 Connect the power adapter to an electrical outlet and charge the
tablet until the battery is fully charged.
NOTE: A fully discharged battery takes about 4 hours to fully charge.
You can check the tablet battery charge status from:
Battery‑charge light located on the right side of the tablet:
LED behavior Description
Solid white Battery is getting charged.
Solid amber Tablet is on or in connected‑standby mode, and
the battery is low.
Off Battery is not charging or battery is fully charged.
Flashing amber Battery is critically low and does not have enough
charge to power up. If you press the power
button during this state, the battery‑charge light
turns on for 2 seconds and then turn off.
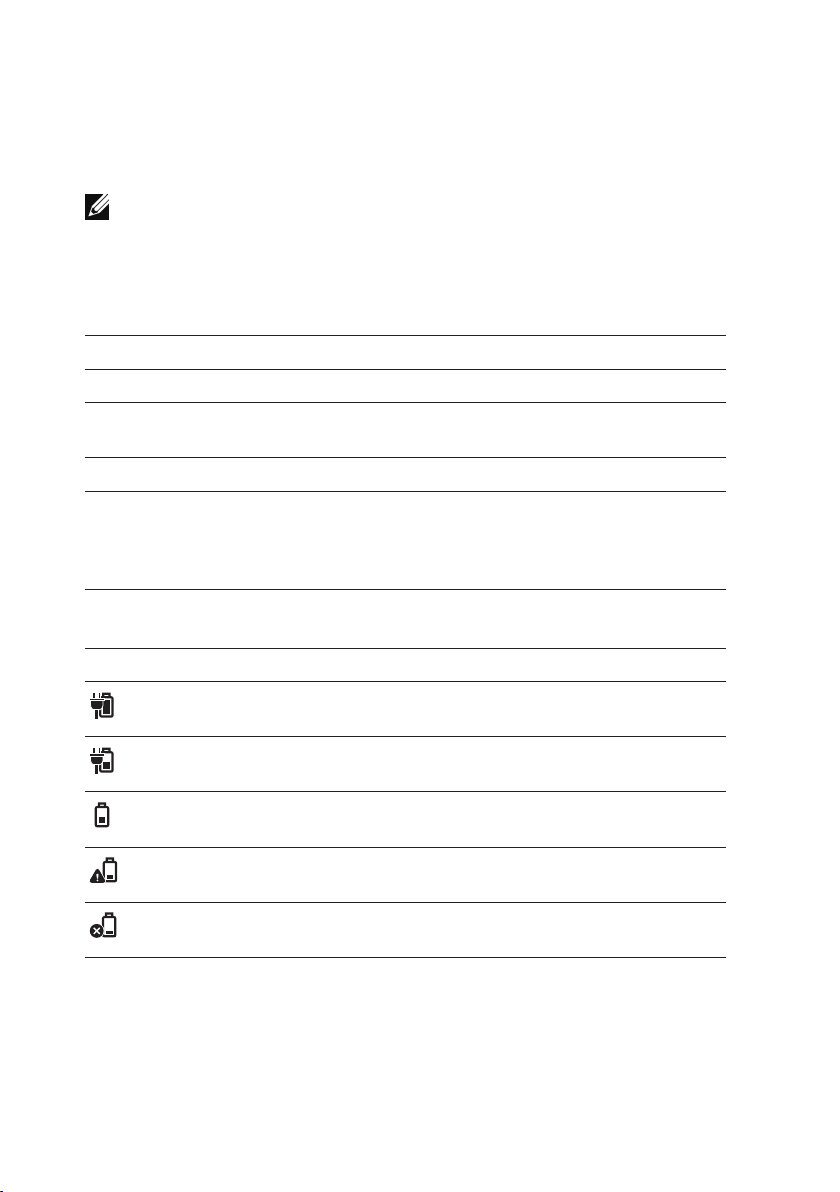
Battery icon displayed on the screen:
Battery icon Description
Tablet is connected to power supply and the
battery is fully charged.
Tablet is connected to power supply and the
battery is getting charged.
Tablet is running on battery power and the battery
is discharging.
Tablet is running on battery power and the battery
charge is low.
Tablet is running on battery power and the battery
charge is critically low.
10 | Setting Up Your Tablet
Turning On Your Tablet
When you turn on the tablet for the first time, you must finish
Windows setup to start using your tablet. For more information, see
the
Quick Start Guide
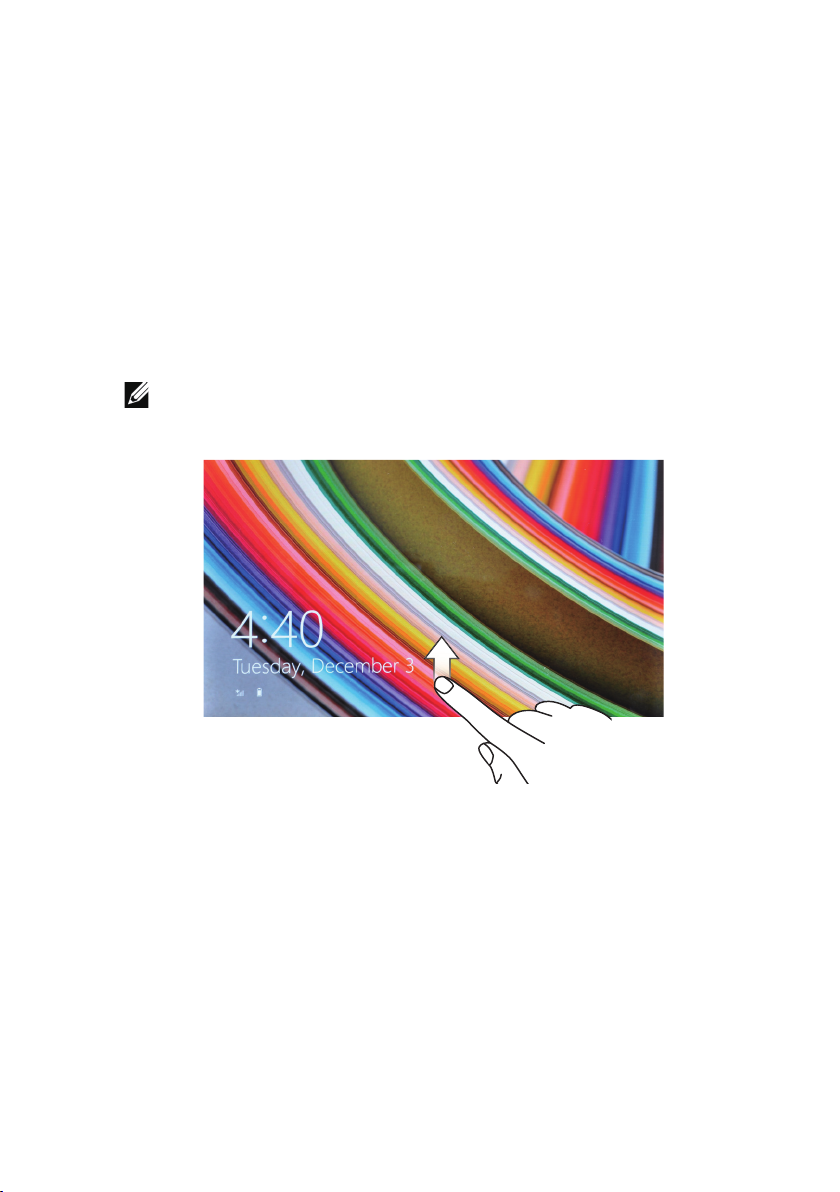
1 Press and hold the power button for 2 seconds to turn on your
tablet. The lock screen appears.
2 Swipe‑up your finger from the bottom of the display to switch to
the login screen, and then enter password to log in to Windows.
NOTE: If the login screen is not enabled, the Start screen appears after
the lock screen.
.
The tablet is ready for use when the Windows Start screen is displayed.
Setting Up Your Tablet | 11

Turning O Your Tablet
Using the power button:
1 Press and hold the power button for at least 4seconds.
2 Swipe‑down the shutdown confirmation screen to the bottom
edge of the display to turn off the tablet.
Using Charms:
1 Swipe‑in from the right edge of the display to access Charms.
2 Touch Settings → Power → Shut down to turn off the tablet.
Turning O the Screen
Using the power button:
Press the power button to turn off the screen.
Using Charms:
1 Swipe‑in from the right edge of the display to access Charms.
2 Touch Settings → Power → Sleep to turn off the screen.
NOTE: If your tablet is in a standby state (tablet is on, but screen is off),
press the power button or Windows button once to turn on the screen.
12 | Setting Up Your Tablet
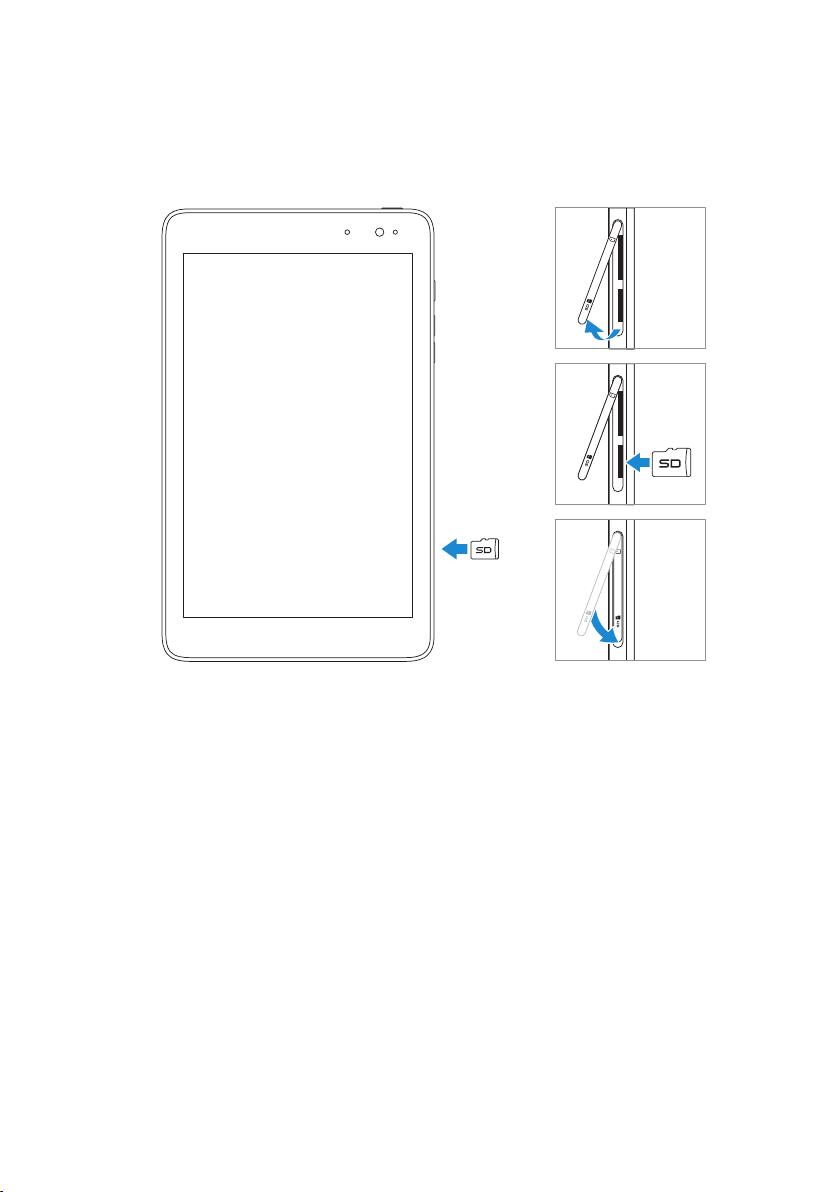
Inserting a microSD Card
1 Open the slot cover.
2 Align the microSD card so that the pins are pointed toward the
card slot and are facing toward the rear of the tablet.
3 Push the microSD card into the card slot.
4 Close the slot cover.
Setting Up Your Tablet | 13
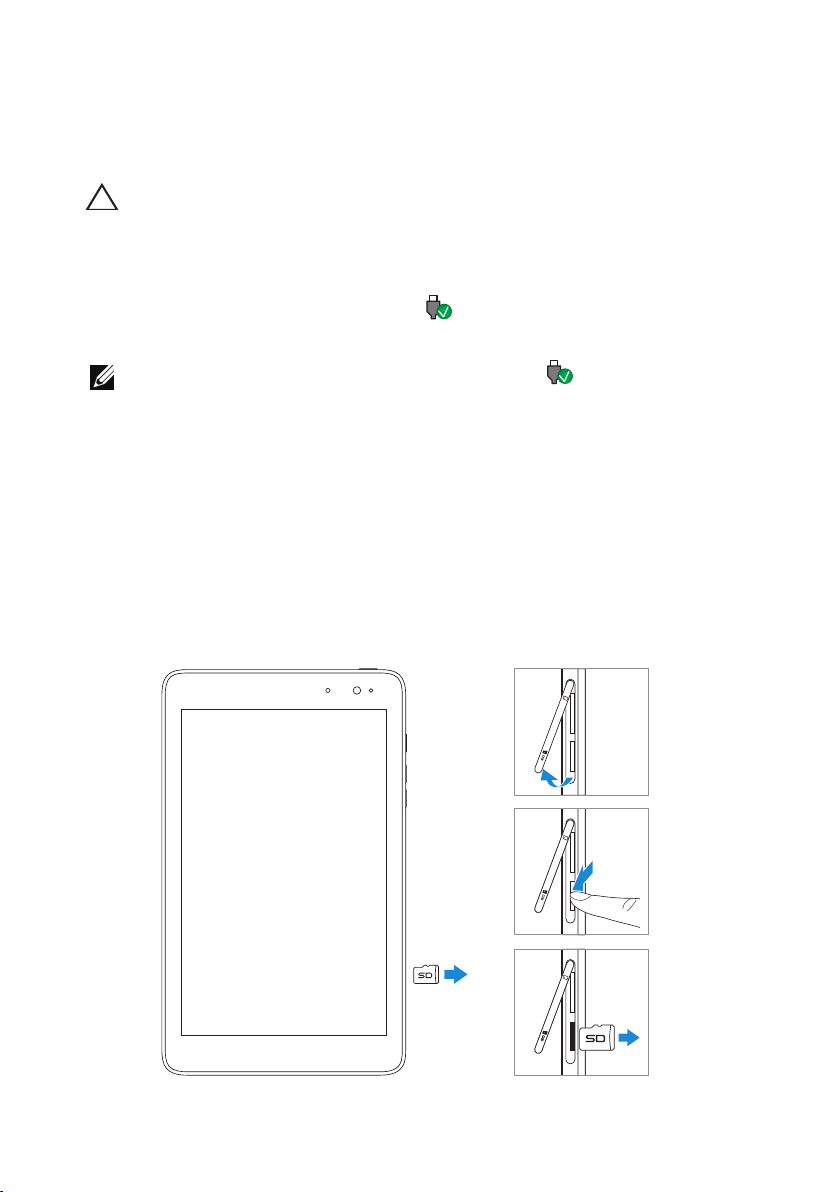
Removing the microSD Card
CAUTION: Removing the microSD card while it is in use may cause data
loss or result in application errors. Make sure all save operations to the
microSD card are complete before removing the microSD card.
1 Touch the Desktop tile to enter Desktop mode.
2 Touch Safely Remove Hardware in the notification area at the
bottom‑right corner of the screen.
NOTE: If you do not see Safely Remove Hardware , touch
Show Hidden Icons to display all icons in the notification area.
3 Touch Eject SD Memory Card. A message appears confirming
that the microSD card can be safely removed. If a warning
message appears stating the microSD card cannot be removed,
make sure all data transfers involving the microSD card are
complete.
4 Open the slot cover.
5 Press on the microSD card to release it.
6 Slide the card out after it pops out from the microSD‑card slot.
14 | Setting Up Your Tablet
 Loading...