

Dell PowerVault NF100, PowerVault NF500, PowerVault NF600 Getting Started Manual

®
Microsoft® Windows
Storage Server 2003
R2 x64 Edition With SP2
for Dell™ PowerVault™
Storage Solutions
Getting Started Guide
使用入门指南
入門指南
Guide de mise en route
Handbuch Zum Einstieg
はじめに
시작 안내서
Guía de introducción


®
Microsoft® Windows
Storage Server 2003 R2
x64 Edition With SP2 for Dell™
PowerVault™ Storage
Solutions
Getting Started Guide

Notes and Notices
NOTE: A NOTE indicates important information that helps you make better use
of your computer.
NOTICE: A NOTICE indicates either potential damage to hardware or loss of data
and tells you how to avoid the problem.
___________________
Information in this document is subject to change without notice.
© 2007 Dell Inc. All rights reserved.
Reproduction in any manner whatsoever without the written permission of Dell Inc. is strictly forbidden.
Trademarks used in this text: Dell, the DELL logo, PowerEdge, PowerVault, and OpenManage are
trademarks of Dell Inc.; Microsoft, Internet Explorer, Windows, and Windows Server are either
trademarks or registered trademarks of Microsoft Corporation in the United States and/or other countries.
Other trademarks and trade names may be used in this document to refer to either the entities claiming
the marks and names or their products. Dell Inc. disclaims any proprietary interest in trademarks and
trade names other than its own.
September 2007 P/N CM391 Rev. A00

Contents
Overview . . . . . . . . . . . . . . . . . . . . . . . . . . 5
Naming Convention
Configuring Your NAS System
. . . . . . . . . . . . . . . . . . . . 6
. . . . . . . . . . . . . . . 7
Configuring Your System Using a Keyboard,
Monitor, and Mouse
. . . . . . . . . . . . . . . . . 7
Configuring Your System For Network Access
Configuring the Network IP Address
for the NAS System
. . . . . . . . . . . . . . . . . . 8
Entering the Default Administrator
User Name and Password
. . . . . . . . . . . . . . 9
Localizing Your System Using the Multilanguage
User Interface
. . . . . . . . . . . . . . . . . . . . . . . 9
Starting the Windows Storage Server
Management Console
. . . . . . . . . . . . . . . . . . 10
Accessing the Microsoft Management Console
Accessing the MMC Locally on the Host
. . . . . . 10
. . . . 7
. . . . 10
Accessing the MMC Using Remote Desktop
Connection
. . . . . . . . . . . . . . . . . . . . . 11
Contents 3

Dell OpenManage Server Administrator . . . . . . . . 12
Installing OpenManage Server Administrator
Accessing OpenManage Server Administrator
Adding Trusted Sites to Your Browser
Updating Your System
. . . . . . . . . . . . . . . . 14
Updating Your Microsoft Windows Software
Other Documents You May Need
. . . . . . . . . . . . 15
. . . 12
. . 13
. . . . . . . 13
. . . 14
4 Contents

This document provides an overview of the Microsoft® Windows®
Storage Server 2003 R2 x64 Edition with SP2 operating system and information
about configuring, localizing, and installing your Dell™ Network Attached
Storage (NAS) system on a corporate network.
The following topics are covered in this document:
• Overview
• Naming Convention
• Configuring your NAS system
• Localizing your system using the Multilanguage User Interface (MUI)
• Starting the Windows Storage Server Management Console
• Accessing the Microsoft Management Console (MMC)
• Dell OpenManage
™
Server Administrator
• Other documents you may need
Overview
The Windows Storage Server 2003 R2 x64 Edition with SP2 operating system
adds new search capabilities, simplified setup and storage management,
extensibility, and is specially tuned to provide optimal NAS performance.
Windows Storage Server 2003 R2 x64 Edition with SP2 provides significant
enhancements in storage management scenarios, and ease of installation.
Your NAS system is preconfigured with the Windows
x64 Edition with SP2 operating system. Most of the setup procedures are
completed for you and do not require user intervention.
When your system boots for the first time, the
Microsoft Mini Setup
begins. When completed, your system automatically reboots and you can access
the server either locally or remotely.
NOTE: If your system is pre-configured with software redundant array of
independent disks (RAID) 5, the system performs a RAID synchronization to optimize
the array. The process runs in the background and may affect your overall system
performance until it completes. If the system is powered off before the process
completes, RAID synchronization will begin again when the system is powered up
and continue until it completes.
Storage Server 2003 R2
process
Getting Started Guide 5
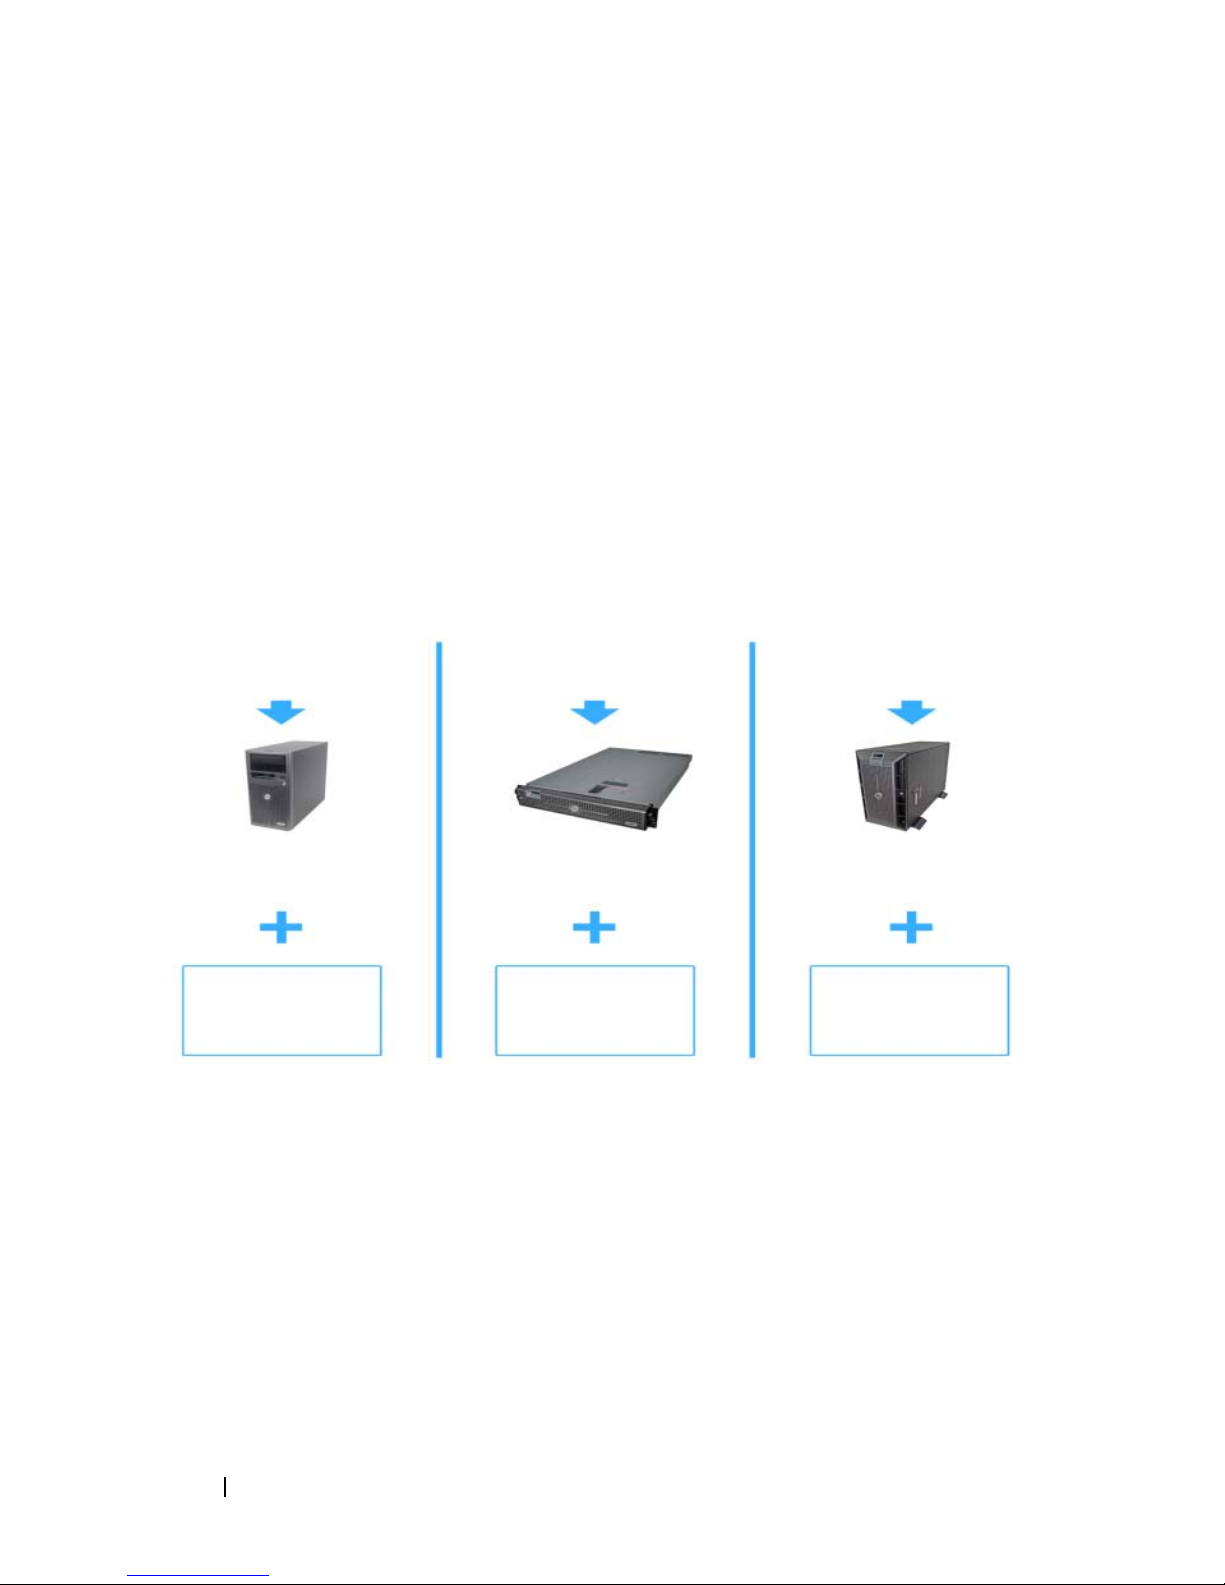
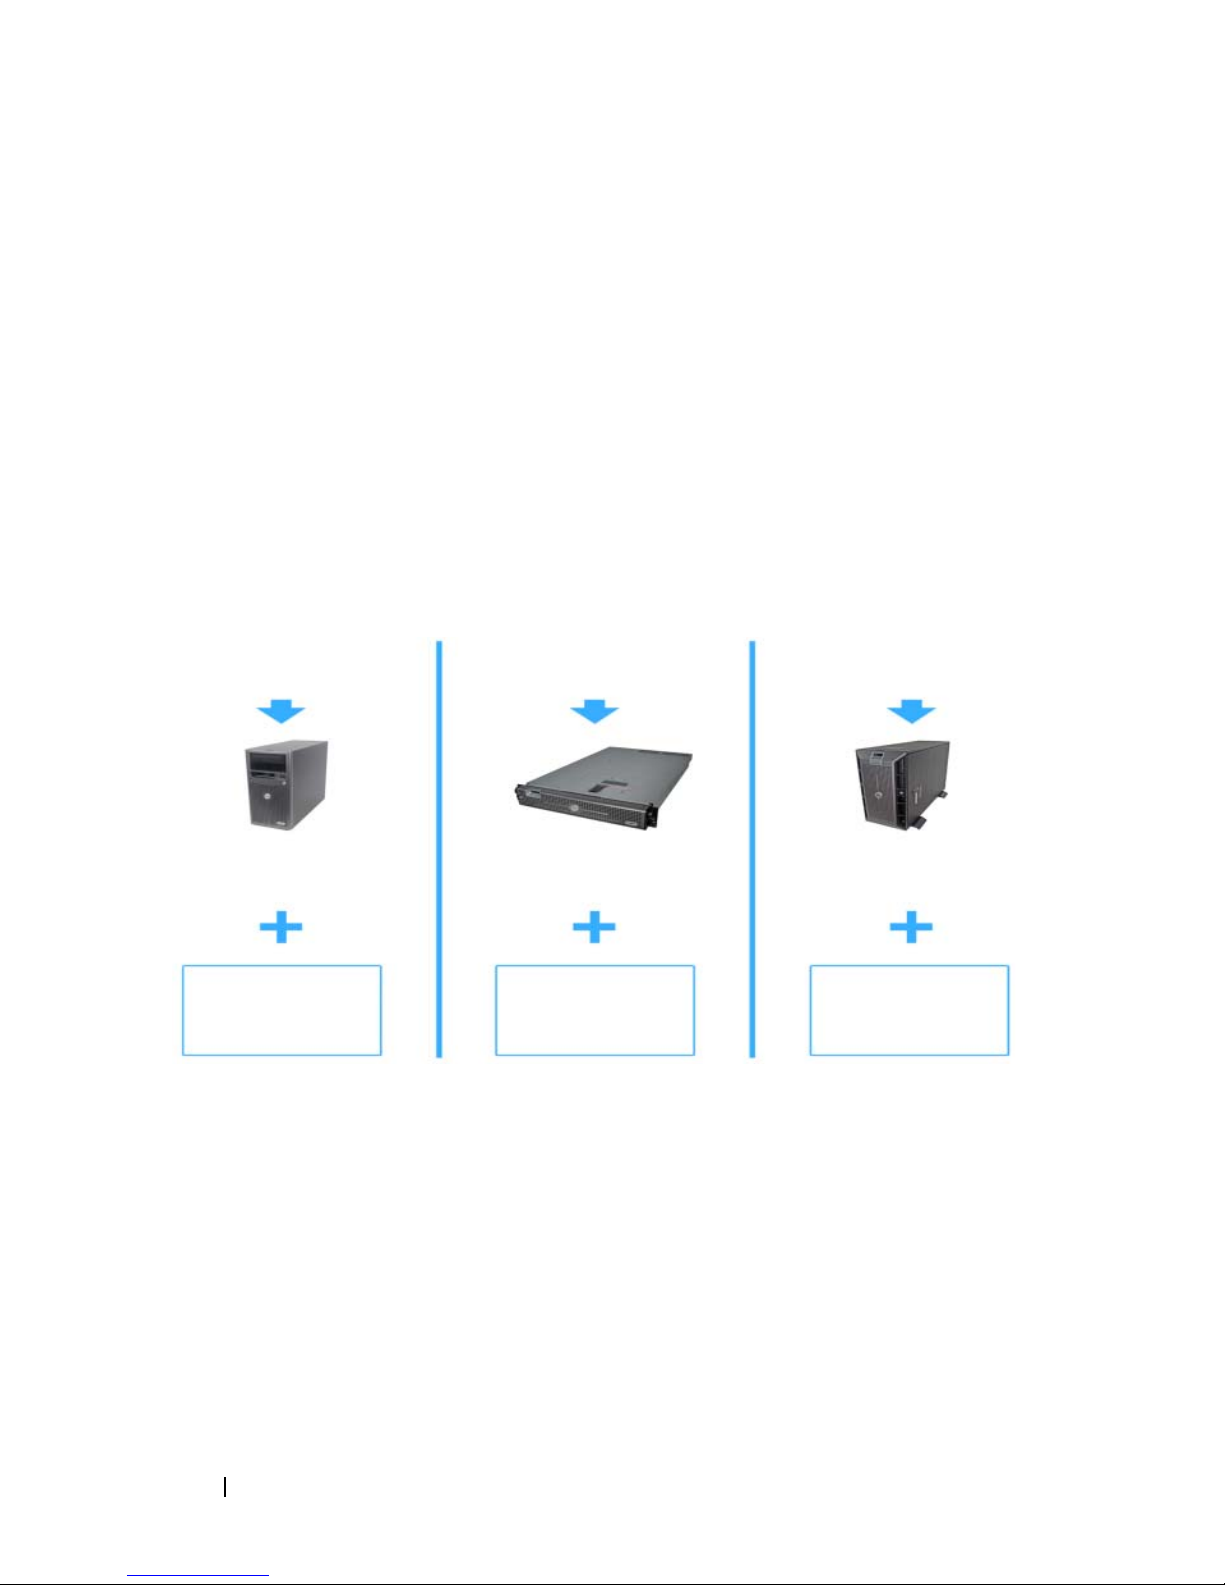
Naming Convention
The term
PowerVault NF100
Dell PowerVault™ 100
refers to the configuration of PowerVault 100 storage system
refers to the hardware platform.
and Microsoft Windows Storage Server 2003 R2 with SP2 operating system.
The term
PowerVault NF500
Dell PowerVault 500
refers to the configuration of PowerVault 500 storage system
refers to the hardware platform.
and Microsoft Windows Storage Server 2003 R2 with SP2 operating system.
The term
PowerVault NF600
Dell PowerVault 600
refers to the configuration of PowerVault 600 storage system
refers to the hardware platform.
and Microsoft Windows Storage Server 2003 R2 with SP2 operating system.
Figure 1-1. Naming Convention
PowerVault NF100
PowerVault NF500
PowerVault NF600
PowerVault 100
storage system
Microsoft Windows
Storage Server 2003
R2 with SP2
PowerVault 500
storage system
Microsoft Windows
Storage Server 2003
R2 with SP2
PowerVault 600
storage system
Microsoft Windows
Storage Server 2003
R2 with SP2
6 Getting Started Guide

Configuring Your NAS System
Configuring Your System Using a Keyboard, Monitor, and Mouse
NOTE: Depending on your method of configuration, local keyboard, video, and
mouse (KVM) connections may be required to complete the installation and
configuration procedures. If your remote system can complete the configuration
procedures, local KVM connections are not required for operation.
1
Connect a keyboard, monitor, and mouse to the NAS system.
For information about system connectors, see your system’s
2
Turn on the NAS system.
3
Log in to the NAS system.
NOTE: The default administrator user name is administrator
.
and the default password is storageserver
User’s Guide
Configuring Your System For Network Access
1
If your NAS system is powered on, turn it off.
2
Connect one end of an Ethernet cable into one of the 10/100/1000 RJ-45
NIC connectors (see Figure 1-2) on the back of your NAS system.
For more information about the location of system connectors, see your
NAS system’s
3
Connect the other end of the Ethernet cable to a functioning Ethernet jack.
4
Turn on the NAS system.
5
Verify that the server is connected to the Ethernet by ensuring that the
LED associated with the network interface controller (NIC) connector
is on. See Figure 1-2. If the NIC connector’s LED is a steady green color,
then the connection is good. If the NIC connector’s LED is a flashing
amber color, then data is successfully being transferred.
User’s Guide
.
.
If the LED is not on, ensure that each end of the Ethernet cable is seated
properly in the NIC connector and the Ethernet jack.
The NAS system retrieves the required information to set up network
parameters (the IP address, gateway subnet mask, and DNS server address)
from a
Dynamic Host Configuration Protocol (
NOTE: Depending on your configuration and the amount of storage attached
to the NAS system, it may take several minutes for the NAS system to boot.
DHCP) server on the network.
Getting Started Guide 7
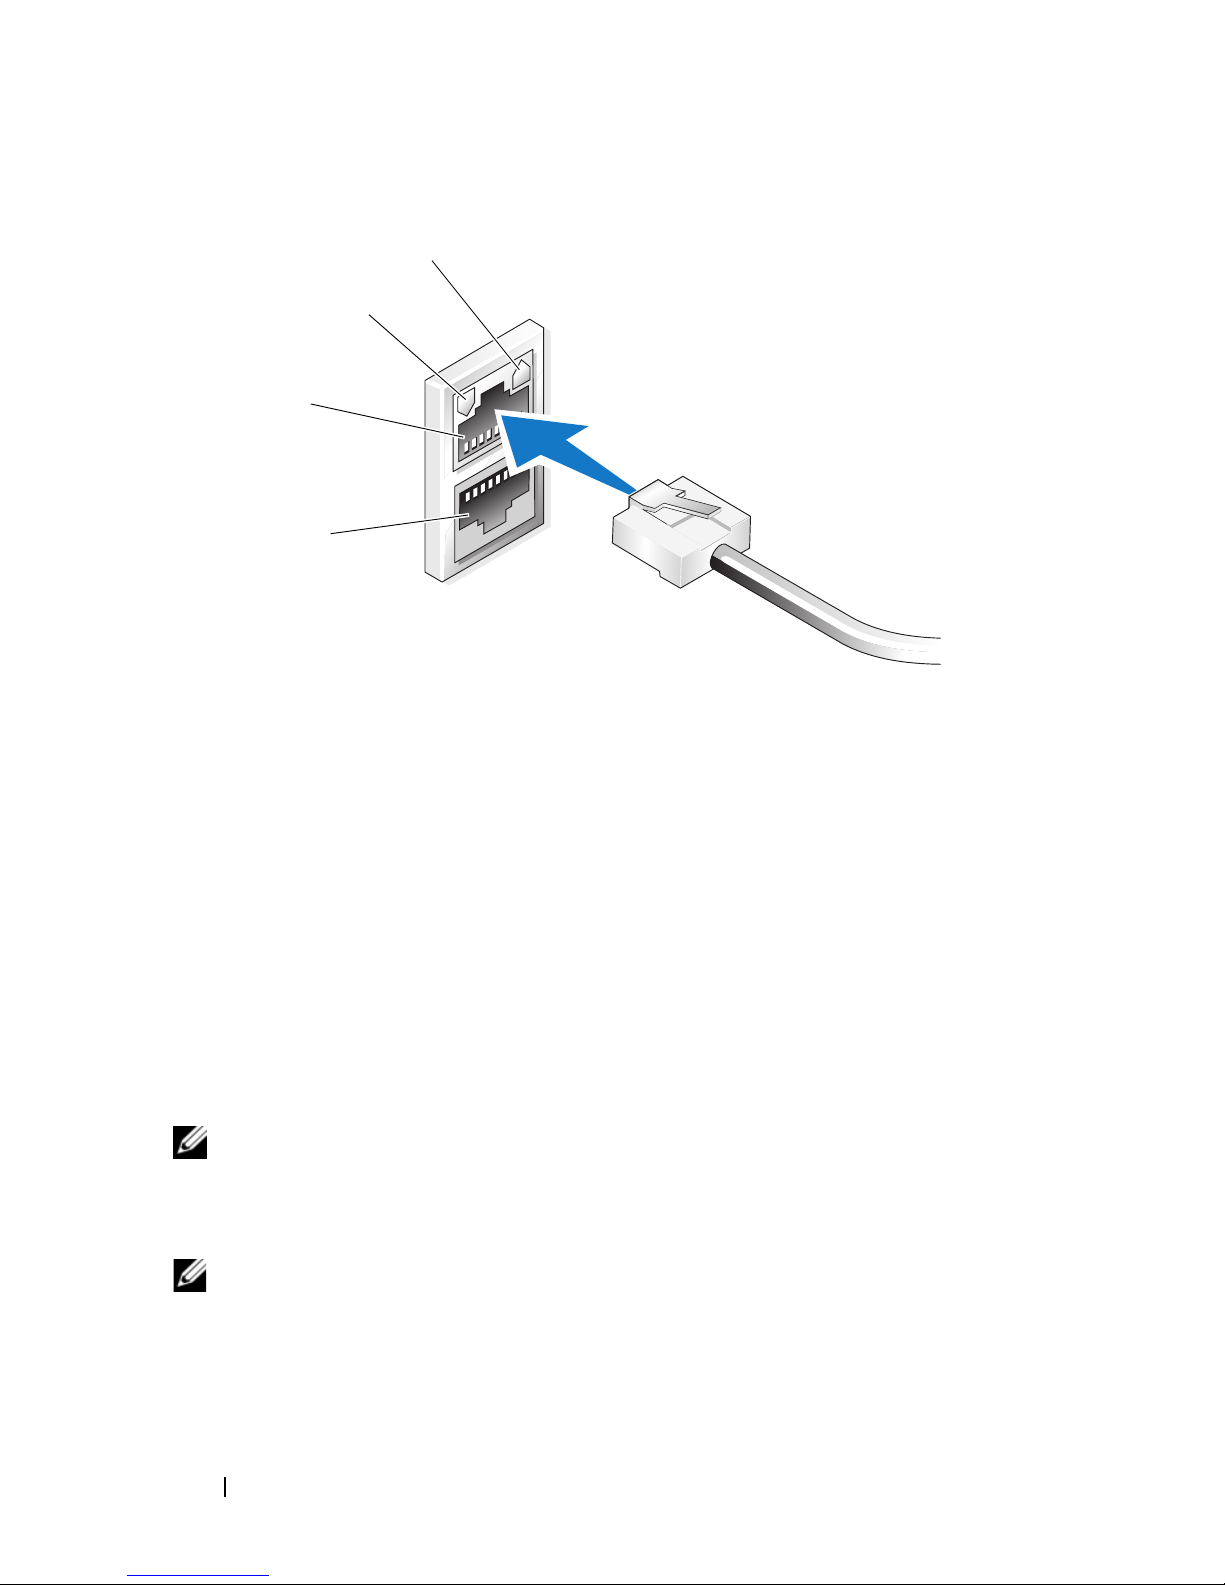
Figure 1-2. NIC Connector
1
2
3
4
1 NIC 1 LED 3 NIC 1
2 NIC 2 LED 4 NIC 2
Configuring the Network IP Address for the NAS System
If you have a DHCP server on your network, you are not required to configure
your NAS system’s IP address because DHCP automatically assigns an address
to the NAS system. If your network is not configured with a DHCP server,
configure the NAS system’s IP address through the
window.
To access the
Panel
→
NOTE: If you do not have a DHCP server on your network, a local keyboard,
monitor, and a mouse is required to complete your NAS configuration. For more
information, see "Configuring Your System Using a Keyboard, Monitor, and Mouse"
on page 7.
NOTE: The Windows Firewall is enabled by default. When you access the remote
system, you may experience issues with connectivity.
Network Configuration
Network Configuration
window, click
.
Network Configuration
Start→
Settings→
Control
8 Getting Started Guide

Entering the Default Administrator User Name and Password
When logging into the NAS system for the first time, you must enter an
administrator user name and password. The default administrator user name
for your NAS system is
storageserver.
Changing the Administrator Password
1
Click
2
In the
and select
3
In the right window pane, right-click
Set Password
4
In the
5
Enter and confirm your password in the appropriate fields and clickOK.
6
Close the
Start→
Computer Management
Users
Set Password for Administrator
Computer Management
administrator
Administrative Tools→
window, expand
.
.
and the default password is
Computer Management
Local Users and Groups
Administrator
window, click
window.
and select
Proceed
.
.
Localizing Your System Using the Multilanguage
User Interface
The NAS system allows you to change the native language for the operating
system's user interface. Many languages are installed on your system by default.
The Multilanguage User Interface (MUI) allows the NAS system to display
operating systems menus, dialogs, and help files in multiple languages.
If your system was pre-configured with the Windows Storage Server 2003 R2
x64 Edition with SP2 operating system, the MUI is pre-configured with your
localized language in both the regional settings and in the browser settings.
No user intervention is required.
To change the default browser language:
1
Open an Internet Explorer® browser.
2
3
4
In the
In the
In the
To ol s
menu, select
General
Language Preference
tab, click
Internet Options
Languages
.
window, click
.
Add
.
5
In the
6
Click OK.
Language
box, select a language.
Getting Started Guide 9

Starting the Windows Storage Server
Management Console
The
Windows Storage Server Management Console
providing an easy and convenient method for system administration. The MMC
opens automatically when you are logged into the Windows Storage Server 2003
R2 x64 Edition with SP2 operating system.
appears in the MMC,
To open the
All Programs→
In the
the
window pane provides selectable scenarios that assist you with operating system
administration.
Microsoft Management Console
File Server Management (Local)
Windows Storage Server Management Console
Windows Storage Server Management
window, the left window pane shows
node as the default node. The center
.
, click
Start→
Accessing the Microsoft Management Console
The MMC is configured by default as part of the Microsoft
MMC can be used for disk management, NFS configuration, and as a general
NAS management station. For more information, see the Microsoft MMC
document included with your system.
Using MMC, you can configure your storage by either accessing MMC locally
on the host or by accessing MMC using a Remote Desktop Connection.
Accessing the MMC Locally on the Host
The MMC appears on the host in the
in the
Start
menu, perform the following steps:
Start
menu. If the MMC does not appear
Start
menu. The
1
Click
2
Ty p e
NOTE: The nas.msc file is located at c:\windows\system32.
10 Getting Started Guide
Start→
nas.msc
Run
and click OK.
.

Accessing the MMC Using Remote Desktop Connection
Use Remote Desktop Connection for remote server administration to reduce
the overhead associated with remote administration. Enabled by Terminal
Services technology, Remote Desktop for Administration is specifically designed
for server management.
Remote Desktop for Administration does not require a special license for client
systems that access the server. Additionally, you are not required to install
Terminal Server Licensing when using Remote Desktop for Administration.
Administrators can also fully administer computers running Windows Storage
Server 2003 R2 x64 Edition with SP2 from systems running earlier versions of
Windows by installing Remote Desktop Connection.
NOTE: To connect to Remote Desktop for Administration from a remote system,
use Remote Desktop Connection.
Creating a Remote Desktop Connection to Your Desktop
To create and save a Remote Desktop Connection to Windows Storage
Server 2003 R2 x64 Edition with SP2, perform the following steps:
1
Click
2
Ty p e
The
3
In the
or IP address of the storage server and then click
4
Under
5
In the
the default
6
In the
Start→ Run
mstsc
.
and then click OK.
Remote Desktop Connection
Remote Desktop Connection
Connection Settings
Save As
Save in
screen, type a name for the connection and include
.rdp
extension.
drop-down menu, select
, click
window appears.
screen, type the computer name
Save As
Desktop
Options
.
and then click
.
Save
.
Your connection is saved to your desktop.
For more information about configuring your Remote Desktop Connection,
Help
click
in the
Remote Desktop Connection
window.
Getting Started Guide 11

Dell OpenManage Server Administrator
Dell OpenManage Server Administrator provides a comprehensive, one-to-one
system management solution using an integrated, Web browser-based interface
(the OpenManage Server Administrator home page) or a command line
interface (CLI) through the operating system.
OpenManage Server Administrator allows you to manage NAS systems on a
network locally and remotely and to focus on managing the entire network
with comprehensive, one-to-one system management.
NOTE: If you are using OpenManage Server Administrator, a system can be a
stand-alone system, a server with Network Attached Storage units in separate
chassis, or a modular system consisting of one or more server modules in a chassis.
For more information, see your OpenManage Server Administrator
documentation.
Installing OpenManage Server Administrator
The
Dell Systems Build and Update Utility
to install, upgrade, and uninstall OpenManage Server Administrator and other
system software components on your NAS system. You can also install
OpenManage Server Administrator on multiple systems through an unattended
installation across a network.
media provides a setup program
Using the setup program on the
you can install and upgrade OpenManage Server Administrator on systems
running all supported Windows Storage Server 2003 R2 x64 Edition with SP2
operating systems.
To install OpenManage Server Administrator, perform the following steps:
1
Insert the
CD/DVD drive.
The media autoloads and the
appears.
2
Click
3
In the
and click
12 Getting Started Guide
Dell
Systems Build and Update Utility media into your system’s
Install, Modify, Repair or Remove Server Administrator
License Agreement
Next
.
Dell Systems Build and Update Utility
Server Administrator Installer
window, read and accept the agreement
media,
window
.

4
In the
for your configuration and click
5
In the
6
In the
Setup Type
window, select the appropriate setup type
Next
Ready to Install
window, click
Install Wizard Completed
.
Install
.
window, click
Finish
.
Accessing OpenManage Server Administrator
You can access OpenManage Server Administrator locally through the host
by double-clicking the
To access OpenManage Server Administrator directly from a client system on
the same network, open an Internet Explorer 6.0 or later browser and connect
to the secure port, 1311, of your NAS system.
For example, type:
https://DELL1234567:1311
Server Administrator
icon on the desktop.
where
DELL1234567
is the name of your NAS system.
If port 1311 is disabled by the firewall, use the following procedure to set
an exception to enable port 1311 for OpenManage use.
1 Click Start→ Settings→ Control Panel→ Windows Firewall
2
Click the
3
Click on
4
Ty p e
Exceptions
Add port
tab.
.
Dell OpenManage Server Administrator
.
in the
Name
field.
5
Ty p e
1311
6
Click OK.
7
If prompted, restart the firewall service.
in the
Port number
field.
Adding Trusted Sites to Your Browser
Due to enhanced Microsoft security standards, you may be prompted to add
an Internet or intranet site to the trusted sites zone when you initially access
the site.
Getting Started Guide 13

To add trusted sites to Internet Explorer, perform the following steps:
1
In the
The
2
Click the
Too ls
menu, click
Internet Options
Security Tab
Internet Options
screen appears.
.
.
Security
The
3
4
5
Click
Click
The
In the
Trusted Sites
Sites
Trusted sites
Add this Web site to the zone:
using the https: secure protocol, and click
The site appears in the
6
Repeat step 5 to add any additional sites and click OK.
Internet Options
The
7
Click OK.
tab menu appears.
.
.
screen appears.
Web sites:
screen appears.
field, type the address of the site,
Add
.
box.
Updating Your System
The
Server Update Utility
applying updates to your server. The Server Update Utility (SUU) can also be
downloaded from the Dell Support website at
information, see the
media contains an application for identifying and
support.dell.com
Server Update Utility User’s Guide
.
. For more
To update individual OpenManage Server Administrator components, use
component-specific Dell Update Packages (DUP), which may be found on the
Dell Updates media. The SUU compares the versions of components currently
installed on your Dell NAS system with update components that are packaged
on the Dell Updates media. Use the SUU to view a comparison report of the
versions and to update an entire system.
Updating Your Microsoft Windows Software
To update your Windows Storage Server 2003 R2 x64 Edition operating system,
see the Microsoft Support website at
Microsoft Windows Server
Server 2003 R2 x64 Edition.
14 Getting Started Guide
support.microsoft.com
®
2003 R2 x64 Edition apply to Windows Storage
. All updates to

Other Documents You May Need
NOTE: The Product Information Guide provides important safety and regulatory
information. Warranty information may be included within this document or as
a separate document.
• The
Rack Installation Guide
or
Rack Installation Instructions
included
with your rack solution describes how to install your system into a rack.
• The
Administrator’s Guide
provides information about completing the
configuration procedures on your system and a general overview of
Windows Storage Server 2003 R2 x64 Edition with SP2 features.
• The
Important Information
document provides the minimum hardware
and software requirements and all known issues.
• The system’s
User's Guide
provides information about system features
and technical specifications.
• Systems management software documentation describes the features,
requirements, installation, and basic operation of the software.
• Operating system documentation describes how to install (if necessary),
configure, and use the operating system software.
• Documentation for any components you purchased separately provides
information to configure and install these options.
• Updates are sometimes included with the system to describe changes
to the system, software, and/or documentation.
NOTE: Always read the updates first because they often supersede information
in other documents.
• Release notes or readme files may be included to provide last-minute
updates to the system, documentation, or advanced technical reference
material intended for experienced users or technicians.
• The
Server Update Utility User's Guide
the Server Update Utility to view the software versions on your system
and update your system’s software. It can be downloaded from the
Dell Support website at
describes how you can use
support.dell.com
.
Getting Started Guide 15

16 Getting Started Guide

用于
Dell™ PowerVault™
存储解决方案的
Microsoft
®
Windows® Storage Server 2003
R2 x64 Edition
(含
SP2
)
使用入门指南

注和注意
注:“注”表示可以帮助您更好地使用计算机的重要信息。
注意:“注意”表示可能会损坏硬件或导致数据丢失,并告诉您如何
避免此类问题。
___________________
本说明文件中的信息如有更改,恕不另行通知。
© 2007 Dell Inc.
未经
Dell Inc.
本文中使用的商标:
的商标;
在美国和/或其它国家/地区的商标或注册商标。
本文件中述及的其它商标和产品名称是指拥有相应商标和名称的公司或其制造的产品。
Dell Inc.
2007 年 9
Microsoft、Internet Explorer、Windows 和 Windows Server 是 Microsoft Corporation
对本公司的商标和产品名称之外的其它商标和产品名称不拥有任何专有权。
月
版权所有,翻印必究。
书面许可,严禁以任何形式进行复制。
Dell、DELL
P/N CM391 Rev. A00
徽标、
PowerEdge、PowerVault 和 OpenManage 是 Dell Inc.

目录
概览 . . . . . . . . . . . . . . . . . . . . . . . . . . .
命名惯例
配置
使用多语种用户界面本地化系统
启动
访问
Dell OpenManage Server Administrator
. . . . . . . . . . . . . . . . . . . . . . . . .
系统
NAS
使用键盘、显示器和鼠标配置系统
配置系统进行网络访问
为
NAS
输入默认管理员用户名和密码
Windows Storage Server
Microsoft
在主机上本地访问
使用远程桌面连接访问
. . . . . . . . . . . . . . . . . . . . .
. . . . . . .
. . . . . . . . . . . . . .
系统配置网络
管理控制台
MMC
IP
. . . . . . . . . . . . . .
MMC
. . . . . . . . . .
地址
. . . . . . . . . .
. . . . . . . . . . .
管理控制台
. . . . . . . . . . . . .
. . . . . . . . . .
. . . . . .
. . . . . . . .
21
22
23
23
23
24
25
25
26
26
26
27
28
您可能需要的其它说明文件
安装
OpenManage Server Administrator
访问
OpenManage Server Administrator
将受信任的站点添加到您的浏览器
更新系统
更新
. . . . . . . . . . . . . . . . . . . . . .
. . . . . . . . . .
Microsoft Windows
软件
. . . . . . . . . . . . . .
. . . . .
. . . . .
. . . . . . .
目录 19
28
29
30
30
30
31

20 目录

本说明文件概要介绍
(含
)操作系统,并提供有关在公司网络上配置、本地化和安装
SP2
网络连接存储器
Microsoft
(NAS)
系统的信息。
本说明文件讨论以下主题:
• 概览
• 命名惯例
®
Windows® Storage Server 2003 R2 x64 Edition
Dell™
• 配置
NAS
• 使用多语种用户界面
• 启动
• 访问
•
Windows Storage Server
Microsoft
Dell OpenManage™ Server Administrator
系统
管理控制台
(MUI)
(MMC)
本地化系统
管理控制台
• 您可能需要的其它说明文件
概览
Windows Storage Server 2003 R2 x64 Edition
(含
的搜索功能,简化了设置和存储管理过程,提高了可扩展性,并经过专门
优化以提供最佳的
(含
NAS
)在存储管理方面提供了重要的增强功能,并且易于安装。
SP2
系统已预配置了
NAS
性能。
Windows
Windows Storage Server 2003 R2 x64 Edition
Storage Server 2003 R2 x64 Edition
操作系统。大多数设置过程已经完成,无需用户干预。
第一次引导系统时,将开始
Microsoft Mini Setup(Microsoft
过程。安装完成后,系统会自动重新引导,然后您便可通过本地或远程访
问服务器。
)操作系统增加了新
SP2
(含
袖珍安装)
SP2
)
注:如果系统已预先配置了软件独立磁盘冗余阵列
同步以优化阵列。此过程在后台运行,在完成之前可能会影响系统的
RAID
整体性能。如果在此过程完成之前关闭系统电源,则在系统通电时将再次开
始
同步,直至此过程完成。
RAID
(RAID) 5
使用入门指南 21
,系统将执行
命名惯例
术语
Dell PowerVault™ 100
PowerVault 100
(含
术语
)操作系统的配置。
SP2
Dell PowerVault 500
存储系统和
存储系统和
Microsoft Windows Storage Server 2003 R2
的配置。
术语
Dell PowerVault 600
存储系统和
Microsoft Windows Storage Server 2003 R2
的配置。
图
1-1.
命名惯例
PowerVault NF100
是指硬件平台。
PowerVault NF100
Microsoft Windows Storage Server 2003 R2
是指硬件平台。
是指硬件平台。
PowerVault NF500
PowerVault NF500
PowerVault NF600
是指
PowerVault 500
(含
SP2
是指
PowerVault 600
(含
SP2
PowerVault NF600
是指
)操作系统
)操作系统
PowerVault 100
存储系统
Microsoft Windows
Storage Server 2003
R2
(含
SP2
)
PowerVault 500
存储系统
Microsoft Windows
Storage Server 2003
R2
(含
SP2
)
PowerVault 600
存储系统
Microsoft Windows
Storage Server 2003
R2
(含
SP2
)
22 使用入门指南

配置
NAS
系统
使用键盘、显示器和鼠标配置系统
注:根据您的配置方法,您可能需要进行本地键盘、视频和鼠标
才能完成安装和配置过程。如果远程系统可以完成配置过程,则无需进行本
地
1 将键盘、显示器和鼠标连接至
有关系统连接器的信息,请参阅《用户指南》。
2 打开
3 登录到
连接,系统即可正常运行。
KVM
NAS
NAS
注: 默认的管理员用户名为 administrator,默认密码为
storageserver
系统。
NAS
系统。
。
系统。
配置系统进行网络访问
1 如果已打开
2 将以太网电缆的一端连接至
RJ-45 NIC
有关系统连接器位置的详情,请参阅
3 将以太网电缆的另一端连接至有效的以太网插孔。
NAS
连接器(请参阅图
系统的电源,请关闭电源。
NAS
系统背面上的一个
)。
1-2
NAS
系统的《用户指南》。
10/100/1000
(KVM)
连接,
4 打开
5 确保与网络接口控制器
NAS
服务器已连接至以太网。请参阅图
呈绿色持续亮起,则表明连接是正常的。如果
琥珀色闪烁,则表明正在成功地传输数据。
如果
LED
地插入
系统将从网络中的动态主机配置协议
NAS
网络参数所需的信息(
注: 引导
系统的存储设备数量而定。
系统。
(NIC)
未亮起,请进行检查,以确保以太网电缆的两端分别正确
NIC
连接器和以太网插孔中。
地址、网关子网掩码和
IP
系统可能需要几分钟,具体视您的配置以及连接至
NAS
连接器关联的
1-2
。如果
(DHCP)
LED
亮起,这表示验证
NIC
连接器的
NIC
使用入门指南 23
连接器的
服务器上检索设置
DNS
服务器地址)。
LED
LED
呈
NAS

图
1-2. NIC
连接器
3
4
1
2
NIC 1 LED 3 NIC 1
1
为
NAS
系统配置网络
如果网络上已配备
DHCP
则通过
要访问
Settings
会自动为
NAS
Network Configuration
Network Configuration
(设置)→
(网络配置)。
注:如果网络上未配备
来完成
配置系统”。
注:默认情况下,已启用
到与连接有关的问题。
配置。有关详情,请参阅第
NAS
NIC 2 LED 4 NIC 2
2
地址
IP
DHCP
服务器,则无需配置
NAS
系统分配地址。如果网络中未配置
(网络配置)窗口配置
(网络配置)窗口,请单击
Control Panel
DHCP
Windows
(控制面板)→
服务器,则需要使用本地键盘、显示器和鼠标
页的“使用键盘、显示器和鼠标
23
防火墙。在访问远程系统时,可能会遇
系统的
DHCP
NAS
Start
地址,因为
IP
系统的
(开始)→
服务器,
地址。
IP
Network Configuration
24 使用入门指南

输入默认管理员用户名和密码
首次登录
NAS
系统时,必须输入管理员用户名和密码。
系统的默认
NAS
管理员用户名为 administrator,默认密码为 storageserver。
更改管理员密码
1 单击
Start
Computer Management
2 在
Computer Management
and Groups
3 在右侧窗格中,右键单击
Set Password
4 在
Set Password for Administrator
单击
Proceed
5 在相应字段中输入并确认密码,然后单击
6 关闭
Computer Management
(开始)→
Administrative Tools
(计算机管理)。
(计算机管理)窗口中,展开
(本地用户和组),然后选择
Administrator
(设置密码)。
(为管理员设置密码)窗口中,
(继续)。
(计算机管理)窗口。
(管理工具)→
Local Users
Users
(用户)。
(管理员),然后选择
(确定)。
OK
使用多语种用户界面本地化系统
系统允许您更改操作系统用户界面的母语。默认情况下,系统中安装
NAS
了多种语言。多语种用户界面
(MUI)
允许
NAS
系统用多种语言显示操作
系统菜单、对话框和帮助文件。
如果系统预配置了
操作系统,则
MUI
Windows Storage Server 2003 R2 x64 Edition
在区域设置和浏览器设置中都已预配置了本地化语言。
(含
无需用户干预。
要更改默认的浏览器语言:
1 打开
2 在
3 在
4 在
5 在
Too ls
General
Language Preference
Language
6 单击
Internet Explorer
(工具)菜单中,选择
(常规)选项卡中,单击
(语言)框中,选择语言。
(确定)。
OK
®
浏览器。
Internet Options(Internet
Languages
(语言)。
(语言首选项)窗口中,单击
(添加)。
Add
)
SP2
选项)。
使用入门指南 25

启动
Windows Storage Server Management Console(Windows Storage Server
管理控制台)显示在
当您登录到
操作系统时,系统将自动打开
Windows Storage Server
MMC
Windows Storage Server 2003 R2 x64 Edition
中,可供用户进行简单便捷的系统管理。
MMC
。
管理控制台
(含
SP2
)
要打开
Server
Windows Storage Server Management(Windows Storage Server
在
格中将显示
节点作为默认节点。中间窗格提供多种可供选择的方案,帮助您进行操作
系统管理。
访问
默认情况下,
MMC
有关详情,请参阅随系统附带的
您可以在主机上本地访问
从而利用
在主机上本地访问
MMC
菜单中未显示
Windows Storage Server Management Console(Windows Storage
管理控制台),单击
Microsoft Management Console(Microsoft
File Server Management (Local)
Microsoft
MMC
可用于进行磁盘管理和
MMC
被配置为
来配置存储设备。
Start
管理控制台
MMC
(开始)→
Microsoft Start
NFS
配置,还可用作常规的
Microsoft MMC
或用远程桌面连接来访问
All Programs
管理控制台)窗口中,左窗
(文件服务器管理 [本地])
(开始)菜单的一部分。
说明文件。
(所有程序)→
NAS
MMC
MMC
显示为主机上
MMC
Start
,则执行以下步骤:
(开始)菜单中的菜单项。如果
Start
管理)。
管理站。
,
(开始)
1 单击
2 键入 nas.msc,然后单击
注:
26 使用入门指南
(开始)→
Start
nas.msc
文件位于
(运行)。
Run
(确定)。
OK
c:\windows\system32
下。

使用远程桌面连接访问
MMC
使用远程桌面连接来进行远程服务器管理,可以减少与远程管理相关的额
外开销。用于管理的远程桌面通过终端服务技术实现,它是专门为管理服
务器而设计的。
对于访问服务器的客户机系统,用于管理的远程桌面不需要特殊许可。
此外,在使用用于管理的远程桌面时,无需安装终端服务器许可。
通过安装远程桌面连接,管理员也可以从运行
上全面管理运行
Windows Storage Server 2003 R2 x64 Edition
Windows
较早版本的系统
(含
的计算机。
注:要从远程系统连接至用于管理的远程桌面,请使用远程桌面连接。
创建指向您的桌面的远程桌面连接
要创建和保存指向
Windows Storage Server 2003 R2 x64 Edition
的远程桌面连接,请执行以下步骤:
1 单击
Start
2 键入 mstsc,然后单击
屏幕将显示
3 在
Remote Desktop Connection
机名称或存储服务器的
4 在
5 在
Connection Settings
Save As
名
.rdp
(开始)→
Remote Desktop Connection
(运行)。
Run
(确定)。
OK
(远程桌面连接)窗口。
(远程桌面连接)屏幕中,键入计算
地址,然后单击
IP
Options
(连接设置)下,单击
(选项)。
Save As
(另存为)。
(另存为)屏幕中,键入连接的名称,并包含默认的扩展
。
SP2
(含
)
SP2
)
6 在
然后单击
Save in
(保存到)下拉式菜单中,选择
Save
此连接已保存到您的桌
有关配置远程桌面连接的详情,请单击
(远程桌面连接)窗口中的
(保存)。
面上。
Help
Remote Desktop Connection
(帮助)。
Desktop
(桌面),
使用入门指南 27

Dell OpenManage Server Administrator
Dell OpenManage Server Administrator
管理解决方案,即通过操作系统使用一个集成的、基于
面(
OpenManage Server Administrator
借助于
网络上的
OpenManage Server Administrator
NAS
系统;同时,通过全面的、一对一的系统管理功能,
提供了一个全面的、一对一的系统
Web
主页)或使用命令行界面
浏览器的界
(CLI)
。
,用户能以本地和远程方式管理
可以将精力集中在整个网络的管理上。
注:如果您使用的是
以是独立式系统,也可以是在单独的机箱中装有多个网络连接存储器装置的
服务器,还可以是在机箱中安装了一个或多个服务器模块的模块化系统。
有关详情,请参阅
安装
OpenManage Server Administrator
OpenManage Server Administrator
Dell Systems Build and Update Utility
系统上安装、升级和卸载
NAS
OpenManage Server Administrator
介质提供了一个安装程序,用于在
OpenManage Server Administrator
,则所谓的系统既可
说明文件。
和其它
系统软件组件。也可采用无人参与安装方式,通过网络在多个系统上安装
OpenManage Server Administrator
使用
Dell Systems Build and Update Utility
所有支持的
统的系统上安装和升级
Windows Storage Server 2003 R2 x64 Edition
OpenManage Server Administrator
。
介质上的安装程序,可以在运行
(含
SP2
)操作系
。
要安装
1 将
OpenManage Server Administrator
Dell Systems Build and Update Utility
驱动器。
介质自动载入程序,并显示
(
Server Administrator
2 单击
Install, Modify, Repair or Remove Server Administrator
(安装、修改、修复或删除
3 在
License Agreement
然后单击
Next
28 使用入门指南
安装程序)窗口。
(许可协议)窗口中,阅读并接
(下一步)。
,请执行以下步骤:
介质插入系统的
CD/DVD
Server Administrator Installer
Server Administrator
)。
受此协议,
 Loading...