

Dell PowerConnect W-7200 Installation Manual
Dell PowerConnect W-7200 Series Fan Tray
1
2
3
Installation Guide
The Dell PowerConnect W-7200 Series controller is equipped with a field-replaceable, hot-swappable fan tray.
Each fan tray features four individual fans that pull air through the chassis from the front and sides through to
the rear. Each fan tray can tolerate the failure of a single fan while maintaining a safe operating temperature for
the controller.
Hot Swapping
Hot swapping allows you to replace a failed fan tray, making it unnecessary to shut down the W-7200 Series
controller during the replacement procedure.
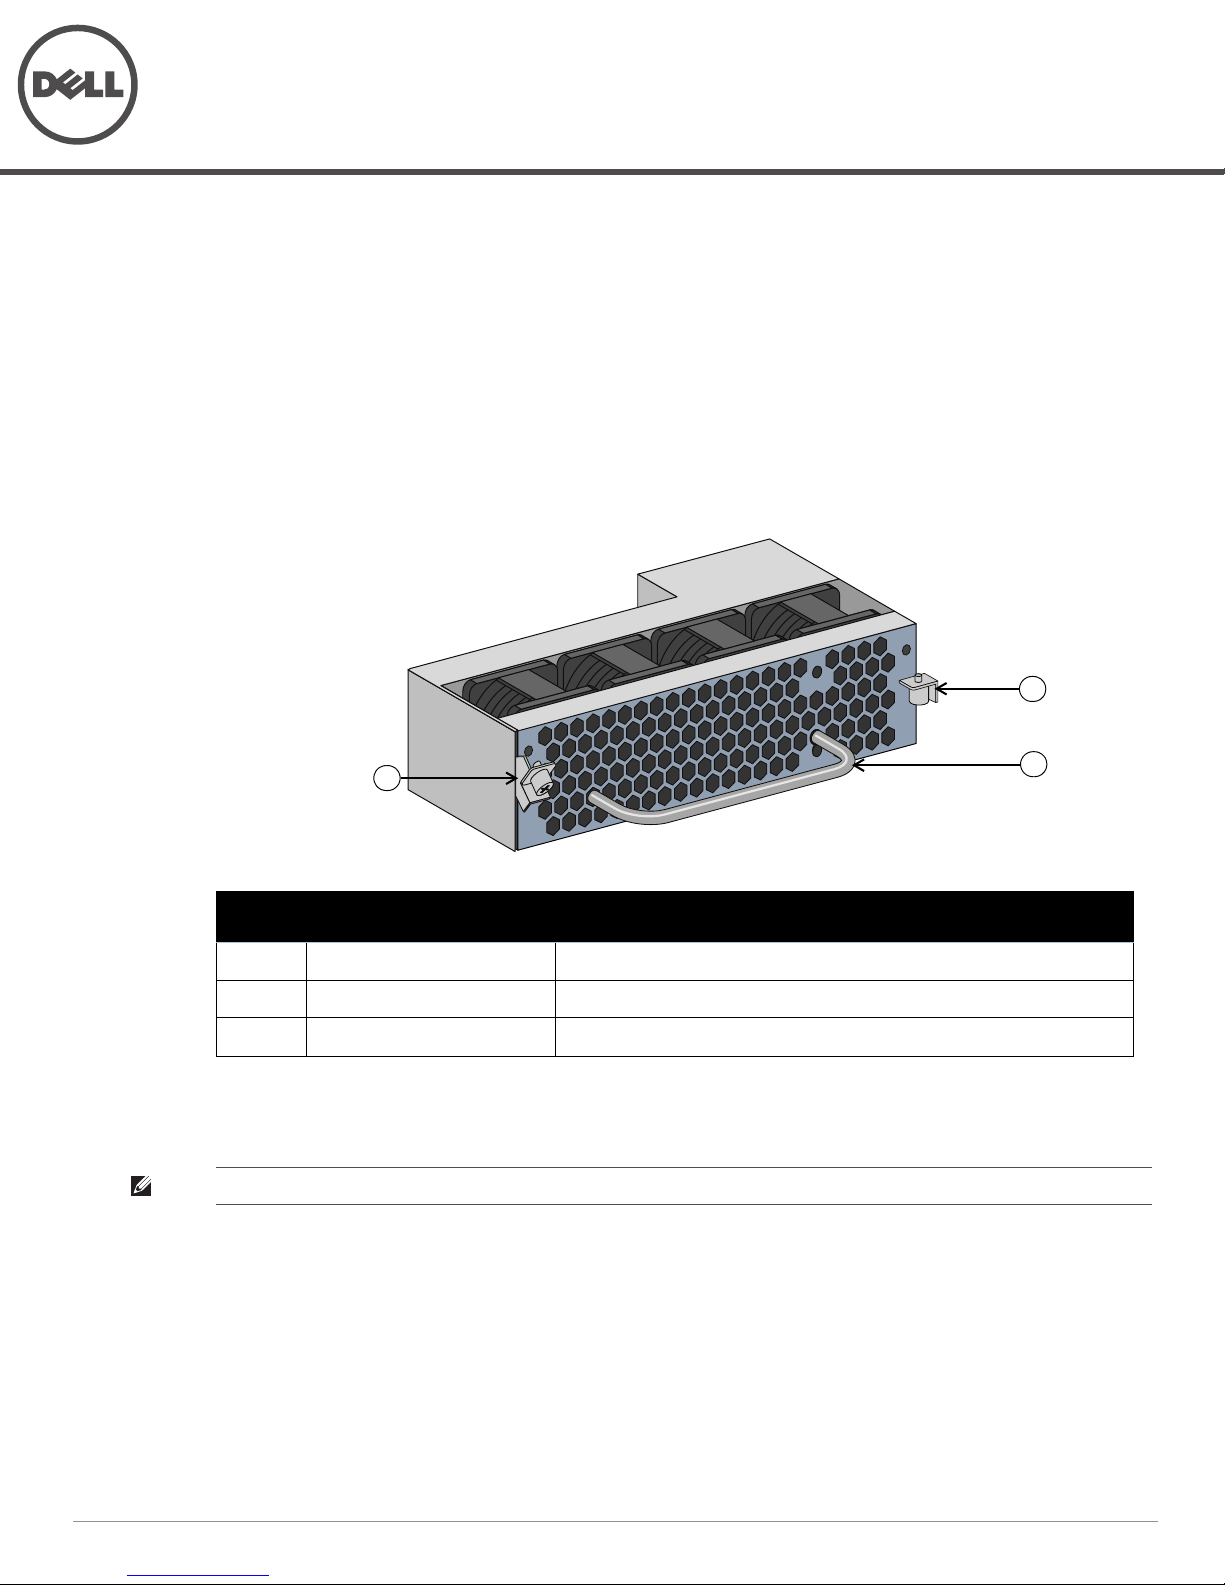
Figure 1
Callout Component Description
1 Left Latch Used to secure the left side of the fan tray to the chassis.
2 Right Latch Used to secure the right side of the fan tray to the chassis.
3 Handle Used to insert and remove the fan tray from the chassis.
Fan Tray
Installing and Removing a Fan Tray
NOTE: Use standard ESD precautions when installing or removing a fan tray module.
The fan tray is field-replaceable and hot-swappable. Hot-swapping allows you to replace the fan tray without
having to power down the W-7200 Series controller.
1. Remove the old fan tray.
a. Using a Phillips Head screwdriver, turn the hinged captive screws counter-clockwise until loose (they
cannot be removed completely).
b. Firmly grasp both of the hinged captive screws and pull the spring loaded hinge down until you are sure
the hinges are disengaged. Use the fan tray handle to pull the fan out.
0511262-01 | January 2013 1
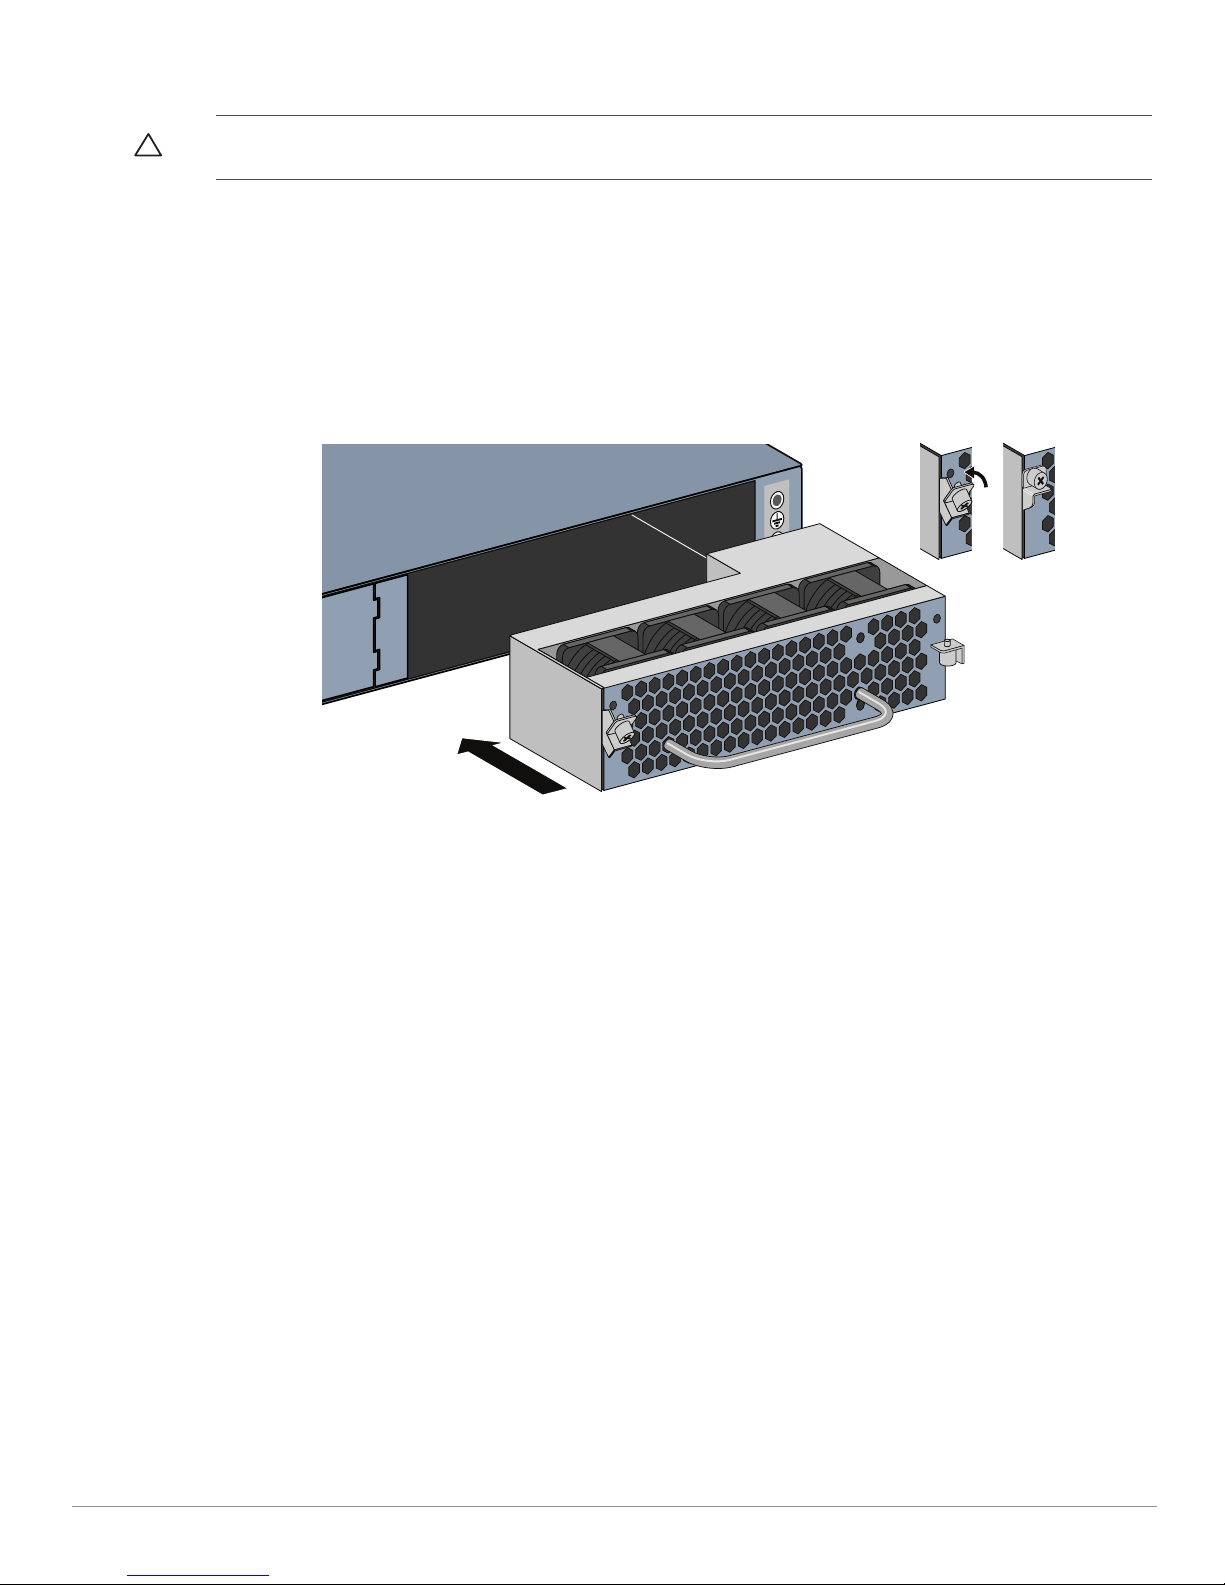
2. Align the new fan tray module with opening in the controller, as shown in Figure 2.
CAUTION: Ensure that fan tray module is correctly aligned with the opening on the W-7200 Series controller. Failure to do so can
result in damage to the fan tray module.
3. Pull down the hinged captive screws on the new fan tray module and align its tabs with the slots on either side
of the opening.
4. Slide the fan tray module into the controller.
5. Lift both the hinged captive screws into the lock position then secure the fan tray module by tightening the
captive screws.
Figure 2
Installing a Fan Tray
2 Dell PowerConnect W-7200 Series Fan Tray | Installation Guide
 Loading...