

Dell PowerConnect RPS720, PowerConnect MPS600, PowerConnect MPS1000 Getting Started Manual

Dell PowerConnect
RPS720, MPS600, MPS1000,
and MPS 1U Shelf
Getting Started
With Your System
Regulatory Model PowerConnect RPS720,
MPS600, and MPS1000

Notes, Cautions, and Warnings
NOTE:
your computer.
CAUTION:
instructions are not followed.
WARNING:
injury, or death.
A NOTE indicates important information that helps you make better use of
A CAUTION indicates potential damage to hardware or loss of data if
A WARNING indicates a potential for property damage, personal
____________________
Information in this publication is subject to change without notice.
© 2010 Dell Inc. All rights reserved.
Reproduction of these materials in any manner whatsoever without the written permission of Dell Inc.
is strictly forbidden.
Trademarks used in this text: Dell™, the DELL logo, and PowerConnect™ are trademarks of Dell
Inc. EMC
Other trademarks and trade names may be used in this publication to refer to either the entities claiming
the marks and names or their products. Dell Inc. disclaims any proprietary interest in trademarks and
trade names other than its own.
Regulatory Model PowerConnect RPS720, MPS600, and MPS1000
November 2010 P/N KPCT8 Rev. A00
®
is a registered trademark of EMC Corporation.
Features
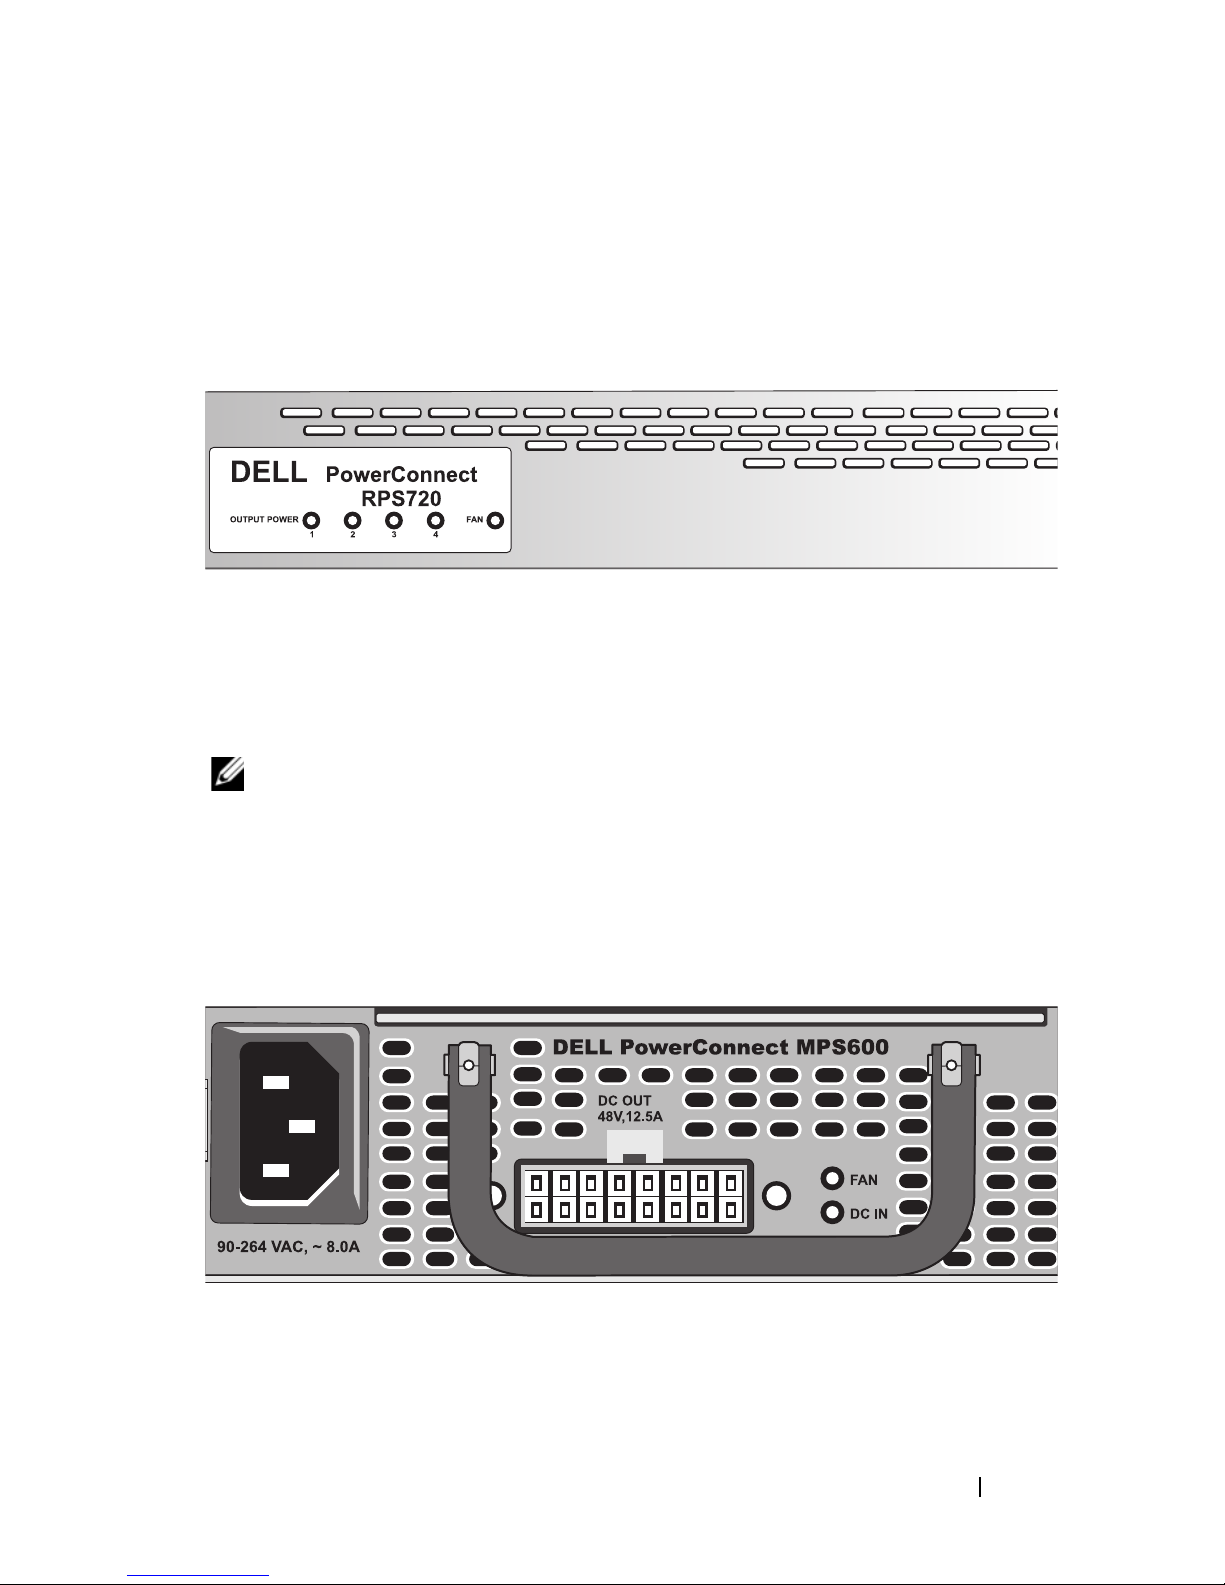
Dell PowerConnect RPS720
Figure 1-1. Front Panel Indicators-PowerConnect RPS720
• Supports up to four PowerConnect switches through 12 V DC output
• Dedicated 180 W power supply for up to four connected switches
• Front panel LEDs display status of individual power supplies
• 1U, 19-inch rack mountable system
NOTE:
redundant power supplies for your PowerConnect switches, eliminating the power
supply as a single point of failure.
The PowerConnect RPS720 redundant power bank provides four external
Dell PowerConnect MPS600
Figure 1-2. Front Panel Indicators-PowerConnect MPS600
• Supports one PowerConnect 55xxP (PoE) switch through 48 V DC output
• Dedicated 600 W power supply for one connected switch
• Front panel LEDs display status of the power supply
Getting Started With Your System
3
• 1U, 19-inch rack mountable system with brackets
• Up to three MPS600 units in a MPS 1U Shelf (density–3per 1U, 19-inch rack)
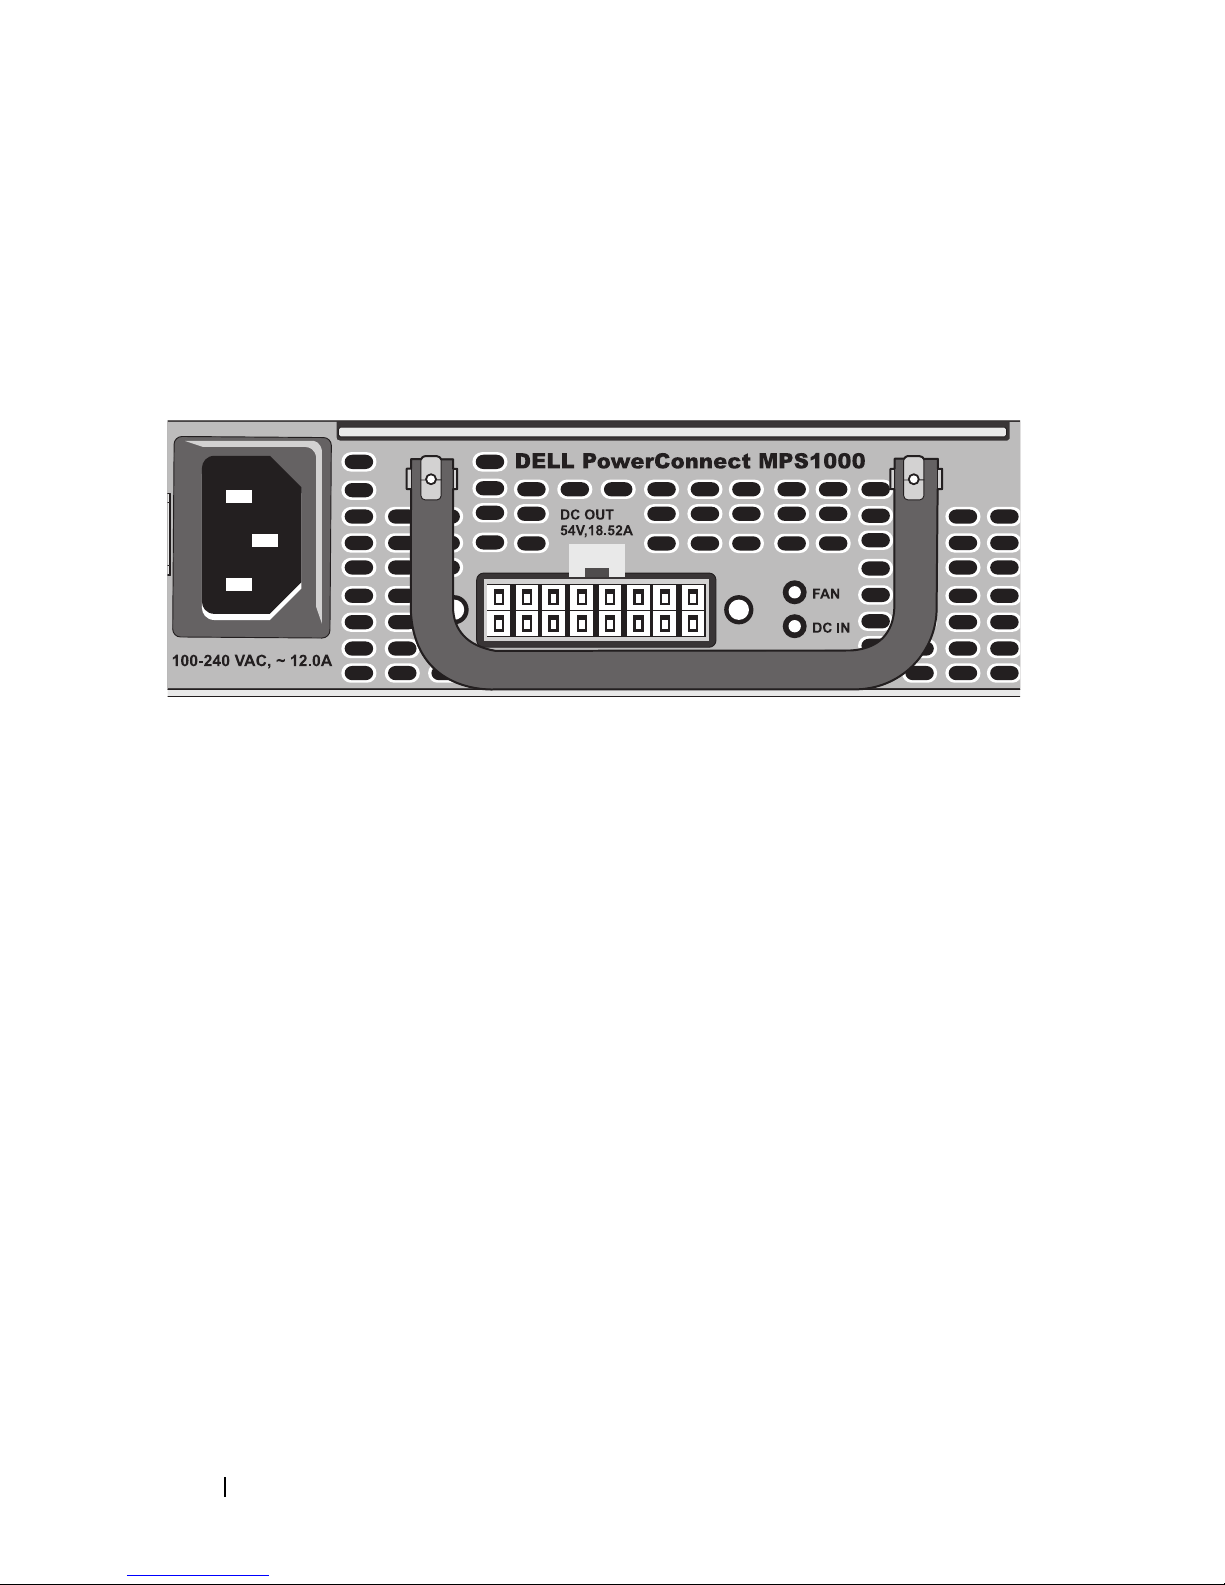
Dell PowerConnect MPS1000
Figure 1-3. Front Panel Indicators–PowerConnect MPS1000
• Supports one PowerConnect 70xxP (PoE+) switch through 54 V DC output
• Dedicated 1000 W power supply for one connected switch
• Front panel LEDs display status of the power supply
• 1U, 19-inch rack mountable system with brackets
• Up to three MPS1000 units in a MPS 1U Shelf (density–3 per 1U,
19-inch rack)
Unpacking
Package Contents
Before you install the RPS720, MPS600, MPS1000, or MPS 1U Shelf, verify
your package contents for:
• One of the following units:
– RPS720—Redundant power bank (supports up to four switches)
– MPS600—Modular power supply 600 watts
– MPS1000—Modular power supply 1000 watts
– MPS 1U Shelf—Mechanical shelf holds up to three MPS600,
MPS1000, or a combination
4
Getting Started With Your System

• Rack mounting kit
• AC power cord:
– RPS720—Type C13 plug
– MPS600—Type C13 plug
– MPS1000—Type C15 plug (with notch)
• Switch DC power cords:
– RPS720—14-pin DC power cords (4)
– MPS600—16-pin DC power cord (1)
– MPS1000—16-pin DC power cord (1)
Installation
WARNING:
instructions that came with the system.
CAUTION:
consult your PowerConnect Switch User's Guide to confirm that your switch
supports the PowerConnect RPS720 redundant power bank or the
MPS600/MPS1000 external power supply.
Before performing the following procedure, review the safety
Before you install the PowerConnect RPS720, MPS600, or MPS1000,
PowerConnect RPS720
Installing PowerConnect RPS720 on a Flat Surface
You can install the PowerConnect RPS720 on any appropriate level surface
that can safely support the weight of the switches, the PowerConnect
RPS720, and their attached cables. There must be adequate space around
the PowerConnect RPS720 for ventilation and to access cable connectors.
CAUTION:
and 5 inches (12.7 cm) at the back for power cord clearance.
1
Set the RPS720 on a flat surface and check for proper ventilation.
2
Attach rubber feet (optional) on each marked location at the bottom of
the chassis.
NOTE:
from slipping.
Allow at least 2 inches (5.1 cm) on each side for proper ventilation
Although optional, rubber feet are recommended to keep the unit
Getting Started With Your System
5
 Loading...