

Dell 5880-27, NRMUNDP-1D User Manual

3
Dell™ Latitude™ E6400 XFR
Setup and Features Information
WARNING: A WARNING indicates a potential for property damage, personal injury,
or death.
CAUTION: A CAUTION indicates either potential damage to hardware or loss of data and tells
you how to avoid the problem.
NOTE: A NOTE indicates important information that helps you make better use of your
computer.
23
Front View
26
25
24
22
21
20
19
28
18
1
2
4
5
6
7
8
9
10
11
12
13
14
15
17
16
December 2008

Dell™ Latitude™ E6400 XFR Setup and Features Information
1 Microphone 2 Camera light (optional)
3 Display latch and release 4 Camera (optional)
5 DirectVue™ Outdoor-Readable Display
(optional touchscreen)
7 Volume control buttons 8 Power button
9 USB connectors (2) 10 Wi-Fi Catcher™ Network Locator
11 Wireless switch 12 Audio connectors (2)
13 Right speaker 14 SIM card reader
15 Media bay (with optical drive) 16 PC or PC-Express card slot (base dependent)
17 IEEE 1394a connector 18 Fingerprint reader (optional)
Contactless smart-card reader (see Smart
19
Cards)
21 Handle (with optional touchscreen stylus)
23 Touch pad 24 Left speaker
25 Track stick (not available on sealed
rubber keyboard)
27 Device status lights 28 Ambient light sensor
6 Keyboard status lights
20 Secure Digital (SD) memory-card reader
22 Touch pad buttons/Track stick buttons
26 Keyboard
Back View
1
2
3
4
5
1 PR-481™ Ultra-Performance Chassis Material 2 RJ-11 modem connector
3 RJ-45 network connector 4 Battery access panel
6
7
8
9
10
13
12
11
Page 2
01/08/09
Dell™ Latitude™ E6400 XFR Setup and Features Information
5 Battery/power lights 6 Multimode DisplayPort
7 AC adapter 8 Security cable slot
9 Video connector 10 eSATA/USB connector
11 USB PowerShare connector
13
Smart-card reader (see Smart Cards)
12 Hard Disk Drive
WARNING: Do not block, push objects into, or allow dust to accumulate in the air
vents. Do not store your Dell™ computer in a low-airflow environment, such as a
closed briefcase, while it is running. Restricting the airflow can damage the computer
or cause a fire. The computer turns on the fan when the computer gets hot. Fan noise
is normal and does not indicate a problem with the fan or the computer.
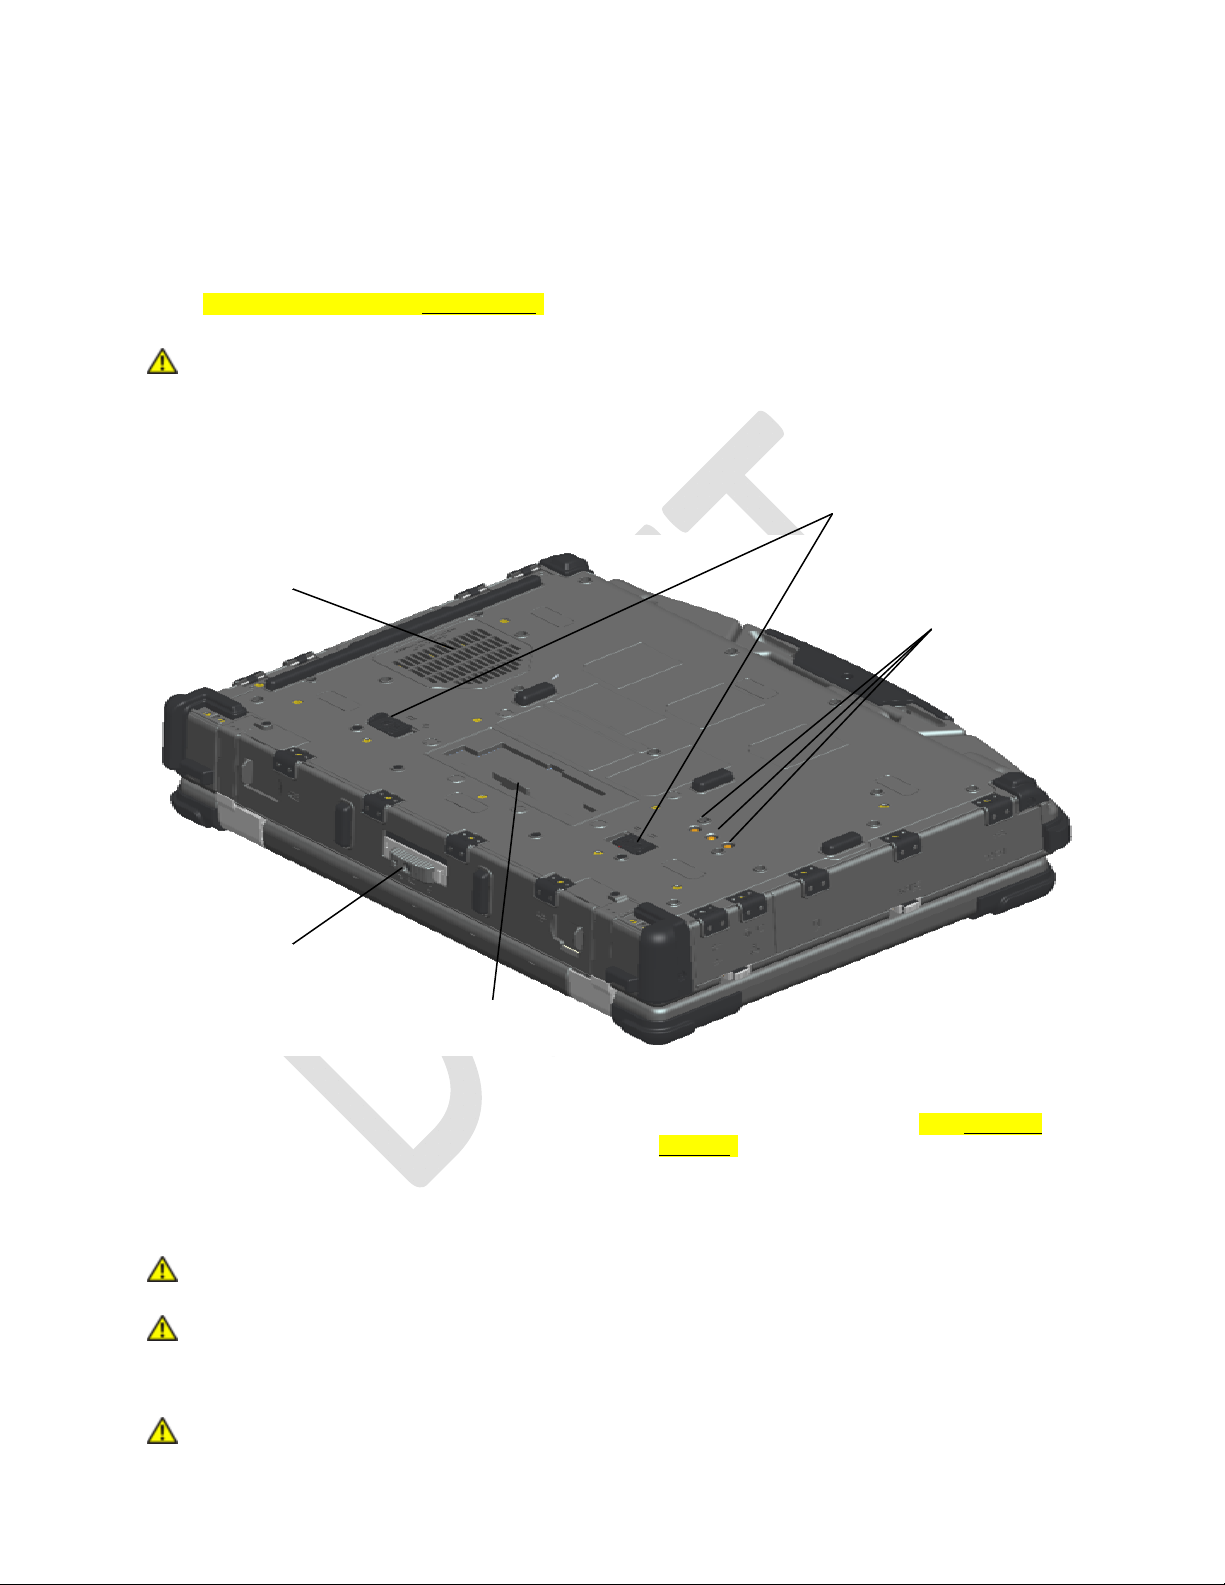
Bottom View
5
1
4
2
3
1 QuadCool™ thermal management 2 Battery access panel
3 Sliding cover to docking device connector 4
RF pass-through connectors (see RF Passthrough)
5 Battery latch release
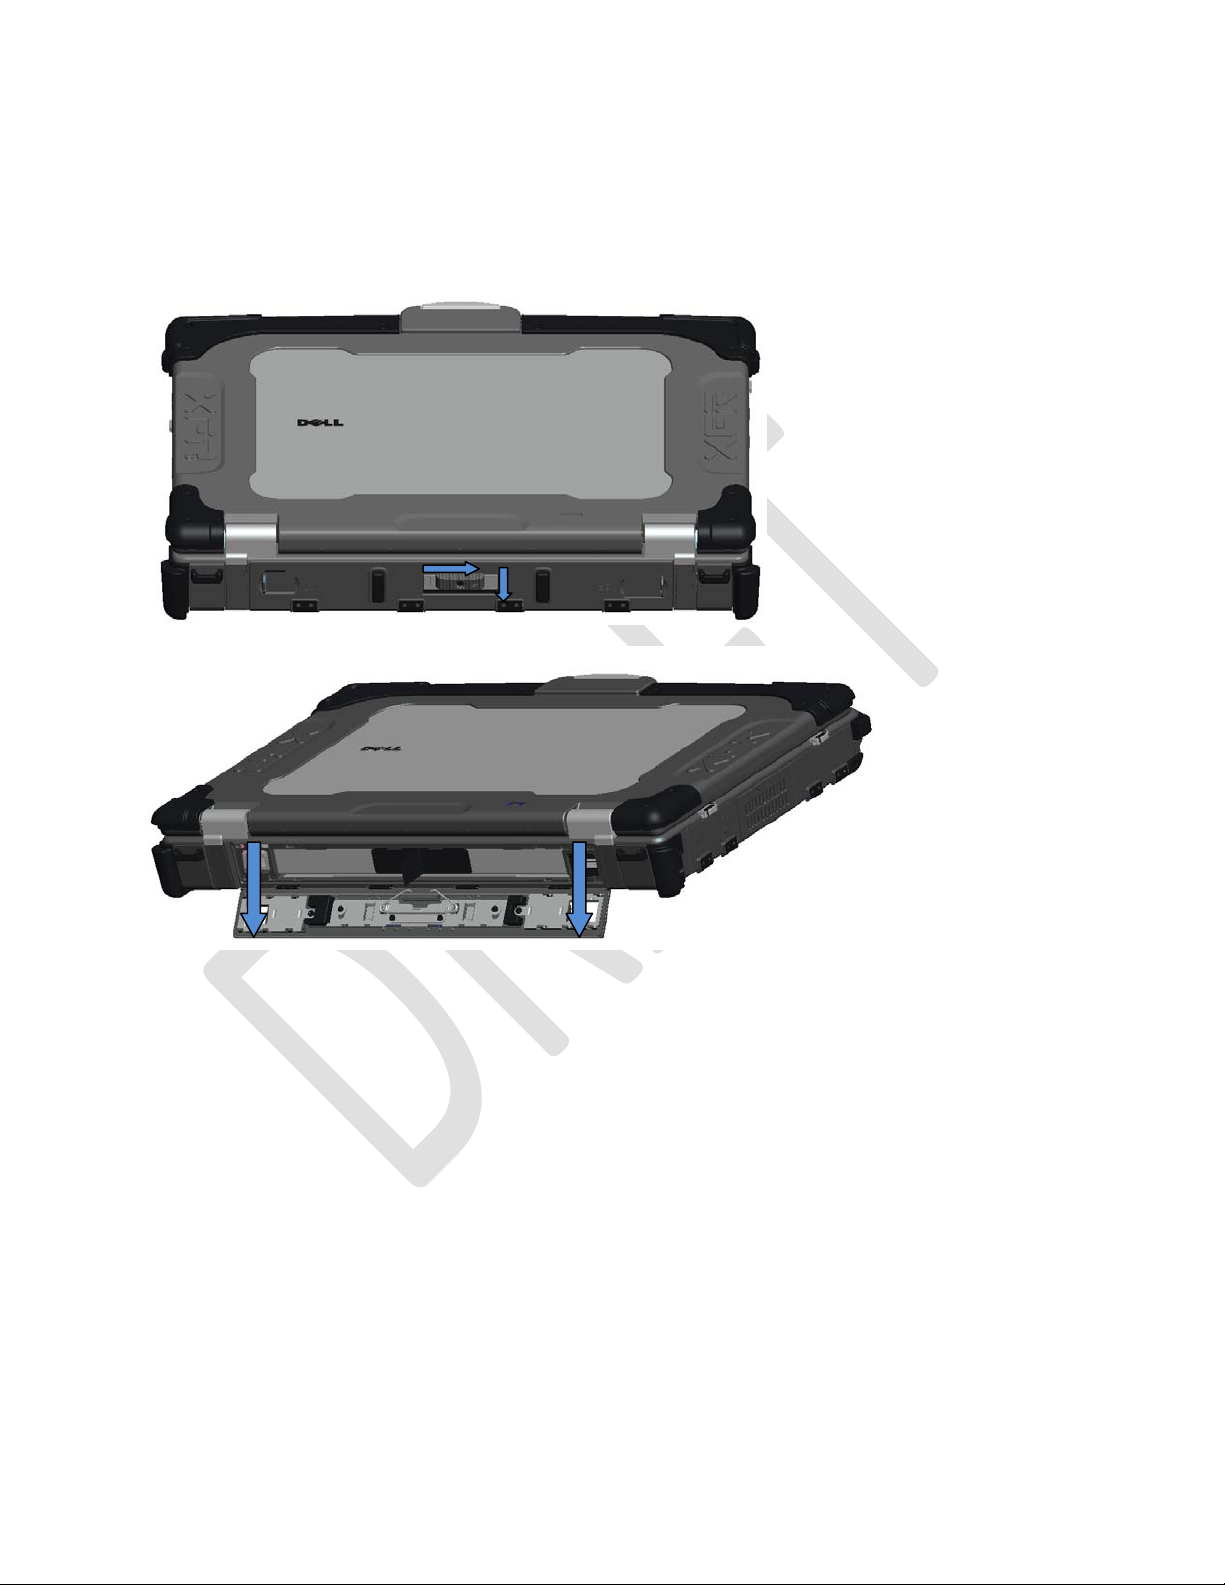
Battery Removal
CAUTION: Before you begin any of the procedures in this section, follow the safety
instructions that shipped with your computer.
CAUTION: Using an incompatible battery may increase the risk of fire or explosion.
Replace the battery only with a compatible battery purchased from Dell. The battery is
designed to work with your Dell computer. Do not use a battery from other computers
with your computer.
CAUTION: Before removing or replacing the battery, turn off the computer, disconnect
Page 3
01/08/09
Dell™ Latitude™ E6400 XFR Setup and Features Information
the AC adapter from the electrical outlet and the computer, disconnect the modem
from the wall connector and computer, and remove any other external cables from the
computer.
1. Release the rear panel.
a. Push the latch to the right, to its unlocked position.
b. Then, press the latch down.
b
2. Lower the rear panel.
3. Press in the two battery release latches on the bottom of the computer.
Page 4
01/08/09
Dell™ Latitude™ E6400 XFR Setup and Features Information
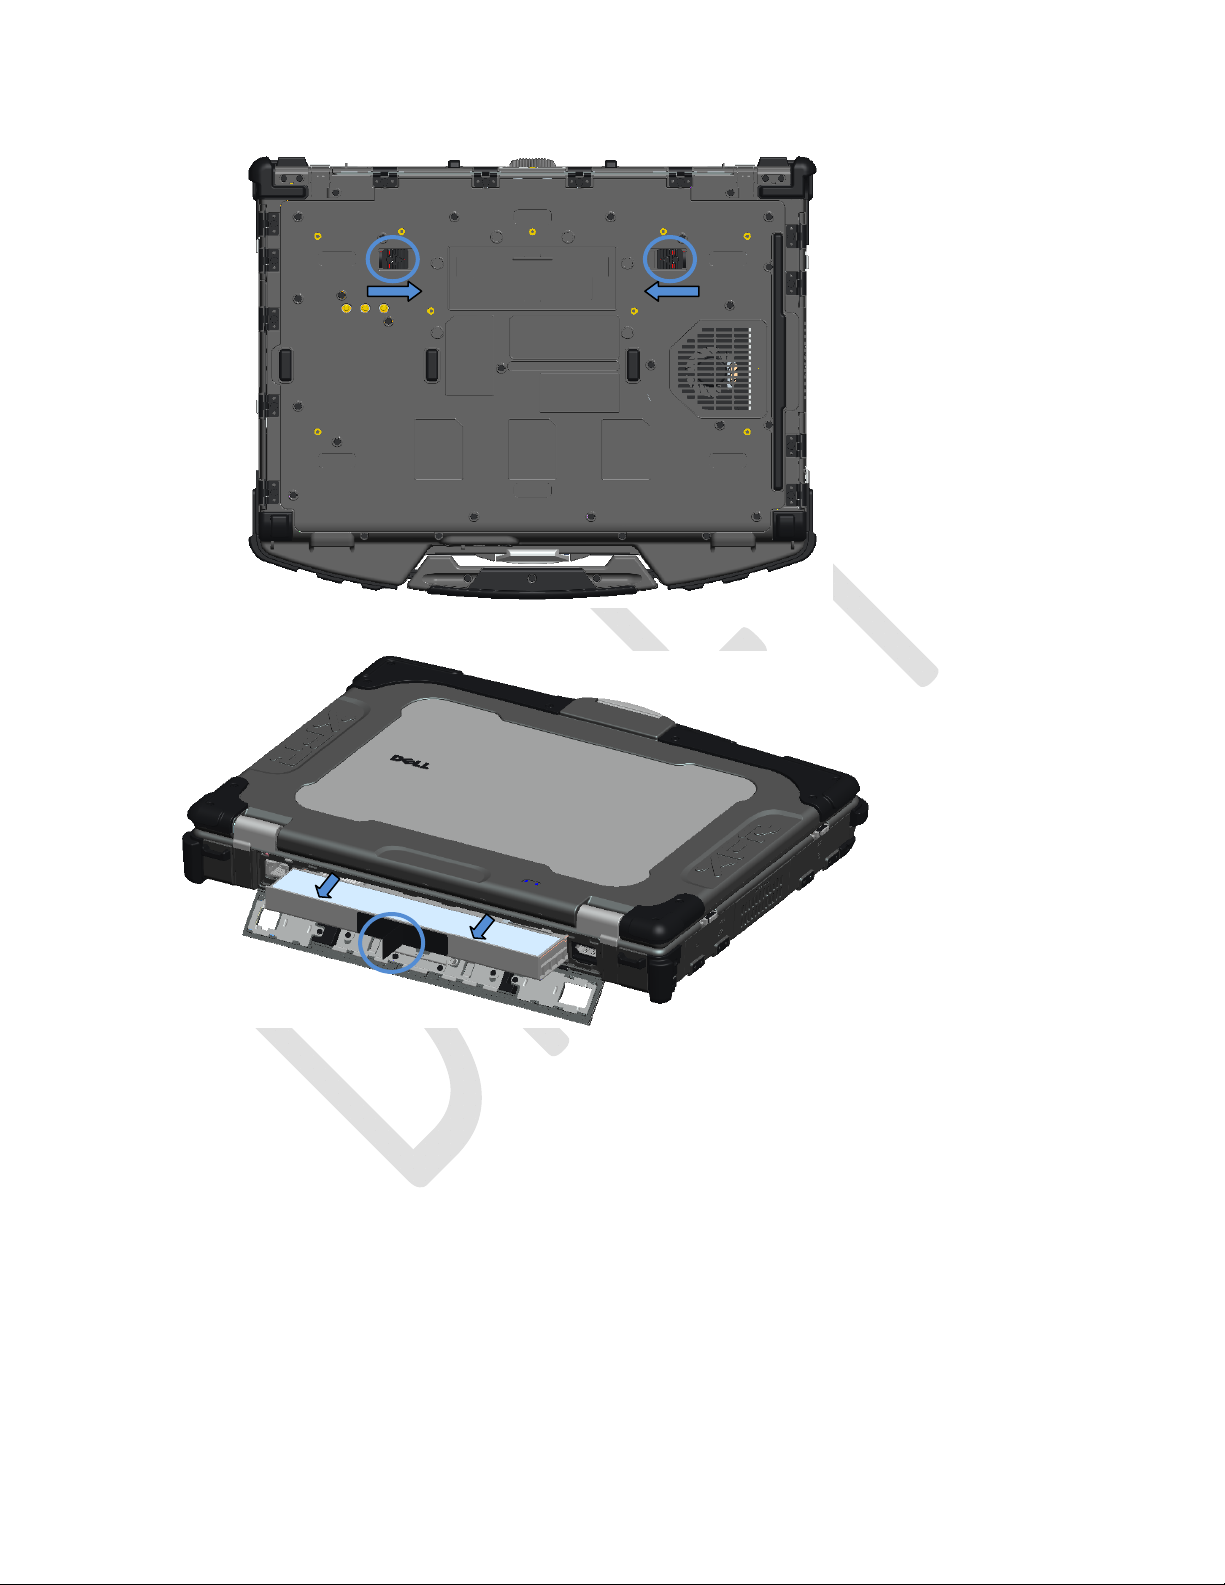
4. Use the tab on the edge of the battery to remove the battery from the computer.
Battery Installation
1. Insert battery until you hear a click and a mechanical stop.
2. Push the latch down and rotate the door into place.
3. Ensure the door is in the fully closed position, raise the latch up and then push the latch to the
left into the locked position.
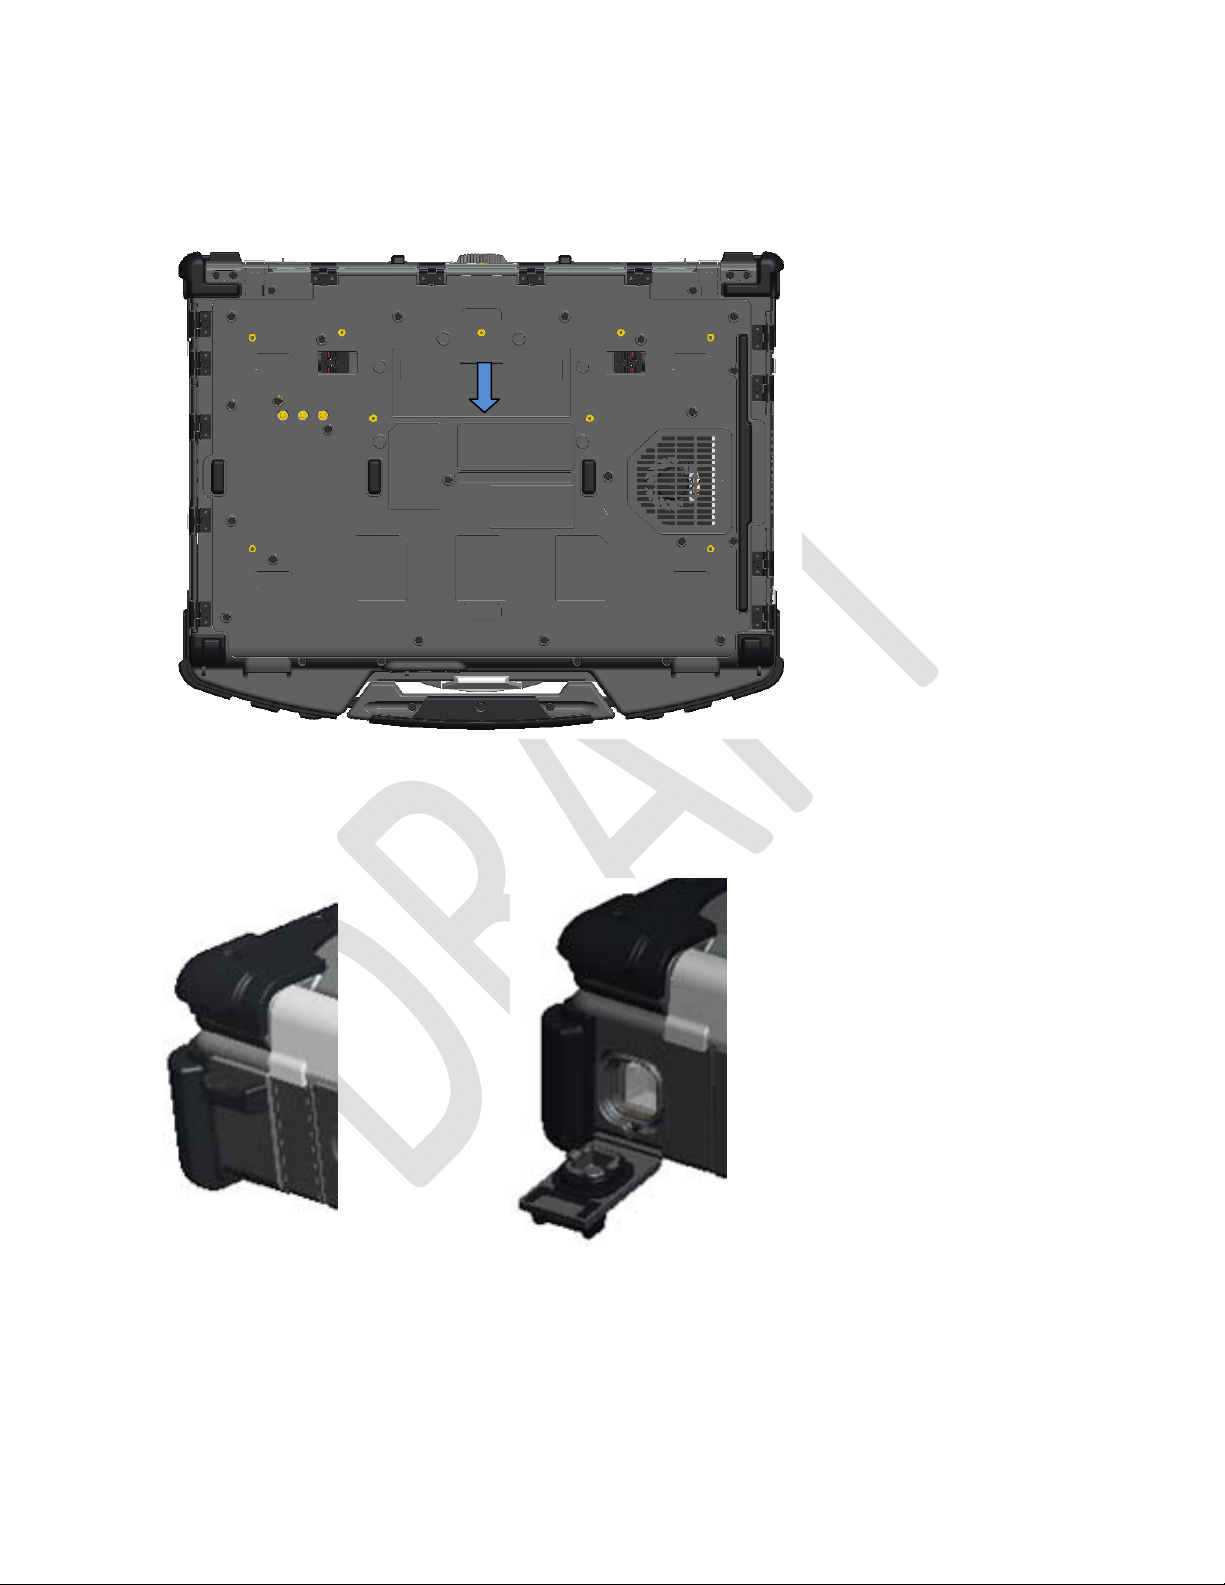
Hard Disk Drive Removal
1. Open the hard disk drive door located on the left side panel by pushing the latch towards the
rear of the computer,
Page 5
01/08/09

Dell™ Latitude™ E6400 XFR Setup and Features Information
and rotating the door down.
2. To remove the hard disk drive:
a. While pressing in the release tab on the right side of the hard disk drive compartment,
b. Use the tab on the edge of the hard disk drive to pull the hard disk drive from the
compartment.
a
b
Hard Drive Installation
1. Insert hard drive until you hear a click and a mechanical stop.
2. Rotate the door into place and press until it clicks into its closed position.
Operation of the PrimoSeal™ Doors
Page 6
01/08/09
Dell™ Latitude™ E6400 XFR Setup and Features Information
Docking Device Connector Door
The docking device connector door is opened by sliding the door towards the front of the computer
until it clicks into its open position. Reverse this procedure to close the door.
Press-Fit Door
The press-fit door is opened by inserting a finger into the door slot and pulling the door away from the
computer. To close the door, rotate it back into its closed position and press until it you hear it click
into position.
Latch Door
The latch door is opened by sliding the latch towards the rear of the computer, and then rotating the
door down. To close the door, rotate the door back into its closed position and press until you hear it
click into position.
Page 7
01/08/09
 Loading...