

Page 1
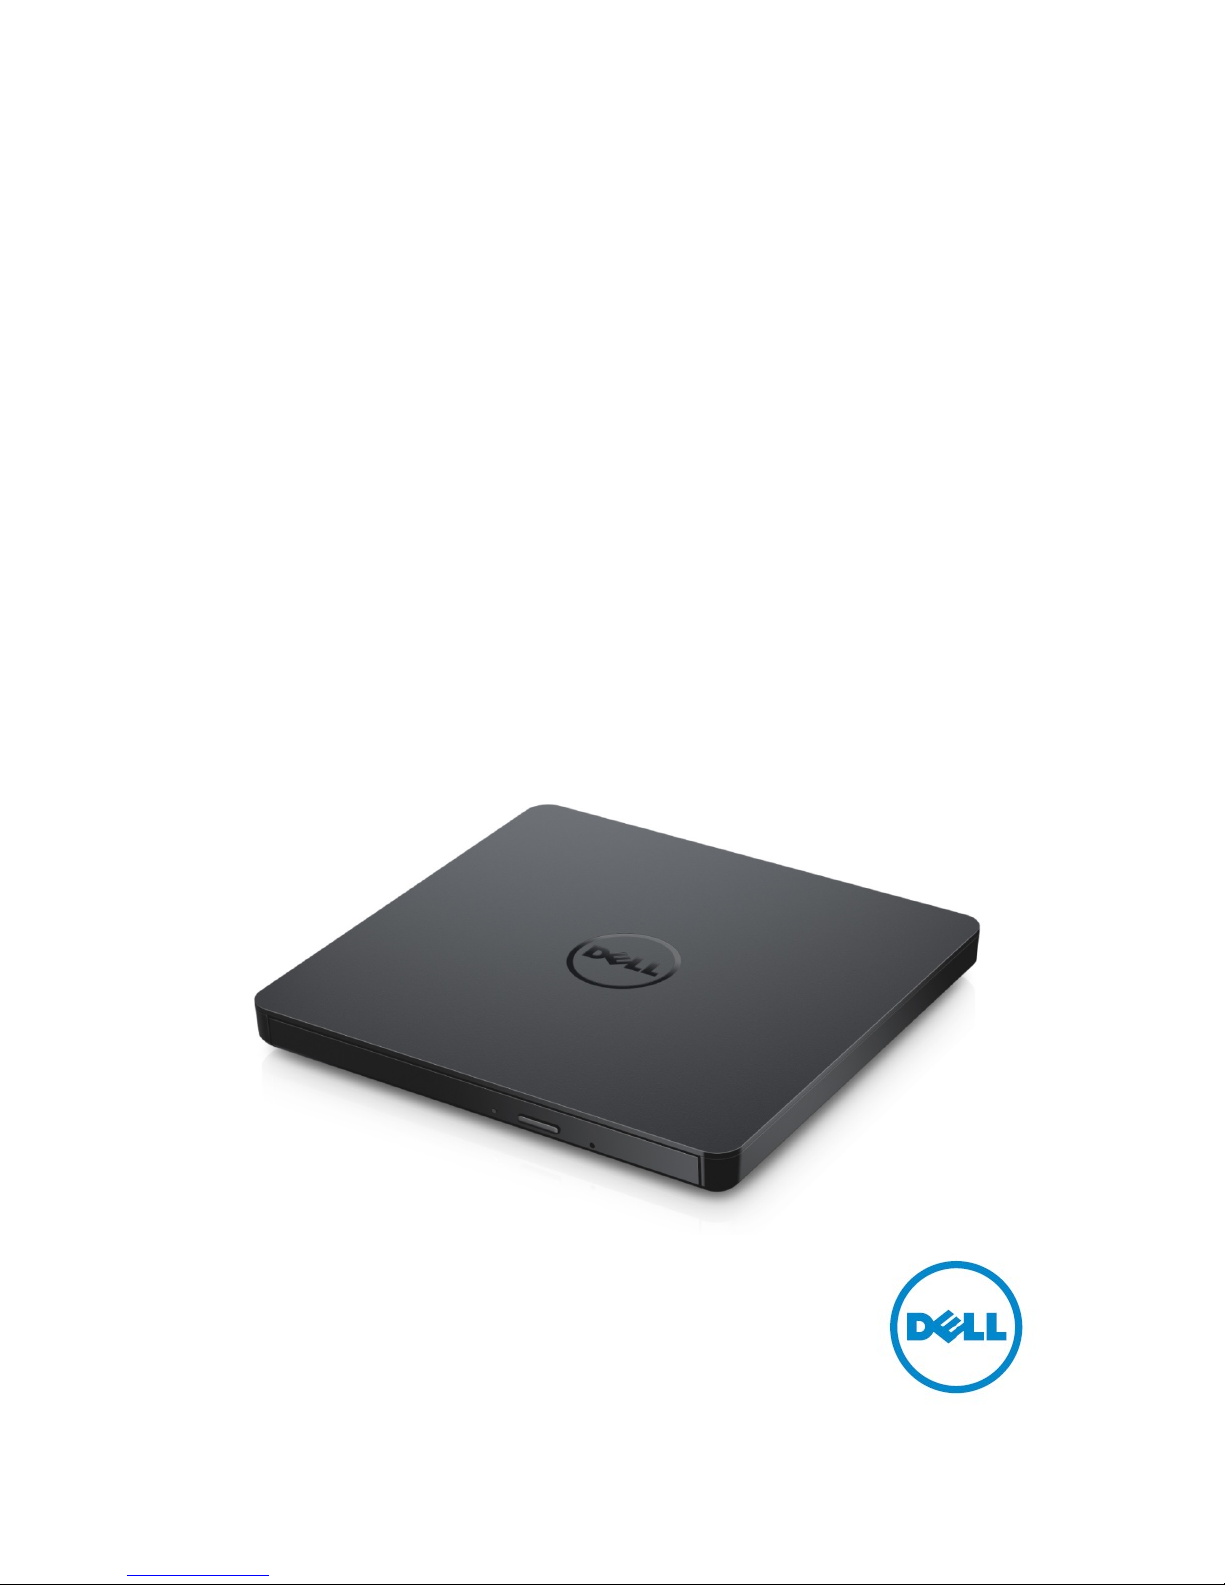
Dell External USB Slim DVD-ROM
Optical Drive-DP61N
User’s Guide
Page 2

NOTE: A NOTE indicates important information that helps you make better use of your computer.
CAUTION: A CAUTION indicates potential damage to hardware or loss of data if instructions are
not followed.
WARNING: A WARNING indicates a potential for property damage, personal injury, or death.
Copyright © 2015 Dell Inc. All rights reserved. This product is protected by U.S. and international copyright
and intellectual property laws. Dell™ and the Dell logo are trademarks of Dell Inc. in the United States and/or
other jurisdictions. All other marks and names mentioned herein may be trademarks of their respective
companies.
2015 -05 Rev. A0 0
Page 3
Contents
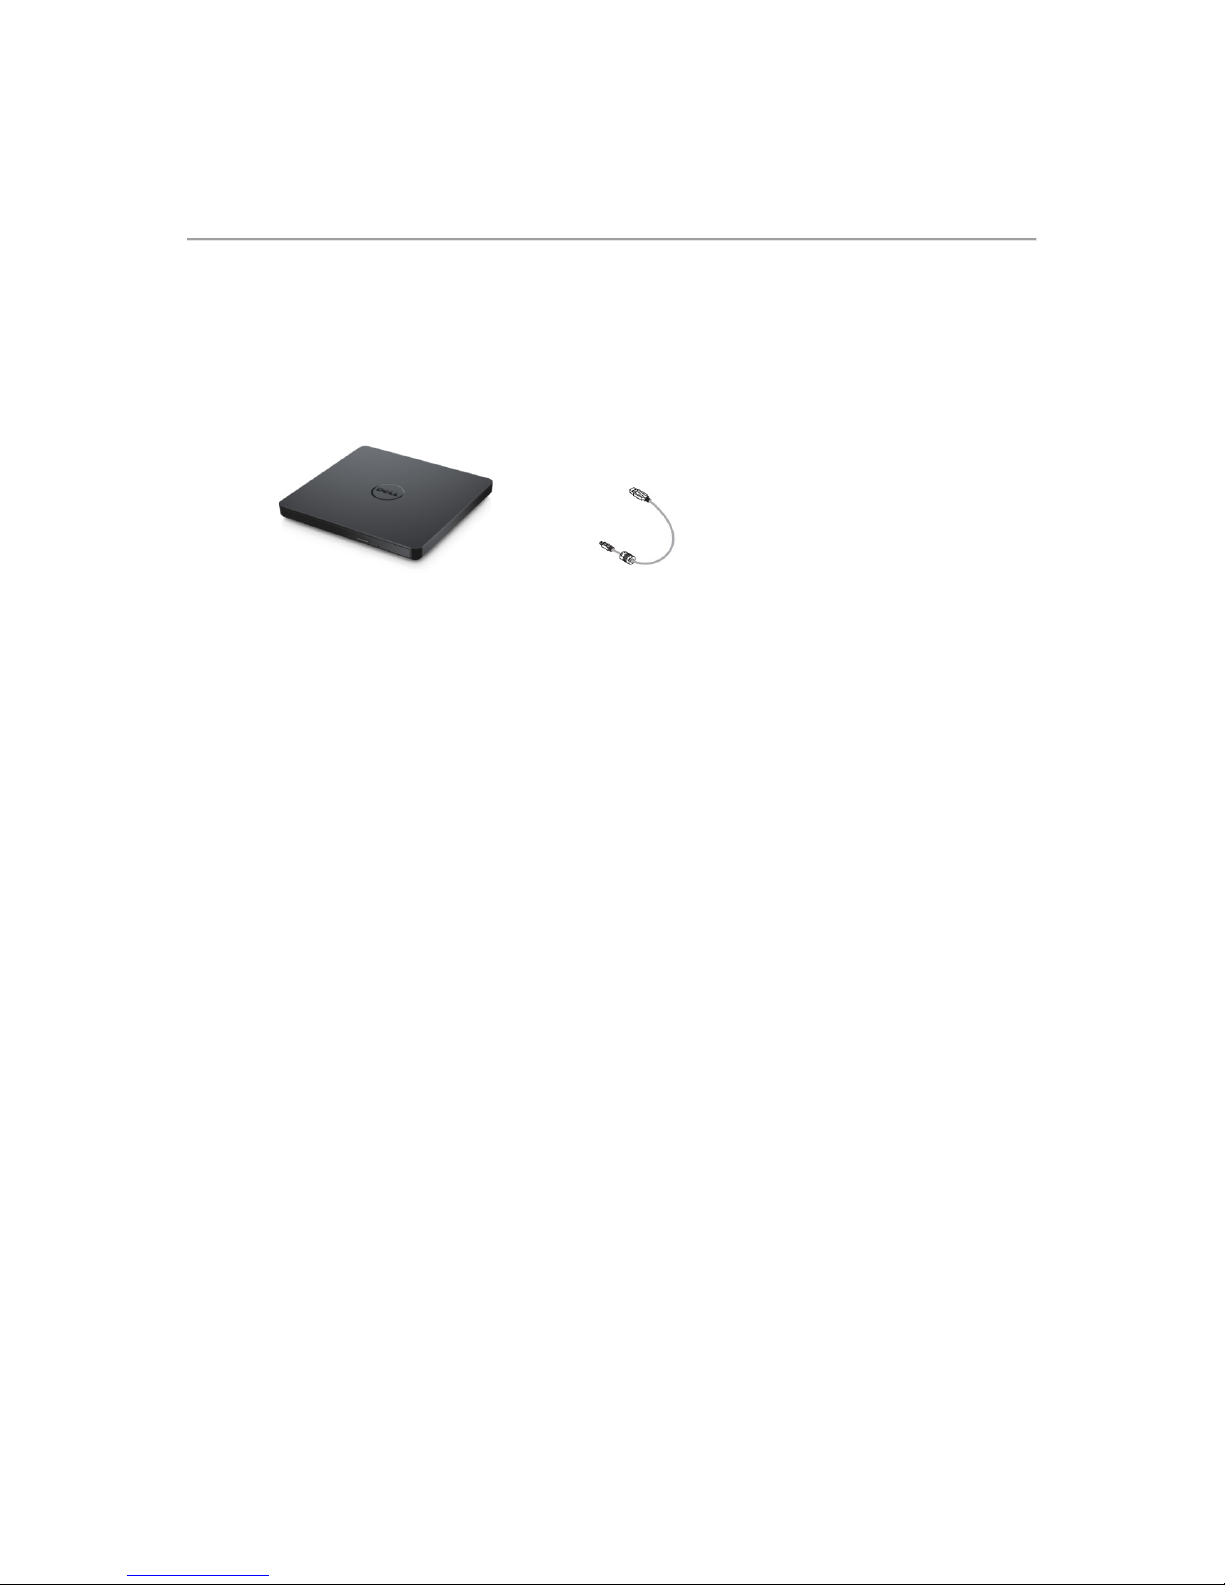
a. Dell External USB Slim DVD-ROM Optical Drive-DP61N
b. USB cable (600 mm)
a. b.
Page 4

Index
Introduction
Using the Drive
Connectivity
Troubleshooting
Specifications
Regulatory
Information in this document is subject to change without notice.
Page 5

Introduction
Drive Description
This is a read only drive and reads CD and DVD media (Refer to Specification section for
specific media types). This drive has a slim form factor.
Special Features Of The Drive
• USB 2.0 Interface (480 Mbits/s).
• Drawer load type, portable slim USB DVD-ROM Drive.
• CD-R/RW, DVD-R/RW/RAM/+R/+RW/+R DL/-R DL, M-DISC (DVD+R SL) read
compatible.
• CD Family and DVD-ROM read compatible.
• Improved Buffer Under Run Error handling through the Preventive function.
1. Supports both 12 cm and 8 cm standard round-type disc.
2. PC USB powered, no AC adaptor needed.
3. Eject button to eject the disc when the optical drive is being connected and
powered by computer.
4. Emergency Eject hole to manually eject the disc in case of a drive failure or a
power outage.
Page 6
Using the Drive
Front Panel
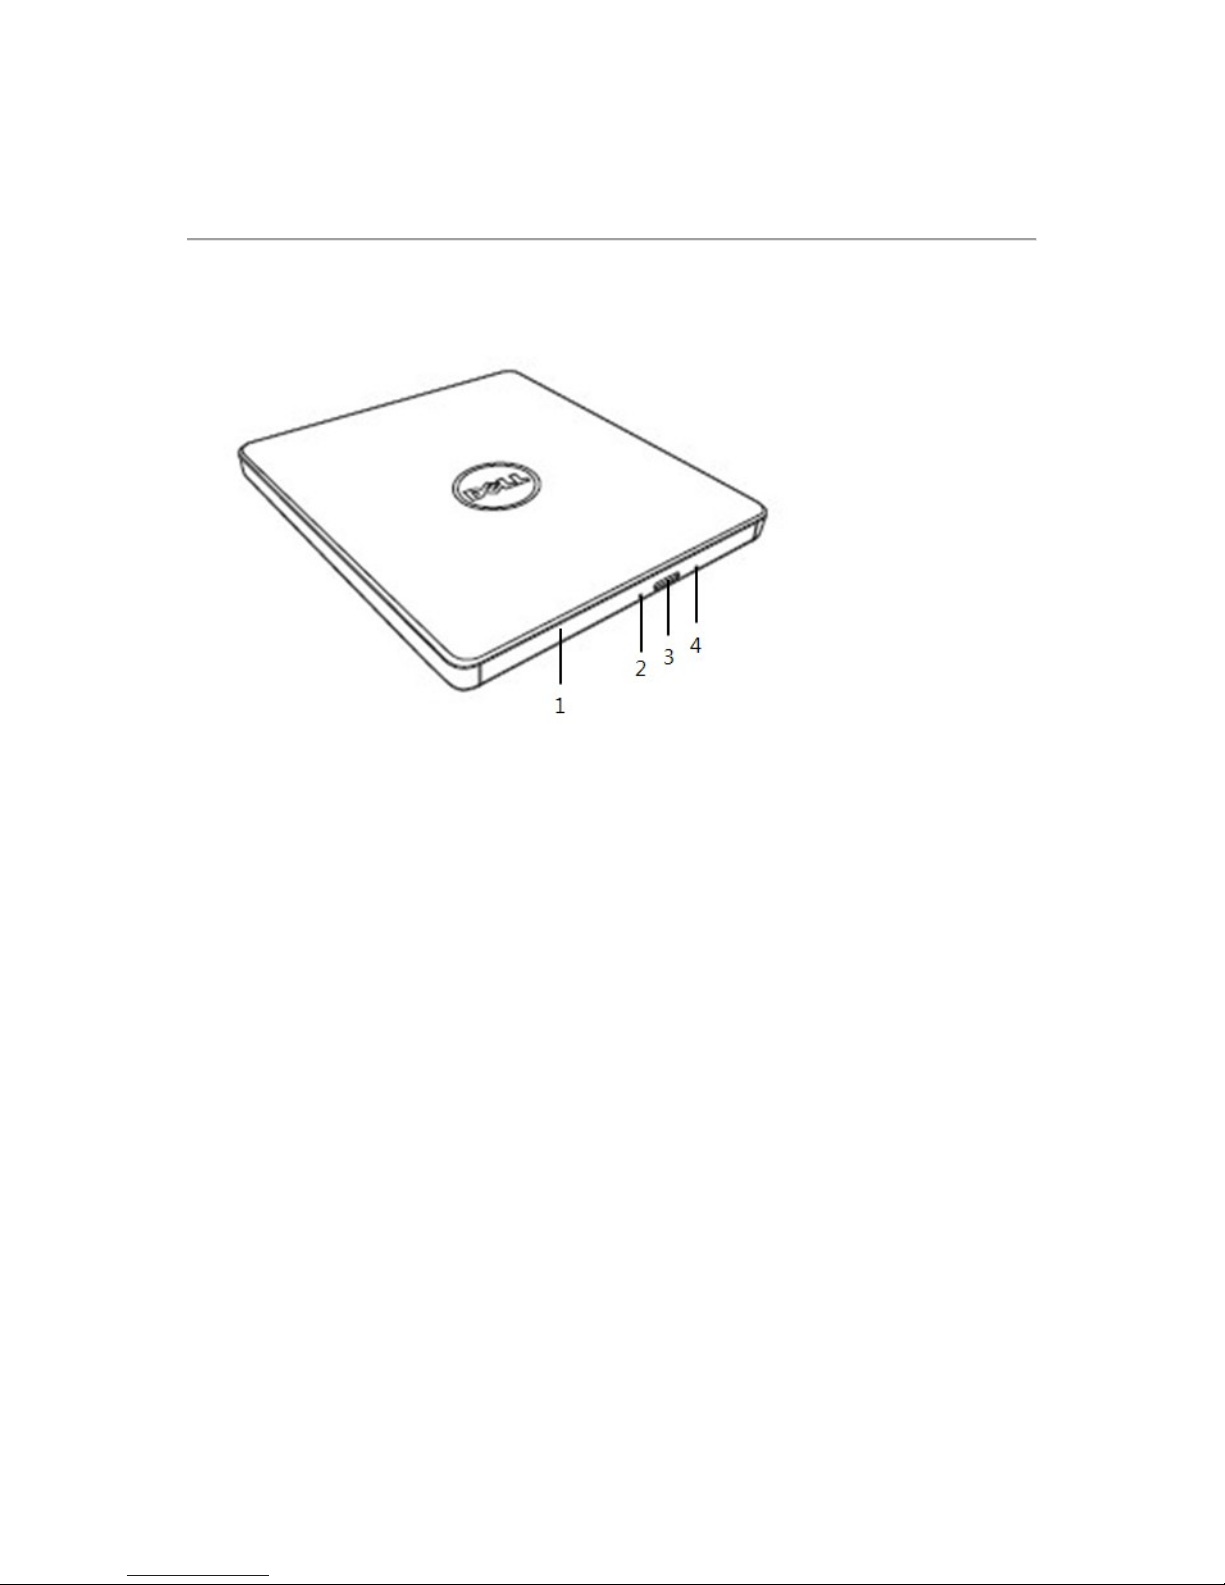
1. Disc Tray
The disc tray opens automatically when you press the eject button. When you
place a disc in the tray, ensure that the label on the disc is facing outwards. If you
are not loading or unloading a disc, the tray should remain closed.
2. Indicator Light
The light blinks when there is drive activity.
3. Eject Button
Press this button to open the disc tray. This button works only when power is
supplied to the drive.
4. Emergency Eject Hole
If the disc tray does not open when you press the eject button, power off the
computer, insert a pin or unfolded paper clip in the hole and push firmly. Refer to
Emergency Eject instructions below.
Page 7
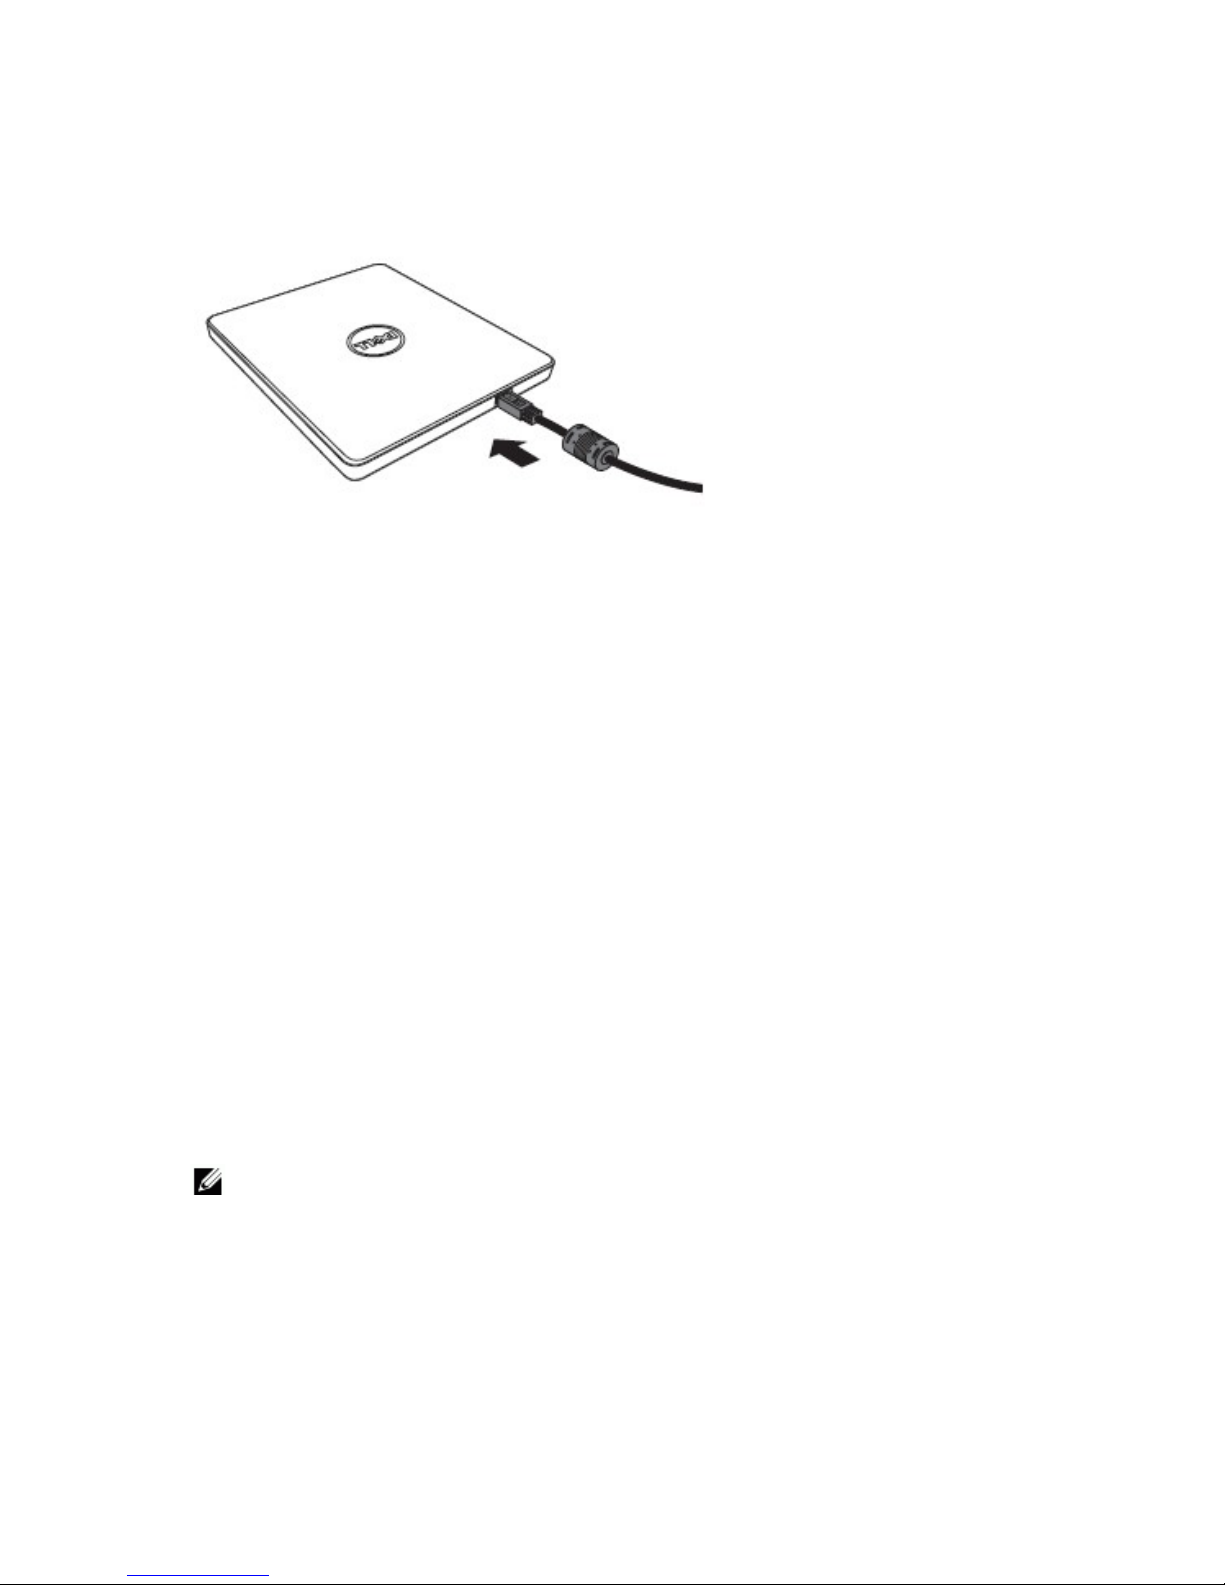
Rear Panel
1. USB port
Connect to the computer’s USB port.
Drive Operation:
Inserting a Disc
• Press the eject button. The disc tray will be ejected.
• Place the disc in the center of the tray with the label side facing up.
• Push disc onto hub until secure.
• Push the disc tray by hand and completely close.
Removing a Disc
• Press the eject button. The disc tray will be ejected.
• Remove the disc.
• Push the disc tray till it closes completely.
NOTE:
During some drive activities, the drive will not allow the tray to open even
when the eject button is pressed.
Usage Guidelines
• Do not press down on the disc tray when it is in opening or closing operation.
• Do not place objects on the disc tray.
• Never use a damaged, broken, scratched, or deformed disc.
• Keep the disc tray closed when the drive is not in use.
Page 8
NOTE:
High-speed drives spin the disc at a high rotational speed. If a disc has
printing on only half of the disc, or if there is a slight
imbalance in the disc, the
imbalance is greatly magnified by the high speed, causing the drive to vibrate or
produce a fan
-like noise. These effects are inherent in the high-speed technology
and do not indicate a problem with the drive.
Emergency Eject
The procedure described below can be used to remove a disc from the drive if the eject button is
disabled by software or if a power failure occurs.
1. Turn the computer off.
2. Insert a small diameter rod or a stiff wire (a straightened paper clip about 1.2
mm [0.047 in] in diameter) into the emergency eject hole and push firmly.
3. The disc tray is ejected by about 10 mm (0.39 in). Pull the disc tray out.
NOTE:
Do not insert more than 50 mm (1.9 in) in depth.
Inserting more than 50 mm (1.9 in) may damage the drive.
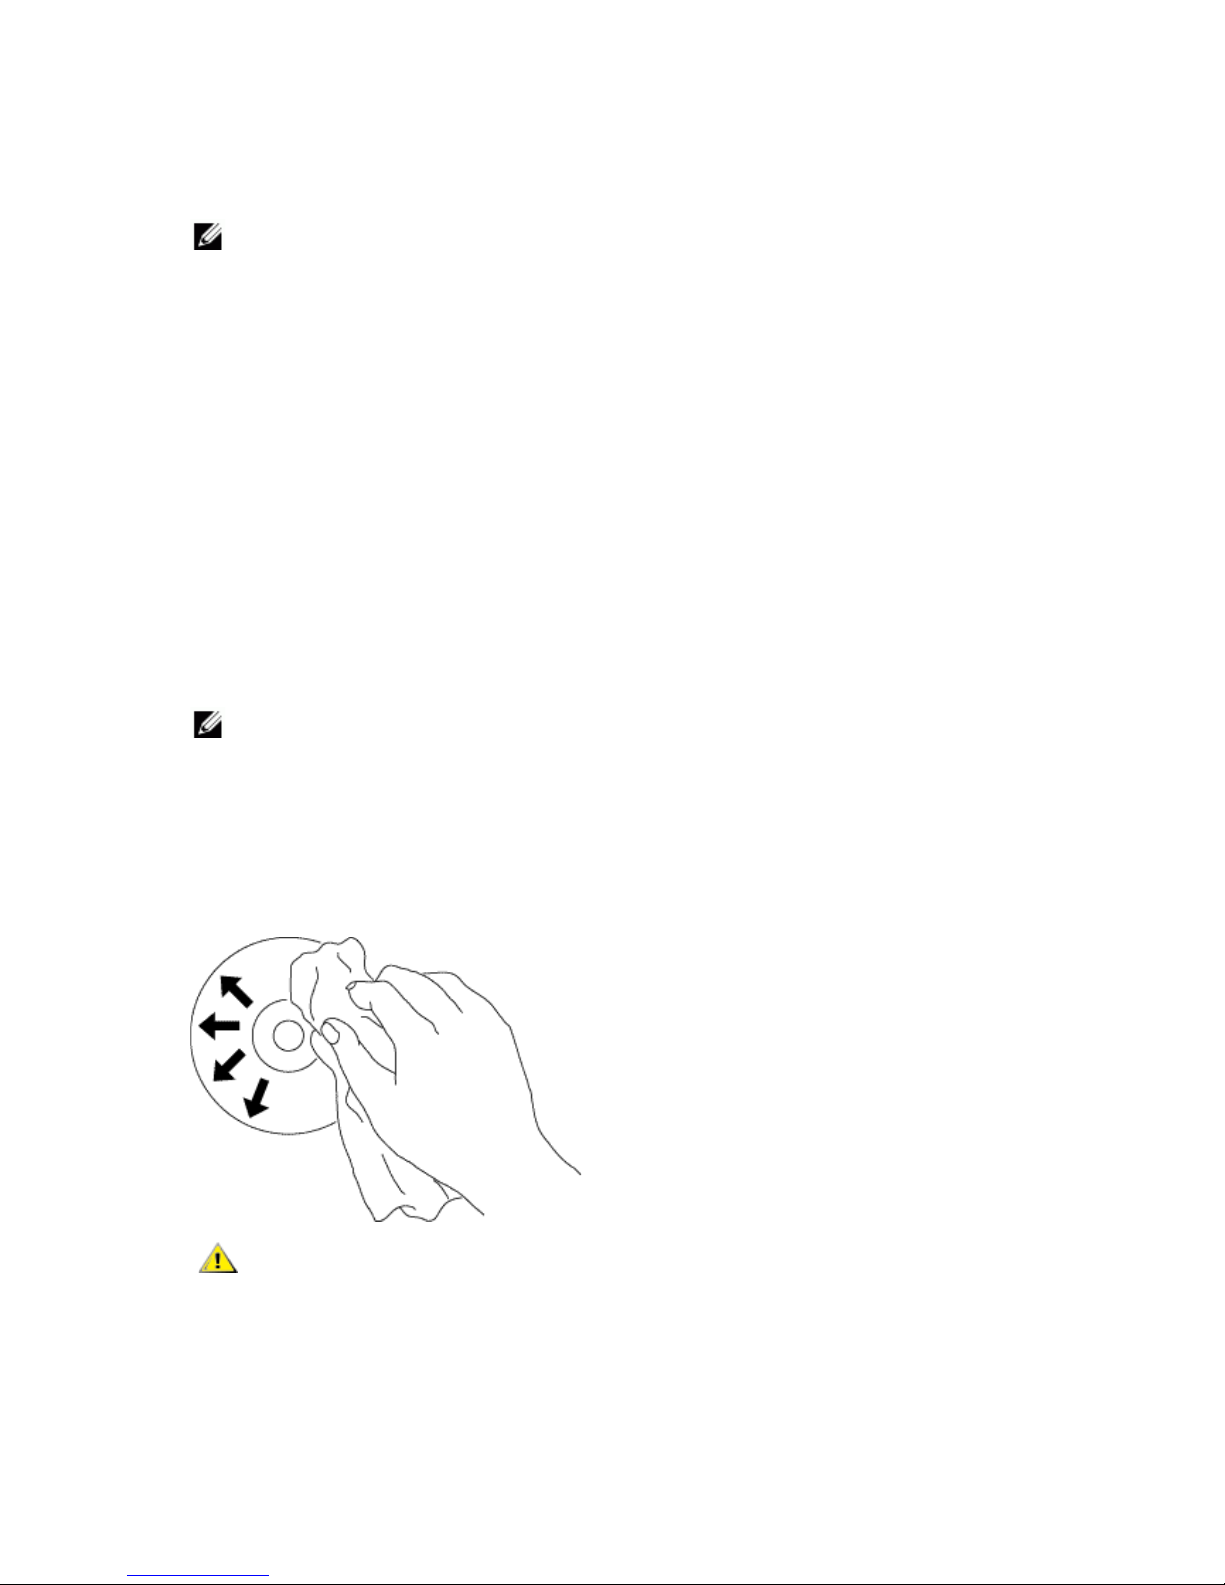
Cleaning Media
• If dust or fingerprints get on the disc, wipe it with a soft cloth from the center to the edge.
CAUTION: Do not use benzene, paint thinner, record cleaner, solvent or
static repellent. This can damage the disc.
Page 9

Safety Instructions
• Do not move the drive suddenly from a cold place to warm one. Condensation
may cause abnormal operation.
• Make sure to remove the disc before moving the drive to prevent the possible
damage to the disc.
• Do not use the Emergency Eject feature except in case of a power outage.
• Prevent foreign objects, such as liquids or metal, from entering the drive and in
the case a foreign object enters the drive, please consult the dealer where the
drive was purchased.
• Do not interrupt the electric power while the drive is operating.
• Do not attempt to open the cover. To reduce the risk of electric shock, do not
remove the cover. There are no user-serviceable parts inside. Refer servicing to
qualified service personnel.
• While drive is operating, do not move the drive or give a shock to the drive, since
it can cause damages to the disc.
• Please pay attention to handling Electrostatic Sensitive Devices; you may use
anti-static products such as wrist, heel straps, and mats to protect your body
from electrostatic.
• Please do not connect the extension cable by any means other than specified.
• The drive is not intended for use by young children or infirm persons without
supervision. Young children should be supervised to ensure that they do not play
with drive.
Cleaning the Drive
Cleaning the inside of the drive is not recommended.
Page 10
Connectivity
Installation
These instructions apply to most commonly used computers.
Before connection
Make sure you have a computer with any open USB port before connecting the
drive to your computer.
Connecting the drive with the wrong interface port can cause it to malfunction.
Follow the instructions when connecting the drive.
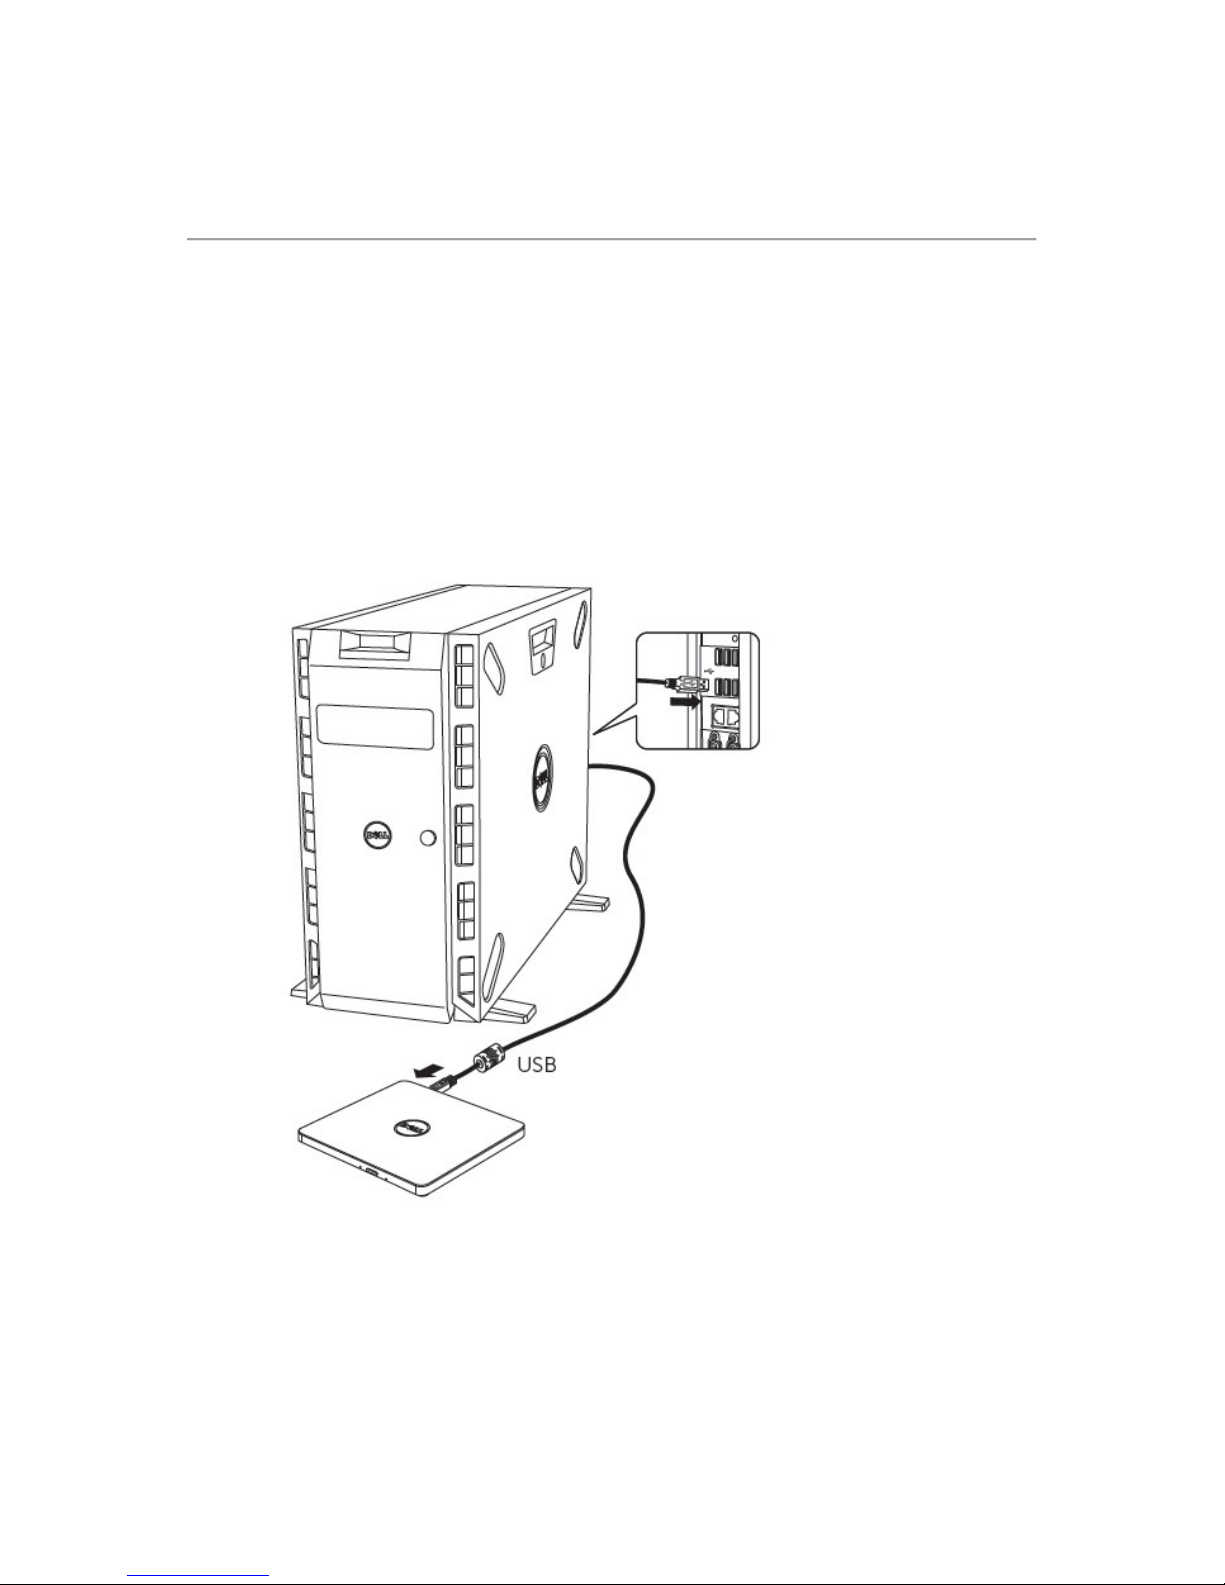
Connecting to computer
1. Connect the USB cable to a USB connector on your computer. This drive does not
have power switch.
The drive turns on when connected to your computer.
2. When the computer is ready, confirm that the drive is detected.
Page 11

Usage of the extended cable
Disconnection
The disconnection procedure varies depending on your OS.
The drive supports the plug and play (not swap) function of Windows, and can be
removed and inserted by performing the following operation.
1. Stop the application software that is using the optical disk drive.
2. Click the icon “ “of the task bar located on your screen’s bottom right side.
3. Operate following the message displayed, if any.
4. Remove the USB cable.
NOTE:
Do not remove USB cable when the busy indicator on the drive blinks, or
during computer start up.
Page 12

Troubleshooting
Symptoms and Solutions
Symptoms Solutions
1. Drive is not
recognized by
system.
1-1. Drive cable may be connected improperly. Verify the interface
cable is connected properly. Disconnect and reconnect the
drive.
1-2. Portable USB drive may not be configured properly. The drive
gets its power from the USB interface. The use of nonpowered hubs and/or daisy-chaining USB peripherals can
keep the drive from getting enough power to function. Try
plugging the drive directly into the USB port on the computer.
2. Cannot read or
play disc.
2-1. If the disc is dirty (fingerprints, etc.), clean it with a non-
abrasive cloth from the disc center hole to the outside.
2-2. If the disc is scratched and warped, do not insert it into the
drive.
2-3. If the disc is inserted upside-down, reinsert it in the proper
direction.
2-4. If the drive is not recognized, refer to section 1 above.
2-5. Check to see that the necessary software applications are
installed correctly.
3. Certain types of
discs do not
pl a y.
3-1. This drive only supports discs with the formats indicated in
the Specifications section. It cannot read the data on discs
with other formats. Check the disc's format.
4. Drive activity
indicator does
not light up.
4-1. Drive cable may be connected improperly. Verify the interface
cable is connected properly. Disconnect and reconnect the
drive.
4-2. Portable USB drive may not be configured properly. The drive
gets its power from the USB interface. The use of nonpowered hubs and/or daisy-chaining USB peripherals can
keep the drive from getting enough power to function.
4-3. Try plugging the drive directly into the USB port on the
computer.
5. Drive will not
read at
maximum
speed.
5-1. Make sure disc is clean and free of scratches.
Page 13

6. Cannot insert
disc.
6-1. Check to see that the system is powered up. (The indicator
LED light will blink on pressing the eject button on the drive.)
6-2. Press eject button to check if a media is inside the drive.
6-3. Turn off the drive (or PC) and then turn it on again. It will
reset and allow the drive to return back to normal condition.
7. Cannot eject
disc.
7-1. Check to see that the system is powered up. (The indicator
LED light will blink on pressing the eject button on the drive.)
7-2. If a media is stuck in the drive, please turn off the drive (or
PC) then turn on it again. Under normal condition, it will reset
and allows normal operation of the drive to resume.
7-3. Use Emergency Eject instructions to eject a disc. Please refer
to the Using the Drive section.
7-
4. If the system is capable of booting into an operating system,
attempt to issue an eject command from within the operating
system
Page 14
Specifications
NOTE: These specifications are provided by the manufacturer for information
purposes only and do not constitute an extension of Dell's warranty to you. Dell's
warranty is contained in the
documentation that came with your system.
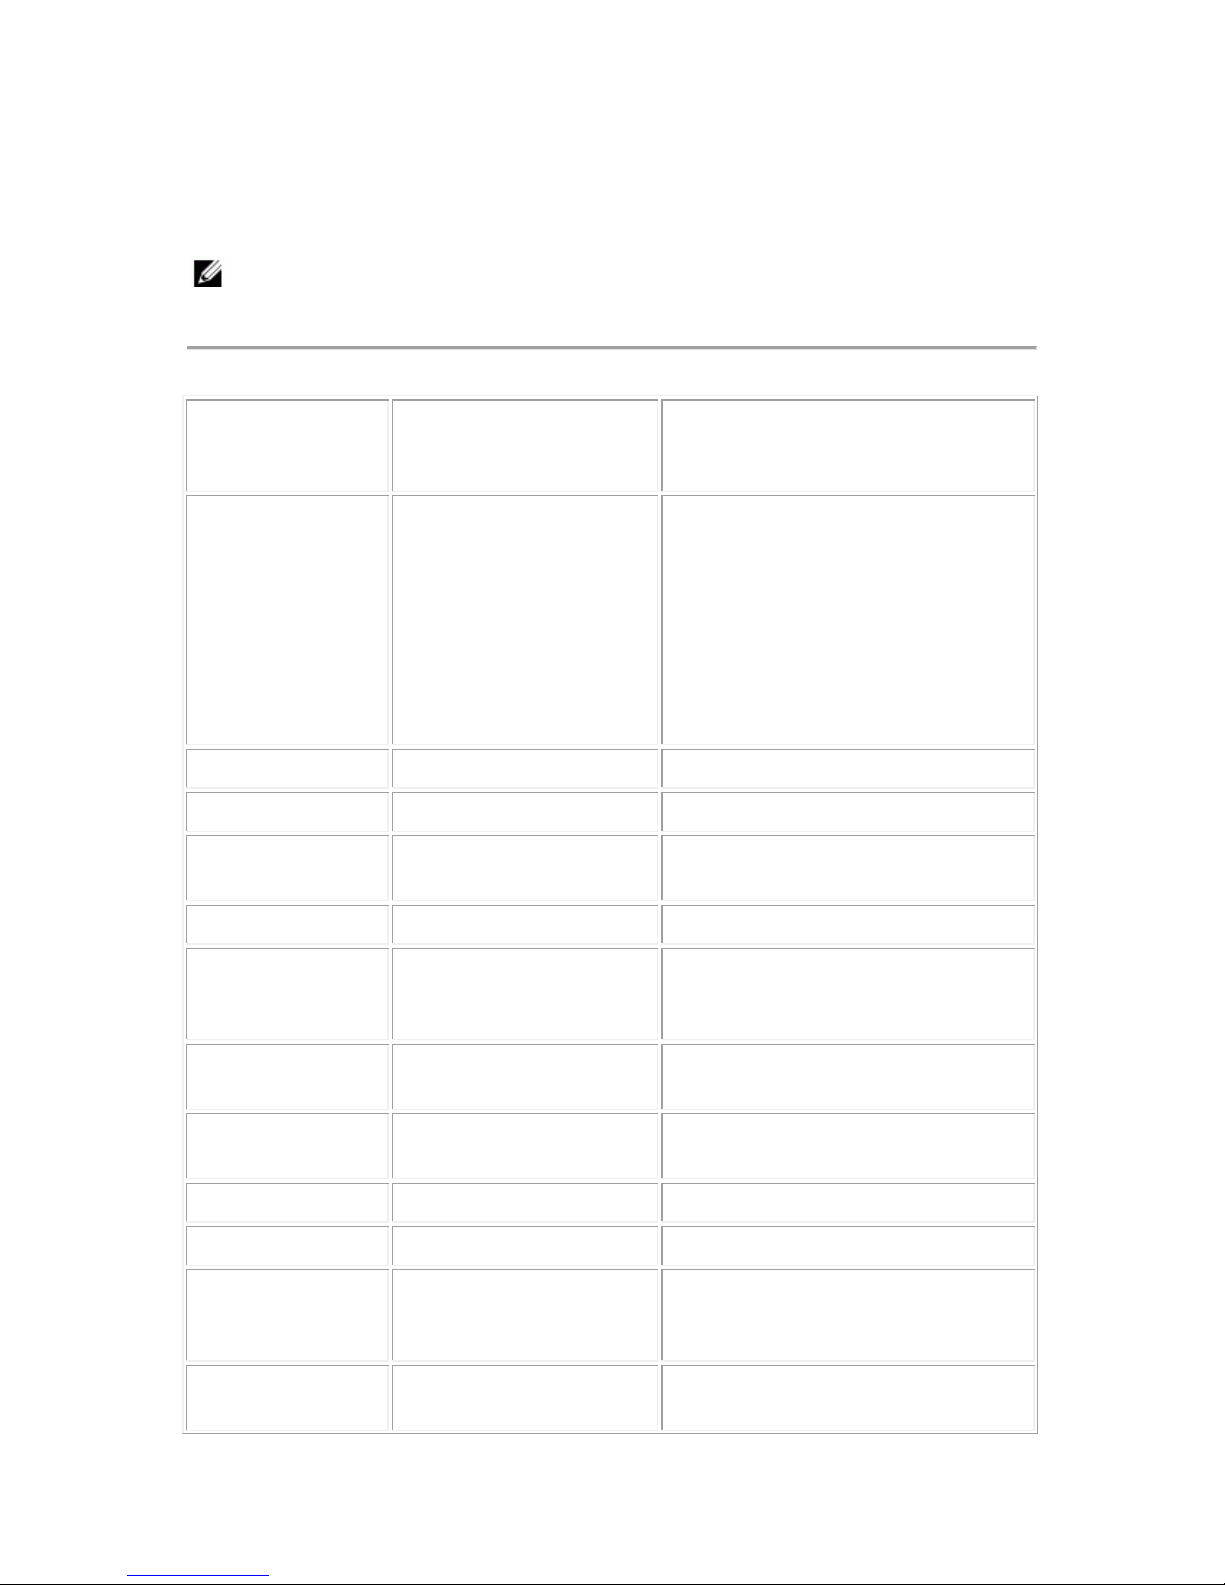
System Interface
Data transfer speed
External(Host): USB 2.0 (480Mbit/s)
Internal(Drive): T13 ATA/ATAPI-8,
MMC-6, INF-8090i v8
Supported disc
formats
Read
DVD-ROM(Single/Dual), DVD-RW,
DVD-R, DVD+RW, DVD+R, DVD+R
Double layer, DVD-R Dual layer,
DVD- RAM, M-Disc (DVD+R SL), CDDigital Audio & CD-Extra, CD-Plus,
CD-ROM, CD-ROM XA-Ready,
CD-I FMV, CD-TEXT, CD-Bridge, CDR, CD-RW, Photo-CD (Single & MultiSession), Video CD
CD
Read CD-R/RW/ROM 24 x max. CAV
Digital Audio Extraction
(DAE)
24 x max. CAV
DVD
Read DVD-ROM (Single
Layer / Dual or Double
Layer)
8 x max. CAV
Read DVD-R/-RW/-R Dual
layer
8 x max. CAV
Read DVD+R/+RW/+R
Double Layer
8 x max. CAV
Read M-Disc (DVD+R SL) 8 x max. CAV
Read DVD-RAM 6 x max. CAV
Power
Consumption
Typical
Stand-by (Sleep) 113 mA
Continuous Read 700 mA
Seek 800 mA
Acoustic noise
Operating (Sound
pressure level, typical)
Less than 50 dBA at 0.25 m away
from bezel and 0.45 m heights away.
Page 15
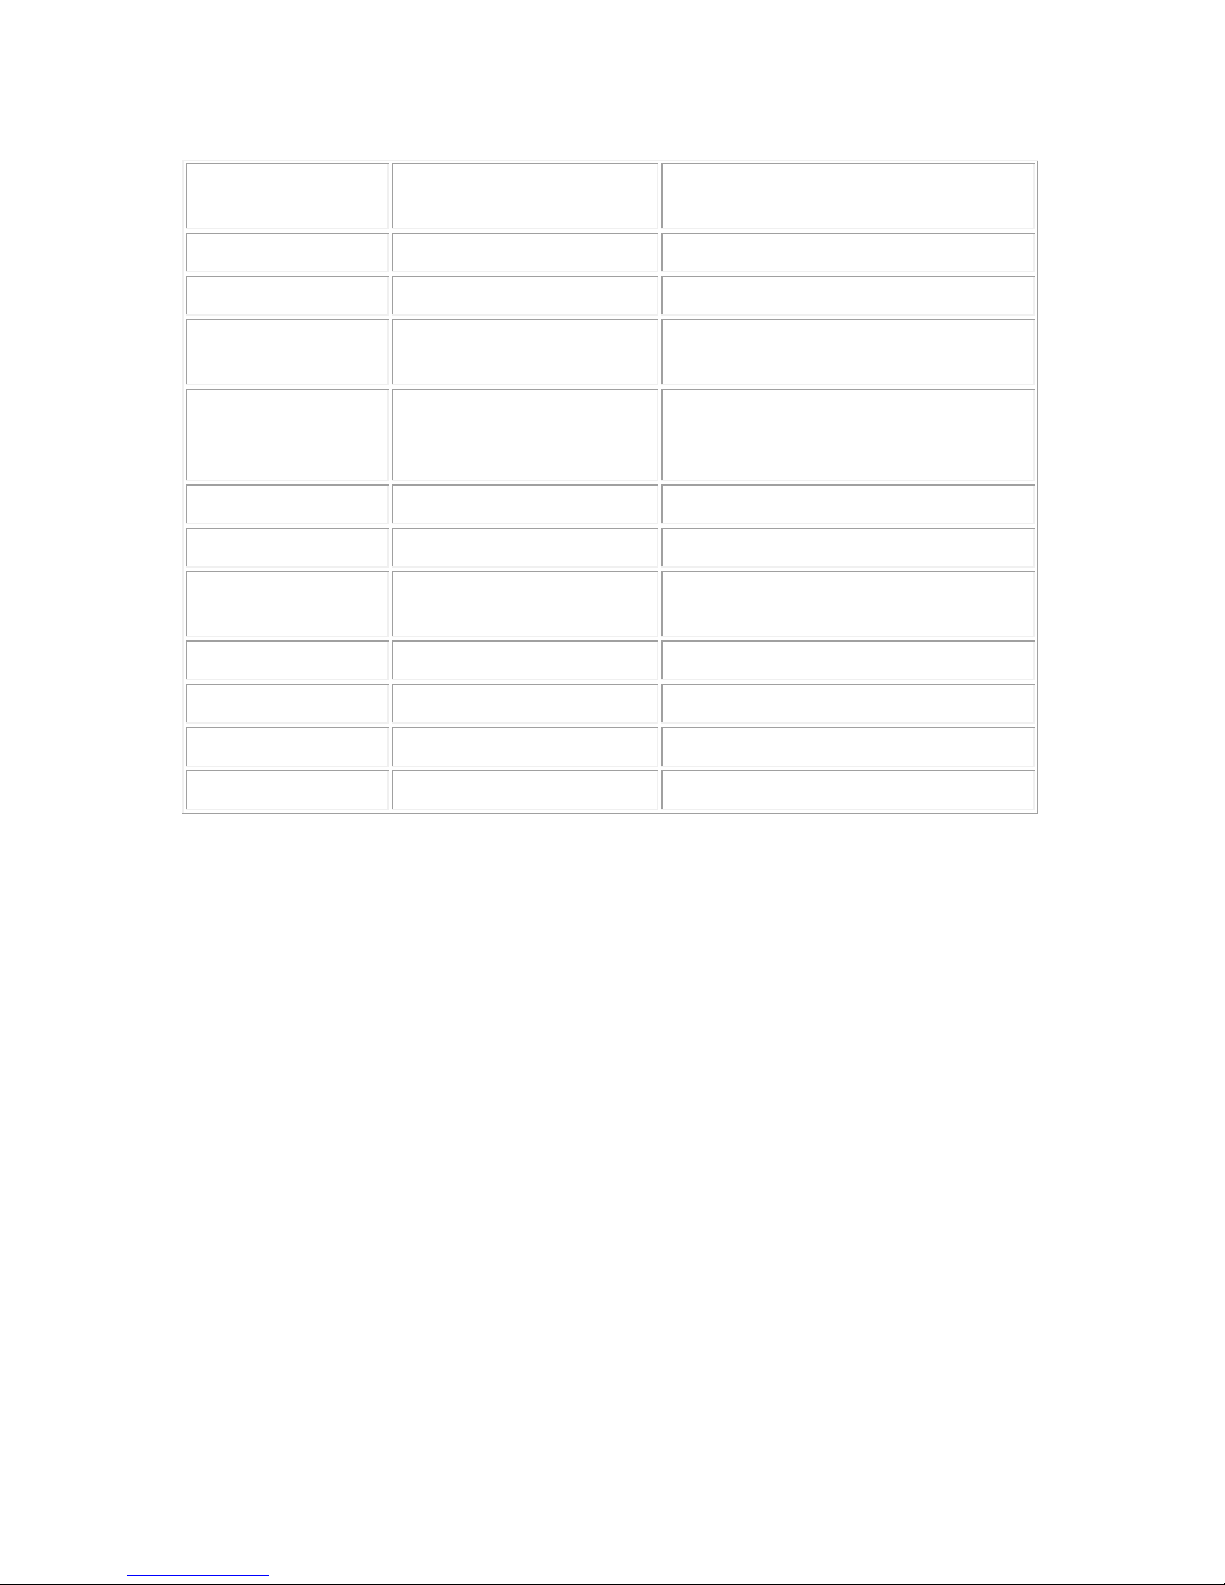
Power supply Voltage
+5 V +/-5 % ripple less than 100
mVp-p
Temperature Operating C (F) 5 ° to 40 ° C (41 ° to 104 ° F)
Non-operating C (F) -30 ° to 60 ° C (-22 ° to 140 ° F)
Relative Humidity
Operating (No
condensation)
15 % to 85 %
Non-operating (No
condensation, Power Off,
without disc)
10 % to 90 %
Altitude Operating m (ft) 0 m ~ 3,000 m
MTBF: 60,000 power on hours (POH)
Dimensions and
weight
Width 144 mm
Depth 137.5 mm
Height 14 mm
Weight About 200 g
Page 16

Regulatory
Regulatory Information
Dell DVD-ROM Drive – DP61N(DP61NB60) complies with the FCC/CE rules and abides by
worldwide regulatory compliance, engineering, and environmental affairs.
Contacting Dell
1. Visit www.dell.com/support
2. Select your support category
3. Select the appropriate service or support link based on your need.
 Loading...