

Page 1

Dell USB Soundbar
AC511
User’s Guide
Page 2

Notes, cautions, and warnings
NOTE: A NOTE indicates important information that helps you make better use of your computer.
CAUTION: A CAUTION indicates either potential damage to hardware or loss of data and tells
you how to avoid the problem
WARNING: A WARNING indicates a potential for property damage, personal injury, or death.
Copyright © 2015 Dell Inc. All rights reserved. This product is protected by U.S. and international copyright and intellectual
property laws. Dell™ and the Dell logo are trademarks of Dell Inc. in the United States and/or other jurisdictions. All other
marks and names mentioned herein may be trademarks of their respective companies.
2016 - 02
Rev. A01
Page 3

Contents
Setup............................................................................................................................... .................................................4
System Requirements............................................................................................................................... ...............4
Contents of the Box.................................................................................................................................................4
Features.......................................................................................................................................................................5
Setting Up Your Dell USB Soundbar..................................................................................................................... 6
Troubleshooting.......................................................................................................................................................9
Specifications............................................................................................................................... ...........................14
Statutory information............................................................................................................................... ..................15
Warranty............................................................................................................................... ....................................15
Page 4
Setup
System Requirements
One USB port (for the USB cable)
Microsoft Windows 7/Microsoft Windows 8/Microsoft Windows 10
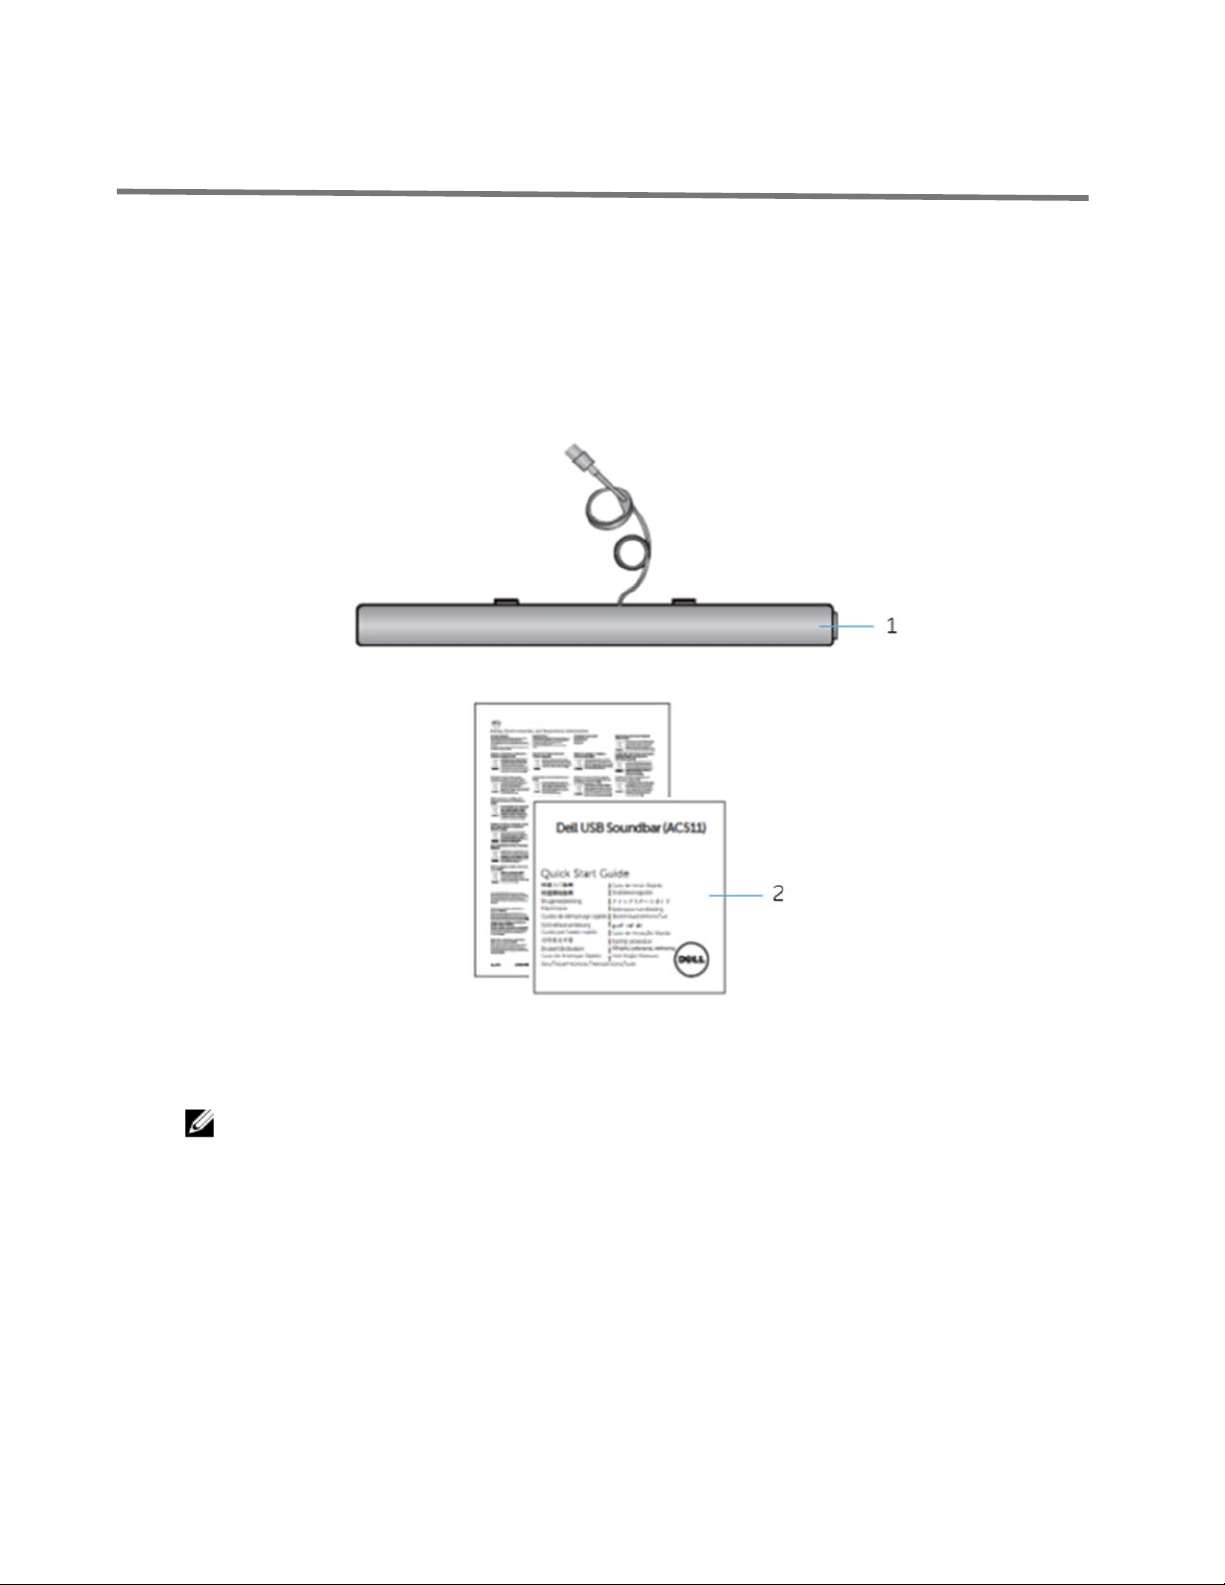
Contents of the Box
1 Dell USB soundbar
NOTE: The documents that shipped with the soundbar may vary based
on your region.
2
documents
Page 5
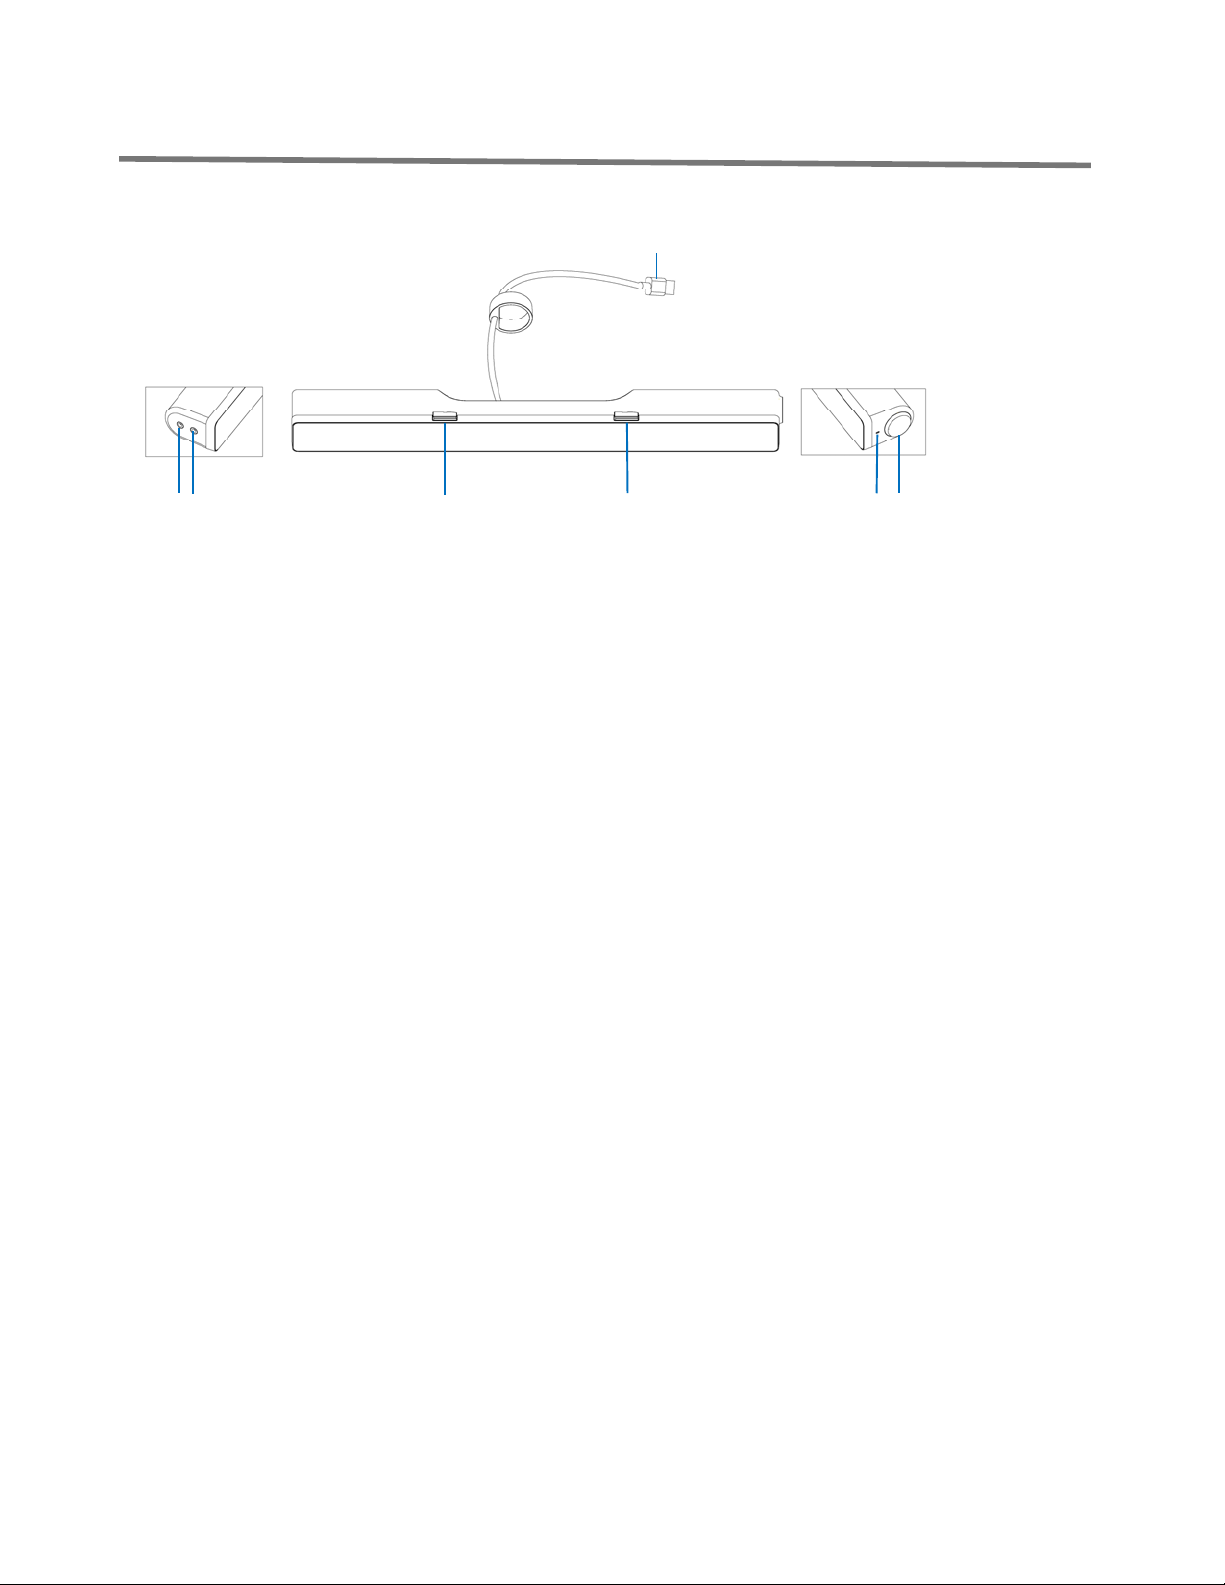
Features
3
2
4
5
6 1 7
USB cable 2
1
headphone port 4
3
right T-Hook for soundbar mounting 6
5
volume knob
7
aux-in port
left T-Hook for soundbar mounting
power LED
Page 6

Setting Up Your Dell USB Soundbar
After unpacking the unit, check the contents of the box.
1.
2. Remove the slot covers at the bottom of the Dell monitor.
Page 7

3. Connect the soundbar to the Dell monitor.
4. Connect the USB cable to the Dell monitor.
Page 8

NOTE:
came with your Dell monitor. Connect one end of the uplink cable to
the USB port on the Dell monitor and to the USB port on your Dell
computer.
5. Direct the control volume level of the computer.
If the soundbar is not detected, connect the uplink cable that
Page 9

Troubleshooting
Problems Possible Causes Possible solutions
Soundbar is not
functioning properly
Soundbar is not
detected or
synchronized
If required for your Dell monitor, connect
1.
one end of the uplink cable to the USB port
on the Dell monitor and to the USB port on
your Dell computer.
2. Once the USB cable is plugged into the
USB power source, observe if the white
LED on the right of the soundbar lights up.
3. If the LED is not lit, check if the USB is
properly inserted to the USB port.
4. If LED is lit and the soundbar does not
function, remove or unplug the soundbar
from the system and restart the computer.
5. Plug in the soundbar again and check if the
LED lights up.
6. If the soundbar still fails to connect, check
if the soundbar is present in Device
Manager.
7. Swap the USB soundbar to another USB
port.
8. If the other USB port works, the first USB
port maybe faulty.
No Sound Soundbar has power –
power LED indicator is
on
If the other USB port does not work, follow the
steps below.
1. Swap with a known-good USB speaker or
device (e.g. keyboard) or connect the
soundbar to another system.
2. If there is no other mouse or system
available to test with, use a known good
USB keyboard (or any other USB device) to
see if it works on the same USB port.
3. If the known good USB device is not
working on the same port, or the original
soundbar works properly on another
system, the former system's USB I/O may
be defective.
4. If the known good USB device works, or
the soundbar does not work properly on
another system, replace the soundbar.
1. If playing through USB streaming, ensure
that a music file is playing from the
platform and the volume level is not 0%.
Page 10

2. If playing through external music devices
such as MP3 player, iPod/iPad/iPhone or
any other Android phone, ensure that the
aux-in cable is properly connected.
3. Ensure that the external music device
volume is not 0%.
4. If playing through USB streaming, set all
Windows volume controls to their
maximum.
5. Play some audio content on the computer
(for example, an audio CD or MP3 player).
6. Turn the volume to a higher level by
rotating the soundbar volume knob
clockwise.
7. Clean or reseat all cables.
8. Test the soundbar with a different music
source (for example, a portable CD player
or an MP3 player).
9. Go to the control panel of the computer
and click on Sound.
10. Try different ports.
11. Reinstall the on-board drivers or the sound
card drivers. Restart the computer.
12. Try with a known-good speaker.
No sound No sound from USB
audio source.
Distorted Sound Computer's sound
card is used as the
audio source.
1. Check if a 3.5 mm aux-in cable is inserted
in the soundbar aux-in jack.
2. Remove the 3.5 mm aux-in cable from the
aux-in jack.
1. Clear any obstructions between the
soundbar and the user.
2. Confirm that the audio line-in plug is
completely inserted into the jack of the
sound card.
3. Set all volume controls to their midpoints.
4. Decrease the volume of the audio
application.
5. Turn the volume level to lower setting by
rotating the soundbar knob
counterclockwise.
6. Clean and reseat all cables.
7. Troubleshoot the computer's sound card.
8. Test the soundbar using another audio
source (for example, a portable CD player
or an MP3 player).
9. Ensure no loose objects are touching the
soundbar.
Page 11

Distorted Sound Other audio source is
used
1. Clear any obstructions between the
soundbar and the user.
2. Confirm that the USB cable or audio line-in
plug is completely inserted into the jack of
the audio source.
3. Decrease the volume of the audio source.
4. Turn the volume level to a lower setting by
rotating the soundbar knob
counterclockwise.
5. Clean and reseat the cables.
6. Turn off the sound processing of the audio
source.
7. Ensure that the soundbar is attached to the
monitor.
8. Ensure no loose objects are touching the
speaker.
Unbalanced sound
output
Sound is coming from
only one side of the
soundbar
Low volume Volume is too low
1. Clear any obstructions between the
soundbar and the user.
2. Confirm that the audio line-in plug is
completely inserted into the jack of the
soundbar or audio source.
3. Set all Windows audio balance controls (L-
R) to their midpoints.
4. Clean and reseat all cables.
5. Troubleshoot the computer's sound card.
6. Test the soundbar using another audio
source (for example, a portable CD player
or an MP3 player).
1. Clear any obstructions between the
soundbar and the user.
2. Turn the volume to a higher level by
rotating the knob clockwise.
3. Set all Windows volume controls to their
maximum.
4. Increase the volume of the audio
application.
5. Test the soundbar using another audio
source (for example, a portable CD player
or an MP3 player).
Buzzing noise Noise could be heard
from the soundbar
1. Ensure that the Soundbar is attached to the
monitor and no loose objects are hanging
or touching the soundbar.
2. Try reducing the volume to a low level by
rotating the knob counterclockwise.
3. Ensure the wires doesn’t interfere with the
soundbar.
Page 12

Aux-in no sound No sound using the
aux-in function
1. Ensure that the aux-in cable is properly
plugged in the soundbar’s aux-in jack and
to the aux-out jack of the audio device.
2. Try using a different or known good aux-in
cable.
3. Check if the audio device is turned on or is
playing music.
4. Ensure that the audio device volume is not
set to 0% volume level.
5. Try replacing the audio device with a
known-good audio device.
Aux-in distortion Aux-in cable is not
properly plugged in
Headphone jack is
connected, but no
sound is heard
USB streaming or
external audio source
is not playing music
and volume is 0%
1. Clear any obstructions between the
soundbar and the user.
2. Confirm that the audio line-in plug is
completely inserted into the jack of the
audio source.
3. Decrease the volume of the audio source.
4. Turn the volume level to a lower setting by
rotating the soundbar knob
counterclockwise.
5. Clean and reseat the cables.
6. Turn the bass or wave setting lower.
7. Turn the “Wow Surround” setting lower.
8. Ensure that the soundbar is properly
attached on the monitor.
9. Ensure no loose objects are touching the
soundbar.
1. Check if the platform music player or
external audio source is playing music.
2. Check if the audio source and the
soundbar volume are not set to 0%.
Headphone jack
connected
Audio distortion
1. Check if the headphone plug is properly
inserted into the soundbar headphone jack.
2. Check if the headphone plug is not
showing intermittent connection.
3. Check if the music file is not distorted
when playing without the headphone or
connected to a known good headphone.
Soundbar cannot
mount to the
monitor
T-Hook
1. Check if the T-Hook is missing.
2. Check if the T-Hook is not damaged or
broken.
3. Check if the Monitor/LCD soundbar slot is
open and that no Mylar covers obstruct the
slots.
Page 13

Missing items Check the packaging 1. Check if all items as show in “Contents of
the box” are present inside the package.
Page 14

Specifications
General
Model number AC511
Connection type USB
Supported operating systems
Electrical
Operating voltage 5V
Microsoft Windows 7
Microsoft Windows 8
Microsoft Windows 10
Audio Input
Output Power 2 x 1.25W @ ≤10% THD
Physical Characteristics
Height 39.00mm (± 0.5mm) (including T-Hook)
Length 406.00mm (± 0.5mm)
Width 49.00mm (± 0.5mm)
Weight 454g (±10g)
USB Extension Cable 51g (± 5g)
Environmental
Operating temperature 0°C to 40°C
Storage temperature -40°C to 65°C
Operating humidity
Storage humidity
USB Digital Audio Input
Analog Audio Aux-in (3.5mm jack)
90% maximum relative humidity,
non condensing
90% maximum relative humidity,
non condensing
Page 15

Statutory information
Warranty
Limited warranty and return policies
Dell-branded products carry a 1-year limited hardware warranty. If purchased together with a
Dell system, it will follow the system warranty.
For U.S. customers:
This purchase and your use of this product are subject to Dell’s end user agreement, which
you can find at Dell.com/terms. This document contains a binding arbitration clause.
For European, Middle Eastern and African customers:
Dell-branded products that are sold and used are subject to applicable national consumer
legal rights, the terms of any retailer sale agreement that you have entered into (which will
apply between you and the retailer) and Dell’s end user contract terms.
Dell may also provide an additional hardware warranty—full details of the Dell end user
contract and warranty terms can be found by going to Dell.com, selecting your country from
the list at the bottom of the “home” page and then clicking the “terms and conditions” link for
the end user terms or the “support” link for the warranty terms.
For non-U.S. customers:
Dell-branded products that are sold and used are subject to applicable national consumer
legal rights, the terms of any retailer sale agreement that you have entered into (which will
apply between you and the retailer) and Dell’s warranty terms. Dell may also provide an
additional hardware warranty
—full details of Dell’s warranty terms can be found by going to Dell.com, selecting your
country from the list at the bottom of the “home” page and then clicking the “terms and
conditions” link or the “support” link for the warranty terms.
 Loading...