

Dell 3590 User Manual

Dell Vostro 3590 (Without optical drive)
Setup and specifications guide
Reg ula tor y M ode l: P75 F
Reg ula tor y T ype : P 75F 010
Nov emb er 202 0
Rev . A 01

Notes, cautions, and warnings
NOTE: A NOTE indicates important information that helps you make better use of your product.
CAUTION: A CAUTION indicates either potential damage to hardware or loss of data and tells you how to avoid
the problem.
WARNING: A WARNING indicates a potential for property damage, personal injury, or death.
© 2018 - 2019 Dell Inc. or its subsidiaries. All rights reserved . D ell , E MC, and other trademarks are trademarks of Dell Inc. or its
subsidiaries. Other trademarks may be trademarks of their respec tiv e o wne rs.

Contents
Chapter 1: Set up your computer................................................................................................... 5
Chapter 2: Create a USB recovery drive for Windows.................................................................... 7
Chapter 3: Chassis........................................................................................................................ 8
Display view...........................................................................................................................................................................8
Left view................................................................................................................................................................................8
Right view..............................................................................................................................................................................8
Palmrest view....................................................................................................................................................................... 8
Bottom view..........................................................................................................................................................................8
Chapter 4: Keyboard shortcuts......................................................................................................9
Chapter 5: System specifications................................................................................................ 10
System information........................................................................................................................................................... 10
Processor............................................................................................................................................................................. 10
Memory................................................................................................................................................................................. 11
Storage.................................................................................................................................................................................. 11
Audio..................................................................................................................................................................................... 12
System board connectors................................................................................................................................................ 12
Media card-reader............................................................................................................................................................. 12
Video card............................................................................................................................................................................ 12
Camera..................................................................................................................................................................................13
Wireless................................................................................................................................................................................ 13
Ports and connectors........................................................................................................................................................13
Display...................................................................................................................................................................................14
Keyboard.............................................................................................................................................................................. 14
Touchpad............................................................................................................................................................................. 15
Fingerprint reader—optional...........................................................................................................................................15
Operating system...............................................................................................................................................................15
Battery..................................................................................................................................................................................15
Power adapter.................................................................................................................................................................... 16
Dimensions and weight.....................................................................................................................................................16
Computer environment..................................................................................................................................................... 17
Security.................................................................................................................................................................................17
Security Software.............................................................................................................................................................. 17
Chapter 6: System setup............................................................................................................. 19
Boot menu............................................................................................................................................................................19
Navigation keys.................................................................................................................................................................. 19
System setup options.......................................................................................................................................................20
General options............................................................................................................................................................20
System information.....................................................................................................................................................20
Video................................................................................................................................................................................21
Contents 3

Security...........................................................................................................................................................................21
Secure boot...................................................................................................................................................................23
Intel Software Guard Extensions............................................................................................................................. 23
Performance................................................................................................................................................................. 24
Power management.................................................................................................................................................... 24
POST behavior............................................................................................................................................................. 25
Virtualization support................................................................................................................................................. 26
Wireless..........................................................................................................................................................................26
Maintenance screen....................................................................................................................................................26
System logs................................................................................................................................................................... 27
SupportAssist System Resolution............................................................................................................................27
System and setup password...........................................................................................................................................27
Assigning a system setup password....................................................................................................................... 28
Deleting or changing an existing system setup password................................................................................. 28
Chapter 7: Software.................................................................................................................... 29
Downloading drivers......................................................................................................................................................... 29
Chapter 8: Getting help............................................................................................................... 30
Contacting Dell.................................................................................................................................................................. 30
4
Contents
Set up your computer
Steps
1. Connect the power adapter and press the power button.
NOTE: To conserve battery power, the battery might enter power saving mode.
2. Finish Windows system setup.
Follow the on-screen instructions to complete the setup. When setting up, Dell recommends that you:
● Connect to a network for Windows updates.
NOTE: If connecting to a secured wireless network, enter the password for the wireless network access when
prompted.
● If connected to the internet, sign-in with or create a Microsoft account. If not connected to the internet, create an
offline account.
● On the Support and Protection screen, enter your contact details.
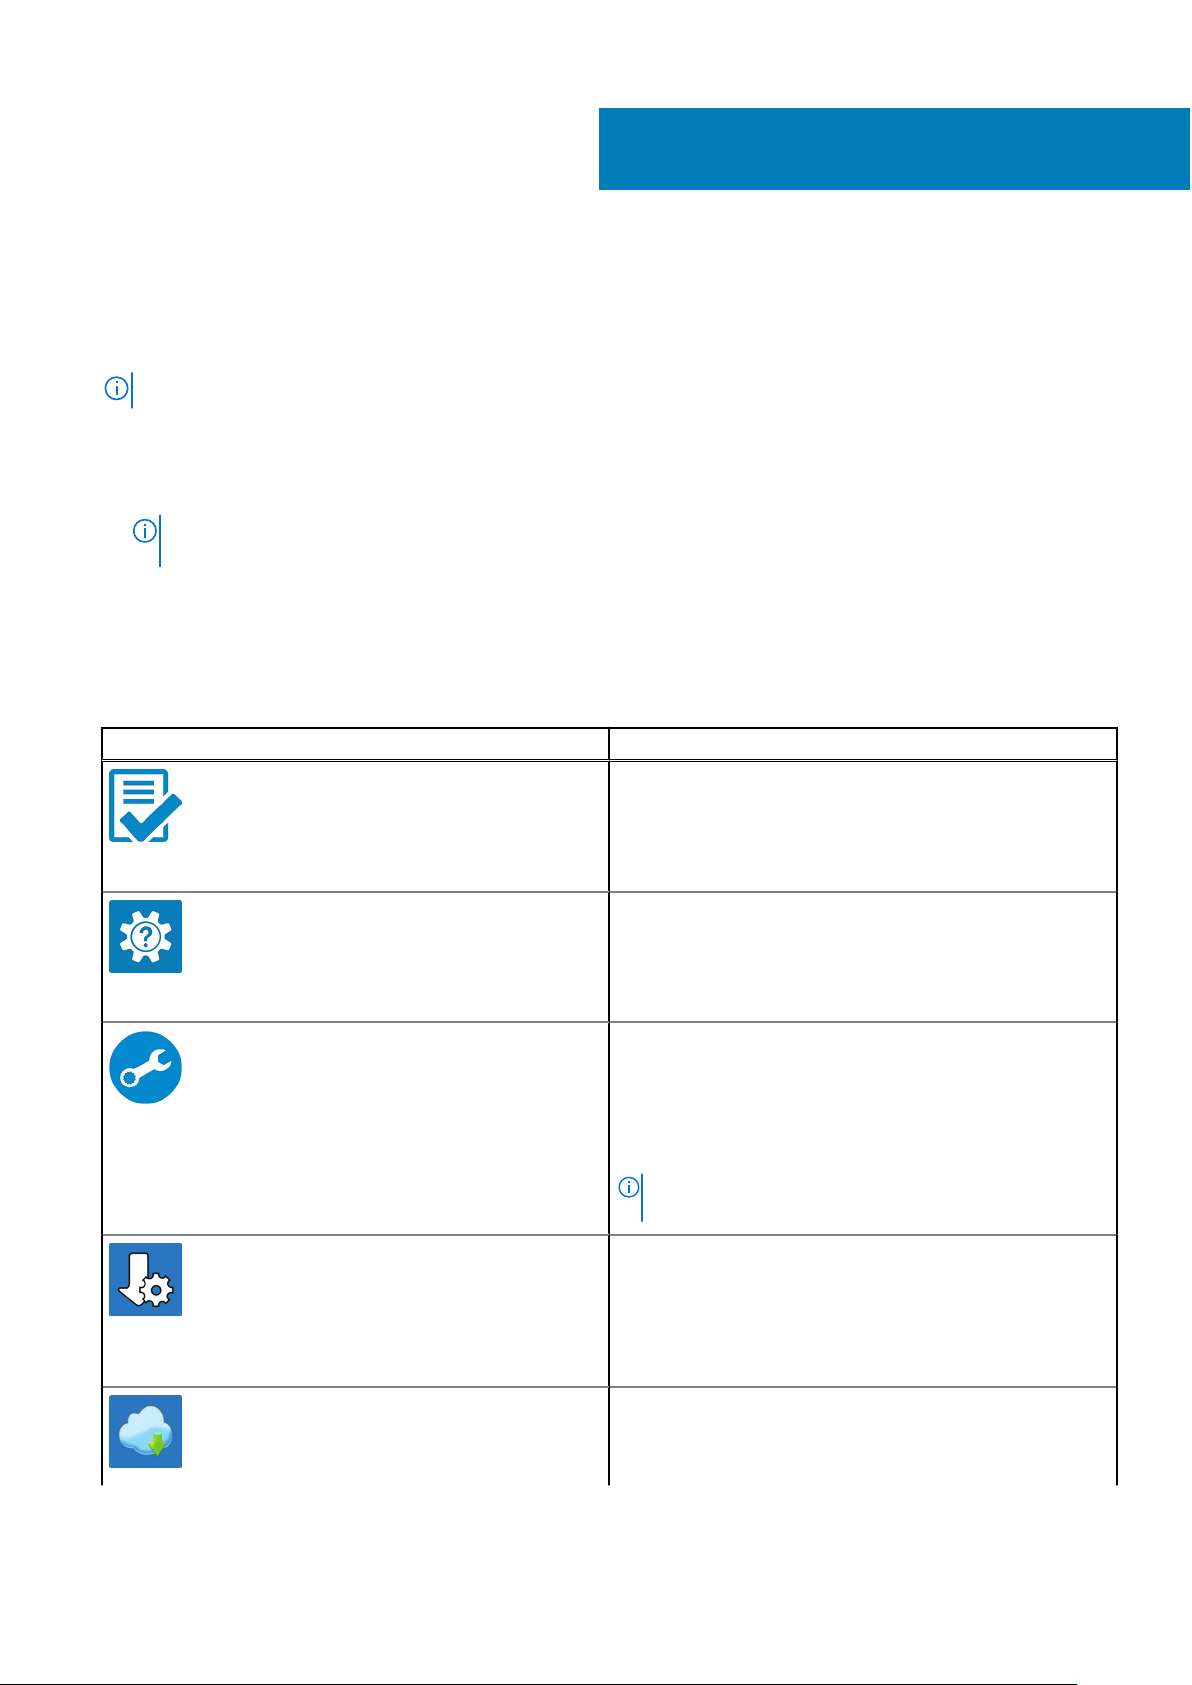
3. Locate and use Dell apps from the Windows Start menu—Recommended
Table 1. Locate Dell apps
1
Dell apps Details
Dell Product Registration
Register your computer with Dell.
Dell Help & Support
Access help and support for your computer.
SupportAssist
Proactively checks the health of your computer’s hardware
and software.
NOTE: Renew or upgrade your warranty by clicking the
warranty expiry date in SupportAssist.
Dell Update
Updates your computer with critical fixes and important
device drivers as they become available.
Dell Digital Delivery
Set up your computer 5

Table 1. Locate Dell apps (continued)
Dell apps Details
4. Create recovery drive for Windows.
NOTE: It is recommended to create a recovery drive to troubleshoot and fix problems that may occur with Windows.
For more information, see Create a USB recovery drive for Windows.
Download software applications including software that is
purchased but not pre-installed on your computer.
6 Set up your computer

Create a USB recovery drive for Windows
Create a recovery drive to troubleshoot and fix problems that may occur with Windows. An empty USB flash drive with a
minimum capacity of 16 GB is required to create the recovery drive.
Prerequisites
NOTE: This process may take up to an hour to complete.
NOTE: The following steps may vary depending on the version of Windows installed. Refer to the Microsoft support site for
latest instructions.
Steps
1. Connect the USB flash drive to your computer.
2. In Windows search, type Recovery.
3. In the search results, click Create a recovery drive.
The User Account Control window is displayed.
4. Click Yes to continue.
The Recovery Drive window is displayed.
5. Select Back up system files to the recovery drive and click Next.
6. Select the USB flash drive and click Next.
A message appears, indicating that all data in the USB flash drive will be deleted.
7. Click Create.
8. Click Finish.
For more information about reinstalling Windows using the USB recovery drive, see the Troubleshooting section of your
product's Service Manual at www.dell.com/support/manuals.
2
Create a USB recovery drive for Windows 7

Chassis
This chapter illustrates the multiple chassis views along with the ports and connectors and also explains the FN hot key
combinations.
Topics:
• Display view
• Left view
• Right view
• Palmrest view
• Bottom view
Display view
1. Camera 2. Camera-status light
3. Microphone 4. Display
Left view
3
Power adapter port 2. Battery status light
1.
3. HDMI port 4. Network port
5. USB 3.1 Gen 1 ports (2) 6. Headset port
Right view
1. SD card reader
2. USB 2.0 port
3. Security-cable slot (for Noble locks)
Palmrest view
1. Power button
2. Keyboard
3. Touchpad
Bottom view
1.
Speakers 2. Base cover
3. Service Tag label 4. Air vent
8 Chassis

Keyboard shortcuts
NOTE: Keyboard characters may differ depending on the keyboard language configuration. Keys used for shortcuts remain
the same across all language configurations.
Table 2. List of keyboard shortcuts
Keys Description
4
Fn + Esc
Fn + F1
Fn + F2
Fn + F3
Fn + F4
Fn + F5
Fn + F6
Fn + F8
Fn + F9
Fn + F11
Fn + F12
Fn + PrtScr
Fn + Ctrl
Toggle Fn-key lock
Mute audio
Decrease volume
Increase volume
Play previous
Play / Pause
Play next
Switch to external display
Search
Decrease brightness
Increase brightness
Turn on/off wireless
Open application menu
Keyboard shortcuts 9
 Loading...