

Page 1
Before returning this product
to the store of purchase
Contact Dee Zee if you experience the following problems:
•MissingParts
•InstallationProblems/Questions
•WarrantyQuestions
1.800.779.2102
Hoursofoperation:8am-5pmCST,Mon-Friday
Reviewcompletewarrantypolicyandregisteryourproductat:
www.deezee.com/warranty.php
Page 2
Installation Instructions
Rear Receiver Rack DZ 760082
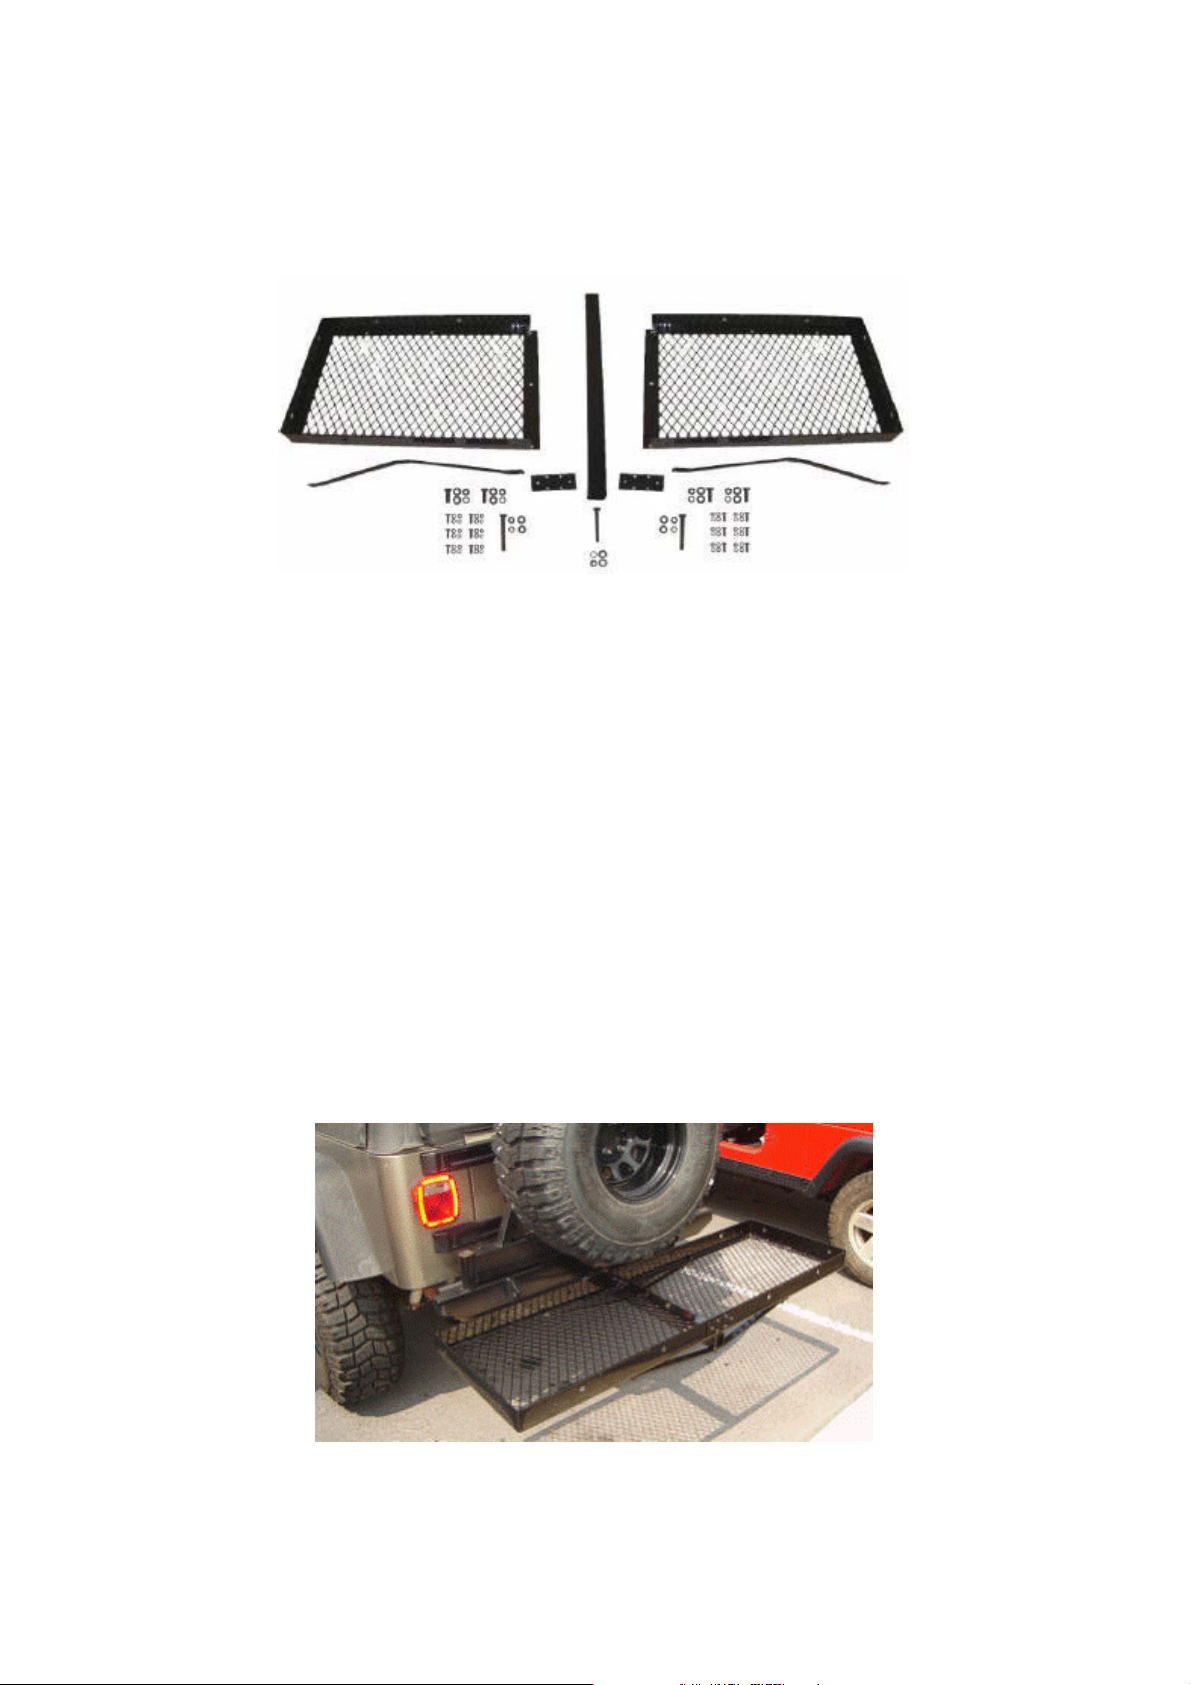
Included Components: Tools Needed:
(2) Rack Trays (1) 16mm socket
(1) 2” Receiver Center Bar (1) Adjustable Crescent wrench
(2) Brace Brackets – curved (1) 10mm socket
(24) M6 (10mm) Flat Washer (1) Socket Wrench
(12) M6 (10mm) Lock Washer
(12) M6 (10mm) Nylock® Nut Important Notice:
(12) M6 (10mm) Hex Head Bolt This rack has been supplied with
(2) Rack Tray Connecting Plate all needed hardware for proper
(14) M10 (16mm) Flat Washer assemble. Rack can be installed
(7) M10 (16mm) Lock Washer into any standard 2” receiver.
(3) M10 X 75mm Hex Head Bolt Please note that receiver pin is
(4) M10 X 25mm Med. Hex Head Bolt NOT supplied with rack and will
(3) M10 (16mm) Hex Head Nut needs to be purchased separately.
CAUTION: NEVER EXCEED THE TONGUE WEIGHT CAPACITY OF YOUR HITCH –
Receiver Rack is rated to 200Lbs evenly distributed.
Page 3

Installation Instructions:
(Step1): Place Rack Trays onto level floor. Overlap Trays as shown in (Fig.1). Position
Rack Tray Connector plates using M6 (10mm) bolts, flat washers, lock washers and
Nylock® nuts as shown in (Fig.2). Insert bolt from the outside using one flat washer.
From the inside place one flat washer; one lock washer and one nut onto bolt and hand
tighten.
(Fig.1) (Fig.2)
(Step2): With connector plates in position place rack on its side and place the 2”
Receiver Bar to the bottom of the rack. Align the three mounting holes (Fig.3). Install the
one M10 X 75mm (Full Thread) Bolt and one M10 (16mm) Flat Washer from the inside
of the rack through the center hole. Attach one M10 (16mm) Flat Washer, one 10M
(16mm) Lock Washer, and one 10M (16mm) Hex Head Nut and hand tighten (Fig.4-5).
(Fig.3) (Fig.4) (Fig.5)
(Step3): Attach upper Brace Bracket to Receiver Center Bar using one M10 X 75mm
(1/4 Thread) Bolt. Place washers and nuts in same sequence used in step 2. Lock Washer
and Nut should be mounted to the bottom of the Receiver Tube. Repeat step for lower
Brace Bracket (Fig.6). Attach the Brace Bracket to the Rack Tray (Fig.7). Each side of
the Brace Bracket will require one M10 X 25mm Bolt with one Flat Washer inserted
from the inside of Rack Tray and through Brace Bracket. One M10 (16mm) Flat Washer,
Page 4

one M10 (16mm) Lock Washer and one M10 (16mm) Nut will be installed to the bottom
of the Brace Bracket (Fig.7). Repeat steps for all Brace Bracket Tray mounts on the top
and bottom (Fig.8). Hand tighten.
(Fig.6) (Fig.7) (Fig.8)
(Step4): With all blots installed proceed to tighten all bolts until secure.
(Step5): Insert Receiver Rack into receiver hitch of the vehicle (Fig.9-10) using only a
certified hitch pin (NOT INCLUDED). Failure to use a certified hitch pin may cause
injury and or damage to your vehicle, other vehicles, and cargo.
(Fig.9) (Fig.10)
All bolts and nuts should be tightened and secured prior to installing, adding cargo
or departing. Always secure your cargo with some type of tie down system to ensure
that cargo does not fall off Receiver Rack. DO NOT place valuables or any other
items on the Receiver Rack that could be damaged by adverse weather or road
debris. CHECK EXHAUST location prior to adding cargo. Prolonged exposure to
high temperature exhaust could result in damage to cargo or possible a fire hazard.
It is the user’s responsibility to properly secure cargo and check for listed hazards
prior to use. NEVER exceed the weight limit of the Receiver Rack (200Lbs – evenly
distributed).
 Loading...