DaySequerra Remote Dashboard User Manual

Remote DashboardTM and
Ethernet Configuration Guide
Version 1.3.8
INCLUDING REMOTE DASHBOARD APPLICATION IN STALLATION IN STRUCTIONS FOR DAYSEQUERRA MAM, M2 AND M4 MONITORS WITH ETHERNET PORTS
DaySequerra │ 154 Cooper Rd. Building 902 │ West Berlin, NJ 08091 │ Voice 856 719 9900 │ www.daysequerra.com

Remote Dashboard Application Removal
Version 1.3.8 supersedes and replaces all earlier DaySequerra Remote Dashboard versions. If you have an earlier version on your PC, please follow these instructions before installing the new version:
1.Using the Windows Uninstall Utility, uninstall the old DaySequerra Remote Dashboard software.
2.Delete the link from the “All Programs” list in your Windows Start Menu.
3.Delete any shortcut you may have created from your Desktop.
4.Rename your existing DaySequerra folder “Old DaySequerra.” (After the new program installs and runs OK, feel free to delete it.)
Note that the program uses a new user_file.txt. It will be necessary to reload your memorized presets and remote unit’s IP address, so please make a note of them before deleting your old Remote Dashboard application.
2
Ethernet Configuration Guide

Remote Dashboard Application Installation
Note: If you have not yet registered your unit please email DaySequerra at support@daysequerra.com to register your unit and receive your password.
From CD:
1.Place disk in your PC’s CD drive.
2.Installation should start automatically, if not
•Click on “Start” > “My Computer”
•Right click on your CD Drive
•Select Autoplay
3.You will be notified "You are about to install DaySequerra Remote Dashboard V1.3.8".
•Click "OK"
4.You will be prompted for a location to unzip the setup files, accept the default.
•Click "Unzip"
5.Enter the password supplied to you by DaySequerra.
•Click “OK”
6.Click “Yes” to install the Microsoft Visual Basic 6 Runtime environment.
7.Dashboard Setup follows automatically and use all specified defaults.
8.Follow the user prompts to finish installing the Dashboard Software.
Download from FTP site:
1.Go to ftp.daysequerra.com
2.Username: dashboard1
Password: Remote09
3.Download the file DaySequerra_Dashboard.exe
4.Enter the unlock password obtained by DaySequerra when you register your unit.
When installation is complete, click on the DaySequerra > Remote Dashboard icon under your Programs Menu to start Remote Dashboard.
3
Ethernet Configuration Guide

Ethernet – IP Configuration
WARNING!
Do not attempt to configure yourDaySequerraunit. unit over the Internet or on an Ethernet network! Network traffic may corrupt your unit.
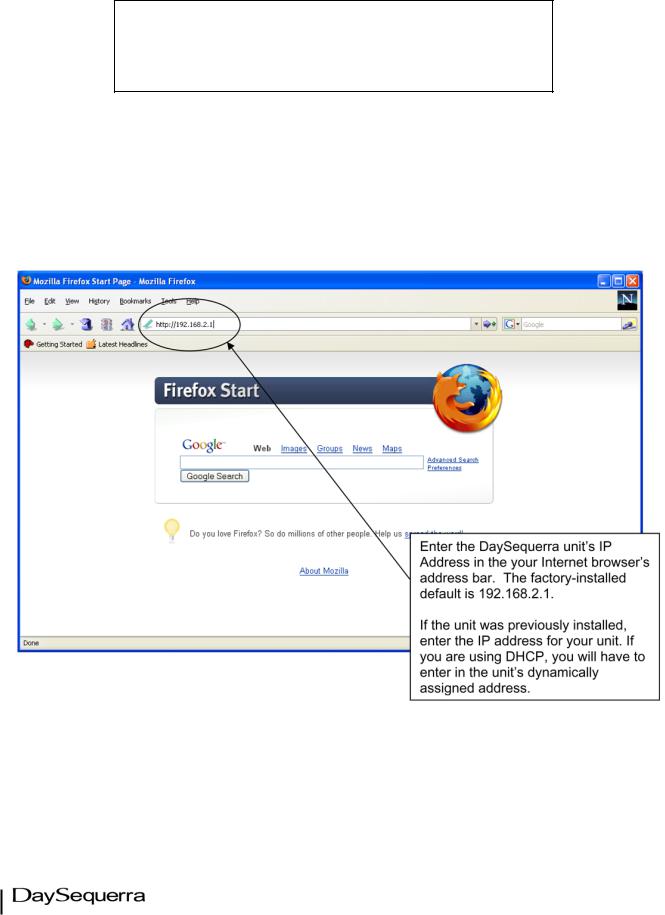
Connect your Windows XP - SP2 host PC to the MAM, M2 or M4 unit using a crossover cable or through an Ethernet hub connected directly to your unit and proceed with the following instructions to change your DaySequerra unit’s IP address:
STEP 1
Note: The host PC and the DaySequerra unit must be on the same TCO network and subnet:e.g., 192.168.2.X and 255.255.255.0
4
Ethernet Configuration Guide
 Loading...