

Page 1
92-2423-01 Rev.B
HD Peel & Present Option
Page 2

Page 3
Overview
This document describes the contents, installation, and use of the Heavy Duty Peel and Present option
for the H-Class printer. After verifying the contents of the kit and the tools needed, follow the steps below
to install and begin using the option. A maintenance procedure is also included, so keep this
documentation for future reference.
For your safety and to avoid equipment damage, always turn ‘Off’ power and unplug the
CAUTION
printer’s power cord before beginning this installation and when performing service.
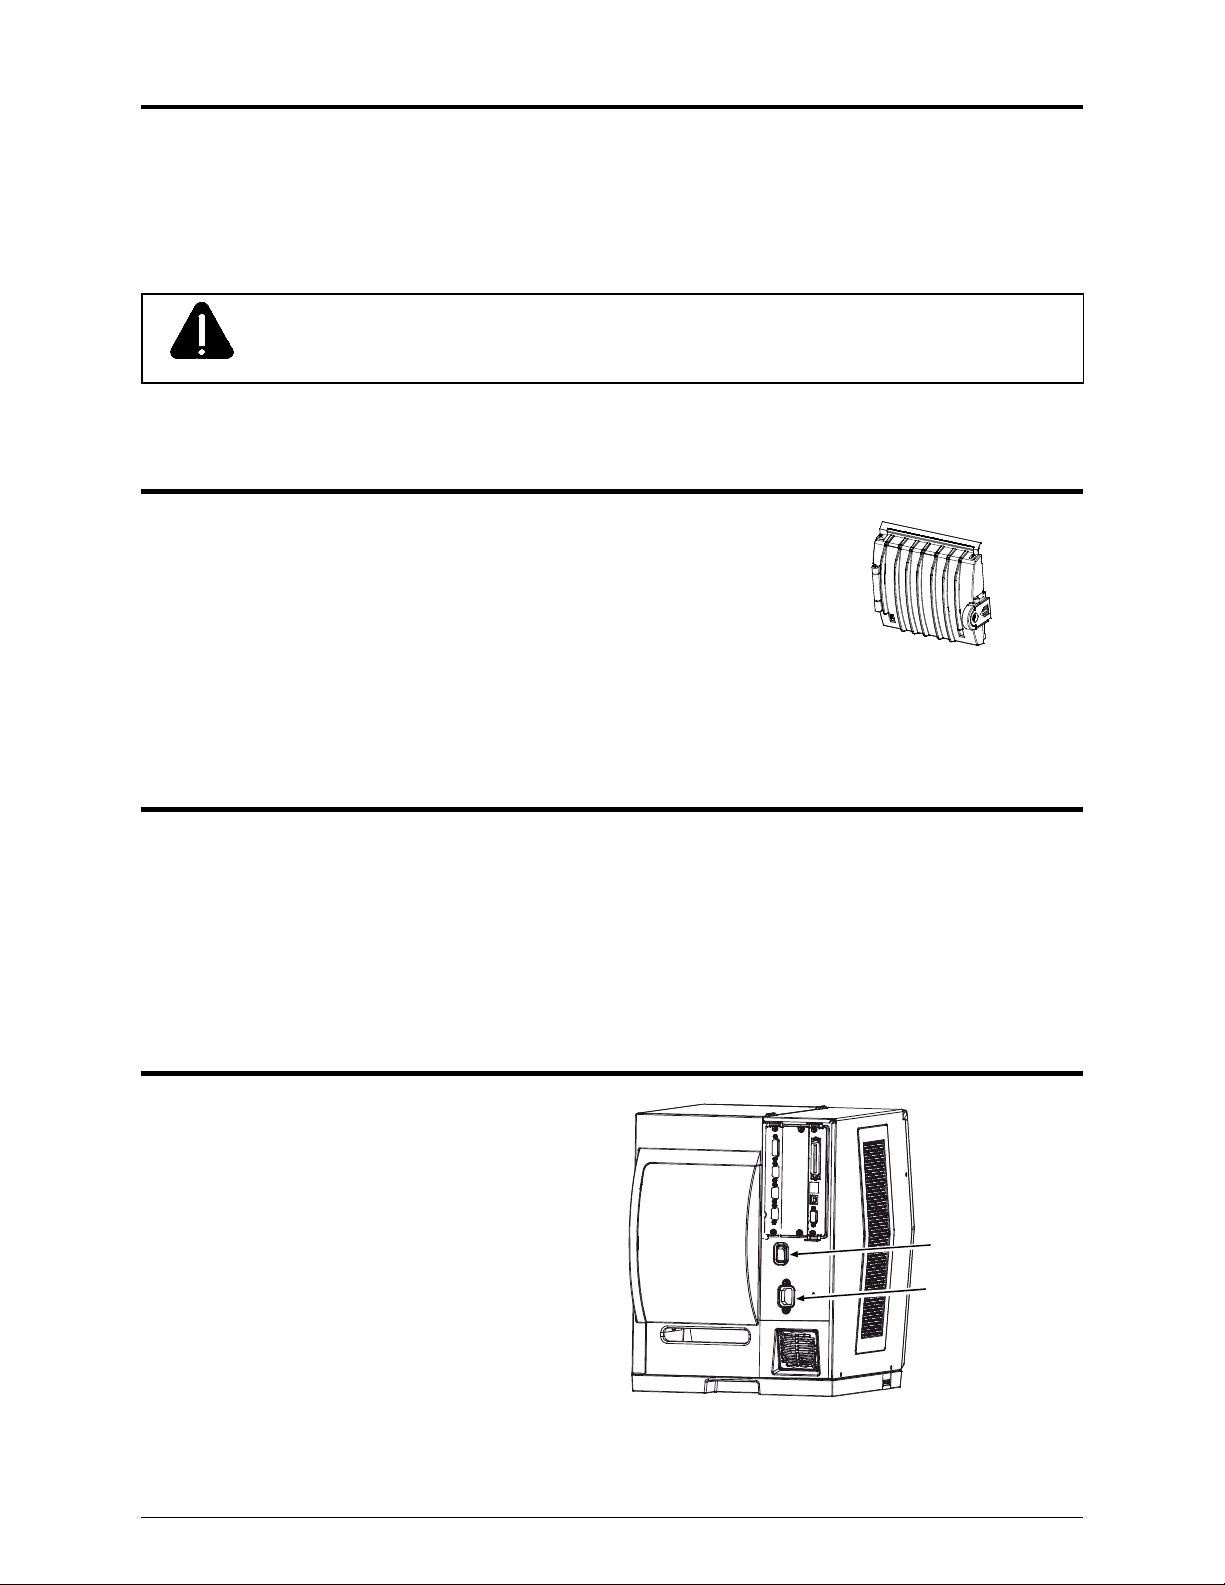
Contents of the Heavy Duty Peel and Present Option
This kit contains the following item:
Heavy Duty Peel and Present Assembly
Tools Required
To install this option, you will need a standard screwdriver.
Step 1: Preparing the Printer
A) Turn ‘Off’ the Power Switch and unplug the
power cord from the AC Receptacle.
Power Switch
AC Receptacle
1
Page 4

B) Press down on the Catch, then pull forward to
remove the Door.
C) Raise the Access Cover and remove your
media from the printer.
D) Remove the Thumbscrew and Tear Plate.
Catch
Door
Tear Plate
Thumbscrew
Access
Cover
(Alternately, if equipped with an Arc Plate,
Present Sensor, or Cutter, remove that
device.)
Step 2: Installing the Heavy Duty Peel and Present Assembly
A) Press the Latch and open the Peel and
Present Assembly.
Peel and Present
Assembly
Latch
2
Page 5

B) Carefully press the Peel and Present
Assembly into the Front Plate Connector.
C) Tighten the Mounting Screw to secure the
Mounting
Screw
Peel and Present Assembly to the printer.
Peel and Present
Assembly
Front Plate
Connector
Step 3: Using the Option
During operation, labels will be peeled from the backing material and dispensed “on-demand” – that is,
subsequent printing will occur only after a previously printed label has been removed from the printer. As a
reminder, “REMOVE LABEL” will be displayed to prompt you when a label awaits removal.
Begin using the option as follows:
A) Load Media (see the Operator’s Manual for
details). Extend 20 inches (50 cm) of Media
from the printer.
B) Remove the labels from this extended portion
of media, leaving only the Backing Material.
Crease the leading edge of this Backing
Material.
3
Backing
Material
Media
Supply
Hub
Page 6

C) Route the Backing Material under the Assist
Roller and the Internal Rewinder.
D) Wrap the Backing Material in a
counterclockwise direction around the
Rewinder Hub and insert the creased
leading edge into one of its Slots. Insert the
Backing
Material
creased
leading edge
Rewinder
Hub
Internal
Rewinder
Assist
Roller
Slots
Media Clasp (Item ) into the Slot over the
creased leading edge of the Backing
Material and around the Rewinder Hub.
E) Close the Peel and Present Assembly.
Close the Access Cover, plug the power cord
into the AC Receptacle, and turn ‘On’ the
Power Switch.
Backing
Material
Media
Clasp
Peel and Present
Assembly
4
Page 7

F) Ensure that READY is displayed on the Front Panel then press
Front Panel
the FEED Key and proceed according to your observations:
If REMOVE LABEL is displayed on the Front Panel, this
completes the installation; or,
If REMOVE LABEL is not displayed on the Front Panel,
proceed to Step 4: “Configuring the Printer.”
FEED
Key
Notes: (1) The operation of the Present Sensor on this option can also be controlled by host
software commands, so ensure that your labeling program is properly configured for use
when sending label formats to the printer.
(2) If this option is removed with power applied, the printer will behave as if a label awaits
removal; to restore normal operation, cycle power to the printer.
Step 4: Configuring the Printer
While the Heavy Duty Peel and Present option is a plug and play device, this step may be necessary if the
printer’s default configuration has been changed. Follow the steps below to configure the printer:
Note: In the following procedure, consult the Operator’s Manual for detailed front panel instructions.
A) Press the MENU Button on the printer’s front panel.
B) Using the DOWN Button, scroll to PRINTER OPTIONS then press the RIGHT Button.
C) Using the DOWN Button, scroll to PRESENT SENSOR then press the ENTER Key.
D) Using the DOWN Button, scroll to MODE then press the ENTER Key.
E) Using the DOWN Button, scroll to AUTO then press the ENTER Key.
F) Press the EXIT Key then, at the SAVE CHANGES? prompt, select YES to complete the installation.
G) Turn the Power Switch ‘Off’ and ‘On’ to reset the printer and complete the configuration.
Note: If the printer fails to separate the labels from the backing material, and the Internal Rewinder
is not turning, it may need to be enabled. Using the procedure above as a guide, press the
MENU Button, scroll to PRINTER OPTIONS, then to REWINDER, and select AUTO.
Afterward, press the EXIT Key and save your changes when prompted.
5
Page 8

Maintaining the Heavy Duty Peel & Present Assembly
To ensure trouble free operation, the Heavy Duty Peel and Present Assembly should be cleaned after
every 100,000 inches (254,000 cm) of media use. This interval depends on the label adhesive, where
“gummy” adhesives may require more frequent cleaning. (To easily track label usage, go to SYSTEM
SETTINGS MEDIA COUNTERS in the printer’s menu system.)
Clean the assembly as follows:
1. Turn ‘Off’ the Power Switch and unplug the power cord from the AC Receptacle. Raise the Access
Cover and remove the media from the printer.
2. Remove the Peel & Present Assembly from the printer.
3. Using compressed air or a soft brush, clean the Sensors on the assembly.
Sensors
Note: For cleaning heavy deposits, isopropyl alcohol can be used – provided it is carefully
applied using a cotton swab, and then allowed to dry before reconnecting the option to
the printer.
6
Page 9

4. Press the Latch to open the Peel and Present Assembly. Then remove the C-Clip that secures the
Upper Roller Shaft to the Front Cover.
C-Clip
Latch
Front Cover
5. Remove the Upper Roller Shaft and the associated Rollers.
Upper Roller
Shaft
Rollers
Upper Roller
Shaft
6. Using a Cotton Swab dampened with alcohol, wipe all Roller and Upper Roller Shaft surfaces
clean. Pay special attention to the ridges on the Rollers to ensure that they are clean.
Note: For cleaning heavy deposits from the Rollers and Shafts in the following steps, WD-40
or another non-damaging adhesive remover can be substituted for isopropyl alcohol –
provided this adhesive remover is carefully applied using a cotton swab.
7. Slide the Rollers back onto the Upper Roller Shaft, place the components into the Front Cover,
and reinstall the C-Clip.
7
Page 10

8. Push and Lift both Tabs that secure the Lower Roller Assembly to the Front Cover (as shown)
and then, while keeping it intact, carefully
Tab
Front Cover
remove the entire Lower Roller Assembly.
Lift
Push
Lower Roller
Assembly
Tabs
9. Take note of the individual Roller positions – they must be
carefully
remove the Rollers from the Lower Roller Shaft.
reinstalled in the same order – then,
Lower Roller
Shaft
10. Using a Cotton Swab dampened with alcohol, wipe all Roller and Lower Roller Shaft surfaces
clean. Pay special attention to the ridges on the Rollers to ensure that they are clean.
11. Slide the Rollers, in their original order, onto the Lower Roller Shaft and reinstall it in the Front
Cover, ensuring that the Tabs are properly seated. Reinstall the Peel and Present Assembly onto the
printer to complete the cleaning procedure.
8
 Loading...