


CP40

CP40 Printer Guide
553772-201 Rev. J
September 2005
Information resources for the CP40 Card Printer
Installation To install the printer:
To install one printer to a PC using a USB cable, see the
Installation Map, shipped at the top of the printer carton.
For detailed installation information or for special
situations (such as network installation), see Info Central.
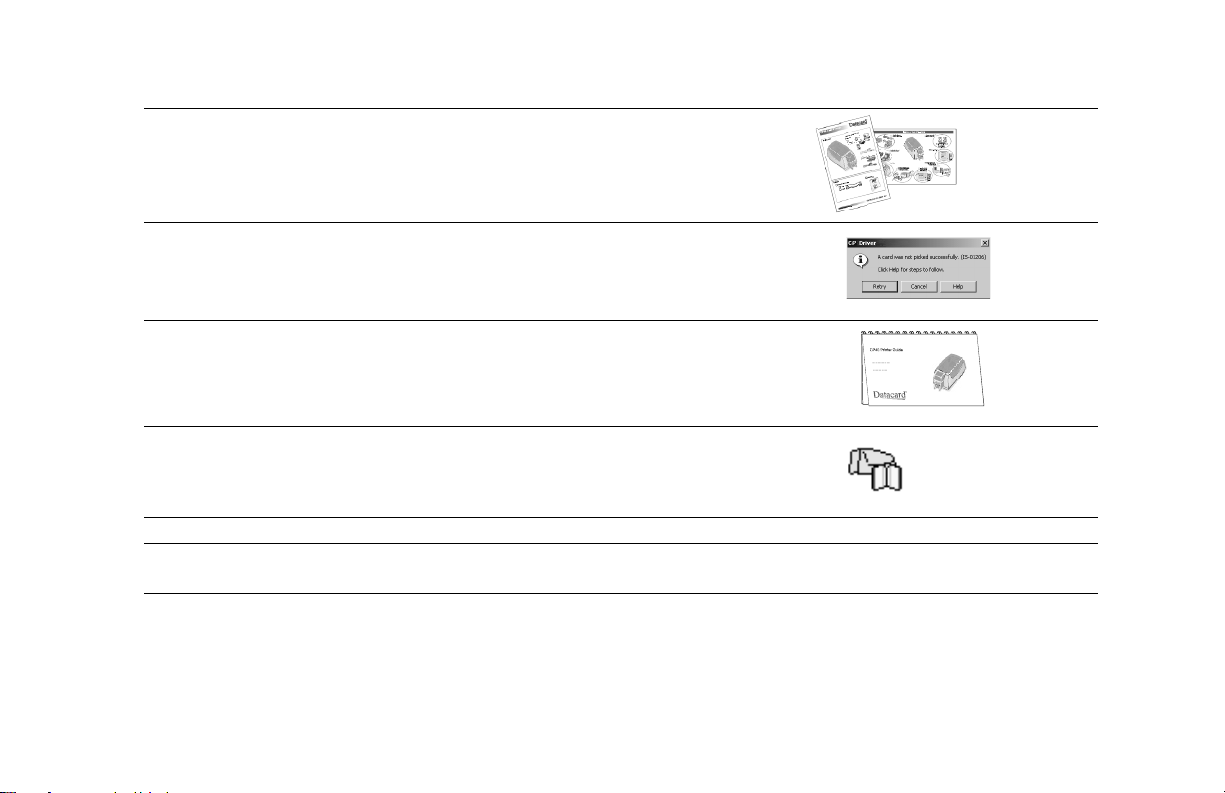
Message Help If you see a message, click Help on the message box.
Really! Help topics are short and to the point.
Printer Guide This Printer Guide contains operating information for the
printer and driver.
Info Central For in-depth information about using the printer, install
Info Central on a Windows PC, then click the icon on the
desktop. (Insert the CP Driver CD-ROM and choose User
Information to install Info Central.)
Dealer
Customer
Care
For help with questions not addressed by other CP Series printer information, contact your dealer.
Contact the Datacard® Customer Care Center at 1.800.328.3996 (U.S. & Canada) or 1.952.988.2316
(worldwide)..

Contents
About the printer . . . . . . . . . . . . . . . . . . . . . . . . . . . 1
Loading cards . . . . . . . . . . . . . . . . . . . . . . . . . . . . . 5
Loading print ribbon. . . . . . . . . . . . . . . . . . . . . . . . . 7
Check the PC connection . . . . . . . . . . . . . . . . . . . . 9
Power on the printer . . . . . . . . . . . . . . . . . . . . . . . 10
Status light. . . . . . . . . . . . . . . . . . . . . . . . . . . . . . . 11
The LCD panel . . . . . . . . . . . . . . . . . . . . . . . . . . . 13
Opening Properties or Printing Preferences . . . . . 15
Open the Printer Toolbox . . . . . . . . . . . . . . . . . . . 17
Cleaning the printer . . . . . . . . . . . . . . . . . . . . . . . . 19
Getting the most out of your printer . . . . . . . . . . . . 21
Printer supplies . . . . . . . . . . . . . . . . . . . . . . . . . . . 23
Troubleshooting. . . . . . . . . . . . . . . . . . . . . . . . . . . 25
Site requirements . . . . . . . . . . . . . . . . . . . . . . . . . 27
Legal Notices (FCC) . . . . . . . . . . . . . . . . . . . . . . . 28
539251-201 Page iii

About the printer
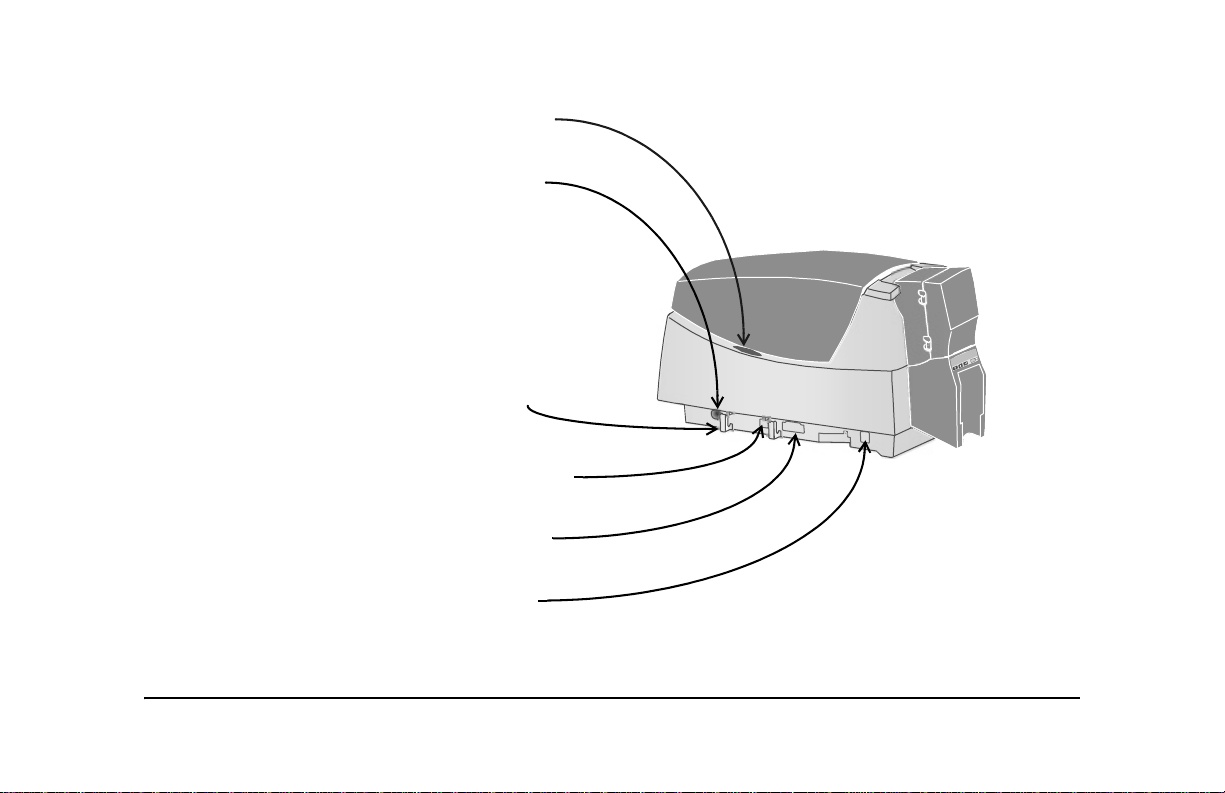
The outside of the printer
Printer Cover.
Latch: Lift the latch to open the printer cover.
Input hopper: Lift the cover to load blank cards.
Output hopper: Remove completed cards.
Ready button: Push to pause or unpause the printer.
Page 1
The status light helps you understand printer operation.
See "Status light" on page 11 for details.
Ports are located on the left side of the printer.
Manual Advance Knob: Use to release a card in
the printer or to turn rollers.
Power Receptacle: Plug in the power supply to
power on the printer.
Cable Guides: Hold the data cable securely.
Optional Smart Card USB Port: See “Features and
options” on page 4.
Optional Smart Card Serial Port: See “Features
and options” on page 4.
USB Data Port: Connect the data cable to the
printer. All printers use this port.
Page 2
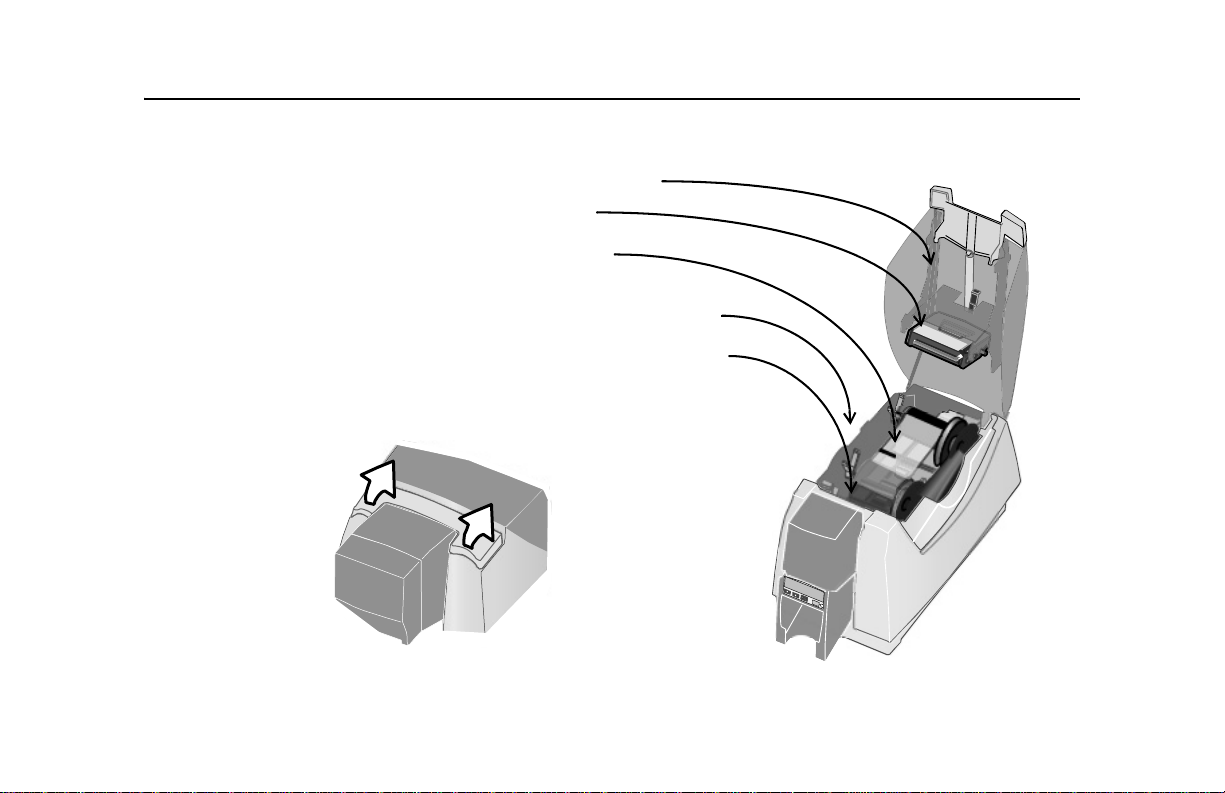
The inside of the printer
Cover Arm: Holds the cover and printhead cartridge in place.
Printhead Cartridge: Applies the image to the card.
Print Ribbon Cartridge (shown with color print ribbon).
Printer Label: Includes the serial number and model information
(located on the left side of the printer and not visible in this drawing).
Cleaning roller (not visible in this drawing): Removes dust and debris
from cards.
Tip: Lift the latch to open the printer and see inside.
1
1
Page 3
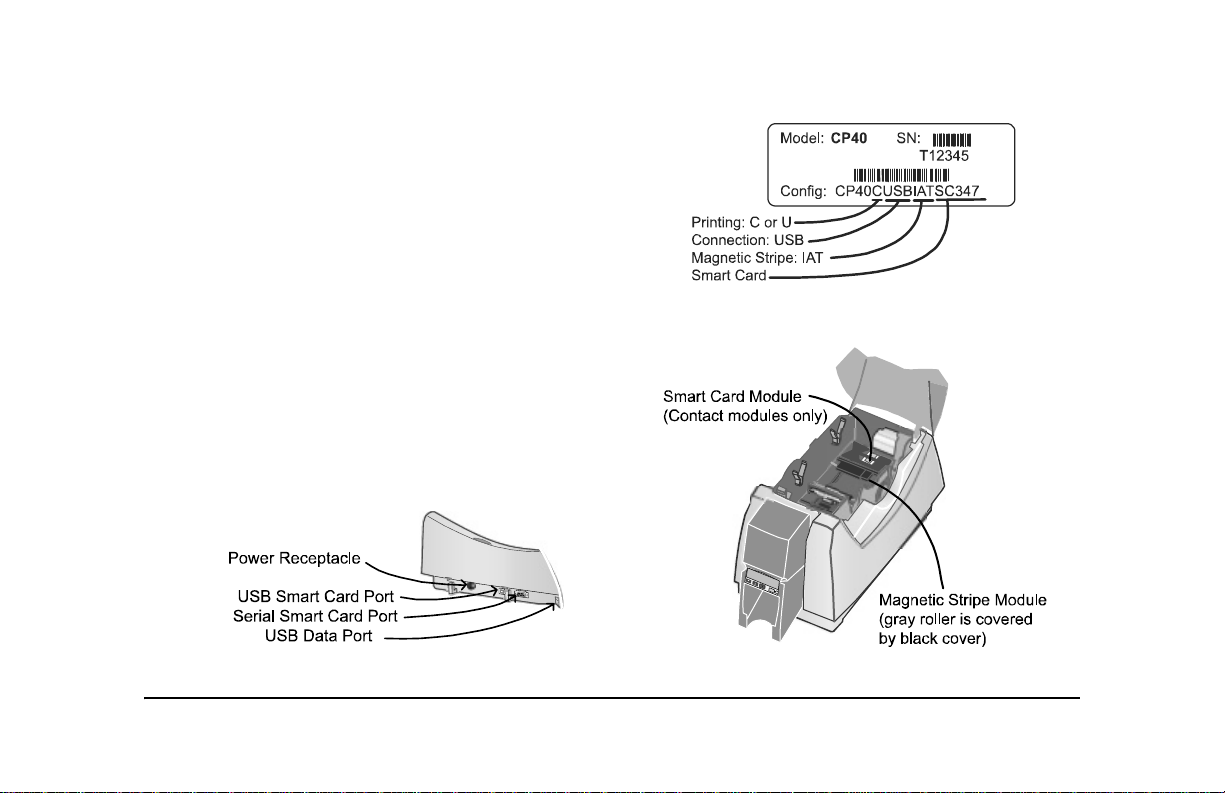
Features and options
Features and options are identified on the printer label.
• Printers with “U” printing can print one color
(monochrome). Printers with “C” printing can print in
full color or monochrome (with specific ribbons).
• All CP40 printers use a USB connection.
• A magnetic stripe module can be a three-track (IAT)
module. The optional magnetic stripe module is visible
inside the printer.
• An optional smart card module can be one of the
following:
— Combination smart card reader (SC347) with
contact and contactless reader. Visible inside the
printer; includes a USB port on the printer.
— Contact station (SC400): visible inside the printer;
includes a serial port.
Page 4
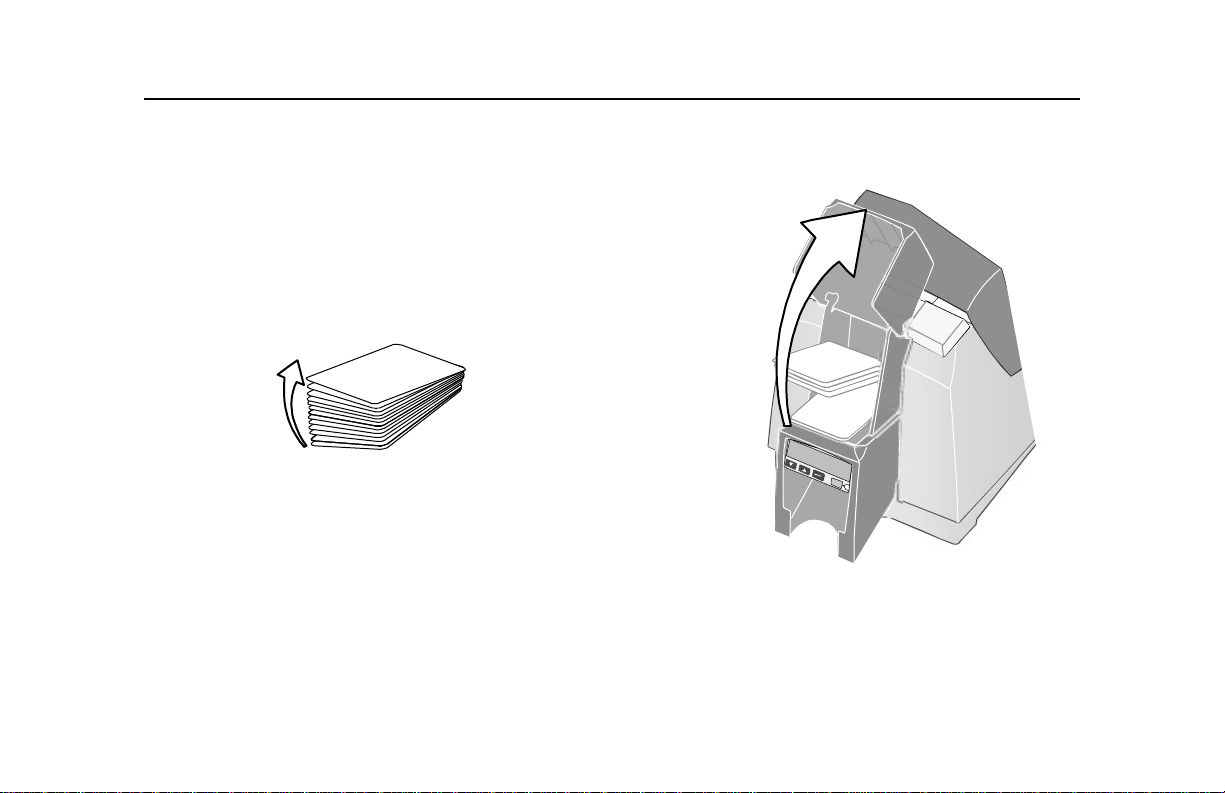
Loading cards
1 Open the input hopper cover.
2 Remove cards from the original package.
Tips: Handling cards
• Cards can stick together: Slide or fan cards to separate the edges.
• Do not touch the surface of cards before printing them. (Oils on
hands will reduce printing quality.)
• Handle cards by the edges or wear gloves.
• Orient all cards the same way.
Page 5
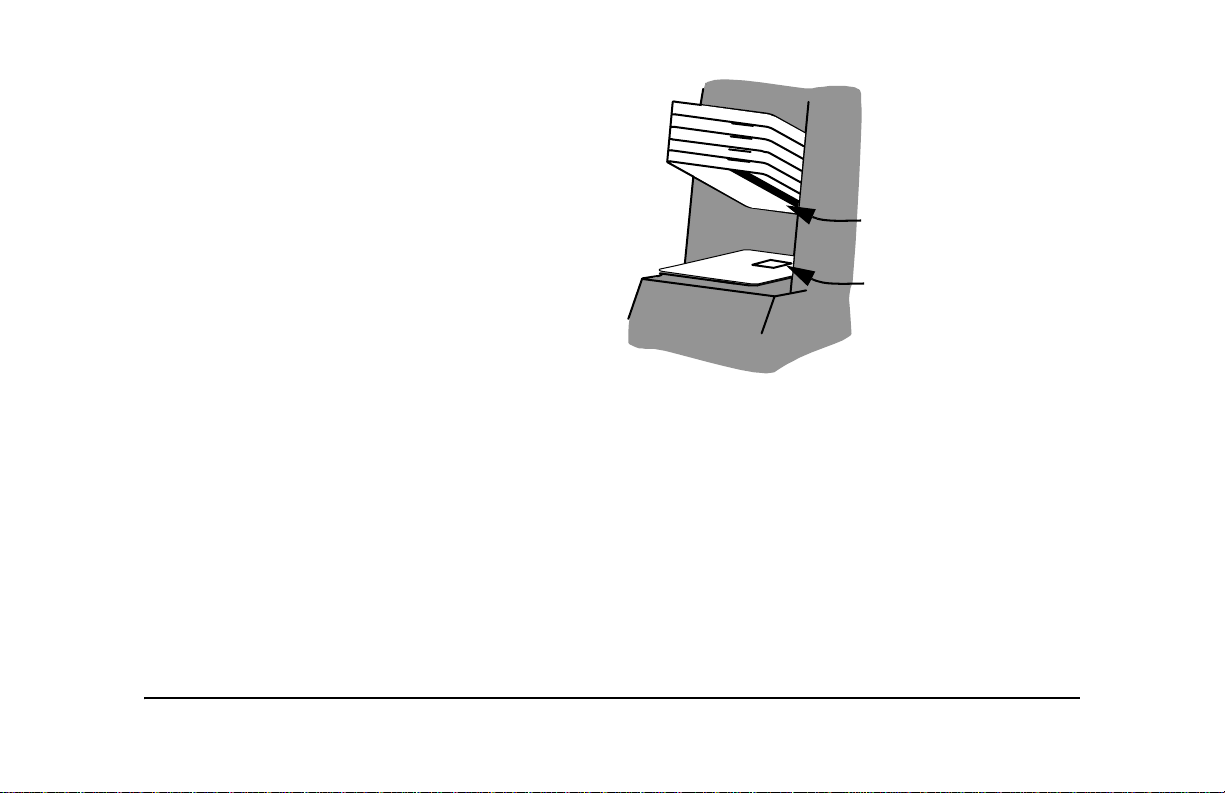
3 Place the cards in the input hopper. The diagram
shows the typical locations for the magnetic stripe
and smart card chip.
4 Push the input hopper cover closed until it
latches.
See Info Central for current information about cards
to use in the printer.
.
Magnetic stripe
Smart card chip
Page 6
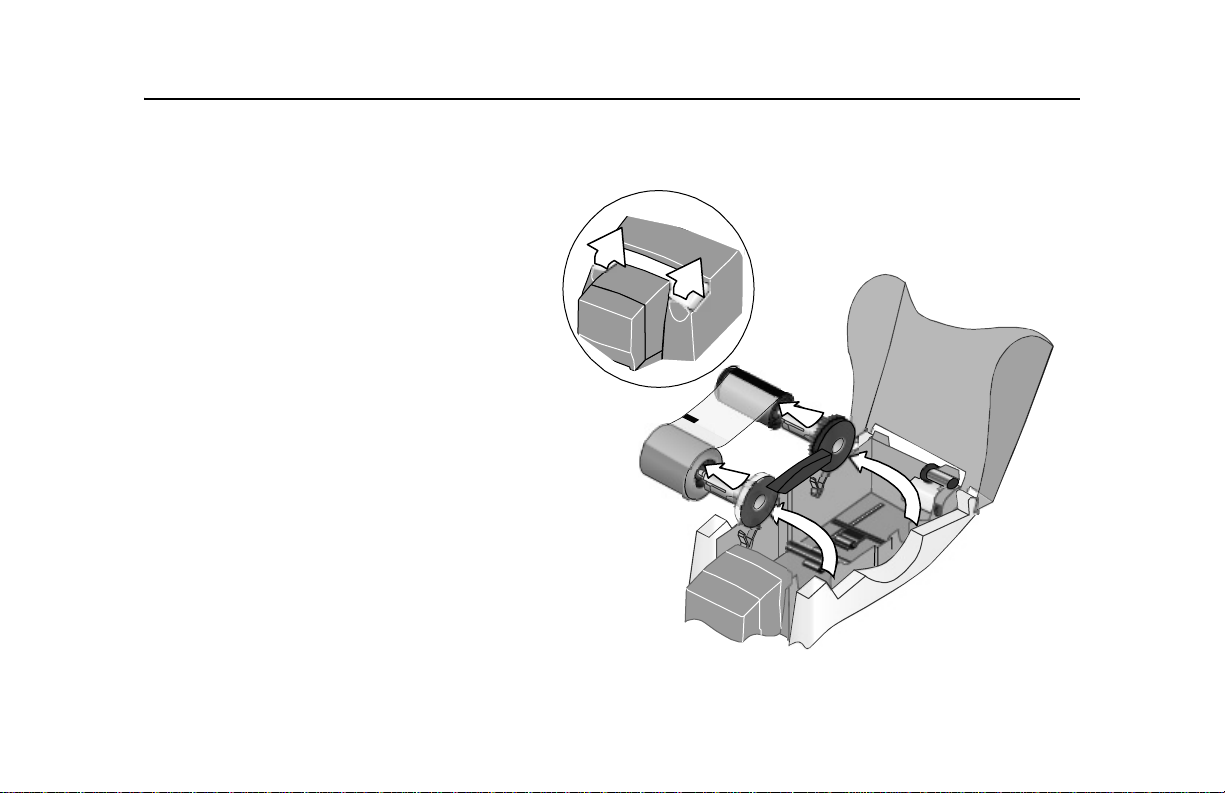
Loading print ribbon
1 Open the printer cover.
2 Remove the ribbon cartridge.
3 Remove both used ribbon spools from the
cartridge (if present).
Tips: Handling print ribbon
• Keep unused ribbon in the original
package.
• Don’t place ribbon on a dusty or dirty
surface–dirt could damage the printhead.
4 Run a cleaning card and replace the
cleaning sleeve at the same time that you
load a new print ribbon. See "Cleaning the
printer" on page 19 for the steps to follow.
Page 7
 Loading...