

Page 1
Room Thermostat
User Guide
Type CFR
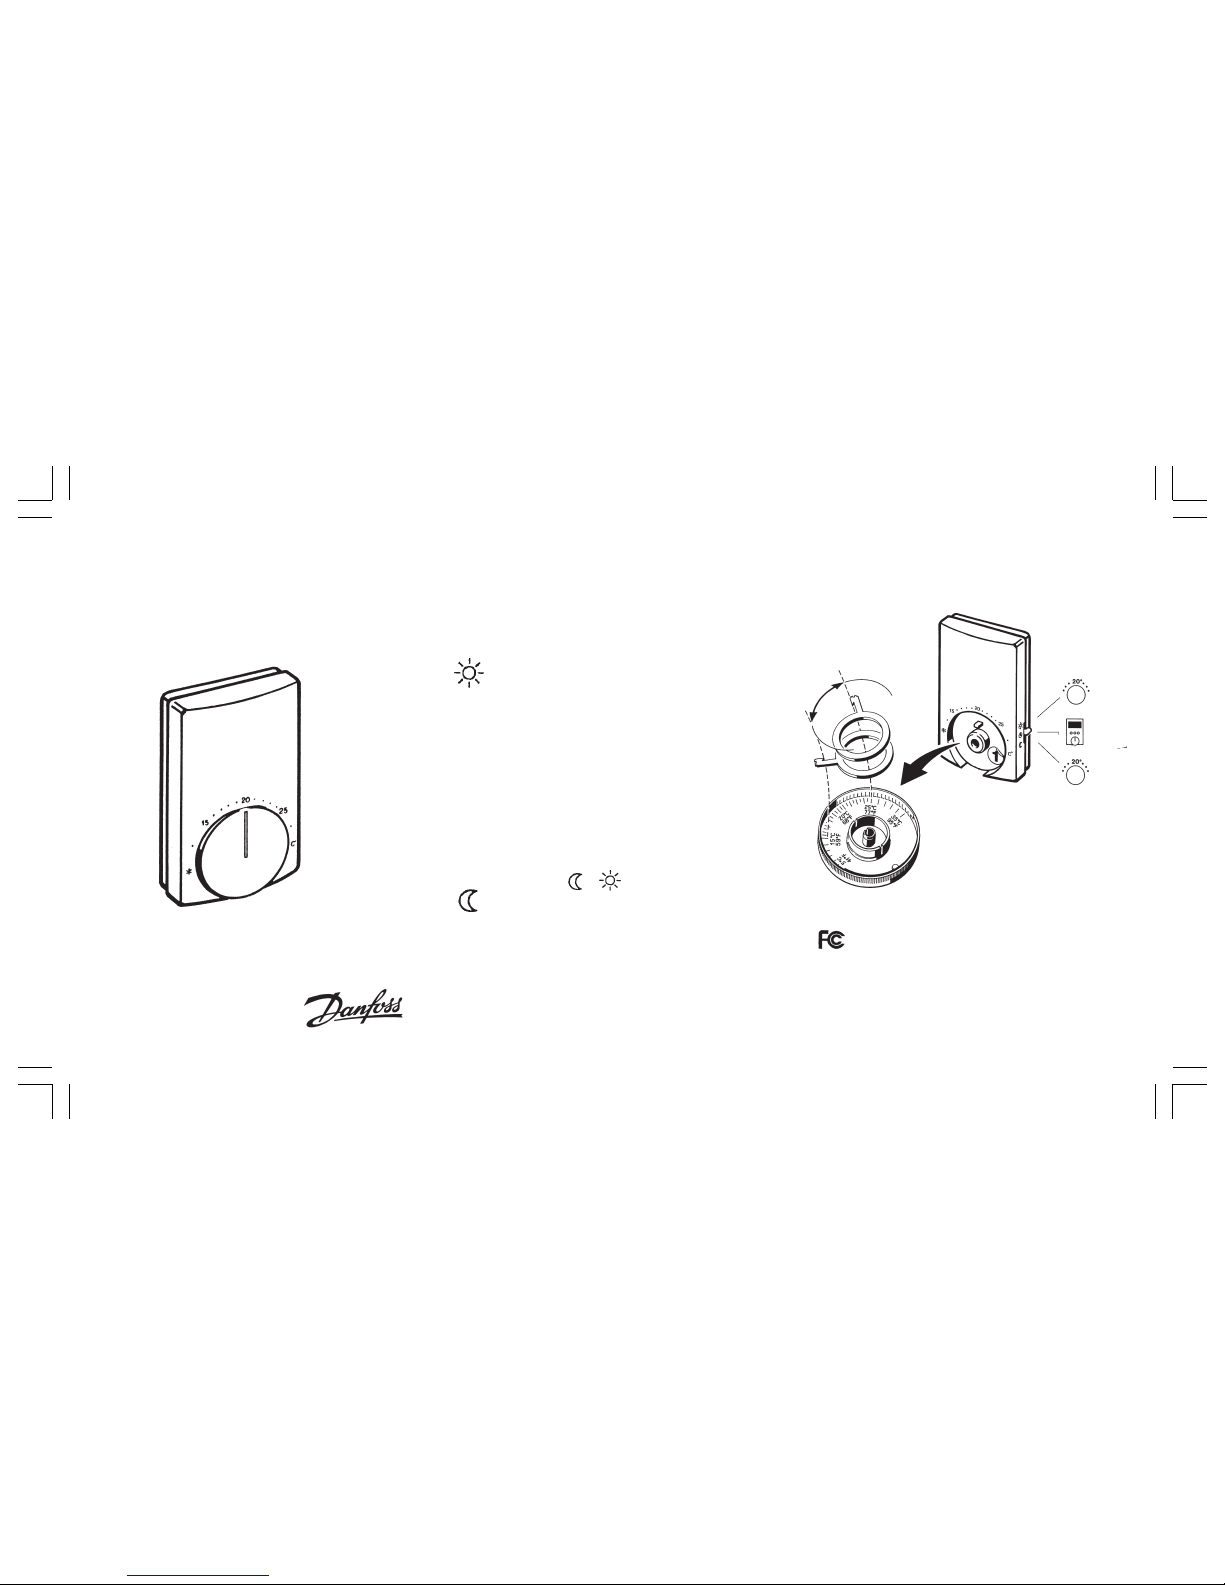
Temperature setting
Set room temperature on the thermostat dial.
On the right-hand side of the thermostat is a
function switch with 3 possible settings:
The room temperature will be as set
on the thermostat.
The control system must have a CFZ
programmer, put thermostat switch
into this position to engage the programmer. The temperature will be as
set on the room thermostat, but in accordance with the consumption pattern
entered.
The heating pattern in the programmer
can be overridden by moving the
switch to or .
The room temperature will be as set
on the thermostat less a setback of
5°C/9°F.
Limitation of the setting range
Behind the dial for temperature setting are two lockrings. These can be moved as shown if the thermostat setting range is to be narrowed.
¹
Warning: Changes or modifications to this unit not
expressly approved by the party responsible for
compliance could void the user’s authority to operate
the equipment.
(70°F)
FCC ID: PGBTYPE-CFR , CAN 3934104209
This device complies with Part 15 of the FCC Rules and
with RSS-210 of Industry Canada:
Operation is subject to the following two conditions:
(1) This device may not cause harmful interference, and
(2) This device must accept any interference received,
including interference that may cause undesired operation.
Setback
5°C (9°F)
088R0228
Page 2
2
3
1
Li 3,6V/1,9Ah
088R0228 DKCD 03/01
Registration field in
CFM
Room Thermostat
Instructions for Installation
Type CFR
Each room thermostat has a unique ID number
preventing conflicts with other thermostats. A single
room thermostat is capable of regulating several
heating outputs, provided these outputs are assigned to
the thermostat.
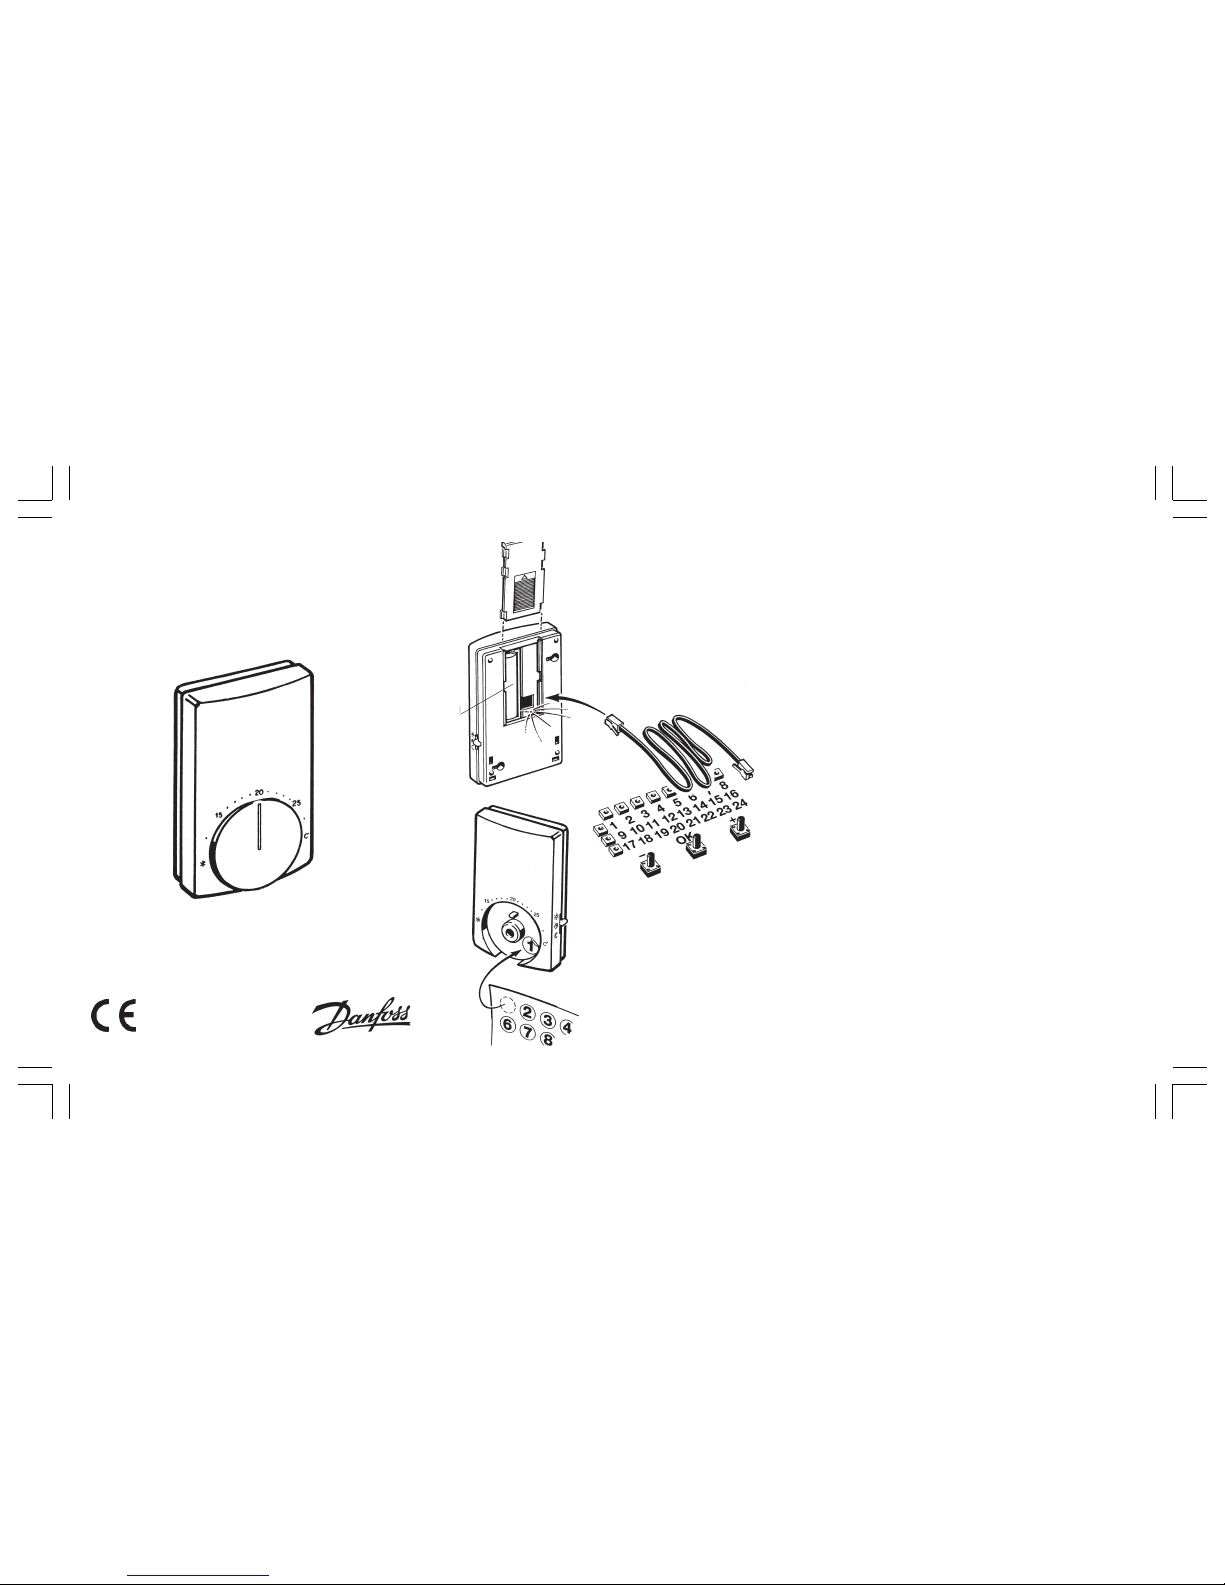
Assigning thermostats to output(s)
-The installation cable between room thermostat and
CFM (fig. 1) must be connected in assigning each
thermostat to the respective output(s).
-In the LED array the first available position will flash.
Outputs already assigned will not be lit (fig. 2). By
pressing OK the thermostat will be assigned to that
output. If the room thermostat is to be assigned under
another lit output, scroll to the output by means of the +/ keys, then press OK.
-When the installation cable is removed, the red LED
underneath the battery cover (fig. 1) will flash for at
least one minute (Test mode).
Removal of assigned thermostat
-It is not necessary to have the installation cable in
place when removing an assigned thermostat. Once a
thermostat has been removed, it may be reassigned to
another output.
-Removal of room thermostat is done by pressing OK
for 5 seconds, then the entire LED array will be lit.
Scroll to the specific room thermostat to be removed
with the +/- button,and press OK for 5 seconds. The
thermostat has now been removed.
Test of room thermostat
If a defect in a room thermostat is suspected, the fol-
lowing test may be carried out:
- Set the thermostat to the highest temperature.
- Move the function switch on the side of the room thermostat to a new position.
- If the LED underneath the battery cover (fig. 1) flashes
quickly for 3 minutes, the room thermostat is OK.
 Loading...