

Page 1

TP7001 Range
Electronic 7 Day
Programmable Room Thermostat
Danfoss Heating
User Guide
Page 2

TP7001
Electronic 7 Day
Programmable Room Thermostat
For a large print version of these instructions
please call Marketing on 0845 121 7400.
®
Certification Mark
Danfoss can accept no responsibility for possible errors in catalogues, brochures, and other
printed material. All trademarks in this material are property of the respective companies.
Danfoss and the Danfoss logotype are trademarks of Danfoss A/S. All rights reserved.
2
TP7001
Page 3

Thank you for buying a Danfoss product
GB
GB
GB
Danfoss Heating
3
Page 4

User Instructions
TP7001 Range
GBGB
Electronic Programmable Room Thermostat
Index
1.0 User Instructions .......................................................................................6
1.1 Your programmable room thermostat ..................................6
1.2 Display ...............................................................................................7
1.3 Preset programmes .......................................................................8
1.4 Before you start ..............................................................................8
1.5 Display preferences .......................................................................9
1.6 Setting the date and time ...........................................................9
1.7 Accepting the preset programme ........................................ 11
1.8 Before you change the preset programme ....................... 11
1.81 Programming in 7-day mode ................................................. 12
1.82 Programming in 5/2 day mode .............................................. 14
1.8.3 Programming in 24 hour mode ............................................. 15
1.8.4 Programming in A+B mode .................................................... 15
2.0 Advanced Functions ............................................................................. 18
2.1 Mode ............................................................................................... 18
2.2 Thermostat mode ....................................................................... 18
2.3 Holiday mode ............................................................................... 19
2.4 User overrides .............................................................................. 20
2.4.1 Temporarily increase/decrease temperature .................... 20
2.4.2 Extend set temperature by 1, 2 or 3 hours ........................21
2.4.3 Changing clock forwards and backward ............................ 21
2.4.4 Delay start feature ...................................................................... 22
2.4.5 Optimum start control .............................................................. 22
2.4.6 Remote override in and out of thermostat mode ........... 22
3.0 User Advanced Programming .......................................................... 23
3.1 Overview of installer selectable features ........................... 27
3.1.1 Temperature range limitation ................................................ 27
3.1.2 Temperature override limitation ........................................... 27
3.1.3 Keyboard lock............................................................................... 27
3.2 In case of low battery ................................................................ 28
4.0 Service Interval Timer .......................................................................... 28
5.0 Resetting the Unit .................................................................................. 29
6.0 INFO Button .............................................................................................. 29
7.0 Settings Reference ................................................................................. 30
4
TP7001
Page 5

What is a programmable room thermostat?
... an explanation for householders
A programmable room thermostat is both a programmer and a room thermostat. A
programmer allows you to set ‘On’ and ‘O ’ time periods to suit your own lifestyle.
A room thermostat works by sensing the air temperature, switching on the heating
when the air temperature falls below the thermostat setting, and switching it o once
this set temperature has been reached.
So, a programmable room thermostat lets you choose what times you want the
heating to be on, and what temperature it should reach while it is on. It will allow you
to select di erent temperatures in your home at di erent times of the day (and days
of the week) to meet your particular needs.
Turning a programmable room thermostat to a higher setting will not make the room
heat up any faster. How quickly the room heats up depends on the design of the
heating system, for example, the size of boiler and radiators.
Neither does the setting a ect how quickly the room cools down. Turning a
programmable room thermostat to a lower setting will result in the room being
controlled at a lower temperature, and saves energy.
The way to set and use your programmable room thermostat is to nd the lowest
temperature settings that you are comfortable with at the di erent times you have
chosen, and then leave it alone to do its job. The best way to do this is to set low
temperatures rst, say 18°C, and then turn them up by one degree each day until
you are comfortable with the temperatures. You won’t have to adjust the thermostat
further. Any adjustments above these settings will waste energy and cost you more
money.
If your heating system is a boiler with radiators, there will usually be only one
programmable room thermostat to control the whole house. But you can have
di erent temperatures in individual rooms by installing thermostatic radiator valves
(TRVs) on individual radiators. If you don’t have TRVs, you should choose a temperature
that is reasonable for the whole house. If you do have TRVs, you can choose a slightly
higher setting to make sure that even the coldest room is comfortable, then prevent
any overheating in other rooms by adjusting the TRVs.
The time on the programmer must be correct. Some types have to be adjusted in
spring and autumn at the changes between Greenwich Mean Time and British
Summer Time.
You may be able to temporarily adjust the heating programme, for example, ‘Override’,
‘Advance’ or ‘Boost’. These are explained in the manufacturer’s instructions.
Programmable room thermostats need a free ow of air to sense the temperature, so
they must not be covered by curtains or blocked by furniture. Nearby electric res,
televisions, wall or table lamps may prevent the thermostat from working properly.
GBGB
Danfoss Heating
5
Page 6

1.0 User Instructions
1.1 Your programmable room thermostat
Your programmable room thermostat allows you to programme
di erent temperatures at di erent time periods. You can programme
GBGB
one set of times and temperatures for week days with a di erent
set of temperatures for weekend days, this is referred to as 5/2 day
operation.
You can also programme di erent times and temperatures for each
day of the week individually – this is called 7 day operation.
The thermostat can also be set to provide one set of times and
temperatures that are repeated each day of the week. This is referred
to as 24 hour operation.
The thermostat can also be set by you to provide two di erent
programming blocks which can then be assigned to any day of the
week, this is referred to as A/B programme operation.
The TP7001 can be set by your installer to provide up 2, 4 or 6 time
and temperature settings each day. The TP7001 features useful
overrides, including a programmable frost setting.
Your thermostat has some advanced features which the installer
will set-up if they are required. There are also a number of advanced
features which can be set up by you. These advanced settings
alter the way that your thermostat operates, some also a ect the
programming functions and the user overrides. Please read the User
Advanced Programming instructions before programming the unit
(see page 23).
6
TP7001
Page 7

1.2 Display
KEY TO SYMBOLS
CURRENT TEMPERATURE
GB
PROGRAMMED TEMPERATURE
TIME
Days of Week (Numbers or Text)
Flame: shows when heating output is on
Battery: ashes when battery voltage is low
Hourglass: shows during programming delays or when
Delayed Start is active
Padlock: indicates keyboard lock
Suitcase: Holiday Mode
House and Thermometers:
Indoor and Outdoor Temperature
Clock and Hand: Timed and Manual Modes
Alarm: Alarm active
Frost Shield: Frost Mode
Λ Up Arrow: Temperature override up
Auto Mode (6 events per day)
Auto Mode (4 events per day)
Auto Mode (2 events per day) or All Day Mode
V Down Arrow: Temperature override down
OFF: Thermostat (O ) Mode
+ HRS: Extend function
Danfoss Heating
7
Page 8

GB
1.3 Preset Programmes
Your TP7001 comes ready programmed with a set of operating times
and temperatures which often suit most people.
Weekdays (Mon-Fri) Weekend (Sat-Sun)
Event Time Temp °C Event Time Temp °C
1 06:30 20 1 07:30 20
2 08:30 15 2 09:30 20
3 11:30 20 3 11:30 20
4 13:30 15 4 13:30 20
5 16:30 21 5 16:30 21
6 22:30 15 6 22:30 15
If you want, you can change any of these settings by following the
instructions on pages 11 to 17. First follow the steps on page 9 to set
your display preferences.
1.4 Before you start
Open the ap on the front of your TP7001.
Using a non-metallic object, press and
release the recessed RESET button.
NOTE: Your TP7001 features a backlight
on it’s display. Unless this has been
disabled or set to be on all the time
(mains version only), the rst press of any
button will cause the backlight to come
on. In order to action a function, a repeat
press of the button will be required. All
buttons will then operate as normal until
the unit is left untouched for 2 minutes
and then the next button press will
activate the backlight again.
8
TP7001
Page 9

1.5 Display Preferences
Temperature display (°C or °F)
Press and hold V and - buttons for 2-3
seconds until display changes.
Clock display (12 or 24 hr)
Press and hold Λ and + buttons for 2-3
seconds until display changes.
(AM or PM will appear in 12 hr mode)
GB
Days of the week (numbers or text)
Press Λ and – to toggle between day
numbers and text
1.6 Setting the Time and Date
Setting the correct date and time
Your TP7001 incorporates a real time clock with calendar function
that automatically changes time in both Spring and Autumn. The
time and date is set in the factory for the relevant time zone (GMT,
CET or CET+1), and does not normally require adjustment. If you live
in another time zone refer to “Time zone o set” on page 24. However,
should it be found necessary to adjust time or date for any other
reason refer to the following instructions.
Danfoss Heating
9
Page 10

GB
Setting the date
Press and hold Λ and PROG buttons for 3
seconds, to display date.
The YEAR number will ash, use Λ or V to
correct the year (Fig 1).
Use - or + to move to MONTH, then use Λ
or V to correct month (Fig 2).
Use - or + to move to DATE in month,
then use Λ or V to correct day in month
(Fig 3).
If you attempt to select an invalid date
the unit will reject it and apply the nearest
valid date. It is recommended that date is
set in the order, yy/mm/dd.
Setting the correct time
After setting the date press PROG to
display the time. The time display will
Fig. 1
Fig. 3
Fig. 2
Fig. 4
ash on and o . Use the + and - buttons
to set the correct time (press and hold to
change in 10 minute increments). (Fig. 4)
10
TP7001
Page 11

Setting the correct day
The day of the week is set automatically
from the date. Press PROG button to
return to normal operation (RUN).
(Fig. 5)
GB
Fig. 5
Fig. 6
1.7 Accepting the preset programmes
If you are happy to use the preset programmes on page 8, you do
not need to do anything else. To accept these settings just close the
front cover.
The unit is now in RUN mode (colon ashes in display) and the
heating will operate according to the preset programmes. (Fig. 6)
1.8 Before you change the preset programmes
Your installer will have set your unit to operate in either 7-day mode,
5/2 day mode or 24 hour mode. To tell which mode your unit is set
press PROG until Event 1 ashes in the display.
In 7-day mode (Fig. 7) you can
programme di erent settings for each
day of the week (see page 12).
Note: Only one day of the week is shown
in the display.
In 5/2 day mode (Fig. 8) you can enter
one set of programmes for weekdays and
another set for weekends (see page 14).
Note: Either weekdays or weekend days
are shown in the display.
Fig. 7 Fig. 8
Danfoss Heating
11
Page 12

In 24 hour mode (Fig. 9) you can enter
one set of programmes which repeats
every day (see page 15).
Note: No days of the week are shown in
the display.
GB
Note:
Event times cannot be set out of
sequence.
To return to RUN mode at any time,
press and hold PROG. Alternatively,
do not press any buttons and the unit
will automatically return to RUN after 2
minutes.
Your installer will have set your unit to
operate with either 2, 4 or 6 events per
day. This will determine the number
of events per day that you are able to
programme.
Fig. 9
1.81 Programming in 7-day mode
(Separate programmes for each day of the week)
a) Press PROG until Event 1 ashes (Fig.
10).
b) Change the time and temperature as
follows:
i) Use the + or – buttons to alter the
time (press and hold to change in
10 minute increments).
ii) Use the or buttons to alter
temperature in 0.5°C (1°F) steps.
iii) Press NEXT to advance to next
Event for that day.
iv) Repeat steps i, ii and iii above for
Fig. 10
Fig. 11
12
the remaining events (Fig. 11).
TP7001
Page 13

c) When all events are correct, press DAY to programme events for
the next day. (If a day’s event times and temperatures are to be
repeated in another day of the week then the COPY function can
be used - see below).
d) Repeat steps b and c to programme
(or COPY) events for the rest of the
week.
To return to RUN mode, press and
release the PROG button. The display
will change to show the current
time, set temperature and actual
GB
temperature (Fig. 12).
Normal Copy Function
1. At step d press the COPY button and the previous day’s events
will be copied into the currently displayed day.
Advanced Copy Function
1. When all 6 events are correct, press the COPY button.
2. Press the DAY button to select which day to copy to.
3. When day is selected press the COPY button.
4. Continue steps 2 and 3 until all the days you would like to copy to
have been copied.
5. To exit advanced copy mode press the DAY button until the day
copied from is selected and press the COPY button.
Note: Advanced Copy can only be used if the Advanced Copy
Function has been enabled in option 2 in User Advanced
Fig. 12
Programming (see page 23).
Danfoss Heating
13
Page 14

1.82 Programming in 5/2 day mode
(One set of programmes for weekdays, another for weekends)
a) Press PROG button until Event 1 ashes, then press the DAY
button until display shows weekdays (Fig. 13).
GB
b) Follow steps b and c on page 12 to programme times and
temperatures for weekdays (Fig. 14).
c) Press the DAY button to programme events for weekend (Day 6-7)
or press the COPY button to repeat weekday programme.
To return to RUN mode, press and release the PROG button. The
display will change to show the current time, set temperature and
actual temperature (Fig. 15).
Fig. 13 Fig. 14 Fig. 15
14
TP7001
Page 15

1.8.3 Programming in 24 hour mode
(Every day of the week uses the same programme)
a) Press the PROG button until event 1 ashes (Fig. 16).
b) Amend the time and temperature as follows:
i) Press the + and – buttons to alter the time (press and hold to
move in 10 minute increments).
ii) Use the V or Λ buttons to alter the temperature in 0.5°C (1°F)
steps.
iii) Press the NEXT button to advance to the next event (Fig.
17).
iv) Repeat the steps above for the remaining events.
c) When all events are programmed press the PROG button to
return to RUN mode (Fig. 18).
GB
Fig. 16 Fig. 17 Fig. 18
1.8.4 Programming in A+B mode
(Installer setting 41 must be in 5+2 mode)
Press and hold the PROG and V buttons for 3 seconds.
The display will change to that shown in Fig. 19. This
will take you into User Advanced Programming
Mode option 1.
Use the Λ or V buttons to enable or disable the
function (1=enabled, 0=disabled).
Fig. 19
Danfoss Heating
15
Page 16

Press and hold the PROG button for 5 seconds until the display
returns to previous RUN mode (Fig. 20).
Press the PROG button, the display will change to show the default
days assigned to programme “A” (MON, TUE, WED, THU, FRI) (Fig. 21).
GB
Use the + or - buttons to scroll forwards or backwards through the
days of the week.
To deselect a day press the V button, (for example TUE). To select a
day press the Λ button (for example SUN).
Any deselected days are automatically assigned to programme “B”.
Fig. 20 Fig. 21
Programming “A” programme days and events
a) Press the PROG button, the rst preset time and temperature
(Event 1 for Programme A) appears in display (Fig. 22).
b) Use the + or - buttons to adjust the TIME (press and hold to
change in 10 minute increments).
16
Fig. 22
TP7001
Page 17

c) Use the Λ or V buttons to adjust the required TEMPERATURE in
0.5°C (1°F) steps.
d) Press the NEXT button to move to the next preset time and
temperature (Event 2) (Fig. 23).
e) Repeat steps b, c, and d to programme the remaining events.
Programming “B” days and events
a) Press and hold the DAY button until the rst preset time and
temperature (Event 1 for Programme B) appears in display (Fig.
24).
b) Use the + or - buttons to adjust the TIME (press and hold to
change in 10 minute increments).
GB
c) Use the Λ or V buttons to adjust the required TEMPERATURE.
d) Press the PROG button to move to the next preset time and
temperature (Event 2) (Fig. 25).
e) Repeat steps b, c, and d to programme the remaining events.
Running the programme
Press the PROG button to return to previous RUN mode. The
heating will now follow the times and temperatures programmed
(Fig. 26).
Fig. 23
Danfoss Heating
Fig. 24 Fig. 25 Fig. 26
17
Page 18

GB
2.0 Advanced Functions
2.1 Mode
The MODE button allows the operation of the programmed events
to be altered between:
1. Auto mode
a. 6 events
b. 4 events
c. 2 events
2. Allday mode
a. Only the rst and last programmed events run
3. Thermostat mode
a. Thermostat mode means that all time pro les are ignored
and the temperature is controlled at whatever temperature is
manually set by the user.
Note: If set for two events per day, then Auto and Allday are e ectively
the same and so the MODE button will only change between Auto
and Thermostat (O ) modes.
When in Auto or Allday modes, the clock symbol is displayed to
indicate the programmed events will be followed.
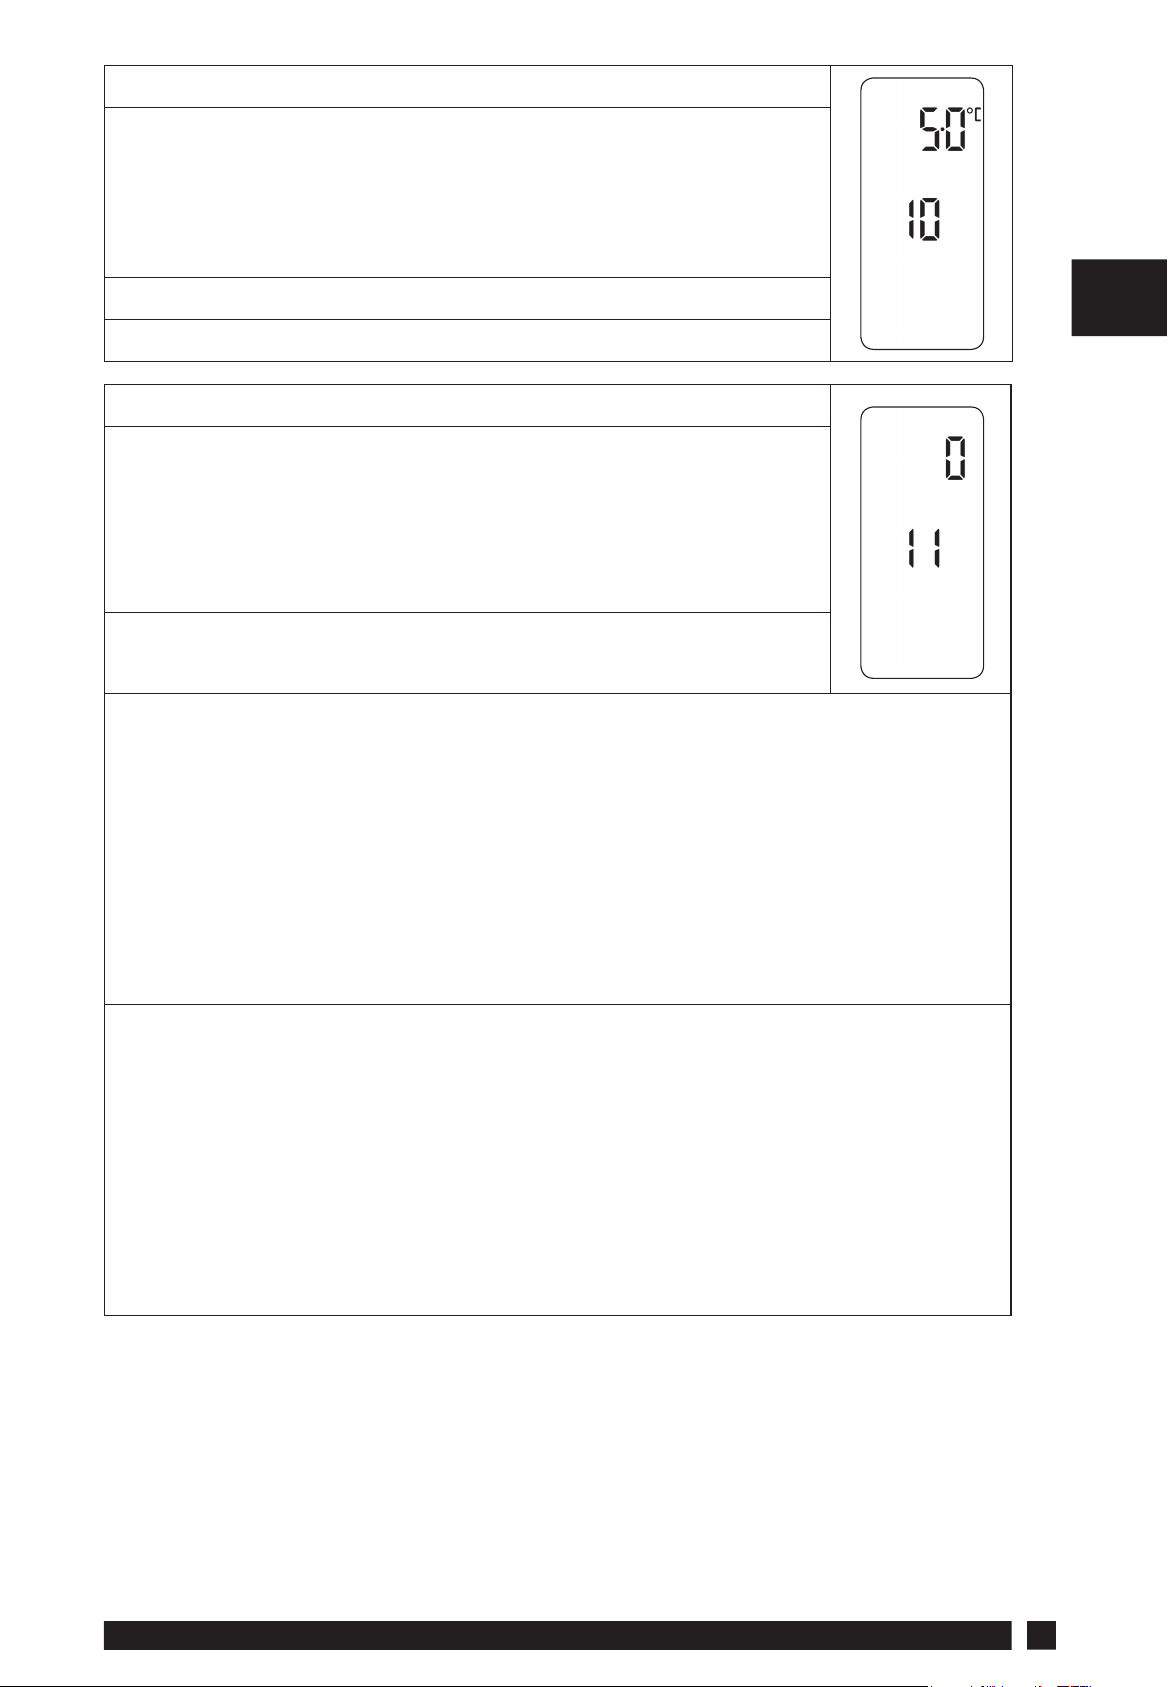
2.2 Thermostat mode
The TP7001 can be converted to control at a constant user selected
temperature, instead of following the set programme.
Press and hold the and buttons together until the
display changes to the colon ashing and default frost
temperature (5°C).
Press the or buttons to alter temperature as
required.
NOTE: The unit will remain in thermostat mode until
and are pressed and held together again.
18
TP7001
Page 19

Alternatively, Thermostat Mode can be selected and deselected via
the MODE button.
Thermostat/Auto modes can also be toggled remotely via the
Remote Override, see page 22.
When in Thermostat mode, the hand symbol is shown to indicate this
is a manual setting mode.
NOTE: The frost protection shield symbol will also be displayed when
the selected temperature is equal to or less than the programmed
frost protection setting.
2.3 Holiday Mode
The TP7001 can control at a constant low temperature while you are away
on holiday, returning to your programmed settings at a speci ed date.
GB
Press and hold the DAY button for at least 3 seconds (the display will
show a suitcase and a date with the year ashing - Fig 27). Now you
can set the date of your return.
The YEAR number will ash, use the Λ or V buttons to set the year
of your return.
Use the - or + buttons to move to MONTH. The MONTH number will
ash (Fig 28). Then use Λ or V to set the month of your return.
Use the - or + buttons to move to DAY in month of your return. The
DAY number will ash (Fig 29). Then use the Λ or V button to set on
which day in month you will return.
Danfoss Heating
Fig. 27
Fig. 28 Fig. 29
19
Page 20

Once the date of return is set correctly, press the DAY button to
start holiday mode – the display will change to show a ashing
suitcase and set temperature – this can be altered if required but it is
recommended to leave it set as the default 5 degrees frost protection
setting.
GB
The mode (auto, all day, or thermostat) of operation to return to can
be selected using the MODE button.
To cancel Holiday Mode, or if returning early from holiday, simply
press the DAY button to resume normal operation.
Holiday mode can also be cancelled remotely via the Remote
Override, see page 22.
When in Holiday Mode, a hand symbol is shown to indicate this is a
manual setting mode.
2.4 User Overrides
Sometimes you may need to change the way you use your heating
temporarily, e.g. due to unusually cold or warm weather. The TP7001
has several user overrides, which can be selected without a ecting
the set programmes. When user overrides are active, the hand
symbol will be additionally shown ashing to indicate a manual
change is active.
2.4.1 Temporarily increase or decrease the programmed
temperature (Fig. 30).
Press the V or Λ buttons to select the desired temperature.
This override stays active until the next timed event.
Or if the installer has set for timed overrides, for a set period of 1, 2,
3 or 4 hours. If set for a timed override, the override arrow will start
ashing once the next event time is encountered.
20
TP7001
Page 21

GB
Fig. 30
2.4.2 Extend the current set temperature by 1, 2 or 3 hours
(Fig. 31).
Press the +Hrs button once for 1 extra hour, twice for 2 extra hours, 3
times for 3 extra hours, and press 4 times to remove override.
The display will indicate the number of extended hours have been
set. A fourth press will cancel the override (Fig. 31)
2.4.3 Changing the clock forwards and backwards
This is handled automatically, however, if the manual changeover has
been selected (User Advanced Programming option 3 on page 24)
Fig. 31
follow the instructions below.
To change from Summer to Winter (turn clocks back)
With clock display showing, press and hold - button until time moves
back.
To change from Winter to Summer (move clocks forward)
With clock display showing, press and hold + button until time
moves forward.
Danfoss Heating
21
Page 22

GB
2.4.4 Delay start feature (Economy Setting)
Your thermostat includes an optional delay start feature to hold o
the heating for a time on mild days when the room temperature at
the start of an event is close to the programmed value. If you have
enabled this function it can be overridden by pressing either Λ or
V buttons. A full description of this and how to enable it and set it
up is given in User Advanced Programming, options 11, 12 & 13,
(pages 25-27)
Note: When this function is active, the set temperature will ash on
the display and an hourglass symbol will be displayed.
2.4.5 Optimum start control (OSC) (Comfort Setting)
Your thermostat includes an optional optimum start control. This
feature allows you to set the time at which you require a room
temperature by. The thermostat then calculates how soon before
the event time the system must be turned up to ensure that the
room is at the temperature by the required time. A full description
of this and how to enable it and set it up is given in User Advanced
Programming, options 11, 12 & 13, (pages 25-27).
Note: When this function is active, the set temperature will ash on
the display. The function can be overridden by pressing the or
buttons.
2.4.6 Remote override in and out of thermostat mode
If the installer has tted a telephone activated switch or window
contacts, then it is possible to step the unit into or out of thermostat
mode.
The required temperature to be maintained when the building is
unoccupied, or when windows are open, must rst be set up in User
Advanced Programming, option 10, (page 25).
To locally override this feature press and hold both Λ and V together.
The remote override function will also allow for exit from Holiday
Mode.
22
TP7001
Page 23

3.0 User Advanced Programming
Important: The thermostat has been set in the factory to suit most
situations, however, there are additional optional settings which can
improve the comfort, convenience and energy e ectiveness of your
thermostat. These are set in the User Advanced Programming and
Installer Advanced Programming modes.
To access User Advanced Programming
Press and hold the V and PROG buttons for 3 seconds. This will put
the unit into User Advanced Programming. Use + and - buttons to
scroll backwards and forwards between options then Λ or V buttons
to change option settings. The ashing digit on the right hand side of
the display indicates the number of the selected option.
GB
Option 1 - Enable or Disable A/B Programming
This enables or disables the A/B programming option.
Press + until Option 1 is displayed, use Λ or V to select
required setting. This option will only be possible if
Option 41 under advanced installation is set to 5+2.
0 = Disabled. Operates as 5/2 day (Factory Setting)
1 = Enabled. Activates A+B programming
Option 2 - Enable/Disable Advanced Copy
This option enables or disables the Advanced Copy
Functionality. Press + until Option 2 is selected, use Λ
or V to select required setting.
0 = Copy function copies yesterday’s events into today
(Factory Setting)
1 = Copy function can copy any day into any other
day
Danfoss Heating
23
Page 24

Option 3-Automatic Summer/Winter Time Change
This establishes the rules that the automatic calendar
clock follows to calculate changes between summer
and winter time. Press + until Option 3 is displayed,
use Λ or V to select required setting.
GB
0 = Disabled
1 = Manual
2 = European (Factory Setting)
3 = US New (After 2007)
4 = US Old (Before 2007)
Option 4 - Time Zone O set
This feature allows the time zone to be established
and corrects time display. Press + until Option 4 is
displayed, use Λ or V to select required setting.
0:00 = No time o set. UK models (Factory setting)
+1:00 = +1 Hour time o set, Central European models
(Factory Setting)
+2:00 = +2 Hour time o set, Eastern European models
(Factory setting)
-12:00 to 14:00 = -12 Hrs to 14 Hrs, in 0:15 hour steps
Option 5 - Backlight (Battery Version)
This feature allows the activation or deactivation of the
display backlight. Press + until Option 5 is displayed,
use Λ or V to select required setting.
0 = Backlight Disabled
1 = Backlight On for 6 seconds after a button press
(Factory Setting)
Option 5 - Backlight (Mains Version)
This feature allows the activation or deactivation of the
display backlight. Press + until Option 5 is displayed,
use Λ or V to select required setting.
0 = Backlight Disabled
1 = Backlight On for 6 seconds after a button press
(Factory default)
2 = Backlight Always On
24
TP7001
Page 25
Option 10 - Frost / Thermostat Mode Setting
This feature allows the default frost/thermostat mode
temperature to be set. Press + until Option 10 is
displayed, use Λ or V to select required setting.
Any value between 5.0ºC to 40.0ºC in 0.5ºC steps
Factory Setting is 5.0ºC
Option 11 - Start Up Method
This feature allows the thermostat to start up the
system in three di erent ways. Press + until Option 11
is displayed, use Λ or V to select required setting.
0 = Normal: Heating is turned up or down at the
programmed times. (Factory Setting)
1 = Optimum Start Control (OSC) (or Comfort Setting): This allows
you to programme the time at which you would like to be up to
the required temperature. The thermostat then calculates how soon
before the required time the heating is turned up. This will vary with
weather conditions ranging from a maximum of 120 minutes to 0
GB
minutes before the programmed event time. This setting must be
used together with option 12 to match the optimiser setting to the
building in which it is installed.
2 = Delayed start (or Economy Setting):
This is an alternative to OSC. Set the event times in the normal way
taking into account the time that the building takes to heat on
an average day. The thermostat monitors switch on time, actual
temperature and wanted temperature and delays the start of the
heating if the actual temperature is close to the programmed
temperature. This setting must be used together with Option 12 to
match the delayed setting to the building in which it is installed.
Danfoss Heating
25
Page 26

GB
Option 12
Optimum Start Control / Delayed Start Maximum
Activation Time Setting (Option 11 set to 1 or 2)
This feature allows the maximum optimum or delayed
start time to be set. Press the + button until Option
12 is displayed, use the Λ or V buttons to select
required setting (only active if Option 11 is set to 1
or 2). The maximum time must be adjusted to match
the building energy characteristics. Use the Λ or V
buttons to select the required period.
Optimum Start
If the building fails to reach temperature on time, increase the setting
by 15 minute steps each day until the correct setting is found. If the
building reaches temperature ahead of time, decrease the setting
by 15 minute steps each day until the correct setting is found.
15 mins, warm air systems, well insulated building.
30 mins, warm air systems, well insulated building.
45 mins, warm air system poorly insulated building.
60 mins, radiator system, light weight well insulated building.
(Factory setting)
75 mins, radiator system, light weight medium insulation.
90 mins, radiator system, medium weight poorly insulation.
105 mins, radiator system, heavy weight building, well insulated.
120 mins, radiator system, heavy weight building, poorly insulated.
Delayed Start
For Delayed Start, if the building fails to reach temperature quickly
enough, decrease the setting by 15 minutes, if the building reaches
temperature too quickly, increase the setting by 15 minutes.
120 mins, warm air systems, well insulated building.
105 mins, warm air systems, well insulated building.
90 mins, warm air system poorly insulated building.
75 mins, radiator system, light weight well insulated building.
60 mins, radiator system, light weight medium insulation.
(Factory Setting)
45 mins, radiator system, medium weight poorly insulation.
30 mins, radiator system, heavy weight building, well insulated.
15 mins, radiator system, heavy weight building, poorly insulated.
26
TP7001
Page 27

Option 13 - Optimum Start Control/ Delayed Start
Event Setting (Option 11 set to 1 or 2)
The Optimum start or delayed start control can
be applied to event 1 only or to each event of the
day which requires a higher temperature than the
previous event. Press + until Option 13 is displayed,
use Λ or V to select required setting (only active if
Option 11 is set to 1 or 2).
0 = Applies to Event 1 only (Factory Setting)
1 = Applies to all Events and will activate on those
events which require a higher temperature compared
to the previous event.
3.1 Overview of installer selectable features which
may a ect the operation of your thermostat
3.1.1 Temperature range limitation
This allows the installer to programme both upper and lower
temperature limits. It may limit the upper and lower temperature
GB
that you are able to set on the thermostat.
3.1.2 Temperature override limitation
This allows the installer to limit the number of degrees that you can
override the programmed temperature by, it also allows the installer
to set rules regarding how long a temperature override will remain
in place.
3.1.3 Keyboard lock
This allows the installer to limit or lock the keyboard to prevent
unauthorised changes to programme values and limits overrides.
Note:
Partial keyboard - Padlock symbol will ash
Full keyboard - Steady Padlock symbol
Danfoss Heating
27
Page 28

3.2 In case of Low Battery (Battery versions only)
If the batteries are not changed within 15 days of a low battery
warning (battery symbol ashing on the display), the unit shuts
down. In normal circumstances the thermostat turns o the valve or
the boiler it is controlling. In extreme climates turning o the heating
GB
is likely to result in the building freezing up. To prevent this, the
installer can set up the unit to turn the heating ON rather than turn
OFF on battery failure. This will consume more fuel but will prevent
damage occurring to the building. If appropriate please check that
the installer has set this function correctly.
Please note: If you replace the batteries and the LCD does not come
on immediately please check battery orientation. Do not leave
batteries in the product if the display is not active.
If, after changing the batteries, the screen remains blank it is
necessary to carry out a partial reset. See page 29 for details.
4.0 Service Interval Timer
If the property is owned by a landlord he may, for gas safety
reasons, have instructed the installer to set the service interval
timer.
If set, 28 days prior to the service due date, a visual and audible
warning will start each day at noon. The audible warning will
last for 10 seconds and will be repeated every hour. The display
will show SEr and the service due date. The visual and audible
warnings will remain until a button is pressed to cancel them. If
cancelled the alarm will recommence the following day at noon.
The alarm symbol will ash as a constant reminder.
If the boiler is not serviced before the due date, a visual and
audible warning will start each day at noon. The audible warning
will last for 1 minute and will be repeated every hour. The display
will show SEr and the service due date. The visual and audible
warnings will remain until a button is pressed to cancel them. If
28
cancelled the alarm will recommence the following day at noon.
The alarm symbol will ash as a constant reminder.
TP7001
Page 29

In addition, all overrides and programming buttons will be disabled
and the heating may operate for a limited amount of time each
hour or not come on at all depending on the installer settings.
The installer may cancel or reset the service interval timer as part
of the boiler service.
This is a gas safety feature that can only be accessed by an
installer.
5.0 Resetting the unit
Partial reset: Press RESET (used to restart micro-computer) if display
freezes for any reason. This does not reset any programme, clock or
date. It is recommended that this is done at time of installation.
User full reset: Press and release RESET whilst holding down the
GB
PROG button. This resets event times and any User Advanced
Programming settings, but does not reset time or date.
Installer full reset: This is only available to the installer. In addition
to the above all of the Installer Advanced Programming settings are
returned to factory settings, however, time, date and service due
date are not reset.
6.0 INFO Button
The INFO button will allow various information to be accessed and
displayed, although the information available will depend on how
the unit is set up. The information that can be shown is as follows:
Next Event Time / Temperature
If set in Auto or Allday mode, then pressing the INFO button will
show the time and temperature of the next event. The time shown
for this event will include any +HRS overrides that may be active. If
the time and temperature for the next event is shown ashing, then
this is showing an approximate time as an Optimised Start or Delayed
Start is active, or a timed override is currently being run.
Danfoss Heating
29
Page 30

GB
Outdoor Temperature
If an Outdoor Temperature Sensor has been tted, then pressing
the INFO button will allow the current outdoor temperature to
be displayed, with subsequent presses then showing the lowest
(indicated by Lo) and highest (indicated by Hi) recorded outdoor
temperatures from the last 24 hours.
Floor Temperature
If a Limit Floor Sensor has been tted, then the current oor
temperature can be displayed with the INFO button, indicated by
just a thermometer symbol and no house symbol.
Service Due Date
If the Installer / Service Engineer has set a Service Due Date, then this
can be displayed via the INFO button.
7.0 Settings Reference
User Settings
Option Description Installer Set Value
1 Enable or Disable A/B Programming
2 Enable/Disable Advanced Copy
3 Calendar Clock Rules
4 Time Zone O set
5 LCD Backlight
10 Frost/Thermostat Mode Setting
11 Start-up Method
12 Optimum Start Control / Delayed Start
Maximum Activation Time Setting
13 Optimum Start Control/Delayed Start
Event Setting
30
TP7001
Page 31

Note to installers: Please use this table to record changes to default
settings.
Installer Settings
Option Description Installer Set Value
30 Set upper limit of temperature range
31 Set lower limit of temperature range
32 Enable O at lower limit
33 Enable On at upper limit
34 Select On/O or Chrono-proportional
35 Set Integration Time
36 Set temperature override rule
37 Set time duration of override rule
38 Relay state on low battery detect
(Battery products only)
40 Number of events per day
41 Operating Mode
(7 day, 5/2 day or 24 hour)
70 Keyboard disable rules
71 Random start rules (24V/230V only)
GB
72 Owner site reference number
73 Owner thermostat reference number
74 Date format for calendar clock
75 LCD Switch O
80 +HRS Enable/Disable
81 Thermostat calibration bias
90 De ne remote sensor 1 type
(Connection b)
92 De ne remote sensor 2 type
(Connection C)
93 De ne remote sensor 3 type
(Connection d)
93 Set limit sensor set-point
94 Con gure digital input switch
Danfoss Heating
31
Page 32

Danfoss Ltd.
Ampthill Road
Bedford MK42 9ER
Tel: 01234 364621
Fax: 01234 219705
Email: ukheating@danfoss.com
Website: www.heating.danfoss.co.uk
Part No. 37033v01 11/11
 Loading...