

Page 1
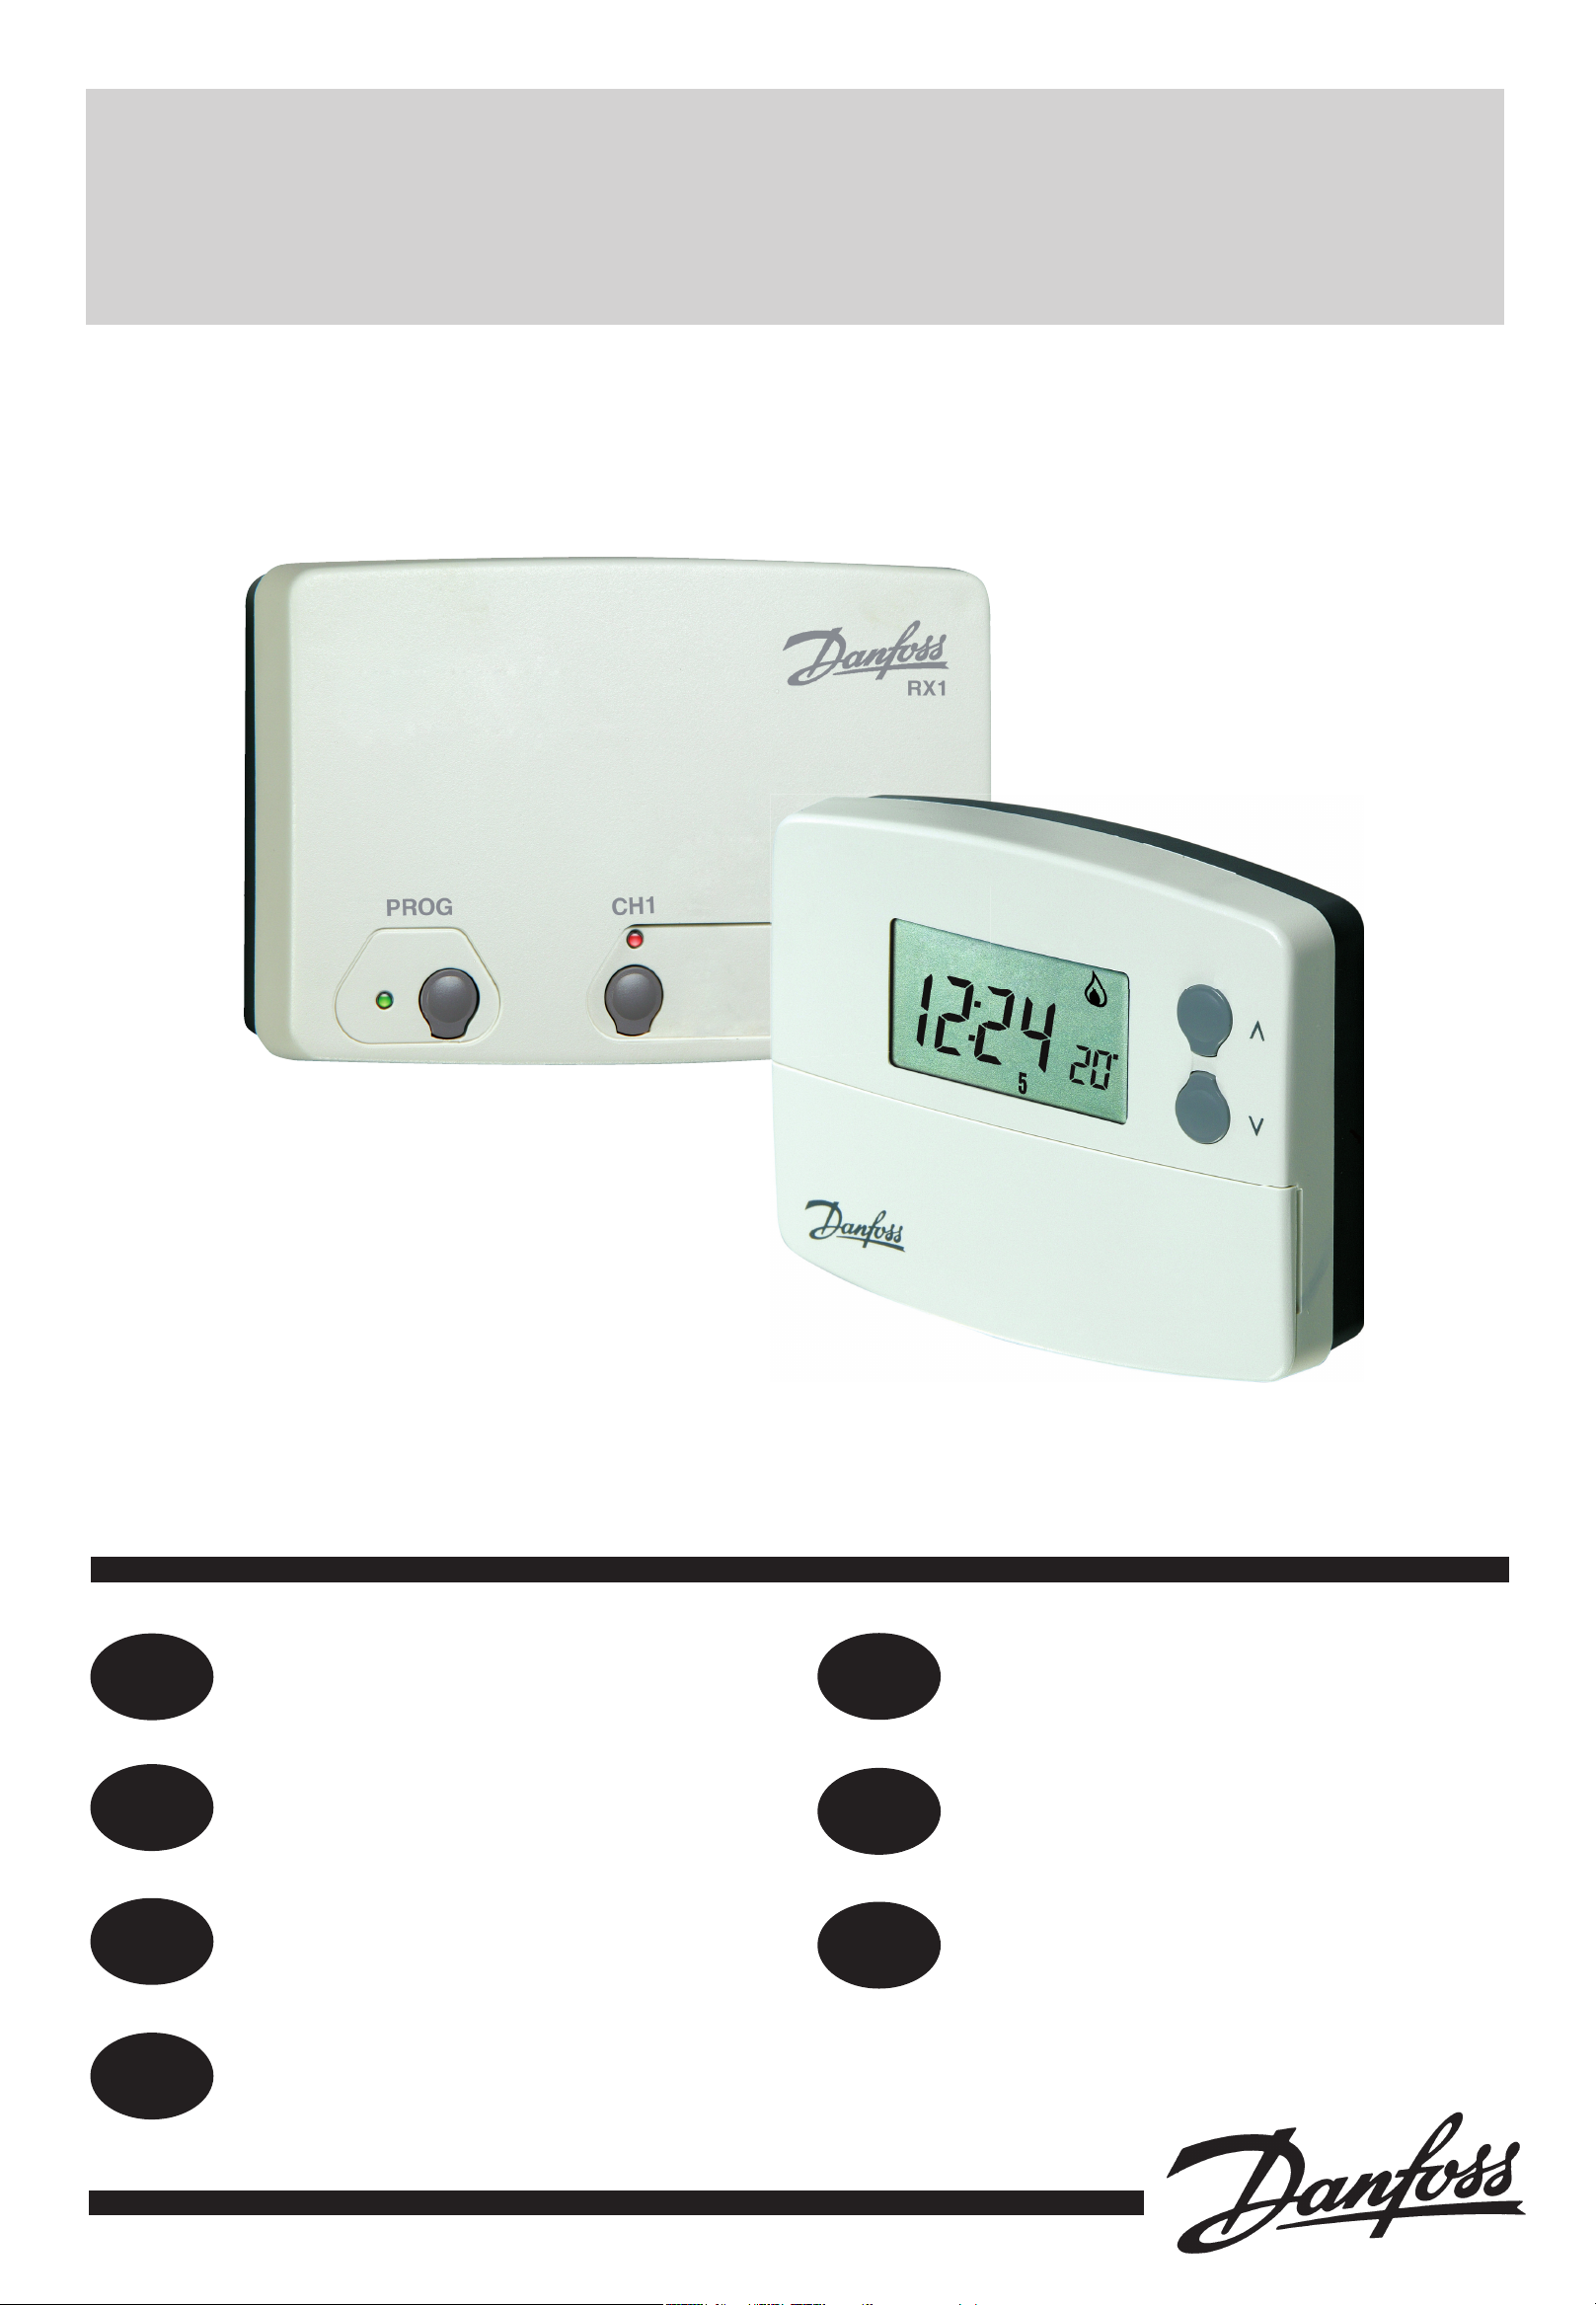
TP5001 Range
Electronic 5/2 day programmable room thermostat
Mains, Battery and RF versions
GB
PL
LT
UA
User Instructions
Instrukcja Użytkownika
Vartotojo instrukcija
Посібник користувача
LV
TR
CZ
Lietošanas pamācība
Kullanıcı Talimatları
Uživatelská příručka
Page 2

GB
User Instructions
User Instructions
An introduction to your programmable room thermostat
Your programmable room thermostat allows you to programme
diff erent temperatures at diff erent time periods. You can programme
one set of times and temperatures for week days with a diff erent set of
temperatures for weekend days, this is referred to as 5/2 day operation.
The thermostat can also be set up by your installer to provide one set
of times and temperatures that are repeated each day of the week. This
is referred to as 24 hour operation.
The thermostat can also be set by you to provide two diff erent
programming blocks which can then be assigned to any day of the
week, this is referred to as A/B programme operation.
All thermostats can be set by your installer to provide up 2, 4 or 6 time
and temperature settings each day.
All thermostats feature useful overrides, including a programmable
frost setting.
Your thermostat has some advanced features which the installer will
set-up if they are required. There are also a number of advanced features
which can be set up by you. These advanced settings alter the way that
your thermostat operates, some also aff ect the programming functions
and the user overrides. Please read the User Advanced Programming
instructions before programming the unit (see page 10).
Preset programmes
Your TP5001 comes ready programmed with a set of operating times and
temperatures which suit most people. Please remember that some of the
options available will depend on how the installer has set up the unit.
Weekdays (Mon-Fri) Weekend (Sat-Sun)
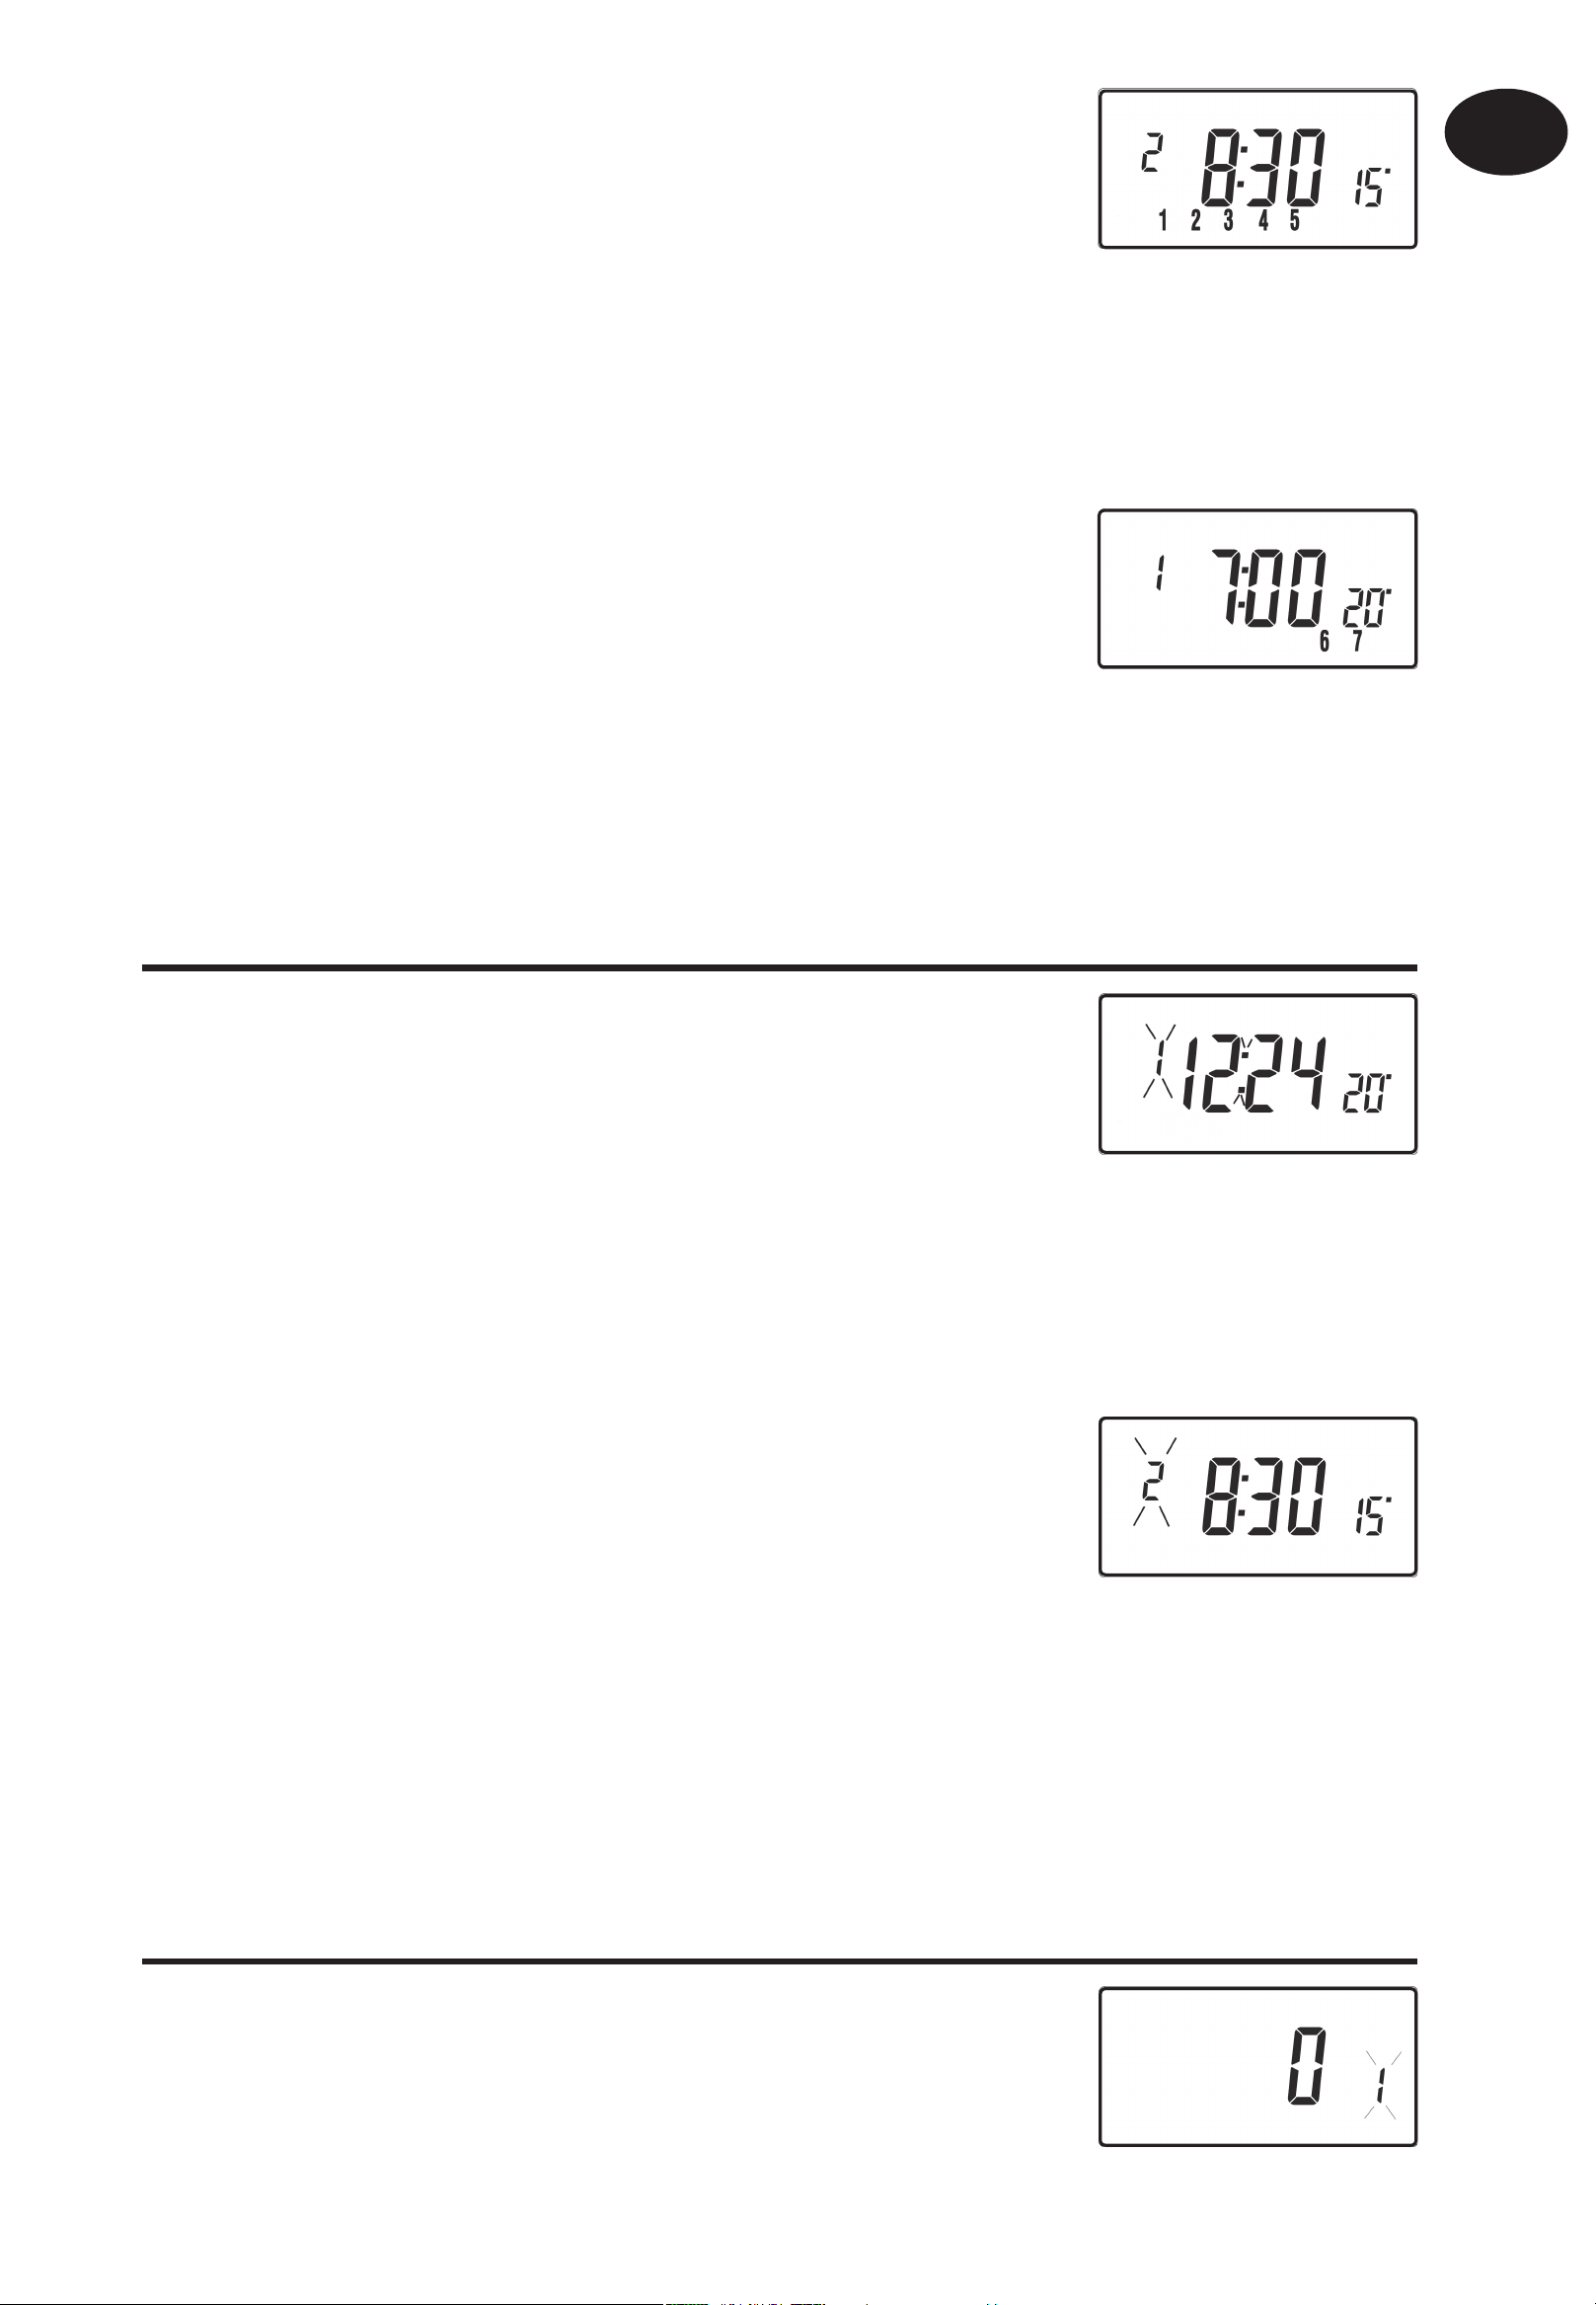
Event Time Temp. °C Event Time Temp. °C
1 06:30 20 1 07:30 20
2
2 08:30 15 2 09:30 20
3 11:30 20 3 11:30 20
4 13:30 15 4 13:30 20
5 16:30 21 5 16:30 21
6 22:30 15 6 22:30 15
Note: these are also times for Block
“A” programmes
Note: these are also times for Block “B”
programmes
Page 3
3
Note: If set up for 4 events per day, events 3 & 4 are skipped. If set up
for 2 events per day, events 2, 3, 4 & 5 are skipped. In both cases the
events are re-numbered.
Before you start
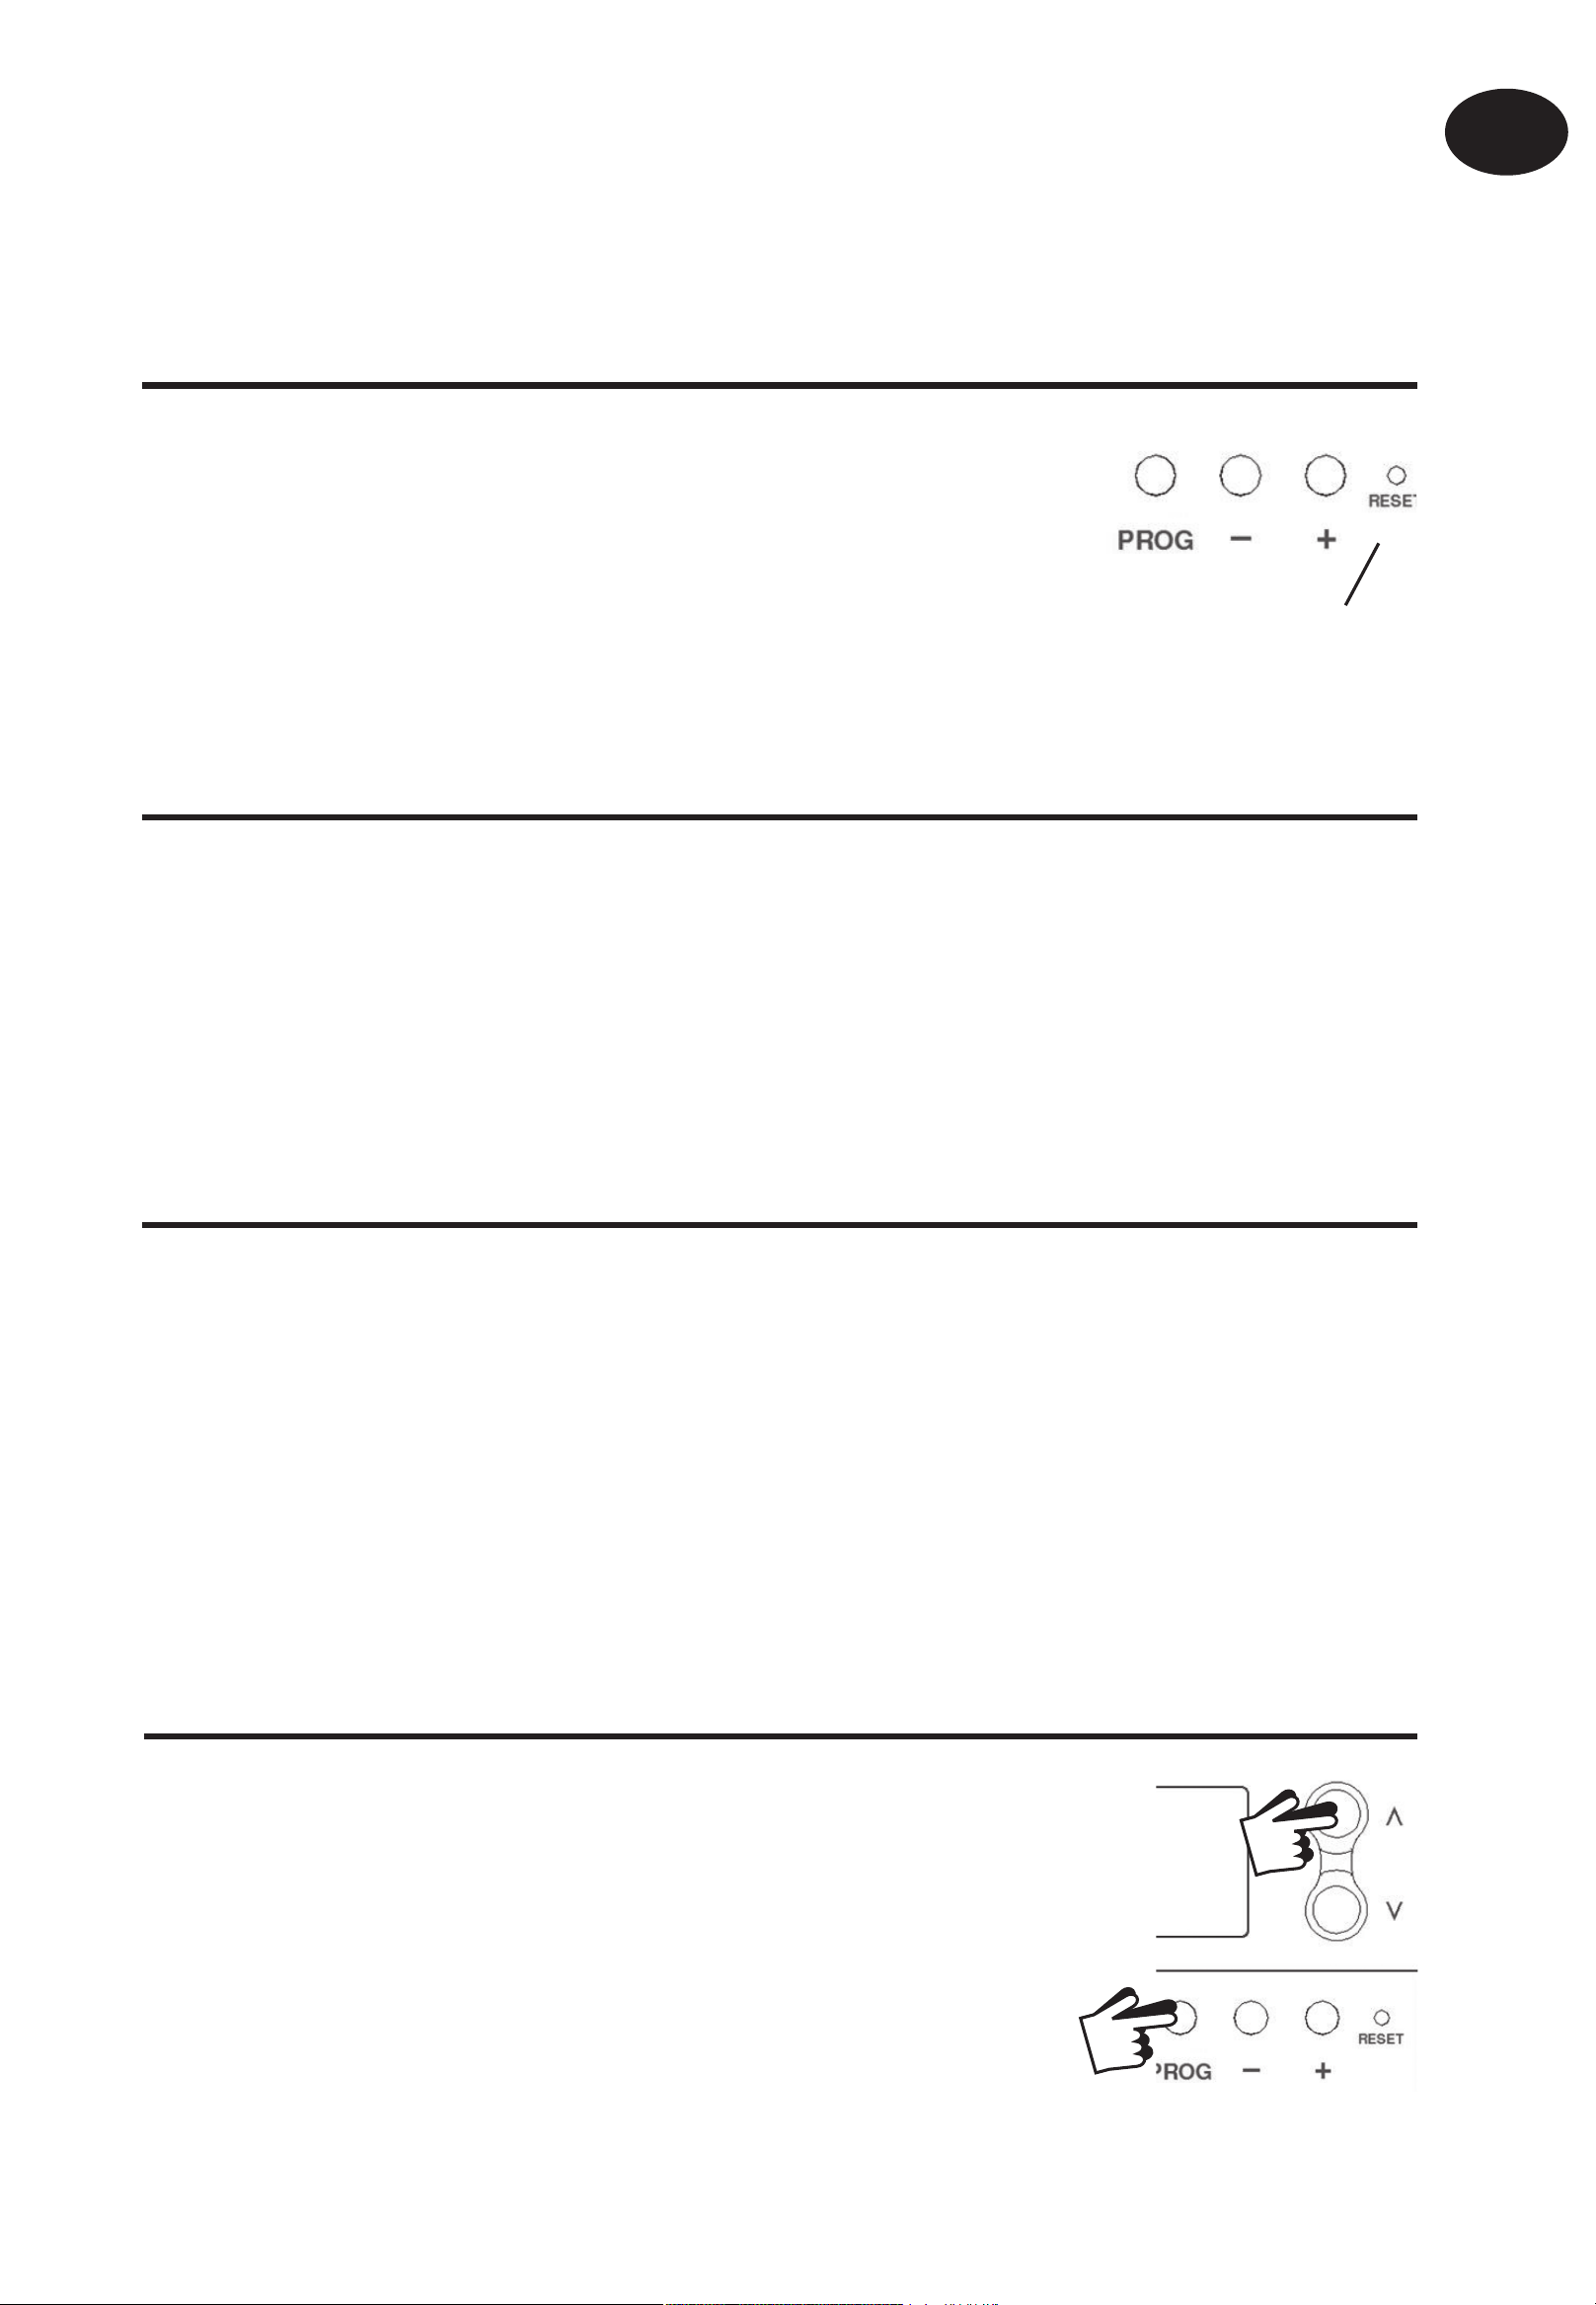
Open the fl ap on the front of the programmer and
press the RESET button with a non-metallic object
until the display goes blank. This will ensure that
the factory programmes are set and that the micro-
RESET
computer in the product is operating correctly.
GB
User Instructions
Customising the display
For the sake of clarity, the instructions assume that the display setting
uses a 24 hour clock, °C and that days of the week are numbered 1-7,
(where 1 is Monday). All of these settings can be personalised after the
thermostat has been programmed, see pages 8 and 9.
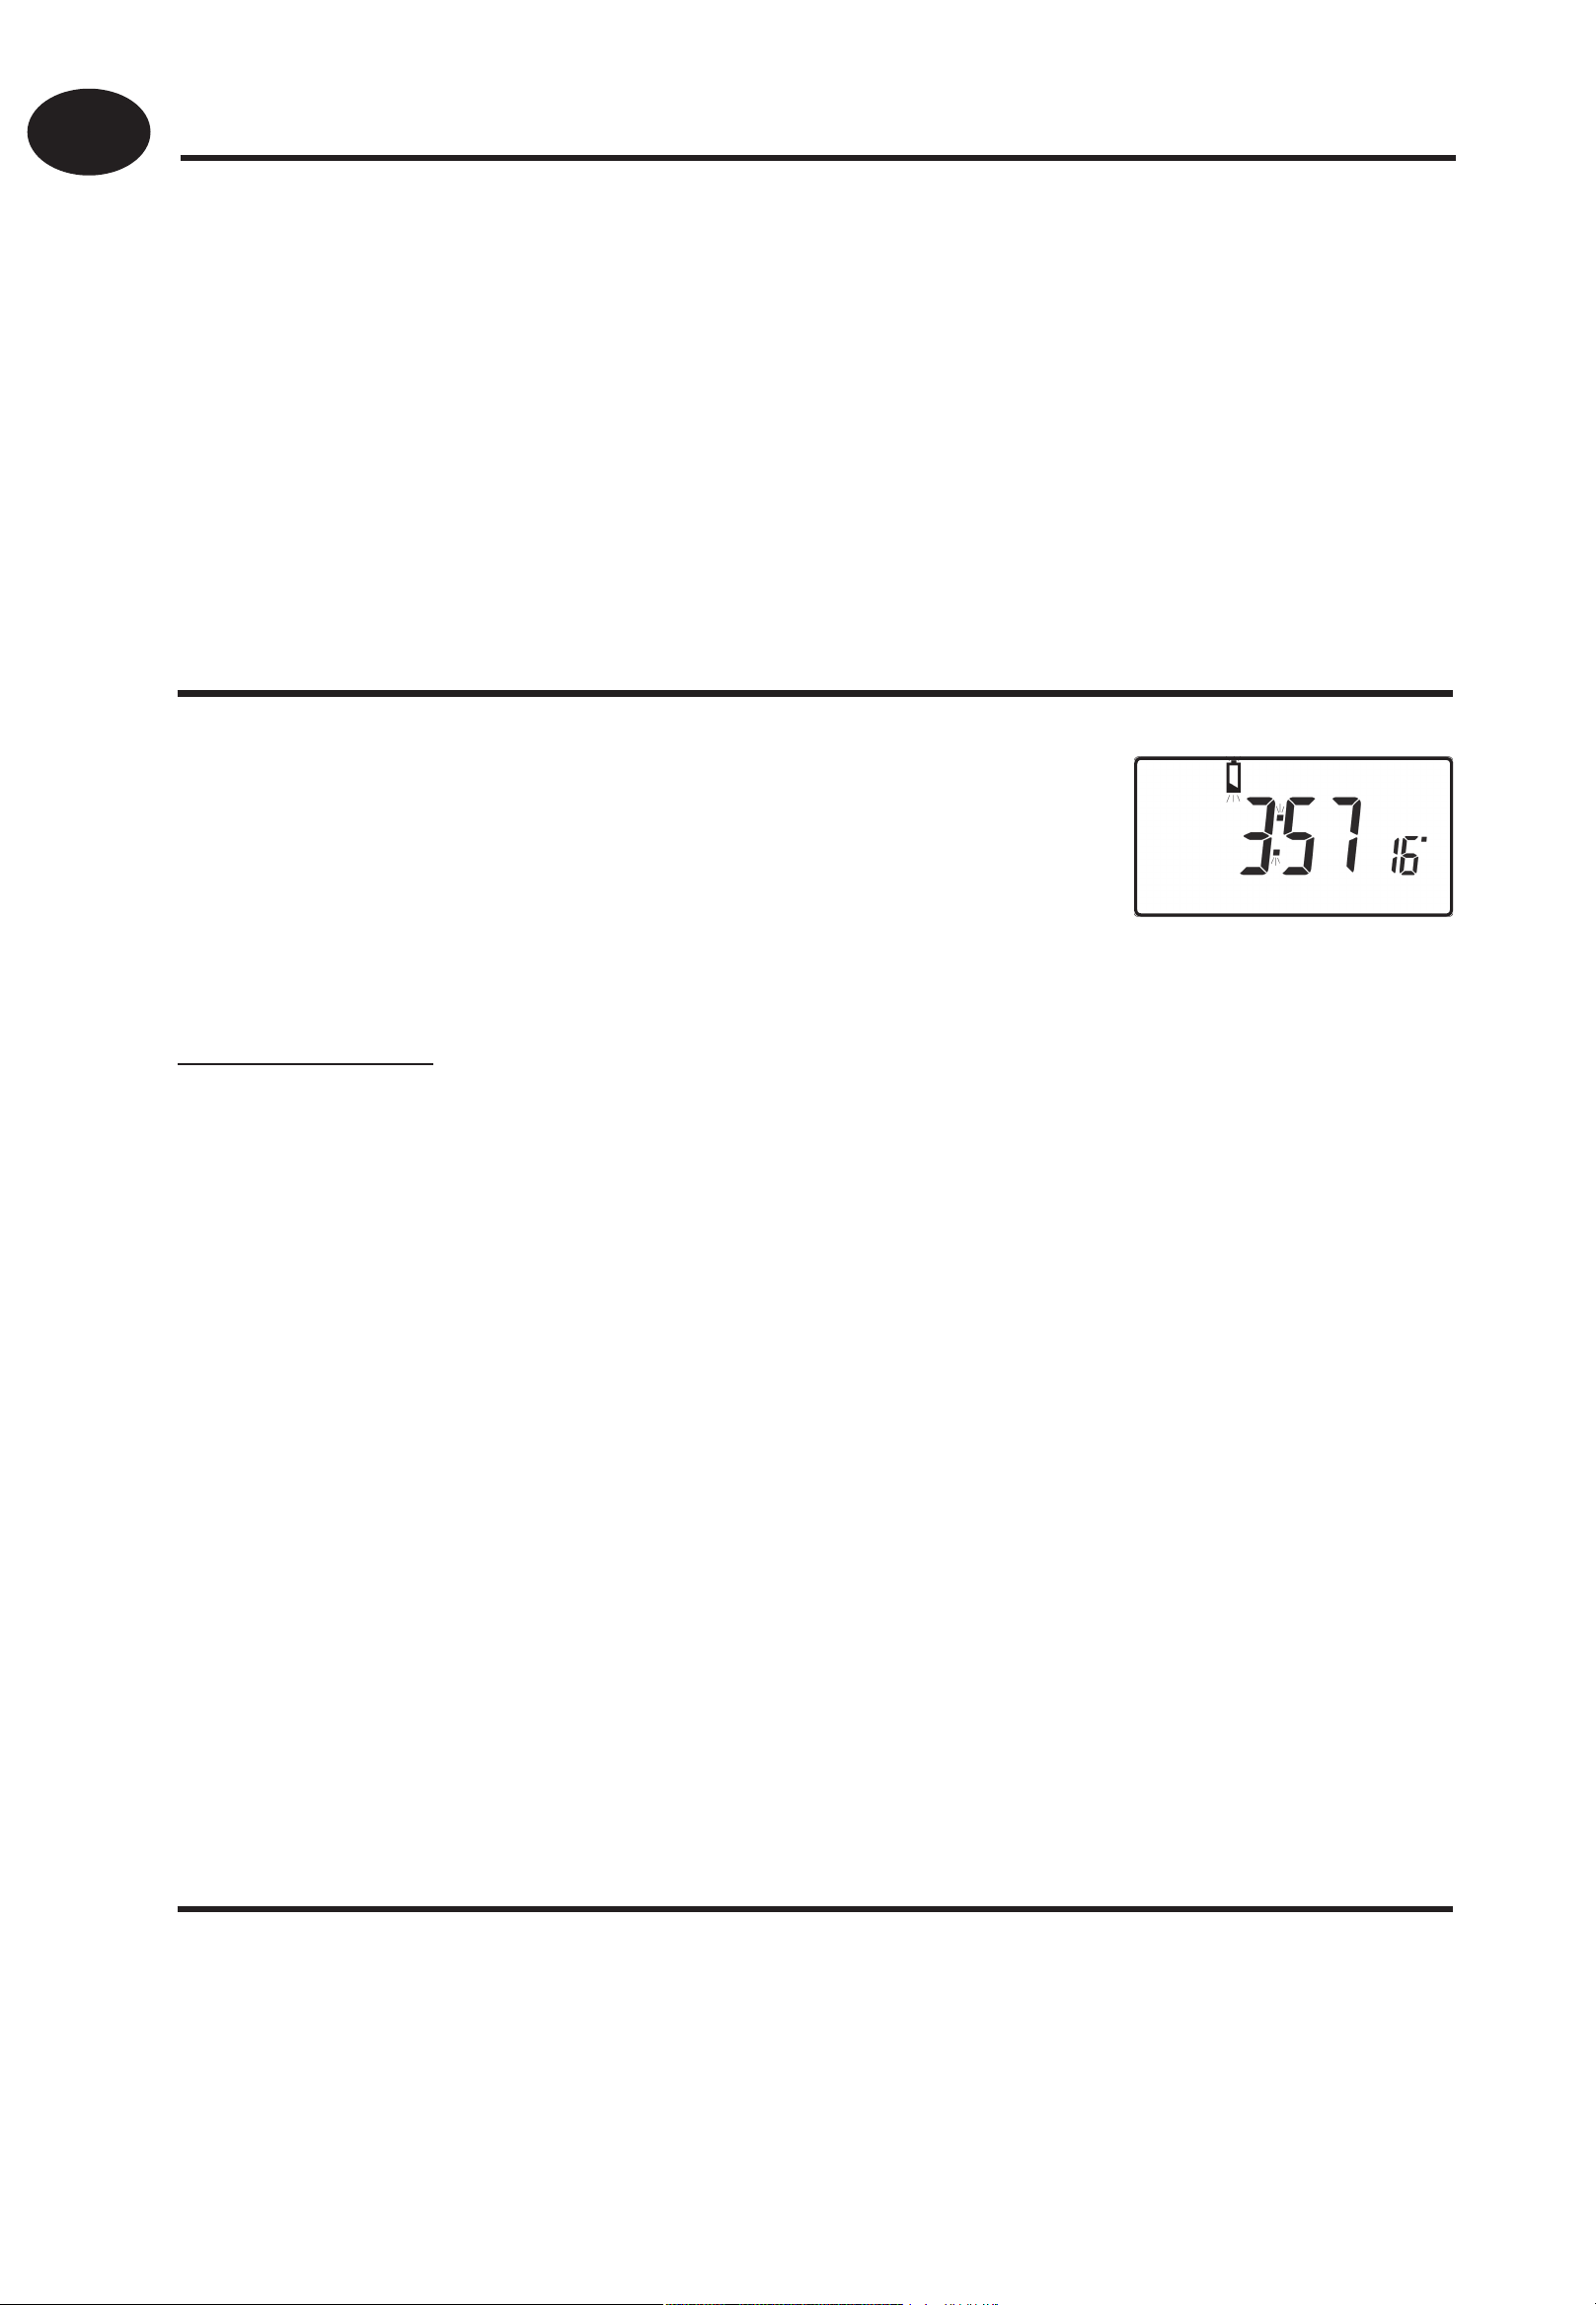
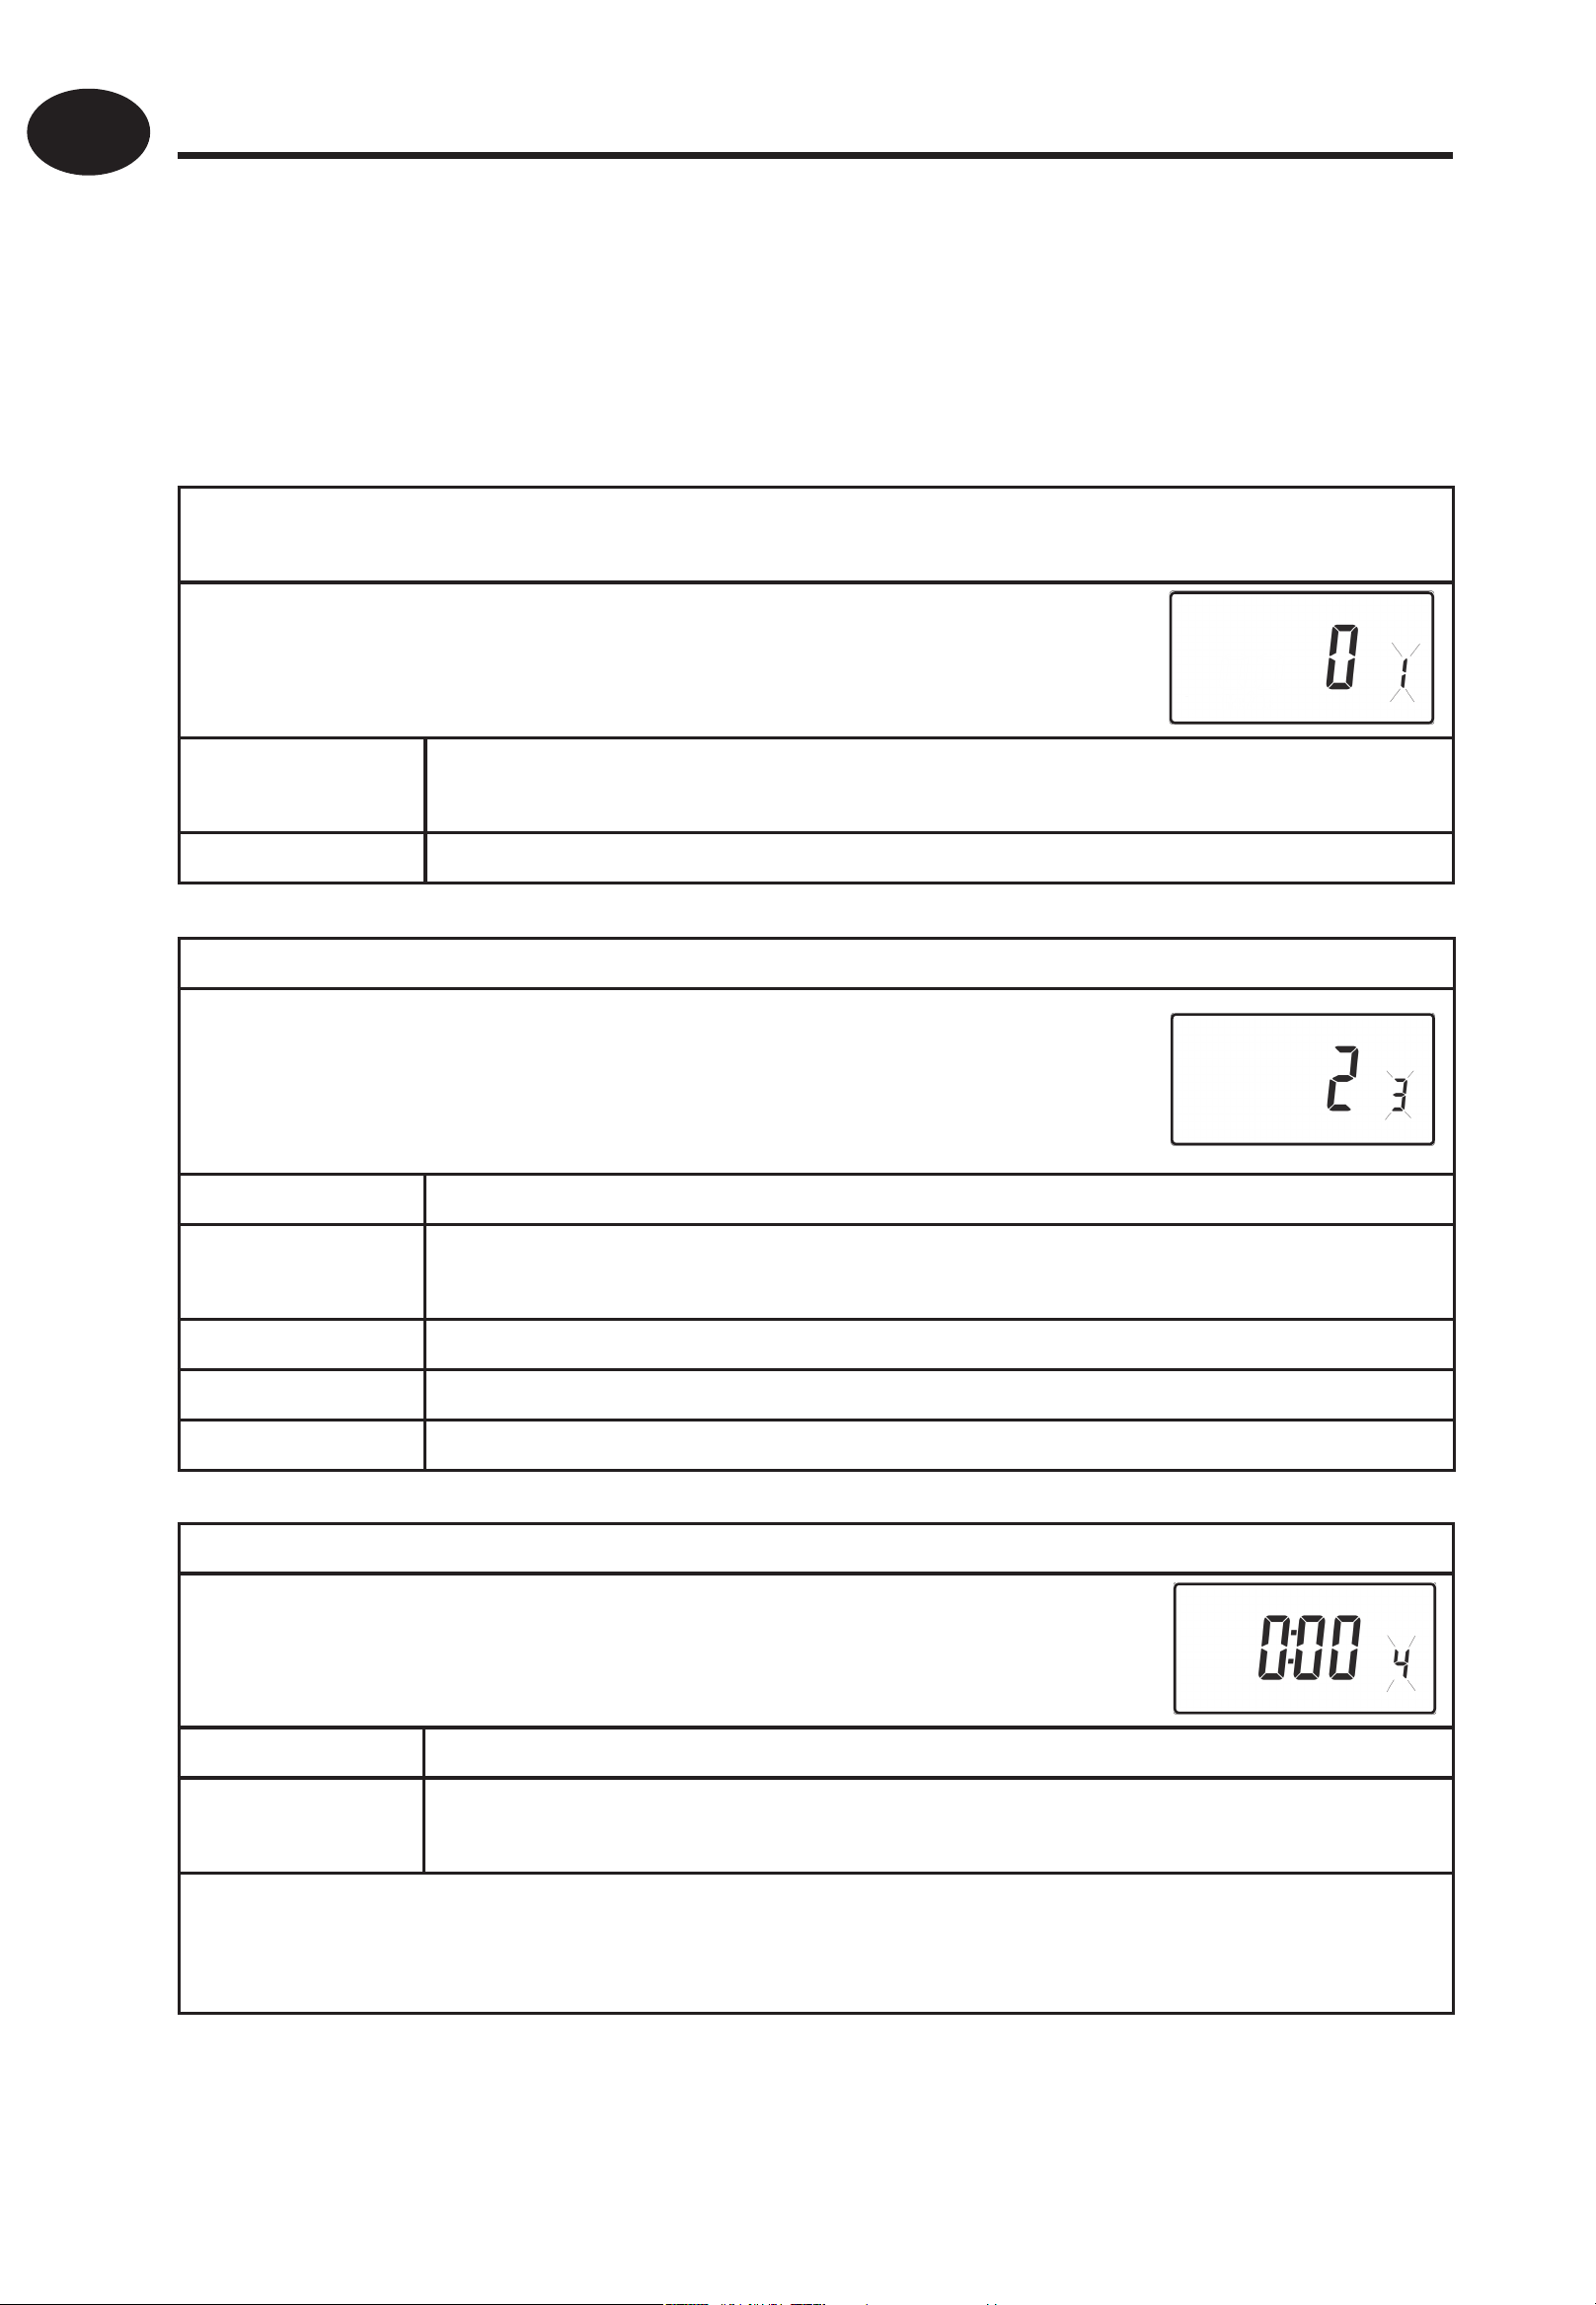
Setting the correct date and time
Your TP5001 incorporates a real time clock with calendar function that
automatically changes time in both Spring and Autumn. The time and
date is set in the factory for the CET time zone, and does not normally
require adjustment. If you live in another time zone refer to “Time zone
off set” on page 11. However, should it be found necessary to adjust
time or date for any other reason refer to the following instructions.
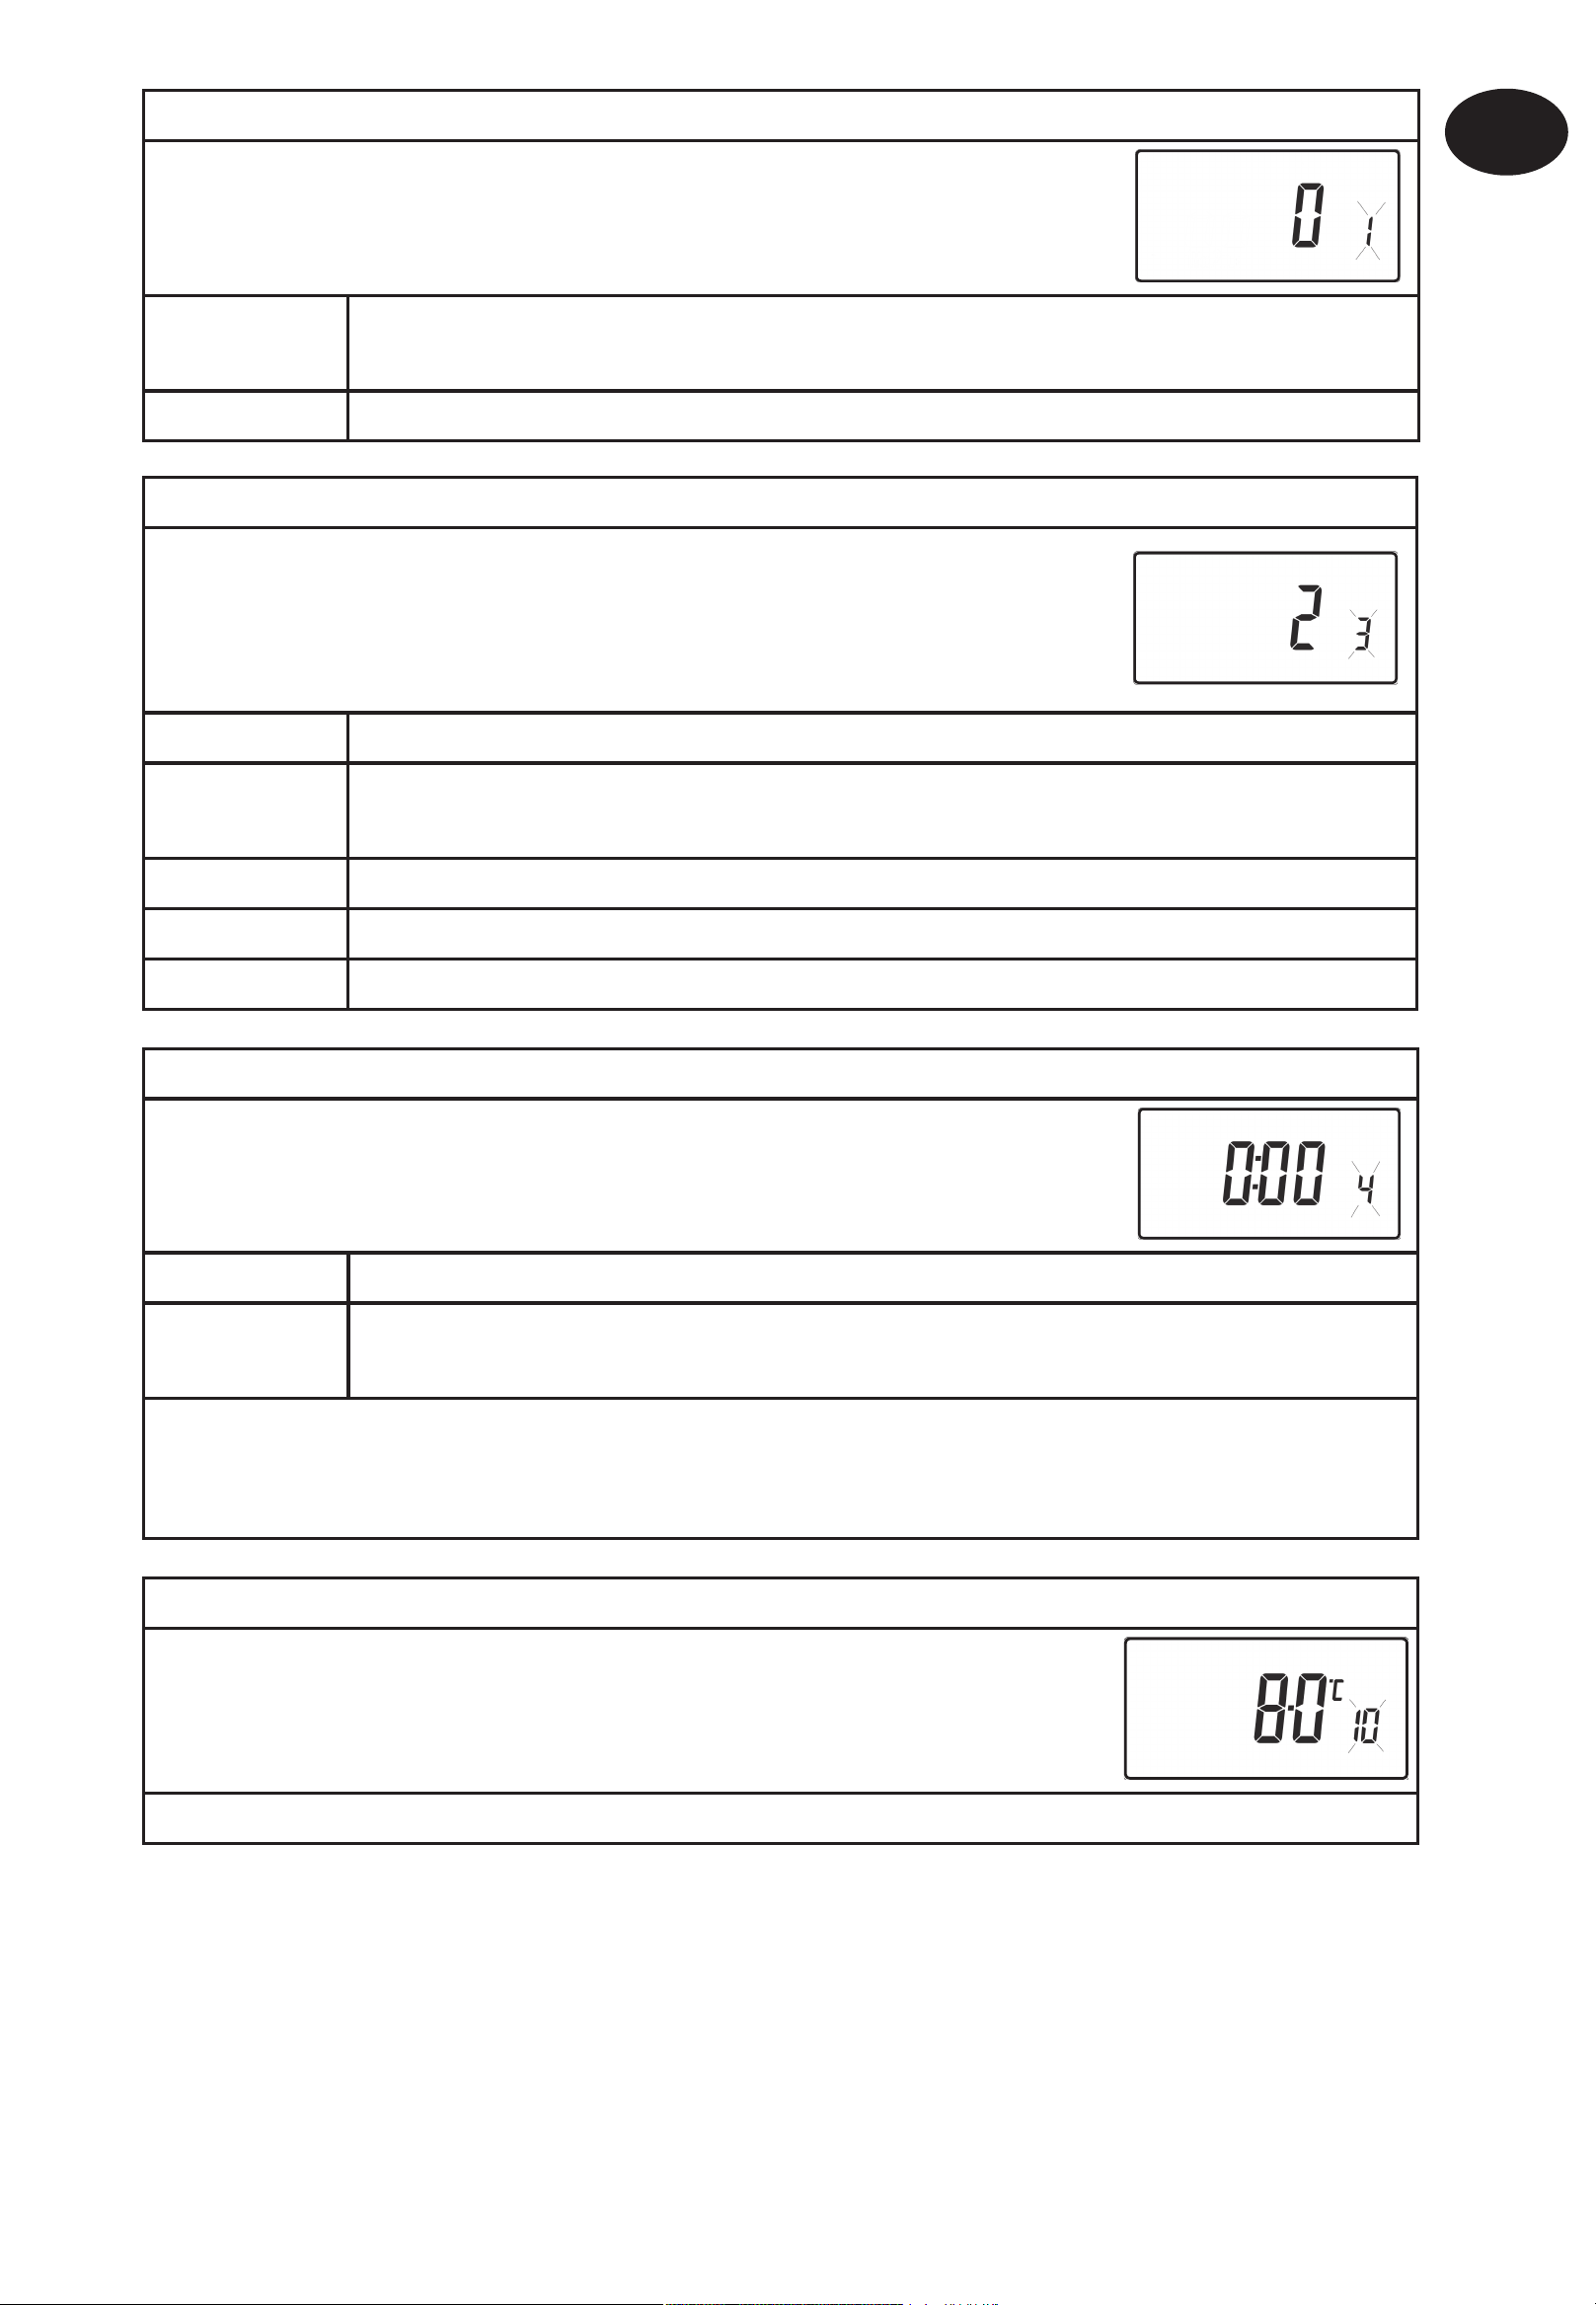
Setting the date
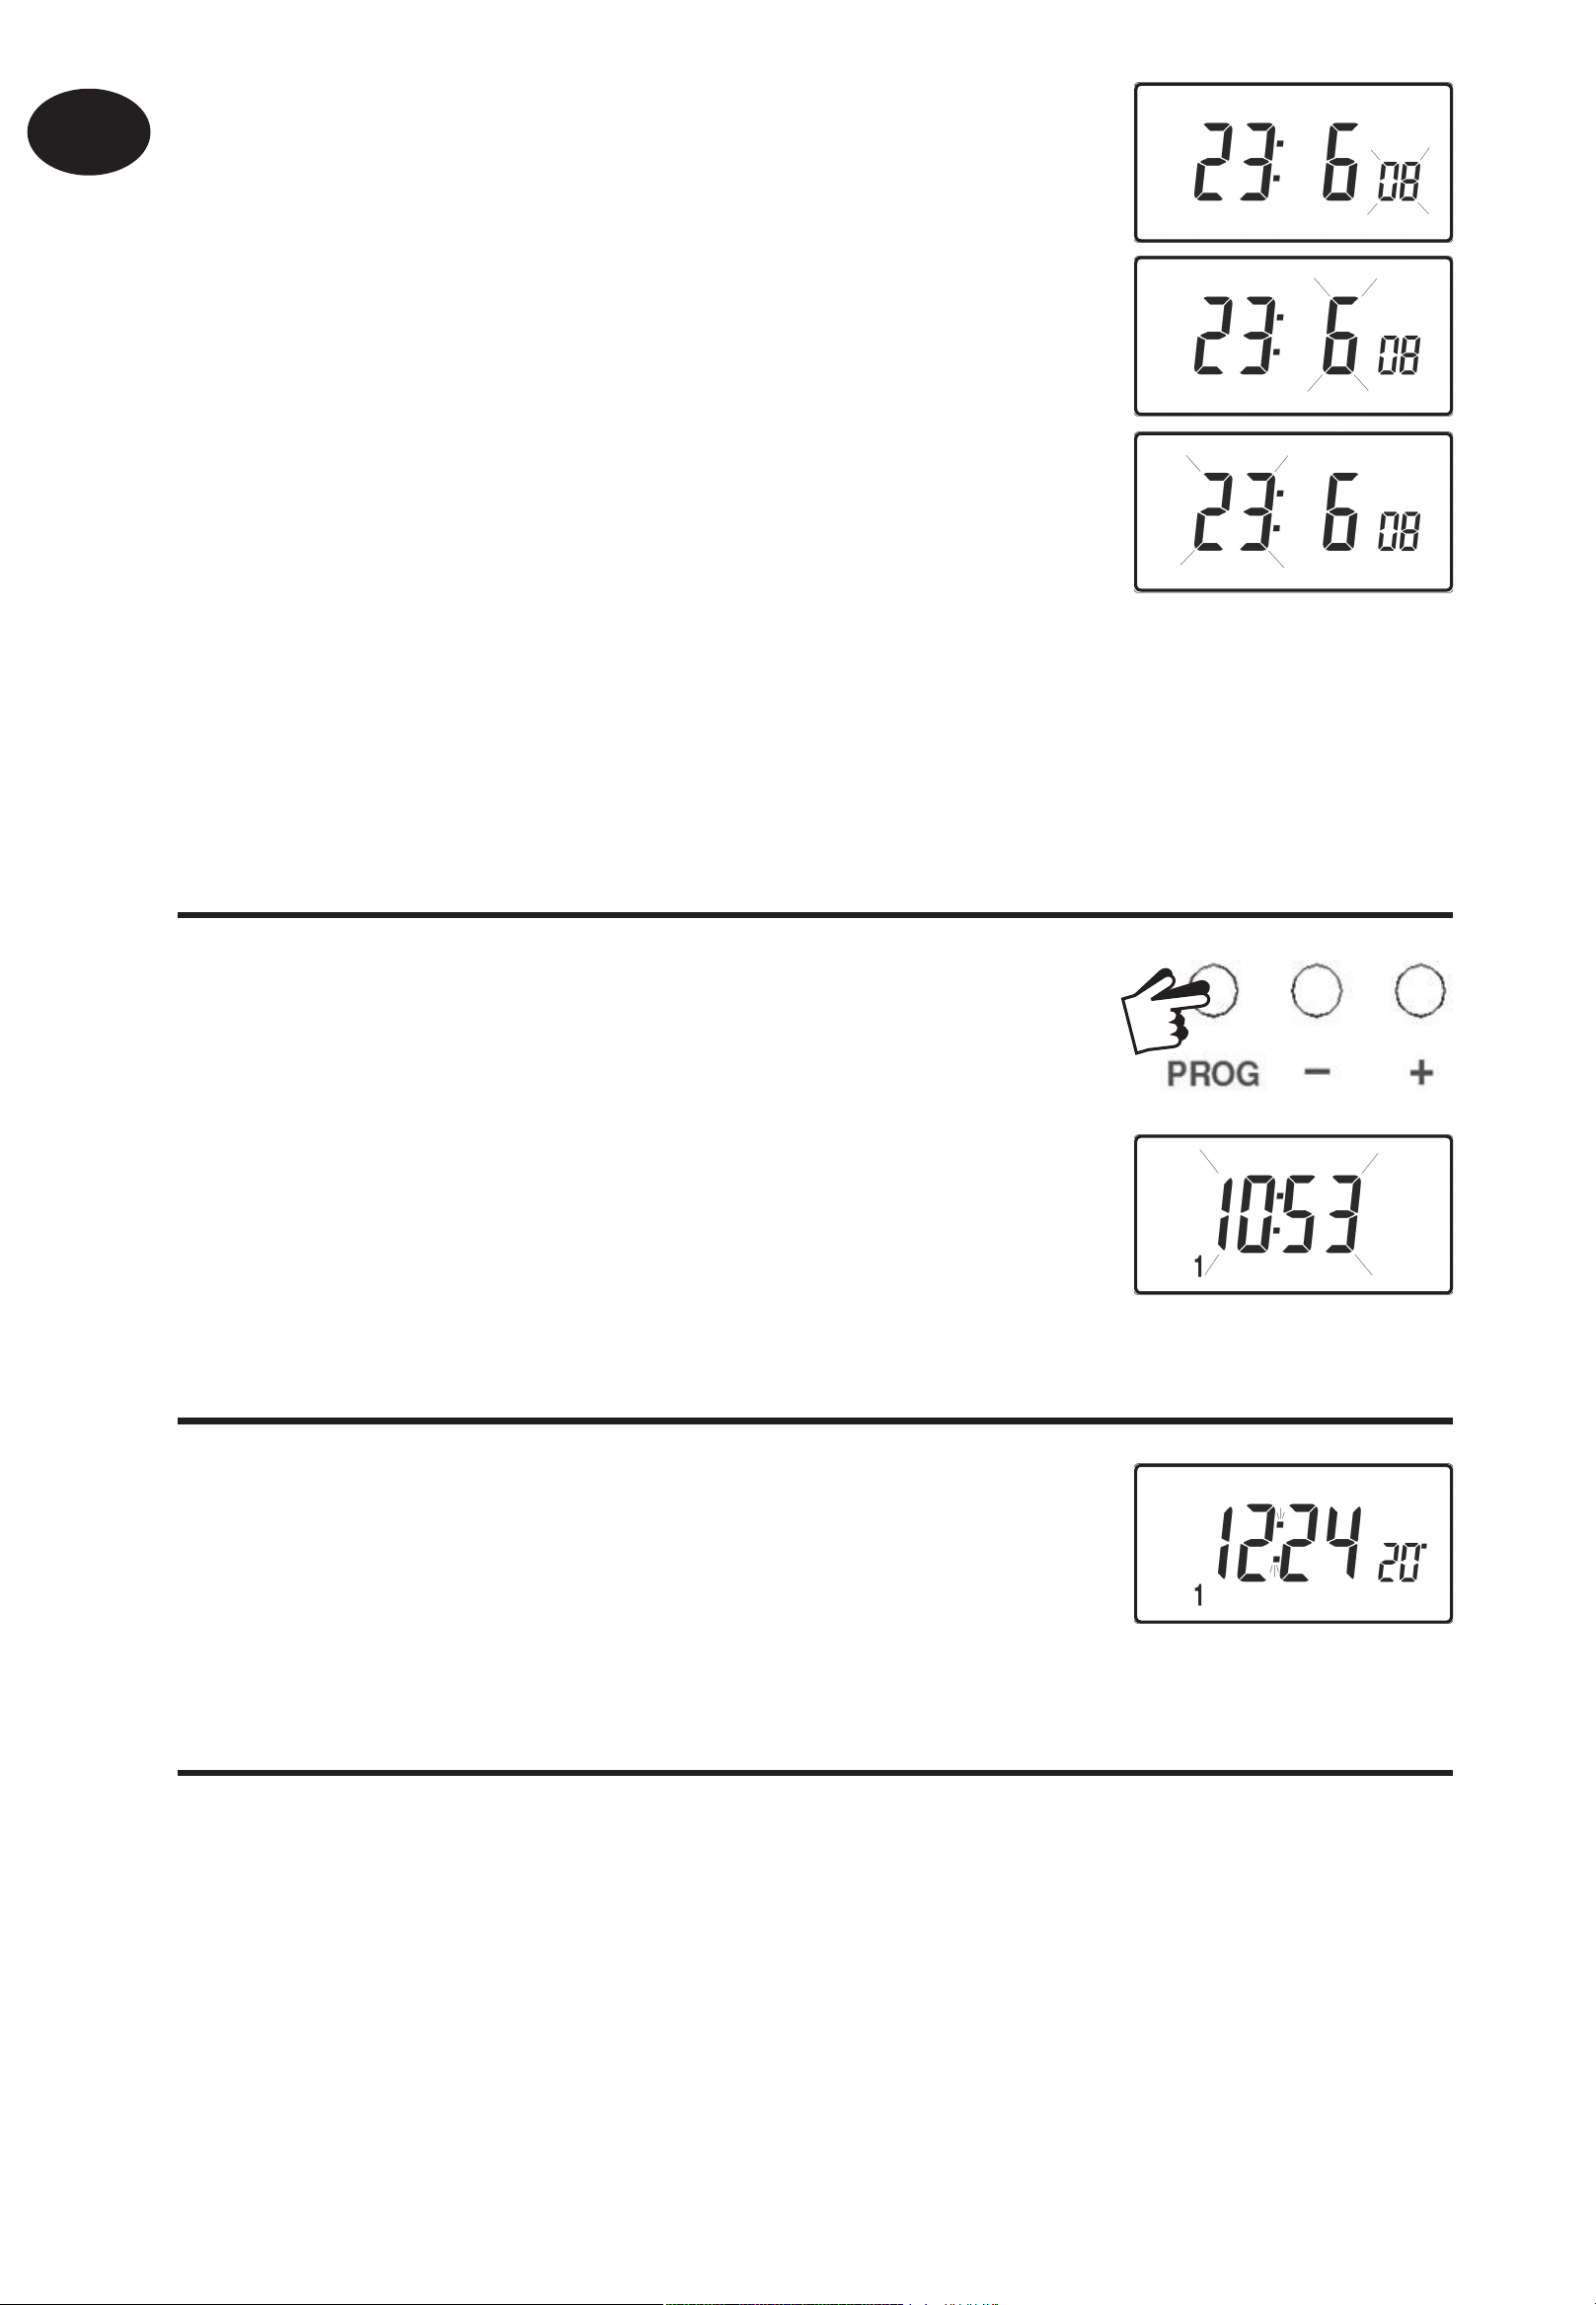
Press and hold Λ and PROG for 3 seconds, to
display date in dd/mm/yy format.
Page 4
GB
The YEAR number will fl ash, use Λ or V to correct
the year.
Use - or + to move to MONTH, then use Λ or V to
correct month.
Use - or + to move to DATE in month, then use Λ or
V to correct day in month.
User Instructions
If you attempt to select an invalid date the unit software will reject it
and apply the nearest valid date. It is recommended that date is set in
the order, yy/mm/dd.
Setting the correct time
After setting the date, press PROG to display the
time. The time display will fl ash on and off .
Use the + and - buttons to set the correct time
(press and hold to change in 10 min. increments).
Setting the correct day
The day of the week is set automatically. Press
PROG to return to normal operation (RUN).
Accepting the preset programmes
If you are happy with the preset times shown in the table on page 2 you
need take no further action.
4
Page 5

5
Changing the preset programmes
Before you change the preset programmes
Your installer will have set the unit to operate in one of the following
modes:
• 5/2 day - one set of programmes for weekdays and another for
weekends (page 5-6).
• 24 hr - one set of programmes for the whole of the week (page 6).
Alternatively
GB
User Instructions
• A/B - The unit can also be set by you to provide two programme
blocks, either of which can be applied to diff erent days of the week.
If this is required refer to page 6 for instructions on how to turn on
this feature.
Please Note
The unit must be programmed in sequence, event times cannot be
set out of sequence.
If you want to leave a preset time as it is, simply press PROG to
move to the next setting.
If you want to return the unit to RUN, press PROG and hold until
the colon in the display blinks. Alternatively leave alone and the
unit will automatically return to RUN after 2 minutes.
Your installer will have set your unit to programme 6, 4 or 2 events
per day. This will determine the number of events per day that you
are able to programme.
Changing the preset programmes in 5/2 day mode
For Days 1-5 (weekdays)
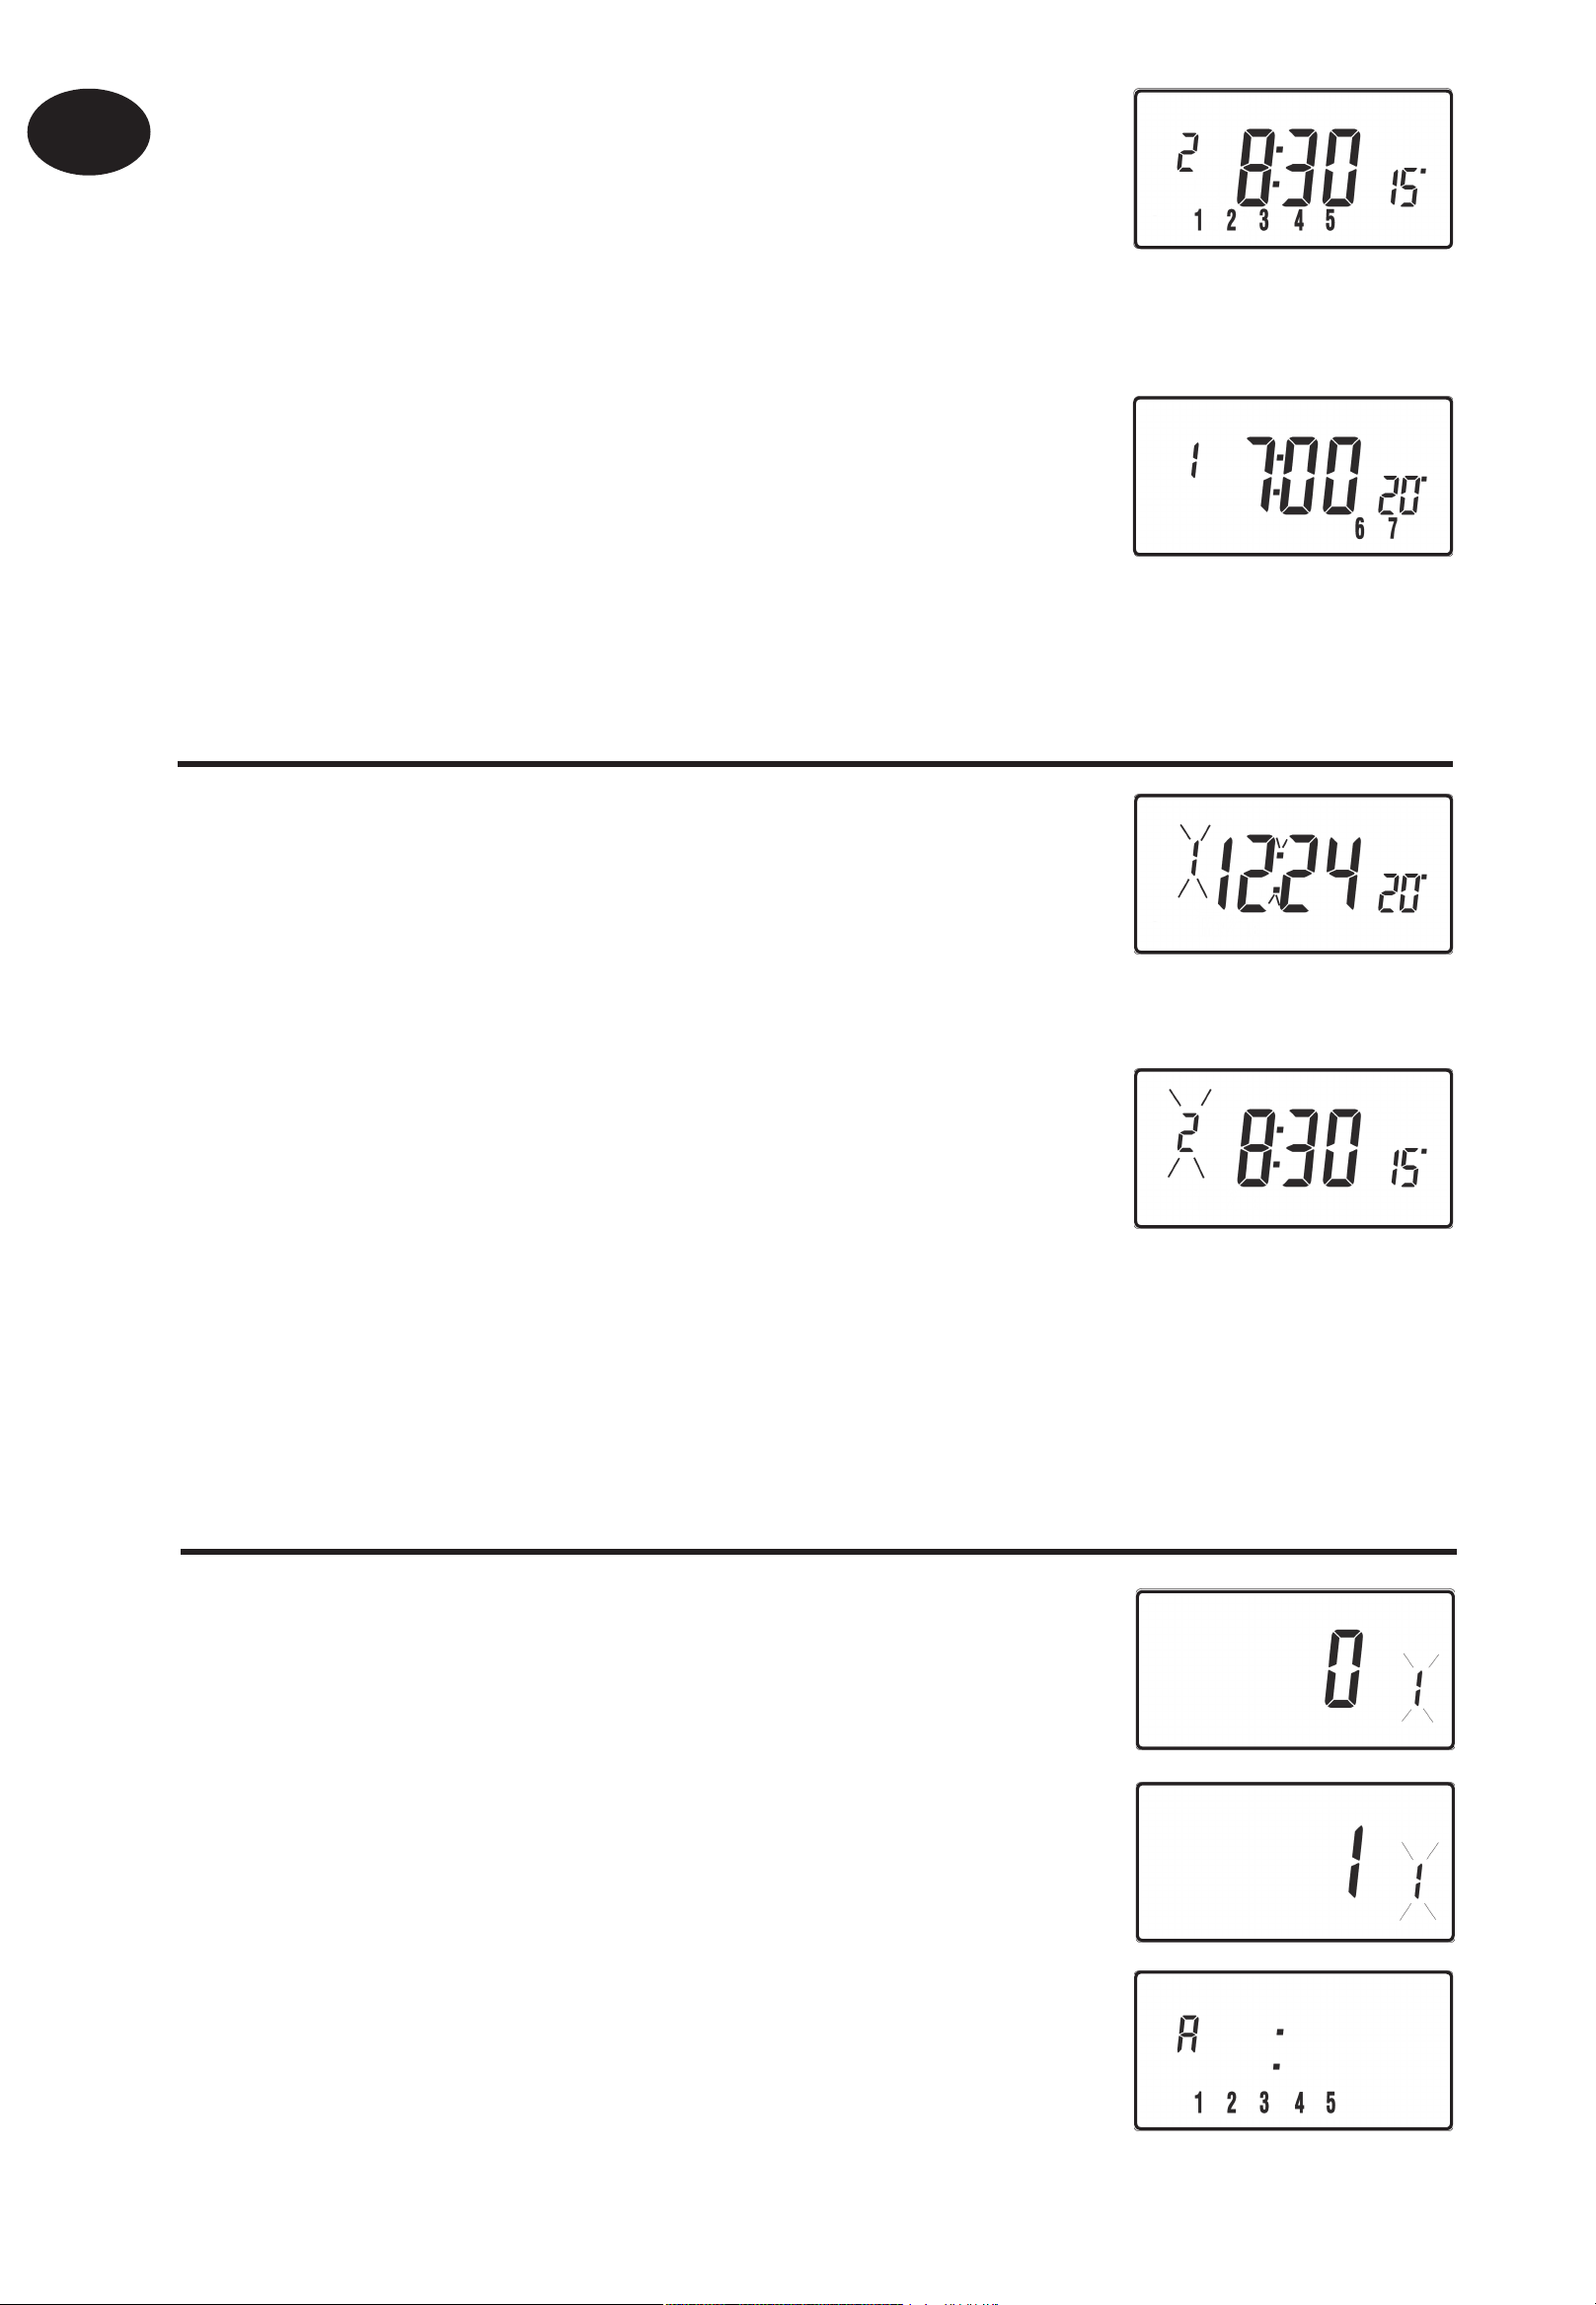
a) Press PROG until the fi rst preset time and
temperature (Event 1 Days 1, 2, 3, 4, 5) appears
in display.
b) Use the + and - buttons to adjust the TIME
(press and hold to change in 10 minute increments).
c) Use the Λ and V buttons to adjust the required TEMPERATURE.
Page 6
GB
User Instructions
d) Press PROG to move to the next preset time
and temperature (Event 2).
e) Repeat steps b, c, & d to programme the
remaining weekday events.
For Days 6-7 (weekends)
Press PROG until the fi rst preset time and
temperature (Event 1 Days 6-7) appears in display.
Repeat steps b, c, & d above to programme the
remaining weekend events.
Changing the preset programmes in 24 hour mode
a) Press PROG until the fi rst preset time and
temperature (Event 1 for all days of the week)
appears in display.
b) Use the + and - buttons to adjust the TIME
(press and hold to change in 10 min increments).
c) Use the Λ and V buttons to adjust the required
TEMPERATURE.
d) Press PROG to move to the next preset time
and temperature (Event 2).
e) Repeat steps b, c, & d to programme the remaining events.
Changing preset programmes for AB programming
(Installer setting must be in 5/2 day mode)
Press and hold PROG and V for 3 seconds. The
display will change to the fi gure opposite. This
will take you into User Advanced Programming
option 1.
Use Λ and V keys to enable or disable the function
6
(1=enabled, 0=disabled).
Press PROG for 5 seconds until the display changes
and the colon in the display fl ashes to confi rm that
you are in RUN.
Press PROG once, the display will change to show
the default days assigned to programme “A” (days
1, 2, 3, 4 & 5).
Page 7

7
Use the + and - keys to scroll forwards or backwards
through the days of the week.
To deselect a day press V, (for example Day 2). To
select a day press Λ (for example Day 7).
Any deselected days are automatically assigned to programme “B”.
Programming “A” programme days and events
a) Press PROG until the fi rst preset time and
GB
User Instructions
temperature (Event 1 for Programme A)
appears in display.
b) Use the + and - buttons to adjust the TIME
(press and hold to change in 10 minute increments).
c) Use the Λ and V buttons to adjust the required TEMPERATURE.
d) Press PROG to move to the next preset time and temperature
(Event 2).
e) Repeat steps b, c, & d to programme the remaining events.
Programming “B” programme days and events
a) Press PROG until the fi rst preset time and
temperature (Event 1 for Programme B)
appears in the display.
b) Use the + and - buttons to adjust the TIME
(press and hold to change in 10 minute increments).
c) Use the Λ and V buttons to adjust the required TEMPERATURE.
d) Press PROG to move to the next preset time and temperature
(Event 2).
e) Repeat steps b, c, & d to programme the remaining events.
Running the programme
Press PROG to return to RUN, the colon in the
display will blink. The heating will now follow the
times and temperatures programmed.
Page 8

GB
User Overrides
Altering the display to show time or temperature
Press + and - together to
change between settings.
User Instructions
Temporarily alter current programmed temperature
Press Λ or V until required temperature is displayed. Please note that
your installer may have restricted both upper and lower temperature
settings and the temperature override limits.
This override will automatically be cancelled at the beginning of the next
programmed event. Please note that your installer may have restricted
the duration of the override to something other than next event.
To change day of week legends from numbers to text
Press Λ and - together to toggle between day numbers and text.
To change time display between 12 & 24 hour clock
Press Λ and + together to toggle between 12 and 24 hour clock.
To change between °C and °F scaling
Press V and - together to toggle between °C and °F temperature
scaling.
8
Thermostat mode
a) A constant temperature of between 5-30°C can be selected if
required. This can provide frost protection for periods away from
home, it can also be used to provide untimed higher temperatures
if, for example, a family member is sick.
Page 9

9
b) Press Λ and V together to enter thermostat mode. The default
setting is 8°C, but this can be reprogrammed, see User Advanced
Programming, step 10, (page 11).
c) A snowfl ake symbol will appear in the display
when the selected temperature is equal to or less
than the programmed frost protection setting.
d) Use the Λ or V buttons to change the
temperature away from the programmed frost protection
temperature to another value.
e) To return to automatic programming press both Λ and V together.
GB
User Instructions
Changing the clock forwards and backwards
This is handled automatically, however, if the manual changeover has
been selected follow the instructions below.
To change from Summer to Winter (clocks back)
Press and hold - button.
To change from Winter to Summer (clocks forward)
Press and hold + button.
Remote override into and out of thermostat mode
Selected models are available with a feature which allows a telephone
activated switch or window contacts to step the unit into or out of
thermostat mode.
The required temperature to be maintained when the building is
unoccupied, or when windows are open, must fi rst be set up in User
Advanced Programming, step 10, (page 11).
To locally override this feature press both Λ and V together.
Delay start feature
Your thermostat includes an optional delay start feature to hold off
the heating for a time on mild days when the room temperature at the
start of an event is close to the programmed value. If you have enabled
this function it can be overridden by pressing either Λ or V buttons.
To enable this feature, please refer to User Advanced Programming,
step 11, (page 12).
Page 10
GB
User Instructions
Optimum start control (OSC)
Your thermostat includes an optional optimum start control. This
feature allows you to set the time at which you require a room
temperature by. The thermostat then calculates how soon before the
event time the system must be turned up to ensure that the room is at
the temperature by the required time. A full description of this and how
to enable it and set it up is given in User Advanced Programming,
steps 12 & 13, (page 12 and 13).
Battery replacement (battery models only)
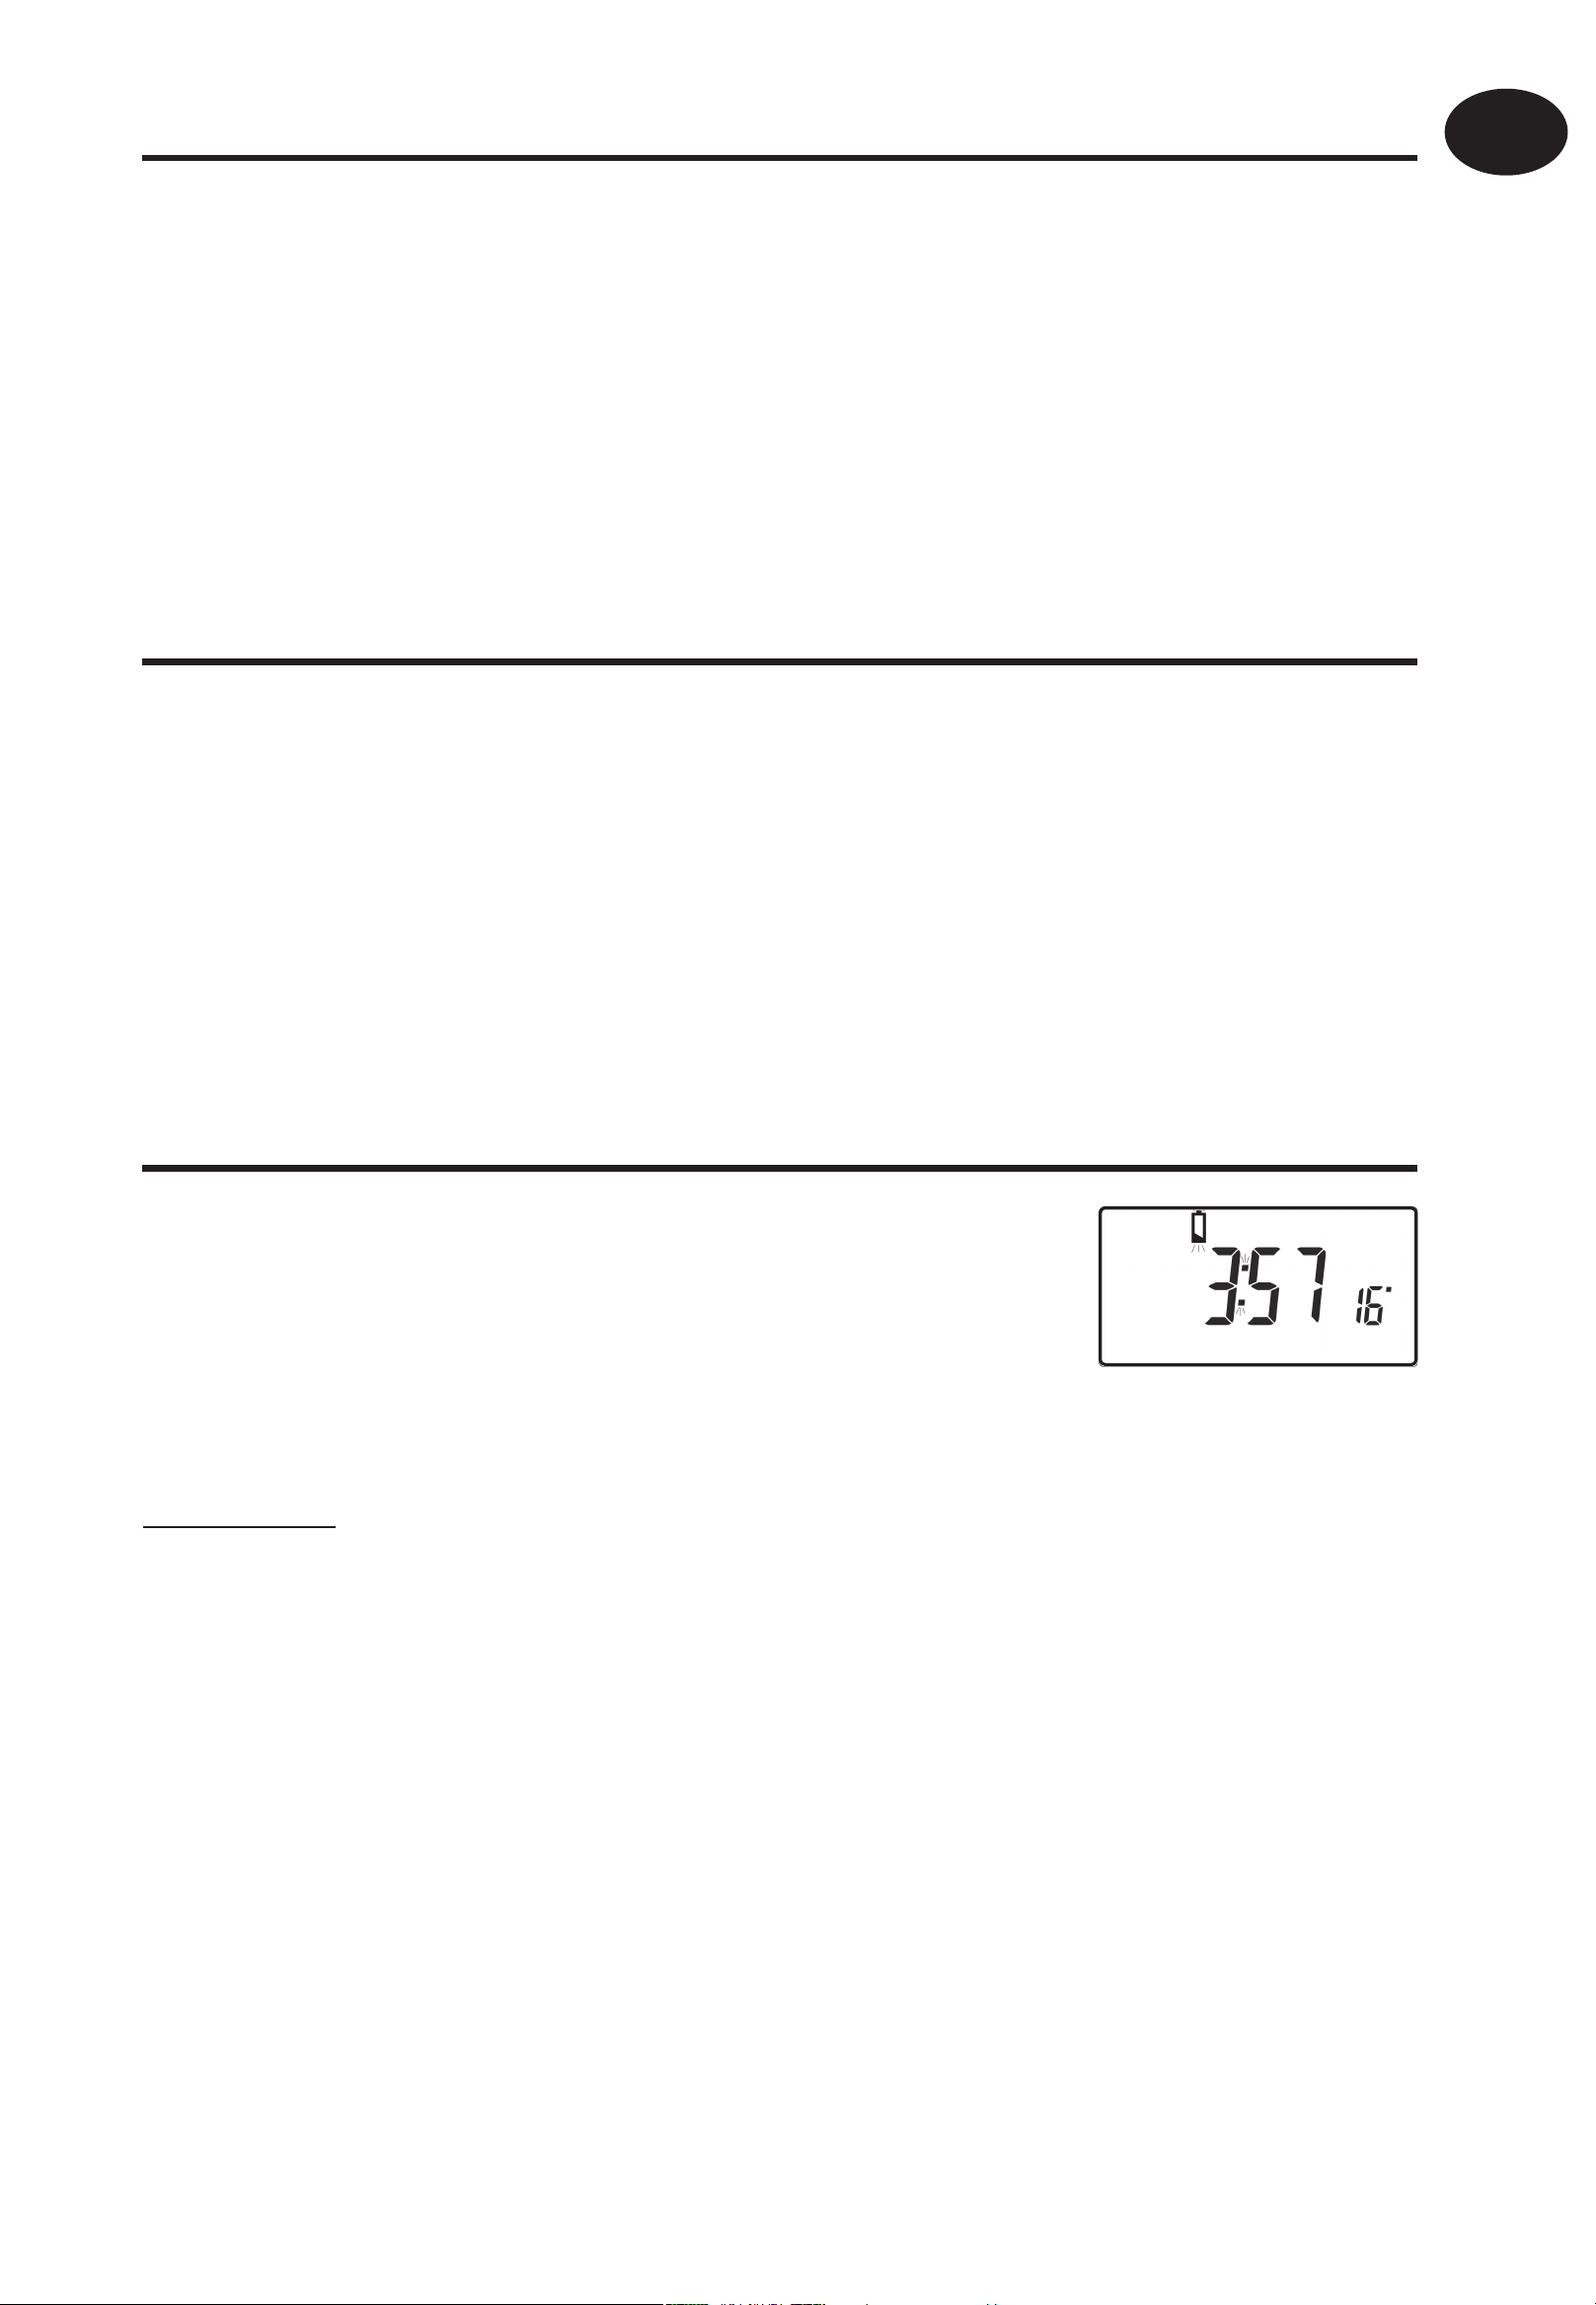
When batteries are low a battery symbol will
appear on the display. You have 15 days to replace
the batteries before the unit shuts down. When
replacing batteries ensure that only high quality
alkaline cells are use.
IMPORTANT: After replacing the batteries press and release the RESET
button to restart the unit. All date, time, programming and override
settings are maintained for the life of the product.
User Advanced Programming
Options
Important: The thermostat has been set in the factory to suit most
situations, however, there are additional optional settings which can
improve the comfort, convenience and energy eff ectiveness of your
thermostat. These are set in the User Advanced Programming and
Installer Advanced Programming modes.
To access User Advanced Programming
Press and hold V and PROG for 3 seconds. This will take you into
10
User Advanced Programming. Use + and - keys to scroll backwards
and forwards between options then Λ and V keys to change option
settings. The fl ashing digit on the right hand of the display indicates
the number of the selected option.
Page 11
11
Option 1 - Enable or disable A/B programming (Option 41 set to 5+2)
This enables or disables the A/B programming option. Press
+ until Option 1 is displayed, use Λ and V to select required
setting.
Disabled, unit operates as 5/2 or 24 hour product depending on
Setting 0
installer settings (factory setting)
Setting 1 Enabled: activates A/B programming
Option 3 - Calendar clock rules
This establishes the rules that the automatic calendar clock
follows to calculate changes between summer and winter
GB
time. Press + until Option 3 is displayed, use Λ and V to select
required setting.
Setting 0 Disabled.
Manual: user must change using + to advance and - to retard
Setting 1
displayed time.
Setting 2 European rules. (Factory Setting)
Setting 3 USA rules (2007 onwards)
Setting 4 USA rules (pre-2007)
Option 4 - Time zone off set
This feature allows the time zone to be established and
corrects time display. Press + until Option 4 is displayed, use Λ
User Instructions
and V to select required setting
Setting 0 UK models: this feature should be left at the factory setting of 0.
Central European time models: this feature should be left at the
Setting 1
factory setting of +1:00.
-12 Hours +14 Hours
Rest of World: use Λ and V keys to select off set from Universal time (GMT) for the
location in which the thermostat is being installed.
Option 10 - Frost/ thermostat mode setting
This feature allows the default frost/thermostat mode
temperature to be set. Press + until Option 10 is displayed, use
Λ and V to select required setting.
5-40°C - Factory setting is 8°C, but can be changed to any value between 5 -40°C.
Page 12
GB
User Instructions
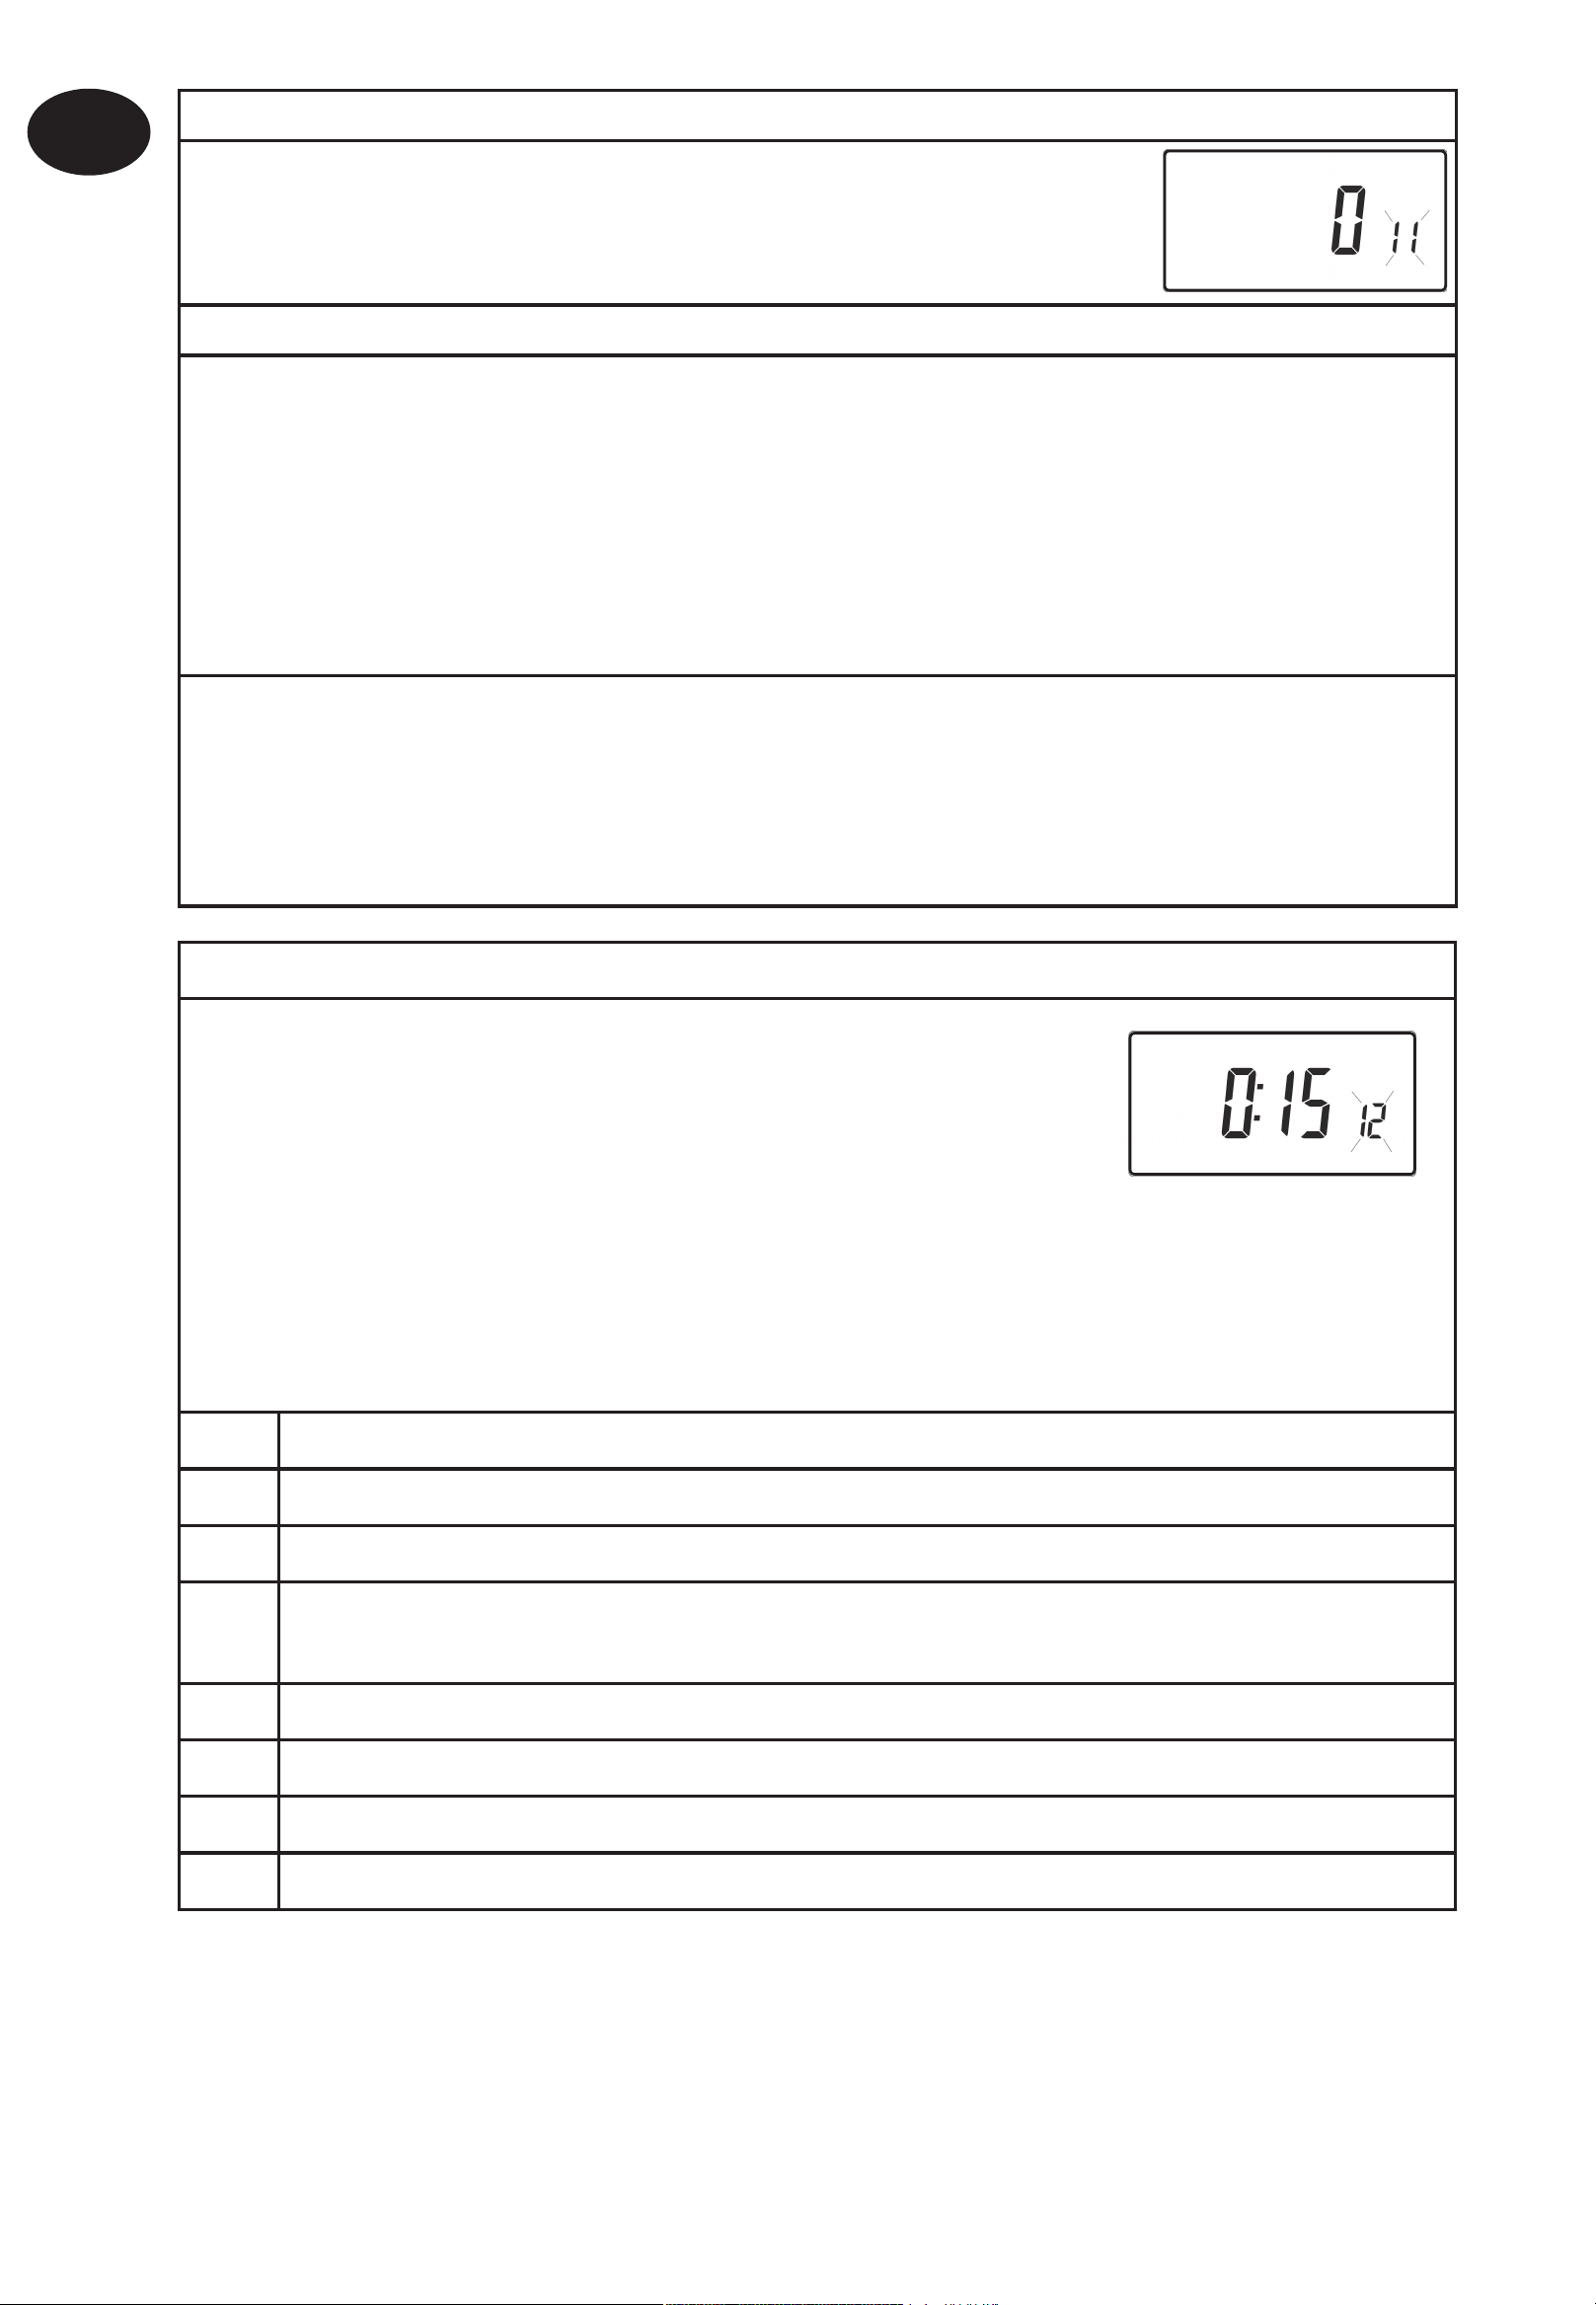
Option 11 - Start-up method
Your thermostat can start up the system in three diff erent
ways. Press + until Option 11 is displayed, use Λ and V to select
required setting.
Setting 0 - Normal: Heating is turned up or down at the programmed times.
Setting 1 - Optimum start control (OSC) or Comfort Setting: This allows you to
programme the time at which you would like to be up to the required temperature.
The thermostat then calculates how soon before the required time the heating is
turned up. This will vary with weather conditions ranging from a maximum of 120
minutes to 0 minutes before the programmed event time. This setting must be used
together with option 12 to match the optimiser setting to the building in which it
is installed.
Setting 2 - Delay start or Economy Setting: This is an alternative to OSC. Set the
event times in the normal way taking into account the time that the building
takes to heat on an average day. The thermostat monitors switch on time, actual
temperature and wanted temperature and delays the start of the heating if the
actual temperature is close to the programmed temperature.
Option 12 - Optimum start control pre-heat setting (Option 11 set to 1)
Press + until Option 12 is displayed, use Λ and V to select
required setting (only active if Option 11 is set to 1).
The optimum start control must be adjusted to match the
building energy characteristics. Use the Λ and V keys to
selected the required pre-heat period. The table below suggests typical settings.
If the building fails to reach temperature on time, increase the setting by 15
minute steps each day until the correct setting is found.
If the building reaches temperature ahead of time, decrease the setting by 15
minute steps each day until the correct setting is found.
0:15 15 mins, warm air system, well insulated building
0:30 30 mins, warm air system, well insulated building.
0:45 45 mins, warm air system poorly insulated building.
1:00 60 mins, radiator system, light weight well insulated building.
(Factory Setting)
1:15 75 mins, radiator system, light weight medium insulation.
1:30 90 mins, radiator system, medium weight poorly insulation.
1:45 105 mins, radiator system, heavy weight building, well insulated.
12
2:00 120 mins, radiator system, heavy weight building, poorly insulated.
Page 13

13
Option 13 - Optimum start control/Delayed start event setting
(Option 11 set to 1 or 2)
The Optimum start or delayed start control can be applied
to event 1 only or to each event of the day which requires
a higher temperature than the previous event. Press + until
Option 13 is displayed, use Λ and V to select required setting
(only active if Option 11 is set to 1 or 2).
Setting 0 Applies only to fi rst event of day. (Factory Setting)
Setting 1 Applies to each event of the day that requires a higher temperature
compared to previous event.
GB
User Instructions
Overview of installer selectable features which may aff ect
the operation of your thermostat
Temperature range limitation
This allows the installer to programme both upper and lower
temperature limits. It may limit the upper and lower temperature that
you are able to set on the thermostat.
Temperature override limitation
This allows the installer to limit the number of degrees that you can
override the programmed temperature by, it also allows the installer
to set rules regarding how long a temperature override will remain in
place.
Keyboard lock
This allows the installer to limit or lock the keyboard to prevent
unauthorised changes to programme values and limits overrides.
Page 14

GB
User Instructions
What happens to the unit when batteries fail
If batteries are not changed within 15 days of a low battery warning,
the unit shuts down. In normal circumstances the thermostat turns off
the valve or the boiler it is controlling. In extreme climates turning off
the heating is likely to result in the building freezing up. To prevent this,
the installer can set up the unit to turn ON rather than turn OFF the
heating on battery failure. This will consume more fuel but will prevent
damage occurring to the building. If appropriate please check that the
installer has set this function correctly.
Please note: If you replace the batteries and the LCD does not come
on immediately please check battery orientation. Do not leave
batteries in the product if the display is not active.
If, after changing the batteries, the screen remains blank it is
necessary to carry out a partial reset. See overleaf for details.
Resetting the unit
Partial reset: Press RESET (used to restart micro-computer) if display
freezes for any reason. This does not reset any programme, clock or
date. It is recommended that this is done at time of installation.
User full reset: Press RESET whilst holding down PROG button. This
resets event times and any User Advanced Programme setting, but
does not reset time or date.
Installer full reset: This is only available to the installer. In addition
to the above all of the Installer Advanced Programming settings are
returned to factory settings, however, time, date and service due date
are not reset.
14
Page 15

15
Instrukcja użytkownika
Wstępne informacje o programowalnym termostacie pokojowym
Programowalny termostat pokojowy umożliwia programowanie różnych
temperatur o różnych porach. Można zaprogramować jeden zestaw
czasów i temperatur na dni robocze oraz inny zestaw temperatur na dni
weekendowe, co jest określane mianem programowania 5/2 dni.
Termostat może być również ustawiony przez instalatora w ten sposób,
aby dany zestaw czasów i temperatur był powtarzany każdego dnia
tygodnia. Określa się to mianem programowania 24-godzinnego.
Termostat może być również ustawiony przez użytkownika w taki
PL
sposób, aby zapewniał dwa różne bloki programowe, które można
przypisać do dowolnego dnia tygodnia, co określane jest mianem
programowania A/B.
Wszystkie termostaty mogą zostać ustawione przez instalatora w
taki sposób, aby zapewniały 2, 4 lub 6 ustawień czasu i temperatury
każdego dnia.
Wszystkie termostaty wyposażone są w wygodne funkcje sterowania
ręcznego, włącznie z zabezpieczeniem przeciwzamrożeniowym.
Termostat wyposażony jest w niektóre wysoce precyzyjne funkcje,
które w miarę potrzeby mogą być uruchomione przez instalatora.
Jest również szereg zaawansowanych funkcji, które może uruchomić
Instrukcja użytkownika
sam użytkownik. Te zaawansowane ustawienia zmieniają sposób
funkcjonowania termostatu, niektóre dotyczą również funkcji
programowania oraz sterowania ręcznego przez użytkownika.
Przed próbą zaprogramowania urządzenia (zob. str. 24) prosimy o
przeczytanie instrukcji dot. Zaawansowanego programowania przez
użytkownika.
Programy ustawione fabrycznie
Termostat TP5001 został fabrycznie wyposażony w szereg programów
z ustalonymi okresami działania i temperaturami odpowiadającymi
większości użytkowników. Prosimy pamiętać, że dostępność niektórych
opcji zależeć będzie od sposobu ustawienia urządzenia przez instalatora.
Uwaga: przy ustawieniu na 4 zmiany temperatury dziennie, zmiana 3 oraz
4 są pomijane. Przy ustawieniu na 2 zmiany temperatury dziennie, zmiany
2, 3, 4 oraz 5 są pomijane.
Page 16
PL
Dni robocze (Pon. - Piątek) Weekend (Sob - Niedz)
Zmiana Czas Temp. °C Zmiana Czas Temp. °C
1 06:30 20 1 07:30 20
2 08:30 15 2 09:30 20
3 11:30 20 3 11:30 20
4 13:30 15 4 13:30 20
5 16:30 21 5 16:30 21
6 22:30 15 6 22:30 15
Czynności wstępne
Otworzyć znajdującą się z przodu programatora
klapkę i przy pomocy niemetalowego przedmiotu
Instrukcja użytkownika
nacisnąć przycisk RESET aż do chwili zgaśnięcia
wyświetlacza. Spowoduje to ustawienie programów
fabrycznych i zapewni prawidłową pracę
mikroprocesora, znajdującego się w urządzeniu.
Uwaga: są to również czasy dla
programów Bloku „A”
Uwaga: są to również czasy dla
programów Bloku „B”
RESET
Dostosowanie wyświetlacza do indywidualnych potrzeb
Dla uniknięcia ewentualnych niejasności, w instrukcji przyjmuje się, że
na wyświetlaczu stosowany jest zegar 24-godzinny, stopnie Celsjusza
(°C) oraz że dni tygodnia ponumerowane są kolejno 1-7, (gdzie 1
oznacza poniedziałek). Po zaprogramowaniu termostatu (zob. str.
21 oraz 22) wszystkie te ustawienia mogą zostać dostosowane do
indywidualnych potrzeb użytkownika.
Ustawienie właściwej daty i czasu
16
Termostat TP5001 ma wbudowany zegar pracujący w czasie
rzeczywistym z funkcją kalendarza, która automatycznie przestawia
zegar na wiosnę i jesienią. Godzina i data ustawiane są fabrycznie
na środkowoeuropejską strefę czasową i zwykle nie wymagają
korekty. Jeśli mieszkasz w innej strefi e czasowej, zajrzyj na stronę
80 – „Ustawianie czasu wg strefy czasowej” (zob. str. 25). Jeśli jednak
konieczna jest korekta godziny i daty z jakiegokolwiek innego powodu,
wówczas należy zastosować się do poniższych instrukcji.
Page 17

17
Ustawianie daty
Nacisnąć i przytrzymać przez 3 sekundy Λ oraz PROG
celem wyświetlenia daty w formacie dd/mm/rr.
Zacznie migać numer ROKU, wówczas przy pomocy
Λ lub V ustawić właściwy rok.
Przy użyciu - lub + przejść na MIESIĄC, a następnie
przy pomocy Λ lub V dokonać korekty miesiąca.
Przy użyciu - lub + przejść do DNIA miesiąca, a
PL
następnie przy pomocy Λ lub V dokonać korekty
dnia miesiąca.
W razie próby wprowadzenia nieważnej daty,
oprogramowanie urządzenia odrzuci ją i wprowadzi
najbliższą ważną datę. Zaleca się ustawienie daty w
kolejności rr/mm/dd.
Ustawianie właściwego czasu
Nacisnąć PROG celem wyświetlenia czasu.
Instrukcja użytkownika
Wyświetlany czas zacznie migać.
Przy użyciu przycisków - lub + ustawić właściwy
czas (po naciśnięciu i przytrzymaniu czas będzie się
zmieniać w odstępach 10-minutowych).
Ustawienie właściwego dnia
Dzień tygodnia ustawiany jest automatycznie.
Nacisnąć PROG celem powrotu do normalnego
trybu pracy (RUN).
Akceptacja ustawionych fabrycznie programów
Jeżeli odpowiadają Ci ustawione fabrycznie czasy pokazane w tablicy
na stronie 16 wówczas nie należy podejmować żadnych dalszych
czynności.
Page 18

18
PL
Zmienianie ustawionych fabrycznie programów
Przed dokonaniem zmian w ustawionych fabrycznie programach
Instalator musi uprzednio przygotować urządzenie do pracy w jednym
z następujących trybów:
• 5/2 dni – jeden zestaw programów na robocze dni tygodnia, a drugi
na weekendy (str. 18).
• 24 godz. – jeden zestaw programów na cały tydzień (str. 19).
Alternatywnie
• A/B – urządzenie może zostać ustawione przez użytkownika na
dwa bloki programowe, przy czym każdy z nich można stosować
do różnych dni tygodnia. Sposób uruchomienia w razie potrzeby tej
funkcji podany jest w instrukcji na str. 19.
Instrukcja użytkownika
Pamiętaj
Urządzenie musi być programowane kolejno, czasy poszczególnych
zdarzeń nie mogą być zaprogramowane bez zachowania
kolejności.
Jeżeli pragniesz zachować ustawiony fabrycznie czas wówczas
należy nacisnąć przycisk PROG celem przejścia do następnego
ustawienia.
Celem powrotu urządzenia do stanu RUN należy nacisnąć PROG
i przytrzymać do czasu, aż dwukropek na wyświetlaczu zacznie
migać. Można też nic nie robić i wtedy urządzenie automatycznie
powróci do stanu RUN po upływie 2 minut.
Instalator ustawił urządzenie do programowania 6, 4 lub 2
zdarzeń na dzień. To określać będzie liczbę zdarzeń możliwych do
zaprogramowania przez użytkownika na dany dzień.
Zmienianie ustawionych fabrycznie programów w trybie
5/2 dnia
Dla dni 1-5 (dni robocze)
a) Naciskać PROG do czasu pokazania się na
wyświetlaczu ustawionego fabrycznie czasu i
temperatury (zmiana 1 dni 1, 2, 3, 4, 5).
b) Przy użyciu przycisków - lub + dokonać korekty
CZASU/TIME (po naciśnięciu i przytrzymaniu czas będzie się
zmieniać w odstępach 10-minutowych).
c) Przy użyciu przycisków Λ oraz V dokonać odpowiedniej korekty
TEMPERATURY.
Page 19
19
d) Nacisnąć PROG celem przejścia do kolejnego
fabrycznego ustawienia czasu i temperatury
(zmiana 2).
e) Powtórzyć kroki b, c oraz d celem
zaprogramowania pozostałych zmian na dni
robocze tygodnia.
Dla dni 6-7 (weekendy)
Naciskać PROG do czasu pokazania się na
wyświetlaczu pierwszego ustawionego fabrycznie
czasu i temperatury (zmiana 1 dni 6-7).
PL
Powtórzyć wskazane wyżej kroki b, c, & d celem
zaprogramowania pozostałych zmian temperatury na weekend.
Zmienianie ustawionych fabrycznie programów w trybie
24-godz
a) Naciskać PROG do czasu pokazania się na
wyświetlaczu pierwszego ustawionego
fabrycznie czasu i temperatury (zmiana 1 dla
wszystkich dni tygodnia).
b) Przy użyciu przycisków - lub + dokonać korekty CZASU/TIME (po
Instrukcja użytkownika
naciśnięciu i przytrzymaniu czas będzie się zmieniać w odstępach
10-minutowych).
c) Przy użyciu przycisków Λ oraz V dokonać odpowiedniej korekty
TEMPERATURY.
d) Nacisnąć PROG celem przejścia do kolejnego
fabrycznego ustawienia czasu i temperatury
(zmiana 2).
e) Powtórzyć kroki b, c oraz d celem zaprogramowania pozostałych
zmian temperatury.
Zmienianie ustawionych fabrycznie programów w trybie
programowania AB
(Ustawienie instalacyjne musi znajdować się w trybie pracy 5/2 dnia)
Nacisnąć i przytrzymać przez 3 sekundy łącznie
PROG oraz V. Wyświetlacz zmieni się, jak pokazano
obok. To otwiera Zaawansowane programowanie
przez użytkownika opcja 1.
Page 20
PL
Przy pomocy przycisków Λ oraz V można
uruchamiać lub blokować funkcję (1=uruchomiona,
0=zablokowana).
Naciskać PROG przez 5 sekund do chwili zmiany
wyświetlacza i momentu, kiedy dwukropek zacznie
migać, co stanowi potwierdzenie znajdowania się
w trybie RUN.
Nacisnąć PROG jeden raz, co spowoduje zmianę
obrazu na wyświetlaczu i pokazywanie ustawionych
fabrycznie dni przypisanych do programu „A” (dni
1, 2, 3, 4 oraz 5).
Przy użyciu przycisków - lub + można przechodzić
do przodu lub w tył dni tygodnia.
Instrukcja użytkownika
Celem wyłączenia danego dnia należy nacisnąć V, (na przykład dzień
2). Do wyboru danego dnia służy przycisk Λ na przykład dzień 7).
Wszystkie wyłączone dni zostaną automatycznie przypisane do
programu „B”.
Programowanie dni i zmian temperatury w programie „A”
a) Naciskać PROG do momentu pokazania się
na wyświetlaczu pierwszych ustawionych
fabrycznie czasu i temperatury (zmiana 1 dla
programu A).
b) Przy użyciu przycisków - lub + dokonać korekty CZASU/TIME (po
naciśnięciu i przytrzymaniu czas będzie się zmieniać w odstępach
10-minutowych).
c) Przy użyciu przycisków Λ oraz V dokonać odpowiedniej korekty
TEMPERATURY.
d) Nacisnąć PROG celem przejścia do kolejnego fabrycznego
ustawienia czasu i temperatury (Zmiana 2).
e) Powtórzyć kroki b, c oraz d celem zaprogramowania pozostałych
zdarzeń.
20
Programowanie dni i zmian temperatury w programie „B”
a) Naciskać PROG do momentu pokazania się
na wyświetlaczu pierwszych ustawionych
fabrycznie czasu i temperatury (Zmiana 1 dla
programu B).
Page 21
21
b) Przy użyciu przycisków - lub + dokonać korekty CZASU/TIME (po
naciśnięciu i przytrzymaniu czas będzie się zmieniać w odstępach
10-minutowych).
c) Przy użyciu przycisków Λ oraz V dokonać odpowiedniej korekty
TEMPERATURY.
d) Nacisnąć PROG celem przejścia do kolejnego fabrycznego
ustawienia czasu i temperatury (zmiana 2).
e) Powtórzyć kroki b, c oraz d celem zaprogramowania pozostałych
zmian temperatury.
Tryb pracy
PL
Nacisnąć PROG celem powrotu do trybu RUN/tryb
pracy, dwukropek na wyświetlaczu zacznie migać.
Ogrzewanie będzie odtąd funkcjonować stosownie
do zaprogramowanych czasów i temperatur.
Ustawianie ręczne przez użytkownika
Zmiana na wyświetlaczu celem pokazywania czasu lub
Instrukcja użytkownika
temperatury
Nacisnąć łącznie + oraz – celem
dokonania zmiany między
ustawieniami.
Czasowa zmiana aktualnie zaprogramowanej temperatury
Naciskać Λ lub V aż do czasu pokazania się wymaganej temperatury.
Należy pamiętać, że instalator mógł wprowadzić ograniczenia w
zakresie ustawiania zarówno najwyższych jak i najniższych temperatur
oraz maksymalne zakresy ustawiania ręcznego.
Takie ustawienie ręczne zostanie automatycznie anulowane na
początku następnego zaprogramowanego zdarzenia. Należy
pamiętać, że instalator mógł wprowadzić ograniczenia w odniesieniu
czasu trwania ustawienia ręcznego lub do czegoś innego niż następne
zdarzenie.
Page 22

PL
Zmienianie opisu dni tygodnia z cyfrowego na tekstowy
Naciskać łącznie Λ oraz – celem zmieniania między pokazywaniem dni
cyframi oraz tekstem.
Zmienianie wyświetlanego czasu między zegarem 12godzinnym i 24-godzinnym
Naciskać łącznie Λ oraz + celem zmieniania między pokazywaniem
zegara 12-godzinnego oraz 24-godzinnego.
Zmienianie pokazywanej temperatury między stopniami
Celsjusza (°C) oraz Fahrenheita (°F)
Instrukcja użytkownika
Naciskać łącznie V oraz – celem zmieniania pokazywanej temperatury
albo w stopniach Celsjusza (°C) albo Fahrenheita (°F).
Tryb termostatu
a) W razie potrzeby można wybrać stałą temperaturę w granicach
5-30°C. Takie ustawienie może zapewniać ochronę przed mrozem
w razie dłuższej nieobecności w domu, może również dawać
nieograniczoną czasowo wyższą temperaturę, na przykład w razie
choroby któregoś z członków rodziny.
b) Nacisnąć łącznie Λ oraz V celem przejścia do trybu termostatu.
Fabrycznie ustawiona została temperatura 8°C, ale można ją
przeprogramować, zob. Zaawansowane programowanie przez
użytkownika, krok 10, (str. 25).
c) Gdy wybrana temperatura będzie równa lub
niższa od fabrycznego ustawienia dla ochrony
przed mrozem, na ekranie pojawi się symbol
płatka śniegu.
d) Posługując się przyciskami Λ lub V można teraz zmieniać
temperaturę na inną wartość odchodząc od zaprogramowanego
ustawienia na ochronę przed mrozem.
22
e) Celem powrotu do automatycznego programowania należy
nacisnąć łącznie przyciski Λ oraz V.
Page 23

23
Zmiana zegara do przodu i do tyłu
Odbywa się to automatyczne, jeżeli jednak funkcja automatycznej
zmiany czasu była wyłączona, wówczas należy zastosować się do
poniższych instrukcji.
Zmiana z czasu letniego na zimowy (cofnięcie zegara)
Nacisnąć i przytrzymać przycisk -.
Zmiana z czasu zimowego na letni (przesunięcie zegara do przodu)
Nacisnąć i przytrzymać przycisk +.
Zdalne ręczne sterowanie wejścia i wyjścia z trybu
PL
termostatu
Niektóre modele urządzenia wyposażone są w funkcję umożliwiającą
przy użyciu kontrolowanego telefonicznie przełącznika lub za pomocą
styków okiennych przełączanie urządzenia na tryb termostatu i z
powrotem.
Temperatura wymagana w okresie, kiedy budynek jest pusty lub kiedy
otwarte są okna, musi być najpierw ustawiona w Zaawansowanym
programowaniu przez użytkownika, krok 10, (strona 25).
Celem lokalnego umożliwienia ręcznego należy łącznie nacisnąć
przyciski Λ oraz V.
Instrukcja użytkownika
Funkcja opóźnionego startu
Termostat wyposażony jest w opcjonalną funkcję opóźnionego
startu wstrzymującą ogrzewanie w dniach, kiedy panuje łagodna
temperatura i kiedy temperatura na początku zdarzenia jest bliska
zaprogramowanej wartości. W razie uprzedniego uruchomienia tej
funkcji można ją następnie wyłączyć naciskając albo przycisk Λ albo
V. Opis uruchomienia tej funkcji podany jest w Zaawansowanym
programowaniu przez użytkownika, krok 11, (strona 26).
Kontrola optymalnego startu (KOS)
Termostat wyposażony jest w opcjonalną funkcję kontroli optymalnego
startu. Funkcja ta umożliwia ustalenie czasu, kiedy temperatura w
pokoju ma osiągnąć określony poziom. Termostat dokonuje wówczas
obliczeń, jak wcześnie przed czasem danego zdarzenia należy włączyć
ogrzewanie, aby na czas osiągnąć wymaganą temperaturę. Pełny opis
Page 24

PL
tej operacji oraz w jaki sposób ją uruchomić i ustawić w odpowiedni
sposób podany jest w Zaawansowanym programowaniu przez
użytkownika, kroki 12 oraz 13, (strona 26/27).
Wymiana baterii (tylko modele na baterie)
Gdy baterie zaczną się wyczerpywać, na
wyświetlaczu pojawi się symbol baterii. Jeżeli
baterie nie zostaną wymienione w ciągu 15 dni,
urządzenie wyłączy się. Przy wymianie baterii
należy używać wyłącznie baterii alkalicznych dobrej jakości.
UWAGA WAŻNE: Po wymianie baterii należy nacisnąć przycisk RESET
w celu zrestartowania urządzenia. Wszystkie ustawienia dotyczące
Instrukcja użytkownika
dnia, czasu, programowania oraz odnoszące się do ustawień ręcznych
są zapamiętywane przez cały czas eksploatacji urządzenia.
Opcja zaawansowanego
programowania przez
użytkownika
Uwaga: Termostat został fabrycznie ustawiony, aby odpowiadał
większości sytuacji, jednakże wyposażony jest on w dodatkowe
ustawienia opcjonalne, które mogą zapewnić lepszy komfort,
wygodę i lepsze wykorzystanie energii. Funkcje te ustawia się w
trybach Zaawansowane programowanie przez użytkownika oraz
Zaawansowane programowanie przez instalatora.
Celem dostępu do Zaawansowanego programowania
przez użytkownika
Przez 3 sekundy naciskać razem V oraz PROG. Spowoduje to przejście
24
do Zaawansowanego programowania przez użytkownika. Posługując
się przyciskami + oraz – można następnie przy pomocy przycisków Λ
oraz V przechodzić do przodu i do tyłu między opcjami celem zmiany
ustawień danej opcji. Migająca cyfra po prawej stronie wyświetlacza
wskazuje numer wybranej opcji.
Page 25
25
Opcja 1 - Aktywacja lub blokada programowania A/B
(Opcję 41 ustawić na 5+2)
Umożliwia aktywację lub zablokowanie opcji programowania
A/B. Naciskać + aż wyświetlona zostanie Opcja 1, a następnie
przy pomocy Λ oraz V wybrać żądane ustawienie.
Zablokowane, urządzenie działa w trybie 5/2 lub zegara 24-
PL
Ustawienie 0
Ustawienie 1 Czynne: aktywizuje programowanie A/B
Opcja 3 – Zasady zegara kalendarzowego
Ustala zasady, jakimi kieruje się automatyczny zegar
kalendarzowy przy przechodzeniu z czasu letniego na
zimowy i odwrotnie. Naciskać + do czasu wyświetlenia Opcji
3, następnie przy użyciu Λ oraz V wybrać żądane ustawienie.
Ustawienie 0 Zablokowane
Ustawienie 1
godzinnego w zależności od ustawienia dokonanego przez
instalatora (ustawienie fabryczne).
Ręczne: użytkownik sam musi dokonać zmian przy pomocy +
celem przesunięcia pokazywanego czasu do przodu, lub przy
pomocy – do jego opóźnienia
Instrukcja użytkownika
Ustawienie 2 Zasady europejskie. (Ustawienie fabryczne)
Ustawienie 3 Zasady USA (od roku 2007)
Ustawienie 4 Zasady USA (przed 2007)
Opcja 4 – Ustawianie czasu wg strefy czasowej
Funkcja ta umożliwia ustalenie strefy czasowej i korektę
wyświetlanego czasu. Naciskać + aż do momentu gdy zostanie
wyświetlona Opcja 4, a następnie przy użyciu Λ oraz V wybrać
żądane ustawienie.
Modele brytyjskie: funkcję tę należy pozostawić w ustawieniu
Ustawienie 0
fabrycznym jako 0.
Środkowoeuropejskie modele czasowe: funkcję tę należy
Ustawienie 1
pozostawić w ustawieniu fabrycznym jako +1.
-12 godzin +14 godzin
Reszta świata: przy użyciu przycisków Λ oraz V wybrać dla miejsca instalacji
termostatu odchylenie od czasu uniwersalnego (GMT).
Opcja 10 – Mróz / ustawianie trybu termostatu
Funkcja ta umożliwia ustalenie wyjściowej temperatury dla
trybu termostatu mróz. Naciskać + aż do czasu wyświetlenia
Opcji 10, a następnie przy użyciu Λ oraz V wybrać wymagane
ustawienie.
5-40°C – Ustawienie fabryczne wynosi 8°C, ale może zostać zmienione na dowolną
wartość w przedziale 5-40°C.
Page 26
PL
Opcja 11 - Metoda rozpoczynania pracy
Termostat może uruchamiać system na trzy różne sposoby.
Naciskać + aż do momentu wyświetlenia Opcji 11, a następnie
przy użyciu Λ oraz V wybrać wymagane ustawienie.
Ustawienie 0 - Normalne: Ogrzewanie jest włączane lub wyłączane o
zaprogramowanym czasie.
Ustawienie 1 - Optymalna kontrola startu (Optimum start control - OSC):
umożliwia zaprogramowanie czasu, kiedy użytkownik pragnie, aby temperatura
w pomieszczeniu osiągnęła określony poziom. W takiej sytuacji termostat oblicza
jak wcześnie przed wymaganym czasem należy włączyć ogrzewanie. Zależeć to
będzie od warunków atmosferycznych wahając się w przedziale od 120 minut do 0
minut przed zaprogramowanym czasem zdarzenia. Ustawienie to musi być robione
łącznie z Opcją 12 celem dopasowania ustawienia optymalnego startu do budynku,
w jakim urządzenie zostało zainstalowane.
Instrukcja użytkownika
Ustawienie 2 - Opóźniony start: Jest to alternatywa do OSC. Ustawić czasy
zdarzenia w normalny sposób uwzględniając czas, w jakim budynek zwykle
ogrzewa się. Termostat monitoruje przełącznik czasowy, rzeczywistą temperaturę
i temperaturę wymaganą i opóźnia włączenie ogrzewania, jeżeli aktualna
temperatura jest bliska zaprogramowanej.
Opcja 12 – Ustawienie ogrzewania wstępnego optymalnej kontroli startu
(Opcję 11 ustawić na 1)
Naciskać + aż do momentu wyświetlenia Opcji 12, a
następnie posługując się Λ oraz V wybrać wymagane
ustawienie (działa jedynie wówczas, gdy Opcja 11
ustawiona jest na 1).
Kontrola optymalnego startu musi zostać skorygowana stosownie do charakterystyki
energetycznej budynku. Posługując się przyciskami Λ oraz V wybrać wymagany okres
ogrzewania wstępnego. Poniższa tabela podaje przykładowe typowe ustawienia.
Jeżeli budynek nie osiąga wymaganej temperatury we właściwym czasie należy
codziennie zwiększać ustawienie o 15 minut, aż do osiągnięcia właściwego
ustawienia.
Jeżeli budynek osiąga wymaganą temperaturę za wcześnie należy codziennie
zmniejszać ustawienie o 15 minut, aż do czasu osiągnięcia właściwego
ustawienia.
0:15 15 min. – systemy z nadmuchem ciepłego powietrza, dobrze ocieplony budynek.
0:30 30 min. – systemy z nadmuchem ciepłego powietrza, dobrze ocieplony budynek.
0:45 45 min. – systemy z nadmuchem ciepłego powietrza, słabo ocieplony budynek.
26
1:00 60 min. – system grzejnikowy, lekki dobrze ocieplony budynek.
(ustawienie fabryczne)
1:15 75 min. – system grzejnikowy, lekki średnio ocieplony budynek.
1:30 90 min. – system grzejnikowy, średnio lekki słabo ocieplony budynek.
1:45 105 min. – system grzejnikowy, ciężki dobrze ocieplony budynek.
2:00 120 min. – system grzejnikowy, ciężki słabo ocieplony budynek.
Page 27
27
Opcja 13 – Ustawienie kontroli optymalnego startu / opóźnionego startu
(Opcja 11 ustawiona na 1 lub 2)
Kontrolę optymalnego startu lub opóźnionego startu
można stosować wyłącznie w odniesieniu do zdarzenia 1 lub
do każdej zmiany temperatury w danym dniu wymagającej
wyższej temperatury, niż poprzednio zaprogramowana.
Naciskać + do momentu wyświetlenia Opcji 13, a następnie
posługując się Λ oraz V wybrać wymagane ustawienie
(działa jedynie wówczas, gdy Opcja 11 ustawiona jest na 1
lub 2).
Ustawienie 0 Odnosi się jedynie do pierwszego ustawienia w danym dniu.
(ustawienie fabryczne)
Ustawienie 1 Odnosi się do każdego wydarzenia w danym dniu wymagającego
PL
wyższej temperatury w porównaniu do poprzedniego zdarzenia.
Omówienie wybieranych przez instalatora funkcji, które
mogą mieć wpływ na funkcjonowanie termostatu
Ograniczenie zakresu temperatury
Umożliwia instalatorowi zaprogramowanie zarówno górnej jak dolnej
granicy temperatury. Może ograniczać użytkownikowi ustawianie na
termostacie górnej i dolnej granicy temperatury.
Instrukcja użytkownika
Ograniczenie ręcznego ustawiania temperatury
Umożliwia instalatorowi ograniczenie liczby stopni, jaką użytkownik
może ustawić ręcznie niezależnie od zaprogramowanego poziomu;
ponadto umożliwia instalatorowi ustanowienie zasad określających jak
długo może funkcjonować ręczne ustawienie.
Blokada klawiatury
Umożliwia instalatorowi ograniczenie lub zablokowanie działania
klawiatury celem zapobieżenia zmianom wprowadzanym przez osoby
nieupoważnione w odniesieniu do wartości programowych i długości
trwania ustawień ręcznych.
Page 28

PL
Co się dzieje, kiedy baterie się wyczerpią
W razie jeżeli w ciągu 15 dni od ukazania się na wyświetlaczu ostrzeżenia
o wyczerpujących się bateriach nie zostaną one zmienione, urządzenie
wyłącza się. W normalnych warunkach termostat zamyka zawór lub
kontrolowany przezeń bojler. W ekstremalnie mroźnych klimatach
wyłączenie ogrzewania może spowodować zamrożenie całego
budynku. Aby temu zapobiec instalator może ustawić urządzenie
w taki sposób, że w razie wyczerpania się baterii, termostat włączy
ogrzewanie, zamiast je wyłączać. Zwiększy to zużycie energii, ale
zapobiegnie szkodom w budynku. W razie potrzeby należy sprawdzić,
czy instalator ustawił tę funkcję prawidłowo.
Ważne: Jeżeli po wymianie baterii na wyświetlaczu nadal nie
Instrukcja użytkownika
pojawiają się żadne informacje należy sprawdzić czy baterie zostały
włożone w odpowiednia stronę. Nie wolno pozostawiać baterii w
urządzeniu jeśli wyświetlacz nie pracuje.
Jeżeli po wymianie baterii wyświetlacz pozostaje pusty, konieczne
jest częściowe zresetowanie. Szcaegóły na następnej stronie.
Resetowanie urządzenia
Reset częściowy: Nacisnąć RESET (używany do ponownego
uruchomienia urządzenia), jeżeli z jakiegokolwiek powodu wyświetlacz
zablokował się. Nie resetuje (zeruje) to jakiegokolwiek programu,
zegara lub daty. Zaleca się, aby zrobić to w czasie instalacji.
Reset pełny przez użytkownika: Nacisnąć RESET przyciskając
jednocześnie przycisk PROG. Zresetuje (wyzeruje) to czasy zdarzeń i
wszelkie ewentualne ustawienia Zaawansowanego programowania
przez użytkownika, ale nie wyzeruje czasu, ani daty.
Reset pełny przez instalatora: Dostępny wyłącznie instalatorowi.
Poza wskazanymi wyżej, wszystkie ustawienia Zaawansowanego
28
programowania przez instalatora powracają do ustawień fabrycznych,
z tym że czas, data oraz data wymaganego serwisu nie zostają
zresetowane.
Page 29

29
Vartotojo instrukcija
Pažintis su Jūsų programuojamu patalpos termostatu
Jūsų programuojamas patalpos termostatas leidžia Jums
užprogramuoti skirtingas temperatūras skirtingiems laiko
periodams. Jūs galite užprogramuoti vienokius laikus ir temperatūras
šiokiadieniams ir kitokias temperatūras savaitgaliams. Tai vadinama
5/2 dienų veikimu.
Termostatą taip pat galima nustatyti taip, kad laikai ir temperatūros
būtų tokie patys kiekvieną savaitės dieną. Tai vadinama 24 valandų
veikimu.
Be to, temostate galima nustatyti du skirtingus programavimo blokus,
LT
Vartotojo instrukcija
kuriuos vėliau būtų galima priskirti bet kuriai savaitės dienai. Tai
vadinama A/B programos veikimu.
Montuotojas visuose jūsų termostatuose gali nustatyti iki 2, 4 arba 6
laiko bei temperatūros režimų kiekvienai dienai.
Visi termostatai turi rankinio valdymo funkciją, įskaitant programuojamą
šalčio nustatymą.
Jūsų termostatas turi kelias papildomas funkcijas, kurias montuotojas
nustatys jei jos bus reikalingos. Taip pat yra daug papildomų funkcijų,
kurias galite nustatyti Jūs. Šie nustatymai keičia termostato veikimo
pobūdį, o kai kurie paveikia programavimo funkcijas ir vartotojo
rankinius nustatymus. Prašome perskaityti vartotojo papildomo
programavimo instrukcijas prieš programuojant prietaisą (žr. 37
puslapį).
Iš anksto nustatytos programos
Jūsų naujas TP5001 turi iš anksto užprogramuotus veikimo laikus ir
temperatūrų rinkinius, kurie tinka daugeliui žmonių. Prašome nepamiršti,
kad kai kurie galimi nustatymai priklausys nuo to, kaip montuotojas
sumontuos prietaisą.
Pastaba: Jei nustatomos 4 programos per dieną, numeriai 3 ir 4 yra
praleidžiami. Jei nustatomos 2 programos per dieną, numeriai 2, 3, 4, ir
5 yra praleidžiami ir programos iš naujo sunumeruojamos.
Page 30
LT
Šiokiadieniai (Pr-Pn) Savaitgalis (Š-S)
Programos
Laikas Temp. °C Programos
Laikas Temp. °C
Vartotojo instrukcija
numeris
1 06:30 20 1 07:30 20
2 08:30 15 2 09:30 20
3 11:30 20 3 11:30 20
4 13:30 15 4 13:30 20
5 16:30 21 5 16:30 21
6 22:30 15 6 22:30 15
Pastaba: šie taip pat yra bloko „A“
programų laikai.
numeris
Pastaba: šie taip pat yra bloko „B“
programų laikai.
Prieš įjungiant
Atidarykite dangtelį programuotojo priekyje
ir paspauskite RESET (nustatymo) mygtuką
nemetaliniu daiktu, kol ekranas taps tuščias. Tai
užtikrins, kad yra nustatyti gamykliniai nustatymai,
RESET
ir kad mikrokompiuteris veikia teisingai.
Ekrano pritaikymas vartotojui
Dėl aiškumo, instrukcijoje nurodyta, kad ekrano nustatymui naudojamas
24 valandų laikrodis, °C, ir kad savaitės dienos yra sunumeruotos 17 (kur 1 yra pirmadienis). Visi šie nustatymai gali būti pažymėti po
termostato užprogramavimo, žr. puslapius 35 ir 36.
Teisingas datos ir laiko nustatymas
Jūsų TP5001 turi laikrodį su kalendoriaus funkcija, kuri automatiškai
keičia laiką pavasarį ir rudenį. Laikas ir data nustatyti gamintojo CET
laiko zonai, todėl jo nustatyti nereikia. Jei gyvenate kitoje laiko juostoje,
žiūrėkite „Laiko juostos nustatymas“ 38 puslapyje. Tačiau, jei laiką,
ar datą, reikia perstatyti dėl kokios nors kitos priežasties, sekite šiuos
nurodymus:
Datos nustatymas
Paspauskite ir laikykite Λ ir PROG 3 sekundes, kol
30
pasirodys data dd/mm/yy (diena/mėnuo/metai)
formatu.
Page 31

31
YEAR (metai) skaičius mirksės, naudokite Λ arba V
metams nustatyti.
Naudokite - arba +, kad pereitumėte prie MONTH
(mėnuo), o tada spauskite Λ arba V mėnesiui
nustatyti.
Naudokite - arba +, kad pereitumėte prie mėnesio
DATE (diena), tada spauskite Λ arba V mėnesio
dienai nustatyti.
LT
Jeigu bandysite nustatyti negalimą datą, programa ją atmes ir nustatys
artimiausią galimą datą. Rekomenduojama, kad data būtų nustatoma
yy/mm/dd (metai/mėnuo/diena) tvarka.
Teisingo laiko nustatymas
Paspauskite PROG, kad rodytų laiką. Laikas ekrane
mirksės.
Naudokite + ir – mygtukus teisingo laiko
nustatymui (nuspauskite ir laikykite, jei norite, kad
laikas padidėtų 10 minučių žingsniu).
Vartotojo instrukcija
Teisingos dienos nustatymas
Savaitės diena nustatoma automatiškai. Paspauskite
PROG, kad grąžintumėte į normalų režimą. (RUN
(veikimas)).
Nustatytų programų patvirtinimas
Jei esate patenkintas laikais, parodytais 30 puslapyje esančioje lentelėje,
Jums nereikia imtis tolimesnių veiksmų.
Nustatytų programų pakeitimas
Prieš pakeičiant nustatytas programas
Montuotojas turės nustatyti prietaiso veikimą vienu iš šių dviejų
režimų:
• 5/2 dienos – vienas programų režimas šiokiadieniams ir kitas
savaitgaliams (32 puslapis).
Page 32

32
LT
• 24 valandos – vienas programų režimas visai savaitei (33 puslapis).
Kitas pasirinkimas
• A/B – Termostate galite nustatyti du programų režimus, kurių
kiekvieną galėsite pritaikyti skirtingoms savaitės dienoms. Jei
tai bus reikalinga, ieškokite instrukcijos 33 psl., kaip įjungti šią
funkciją.
Prašome atkreipti dėmesį
Prietaisas turi būti programuojamas nuosekliai, programų laikai turi
nuosekliai sekti vienas paskui kitą.
Vartotojo instrukcija
Jei norite palikti iš anksto nustatytą laiką tokį, koks jis yra, tiesiog
paspauskite PROG, kad pereitumėte prie kito nustatymo.
Jei norite, kad prietaisas grįžtų į veikimo režimą RUN (veikimas),
paspauskite PROG ir laikykite, kol ekrane esantis dvitaškis sumirksės.
Arba palikite jį ir prietaisas automatiškai grįš į RUN (veikimo) režimą
po 2 minučių.
Jei jūsų montuotojas bus nustatęs termostato programoje 6,
4 ar 2 režimus per dieną, tai reiškia, kad per dieną jūs galėsite
užprogramuoti tokį skaičių režimų.
Nustatytų programų keitimas 5/2 dienų režimui
Dienoms 1-5 (šiokiadieniams)
a) Paspauskite PROG, kol ekrane pasirodys pirmas nustatytas laikas ir
temperatūra (Programos numeris 1, dienos 1, 2,
3, 4, 5).
b) Naudokite + ir – mygtukus, kad nustatytumėte
TIME (laiką) (nuspauskite ir laikykite, jei norite,
kad laikas padidėtų 10 minučių žingsniu).
c) Naudokite Λ ir V mygtukus reikalingos TEMPERATURE
(temperatūros) nustatymui.
d) Paspauskite PROG, kad pereitumėte prie kito
nustatyto laiko ir temperatūros (Programos
numeris 2).
e) Pakartokite žingsnius b, c, d, kad
užprogramuotumėte likusias šiokiadienių
programas.
Page 33

33
Dienoms 6-7 (savaitgaliams)
Paspauskite PROG, kol ekrane pasirodys pirmas
nustatytas laikas ir temperatūra (Programos
numeris 1, dienos 6-7).
Pakartokite žingsnius b, c, d, kad
užprogramuotumėte likusias savaitgalio programas.
Nustatytų programų keitimas 24 valandų režimui
a) Paspauskite PROG, kol ekrane pasirodys pirmas
nustatytas laikas ir temperatūra (Programos
LT
numeris 1 visoms savaitės dienoms).
b) Naudokite + ir – mygtukus, kad nustatytumėte
TIME (laiką) (nuspauskite ir laikykite, jei norite, kad laikas padidėtų
10 minučių žingsniu).
c) Naudokite Λ ir V mygtukus reikalingos TEMPERATURE
(temperatūros) nustatymui.
d) Paspauskite PROG, kad pereitumėte prie kito
nustatyto laiko ir temperatūros (Programos
numeris 2).
e) Pakartokite žingsnius b, c, d, kad
užprogramuotumėte likusius režimus.
Vartotojo instrukcija
Nustatytų programų keitimas AB programavimui
(Produktas turi būti nustatytas 5/2 dienų režime)
Paspauskite ir laikykite PROG ir V 3 sekundes.
Ekrane pasirodys priešingas skaičius. Tai Jus
nuves prie vartotojo papildomo programavimo
pasirinkimo 1.
Naudokite Λ ir V mygtukus, kad įjungtumėte arba
išjungtumėte funkciją (1 = įjungta, 0 = išjungta).
Nuspauskite PROG 5 sekundėms, kol ekranas
pasikeis, ir jame esantis dvitaškis sumirksės,
patvirtinant, kad esat RUN (veikimo) režime.
Paspauskite PROG vieną kartą, ekranas pasikeis,
rodydamas numatytas dienas, priskirtas programai
„A“ (dienos 1, 2, 3, 4 ir 5).
Page 34

LT
Naudokite + ir – mygtukus, kad galėtumėte
pasirinkti norimas savaitės dienas.
Kad atšauktumėte dieną, paspauskite V,
(pavyzdžiui 2 dieną). Kad pasirinktumėte spauskite
Λ (pavyzdžiui 7 dieną).
Bet kokios atšauktos dienos automatiškai priskiriamos programai „B“.
„A“ programos dienų ir atvejų programavimas
a) Paspauskite PROG, kol ekrane pasirodys pirmas
iš anksto nustatytas laikas ir temperatūra
Vartotojo instrukcija
(Programos numeris 1 programai A).
b) Naudokite + ir – mygtukus, kad nustatytumėte
TIME (laiką) (nuspauskite ir laikykite, jei norite, kad laikas padidėtų
10 minučių žingsniu).
c) Naudokite Λ ir V mygtukus reikalingos TEMPERATURE
(temperatūros) nustatymui.
d) Paspauskite PROG, kad pereitumėte prie kito nustatyto laiko ir
temperatūros (Programos numeris 2).
e) Pakartokite žingsnius b, c, d, kad užprogramuotumėte likusius
režimus.
„B“ programos dienų ir režimų programavimas
a) Paspauskite PROG, kol ekrane pasirodys pirmas
nustatytas laikas ir temperatūra (Programos
numeris 1 programai B).
b) Naudokite + ir – mygtukus, kad nustatytumėte
TIME (laiką) (nuspauskite ir laikykite, jei norite, kad laikas padidėtų
10 minučių žingsniu).
c) Naudokite Λ ir V mygtukus reikalingos TEMPERATURE
(temperatūros) nustatymui.
d) Paspauskite PROG, kad pereitumėte prie kito nustatyto laiko ir
temperatūros (Programos numeris 2).
34
e) Pakartokite žingsnius b, c, d, kad užprogramuotumėte likusius
režimus.
Page 35

35
Programos vykdymas
Paspauskite PROG, kad grįžtumėte į RUN (veikimo)
režimą, ekrane esantis dvitaškis sumirksės.
Šildymas dabar vyks pagal užprogramuotus laikus
ir temperatūras.
Vartotojo rankinis nustatymas
Laiko arba temperatūros nustatymas
LT
Paspauskite kartu + ir -,
kad galėtumėte pasirinkti
nustatymus.
Laikinai pakeisti esamą užprogramuotą temperatūrą
Paspauskite Λ arba V, kol bus rodoma norima temperatūra. Prašome
atkreipti dėmesį, kad montuotojas galėjo apriboti viršutinius ir apatinius
temperatūros nustatymus ir temperatūros rankinio nustatymo ribas.
Šis rankinis nustatymas bus automatiškai atšauktas prasidedant
sekančiam užprogramuotam režimui. Prašome atkreipti dėmesį, kad
Vartotojo instrukcija
montuotojas galėjo apriboti rankinio nustatymo trukmę kokiam nors
kitam periodui, nei sekančio režimo pradžia.
Savaitės dienos pakeitimas iš numerio į tekstą
Paspauskite kartu Λ ir -, kad galėtumėte pasirinkti skaičių ir/arba
tekstą.
Laikrodžio pakeitimas 12 ir 24 valandų žymėjimu
Paspauskite kartu Λ ir +, kad galėtumėte pasirinkti tarp 12 ir 24 valandų
žymėjimo.
°C ir °F pakeitimas
Paspauskite kartu V ir -, kad galėtumėte pasirinkti tarp °C ir °F matavimo
sistemų.
Page 36

LT
Termostato režimas
a) Gali būti parinkta pastovi 5-30°C temperatūra. Tai apsaugo nuo
užšalimo, išvykus iš namų, o taip pat galima anksčiau laiko nustatyti
aukštesnę temperatūrą.
b) Paspauskite kartu Λ ir V, kad įeitumėte į termostato režimą. Pradinis
nustatymas yra 8°C, tačiau jį galima perprogramuoti. Žiūrėkite
vartotojo papildomų funkcijų programavimą, 10 žingsnį (39
puslapyje).
c) Ekrane atsiras snaigės simbolis, kai pasirinkta temperatūra bus lygi,
arba žemesnė, negu užprogramuota.
d) Naudokitės Λ arba V mygtukais, norėdami
Vartotojo instrukcija
pakeisti užprogramuotą apsaugos nuo užšalimo
temperatūrą.
e) Norėdami grįžti prie automatinio programavimo, paspauskite
kartu Λ ir V.
Laikrodžio pasukimas į priekį ir atgal
Tai yra daroma automatiškai, tačiau jei automatinis perjungimas yra
išjungtas, sekite žemiau esančiomis instrukcijomis.
Pakeitimas iš vasaros į žiemą (laikrodžio pasukimas atgal)
Paspauskite ir laikykite – mygtuką.
Pakeitimas iš žiemos į vasarą (laikrodžio pasukimas į priekį)
Paspauskite ir laikykite + mygtuką.
Nuotolinis valdymas išjungiant arba įjungiant termostato
režimą
Pasirinkti modeliai turi savybę, kuri leidžia įeiti į termostato režimą,
arba išeiti iš jo, naudojant telefonu aktyvuojamą jungiklį, arba langų
kontaktus.
36
Reikalingos temperatūros palaikymas, kai pastate nėra žmonių, arba
kai atidaryti langai, pirmiausiai nustatomas pagal papildomų funkcijų
programavimo instrukciją, 10 žingsnį. (39 puslapis).
Norint vietoje nustatyti šią funkciją, paspauskite kartu Λ ir V.
Page 37
37
Atidėto įjungimo savybė
Jūsų termostate yra laisvai pasirenkama atidėto įjungimo savybė,
leidžianti kuriam laikui sustabdyti šildymą šiltomis dienomis, kai
patalpos temperatūra programos vykdymo pradžioje yra artima
užprogramuota reikšmei. Jei įjungėte šią funkciją, ją galima pakeisti
rankiniu būdu, spaudžiant Λ arba V mygtukus. Norint įjungti šią
savybę, skaitykite vartotojo papildomų funkcijų programavimo 11
žingsnį (39 puslapis).
Optimalaus įjungimo kontrolė (OSC)
LT
Termostate yra laisvai pasirenkama optimalaus įjungimo kontrolė.
Ši savybė leidžia Jums nustatyti laiką, kada bus reikalinga tam tikra
patalpos temperatūra. Termostatas tada apskaičiuoja, kada iki
programos paleidimo sistema turi būti įjungiama, kad užtikrintų
reikiamą patalpos temperatūrą reikiamu laiku. Pilnas aprašymas apie tai
kaip įjungti, duotas vartotojo papildomų funkcijų programavimo 12
ir 13 žingsniuose (40 puslapis).
Baterijos pakeitimas (tik modeliams su baterijomis)
Kai baterijos išseks, ekrane pasirodys baterijos
simbolis. Jūs turite 15 dienų baterijų pakeitimui
Vartotojo instrukcija
iki prietaiso išsijungimo. Keičiant baterijas
užtikrinkite, kad būtų panaudotos tik aukštos
kokybės šarminės baterijos.
DĖMĖSIO: Pakeitus bateriją, iš naujo įjunkite įrenginį, nuspausdami
ir atleisdami RESET (nustatymo) mygtuką. Visi datos, laiko,
programavimo ir rankiniai vartotojo nustatymai yra saugomi visą
produkto veikimo laiką.
Vartotojo papildomų funkcijų
programavimo pasirinkimai
Svarbu: termostatas gamykloje buvo nustatytas taip, kad tenkintų įvairius
poreikius, tačiau yra papildomų laisvai pasirenkamų nustatymų, kurie gali
pagerinti komfortą, patogumą ir Jūsų termostato energijos sunaudojimą.
Jie yra nustatomi vartotojo papildomų funkcijų programavimo ir
montuotojo papildomų funkcijų programavimo režimuose.
Page 38
LT
Vartotojo papildomų funkcijų programavimas
Paspauskite ir laikykite V ir PROG 3 sekundes. Taip Jūs pateksite į
vartotojo papildomų funkcijų programavimą. Naudokite + ir
– mygtukus pasirinkimui išrinkti, o Λ ir V mygtukus pasirinkimo
nustatymams pakeisti. Žybčiojantis skaičius dešinėje ekrano pusėje
parodo išrinkto pasirinkimo numerį.
Pasirinkimas 1 - Įjungti arba išjungti A/B programavimą
(pasirinkimas 41 nustatytas ties 5+2)
Įjungia, arba išjungia, A/B programavimo pasirinkimą.
Paspauskite +, kol pasirodys pasirinkimas 1, naudokite Λ ir V
Vartotojo instrukcija
reikalingo nustatymo pasirinkimui.
Išjungtas, kol veikia 5/2, ar 24 valandų, režimai, priklausomai nuo
Nustatymas 0
montavimo nustatymo (gamyklinio nustatymo).
Nustatymas 1 Įjungtas: aktyvuoja A/B programavimą.
Pasirinkimas 3 – Kalendorinio laikrodžio taisyklės
Nurodo taisykles, kuriomis vadovausis automatinis
kalendorinis laikrodis, apskaičiuojant pokyčius tarp vasaros
ir žiemos laiko. Paspauskite +, kol pasirodys pasirinkimas 3,
naudokite Λ ir V reikalingo nustatymo pasirinkimui.
Nustatymas 0 Išjungtas.
Rankinis: vartotojas turi pats pakeisti laiką spausdamas + laiko
Nustatymas 1
pasukimui į priekį ir - laiko pasukimui atgal.
Nustatymas 2 Europiniai standartai. (Gamyklinis nustatymas)
Nustatymas 3 JAV standartai (nuo 2007 m.)
Nustatymas 4 JAV standartai (iki 2007 m.)
Pasirinkimas 4 – Laiko juostos nustatymas
Ši savybė leidžia nustatyti laiko juostą, kad būtų rodomas
teisingas laikas. Paspauskite +, kol pasirodys pasirinkimas 4,
naudokite Λ ir V reikalingo nustatymo pasirinkimui.
Nustatymas 0 JK modeliai: ši savybė turėtų būti palikta gamykliniame nustatyme 0.
Centrinės Europos laiko modeliai: ši savybė turėtų būti palikta
Nustatymas 1
gamykliniame nustatyme +2.
-12 valandų +14 valandų
38
Kitos šalys:: naudokite Λ ir V mygtukus skirtumo pasirinkimui nuo universaliojo
laiko (GMT) vietovei, kurioje yra termostatas.
Page 39

39
Pasirinkimas 10 - Šalčio/termostato režimo nustatymas
Ši savybė leidžia nustatyti numatytąją šalčio/termostato
režimo temperatūrą. Paspauskite +, kol pasirodys pasirinkimas
10, naudokite Λ ir V to reikalingo nustatymo pasirinkimui.
5-40°C - Gamyklinis nustatymas yra 8°C, bet gali būti pakeistas bet kuria reikšme
nuo 5°C iki 40°C.
Pasirinkimas 11 – Paleidimo būdas
Jūsų termostatas gali paleisti sistemą trim skirtingais būdais.
Paspauskite +, kol pasirodys pasirinkimas 11, naudokite Λ ir V
reikalingo nustatymo pasirinkimui.
LT
Nustatymas 0 - Normalus: Šildymas įjungiamas, arba išjungiamas,
užprogramuotais laikais.
Nustatymas 1 - Optimalaus paleidimo kontrolė (OSC): Tai leidžia Jums
užprogramuoti laiką, kada reikalinga tam tikra temperatūra. Termostatas tada
apskaičiuoja, kada iki reikalingo laiko reikia įjungti šildymą. Tai skirsis priklausomai
nuo oro sąlygų. Šildymas gali įsijungti iki programos paleidimo likus daugiausiai 120
minučių, mažiausiai – 0. Šis nustatymas turi būti naudojamas kartu su pasirinkimu
12, kad atitiktų optimizavimo nustatymą pastatui, kuriame yra termostatas.
Nustatymas 2 - Atidėtas paleidimas: Tai yra alternatyva OSC. Programos
paleidimo laiką nustatykite įprastu būdu, omenyje turint vidutinį laiką, kurio
reikia pastato apšildymui paprastą dieną. Termostatas fi ksuoja įsijungimo laiką,
tikrąją temperatūrą ir norimą temperatūrą ir atideda šildymo įjungimą, jei tikroji
temperatūra yra artima užprogramuotai temperatūrai.
Vartotojo instrukcija
Page 40

LT
Pasirinkimas 12 – Optimalaus paleidimo kontrolės nustatymas pašildymui
(pasirinkimas 11 nustatytas ties 1)
Paspauskite +, kol pasirodys pasirinkimas 12, naudokite
Λ ir V reikalingo nustatymo pasirinkimui (įjunkite tik tuo
atveju, jei pasirinkimas 11 yra nustatytas ties 1).
Optimalaus paleidimo kontrolė turi būti pareguliuota,
kad atitiktų pastato energijos charakteristikas. Naudokite Λ ir V mygtukus
reikalingo pašildymo periodo parinkimui. Žemiau esanti lentelė siūlo tipinius
nustatymus.
Jei pastatui nepavyksta pasiekti reikalingos temperatūros laiku, didinkite
nustatymą 15 min. žingsniu kiekvieną dieną, kol atrasite tinkamą nustatymą.
Jei pastatas reikiamą temperatūrą pasiekia anksčiau laiko, mažinkite nustatymą
15 min. žingsniu kiekvieną dieną, kol atrasite tinkamą nustatymą.
Vartotojo instrukcija
0:15 15 min., šilto oro sistemos, gerai izoliuotas pastatas.
0:30 30 min., šilto oro sistemos, gerai izoliuotas pastatas.
0:45 45 min., šilto oro sistema, prastai izoliuotas pastatas.
1:00 60 min., radiatorių sistema, lengvo svorio, gerai izoliuotas pastatas.
(gamyklinis nustatymas)
1:15 75 min., radiatorių sistema, lengvo svorio, vidutiniškai izoliuotas.
1:30 90 min., radiatorių sistema, vidutiniško svorio, menkai izoliuotas.
1:45 105 min., radiatorių sistema, didelio svorio, gerai izoliuotas.
2:00 120 min., radiatorių sistema, didelio svorio pastatas, menkai izoliuotas.
Pasirinkimas 13 – Optimalaus paleidimo kontrolės/Atidėto programos
paleidimo nustatymas (Funkcija 11 nustatyta ties 1 arba 2)
Optimalaus paleidimo, ar atidėto paleidimo, kontrolė
gali būti taikoma tik 1 programai, arba kiekvienai dienos
programai, kuriai reikalinga aukštesnė temperatūra, nei
prieš tai buvusiai programai. Paspauskite +, kol pasirodys
pasirinkimas 13, naudokite Λ ir V reikalingo nustatymo
pasirinkimui (aktyvuokite tik tuo atveju, jei pasirinkimas 11
yra nustatytas ties 1 arba 2).
Nustatymas 0 Pritaikomas tik pirmai dienos programai.
(gamyklinis nustatymas)
Nustatymas 1 Pritaikomas kiekvienai dienos programai, kuriai reikalinga
aukštesnė temperatūra, palyginus su prieš tai buvusios programos
temperatūra.
40
Page 41

41
Montuotojo parenkamų savybių apžvalga, kurios gali
paveikti Jūsų termostato veikimą
Temperatūros apribojimas
Leidžia montuotojui užprogramuoti viršutinę ir apatinę temperatūros
ribą. Gali apriboti viršutinę ir apatinę temperatūrą, kurią galite nustatyti
termostatui.
Temperatūros rankinio nustatymo apribojimas
Tai leidžia montuotojui riboti temperatūrą,kurią galite rankiniu
LT
būdu nustatyti vietoj užprogramuotos temperatūros, o taip pat
leidžia montuotojui nustatyti taisykles dėl rankiniu būdu nustatytos
temperatūros laiko trukmės.
Klaviatūros užrakinimas
Tai leidžia montuotojui apriboti, arba užrakinti, klaviatūrą, kad būtų
išvengti neleistini pakeitimai programos reikšmėms ir rankinio
nustatymo riboms.
Kas atsitinka prietaisui, kai išsikrauna baterijos
Vartotojo instrukcija
Jei baterijos nepakraunamos per 15 dienų nuo baterijos išsikrovimo
įspėjimo, prietaisas išsijungia. Esant normalioms aplinkybėms,
termostatas išjungia kontroliuojamą sklendę, arba katilą. Esant
neįprastoms klimato sąlygoms, šildymo išjungimas gali baigtis pastato
užšalimu. Norint to išvengti, montuotojas gali nustatyti prietaisą taip,
kad jis ON (įjungtų), o ne OFF (išjungtų) šildymą, esant išsikrovusioms
baterijoms. Tai pareikalaus daugiau kuro, bet užkirs žalos grėsmę
pastatui. Jei tai tinka, prašome patikrinti, kad montuotojas būtų
nustatęs šią funkciją teisingai
PASTABA: Jeigu, pakeitus baterijas, LCD ekranas iš karto neįsijungia,
patikrinkite, ar teisingai įdėjote baterijas. Nepalikite baterijų
termostate, jeigu ekranas neveikia.
Jeigu, pakeitus baterijas, ekranas bus tuščias, reikia atlikti dalinį
pakartotiną nustatymą. Plačiau apie tai rasite sekančiame
puslapyje.
Page 42

LT
Prietaiso grąžinimas į pradinę būseną
Dalinis atstatymas: Paspauskite RESET ((atstatyti) naudojamas
mikrokompiuterio pakartotiniam paleidimui), jei ekranas dėl kokios
nors priežasties staiga nebereaguoja. Tai nepakeičia jokios programos,
laikrodžio, ar datos. Rekomenduojama tai padaryti montavimo metu.
Vartotojo pilnas atstatymas: Paspauskite RESET (atstatyti) kartu
laikant nuspaudus PROG mygtuką. Tai atstatys programų laikus ir bet
kokį vartotojo aukštesnio tipo nustatymą, bet nepakeis laiko, ar datos.
Vartotojo instrukcija
Montuotojo nustatymų pilnas atstatymas: Tai prieinama tik
montuotojui. Be to, montuotojo papildomų funkcijų programavimo
nustatymams yra grąžinamos pradinės reikšmės, o laikas, data ir
techninės priežiūros datos negrąžinamos į pradinę būseną.
42
Page 43

43
Посібник користувача
Загальні відомості про програмований кімнатний
термостат
Цей програмований кімнатний термостат дозволяє програмувати
різні температури у різні інтервали часу. Ви можете запрограмувати
одні інтервали часу та температур для робочих днів та інші – для
вихідних днів, такий режим роботи називається тижневий режим
5/2.
UA
Монтажник може також налаштувати цей термостат на параметри
часу та температур, які будуть дотримуватися кожного дня на протязі
тижня. Такий режим роботи називається добовим (24 години).
Ви можете також налаштувати цей термостат на два різні програмні
блоки, які можна потім призначати для будь-якого дня тижня, такий
режим роботи називається програмний A/B режим.
Монтажник може налаштувати будь-який термостат на зміну
параметрів часу та температури 2, 4 або 6 разів на добу.
Усі термостати мають корисні функції тимчасового виходу за
встановлені обмеження, у тому числі програмований захист від
замерзання.
Посібник користувача
Цей термостат має декілька додаткових функцій, які монтажник
може налаштувати, якщо вони потрібні. Є також додаткові функції, які
користувач може налаштувати самостійно. Ці додаткові настройки
змінюють режим роботи термостату, деякі з них впливають на функції
програмування та параметри тимчасового виходу за встановлені
обмеження. Перед програмуванням пристрою прочитайте інструкції
з розширеного програмування для користувача (див. стор. 53).
Попередньо встановлені програми
Термостат TP5001 постачається із запрограмованими параметрами
часу роботи та температур, які задовольняють більшість людей.
Пам’ятайте, що деякі з доступних параметрів залежатимуть від того, як
монтажник запрограмував цей пристрій.
Page 44

UA
Робочі дні (понеділок – п’ятниця) Вихідні дні (субота – неділя)
Подія Час Темп. °C Подія Час Темп. °C
1 06:30 20 1 07:30 20
2 08:30 15 2 09:30 20
3 11:30 20 3 11:30 20
4 13:30 15 4 13:30 20
5 16:30 21 5 16:30 21
6 22:30 15 6 22:30 15
Посібник користувача
Примітка: ці параметри часу
стосуються також програм Блоку
«А»
Примітка: ці параметри часу
стосуються також програм Блоку
«B»
Примітка: Якщо пристрій налаштований на 4 події на добу, то події 3
та 4 оминаються. Примітка: Якщо пристрій налаштований на 2 події
на добу, то події 2, 3, 4 та 5 оминаються. В обох випадках нумерація
подій змінюється.
Перед початком роботи
Відкрийте кришку пульта програмування та
натисніть кнопку RESET будь-яким неметалевим
предметом, доки дисплей не стане пустим. Це
RESET
гарантує, що заводські програми встановлені
та мікрокомп’ютер пристрою працює належним
чином.
Налаштування дисплею за бажанням користувача
Задля більшої зрозумілості, у цих інструкціях передбачається, що
дисплей налаштований на 24-годинну індикацію часу, індикацію
температури у °C та нумерацію днів тижня з 1 до 7 (1 відповідає
44
понеділку). Усі ці настройки можна змінити за бажанням
користувача після програмування термостату, див. стор. 50 та 51.
Встановлення правильних дати та часу
Термостат TP5001 має годинник реального часу з функцією
календаря, яка автоматично змінює час навесні та восени. Пристрій
постачається з часом та датою, встановленими відповідно до
центральноєвропейського часової зони, та зазвичай не потребує
Page 45

45
налаштування. Якщо ви живете у іншій часовій зоні, див. розділ
«Налаштування часової зони» на стор. 54. Крім того, якщо необхідно
змінити час або дату за будь-якої іншої причини, скористайтеся
наступними вказівками.
Встановлення дати
Натисніть та тримайте кнопки Λ і PROG впродовж
3 секунд, щоб відобразити дату у форматі дд/мм/
рр.
UA
Спалахуватиме число, що відповідає РОКУ;
змініть рік за допомогою кнопок Λ або V.
Користуючись кнопками - або +, перейдіть до
МІСЯЦЯ; змініть місяць за допомогою кнопок Λ
або V.
Користуючись кнопками - або +, перейдіть до
ДАТИ у місяці; змініть дату у місяці за допомогою
Посібник користувача
кнопок Λ або V.
Якщо ви помилково оберете неправильну дату, програма відхилить
її та встановить найближчу правильну дату. Рекомендується
встановлювати дату у такій послідовності: рр/мм/дд.
Встановлення правильного часу
Після встановлення дати натисніть PROG, щоб
відобразити час. Індикація часу миготітиме.
Встановіть правильний час за допомогою
кнопок + та - (натисніть та тримайте для зміни з
кроком 10 хвилин).
Page 46

46
UA
Встановлення правильного дня
День тижня встановлюється автоматично.
Натисніть PROG, щоб повернутися до нормальної
роботи (RUN).
Прийняття попередньо встановлених програм
Якщо вас влаштовують попередньо встановлені значення часу, що
наведені в таблиці на сторінці 44, вам не потрібно робити ніяких дій.
Посібник користувача
Зміна попередньо встановлених програм
Перед тим, як змінювати попередньо встановлені програми
Монтажник налаштує ваш пристрій на роботу в одному з наступних
режимів:
• тижневий 5/2 – один комплект програм для робочих днів та
інший – для вихідних (стор. 47).
• добовий - один комплект програм для на увесь тиждень (стор.
47).
Інші режими
• A/B - Ви можете також налаштувати цей пристрій на два
програмні блоки, будь-який з них можна призначати для різних
днів тижня. Якщо потрібно задіяти цю функцію, див. інструкції
на стор. 48.
Зверніть увагу
Цей пристрій необхідно програмувати послідовно, неможливо
налаштувати час подій, виконуючи це непослідовно.
Якщо ви бажаєте залишити будь-який попередньо встановлений
час без зміни, натисніть кнопку PROG для переходу до наступної
настройки.
Щоб повернутися до нормального режиму RUN, натисніть
кнопку PROG та тримайте її, доки двокрапка на дисплеї
не блимне. Або нічого не робіть, і пристрій автоматично
повернеться до нормального режиму RUN за 2 хвилини.
Page 47

47
Монтажник налаштує ваш пристрій на програмування 6, 4 або
2 подій на добу. Це визначатиме кількість подій на добу, які ви
можете програмувати.
Зміна попередньо встановлених програм у тижневому
режимі роботи 5/2
Для днів 1-5 (робочі дні)
a) Натисніть кнопку PROG, доки на дисплеї не з’являться перші
UA
попередньо встановлені час та температура (Подія 1, дні 1, 2, 3,
4, 5).
b) Змініть ЧАС за допомогою кнопок + та -
(натисніть та тримайте для зміни з кроком 10
хвилин).
c) Натисніть кнопку PROG для переходу до
наступних попередньо встановлених часу та
температури (Подія 2).
e) Повторіть кроки b, c та d, щоб запрограмувати
решту подій робочого дня
Посібник користувача
Для днів 6-7 (вихідні дні)
Натисніть кнопку PROG, доки на дисплеї не
з’являться перші попередньо встановлені час та
температура (Подія 1, дні 6-7).
Повторіть вказані вище кроки b, c та d, щоб
запрограмувати решту подій вихідного дня.
Зміна попередньо встановлених програм у добовому
режимі роботи (24 години)
a) Натисніть кнопку PROG, доки на дисплеї не
з’являться перші попередньо встановлені
час та температура (Подія 1 для усіх днів
тижня).
b) Змініть ЧАС за допомогою кнопок + та -
(натисніть та тримайте для зміни з кроком
10 хвилин).
Page 48

UA
c) Змініть ТЕМПЕРАТУРУ за допомогою кнопок
Λ та V.
d) Натисніть кнопку PROG для переходу до
наступних попередньо встановлених часу
та температури (Подія 2).
e) Повторіть кроки b, c та d, щоб запрограмувати решту подій.
Зміна попередньо встановлених програми для
програмування AB
(Монтажник має встановити тижневий режим 5/2 днів)
Посібник користувача
Натисніть та тримайте кнопки PROG та V
впродовж 3 секунд. На дисплеї з’явиться
зображення як на малюнку поруч. Пристрій
перейде до параметру 1 режиму розширеного
програмування для користувача.
Щоб увімкнути або вимкнути функцію,
користуйтеся кнопками Λ та V (1=Увімкнено,
0=Вимкнено).
Натисніть кнопку PROG впродовж 5 секунд,
доки не зміниться зображення на дисплеї та
не спалахне двокрапка, підтверджуючи, що
пристрій знаходиться у нормальному режимі
RUN.
Натисніть кнопку PROG один раз, на дисплеї
з’являться дні, призначені програмі «А» за замовчанням (дні 1, 2, 3,
4 та 5).
Користуйтеся кнопками + та – для переміщення
по дням тижня вперед та назад.
Щоб скасувати будь-який день, натисніть V,
(наприклад, День 2). Щоб призначити будь-який
день, натисніть Λ, (наприклад, День 7).
48
Усі скасовані дні автоматично призначаються програмі «В».
Page 49

49
Програмування днів та подій програми «А»
a) Натисніть кнопку PROG, доки на дисплеї не
з’являться перші попередньо встановлені
час та температура (Подія 1 для Програми
А).
b) Змініть ЧАС за допомогою кнопок + та - (натисніть та тримайте
для зміни з кроком 10 хвилин).
c) Змініть ТЕМПЕРАТУРУ за допомогою кнопок Λ та V.
d) Натисніть кнопку PROG для переходу до наступних попередньо
встановлених часу та температури (Подія 2).
UA
e) Повторіть кроки b, c та d, щоб запрограмувати решту подій.
Програмування днів та подій програми «В»
a) Натисніть кнопку PROG, доки на дисплеї не
з’являться перші попередньо встановлені
час та температура (Подія 1 для Програми
В).
b) Змініть ЧАС за допомогою кнопок + та - (натисніть та тримайте
для зміни з кроком 10 хвилин).
c) Змініть ТЕМПЕРАТУРУ за допомогою кнопок Λ та V.
Посібник користувача
d) Натисніть кнопку PROG для переходу до наступних попередньо
встановлених часу та температури (Подія 2).
e) Повторіть кроки b, c та d, щоб запрограмувати решту подій.
Виконання програми
Щоб повернутися до нормального режиму RUN,
натисніть кнопку PROG, двокрапка на дисплеї
блимне. Обігрів приміщення здійснюватиметься
відповідно до запрограмованих часу та
температури.
Page 50

UA
Доступні користувачеві можливості
тимчасового виходу за обмеження
Зміна індикації на
дисплеї – час або
температура
Щоб змінити зображення на дисплеї, одночасно натисніть кнопки
+ та -.
Посібник користувача
Тимчасова зміна поточної запрограмованої
температури
Натисніть кнопку Λ або V, доки не з’явиться потрібна температура.
Зверніть увагу, що монтажник міг змінити як верхню, так і нижню
границі температурного діапазону, а також параметри тимчасового
виходу за обмеження температури.
Цей тимчасовий вихід за обмеження буде автоматично скасовано
на початку наступної запрограмованої події. Зверніть увагу,
що монтажник міг обмежити тривалість тимчасового виходу за
обмеження не наступною подією, а будь-яким іншим моментом.
Зміна позначення днів тижня з номерів на текст
Щоб перемикати індикацію між номерами днів на текстом,
одночасно натисніть кнопки Λ та -.
Зміна формату індикації часу між 12 та 24 годинами
Щоб перемикати формат індикації часу між 12 та 24 годинами,
одночасно натисніть кнопки Λ та +.
Зміна шкали вимірювання температури між °C та °F
50
Щоб змінювати шкалу вимірювання температури між °C та °F,
одночасно натисніть кнопки V та -.
Page 51

51
Режим термостату
a) Якщо необхідно, можна обрати постійну температуру у
діапазоні 5-30 °C. Це може забезпечити захист від замерзання
в той час, коли вдома нікого нема, цей режим може також
забезпечити постійну підвищену температуру, якщо, наприклад,
у приміщенні є хворий.
b) Щоб увійти до режиму термостату, одночасно натисніть кнопки
Λ та V. Це значення за умовчання дорівнює 8°C, але його
можна перепрограмувати; див. розділ Режим розширеного
програмування для користувача, крок 10, (стор. 55).
UA
c) Якщо обрана температура дорівнює
запрограмованому значенню захисту від
замерзання, або нижча за нього, на дисплеї
з’явиться позначка «сніжинка».
d) За допомогою кнопок Λ або V встановіть температуру, яка
б не дорівнювала запрограмованому значенню захисту від
замерзання.
e) Щоб повернутися до автоматичного програмування, одночасно
натисніть кнопки Λ та V.
Переведення годинника вперед та назад
Посібник користувача
Це виконується автоматично, але якщо необхідно змінити час
вручну, скористайтеся наступними вказівками.
Перехід з літнього часу на зимовий (переведення назад)
Натисніть та тримайте кнопку -.
Перехід з зимового часу на літній (переведення вперед)
Натисніть та тримайте кнопку +.
Тимчасовий вхід до режиму термостату або вихід з
нього, що активується дистанційно
Окремі моделі мають функцію, яка дозволяє активувати вхід до
режиму термостату або вихід з нього за допомогою телефону або
контактів вікна.
Значення температури, яке потрібно підтримувати, коли у
приміщенні немає людей, або при відчиненому вікні, має
бути запрограмоване попередньо у режимі розширеного
Page 52

UA
програмування для користувача, крок 10, (стор. 55).
Щоб тимчасово скасувати цю функцію за допомогою кнопок
пристрою, одночасно натисніть Λ та V.
Функція затриманого старту
Цей термостат має додаткову функцію затриманого старту, яка на
деякий час затримує початок обігріву у теплі дні, коли температура
у кімнаті на початку події близька до запрограмованого значення.
Якщо ця функція активована, її можна тимчасово скасувати,
натиснувши кнопку Λ або V. Щоб активувати цю функцію, див.
Посібник користувача
розділ Режим розширеного програмування для користувача,
крок 11, (стор. 55).
Контроль оптимального старту (OSC)
Цей термостат має додаткову функцію контролю оптимального
старту. За допомогою цієї функції можна призначити час, до якого
температура у кімнаті має досягти бажаного значення. Термостат
розрахує, у який момент до часу події потрібно увімкнути систему,
щоб до встановленого часу отримати бажану температуру
у кімнаті. Докладна інформація про цю функцію та вказівки
щодо її увімкнення та налаштування наведені у розділі Режим
розширеного програмування для користувача, кроки 12 та 13,
(стор. 56).
Заміна батареї (тільки моделі з живленням від
батарей)
Якщо залишковий заряд батарей малий, на
дисплеї з’явиться позначка батареї. Ви маєте
15 діб для заміни батарей до того, як пристрій
вимкнеться. Переконайтеся, що для заміни
52
використовуються тільки високоякісні лужні батареї.
ВАЖЛИВО: Щоб увімкнути пристрій після заміни батарей,
натисніть та звільніть кнопку RESET. Усі настройки дати, часу,
програмування та тимчасового виходу за обмеження зберігаються
впродовж строку служби пристрою
Page 53

53
Додаткові можливості
програмування для користувача
Важливо: Цей термостат був налаштований на заводі для роботи
у більшості ситуацій, проте є додаткові настройки, які можуть
поліпшити рівень комфорту, зручність використання та енергетичну
ефективність термостату. Ці настройки встановлюються у режимах
розширеного програмування для користувача та розширеного
програмування для монтажника.
UA
Вхід до режиму розширеного програмування для
користувача
Натисніть та тримайте кнопки V та PROG впродовж 3 секунд.
Пристрій перейде до режиму розширеного програмування для
користувача. Користуйтеся кнопками + та – для переміщення
вперед та назад по переліку параметрів, потім кнопками Λ та V
змініть значення параметрів. Число, що спалахує на правому боці
дисплею, означає номер обраного параметру.
Посібник користувача
Page 54

UA
Параметр 1 - Вмикання або вимикання програмування A/B (перемикач
(Параметр 41 встановлений на 5+2)
Цей параметр вмикає або вимикає програмування A/B.
Натискайте +, доки не з’явиться параметр 1, за допомогою
Посібник користувача
кнопок
Значення 0
Значення 1 Увімкнено: вмикає програмування A/B
Параметр 3 – Правила роботи годинника/календаря
Цей параметр визначає правила, за якими автоматичний
годинник/календар обчислює перехід між літнім та
зимовим часом. Натискайте +, доки не з’явиться параметр
3, за допомогою кнопок
Λ та V оберіть потрібне значення.
Вимкнено, пристрій працює у тижневому 5/2 або добовому
(24 години) режимі в залежності від настройок, зроблених
монтажником (заводська настройка)
Λ та V оберіть потрібне значення.
Значення 0 Вимкнено.
Ручний режим: користувач переводить годинник уперед за
Значення 1
допомогою кнопки + та назад - за допомогою кнопки -.
Значення 2 Європейські правила. (Заводська настройка)
Значення 3 Правила США (починаючи з 2007 р.)
Значення 4 Правила США (до 2007 р.)
Параметр 4 - Налаштування часової зони
Цей параметр дозволяє встановити часову зону та змінити
індикацію часу. Натискайте +, доки не з’явиться параметр
4, за допомогою кнопок
V та Λ оберіть потрібне значення.
Значення 0 Британські моделі: треба залишити заводську настройку 0.
Центральноєвропейські моделі: треба залишити заводську
Значення 1
настройку +1:00.
-12 годин +14 годин
Усі інші країни: за допомогою кнопок
Всесвітнього часу (GMT) для того місця, де знаходиться термостат.
Λ та V оберіть різницю відносно
54
Page 55

55
Параметр 10 - Захист від замерзання/Режим термостату
Цей параметр дозволяє встановити температуру захисту
від замерзання / режиму термостату за замовчанням.
Натискайте +, доки не з’явиться параметр 10, за допомогою
UA
кнопок
5-40°C - - Заводська настройка дорівнює 8°C, однак її можна змінити на будь-
яке значення з діапазону 5 -40°C.
Параметр 11 – Спосіб вмикання системи обігріву
Цей термостат може увімкнути систему обігріву одним
з трьох різних способів. Натискайте +, доки не з’явиться
параметр 11, за допомогою кнопок Λ та V оберіть потрібне
значення.
Значення 0 - Нормальний: Обігрів вмикається або вимикається у
запрограмовані моменти часу.
Значення 1 - Контроль оптимального старту (OSC) або настройка комфорту:
Λ та V оберіть потрібне значення.
Посібник користувача
Дозволяє запрограмувати час, до якого необхідно отримати бажану
температуру. Термостат розрахує, у який момент до встановленого часу
потрібно увімкнути обігрів. В залежності від погодних умов, цей проміжок
часу може бути від максимум 120 хвилин до 0 хвилин до запрограмованого
часу події. Цю настройку треба використовувати разом з параметром 12, щоб
забезпечити відповідність настройки оптимізатора тому будинку, в якому
встановлено термостат.
Значення 2 - Затриманий старт або Економічний режим: Це альтернатива
режиму OSC. Встановіть час подій у нормальний спосіб, беручи до уваги ту
середню тривалість часу, яка потрібна на обігрів будинку. Цей термостат
контролює час вмикання, фактичну температуру та бажану температуру;
він затримує початок обігріву, якщо фактична температура близька до
запрограмованого значення.
Page 56

UA
Параметр 12 – Попередній обігрів для функції контролю оптимального
старту (Параметр 11 встановлений на 1)
Натискайте +, доки не з’явиться параметр 12, за
Посібник користувача
допомогою кнопок
(активний тільки якщо параметр 11 встановлений на 1).
Функцію контролю оптимального старту слід
відрегулювати відповідно до енергетичних характеристик будинку. За
допомогою кнопок
Далі у таблиці наведені типові настройки. Якщо будинок вчасно не досягає
потрібної температури, збільшуйте цю настройку на 15 хвилин кожного дня,
доки не визначите правильне значення. Якщо будинок досягає потрібної
температури завчасно, зменшуйте цю настройку на 15 хвилин кожного дня,
доки не визначите правильне значення.
0:15 15 хв., система обігріву повітря, якісна ізоляція будинку
0:30 30 хв., система обігріву повітря, якісна ізоляція будинку
Λ та V оберіть потрібне значення
Λ та V оберіть потрібну тривалість попереднього обігріву.
0:45 45 хв., система обігріву повітря, неякісна ізоляція будинку
1:00 60 хв., радіаторна система, будинок невеликої маси з якісною ізоляцією.
(Заводська настройка)
1:15 75 хв., радіаторна система, будинок невеликої маси з ізоляцією
середньої якості.
1:30 90 хв., радіаторна система, будинок середньої маси з неякісною
ізоляцією.
1:45 105 хв., радіаторна система, будинок великої маси з якісною ізоляцією.
2:00 120 хв., радіаторна система, будинок великої маси з неякісною ізоляцією.
Параметр 13 - Контроль оптимального старту / затриманого старту
(Параметр 11 встановлений на 1 або 2)
Контроль оптимального старту або затриманого старту
може застосовуватися або тільки до події 1, або до кожної
події дня, яка потребує більш високої температури,
ніж попередня подія. Натискайте +, доки не з’явиться
параметр 13, за допомогою кнопок
потрібне значення (активний тільки якщо параметр 11
встановлений на 1 або 2).
Значення 0 Стосується тільки першої події дня. (Заводська настройка)
Значення 1 Стосується кожної події дня, яка потребує більш високої
температури порівняно з попередньою подією.
Λ та V оберіть
56
Page 57

57
Загальні відомості про функції, які може обирати
монтажник і які можуть впливати на роботу
термостату
Обмеження діапазону температури
Ця функція дозволяє монтажнику програмувати як верхню, так
і нижню межі температури. Вона може обмежити максимальну
і мінімальну температури, які ви можете встановлювати на
термостаті.
UA
Границі тимчасового виходу за обмеження
температури
Ця функція дозволяє монтажнику обмежити кількість градусів, на
які ви можете вийти за запрограмовані значення температури, вона
також дозволяє монтажнику встановити правила щодо тривалості
перевищення температури.
Блокування клавіатури
Ця функція дозволяє монтажнику обмежити можливості роботи з
клавіатурою, або заблокувати її, щоб запобігти несанкціонованим
Посібник користувача
змінам програмних значень та тимчасовим виходам за встановлені
обмеження.
Що трапляється з пристроєм, коли виходять з ладу
батареї
Якщо батареї не замінені на протязі 15 діб після попередження
про малий залишок заряду, пристрій вимикається. У нормальних
обставинах термостат закриває кран або вимикає бойлер, який
він контролює. У місцях з дуже холодним кліматом вимикання
обігріву може призвести до замерзання будинку. Щоб запобігти
цьому, монтажник може налаштувати пристрій так, що при відмові
батарей він буде ВМИКАТИ, а не ВИМИКАТИ, обігрів. Це призведе
до збільшення споживання пального, але відверне шкоду для
будинку. Якщо це потрібно, переконайтеся, що монтажник
правильно налаштував цю функцію.
Page 58

UA
Зверніть увагу: Якщо ви замінили батареї, але дисплей не
ввімкнувся одразу після цього, перевірте орієнтацію батарей.
Не залишайте батареї у пристрої, якщо дисплей не працює.
Якщо після заміни батарей екран залишається пустим,
необхідно виконати часткове повернення до первісних
настройок. Докладну інформацію див. на звороті сторінки.
Повернення пристрою до первісних настройок
Часткове повернення настройок: Натисніть кнопку RESET
Посібник користувача
(для перезапуску мікрокомп’ютера), якщо зображення на дисплеї
завмирає з будь-якої причини. Це не призводить до повернення
програм, годинника або дати до їх первісного стану. Рекомендується
зробити цю операцію під час встановлення.
Повне повернення настройок користувачем: Натисніть кнопку
RESET, утримуючи кнопку PROG. При цьому повертаються до
первісного стану час подій та значення, встановлені у режимі
розширеного програмування для користувача, однак індикація
часу та дати залишаються без змін.
Повне повернення настройок монтажником: Цю операцію може
виконати лише монтажник. Окрім вказаного вище, усі настройки
розширеного програмування для монтажника повертаються
до заводських значень, однак час, дата та призначена дата
обслуговування залишаються без змін.
58
Page 59

59
Lietošanas pamācība
Iepazīstieties ar programmējamo istabas termostatu
Programmējamais istabas termostats ļauj ieprogrammēt dažādu
temperatūru dažādos laika posmos. Varat ieprogrammēt vienu laika un
temperatūras režīmu darbdienām un atšķirīgu temperatūras režīmu
brīvdienām; tas attiecas uz 5/2 dienu darbības režīmu.
Uzstādītājs var arī iestatīt termostatu tā, lai nodrošinātu noteiktu laika un
temperatūras režīmu, kas atkārtojas katru dienu. Tas attiecas uz 24 stundu
darbības režīmu.
LV
Jūs varat iestatīt termostatu tā, lai paredzētu divus dažādus programmēšanas
blokus, kurus pēc tam var piemērot jebkurai nedēļas dienai; tas attiecas uz
A/B programmas darbību.
Uzstādītājs var arī iestatīt visus termostatus tā, lai katrai dienai paredzētu 2,
4 vai 6 laika un temperatūras iestatījumus.
Visiem termostatiem raksturīgas ignorēšanas funkcijas, ieskaitot
programmējamu pretapsarmošanas funkciju.
Termostatam ir dažas progresīvas funkcijas, kuras nepieciešamības
gadījumā var iestatīt uzstādītājs. Ir arī vairākas modernizētas funkcijas, kuras
lietotājs var iestatīt pats. Šie modernizētie iestatījumi maina termostata
darbības veidu; daži no tiem ietekmē arī programmēšanas funkcijas un
Lietošanas pamācība
lietotāja ignorētos iestatījumus. Pirms iekārtas programmēšanas izlasiet
Izvērstās lietotāja programmēšanas instrukcijas (skat. 68. lpp.).
Iepriekš iestatītās programmas
Termostats TP5001 tiek piegādāts ar jau ieprogrammētu darbības laika un
temperatūras ciklu, kas piemērots vairumam cilvēku. Dažas no pieejamajām
opcijām būs atkarīgas no tā, kā uzstādītājs iestatījis iekārtu.
Darbdienās (pirmd.-piektd.) Nedēļas nogalē (sestd.;svētd.)
Sildīšanas Laiks Temp. °C Sildīšanas Laiks Temp. °C
1 06:30 20 1 07:30 20
2 08:30 15 2 09:30 20
3 11:30 20 3 11:30 20
4 13:30 15 4 13:30 20
5 16:30 21 5 16:30 21
6 22:30 15 6 22:30 15
Piezīme: šādi laiki ir arī “A” bloka
programmām.
Piezīme: šādi laiki ir arī “B” bloka
programmām.
Page 60

LV
Piezīme: ja iestatīti 4 sildīšanas periodi diennaktī, tad 3. un 4. sildīšanas
periods tiek izlaists. Ja iestatīti 2 sildīšanas periodi diennaktī, tad tiek
izlaists 2., 3., 4. un 5. sildīšanas periods. Abos gadījumos sildīšanas
periodu numuri mainās.
Pirms sākat darbu
Atveriet atvāžamo vāciņu programmatora
priekšpusē un, izmantojot nemetāla priekšmetu,
spiediet pogu RESET (ATGRIEZTIES IEPRIEKŠĒJOS
IESTATĪJUMOS), līdz displeja ekrāns kļūst tukšs. Tā
tiks nodrošināta rūpnīcas programmu iestatīšana
Lietošanas pamācība
un iekārtas mikrodatora pareiza darbība.
Displeja pielāgošana
Skaidrības labad instrukcijās pieņemts, ka displeja iestatījumos
izmantots 24 stundu pulkstenis, °C temperatūra, un nedēļas dienas
numurētas no 1. līdz 7. (1. atbilst pirmdienai). Visus šos iestatījumus pēc
termostata ieprogrammēšanas var personalizēt, skatiet 65. un 66. lpp.
RESET
Pareiza datuma un laika iestatīšana
Termostatā TP5001 ir reālā laika pulkstenis ar kalendāra funkciju, kas
automātiski veic pāreju uz vasaras un ziemas laiku. Rūpnīcā laiks un
datums iestatīti atbilstoši Centrāleiropas laika zonai, un regulēšana
parasti nav nepieciešama. Ja dzīvojat citā laika zonā, skatiet “Laika
zonas nobīde” 69. lpp. Tomēr, ja kādu citu iemeslu dēļ jāregulē laiks vai
datums, ievērojiet lietošanas pamācībā sniegtos norādījumus.
Datuma iestatīšana
60
Lai parādītu datumu dd/mm/gg formātā, nospiediet
un 3 sekundes pieturiet taustiņus Λ un PROG.
Page 61
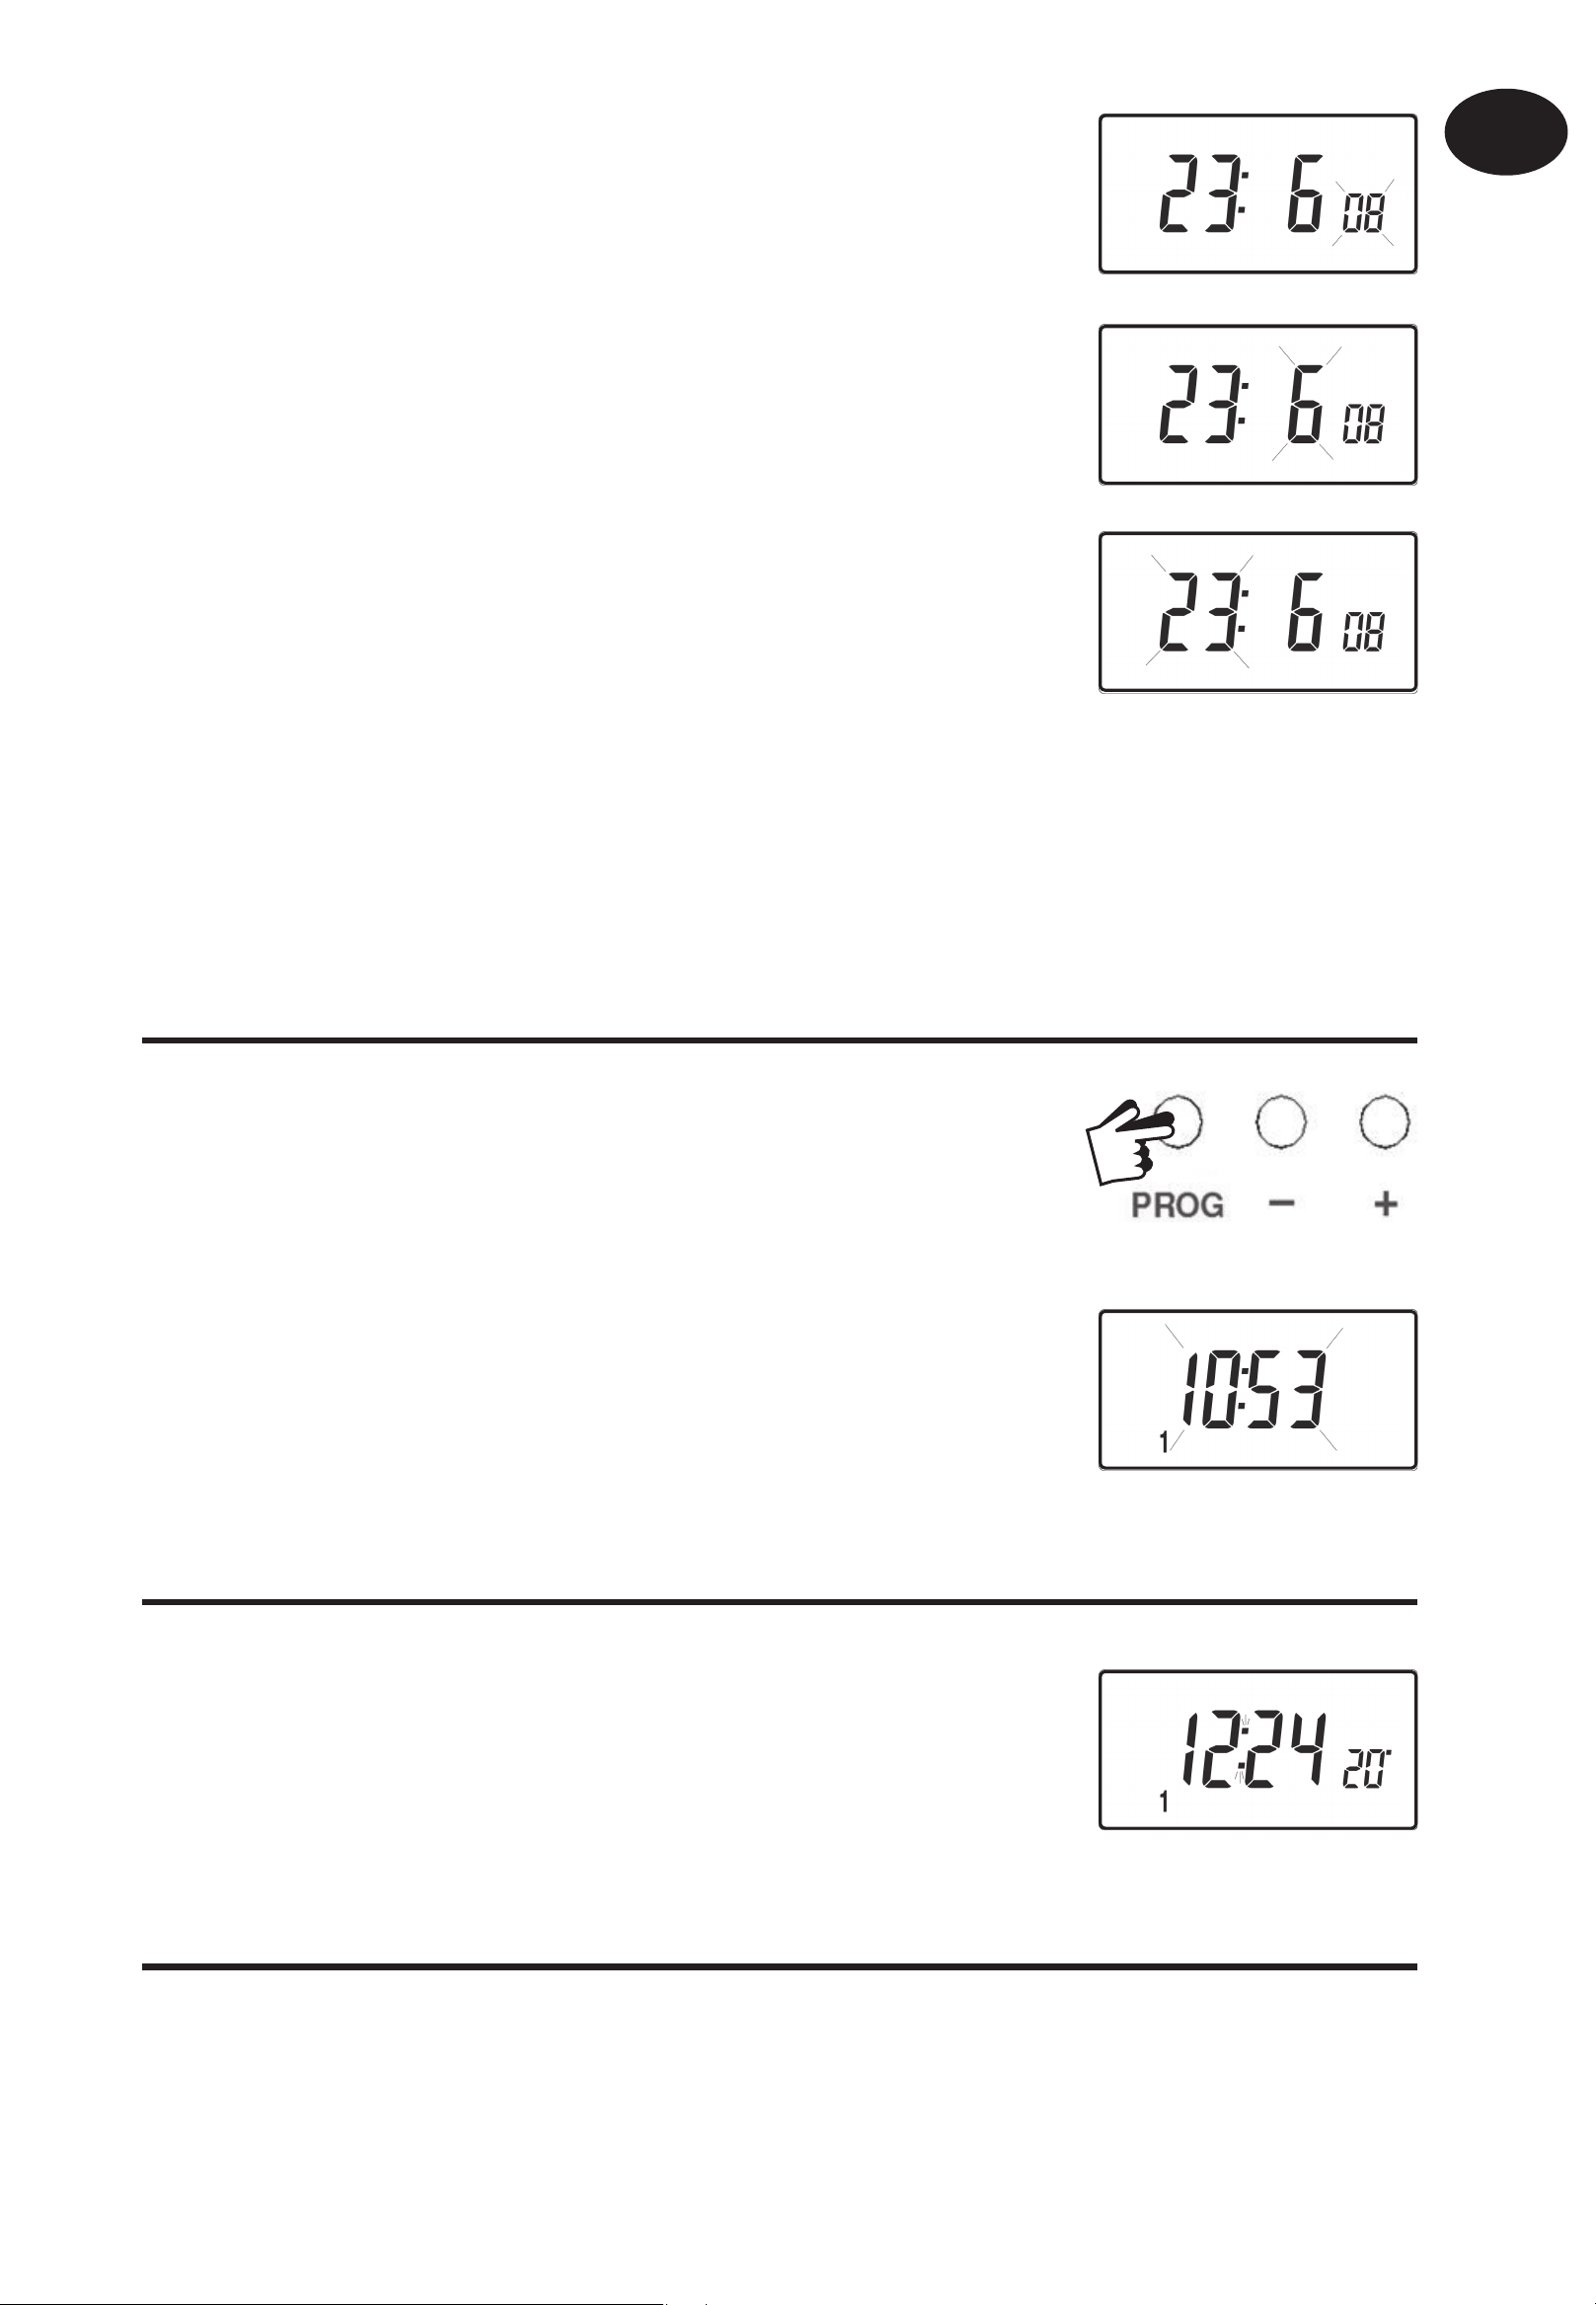
61
Sāks mirgot GADA skaitlis; lai koriģētu gadu,
izmantojiet taustiņus Λ vai V.
Lai pārietu uz MĒNESI, izmantojiet taustiņus
– vai +; pēc tam, lai koriģētu mēnesi, izmantojiet
taustiņus Λ vai V.
Lai pārietu uz DATUMU, izmantojiet taustiņus – vai
+; pēc tam, lai koriģētu mēneša dienu, izmantojiet
taustiņus Λ vai V.
LV
Ja mēģināsiet atlasīt neesošu datumu, iekārtas programmatūra to
noraidīs un lietos tuvāko derīgo datumu. Ieteicams iestatīt datumu
secībā gg/mm/dd.
Pareiza laika iestatīšana
Lai parādītu laiku, pēc datuma iestatīšanas
nospiediet taustiņu PROG. Laika displejs sāks
mirgot.
Lietošanas pamācība
Pareiza laika iestatīšanai izmantojiet taustiņus +
un – (nospiediet un pieturiet, lai mainītu laiku uz
priekšu ar 10 min. intervāliem).
Pareizas dienas iestatīšana
Diena tiek iestatīta automātiski. Lai atgrieztos
parastā darbības režīmā (RUN) (PALAIST),
nospiediet PROG.
Pieņemt iestatīto programmu
Ja jūs apmierina iestatītie laiki, kas redzami tabulā 59. lpp. , nekas vairāk
nav jādara.
Page 62

62
LV
Iepriekš iestatīto programmu mainīšana
Pirms iepriekš iestatīto programmu mainīšanas
Uzstādītājs būs iestatījis iekārtu darbam vienā no šiem režīmiem:
• 5/2 dienu – viens programmu kopums darbdienām, otrs – brīvdienām
(62. lpp.).
• 24 stundu – viens programmu kopums visai nedēļai (63. lpp.).
Cita iespēja
• A/B – termostatu varat iestatīt arī tā, lai paredzētu divus dažādus
programmu blokus; jebkuru no tiem var izmantot dažādām nedēļas
dienām. Ja tas ir nepieciešams, skatiet 63. lpp. norādījumus par to, kā
Lietošanas pamācība
ieslēgt šo funkciju.
Lūdzu ievērot:
iekārtas programmēšana jāveic secīgi; sildīšanas perioda laiku
nevar iestatīt, neievērojot noteikto secību.
Ja vēlaties atstāt iepriekš iestatīto laiku, lai pārietu uz nākamo
iestatījumu, vienkārši nospiediet PROG.
Lai atgrieztos uz RUN (PALAIST), nospiediet PROG un pieturiet,
līdz displejā sāk mirgot divpunkts. Varat arī nedarīt neko, un pēc 2
minūtēm iekārta automātiski atgriezīsies uz RUN (PALAIST).
Uzstādītājs būs iestatījis iekārtu, ieprogrammējot 6, 4 vai 2 sildīšanas
periodiem diennaktī. Tas noteiks, cik sildīšanas periodus diennaktī
jūs varat ieprogrammēt.
Iepriekš iestatīto programmu mainīšana 5/2 dienu režīmā
No 1. līdz 5. dienai (darbdienām):
a) spiediet PROG, līdz displejā parādās pirmais
iepriekš iestatītais laiks un temperatūra (1.
sildīšanas periods 1., 2., 3., 4. un 5. dienai);
b) lai noregulētu LAIKU, izmantojiet taustiņus +
un – (nospiediet un pieturiet, lai mainītu laiku uz priekšu ar 10 min.
intervāliem);.
c) lai noregulētu vēlamo TEMPERATŪRU, izmantojiet taustiņus Λ un V;
Page 63

63
d) lai pārvietotos uz nākamo iepriekš iestatīto laiku
un temperatūru (2. sildīšanas periods), nospiediet
PROG;
e) lai ieprogrammētu atlikušo nedēļas dienu sildīšanas
periodus, atkārtojiet darbības b, c un d.
6. un 7. dienai (brīvdienām)
Spiediet PROG, līdz displejā parādās pirmais
iepriekš iestatītais laiks un temperatūra (1. sildīšanas
periods 6.–7. dienai).
Atkārtojiet iepriekš minētās darbības b, c un d,
LV
lai ieprogrammētu atlikušo brīvdienu sildīšanas
periodus.
Iepriekš iestatīto programmu mainīšana 24 stundu režīmā
a) spiediet PROG, kamēr displejā parādās pirmais
iepriekš iestatītais laiks un temperatūra (1.
sildīšanas periods visām nedēļas dienām);
b) lai noregulētu LAIKU, izmantojiet taustiņus +
un – (nospiediet un pieturiet, lai mainītu laiku uz priekšu ar 10 min
intervāliem);
Lietošanas pamācība
c) lai noregulētu vēlamo TEMPERATŪRU,
izmantojiet taustiņus Λ un V;
d) lai pārvietotos uz nākamo iepriekš iestatīto
laiku un temperatūru (2. sildīšanas periods),
nospiediet PROG;
e) Atkārtojiet soļus b, c, un d , lai ieprogrammētu pārējās darbības.
Iepriekš iestatīto programmu mainīšana AB programmēšanai
(Uzstādītāja iestatījumam jābūt 5/2 dienu režīmā)
Nospiediet un 3 sekundes pieturiet taustiņus PROG
un V. Displejā rādītājs mainīsies uz pretējo. Līdz ar
to parādīsies Izvērstās lietotāja programmēšanas
1. opcija.
Lai ieslēgtu vai izslēgtu šo funkciju (1=ieslēgta,
0=izslēgta), izmantojiet Λ un V taustiņus.
Nospiediet PROG un pieturiet 5 sekundes, līdz
Page 64
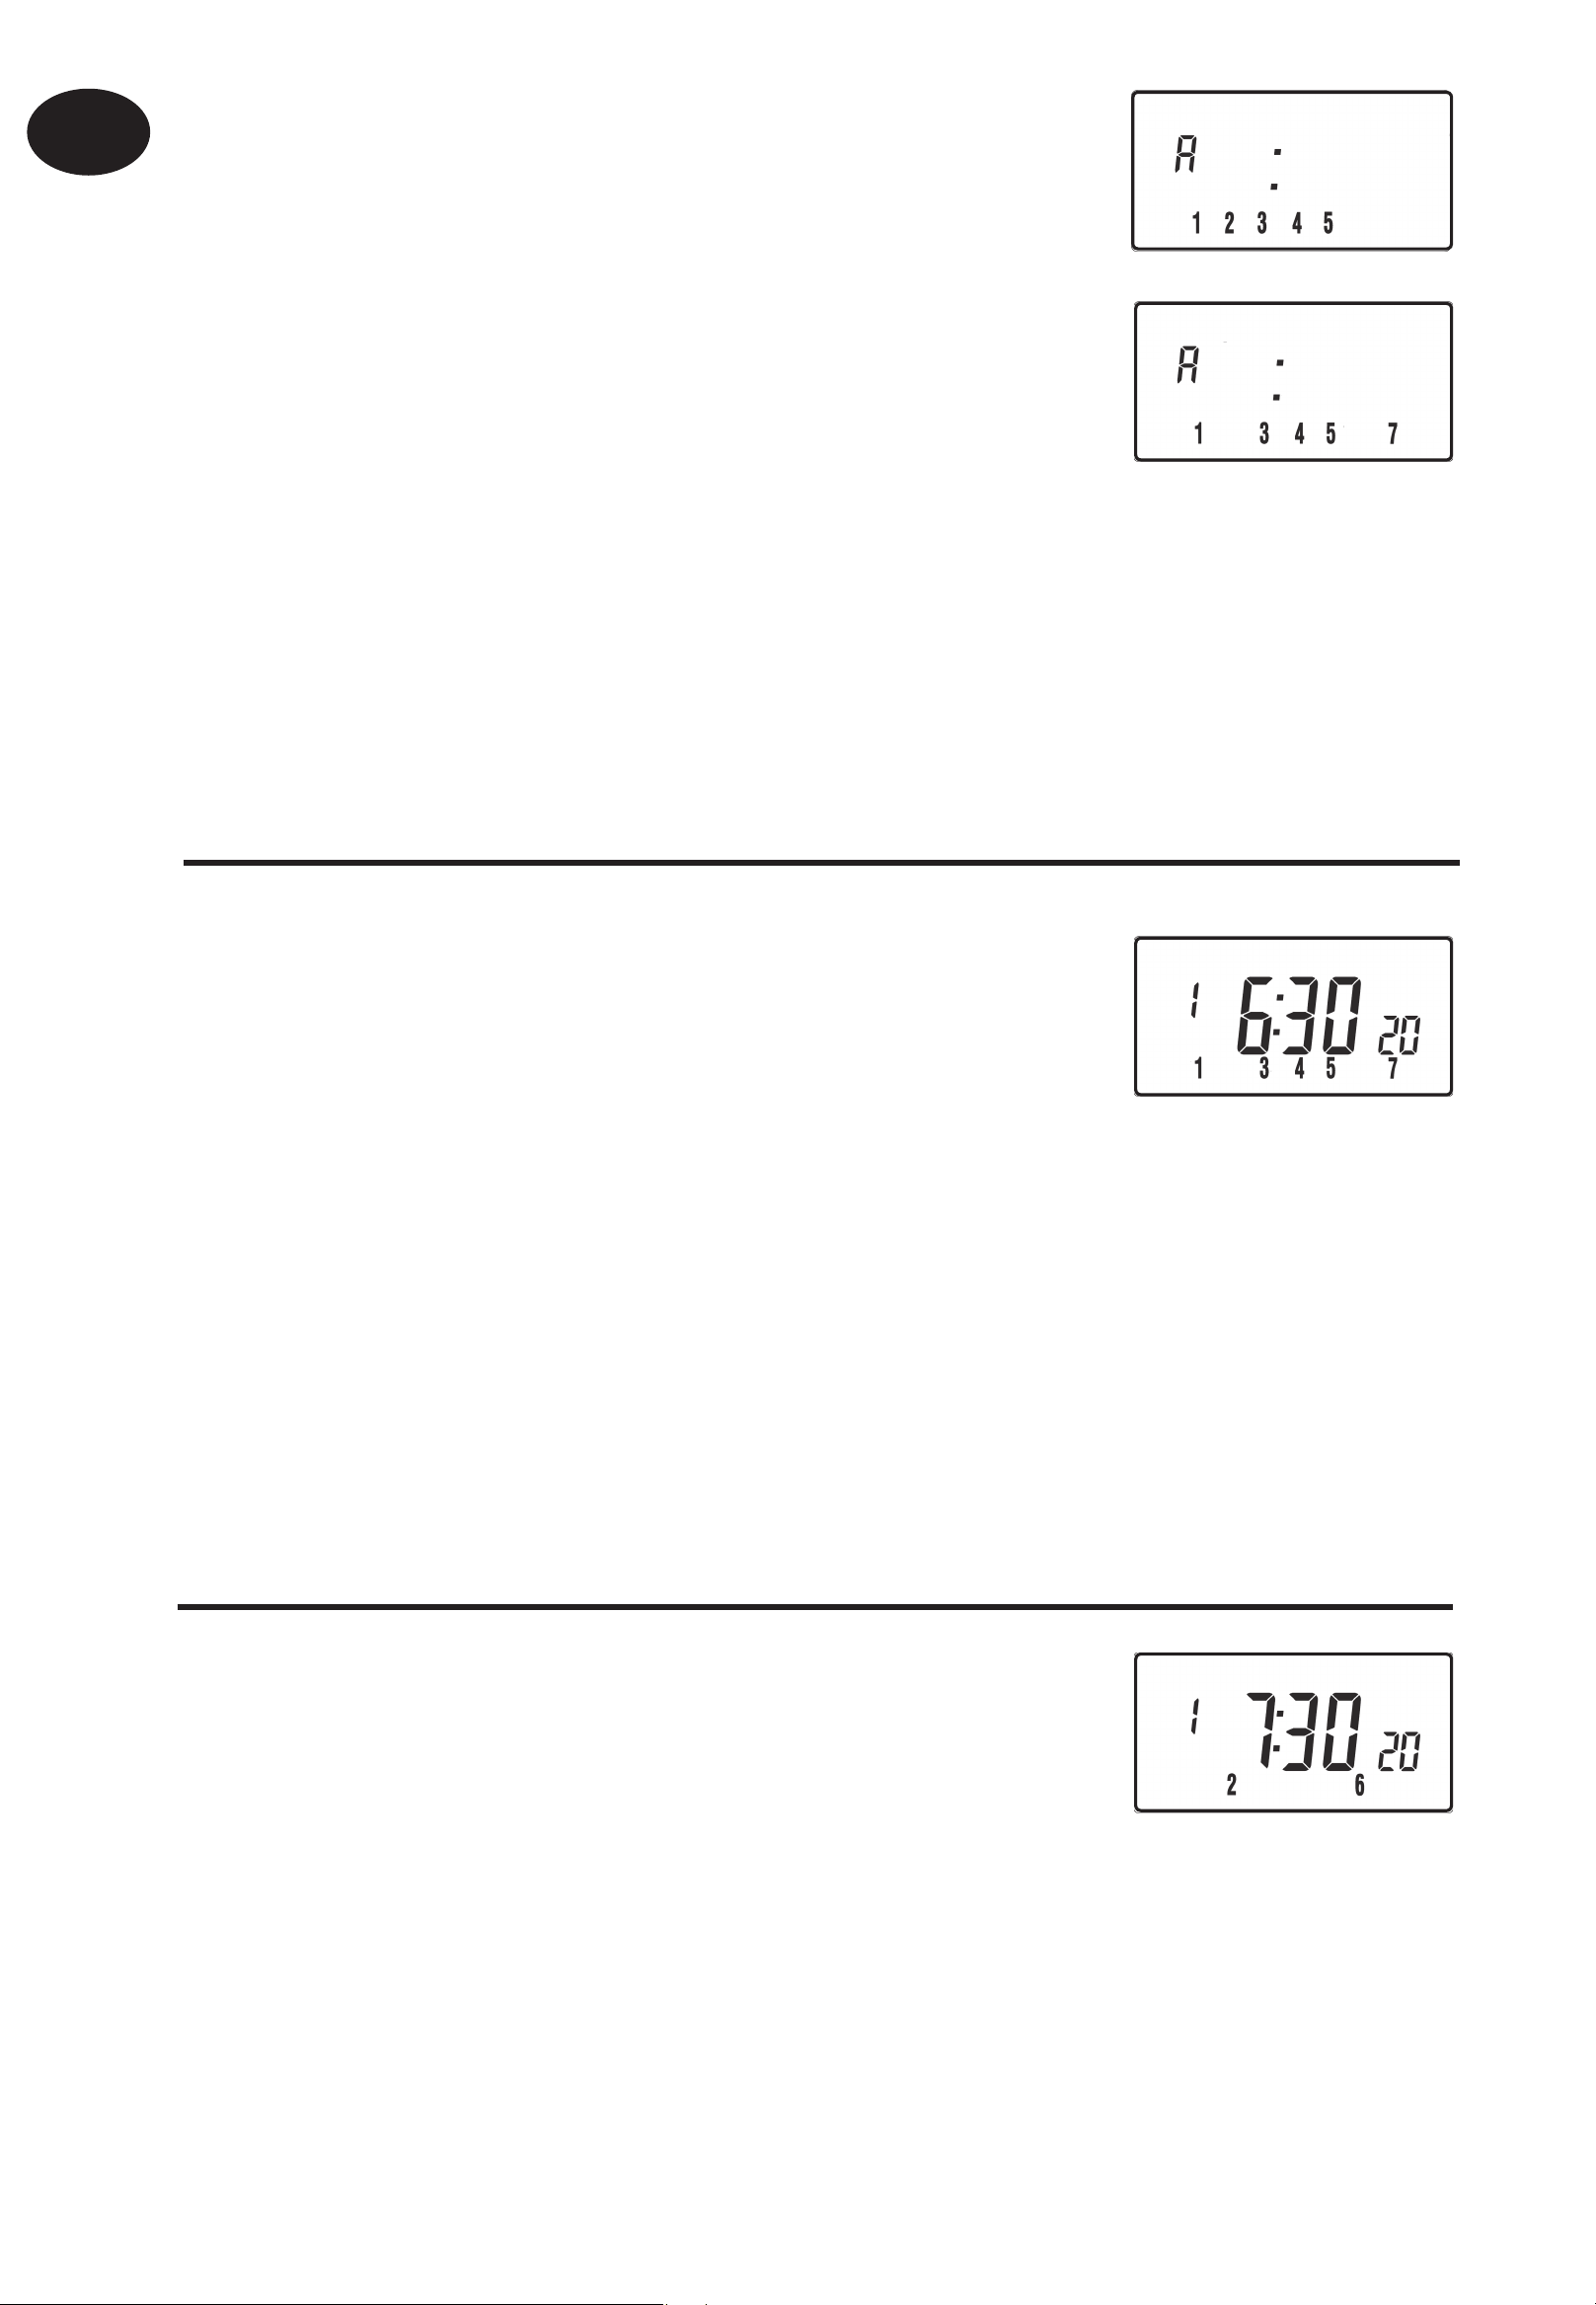
LV
displejs mainās un divpunkts displejā sāk mirgot,
apstiprinot atgriešanos uz RUN (PALAIST).
Nospiediet PROG vienu reizi; displejā tiks parādītas
programmai “A” piešķirtās noklusējuma dienas (1.,
2., 3., 4. un 5. diena).
Lai ritinātu nedēļas dienu sarakstu uz priekšu vai
atpakaļ, izmantojiet taustiņus + un -.
Lai noņemtu atzīmi kādai dienai, nospiediet V
(piemēram, 2. dienai). Lai atlasītu kādu dienu, nospiediet Λ (piemēram,
7. dienai).
Visas dienas, kurām noņemtas atzīmes, automātiski tiek piešķirtas
programmai “B”.
Lietošanas pamācība
Programmas “A” dienu un sildīšanas periodu programmēšana
a) spiediet PROG, līdz displejā parādās pirmais
iepriekš iestatītais laiks un temperatūra (1.
sildīšanas periods programmai A);
b) lai noregulētu LAIKU, izmantojiet taustiņus + un
– (lai mainītu laiku uz priekšu ar 10 min. intervāliem, nospiediet un
pieturiet);
c) lai noregulētu vēlamo TEMPERATŪRU, izmantojiet taustiņus Λ un V;
d) lai pārvietotos uz nākamo iepriekš iestatīto laiku un temperatūru (2.
sildīšanas periods), nospiediet PROG;
e) lai ieprogrammētu atlikušos sildīšanas periodus, atkārtojiet darbības
b, c un d.
Programmas “B” dienu un sildīšanas periodu programmēšana
a) spiediet PROG, līdz displejā parādās pirmais
iepriekš iestatītais laiks un temperatūra
(programmas B 1. sildīšanas periods);
b) lai noregulētu LAIKU, izmantojiet taustiņus + un – (lai mainītu laiku uz
64
priekšu ar 10 min. intervāliem, nospiediet un pieturiet);
c) lai noregulētu vēlamo TEMPERATŪRU, izmantojiet taustiņus Λ un V;
d) lai pārvietotos uz nākamo iepriekš iestatīto laiku un temperatūru (2.
sildīšanas periods), nospiediet PROG;
e) lai ieprogrammētu atlikušos sildīšanas periodus, atkārtojiet darbības
b, c un d.
Page 65

65
Programmas palaišana
Lai atgrieztos uz RUN (PALAIST), nospiediet PROG;
kamēr divpunkts displejā sāks mirgot. Tagad apkure
darbosies saskaņā ar ieprogrammētajiem laika un
temperatūras rādītājiem.
Lietotāja manuālās korekcijas
Displeja mainīšana, lai parādītu laiku vai temperatūru
LV
Lai pārslēgtos starp
iestatījumiem, vienlaikus
nospiediet + un -.
Uz laiku mainīt pašreizējo ieprogrammēto temperatūru
Spiediet Λ vai V, līdz parādās vajadzīgā temperatūra. Lūdzu ievērot,
ka uzstādītājs, iespējams, ierobežojis kā augstākās, tā zemākās
temperatūras iestatījumus un temperatūras manuālās regulēšanas
robežas.
Lietošanas pamācība
Nākamā ieprogrammētā sildīšanas perioda sākumā šīs manuāli veiktās
pārmaiņas tiks automātiski atceltas. Lūdzu ievērot, ka uzstādītājs,
iespējams, ierobežojis citu manuālās regulēšanas termiņu, nevis līdz
nākamajam sildīšanas periodam.
Mainīt nedēļas dienu pieņemtos apzīmējumus no skaitļiem
uz tekstu
Lai pārslēgtos starp dienu apzīmējumiem ar skaitļiem un tekstu,
vienlaikus nospiediet Λ un -.
Pārslēgt laika displeju starp 12 un 24 stundām
Lai pārslēgtos starp 12 un 24 stundu pulksteni, vienlaikus nospiediet
Λ un +.
Page 66

LV
Pārslēgt temperatūras skalas starp °C un °F.
Lai pārslēgtos starp °C un °F temperatūras skalām, nospiediet
vienlaikus V un -..
Termostata režīms
a) vajadzības gadījumā var izvēlēties nemainīgu temperatūru starp
5°C un 30°C. Tādējādi var nodrošināt aizsardzību pret aizsalšanu tad,
kad neviena nav mājās; to var izmantot arī, lai noregulētu augstāku
temperatūru, ja, piemēram, ģimenē kāds saslimis;
b) lai ieslēgtu termostata režīmu, vienlaicīgi nospiediet Λ un V.
Lietošanas pamācība
Noklusējuma iestatījums ir 8°C, taču to var pārprogrammēt – skatiet
Izvērstās lietotāja programmēšanas 10. darbību (69. lpp.);
c) kad izvēlētā temperatūra būs vienāda ar
ieprogrammēto iestatījumu aizsardzībai pret
aizsalšanu vai mazāka par to, displejā parādīsies
sniegpārsliņas simbols;
d) lai mainītu temperatūru no ieprogrammētās temperatūras
aizsardzībai pret aizsalšanu uz citu temperatūru, izmantojiet
taustiņus Λ vai V;
e) lai atgrieztos automātiskās programmēšanas režīmā, nospiediet
vienlaikus Λ un V.
Pulksteņa laika mainīšana uz priekšu un atpakal
Šī regulēšana notiek automātiski; tomēr, ja izvēlēta manuāla
pārslēgšana, izpildiet tālāk sniegtos norādījumus.
Lai pārietu no vasaras uz ziemas laiku (pulksteni pagriež atpakaļ)
Nospiediet un pieturiet taustiņu -.
Lai pārietu no ziemas uz vasaras laiku (pulksteni pagriež uz priekšu)
Nospiediet un pieturiet taustiņu +.
66
Page 67

67
Termostata režīma tālvadības manuāla ieslēgšana un izslēgšana
Aplūkotajiem modeļiem ir funkcija, kura ļauj ieslēgt vai izslēgt ierīces
termostata režīmu, izmantojot ar telefonu aktivizējamu slēdzi vai logu
kontaktus.
Temperatūru, kura jāuztur, kad ēka nav apdzīvota vai kad atvērti logi,
vispirms jāiestata ar Izvērstās lietotāja programmēšanas 10. darbību
(69. lpp.).
Lai uz vietas manuāli regulētu šo funkciju, nospiediet vienlaikus Λ un V.
Atliktā ieslēgšanas laika funkcija
LV
Lai siltās dienās uz laiku varētu atlikt apkures sākšanu, un, ja telpu
temperatūra sildīšanas perioda sākumā ir tuva ieprogrammētajam
lielumam, termostatam ir atliktā ieslēgšanas laika izvēles funkcija. Ja
šī funkcija ir iespējota, to var ignorēt, nospiežot taustiņus Λ vai V. Lai
ieslēgtu šo funkciju, skatiet Izvērstās lietotāja programmēšanas 11.
darbību (70. lpp.).
Optimālā ieslēgšanas laika kontrole (OSC)
Termostatam ir optimālā ieslēgšanas laika kontroles izvēles funkcija. Šī
funkcija ļauj iestatīt laiku, līdz kuram nepieciešams sasniegt vajadzīgo
Lietošanas pamācība
temperatūru. Pēc tam termostats aprēķina, cik drīz pirms sildīšanas laika
sistēma jāieslēdz, lai paredzētajā laikā telpās nodrošinātu vajadzīgo
temperatūru. Pilns šīs funkcijas un tās ieslēgšanas un iestatīšanas
apraksts sniegts Izvērstās lietotāja programmēšanas 12. un 13.
darbībā (70. un 71. lpp.).
Bateriju maiņa (tikai modeļiem ar baterijām)
Ja baterijas būs gandrīz tukšas, displejā parādīsies baterijas simbols.
Jūsu rīcībā ir 15 dienas bateriju nomaiņai
pirms iekārtas izslēgšanās. Nomaiņai noteikti
izmantojiet tikai kvalitatīvas sārma baterijas.
SVARĪGI: lai restartētu iekārtu, pēc bateriju nomaiņas, nospiediet
un atlaidiet pogu RESET (ATGRIEZTIES IEPRIEKŠĒJOS IESTATĪJUMOS).
Visi datuma, laika, programmēšanas un ignorēšanas iestatījumi tiek
saglabāti visu iekārtas kalpošanas laiku.
Page 68

LV
Izvērstās lietotāja
programmēšanas opcijas
Svarīgi: termostats rūpnīcā iestatīts atbilstoši izplatītākajām situācijām,
tomēr tam ir arī papildu izvēles iestatījumi, ar kuru palīdzību var
uzlabot termostata komforta, lietošanas ērtuma un energoefektivitātes
līmeni. Tos var iestatīt režīmos Izvērstā lietotāja programmēšana un
Lietošanas pamācība
Izvērstā uzstādītāja programmēšana.
Lai piekļūtu Izvērstajai lietotāja programmēšanai
Nospiediet un 3 sekundes pieturiet taustiņus V un PROG. Līdz ar to
ieslēgsies Izvērstā lietotāja programmēšana. Izmantojiet taustiņus +
un -, lai ritinātu atpakaļ un uz priekšu starp opcijām, pēc tam taustiņus
Λ un V, lai mainītu opciju iestatījumus. Mirgojošais cipars displeja labajā
pusē norāda atlasītās opcijas numuru.
68
Page 69

69
Opcija 1 – ieslēdz vai izslēdz A/B programmēšanu
(opcija 11 iestatīta uz 5+2)
Šis iestatījums ieslēdz vai izslēdz A/B programmēšanas opciju.
Spiediet +, kamēr parādās Opcija 1; lai atlasītu vajadzīgo
iestatījumu, izmantojiet taustiņus Λ un V.
Izslēgts, iekārta darbojas kā 5/2 stundu vai 24 stundu termostats
Iestatījums 0
atkarībā no uzstādītāja iestatījumiem (rūpnīcas iestatījumiem)
Iestatījums 1 Ieslēgts: aktivizē A/B programmēšanu
Opcija 3 – kalendārpulksteņa noteikumi
Šis iestatījums nosaka, kā automātiskais kalendārpulkstenis,
pārejot uz vasaras un ziemas laiku, aprēķina nepieciešamās
LV
pārmaiņas. Spiediet +, kamēr parādās Opcija 3; lai atlasītu
vajadzīgo iestatījumu, izmantojiet taustiņus Λ un V.
Iestatījums 0 Izslēgts.
Manuāls: lietotājam jāmaina + lietošana, lai paātrinātu parādīto
Iestatījums 1
laiku, un – lietošana, lai to palēninātu.
Iestatījums 2 Eiropas noteikumi (rūpnīcas iestatījums)
Iestatījums 3 ASV noteikumi (sākot ar 2007. gadu)
Iestatījums 4 ASV noteikumi (līdz 2007. gadu)
Opcija 4 – laika zonas nobīde
Šī funkcija ļauj noteikt laika zonu un koriģē laika displeju.
Lietošanas pamācība
Spiediet +, kamēr parādās Opcija 4; lai atlasītu vajadzīgo
iestatījumu, izmantojiet taustiņus Λ un V.
Lielbritānijas modeļiem: šai funkcijai jāatstāj rūpnīcas iestatījums:
Iestatījums 0
0.
Centrāleiropas laika modeļiem: šai funkcijai jāatstāj rūpnīcas
Iestatījums 1
iestatījums: +1:00.
-12 stundas +14 stundas
Citur pasaulē: lai atlasītu nobīdi no universālā laika (GMT) vietai, kurā
termostats uzstādīts, izmantojiet taustiņus Λ un V.
Opcija 10 – pretaizsalšanas/termostata režīma iestatīšana
Šī funkcija ļauj iestatīt pretapsarmošanas/termostata
noklusējuma režīmu. Spiediet +, kamēr parādās Opcija 10; lai
atlasītu vajadzīgo iestatījumu, izmantojiet taustiņus Λ un V.
5°C–40°C – rūpnīcas iestatījums ir 8°C, bet to var mainīt uz jebkuru lielumu starp
5°C–40°C..
Page 70

LV
Opcija 11 – palaišanas metode
Termostats var palaist sistēmu trijos dažādos veidos. Spiediet
+, kamēr parādās Opcija 11; lai atlasītu vajadzīgo iestatījumu,
izmantojiet taustiņus Λ un V.
Iestatījums 0 – parastais: apkure tiek pastiprināta vai pavājināt
ieprogrammētajā laikā.
Iestatījums 1 – optimālā ieslēgšanas laika kontrole (OSC) vai komforta iestatījums:
šis iestatījums ļauj ieprogrammēt laiku, kad vēlaties iestatīt vajadzīgo temperatūru.
Pēc tam termostats aprēķina, cik drīz pirms vajadzīgā laika apkure jāpastiprina.
Atkarībā no laika apstākļiem pirms ieprogrammētā sildīšanas laika šai darbībai būs
vajadzīgas no 120 līdz 0 minūtēm. Lai optimizētais iestatījums atbilstu attiecīgajai
ēkai, kurā tas uzstādīts, šis iestatījums jālieto kopā ar opciju 12.
Iestatījums 2 – atliktais ieslēgšanas laiks vai taupības iestatījums: šis iestatījums
Lietošanas pamācība
ir OSC alternatīva. Iestatiet sildīšanas laiku parastā veidā, ņemot vērā laiku, kas
vidēji nepieciešams, lai ēka iesiltu. Termostats kontrolē ieslēgšanu laiku, faktisko
temperatūru un vēlamās temperatūras, un atliek apkures ieslēgšanu, ja faktiskā
temperatūra ir tuva ieprogrammētajai temperatūrai.
Opcija 12 – optimālā ieslēgšanas laika kontroles iestatījums pirms apkures
(opcija 11 iestatīta uz 1)
Spiediet +, kamēr parādās Opcija 12; lai atlasītu vajadzīgo
iestatījumu, izmantojiet taustiņus Λ un V (aktīvs tikai tad,
ja opcija 11 iestatīta uz 1).
Optimālā ieslēgšanas laika kontrole jānoregulē atbilstoši
ēkas enerģētiskajiem raksturlielumiem. Lai pirms apkures
sākšanas atlasītu vajadzīgo periodu, izmantojiet taustiņus
Λ un V. Tālāk dotajā tabulā ieteikti tipiski iestatījumi.
Ja ēkā savlaicīgi netiek sasniegta nepieciešamā temperatūra, katru dienu
palieliniet šo iestatījumu par 15 minūtēm, līdz atrasts pareizais iestatījums.
Ja nepieciešamā temperatūr ēkā tiek sasniegta pārāk ātri, katru dienu samaziniet
šo iestatījumu par 15 minūtēm, līdz atrasts pareizais iestatījums.
0:15 15 minūtes, siltā gaisa sistēma, labi izolēta ēka
0:30 30 minūtes, siltā gaisa sistēma, labi izolēta ēka
0:45 45 minūtes, siltā gaisa sistēma, nepietiekami izolēta ēka
1:00 60 minūtes, radiatoru sistēma, vieglas konstrukcijas labi izolēta ēka
(rūpnīcas iestatījums)
70
1:15 75 minūtes, radiatoru sistēma, vieglas konstrukcijas vidēji izolēta ēka
1:30 90 minūtes, radiatoru sistēma, vidējas konstrukcijas nepietiekami izolēta
ēka
1:45 105 minūtes, radiatoru sistēma, smagas konstrukcijas labi izolēta ēka
2:00 120 minūtes, radiatoru sistēma, smagas konstrukcijas nepietiekami izolēta ēka
Page 71

71
Opcija 13 – optimālā ieslēgšanas laika kontrole/atliktās ieslēgšanas
sildīšanas laika iestatījums
(Opcija 11 iestatīta uz 1 vai 2)
Optimālo ieslēgšanas laiku vai atliktās ieslēgšanas kontroli
var izmantot tikai 1. sildīšanas periodā vai katrā sildīšanas
periodā dienās, kad nepieciešama augstāka temperatūra nekā
iepriekšējā sildīšanas periodā. Spiediet +, kamēr parādās Opcija
13; lai atlasītu vajadzīgo iestatījumu, izmantojiet taustiņus Λ
un V (aktīvs tikai tad, ja opcija 11 iestatīta uz 1 vai 2).
Iestatījums 0 Attiecas tikai uz pirmo dienas sildīšanas periodu (rūpnīcas
iestatījums).
Iestatījums 1 Attiecas uz katru sildīšanas periodu dienās, kad nepieciešama
augstāka temperatūra nekā iepriekšējā sildīšanas periodā.
LV
Pārskats par uzstādītāja izvēles funkcijām, kuras var
ietekmēt termostata darbību
Temperatūras diapazona ierobežojums
Šī funkcija ļauj uzstādītājam programmēt gan augstāko, gan zemāko
temperatūras robežu. Tā ierobežo augstāko un zemāko temperatūru,
ko varat iestatīt termostatā.
Temperatūras manuālās regulēšanas ierobežojums
Lietošanas pamācība
Šī funkcija ļauj uzstādītājam noteikt robežu, par cik grādiem jūs
varat manuāli regulēt ieprogrammēto temperatūru; turklāt tā ļauj
uzstādītājam iestatīt noteikumus attiecībā uz manuāli noregulētās
temperatūras saglabāšanās ilgumu.
Tastatūras bloķēšana
Šī funkcija ļauj uzstādītājam ierobežot vai bloķēt tastatūru, lai novērstu
nesankcionētas pārmaiņas programmu skaitliskajās vērtībās un
ierobežotu manuālo regulēšanu.
Page 72

LV
Kas notiek ar termostatu, ja baterijas nedarbojas
Ja baterijas nav nomainītas 15 dienu laikā pēc brīdinājuma par zemu
uzlādes līmeni, iekārta izslēdzas. Parastos apstākļos termostats izslēdz
vārstu vai boileri, ko tas kontrolē. Ļoti aukstā laikā apkures izslēgšanas
dēļ ēka visdrīzāk izsals. Lai to novērstu, uzstādītājs var iestatīt iekārtu
tā, lai tā IESLĒGTU, nevis IZSLĒGTU apkuri baterijas nedarbošanās
gadījumā. Tas palielinās kurināmā patēriņu, bet novērsīs ēkas
bojājumus. Vajadzības gadījumā pārbaudiet, vai uzstādītājs ir pareizi
iestatījis šo funkciju.
Lūdzu ievērot: ja pēc bateriju nomaiņas šķidro kristālu displejs tūlīt
Lietošanas pamācība
neieslēdzas, pārbaudiet bateriju orientāciju. Ja displejs nedarbojas,
neatstājiet baterijas termostatā.
Ja pēc bateriju nomaiņas ekrāns paliek tukšs, jāveic daļēja
atgriešanās iepriekšējos iestatījumos. Plašāku informāciju skatiet
lapas otrā pusē.
Iekārtas atgriešanās iepriekšējos iestatījumos
Daļēja atiestatīšana: ja displejs kāda iemesla dēļ sastingst, nospiediet
RESET (atgriešanās iepriekšējos iestatījumos) (izmanto, lai restartētu
mikrodatoru). Ar šo darbību netiek atiestatīta neviena programma,
pulkstenis vai datums. Ieteicams to darīt uzstādīšanas laikā
Lietotāja pilna atgriešanās iepriekšējos iestatījumos: nospiediet
RESET, vienlaikus turot nospiestu taustiņu PROG. Tā tiek atiestatīts
sildīšanai nepieciešamais laiks, kā arī jebkurš Izvērstās lietotāja
programmēšanas iestatījums, bet ne pārējie laika iestatījumi vai
datums.
Lietotāja pilna atgriešanās iepriekšējos iestatījumos: šo darbību
var veikt tikai uzstādītājs. Turklāt visiem Izvērstās uzstādītāja
72
programmēšanas iestatījumiem tiek atjaunoti rūpnīcas iestatījumi, taču
laiks, datums un apkopes noteiktie datumi netiek atgriezti iepriekšējos
iestatījumos.
Page 73

73
Kullanıcı Talimatları
Programlanabilir termostata giriş
Programalanabilir termostatınız değişik zaman dilimlerinde değişik
sıcaklık ayarı yapmanızı sağlar. Hafta içi ve hafta sonu günleri için farklı
zaman ve sıcaklık ayarı yapabilirsiniz. Biz bu ayara 5/2 gün seçeneği
diyoruz.
Termostat ayrıca her gün birbirni tekrar eden aynı zaman ve programı ile
de çalışabilir. Biz buna 24 saat seçeneği diyoruz.
TR
Termsotat ayrıca haftanın herhengibir gününe atanabilen iki farklı
program bloğu ile birlikte de çalışabilir. Biz bu tip çalışma tipine A/B
program blokları çalışma modu diyoruz.
Her termostat montörünüz tarafından her gün için 2,4 veya 6 farklı
zaman ve sıcaklık programı ile ayarlanabilir.
Her thermostat kullanıcı dostu değiştirilebilir özellikler içermektedir. Bu
özelliklere donma koruması da dahildir.
Teromstatın eğere istenirse montör tarafından ayarlanbilecek gelişmiş
özellikleri de bulunmaktadır. Bununla birlikte siz kullanıcılar tarafından
da ayarlanabilecek gelişmiş özelliklere de sahiptir. Bu ayarlar için lütfen
kullanıcı için geliştirilmiş programlama kısmına bakınız (sayfa 82)
Kullanıcı Talimatları
Önceden Ayarlı Programlar
Evinizde bulunan TP5001 çoğu kullanıcıya uygun önceden ayarlanmış
sıcaklık ve zaman programları ile birlikte gelir. Bazı seçeneklerin kullanılabilir
olması ürünün montör tarafından nasıl monte edildiğine bağlı olduğunu
unutmayınız.
Hafta içi günleri (pzt-cum) Hafta Sonu (cmt-pz)
Olay Saat Sıc. °C Olay Saat Sıc. °C
1 06:30 20 1 07:30 20
2 08:30 15 2 09:30 20
3 11:30 20 3 11:30 20
4 13:30 15 4 13:30 20
5 16:30 21 5 16:30 21
6 22:30 15 6 22:30 15
Not: Bu zaman ayzrları aynı zamanda
önceden kayıtlı “A” programı için de
geçerlidir.
Not: Bu zaman ayzrları aynı zamanda
önceden kayıtlı “B” programı için de
geçerlidir.
Page 74

TR
Not: Her gün için 4 olay seçilir ise; olay 3 & 4 atlanmış olacaktır. Eğer her
gün için 2 olay seçilir ise 2,3,4 & 5 atlanmış olacaktır. Her iki durumumda
da olaylar yeniden numaralandırlmıştır.
Başlamadan önce
Programcının önündeki kapağı kaldırınız. RESET
butonuna metalik olmayan bir nesne ile ekran
görünmez olana kadar basınız. Yaptığınız bu işlem
fabrika ayarlarının aktif olmasını ve ürünün doğru
RESET
çalışmasını sağlar.
Kullanıcı Talimatları
Ekranın ayarlanması
Ekran netliğini artırabilmek için kullancı talimatları; ekran ayarlarının
24 saat zaman formatında, sıcaklık °C, ve haftanın günleri’ni (1-
7) kullandığını varsayar. Daha sonra bu ayarlar kullanıcıya göre
değiştirliebilir.Bu ayarlar için sayfa 79 ve 80’a bakınız.
Doğru tarih ve saat’I ayarlama
Kullanmakta olduğunuz TP5001 gerçek zamanlı takvim ve saat
programı ile birlikte ilkbahar ve sonbahar aylarında otomatik zaman
geçişi yapma özelliğine sahiptir.Saat ve tarih fabrika ayarlarına göre CET
zaman dilimine gore ayarlanmıştır. Bu yüzden ayrıca ayar gerektirmez.
Eğer başka bir zaman diliminde yaşıyorsanız sayfa 83’deki zaman zonu
off setleme özelliğine bakınız.
Tarihi ayarlama
Yıl göstergesi yanıp sönecektir. Λ veya V tuşlarını
kullanarak doğru yılı ayarlayınız.
74
Page 75

75
- veya + tuşlarını kullanarak ay ayarına geçiş
yapınız, daha sonra Λ veya V tuşlarını kullanarak
doğru ay ayarını yapınız..
- veya + tuşalrını kullanarak gün ayarına
geliniz,daha sonra Λ veya V tuşalrını kullanarak
doğru günü seçiniz.
Ay içinde GÜN (DATE) ayarına gelmek için – ya da
+ komutlarını kullanınız, sonra doğru gün için Λ ya
da V komutlarına basınız.
TR
Eğer doğru olmayan bir tarih girişi yaparsanız, yazılım bu tarih iredderek,
buna en yakın doğru tarihi otomatik olarak atayacaktır. Tarihin , yy/mm/
dd formatında ayarlanması önerilmektedir..
Doğru Zamanı ayarlama
Tarihi ayarladıktan sonra, PROG tuşuna basarak
ekranda zamanın belirmesini sağlayınız. Zaman
göstergesi yanıp sönecektir.
Kullanıcı Talimatları
+ ve – tuşalrını kullanarak doğru zamanı ayarlayınız.
+ ve – tuşalrına basılı tutarak değişklik yaparsanız
değişimler 10’ar dakikalık olacaktır.
Doğru Günü ayarlama
Haftanın günü otomatik olarak ayarlıdır. PROG
tuşuna basarak normal çalışma moduna
dönünüz (RUN).
Kurulu programları onaylamak
73. sayfada verilen çizelgedeki önceden kurulu zaman ayarlarından
hoşnutsanız başka bir şey yapmanıza gerek yoktur.
Page 76

76
TR
Önceden ayarlı programları değiştirmek
Önceden ayarlı programları değiştirmeden önce
Termostatın montajını yapan teknisyen ürünün aşağıdakilerden hangi
modda çalışacağını belirlemelidir:
• 5/2 gün - hafta içi için ayrı, hafta sonu için ayrı program (sayfa 76).
• 24 saat –tüm hafta için aynı program (sayfa 77).
Alternatif olarak
• A/B – Ürün sizin tarafınınzdan iki farklı programda çalışabilecek
Kullanıcı Talimatları
şekilde ayarlanabilir. Her ikisinden biri haftanın farklı günlerine
ayarlanabilir. Eğer bu özelliği uygulamak isterseniz, sayfa 77’daki
talimatlara bakınız.
Lütfen dikkat
Birim ancak sırayla programlanabilir, işlem zamanları sıraları
dışında kurulamaz. Önceden kurulu zaman ayarlarından birini
olduğu gibi bırakmak istiyorsanız yalnızca PROG komutuna basınız
ve bir sonraki ayara geçiniz. Birimi RUN konumuna geri getirmek
isterseniz, PROG komutuna basıp ekrandaki iki nokta üstüste işareti
yanıp sönene kadar basılı tutunuz. Ya da hiçbir şey yapmayınız,
birim 2 dakika sonra kendiliğinden RUN konumuna geri dönecektir.
Kurulum görevlisi biriminizi günde 6, 4 ya da 2 işlem programına
ayarlayacaktır. Böylece bir günde program yapabileceğiniz işlem
sayısı ayarlanmış olur.
Önceden 5/2 gün modunda ayarlı programları
değiştirmek
1-5 günler için (hafta içi)
a) PROG tuşuna, ekranda ilk ayarlı zaman ve
sıcaklık olayı gelene kadar basılı tutunuz. (Olay
1 Günler 1, 2, 3, 4, 5)
b) + ve – tuşlarını kullanarak ZAMAN’ı
ayarlayabilirsiniz.
c) Λ ve V tuşlarını kullanarak sıcaklığı ayarlayınız.
Page 77

77
d) PROG tuşuna basarak diğer zaman ve sıcaklık
olayına geçiniz (Olay 2).
e) b, c, ve d adımlarını tekrarlayarak hafta içinin
diğer günlerinin ayarlarını yapınız.
6 ve 7. günler için (hafta sonu)
PROG tuşuna ekranda ilk zaman ve sıcaklık ayar
programı belirinceye kadar basınız. (Olay 1 günler
6-7) b, c, ve d adımlarını tekrarlayarak hafta sonunun
diğer olaylarını programlayınız.
TR
24 saat modunda önceden ayarlı programları değiştirmek
a) PROG tuşuna ekranda ilk zaman ve sıcaklık
olayı belirinceye kadar basınız ( haftanın
bütün günleri için Olay 1) .
b) + ve - tuşlarını kullanarak ZAMAN ayarını
değiştiriniz
c) Λ ve V tuşlarını kullanarak SICAKLIK ayarını
değiştiriniz.
d) PROG tuşuna basarak diğer zaman ve sıcaklık
programına geçiniz (olay
Kullanıcı Talimatları
e) b, c, ve d adımlarını tekrarlayarak kalan olayların ayarlarını
gerçekleştiriniz.
AB programlaması için Önceden ayarlanmış olayları
değiştirmek (Montör ayarları 5/2 gün modunda olmalıdır)
PROG ve V tuşuna 3 saniye boyunca basılı tutunuz.
Ekranda çarpı işareti belirecektir. Bu sizi Gelişmiş
kullanıcı ayarlarında seçenek 1’e yönlendirecektir.
Λ ve V tuşlarını kullanarak bu fonksiyonu
kullanılabilir veya kullanılamaz hale getiriniz
(1=kullanılabilir, 0=kullanılamaz).
PROG tuşuna 5 saniye boyunca ekran değişinceye
ve görüntü yanıp sönmeye başlayana kadar basılı
tutunuz.
PROG tuşuna bir defa basınız, erkran “A”
programında önceden ayarlı olayları gösterecektir.
“A” (günler 1, 2, 3, 4 & 5).
Page 78

TR
+ ve – tuşlarını kullanarak haftanın günleri arasında
ileri veya geri gidebilirsiniz.
Bir günü iptal etmek için V tuşuna basınız, (örnek
olarak gün 2). Bir günü seçmek için ise Λ tuşuna
basınız ( örnek olarak gün 7).
İptal edilen her gün “B” programına atanacaktır.
“A” programındaki olayların ayarlanması
a) PROG tuşuna ekranda ilk zaman ve sıcaklık
Kullanıcı Talimatları
b) + ve – tuşalrını kullanarak ZAMAN’I
c) Λ ve V tuşalrını kullanarak Sıcaklığı ayarlayınız.
d) PROG tuşuna basarak diğer zaman ve sıcaklık programına geçiniz
e) b, c, ve d adımlarını tekrarlayarak kalan olayları ayarlayınız.
“B” programındaki olayların ayarlanması
olayı belirene kadar basınız (Program A için
olay 1).
ayarlayınız.
(olay 2).
a) PROG tuşuna ekranda ilk zaman ve sıcaklık
olayı belirene kadar basınız (Program B için
olay 1).
b) + ve – tuşalrını kullanarak ZAMAN’I
ayarlayınız.
c) Λ ve V tuşalrını kullanarak Sıcaklığı ayarlayınız.
d) PROG tuşuna basarak diğer zaman ve sıcaklık programına geçiniz
(olay 2).
e) b, c, ve d adımlarını tekrarlayarak kalan olayları ayarlayınız.
Programın Çalıştırılması
78
PROG tuşuna basarak RUN’ a dönünüz, ekrandaki
görüntü yanıp sönecektir. Isıtma artık ayarlanan
zaman ve sıcaklık değerlerine göre çalışacaktır.
Page 79

79
Kullanıcı İptalleri
Ekranın sıcaklık veya zaman göstermek üzere ayarlanması
+ ve – tuşlarına basarak ayarı
değiştiriniz
Geçici olarak ayarlanmış sıcaklık değerini değiştirmek
TR
Kullanıcı Talimatları
Λ veya V tuşlarına istenen sıcaklık belirene kadar basınız.
Montörünüzün sıcaklık alt ve üst limit ayarlarını değiştirlemez hale
getirmiş olabileceğini lütfen not ediniz.
Bu iptal diğer olay başlangıcında otomatik olarak iptal olacaktır.
Gün göstergesini rakam veya harf olarak değiştirmek
Λ ve – tuşlarına birlikte basarak rakamveya harf seçiminizi yapınız
Zamanı 12 veya 24 saat moduna ayarlamak
Λ ve + tuşlarına birlikte basarak 12 saat ve 24 saat modu arasında seçim
yapınız.
°C ve °F ayarları arasında seçim yapmak
V ve – tuşlarına birlikte basarak °C ve °F sıcaklık birimleri arasında
değişklik yapabilirisiniz
Termostat Modu
a) Eğer İstenise 5-30°C arasında sabit bir sıcaklık ayarı yapılabilir. Bu
evden uzakta olunan zamanlarda donma koruması sağlar. Ayrıca
aile üylerinden birinin hasta olması durumunda istene konfora
ulaşılmasını sağlar.
b) Λ ve V tuşlarına birlikte basrak termostat modunu seçiniz. Varsayılan
Page 80

TR
seçim 8°C2dir, fakat bu ayar değiştirlebilir. Gelişmiş Kullanıcı
Ayarları, Adım 10, (sayfa 83).
c) Seçilen sıcaklık donma koruması ayarına eşit
veya ondan küçük ise ekranda kar tanesi işareti
belirecektir.
d) Λ veya V tuşlarını kullanarak donma koruması
için ayarlanan sıcaklık değerinden farklı bir sıcaklığa değişklik
yapabilirsiniz.
e) Otomatik programlamaya dönmek için Λ ve V tuşlarına birlikte
basınız.
Kullanıcı Talimatları
Saati ileri ya da geri almak
Bu işlem otomatik olarak yapılır. Ancak elle ayar seçeneği seçildiyse
aşağıdakı adımları izleyiniz.
Yaz saatinden Kış saatine ayar (saatler geri alınır)
- komutuna basıp tutunuz.
Kış saatinden Yaz saatine ayar (saatler ileri alınır)
+ komutuna basıp tutunuz.
Termostat konumuna giriş ve çıkış için uzaktan komut verme
Bazı modellerde birimi termostat konumuna sokmak ya da çıkarmak için
telefonla çalışan bir anahtar ya da pencere bağlantıları özelliği vardır.
Bu özelliği kullanmadan önce Gelişkin Kullanıcı Programlaması
bölümünün 10. adımında (sayfa 83) belirtildiği biçimde bina boşken ya
da pencereler açıkken gerekli ısının saklanması durumu kurulmalıdır.
Yerel olarak bu özelliği denetlemek için Λ ve V komutlarının her ikisine
birden basınız.
Gecikmeli başlatma özelliği
Termostatınızda isteğe bağlı kullanılabilen gecikmeli başlatma özelliği
80
vardır. Bu özellik ılık günlerde işlemin başlangıcında oda sıcaklığı
programlanan değere yakınsa birimin ısıtmayı belli bir süre geç
başlatmasına yarar. Bu işlevi etkin hale getirdiyseniz kullanımını Λ ya da
V komutlarına basarak denetleyebilirsiniz. Bu işlevi etkin hale getirmek
için lütfen Gelişkin Kullanıcı Programlaması bölümünün 11. adımına
(sayfa 84) bakınız.
Page 81

81
Optimum başlatma kontrolu (OSC)
Termostatınızda isteğe bağlı kullanılabilen optimum başlatma kontrolu
vardır. Bu özellik odanın istenen ısıya gelmesini istediğiniz zamanı
ayarlamaya yarar. Termostat, istenen zamanda odanın istenen ısıda
olmasını sağlamak üzere sistemin kurulan işlem zamanından ne
kadar süre önce başlatılması gerektiğini hesaplar. Bu işlemin ayrıntılı
açıklaması, nasıl etkin hale getirileceği ve kurulacağı ile ilgili bilgiler
Gelişkin Kullanıcı Programlaması bölümünün 12. ve 13. adımlarında
(sayfa 84 ve 85) verilmiştir.
TR
Pil Değişimi (pilli modeler için)
Pil bitmek üzere olduğunda ekranda düşük pil
ömrü sembolü görünecektir. Bu sembol çıktıktan
sonar termostat kapanmadan 15 gününüz vardır.
Pilleri değiştiriken yüksek kaliteli alkalin pil
kullandığınızdan emin olunuz.
ÖNEMLİ: Pilleri değiştirdikten sonra RESET tuşunu basılı tuttuktan sonra
bırakınız. Böylece thermostat yeniden çalışacaktır. Bütün zaman,tarih
Kullanıcı Talimatları
ve programlar ürünün ömrü boyunca thermostat içerisinde saklı olarak
kullanıma hazırdır.
Page 82

TR
Kullanıcılar için Gelişmiş
Programlama Seçenekleri
Önemli: Termostat, fabrikada üretilirken her türlü ihtiyaca cevap
verecek şekilde ayarlanmıştır. Bununla birlikte ürünün performansını
arttırabilmek için ek olarak bazı özellikler sunulmuştur. Bu özelliklere
kullanıcı için gelişmiş programlama ve montör için gelişmiş
programlama kısmından ulaşabilirsiniz.
Kullanıcı Talimatları
Kullanıcılar için Gelişmiş Programlama Seçeneklerine Ulaşım
V ve PROG tuşalrına 3 saniye boyunca birlikte basılı tutunuz.
Bu işlem sizi kullanıcı için gelişmiş programlama seçeneklerine
ulaştıracaktır. + ve - tuşalrını kullanarak seçenekler arasında seçim
yapınız. Daha sonra bu seçimleri değiştirebilnek için Λ ve V tuşalrını
kullanınız. Sağ taraftaki yanıp sönen rakam seçilen seçeneği belirtir.
82
Page 83

83
Seçim 1 - Kullanılır veya Kullanılamaz (A/B programlaması) (Seçim 41, 5+2’ye
ayarlanmalıdır)
Bu seçim A/B programlanmasını kullanılabilir veya kullanılamaz
hale getirir. + tuşuna Option 1 belirene kadar basınız, Λ ve V
tuşlarını kullanarak istenen değişikliği yapınız.
Kulllanılamaz, termostat montör ayarlarına göre 5/2 veya 24 saat
Ayar 0
modunda çalışır. (fabrika ayarı)
Ayar 1 Kullanılabilir: A/B programlamasını active eder.
Seçim 3 – Tarih Ayarları
Bu ayar sayesinde kış ve yaz zamanı geçişleri otomatik olarak
TR
hesaplanabilir. + tuşuna basılı tutarak Option 3’ün belirmesini
bekleyin, Λ ve V tuşlarını kullanrak istenen seçimi yapınız.
Ayar 0 Kullanılamaz.
Manuel:kullanıcı görüntülenen zaqmanı ilerletmek için + tuşunu ve
Ayar 1
geciktirmek için – tuşunu kullanmalıdır.
Ayar 2 Avrupa Ayarları. (Fabrika ayarı)
Ayar 3 ABD Ayaları (2007 sonrası)
Ayar 4 ABD Ayarları (2007 öncesi)
Seçim 4 -Zaman dilimi dengesi
Bu özellik zaman diliminin tanıtılmasını ve zaman ekranının
düzeltilmesini sağlar. + tuşuna ekranda Option 4 belirene
Kullanıcı Talimatları
kadar basınız, Λ ve V tuşlarına basarak istenen ayarı
gerçekleştiriniz.
Ayar 0 UK modelleri: bu özellik fabrika ayarı olan 0’da bırakılmalıdır.
Ayar 1 CET: Bu özellik fabrika ayarı olan +1:002de bırakılmalıdır.
-12 Saat +14 Saat
Diğer Ülkeler: Λ ve V tuşlarını kullanarak montajın yapıldığı ülkedeki istenen
zaman dilimini seçiniz (GMT).
Seçim 10 - Donma/ termostat modu ayarı
Bu özellik önceden ayarlanmış donma/termostat modunun
seçiminin ayarını gerçekleştirir. + tuşuna basarak ekranda
Option 10’un belirmesini belkleyiniz. Λ ve V tuşlarını
kullanarak istenen değişkliği gerçekleştiriniz.
5-40°C –Fabrika ayarı - 8°C’dir. Ama 5 -40°C arasındaki bir değere ayarlanabilir.
Page 84

TR
Seçim 11 - Çalıştırma Metodu
Termostatınız üç değişik şekilde çalışabilir. + tuşuna ekranda
Option 11 belirene kadar basınız. Λ ve V tuşlarını kullanarak
istenen değişkliği yapınız.
Ayar 0 - Normal: Isıtma istenen zaman programında arttırılır veya azaltılır.
Ayar 1 - Optimum Çalışma Kontrolü (OÇK) veya Komfor ayarı: Bu özellik sayesinde
istenen zaman programında istenen sıcaklığın ayarlanması sağlanır.
Termsotat bu sayede, istene sıcaklığa ulaşabilmek için, ayarlanan zamandan ne
kadar önce ısıtmanın devreye gireceğini hesaplar. Bu ayar hava koşullarına göre
ayarlanan zaman programından önce 0-120 dakika arasında değişir. Bu ayar Option
12 ile birlikte kullanılmalıdır.
Ayar 2 - Gecikmeli başlangıç veya Ekonomik Ayar: Bu OÇK’ya alternatiftir. Olay
Kullanıcı Talimatları
zamanlarını ortlama bir günde ısıtmanın devreye gireceği saatlere ayarlayınız.
Termostat,gerçek sıcaklık ayarlanan sıcaklığa yakın ise çalışma zamanını, ayarlanan
sıcaklığı, ısıtma başlam gecikmelerini gösterecketir.
Seçim 12 - Optimum başlangıç, Ön ısıtma kontrolü (Option 11, 1’e
ayarlanmalıdır)
+ tuşuna Option 12 belirene kadar basınız, Λ ve V tuşalrını
kullanarak istenen değişikliği gerçekleştiriniz. (Option 11,
1’e ayarlanmış ise aktifdir).
Optimum başlangıç kontrolü binanın enerji karakterine
göre ayarlanmalıdır. Λ ve V tuşlarını kullanarak istenen ön
ısıtma periodunu seçiniz.
Aşağıdaki tablo önerilen bazı ayarları göstermektedir.
Eğer bina istenen sıcaklığa zamanında ulaşamaz ise, ayarı 15 dakikalık adımlar
şeklinde doğuru ayara ulaşana kadar arttırınız.
Eğer Bina istene sıcaklığa zamanın önünde ulaşır ise zaman ayarını 15 dakikalık
adımlar halinde doğru ayarı bulana kadar azaltınız.
0:15 15 dak,ılık hava sistemi, iyi yalıtıma sahip bina
0:30 30 dak, ılık hava sistemi, çok iyi yalıtılmış bina.
0:45 45 dak, ılık hava sitemi,köyü talıtılıma sahip bina.
1:00 60 dak, radyatör sistemi, çok iyi yalıtımlı bina.
(Fabrika ayarı)
1:15 75 dak, radiator sistemi, orta yalıtımlı bina
1:30 90 dak, radyatör sistemi, kötü yalıtımlı bina.
84
1:45 105 dak, radiator sistemi, kötü yalıtımlı bina.
2:00 120 dak, radyatör sistemi, kötü yalıtımlı bina.
Page 85

85
Option 13 – Optimum Çalışma Kontrolü/Gecikmeli başlangıç Olay Ayarları
(Option 11 ayarı 1 veya 22ye ayarlanmalıdır)
Optimum başlangıç veya gecikmeli başlangıç kontrolü
sadece olay 1 veya bir önceki olaydan daha yüksek sıcaklık
istenen her olay’a uygulanabilir. + tuşuna, ekranda Option
13 belirene kadar basınız. Λ ve V tuşlarını kullanarak
istenen ayarları gerçekleştiriniz. (Option 11 1 veya 2’ye
ayarlanmış ise kullanılabilir).
Ayar 0 Sadece günün ilk olayına uygulanır. (Fabrika ayarı)
Ayar 1 Bir önceki olaydan daha yüksek sıcaklık istenen her olaya
uygulanabilir.
TR
Montör Tarafından Gerçekleştirilebilen, Termostatın
Çalışmasını Etkileyebilecek Özelliklerin Gözden
Geçirilmesi
Sıcaklık Aralığı limitlemesi
Bu özellik sayesinde montör, max. ve min sıcaklık değerlerini
programlayabilir. Termostat üzerinde sizin ayarlayacağınız sıcaklık
değerleri limtlenmiş olur.
Sıcaklık İptal Sınırı
Kullanıcı Talimatları
Bu özellik sayesinde montör sıcaklık değerinin ne şartlarda
limitlenebileceğini belirler. Ayrıca sıcaklık limitlemesinin ne kadar
zaman aktif olacağı programlanabilir.
Tuş Takımı Kilidi
Yetkisi olmayan kişilerin kullanımını engellemek amacı ile tuş takımı
tamamen veya kısmen kilitlenebilir.
Page 86

TR
Pil Bitince Ne Olur?
Düşük pil uyarısı ekranda belirdikten sonraki 15 gün içerisinde piller
değiştirilmez ise termostat kapanacaktır. Normal şartlarda termostat
kontrol ettiği vanayı veya kombiyi kapatacaktır. Şiddetli kış şartlarında
vananın kapanması binada donmaya neden olabilir. Bunu önlemek
amacı ile, montör pil bittiğinde vananın kapanması yerine açmasını
sağlayacak ayarı yapabilir. Bu özellik aktif hale getirilir ise yakıt tüketimi
artacak fakat donma tehlikesi önlenmiş olacaktır.
Not: Eğer pilleri değiştirir ve LCD ekran görünür halde değil ise
Kullanıcı Talimatları
pillerin montaj şeklini hemen control ediniz.eğer ekran görünür
değil ise pilleri termostatın içerisinde bırakmayınız.
Eğer pilleri kontrol ettikten sonra, ekran halen boş isetermostata
kısmen reset atılmalıdır. Aşağıdaki detayları inceleyiniz.
Termostatı resetlemek
Kısmi reset: herhangi bir nedenden dolayı ekran donar ise RESET
butonuna basınız (mikro-bilgisayarı yeniden başlatmak için kullanılır).
Bu herhangi bir programı,zamanı veya tarihi resetlemez. Montaj
sırasında yapılması önerilir.
Kullanıcı İçin Tamamen RESET Atmak: RESET tuşuna, PROG tuşuna
basılı tutarken basınız button.Bu olay zamanlarını ve gelişmiş kullanıcı
ayarlarının resetler. Ama zamanı ve tarihi resetlemez.
Kurulum görevlisinin sistemi tamamen yeniden kurması: Bu özellik
yalnızca kurulum görevlisi tarafından kullanılabilir. Yukarıdakilere ek
olarak Gelişkin Kurulum Programlaması ayarları fabrika değerlerine
getirilir. Ancak zaman, gün ve servis tarihi ayarları değişmez.
86
Page 87

87
TR
Kullanıcı Talimatları
Kullanıcı hatalarından kaynaklanan arızalar garanti kapsamı dışında kalmaktadır. Ürünün kullanım ömrü 10 yıldır.
Page 88

88
TR
Kullanıcı Talimatları
Page 89

89
Uživatelská příručka
Úvodní informace o programovatelném pokojovém termostatu
Tento programovatelný pokojový termostat umožňuje naprogramovat různé
teploty pro různé časové úseky. Termostat vám umožňuje naprogramovat sadu
režimu teploty a času platných o víkendu. Tato možnost je vyjádřena označením
5/2 denní provoz.
Instalační technik může termostat nastavit také tak, že sada režimu teploty a času
se bude opakovat každý den v týdnu. Tato možnost je vyjádřena označením 24
hodinový provoz.
Termostat si můžete také sami nastavit do dvou různých programových bloků,
CZ
které budou využity v jakýkoliv den týdne. Tato možnost je vyjádřena označením
A/B naprogramovaný provoz.
Instalační technik může nastavit všechny termostaty tak, že bude možné pro
každý den nastavit až 2, 4 nebo 6 různých nastavení teploty a času.
Všechny termostaty umožňují užitečná nastavení, včetně naprogramování
nastavení proti zamrznutí.
Termostat je vybaven několika pokročilými funkcemi, které na základě vašeho
požadavku instalační technik nastaví na požadovanou hodnotu.
Termostat je také vybaven řadou pokročilých funkcí, které si můžete nastavovat
sami. Tato pokročilá nastaveni se mění podle aktuálního provozního režimu
termostatu, některé také ovlivňují programovací funkce a uživatelská nastavení
než začnete programovat jednotlivé možnosti (viz strana 98), tak si pročtěte
Uživatelská příručka
uvedené instrukce v části Programování pokročilých uživatelských funkcí.
Přednastavené programy
Termostat TP5001 přichází do vašich rukou již s naprogramovaným provozním
režimem teplot a časů, které uspokojí potřeby většiny uživatelů. Mějte na
paměti, že některá možná nastavení jsou závislá na nastavení funkcí, které
provedl instalační technik přivlastní instalaci jednotky.provedl instalační technik
přivlastní instalaci jednotky.
Pracovnídny (Po-Pá) Vikend (So-Ne)
Událost Čas Teplota °C Událost Čas Teplota °C
1 06:30 20 1 07:30 20
2 08:30 15 2 09:30 20
3 11:30 20 3 11:30 20
4 13:30 15 4 13:30 20
5 16:30 21 5 16:30 21
6 22:30 15 6 22:30 15
Poznámka: toto jsou také časy
použitlné pro programový blok “A”
Poznámka: toto jsou také časy
použitlné pro programový blok “B”
Page 90

CZ
Poznámka: Jestliže je nastavení na 4 události denně, tak události 3 & 4
jsou přeskočeny. Jestliže je nastavení na 2 události denně, tak události
2, 3,4 & 5 jsou přeskočeny a tyto události jsou přečíslovány.
Před prvním použitím
Na přední stěně programátoru nadzvedněte
víčko a pomocí nekovového předmětu
stiskněte tlačítko RESET (nulování) až do zhasnutí
displeje.Tato operace aktivuje továrně
RESET
neprogramové funkce a zároveň zajistí, že
Uživatelská příručka
mikroprocesor jednotky začne správně pracovat.
Volba vzhledu displeje
Z důvodu přehlednosti je displej nastaven na zobrazování 24hodinového režimu, teploty ve °C a jednotlivé dny týdne jsou číslovány
od 1 do 7, kde 1 znamená pondělí. Všechna tato nastavení je možné po
naprogramování termostatu změnit a upravit dle požadavku, viz strany
95 a 96.
Nastavení správného kalendářního data a hodin
Regulátor TP5001 je vybaven hodinami s reálným časem a také funkcí
kalendáře, která automaticky na jaře a na podzim mění čas. Čas a datum
byl v továrně nastaven do CET časové zóny (čas střední Evropy) a proto
normálně nevyžaduje žádné dodatečné nastavování. Jestliže žijete v
jiném časovém pásmu, tak postupujte dle návodu na straně 99 v části
„Nastavení jiného časového pásma“. Jestliže je nutné změnit čas nebo
Datum z jiného důvodu, tak postupujte dle následujícího návodu.
Nastavení kalendářního data
Stiskněte a držte stisknutá tlačítka Λ a PROG
90
podobu3sekund až se objeví datum ve formátu
dd/mm/rr.
Page 91

91
Číslice odpovídající ROKU začne blikat,pomocí
tlačítek Λ a V nastavte správný rok.
Použitím tlačítek+a–se přesunete na MĚSÍC,
pomocí tlačítek Λ a V nastavte správný měsíc..
Použitím tlačítek+a–se přesunete na DEN pomocí
tlačítek Λ a V nastavte správný den.
Jestliže se pokusíte vložit nesprávný údaj, tak software jednotky
CZ
takový údaj odmítne a vloží nejbližší správný údaj. Doporučujeme, aby
vkládání data v řadě rok/měsíc/den.
Nastavení správného času
Čas zobrazíte stisknutím tlačítka PROG. Čas začne
blikat.
Pro nastavení správného času stiskněte + a
– tlačítko (stiskněte držte, čas se bude přidávat v
10 min přídavcích ).
Uživatelská příručka
Nastavení správného dne
Den v týdnu se nastaví automaticky dle zvoleného
Kalendářního dne. Do normálního režimu (RUN)
přejděte stisknutím tlačítka PROG.
Přijmutí přednastavených programů
Jestliže vám přednastavené časové hodnoty uvedené v tabulce na
straně 89 zcela vyhovují, tak není třeba provádět žádné další
nastavování.
Page 92

92
CZ
Změna přednastavených programů
Předtím než začnete měnit přednastavené programy
Instalační technik musí nastavit jednotku do jednoho z následujících
režimů:
• 5/2 denní – jedna sada programů pro pracovní dny a další sada pro
víkend (viz strany 92)
• 24hodinové – jedna sada programů pro celý týden(strana 93).
Případně
• A/B – Jednotku je možné také nastavit tak, že umožní nastavit
Uživatelská příručka
režimy ve dvou nezávislých programových blocích, které lze použít
pro různé dny v týdnu. Jestliže vám vyhovuje toto nastavení, tak
postup pro nastavení jednotky do stavu umožňující tuto možnost
naleznete na straně 93.
Pozor!
Jednotka se musí programovat postupně, jednotlivé časy se
nemohou programovat na přeskáčku.
Jesliže hodláte ponechat přednastavené časy tak jak jsou, tak
stiskněte tlačítko PROG a tím se přesunete do dalšího nastavovacího
bloku.
Jestliže hodláte jednotku vrátit do režimu RUN, tak tiskněte tlačítko
PROG tak dlouho, dokud dvojtečja ba dusokehu bezačne blikat
nebo po dobu 2 minut nepoužijte žádné tlačítko a jednotka se tak
do režimu RUN přepne automaticky.
Instalační technik musí nastavit jednotku pro možnost programovat
6, 4 nebo 2 události za den. Toto nastavení určí počet jednotlivých
události za den, které můžete naprogramovat.
Změna přednastavených programů v režimu 5/2 dny
Pracovní dny 1-5 (Pondělí až pátek)
a) Tiskněte tlačítko PROG tak dlouho, dokud se
na displeji nezobrazí první přednastavený čas
teplota (Událost 1 Dny 1, 2, 3, 4 a 5).
b) Pomocí tlačítek + a – nastavte ČAS (čas bude
narůstat po 10 minutách po stisknutí a držení tlačítka).
c) Pomocí tlačítek Λ a V nastavte požadovanou TEPLOTU.
Page 93

93
d) Na další údaje přednastaveného čas a teploty
(událost 2) se posuňte stisknutím tlačítka
PROG
e) Zbývající pracovní dny nastavte opakováním
kroků b, c, & d.
Víkendové dny 6-7 (Sobota-Neděle)
Tiskněte tlačítko PROG tak dlouho, dokud se na
displeji nezobrazí první přednastavený čas teplota
(Událost 1 Dny 6-7). Zbývající víkendové dny
nastavte opakováním kroků b, c,& d.
CZ
Změna přednastavených programů v režimu 24 hodin
a) Tiskněte tlačítko PROG tak dlouho, dokud se na displeji
nezobrazí první přednastavený čas teplota
(Událost1provšechnydny v týdnu).
b) Pomocí tlačítek + a – nastavte ČAS – (čas bude
narůstat po 10 minutách po stisknutí a držení
tlačítka).
c) Pomocí tlačítek Λ a V nastavte požadovanou
TEPLOTU.
d) Na další údaje přednastaveného času a teploty
(událost 2) se posuňte stisknutím tlačítka PROG.
Uživatelská příručka
e) Zbývající události nastavte opakováním kroků b, c, & d.
Změna přednastavených programů při AB programování
(Instalační technik musí nastavit jednotku do režimu 5/2 dny)
Po dobu 3 sekund tiskněte tlačítka PROG a V. Údaje
na displeji se změní dle vyobrazení. Tento stav vám
umožňuje přejít do Programování pokročilých
uživatelských funkcí možnost 1.
Použitím tlačítek Λ a V danou funkci aktivujte nebo
deaktivujte (1=funkce je aktivní, 0=funkce není
aktivní). Tlačítko PROG tiskněte po dobu 5 sekund
až do okamžiku kdy se displej změní a dvojtečka
začne blikat. Tím bude signalizován přechod do
provozního režimu RUN.
Tlačítko PROG stiskněte jednou, displej se změní a
začne zobrazovat implicitně určené dny programu„A“ (dny1, 2, 3, 4 & 5).
Page 94

CZ
Použitím tlačítek + a – můžete přecházet mezi CZ
jednotlivými dny týdne. Zrušení dne proveďte
tisknutím tlačítka V, (například Den 2). Zvolení dne
proveďte stisknutím tlačítka Λ (například den 7).
Všechny zrušené dny jsou automaticky přesunuty do programu„B“.
Programování dnů a událostí v programu„A“
a) Tiskněte tlačítko PROG tak dlouho,dokud se na displeji nezobrazí
první přednastavený čas teplota (Událost 1, Program A).
b) Pomocí tlačítek + a – nastavte ČAS (čas bude
Uživatelská příručka
c) Pomocí tlačítek Λ a V nastavte požadovanou
d) Na další údaje přednastaveného času a teploty (událost 2) se
e) Zbývající události nastavte opakováním kroků b, c & d.
narůstat po10 minutách po stisknutí a držení
tlačítka).
TEPLOTU.
posuňte stisknutím tlačítka PROG
Programování dnů a událostí v programu„B“
a) tlačítko PROG tak dlouho,dokud se na displeji nezobrazí první
přednastavený čas teplota (Událost 1,Program B).
b) Pomocí tlačítek + a – nastavte ČAS (čas bude
narůstatpo10 minutáchpostisknutí a držení
tlačítka).
c) Pomocí tlačítek Λ a V nastavte požadovanou
TEPLOTU.
d) Na další údaje přednastaveného čas a teploty (událost 2) se
posuňte stisknutím tlačítka PROG.
e) Zbývající události nastavte opakováním kroků b,c,&d.
Spuštění zvoleného programu
94
Do základního provozního režimu RUN se vrátíte stisknutím tlačítka
PROG. Dvojtečka na displeji začne blikat. Vytápění
se nyní začne řídit naprogramovanými údaji teplot
a časů.
Page 95

95
Uživatelská příručka
Změna zobrazování času a teploty na displeji
Stiskněte současně tlačítka + a
- a tím změníte dané nastavení
na zobrazení teploty nebo
času.
Dočasná změna aktuálně naprogramované teploty
CZ
Tiskněte tlačítka Λ a V tak dlouho, dokud se na displeji nezobrazí
požadovaná teplota. Mějte v patrnosti, že instalační technik mohl
omezit maximální minimální nastavitelnou teplotu a vámi požadovaná
teplota přesahuje nastavené rozpětí.
Nastavená hodnota se automaticky zruší s přechodem do další
naprogramované události. Mějte v patronosti, že instalační technik
mohl omezit trvání dané změny na jinou hodnotu než k další události.
Změna dne týdne z číselného údaje na textový údaj
Uživatelská příručka
Stiskněte současně tlačítka Λ a - a tím změníte nastavení na číselný
údaj nebo textový údaj.
Změna zobrazování času z 24 hodinového režimu na 12
hodinový režim
Stiskněte současně tlačítka Λ a + a tím změníte dané nastavení na 24
hodinový nebo 12 hodinový režim
Změna zobrazování teploty v °C na °F
Stiskněte současně tlačítka V a - a tím změníte dané nastavení na °C
nebo °F
Page 96

CZ
Režim termostatu
a) V případě potřeby je možné zvolit konstantní
teplotu v rozsahu 5 až 30°C. Toto nastavení
umožňuje také nastavit režim proti nebezpečí
zamrznutí v době nepřítomnosti, je také
možné nastavit mimořádně vyšší teploty v těch
případech, kdy například některý člen domácnosti zůstává doma
nemocen.
b) Režim termostatu vložte současným stisknutím tlačítek Λ
a V Přednastavená hodnota je 8°C, kterou je možné nově
naprogramovat, viz Programování pokročilých uživatelských
Uživatelská příručka
funkcí krok 10, (strana 99).
c) Na displeji se zobrazí symbol vločky v těch případech kdy je zvolená
teplota stejná nebo nižší než naprogramovaná teplota ochrany
proti zamrznutí.
d) Použitím tlačítek Λ a V je možné změnit naprogramovanou teplotu
ochrany proti zamrznutí na jinou hodnotu.
e) Současným stisknutím tlačítek Λ a V se vrátíte do automatického
programování.
Změna času dopředu a dozadu (zimní a letní čas)
Tento proces je prováděn automaticky. Je-li možnost automatické
změny vypnutá, tak postupujte podle níže uvedeného postupu.
Změna z letního času na zimní(hodiny dozadu)
Držte stisknuté tlačítko-.
Změna ze zimního času na letní(hodiny dopředu)
Držte stisknuté tlačítko+.
96
Page 97

97
Dálková změna na režim/z režimu termostatu
Vybrané modely jsou vybavené možnostmi, které umožňují
telefonickou aktivaci nebo pomocí okenních kontaktů přepnout
jednotku do/z režimu termostatu. Požadovanou teplota v době, kdy je
budova opuštěná nebo když jsou otevřená okna je možné řídit až po
nastavení dle Programování pokročilých uživatelských funkcí krok
10, (strana 99).
Současným stisknutím tlačítek Λ a V je možné tuto možnost lokálně
zrušit.
CZ
Možnost odloženého spuštění
Termostat je vybaven možností nastavit odložený start, který v teplejších
dnech ponechá po nějakou dobu topení vypnuté za předpokladu, že
pokojová teplota v okamžiku zapnutí programu události leží blízko
naprogramované hodnoty. Jestliže je tato funkce aktivována, je možné
ji stisknutím tlačítka V nebo zrušit. Pro možnost využít této funkce
přejděte do části příručky Programování pokročilých uživatelských
funkcí krok 11, (strana 100).
Řízení optimálního startu (ŘOS)
Uživatelská příručka
Termostat je vybaven možností řízení optimálního startu. Tato funkce
vám umožňuje nastavit čas, ve kterém požadujete v místnosti
dosáhnout požadovanou teplotu. Termostat tak propočítá jak dlouho
před zahájením události je nutné systém zapnout, aby v požadovaném
čase byla v místnosti dosažená požadovaná teplota. Celkový popis této
funkce, její aktivace a způsob nastavení naleznete v části Programování
pokročilých uživatelských funkcí kroky12 & 13, (strana 100 a 101).
Page 98

CZ
Výměna baterie (pouze pro modely s bateriemi)
Jestliže jsou baterie skoro vybité, tak se na displeji
zobrazí symbol baterie.Od tohoto okamžiku máte
stále ještě 15 dní na jejich výměnu než dojde k
vypnutí jednotky.
V jednotce používejte pouze vysoce kvalitní alkalické baterie.
DŮLEŽITÉ: Po výměně baterií stiskněte a uvolněte tlačítko RESET a tím
jednotku opět restartujte. Všechna nastavená data, naprogramované
údaje a zvolená nastavení jsou udržována po celou dobu životnost
přístroje.
Uživatelská příručka
Programování pokročilých
uživatelských funkcí
Důležité: Termostat byl ve výrobním závodě nastaven tak, aby splnil
požadavky většiny možných situací, přesto je přístroj vybaven dalšími
možnými funkcemi, které mohou zlepšit komfort, pohodlí a efektivní
využití energie pomocí vašeho regulátoru. Přístroj je vybaven jak řadou
režimů Programování pokročilých uživatelských funkcí tak řadou
Instalačního pokročilého programování.
Zadávání režimu Programování pokročilých uživatelských
funkcí
Do režimu Instalačního pokročilého programování se dostanete
provedením níže uvedených instrukcí: Stiskněte a držte stisknutá
tlačítka V a PROG po dobu 3 sekund a tím vstoupíte do prostředí
Uživatelského pokročilého programování.
98
Pomocí tlačítek + a – můžete rolovat dopředu a dozadu mezi
jednotlivými nabídkami a pomocí tlačítek Λ a V můžete měnit hodnotu
vybrané nabídky. Blikající číslice na pravé straně displeje vyznačuje
číslo zvolené možnosti.
Page 99

99
Nabídka 1 - Aktivace a deaktivace A/B programování
(Nabídka 41 nastaven na 5 + 2)
Tato nabídka umožňuje zapnout nebo vypnout možnost A/B
programování. Tiskněte tlačítko +, dokud se neobjeví nabídka
1, pomocí tlačítek Λ a V zvolte požadované nastavení
Vypnuto: jednotka může pracovat v režimu 5/2 nebo 24 hodin
CZ
Nastavení 0
Nastavení 1 Zapnuto: Funkce A/B programování je aktivována
Nabídka 3 - Pravidlo změny letního/zimní času dle regionu
Tato nabídka umožňuje nastavit automatickou změnu letního
a zimního času dle zvoleného kalendáře. Tiskněte tlačítko +,
dokud se neobjeví nabídka 3 pomocí tlačítek Λ a V zvolte
požadované nastavení
Nastavení 0 Vypnuto.
Nastavení 1
Nastavení 2 Evropské pravidlo. (Tovární nastavení)
a to v závislosti na nastavení instalačního technika (tovární
nastavení)
Ruční: Uživatel musí změnit čas pomocí tlačítek + (zvýšení
o hodinu) nebo – (snížení o hodinu)
Uživatelská příručka
Nastavení 3 Pravidlo pro USA (od roku 2007)
Nastavení 4 Pravidlo pro USA (do roku 2007)
Nabídka 4- Nastavení časového pásma
Tato nabídka umožňuje nastavit časové pásmo a zároveň
úpravu času na správnou hodnotu. Tiskněte tlačítko +,
dokud se neobjeví nabídka 4, pomocí tlačítek Λ a V zvolte
požadované nastavení.
Modely pro Velkou Británii: ponechat tuto možnost na hodnotě
Nastavení 0
továrního nastavení, tzn. na 0.
Modely pro střední Evropu: ponechat tuto možnost na hodnotě
Nastavení 1
továrního nastavení, tzn. na +1.
-12 hodin +14 hodin
Zbytek světa: pomocí tlačítek Λ a V zvolte nastavení odpovídající časovému
pásmu, které se odvíjí od světového času (GMT), tzn. nastavení času odpovídající
místu instalace termostatu.
Nabídka 10 - Nastavení režimu termostatu/režimu proti zamrznutí
Tato nabídka umožňuje nastavit prioritní režim nastavení
teploty proti zamrznutí/režim termostatu. Tiskněte tlačitko +
dokud se neobjeví nabídka 10, pomocí tlačítek Λ a V zvolte
požadované nastavení
5-40°C - Tovární nastavení je 8°C, které je možné měnit v rozsahu 5 až 40°C.
Page 100

CZ
Nabídka 11 - Spuštění termostatu
Termostat může spustit systém třemi různými způsoby.
Tiskněte tlačítko +, dokud se neobjeví nabídka 11, pomocí
tlačítek Λ a V zvolte požadované nastavení.
Nastavení 0 - Normální:Vytápění se zapíná a vypíná/tlumí podle naprogramovaných
časů.
Nastavení 1 - Řízení optimálního startu (ŘOS): Tato funkce vám umožňuje
naprogramovat čas, ve kterém požadujete v místnosti dosáhnout požadovanou
teplotu.
Termostat tak propočítá jak dlouho před zahájením události je nutné systém
zapnout. Tento proces je závislý na venkovních podmínkách a může se pohybovat
v hodnotách od 120 minut do 0 minut před časem, který je naprogramován.
Toto nastavení je možné použít pouze v kombinaci s nabídkou 12, aby tak bylo
Uživatelská příručka
možné dosáhnout optimálního nastavení v konkrétní budově, kde je termostat
nainstalován.
Nastavení 2 - Odložený start: Tato funkce představuje alternativu k funkci ŘOS.
Nastavte normálně čas události, který odpovídá času doby ohřevu budovy
v průměrně teplý den. Termostat monitoruje čas zapínání aktuálni teplotu
a požadovanou teplotu a dobu odloženého startu zapnutí systému v těch
případech, kdy je aktuální teplota blizko teplotě naprogramované.
Nabídka 12 - Řízení optimálního startu nastavení předehřevu
Tiskněte tlačítko +, dokud se neobjeví nabídka 12, pomocí
tlačítek Λ a V zvolte požadované nastavení (pouze aktivní
v těch případech kdy je v nabídce, 11 zvolené nastavení
1). Řízení optimálního startu musí být nastaveno tak, aby
byla zohledněna tepelná charakteristika budovy. Pomocí tlačítek Λ a V zvolte
požadovanou dobu předehřevu. V tabulce dole jsou uvedená typická nastavení.
Jestliže teplota v budově nebude dosažená v požadovaném čase, tak zvyšujte
nastavení každý den o 15 minut, dokud nedosáhnete požadované nastavení.
Jestliže teplota v budově bude dosažená před požadovaným časem tak snižujte
nastavení každý den o 15 minut, dokud nedosáhnete požadované nastavení.
0:15 15 minut, horkovzdušné soustavy, dobře zaizolované budovy
0:30 30 minut, horkovzdušné soustavy, dobře zaizolované budovy
0:45 45 minut, horkovzdušné soustavy, špatně zaizolované budovy
1:00 60 minut, radiátorová soustava, lehké a dobře zaizolované budovy
100
1:15 75 minut, radiátorová soustava, lehké a středně dobře zaizolované budovy
1:30 90 minut, radiátorová soustava, středně těžké a špatně zaizolované
budovy
1:45 105 minut, radiátorová soustava, těžké a dobře zaizolované budovy
2:00 120 minut, radiátorová soustava, těžké a špatně zaizolované budovy
 Loading...