

Page 1
Service Kit Instructions
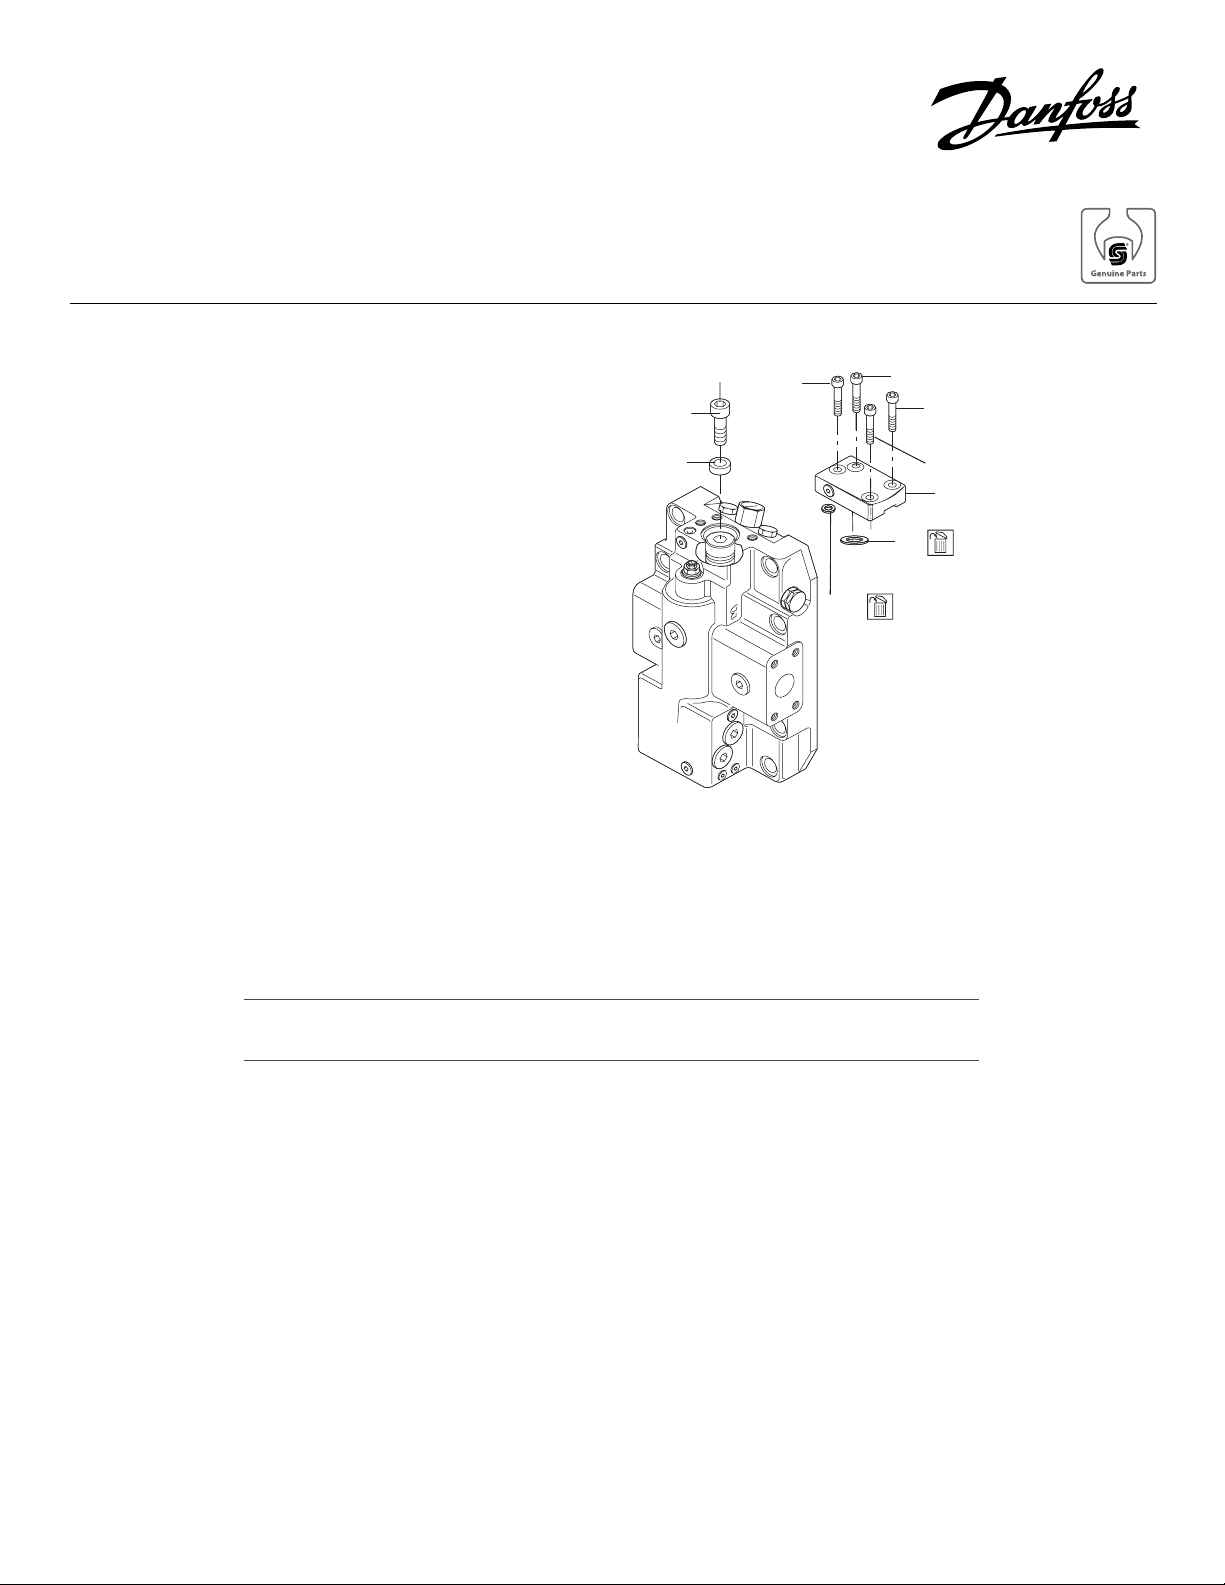
Series 51
Servo cover replacement
Replace servo cover this way:
1. Remove the 4 screws (items G24)
retaining the G260 servo cover
Series 51 Maximum displacement limiter
G24
F10*
G24
• using an 8mm hex [Allen]
wrench for 160 cc motors,
F20*
or
G36
• a 10 mm hex [Allen] wrench
(250cc motors).
G100
2. Remove the G260 servo cover and
G36 and G100 O-rings.
3. Inspect G36 and G100 O-rings.
• Replace, if necessary, with P/N
792739 (G100) and 364076
(G36 for 160 cc), or 707737
(G36 for 250 cc).
• Do not discard any O-ring until you are certain that you have the correct
replacement.
4. For motors with 100% maximum displacement, remove the F10* displacement
limiter screw using a 10 mm hex [Allen] wrench for 160 cc and 250 cc motors. Servo
stops against the servo cover.
G24
G24
G260
Motors with less than 100% displacement require the displacement limiter F10* screw
and F20 spacer.
5. Install the G36 and G100 O-rings.
6. Install the new servo cover.
7. Install the G24 servo cover screws.
8. Torque the G24 servo cover screws to:
• 78 Nm [58 lbf•ft] for 160cc motors using an 8mm hex [Allen]
wrench.
• 110 Nm [81 lbf•ft] for 250cc motor using a 10mm hex [Allen] wrench.
© Danfoss, 2013 BLN-10245 • Rev AA • September 2013 1
 Loading...