

Page 1
Instruction
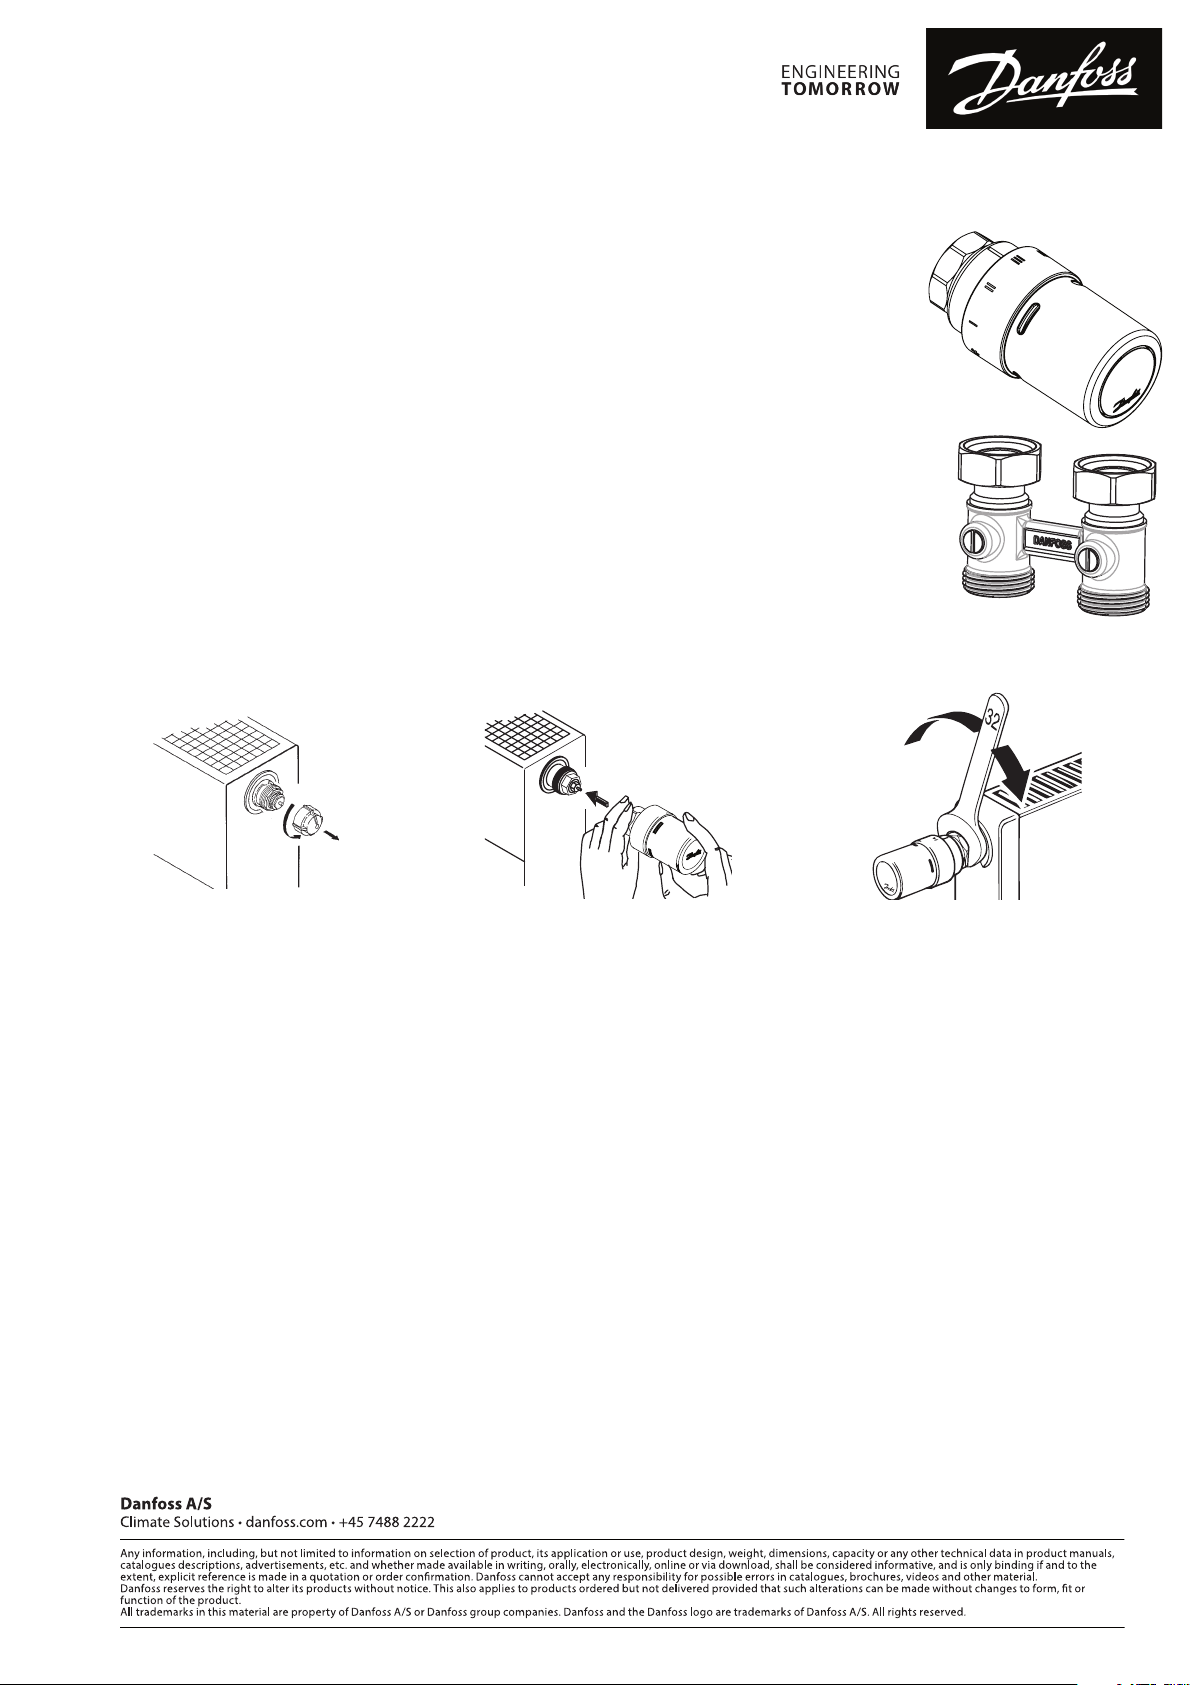
Thermostatic sensor RAX-K
Sets for systems with flow coming from the bottom, with an M30x1.5 built-in valve insert:
- thermostatic sensor RAX-K
- H-Piece, type RLV-KB
Conçu pour les radiateurs avec arrivées par le sol et équipés d’un insert M30x1.5:
- tête thermostatique RАX-К
- raccord en H, de type RLV-KB
Sets voor radiatoren met vloeraansluiting en M30x1,5 inbouwventiel:
- thermostatisch element RAX-K
- H-blok RLV-KS
1 2 3
Danfoss Thermostatic Sensors RAX-K
1. Remove the protective cap from the valve insert by turning it anticlockwise.
2. Ensure that the setting mark on the sensor is positioned at the top before mounting the sensor.
3. Mount the thermostatic sensor on the valve and tighten it with a 32 mm spanner (max torque 15 Nm).
Têtes thermostatiques RAX-K Danfoss
1. Retirez le capuchon de protection de l’insert : pour cela, tournez-le dans le sens contraire des aiguilles d’une montre.
2. Assurez-vous que le repère de réglage de la tête est situé sur le haut avant de monter la tête.
3. Fixez la tête thermostatique sur l’insert et serrez-le au moyen d’une clé plate de 32 mm (avec un couple de 15 Nm maximum).
Danfoss thermostatisch element RAX-K
1. Draai de beschermkap los van het inbouwventiel.
2. Zorg dat het merkteken voor instelling van het element bovenaan staat.
3. Monteer het element op het inbouwventiel met een 32 mm steeksleutel (max 15 Nm moment).
© Danfoss Climate Solutions | 03/2022 | AN408535149374en-000101
Page 2
Instruction
1)
1)
!
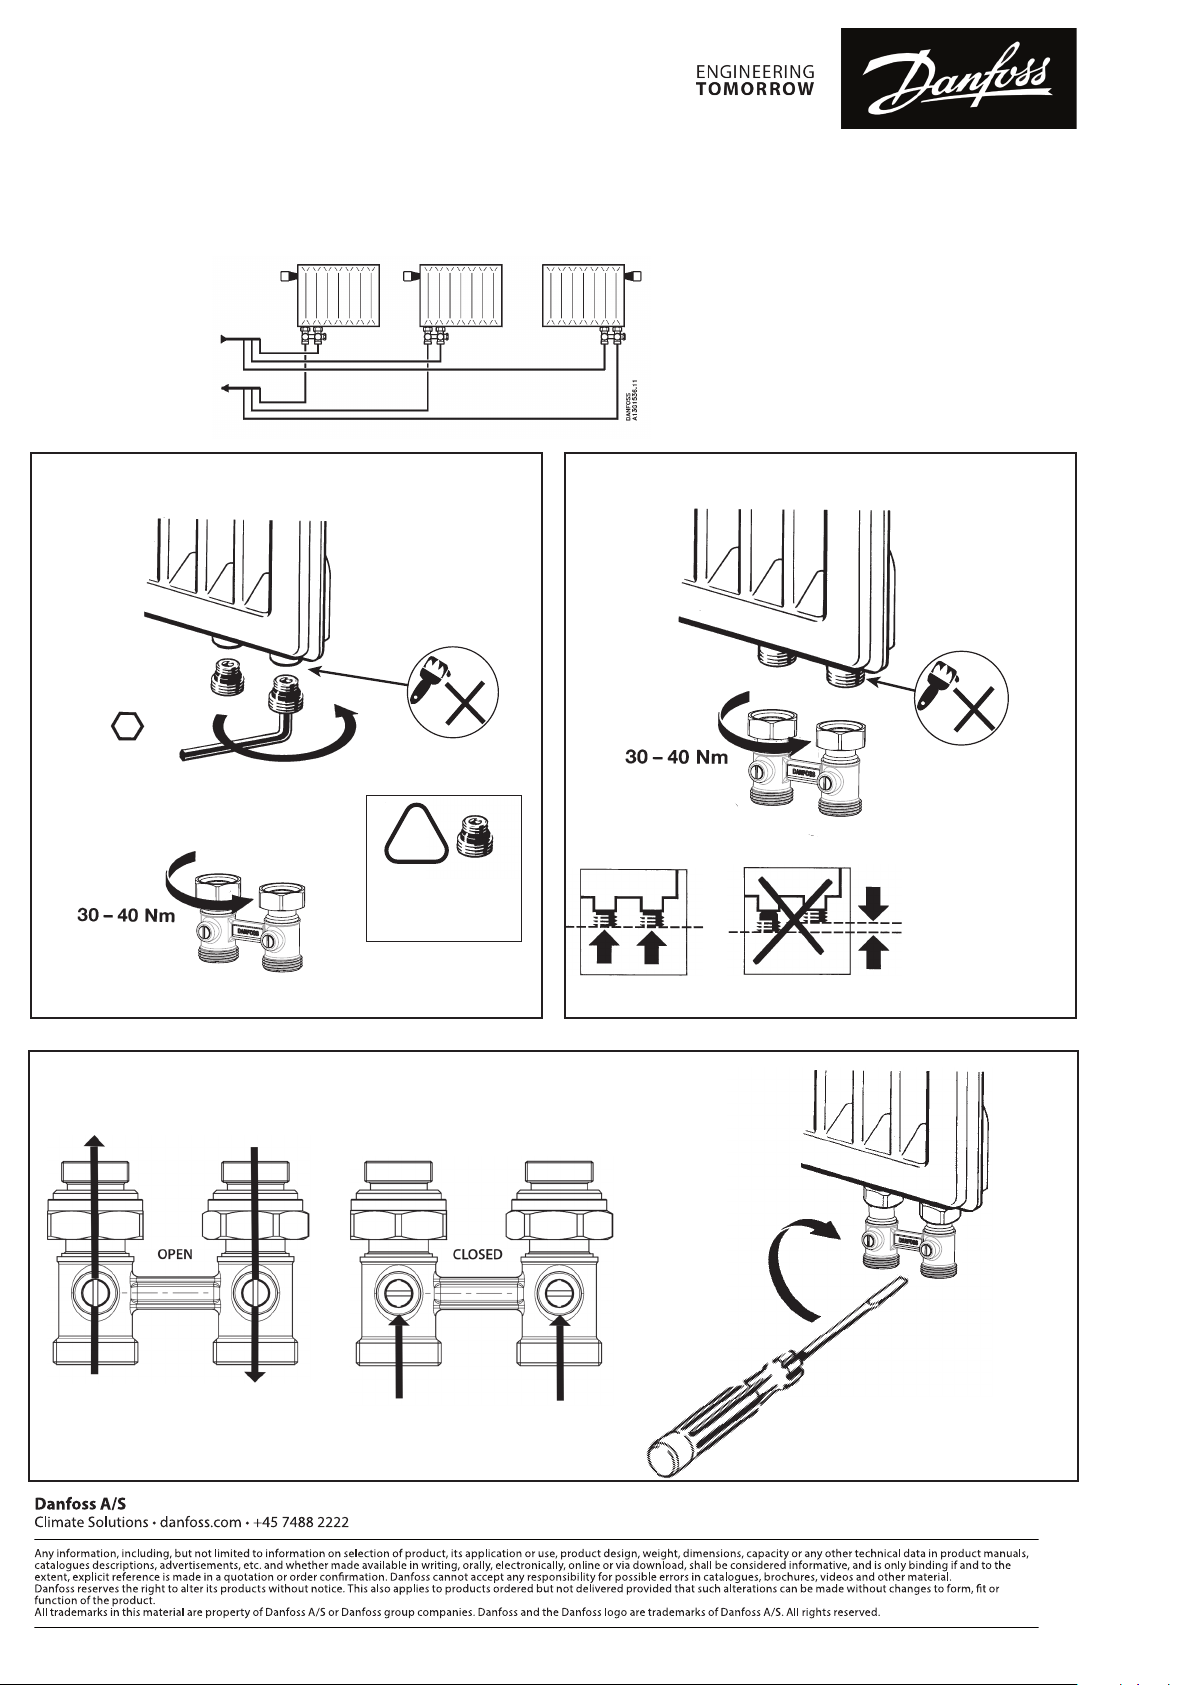
Do not re-use
adapter after
disassembly
H-piece valves, type RLV-KB
two pipe system
G½ G¾
10mm
20 - 30 Nm
2)
! The radiator
has to follow
DIN V3838
© Danfoss Climate Solutions | 03/2022 | AN408535149374en-000101
 Loading...