

Page 1
INSTRUCTION
Combi-set with living sensor & bi-directional straight valve
013R9549
013R9549
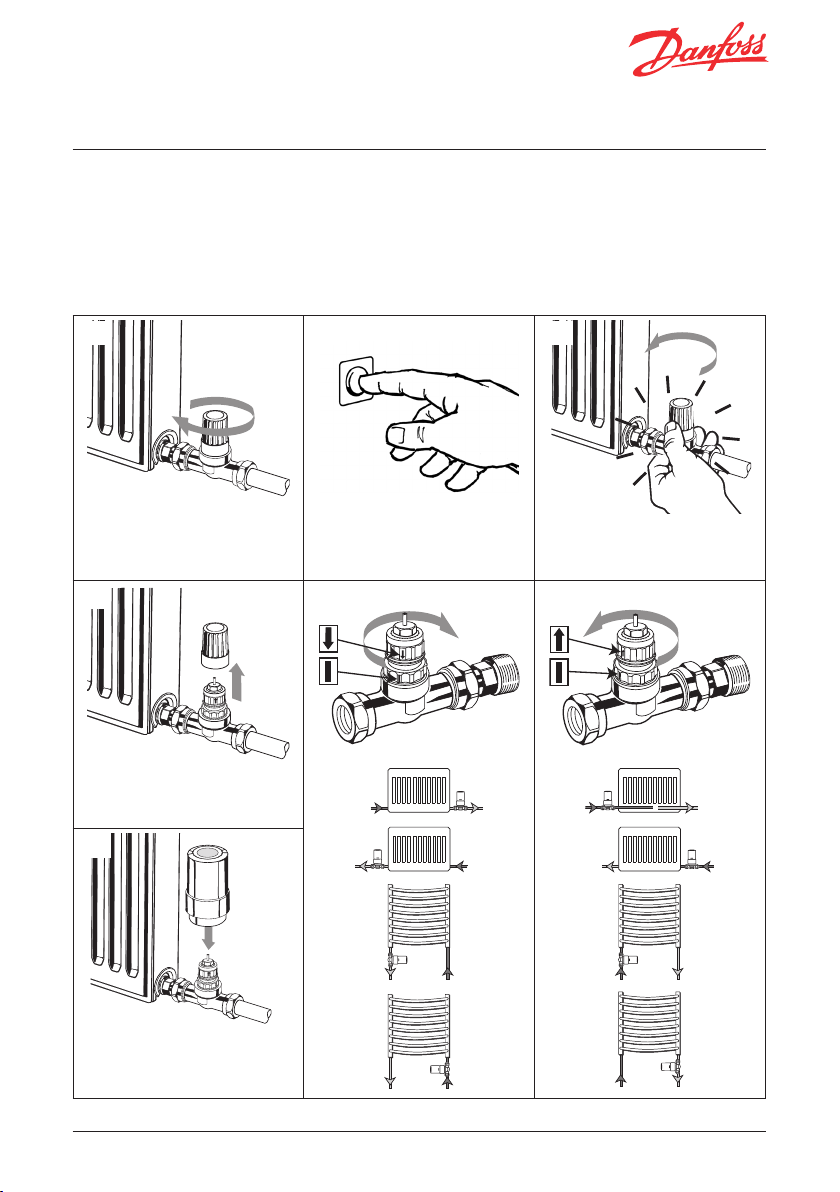
Installing the bi-directional valve
The valve is bi-directional and can be installed horizontally
or vertically in either flow or return pipe.
A built in flow direction selection feature can be used to
eliminate the risk of water hammer.
Note! Maximum pressure drop should not exceed 0.45 bar.
1. 2.
Close all radiator valves by turning
the valve cap clockwise.
Leave system to cool down.
4.
Start boiler/heating. Open a valve and determine flow
4a.
Troubleshooting
In the unlikely event of water hammer being encountered,
turn the setting ring to the another setting.
Alternatively, if commissioning the whole system, establish
the flow direction through each valve as shown below.
If the flow direction needs to be changed there is no need
to remove the valve, simply turn the setting ring.
3.
direction. Which pipe heats up first?
4b.
Remove cap and turn setting ring (by
hand) according to 4a. and 4b.
5.
Repeat step 3 and 4 until all valves
have been set correctly. To mount the
living sensor, see next page.
Danfoss Heating Solutions VIGWF102 © Danfoss 02/2012
V
V
Page 2
INSTRUCTION
Combi-set with living sensor & bi-directional straight valve
013R9549
013R9549
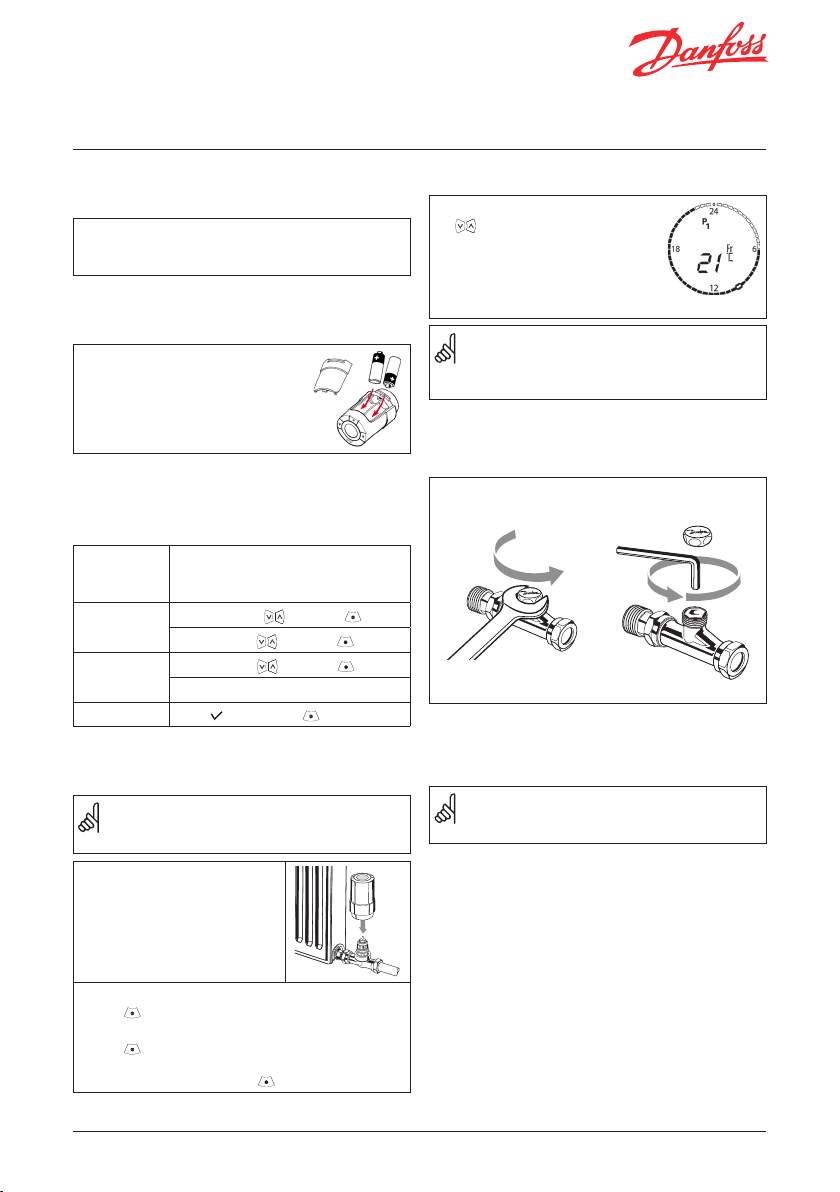
Preparing the living sensor
for installation
The living sensor is supplied with two alkaline type AA
batteries, a 2 mm Allen key and adapters for Danfoss RA
valves.
Inserting the batteries
Remove the battery cover and insert
the batteries.
Make sure the batteries are correctly
oriented.
Setting time and date for the first time
(only living eco®)
Once the
batteries are
installed
Set the time
Set date
Confirm setting When flashes, press to confirm.
The time will flash in the display - 23:59.
Set hours using and press .
Set min. using and press .
Set date using and press .
Format: day/month/year (DD/MM/YYYY)
Adjusting the temperature
Set the desired temperature by pressing . Default setting is 21°C.
This also allows the temperature to be
changed temporarily during a setback
period, without having to change the
program or period.
If the comfort temperature is changed, e.g. from
21°C to 22°C, living eco® will remember this change,
and the comfort temperature will remain 22°C after
the next setback period.
Sets with lockshield valves
Lockshield valve (type RLV-D) is only included in sets with
code numbers 014G0010 and 014G0061.
Removal of
protective cap
Balancing
Installing the living sensor
M must be flashing in the display prior to installing.
If not, see installation mode in separate living eco®/
living connect® installation guide.
1. Mount the living sensor on the
valve and tighten with the Allen
key.
2. For living connect®:
Press for approx. 3 seconds to fix the sensor.
For living eco®:
Press for approx. 3 seconds to enter the function
menu.
When a small M flashes, press again to fix the sensor.
Danfoss Heating Solutions VIGWF102 © Danfoss 02/2012
V
Do not cover the thermostat!
The thermostat opens and closes as determined by
the temperature around it. Therefore the sensor must
never be hidden behind thick curtains, furniture, etc.
V
 Loading...