

Page 1

ED-12126
Product 1196
Rev 13 – 28 June 2005
All Sport® 3000 Series
ED-12126 Rev 11 – 28 July 2006
Control Console
Operation Manual
DAKTRONICS, INC.
Copyright © 2000-2004
All rights reserved. While every precaution has been taken in the preparation of this manual,
the publisher assumes no responsibility for errors or omissions. No part of this book covered
by the copyrights hereon may be reproduced or copied in any form or by any mea ns – graphic,
electronic or mechanical, including photocopying, taping or information storage and retrieval
systems – without written permission
of the publisher.
All Sport® and Tuff Sport™ are trademarks of Daktronics, Inc.
Page 2

Reproduction Reference
ED-12126 – Product 1196
All Sport 3000 Operation Manual
1. This page is for reproduction reference only and will not be included in the
manual.
2. This manual is to be copied on FRONT AND BACK PAGES -8 ½ x 11 paper.
Note: The first two pages, the Cover Page and the Copyright Page, uses only
the front of the page (blank on back). Section heading pages always start on
a new page, never on the back of another page.
3. The following manuals are to be added to the back of this manual in
numerical order, with labeled, white tabbed dividers: None
4. The following drawings are to be inserted in the Appendices in
alphanumeric order:
Print all drawings back-to-back, and print all drawings A-size.
Appendix A: Reference Drawings
A-115078 A-124689 A-135163
A-115079 A-124690 A-135794
A-123783 A-125316 A-180566
A-123940 A-125415 A-180922
A-123941 A-125417 A-180923
A-124686 A-126174 A-207640
A-124688 A-131941
5. Use a blue window cover and a blue back.
6. Punch all pages, window cover and back cover along the left edge and bind
with a binder.
7. Please direct questions and suggestions to Engineering Support.
Appendix B: Sport Insert Drawings
A-125290 A-129372 A-235056
A-129364 A-129374
A-129366 A-129566
A-129368 A-130828
A-129370 A-159649
Page 3

Table of Contents
Section 1: Introduction.........................................................................1-1
1.1 How to Use This Manual........................................................................... 1-1
1.2 Console Overview ..................................................................................... 1-2
Inspect for Damage.............................................................................1-2
1.3 Revision History........................................................................................ 1-3
Section 2: Basic Operation ..................................................................2-1
2.1 Console Operation.....................................................................................2-1
2.2 Sport Inserts............................................................................................... 2-1
2.3 Sport Insert Operation Concepts................................................................ 2-1
2.4 Startup .....................................................................................................2-2
2.5 Setting Radio Channels .............................................................................2-3
Single Controller Systems Channel Setting........................................2-7
Multiple Controller w/ Single Broadcast Group Channel Setting......2-7
Multiple Controller w/ Multiple Broadcast Systems Channel Setting 2-8
2.6 Common Sport Keys ............................................................................... 2-11
Start .................................................................................................. 2-11
Stop...................................................................................................2-11
Enter/Edit Key.................................................................................. 2-11
Clear/Alt Key ................................................................................... 2-11
Set Time ........................................................................................... 2-11
Count Up/Down ............................................................................... 2-13
Auto Horn......................................................................................... 2-13
Manual Horn.....................................................................................2-13
Time Out On/Off.............................................................................. 2-13
Score +1, +2, +3, +6, -1....................................................................2-14
2.7 Alt Key Functions.................................................................................... 2-14
New Game........................................................................................ 2-14
Dim ...................................................................................................2-15
Segment Timer.................................................................................2-15
Lamp Test......................................................................................... 2-16
1/10 Second...................................................................................... 2-16
2.8 Remote Start/Stop Controls.....................................................................2-16
Main Clock Control.......................................................................... 2-16
Shot Clock Control........................................................................... 2-16
Play Clock Control...........................................................................2-16
2.9 General Multipurpose Timer Information ............................................... 2-17
Standard Keys...................................................................................2-17
Accessing Time of Day....................................................................2-17
Section 3: Segment Timer....................................................................3-1
3.1 Segment Timer Information ...................................................................... 3-1
3.2 Accessing the Segment Timer...................................................................3-1
3.3 Segment Timer Keys.................................................................................3-2
First Segment...................................................................................... 3-2
Last Segment...................................................................................... 3-2
Table of Contents i
Page 4

Interval Time......................................................................................3-3
Display Interval ..................................................................................3-3
Segment Time.....................................................................................3-4
Copy Range........................................................................................3-4
Auto Stop............................................................................................3-5
Warning Time.....................................................................................3-5
Current Segment.................................................................................3-5
Reset Current Segment....................................................................... 3-5
Reset to First....................................................................................... 3-6
3.4 Edit ............................................................................................................3-6
Current Segment.................................................................................3-6
Section 4: Baseball Operations........................................................... 4-1
4.1 Baseball Keys ............................................................................................4-1
Out +1, Inning +1...............................................................................4-1
Batter ..................................................................................................4-2
Ball, Strike, Clear Ball/Strike.............................................................4-2
Hit, Error, Clear Hit/Error ..................................................................4-2
At Bat ................................................................................................. 4-3
Runs +1...............................................................................................4-3
Hits, Errors .........................................................................................4-3
4.2 Edit ............................................................................................................4-4
Inning +1 ............................................................................................4-4
Runs +1...............................................................................................4-4
Hits +1, Errors +1...............................................................................4-4
Section 5: Basketball Operations........................................................5-1
5.1 Basketball Keys .........................................................................................5-2
Set Shot Time.....................................................................................5-2
Time Out On/Off................................................................................ 5-3
Time Out.............................................................................................5-3
Period +1 ............................................................................................5-4
Team Fouls +1....................................................................................5-4
Update Player Fouls............................................................................5-4
Bonus.................................................................................................. 5-5
Possession........................................................................................... 5-5
Blank Player Foul (Update Player Foul is Set to ON)........................5-6
Blank Player Foul (Update Player Foul is Set to OFF).......................5-6
Player..................................................................................................5-6
5.2 Edit ............................................................................................................5-7
Score +1, +2, +3, -1............................................................................5-7
Team Fouls +1....................................................................................5-7
Player..................................................................................................5-8
Period +1 ............................................................................................5-8
Time Out On/Off................................................................................ 5-8
Time Out e, Time Out f ..................................................................5-9
Section 6: Football Operations............................................................6-1
6.1 Football Keys.............................................................................................6-1
Set Play Clock ....................................................................................6-1
ii Introduction
Page 5

Quarter +1 .......................................................................................... 6-3
Yards To Go....................................................................................... 6-3
Down +1............................................................................................. 6-3
Ball On ............................................................................................... 6-3
First & 10 ........................................................................................... 6-4
Possession........................................................................................... 6-4
6.2 Edit ............................................................................................................ 6-4
Score +1, +2, +3, +6, -1......................................................................6-4
Quarter +1 .......................................................................................... 6-4
Time Out On/Off................................................................................ 6-5
Section 7: Gymnastics Operations .....................................................7-1
7.1 Gymnastics ................................................................................................ 7-1
Competitor.......................................................................................... 7-1
Score................................................................................................... 7-2
Blank Display..................................................................................... 7-2
Section 8: Hockey Operations.............................................................8-1
8.1 Hockey Keys .............................................................................................8-1
Enable Penalty Clocks........................................................................8-1
Disable Penalty Clocks....................................................................... 8-1
Minor/Major Penalty..........................................................................8-1
Period +1............................................................................................8-2
Penalty................................................................................................ 8-2
Player Penalty..................................................................................... 8-2
Delete Penalty.....................................................................................8-3
8.2 Edit ............................................................................................................ 8-3
Score................................................................................................... 8-3
Period +1............................................................................................8-4
Time Out On/Off................................................................................ 8-4
Section 9: Soccer Operations..............................................................9-1
9.1 Soccer Keys...............................................................................................9-1
Half +1................................................................................................9-1
Shots on Goal +1, -1........................................................................... 9-2
9.2 Edit 9-2
Half +1................................................................................................9-2
9.3 Time Out On/Off.......................................................................................9-2
Score +1, -1........................................................................................9-3
Shots on Goal +1, -1........................................................................... 9-3
Section 10: Tennis Operations ............................................................10-1
10.1 Tennis Keys............................................................................................. 10-1
Serve................................................................................................. 10-1
Games Won...................................................................................... 10-1
Point ................................................................................................. 10-1
Advantage......................................................................................... 10-2
Deuce................................................................................................ 10-2
Tie Break.......................................................................................... 10-2
Table of Contents iii
Page 6

Reset Match...................................................................................... 10-2
Reset Game Score.............................................................................10-2
Set +1................................................................................................10-2
10.2 Edit .......................................................................................................... 10-3
Games Won......................................................................................10-3
Points................................................................................................ 10-3
Set +1................................................................................................10-3
Section 11: Volleyball Operations.......................................................11-1
11.1 Volleyball Keys.......................................................................................11-1
Match Number +1, Games +1..........................................................11-1
Games Won +1.................................................................................11-2
Serve.................................................................................................11-2
11.2 Edit .......................................................................................................... 11-2
Match Number +1, Games +1..........................................................11-2
Score +1, -1 ......................................................................................11-3
Games Won +1.................................................................................11-3
Time Out On/Off.............................................................................. 11-3
Section 12: Wrestling Operations ....................................................... 12-1
12.1 Wrestling Keys........................................................................................12-1
Match Number +1.............................................................................12-1
Period +1 ..........................................................................................12-2
Reset Match...................................................................................... 12-2
Match Score +1, +2, +3, -1............................................................... 12-2
Start Injury Time ..............................................................................12-3
Start Blood Time ..............................................................................12-3
12.2 Edit .......................................................................................................... 12-4
Blood Time.......................................................................................12-4
Injury Time.......................................................................................12-4
Match Number, Period, Team Score and Match Score.....................12-5
Section 13: Cricket Operations............................................................ 13-1
13.1 Cricket Keys............................................................................................13-1
Extras (+1,-1), Overs (+1,-1), Wickets (+1,-1)................................. 13-1
Batsman Number (Alternative Function) .........................................13-2
Batsman Facing................................................................................13-2
Score +1, +4, +6, -1..........................................................................13-2
Bowler A Info, Bowler B Info .......................................................... 13-3
Last Man...........................................................................................13-3
Last Wicket.......................................................................................13-3
Runs Reqd ........................................................................................13-3
1st Inns ............................................................................................. 13-4
Total..................................................................................................13-4
Team Out/ Declare............................................................................13-4
Umpire Light....................................................................................13-4
13.2 Edit .......................................................................................................... 13-5
Wickets +1, -1 ..................................................................................13-5
Score +1, +4, +6...............................................................................13-5
Overs +1, Extras +1 .......................................................................... 13-5
iv Introduction
Page 7

Appendix A: Reference Drawings.............................................................13-1
Appendix B: Sport Insert Drawings .......................................................... B-1
Appendix C: Sport Code Numbers ............................................................ C-1
C.1 Indoor Model Numbers .............................................................................C-1
C.2 Indoor Sport Output Table.........................................................................C-3
C.3 Outdoor Model Numbers...........................................................................C-4
C.4 Outdoor Sport Output Table......................................................................C-6
C.5 All Sport 3000 Codes used for All Sport 2500 Codes...............................C-8
Section 14:
Table of Contents v
Page 8

Page 9
Section 1: Introduction
This manual is designed to explain the operation of the All Sport® 3000 Series Control
Console. For questions regarding the safety, installation, operation or service of this system,
please refer to the telephone numbers listed on the cover page of this manual. To fully
understand this manual and the operation of the All Sport 3000 Series console; Daktronics
recommends that you read all general sections of the manual in conjunction with your specific
sport or sports.
1.1 How to Use This Manual
Important Safeguards:
1. Read and understand all instructions before beginning operation.
2. Do not drop the control console or allow it to get wet.
3. Do not let any power cord touch a hot surface or hang over the edg e of a
table or counter, which could damage or cut the cord.
4. If an extension cord is necessary, use a polarized cord with a three-prong
plug. Arrange the cord with care – away from foot traffic – so that athletes
or spectators will not trip over it or pull it from its outlet.
5. Always turn off and/or unplug the control equipment when it is not in use.
Never yank the power cord to pull the plug from the outlet. Grasp the plug
and pull it firmly to disconnect.
6. To avoid electrical shock, do not disassemble the control equipment or the
driver modules. Incorrect reassembly can cause electric shock and faulty
operation or permanent damage to the circuits.
The illustration below is an example of a Daktronics drawing label. Drawing
labels are located in the lower right corner of drawings. Each drawing bears a
label in its lower-right corner, and the drawing number is at the bottom of the
label (in the example, 7087-P08A-69945). This manual refers to drawings by
their last set of digits and the letter preceding them. The drawing illustrated
would be referred to as Drawing A-69945.
Figure 1: Daktronics Drawing Label
Introduction 1-1
Page 10
All reference drawings and sport insert drawings are grouped in Appendix A and
listed in alphanumeric order.
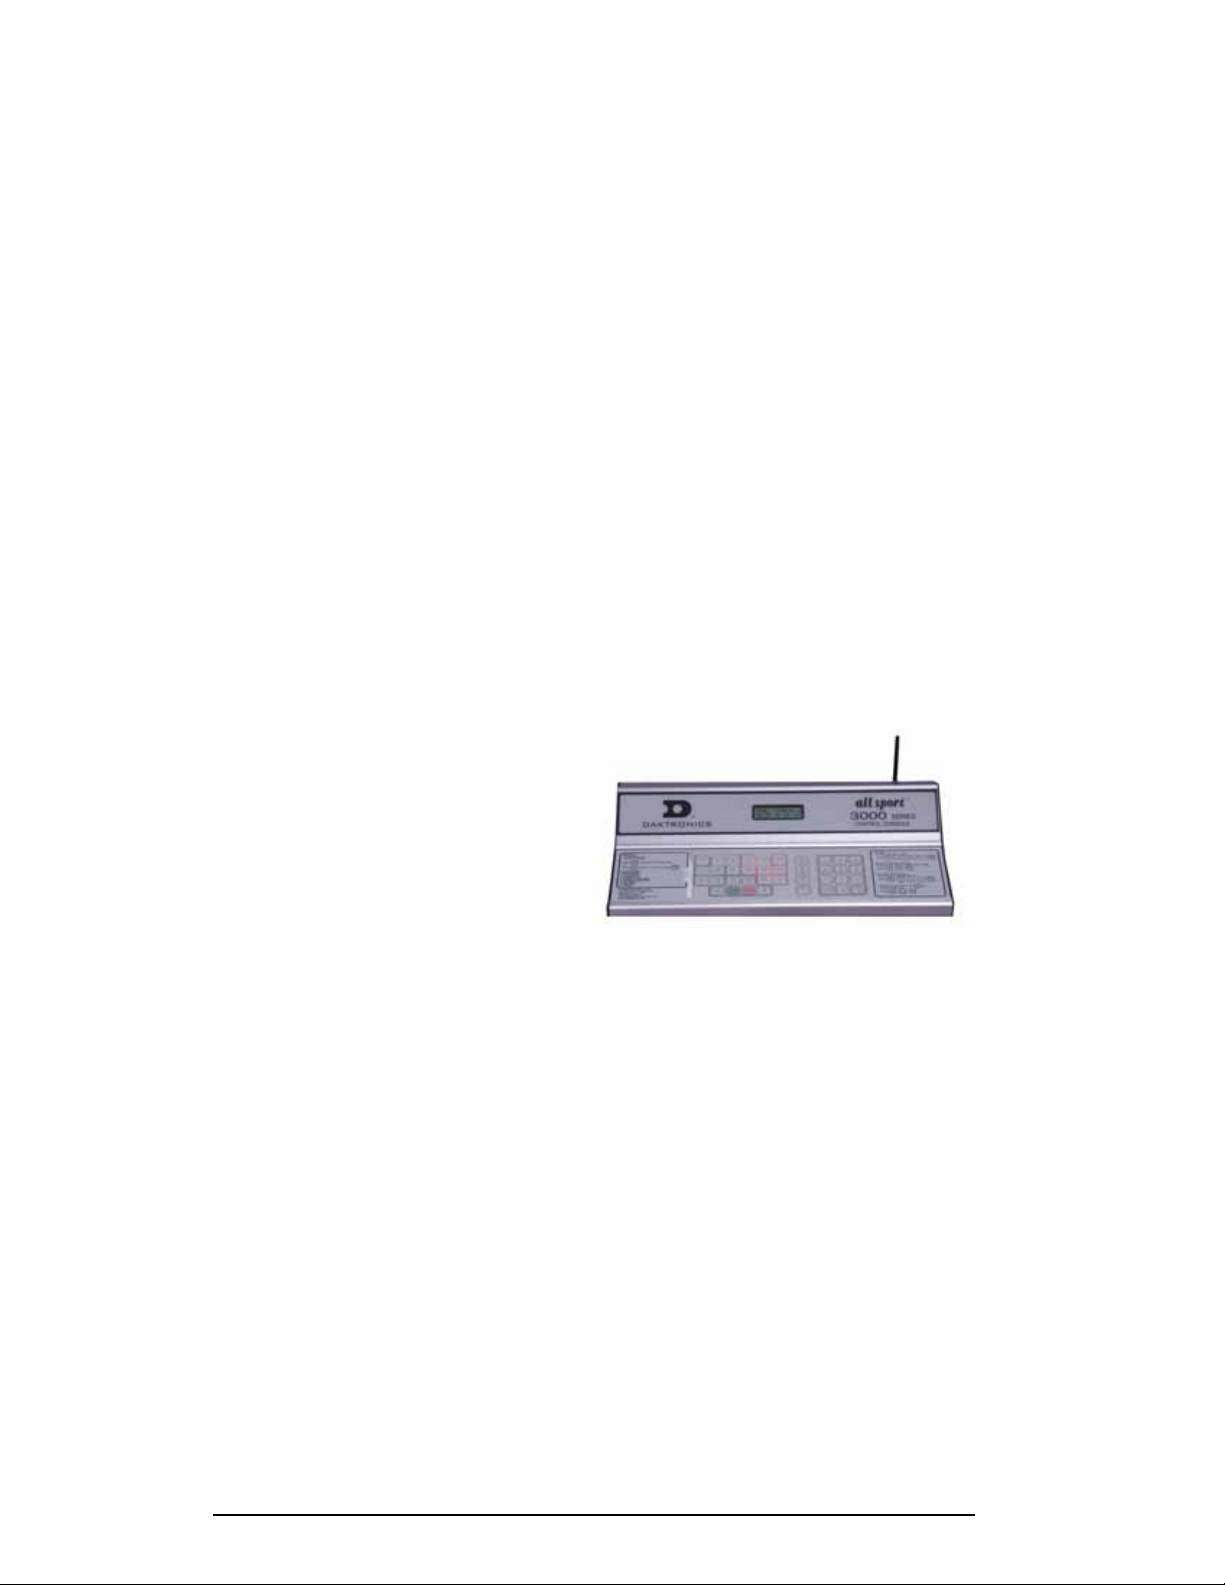
1.2 Console Overview
The All Sport 3000 Series Control Console is a state-of-the-art scoring and timing
system.
The anodized aluminum console features a sealed, "snap-action" keyboard with
changeable keyboard overlays to input event information and/or control the
scoreboards. A 32-character, two-line liquid crystal display (LCD) prompts the user
through the operation of the controller and provides vital feedback of game or event
data.
The LCD screen of the 3000 Series console is backlit to provide optimum viewing of
current event information, even in low-light areas, and an audible beep sounds to
indicate when a command has been received.
The controller features tenth-of-a-second timing, and a time of day display permits
scoreboards to display current time when not used for sporting events.
The console case is approximately
8.5" (216 mm) wide by 9" (229 mm
deep). Its maximum top height is
4.25" (114 mm). The controller
weighs 7 pounds.
The console operates on 120 V AC
power (60 Hz, 6 watts maximum).
Options include an external battery
that permits scoreboard control for
up to 30 hours, and wireless remote control. A 230 V, 50 H z model is also available.
Console event data may be transmitted through standard wire signal cabling or fiberoptic cable. With the radio-control model, transmission is wireless remote via FM
radio signal.
As a safety feature, this product has a three-wire, ground-type plug equipped with a
third (grounding) pin. This plug only fits into a grounding-type power outlet. (If you
are unable to insert the plug into the outlet, contact a qualified electrician to replace
the obsolete outlet.)
The All Sport 3000 is ETL-listed to UL
Figure 2: All Sport 3000 with Antenna
®
standards, CSA-tested and FCC-certified.
Inspect for Damage
When you open your console packages, inspect for shipping damage, such as dents
or rattles. Verify that all equipment is included as itemized on the packing slip, and
immediately report any deficiencies to Daktronics. Save all packing materials for
shipping in case warranty repair or exchange becomes necessary.
1-2 Introduction
Page 11

1.3 Revision History
Version 1.0
Release Date: 9 May 2000
Initial software release.
Version 1.0.1
Release Date: 14 Aug 2000
Added an indicator to show the status of Auto Horn, a small "h" that will
display with the clock direction arrow when Auto Horn is enabled.
Added score x100 for home and guest to football FB8 boards and to soccer
for SO8 boards. This change was made for a new rugby scoreboard, MS-
2007.
Changed the Set Time of Day (TOD) function so it would not allow a time
of 0 hours.
Changed New Game so it would not reset TOD to 12:00:00.
Added Multipurpose Timer Code 90 for two-, four- and six-digit time
displays.
Added Code 91 for dedicated Segment Timer displays.
Version 1.0.2
Release Date: 28 Nov 2000
Added Manual Horn button and Reset button to remote switches on the
Multipurpose Timer. The Reset function is only available on shot clock
jack J7. Reset will reset the clock to the period time when in Count Down
mode and reset to 0:00 when in Count Up mode.
Corrected the problem of the Remote Manual Horn switch not working in
some sports.
Corrected a problem with the clock stopping at the period time when in
Count Up mode. It would not stop at the period end if there were a value in
min x10 or hour x10.
Added Home and Guest Penalty keys for soccer used on the SO-1424
display.
Version 1.0.3
Release Date: 17 Jan 2001
Added output for TI-218 in baseball at Address 2.
Made the dimming select three levels of dimming.
Introduction 1-3
Page 12

Corrected the problem of the period end time not being saved, after a loss of
power, for a resume game.
Corrected the problem in wrestling of the match number edit showing two
digits instead of three digits.
Reco nfigured the Segment Timer so it could exit with the New Code key.
Version 1.0.4
Release Date: 21 Dec 2001
Added SO-2008 address 17 to soccer and football.
Added radio channels up to 75.
Made segment timer capable of counting up.
Added FB-2005 to address 11 in football.
Added BA-2010 to address 61 in baseball.
Changed basketball to keep stats on player/fouls and added timeouts for
Tuff Sport
™
displays. Tuff Sport display address 17 was added to
basketball, volleyball, hockey, and wrestling.
Version 2.0.0
Release Date: 15 Jan 2003
Fixe d the reset in wrestling to handle tenths of second mode.
Fixe d the segment timer code so it will retain segment memory. Set the
default time to 5:00 for segments.
Added code number and version to output to address 254 for True Time.
Fixe d the Time Out On/Off key in basketball to turn off the timer.
Add ed address 22 to the multi-purpose timer.
Version 2.1.0
Release Date: 30 Apr 2003
Made All Sport codes power up in game time display, not TOD.
Changed basketball so the Blank Player Foul key can post a player foul if
the Foul Update setting is turned off.
Added two-digit time to address 61 in code 5 for baseball for the model
BA-2012.
1-4 Introduction
Page 13

Fixed the radio channel select to work for Gen IV radios after exit from the
production test.
A dded codes for support of 12.8k protocol on the AS251 0 codes.
Version 2.1.1
Release Date: 30 Mar 2004
Changed volleyball to blank game scores when game +1 is pressed.
Added a mode for baseball on the SO-2008.
Added the setting of default # of timeouts on the Time Out On/Off key in
basketball, volleyball, football, soccer and hockey.
Added clear of team fouls to basketball, by using the alternate function on
team fouls +1 key.
Added gymnastics mode to the matside junior with code 015.
Added volleyball mode to the matside junior.
Added basketball mode to the matside junior.
Version 2.1.2
Release Date: 22 July 2004
Added a code for test console in 12.8k protocol (code 100).
Fixed a problem with segment timer that was introduced in version 2.1.1
Version 2.1.3
Release Date: 7 Feb 2005
Added 24 hour time selection for time of day setting.
Removed the MDP blank on power up and added to when code is selected
for MDP codes (those under 100).
Version 2.1.4
Release Date: 23 June 2005
Added address 14 to basketball for All Sport CG.
Added a new Cricket code for small and medium size boards.
Introduction 1-5
Page 14
Section 2: Basic Operation
The console face consists of a two-line by 16-character liquid crystal display (LCD) and
sport-specific inserts. In most cases, the top line of the LCD shows the main clock time, the
direction the clock is counting, and when the main horn is sounding. Generally, the bottom
line of the LCD shows the home and guest team scores.
2.1 Console Operation
Throughout the manual the names or letters of keys on the keyboard are enclosed in
angle brackets, for example, <ENTER>. Screen prompts and scoreboard instructions
typically appear in boldface type. Keys and functions common to all sports are
explained in Section 2.5. All of the keys that pertain to a specific sport code insert
are explained in detail in the section of the manual describing console operation for
that specific sport.
2.2 Sport Inserts
The All Sport 3000 Series uses sport inserts to allow a single console to control
multiple sports. Select the proper insert (refer to the chart below) and slide it into the
insert opening on the left side of the console until it stops. To remove a sport insert,
pull on the tab that extends from the left side of the console. The insert will slide out
easily.
If you lose or damage an insert, you can use a photocopy of the insert drawing
(located in the Appendix) until you can order a replacement.
Sport Insert Number Number Code
Baseball LL-2469 05
Basketball LL-2465 01
Football LL-2470 06
Hockey LL-2468 04
Soccer LL-2471 07
Tennis LL-2481 08
Volleyball LL-2466 02
Wrestling LL-2467 03
Segment Timer LL-2472 Alt Function Key
Basketball Tuff Sport LL-2539 01 After v.1.0.4
2.3 Sport Insert Operation Concepts
A sport insert identifies the action keys required in the normal course of operation
for a specific sport. In most cases, pressing a key immediately changes the
scoreboard. Sometimes the operator must press a sequence of keys before a change
displays on the scoreboard. Keys that require entry of additional information are
marked by a dot, for example, <SET TIME >. The additional information required
usually is a number followed by the <ENTER> key.
Basic Operation 2-1
Page 15
Keys with arrows activate an indicator (possession, bonus, etc.) on the scoreboard.
The direction of the arrow selects the appropriate team (home or guest).
Some keys have a +1, +2, or +3 symbol. Pressing one of these keys once increments,
or increases, the corresponding field on the scoreboard (such as team score or period)
by the value printed on the key. A key with a -1 decrements (decreases ) by one.
On most inserts, certain keys have been grouped together under the heading Home
or Guest. These keys are team keys and work the same for both teams. They affect
the statistics for that particular team. Keys not under one of these two headings are
game keys, general keys that control the progress of the game (such as period or
quarter).
Other keys have been grouped into blocks to emphasize that these keys work
together.
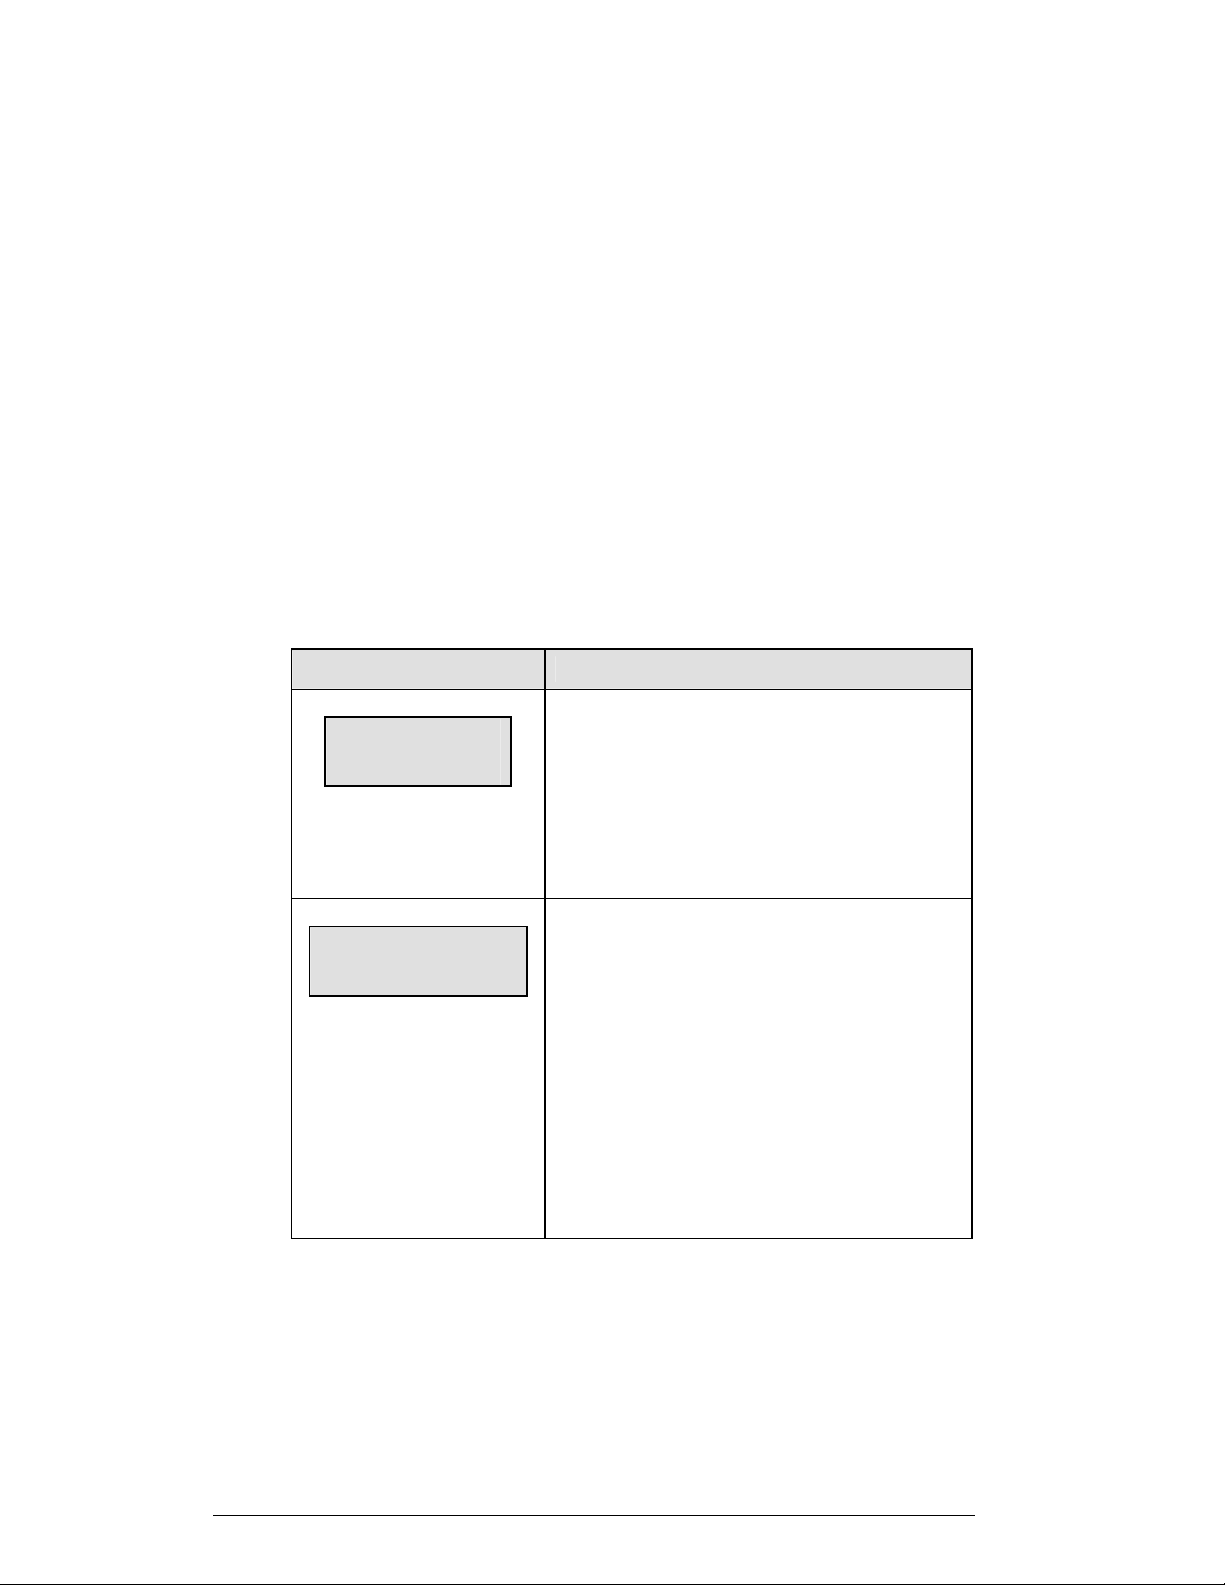
2.4 Startup
LCD Display Action
AS-3100 v1.0.0
ED-12107
PREV CODE nn
ENTER TO RESUME
nn = last code selected
The console performs a self-test when it is powered on.
During the self-test, a message displays the version of
the standard software loaded in the console.
V = version number and revision number
ED = standard software number
When the self-test completes, a prompt displays the
code number for the last game played. This is useful
during a game when power to the console may be lost
or interrupted.
Press <ENTER> to resume the last game stored in
memory. The console is now ready for game operation.
Press <CLEAR> to start a new game or change to a
different sport. The console will prompt for a new code
number as shown below.
(Continued on next page)
2-2 Basic Operation
Page 16
(Continued from preceding page)
LCD Display Action
SELECT CODE
CODE nn
nn = last code selected
RADIO SETTINGS
BCAST Y CHAN XX
The LCD will toggle
these screens
Enter to accept
clear to modify
The Select Code prompt allows the operator to accept
the last code selected (displayed on the second line) or
enter a new code.
To accept the code shown, press <ENTER>.
To select a new sport code:
1. Get the code number from the sport insert or
the section of the manual for that sport.
2. Use the number keys to enter the new two-digit
code.
Press <ENTER>.
The LCD shows the current radio settings along with a
prompt to accept or modify these values.
If the radio settings are correct, press <ENTER>
If these values are incorrect, press <CLEAR>
2.5 Setting Radio Channels
Reference Drawings:
Channel Selection;
Single Control Console, Gen IV ............................Drawing A-180566
Channel Selection;
Single Broadcast Group; Gen IV...........................Drawing A-180922
Channel Selection;
Multiple Broadcast Group, Gen IV.........................Drawing A-180923
Basic Operation 2-3
Page 17

The radio receiver units used in the scoreboards have a channel-setting switch that
can be set from 1 through 8 (channels 0, and 9-15 are not used). A radio receiver will
accept data from a console transmitter with the same channel (and broadcast group)
setting. The drawings, listed above show how to install the All Sport console in order
to operate one scoreboard or multiple scoreboards at a time.
The receivers also have a jumper that can be used to select broadcast group 1, 2, 3, or
4. A “Broadcast Group” defines a group of radio receivers that in addition to
“listening” to the channel selected on the channel switch will also “listen” for data
broadcast on their broadcast channel. There are a total of four broadcast groups
available.
In this type of system, the receiver unit at the scoreboard must have the channel
switch set to a specific channel. The operator must know which channel the board is
set on. The operator must then enter the specific channel during console startup when
prompted to do so.
Each radio receiver will accept data sent from the broadcast channel of its respective
broadcast group. This is selected by setting the transmitter radio (from the console)
to the respective broadcast group (either 1, 2, 3, or 4). Every radio receiver will also
accept data sent from the “Master Broadcast” channel. This is selected when a
transmitter (console) radio is set to Broadcast Group 0 (BCAST 0) and Channel 0.
The channel number and broadcast group set on the ra di o i nstal l ed in each
scoreboard can be verified by cycling power to the scoreboard. Approximately seven
seconds after power up, the scoreboard will show the current channel in the
scoreboard clock digits. A CXX will first be shown where XX is the current radio
channel number. This will be followed by BXCY where X is the current broadcast
group and Y is the current channel number within this broadcast group.
There are three different radio scenarios that can be accomm odat e d.
1. Single Controller System:
In a Single Controller system, all radio receivers and all scoreboards receive
signal from the same All Sport console at all times. The default channel and
broadcast group settings on the receiver are not typically modified. An
example of this type of system is a typical high school football installation.
2. Multiple Controller System With a Single Broadcast Group:
In a Multiple Controller system with a single broadcast group, there are
additional All Sport Controllers for controlling multiple scoreboards. There
is never a scenario where groups of scoreboards that were run by individual
controllers need to be run by a single controller. An example of this type of
system is a softball complex with multiple fields and a scoreboard on each
field.
2-4 Basic Operation
Page 18
3. Multiple Controller with Multiple Broadcast Groups:
In a Multiple Controller with Multiple Broadcast (Split Court Operation)
system, there are additional All Sport Controllers that can control multiple
scoreboards. The broadcast group jumper is used to select broadcast group
1, 2, 3, or 4. By changing All Sport settings to a Broadcast address, a single
All Sport Controller can control all scoreboards or specific groups of
scoreboards (defined by the broadcast group). One example of this scenario
is split court operation in Basketball installations, where scoreboards are
used to score multiple games at once, but can be grouped together to show
one game if necessary. Refer to the drawings listed on the previous page
for more information.
The All Sport Console will automatically detect when a radio transmitter is installed
and will prompt the user for transmitter settings.
The All Sport Console will show the current transmitter radio status on the LCD
when a code is entered. The table on the next page describes the broadcast groups
and channel settings.
LCD Display Action
RADIO SETTINGS
BCAST Y CHAN XX
The LCD will toggle
these screens
LCD Display Action
The LCD shows the current radio settings along with a
prompt to accept or modify these values.
If the radio settings are correct, press <ENTER>
If these values are incorrect, press <CLEAR>
If <CLEAR> is pressed to modify the radio settings, the
LCD at the left is shown, allowing edit of the Channel or
Broadcast group setting.
(Continued on next page)\
(Continued from previous page)
Basic Operation 2-5
Page 19
Edit the Broadcast Setting. Use the number keys to enter
the desired broadcast group and press <ENTER> to
accept.
Enter to accept
Clear to modify
The bottom line shows the
current setting
Bcast group 1
Radio chan 01
The default setting is
Broadcast 1
Channel 1
2-6 Basic Operation
The asterisk will move to the channel setting. Use the
number keys to edit this value and press <ENTER> to
accept. Edit the channel number to the desired value and
press <ENTER> to accept.
Broadcast
Group
Channel
Setting
Control
Scoreboards
0 0
All
Scoreboards
0
All in BCAST
Group 1
1
1-8
Set to
corresponding
BCAST 1
Channel
0
All in BCAST
Group 2
2
1-4
Set to
Corresponding
BCAST 2
Channel
0
All in BCAST
Group 3
3
1-8
Set to
corresponding
BCAST 3
Channel
0
All in BCAST
Group 4
4
Set to
1-4
corresponding
BCAST 4
Channel
Page 20
Single Controller Systems Channel Setting
Typically all Single Controller systems will use the default setting BCAST = 1,
CHAN = 1. All radio receivers must be set with a switch setting of 1 with the
Broadcast 1 (BCAST 1) jumper set.
If you suspect interference from a nearby Daktronics system, press <CLEAR> at the
“RADIO SETTINGS” prompt to change the channel number.
Typically all Multiple Controller systems will use channel 1 for the first controller.
All other controllers will use sequential channel settings (2-8). The table below
describes broadcast channel and channel settings.
LCD Display Action
RADIO SETTINGS
BCAST Y CHAN XX
The LCD will toggle these
screens.
Enter to accept
Clear to modify
The LCD shows the current radio settings along with a
prompt to accept or modify these values.
If the radio settings are correct, press <ENTER>
If these values are incorrect, press <CLEAR>
If <CLEAR> is pressed to modify the radio settings, the
LCD at the left is shown, allowing edit of the Channel or
Broadcast group setting.
Edit the Broadcast Setting. Use the number keys to enter the
desired broadcast group and press <ENTER> to accept.
bcast group 1
Radio Chan 01
The bottom line shows default
settings.
Broadcast Group Setting
Use this setting for all single controller systems
The asterisk will move to the channel setting. Use the
number keys to edit this value and press <ENTER> to
accept. Edit the channel number to the desired value and
press <ENTER> to accept.
Channel Setting
Channels that may be used with broadcast channel 1. The
channel switch on the receiver must match this value and
only the Broadcast 1 (BCAST1) jumper must be installed.
Multiple Controller with Single Broadcast Group Channel
Setting
Typically all Single Controller systems will use Broadcast 1 and Channel 1 for the
first controller and Channels 2-8 for all remaining controllers. All radio receivers
must be set with a switch setting corresponding to the console controlling the
scoreboard and a Broadcast 1 (BCAST 1) jumper set.
Basic Operation 2-7
Page 21
If you suspect interference from a nearby Daktronics system, press <CLEAR> at the
“RADIO SETTINGS” prompt to change the channel number.
Typically all Multiple Controller systems will use channel 1 for the first controller.
All other controllers will use sequential channel settings (2-8). The table on the
following page describes broadcast group and channel settings.
LCD Display Action
RADIO SETTINGS
BCAST Y CHAN XX
The LCD will toggle
these screens
Enter to accept
Clear to modify
bcast group 1
Radio chan 01
The bottom line shows default
settings.
The LCD shows the current radio settings along with a
prompt to accept or modify these values.
If the radio settings are correct, press <ENTER>.
If these values are incorrect, press <CLEAR>
If <CLEAR> is pressed to modify the radio settings, the
LCD at the left is shown, allowing edit of the Channel
or Broadcast group setting.
Edit the Broadcast Setting. Use the number keys to
enter the desired broadcast group and press <ENTER>
to accept.
Broadcast Group Setting
1- Use this setting for all multiple controller with
single broadcast group setups.
The asterisk will move to the channel setting.
Use the number keys to edit this value and press
<ENTER> to accept. Edit the channel number
to the desired value and press <ENTER> to
accept.
Channel Setting
1-8 Channels that may be used with broadcast
channel 1. The channel switch on the receiver
must match this value and only the Broadcast 1
(BCAST1) jumper must be installed.
Multiple Controller with Multiple Broadcast Systems
Channel Setting
Typically all multiple controller systems will use Broadcast Group 1 Channel 1 for
the first controller in Broadcast Group 1 and Broadcast Group 2 Chann e l 1 for the
first controller in Broadcast Group 2. All other consoles in each group are added
sequentially, using channels 2-4.
2-8 Basic Operation
Page 22
LCD Display Action
RADIO SETTINGS
BCAST Y CHAN XX
The LCD will toggle
these screens
Enter to accept
Clear to modify
bcast group 1
Radio chan 01
The bottom line shows default
settings.
The LCD shows the current radio settings along with a
prompt to accept or modify these values.
If the radio settings are correct, press <ENTER>.
If these values are incorrect, press <CLEAR>
If <CLEAR> is pressed to modify the radio settings, the
LCD at the left is shown, allowing edit of the Channel or
Broadcast group setting.
Edit the Broadcast Setting. Use the number keys to enter
the desired broadcast group and press <ENTER> to
accept.
The asterisk will move to the channel setting. Use the
number keys to edit this value and press <ENTER> to
accept. Edit the channel number to the desired value and
press <ENTER> to accept.
(Continued on next page)
Basic Operation 2-9
Page 23
LCD Display Action
bcast group 1
Radio Chan 01
The bottom line shows default
settings.
(Continued from preceding page)
Broadcast
Group
0 0
1
2
3
4
Channel
Setting
0
1-8
0
1-4
0
1-8
0
1-4
Control
Scoreboards
All
Scoreboards
All in BCAST
Group 1
Set to
corresponding
BCAST 1
Channel
All in BCAST
Group 2
Set to
Corresponding
BCAST 2
Channel
All in BCAST
Group 3
Set to
corresponding
BCAST 3
Channel
All in BCAST
Group 4
Set to
corresponding
BCAST 4
Channel
2-10 Basic Operation
Page 24
*IMPORTANT* Because the 1600 series controller does not have
“Resume Game”; memory for game, there will be a longer delay when linking to the
SCBD.
2.6 Common Sport Keys
Start
<START> is used to start the main clock.
Stop
<STOP> is used to stop the main clock.
Enter/Edit Key
The <ENTER/EDIT> key has two functions. The key functions as the <ENTER>
key when editing game data. Pressing the key will accept the new data and end the
edit. If not in edit, the <ENTER/EDIT>key allows the user to select which item is to
be edited (such as team score). After pressing the <ENTER/EDIT>key, press one of
the increment or decrement keys for the desired field on the scoreboard. Then simply
enter the value you wish to display and press <ENTER/EDIT>to accept.
Clear/Alt Key
The <CLEAR/ALT> key has two functions. The key functions as the <CLEAR>
key when editing game data. Pressing the key will clear the data being edited or, if
pressed twice, will exit the edit. When not in Edit mode the <CLEAR/ALT> key
allows the user to access the special function keys: <NEW GAME>, <DIM>,
<TOD/GAME>, <SEGMENT>, <LAMP TEST>, <1/10 SEC>, and <FOUL
ON/OFF>. Pressing <CLEAR/ALT> and then one of the special function keys will
initiate the desired function.
Set Time
LCD Display Action
MAIN CLOCK -SET
CURR mm:ss.t*
mm:ss.t = minutes, seconds,
tenths of a second
MAIN CLOCK -EDIT
PERIOD mm:ss**
mm:ss = minutes, seconds
Basic Operation 2-11
After the main clock has been stopped, press <SET
TIME •> to display the current time of the main clock.
To change the time, enter the desired time on t he
number pad and press <ENTER>.
Press <CLEAR> twice to clear changes and return to
the game.
Press <SET TIME •> a second time to display the
configured time for the main clock period length.
To accept the displayed period length, press
<ENTER>.
Page 25
LCD Display Action
To decline the selection of the period length, press
<CLEAR>.
To change the period length and set the main clock,
enter the new time in minutes and seconds on the
number pad and press <ENTER>.
Note: Pressing <ENTER> to select the period time as
the main clock setting will increment the current period
number if the clock value was previously zero.
Press <CLEAR> twice to clear changes and return to
the game.
MAIN CLOCK -EDIT
BREAK mm:ss *
mm:ss = minutes, seconds
MAIN CLOCK -EDIT
OT mm:ss *
mm:ss = minutes, seconds
Press <SET TIME •> a third time to display the
configured time for break length.
To accept the break length, press <ENTER>.
To decline the selection of the break length, press
<CLEAR>.
To change the break length and set the main clock,
enter the new time in minutes and seconds on the
number pad and press <ENTER>.
Press <CLEAR> twice to clear changes and return to
the game.
Press <SET TIME •> a fourth time to display the
configured time for overtime length.
To accept the overtime length, press <ENTER>.
To decline the selection of the overtime length, press
<CLEAR>.
To change the overtime length and set the main clock,
enter the new time in minutes and seconds on the
number pad and press <ENTER>.
Press <CLEAR> twice to clear changes and return to
the game.
2-12 Basic Operation
Page 26
Count Up/Down
LCD Display Action
MAIN CLOCK-DOWN
1-UP, 2-DOWN
Up/down = current direction
Auto Horn
LCD Display Action
AUTO HORN-ON
1-ON, 2-OFF
On/off = current setting
After the main clock has been stopped, the direction of
the clock can be set.
Press <1> or <2> to select Up or Down (default).
Notes: The current direction of the main clock is shown
on the top line of the LCD.
The <COUNT UP/DOWN> function is disabled while
the clock is running.
Press <1> or <2> to select On (default) or Off.
Manual Horn
Press <MANUAL HORN> to sound the main horn. The horn sounds as long as the
key is pressed. The horn stops sounding when the key is released.
Time Out On/Off
<TIME OUT ON/OFF> stops and starts the time out clock. The length of both the
full and partial time outs can also be changed when the time out clock is stopped by
using the <EDIT> key.
LCD Display Action
TIME OUTs-SELECT
FULL MM:SS
mm:ss = minutes, seconds
Press <TIME OUT ON/OFF> to display the
configured time for full time out length.
To accept the full time out length, press <ENTER>.
To decline the selection of the full time out length,
press <CLEAR>.
Basic Operation 2-13
Page 27
Score +1, +2, +3, +6, -1
The Home and Guest <SCORE +1>, <SCORE +2>, <SCORE +3> and <SCORE
+6> keys are used to increment the team score, and the <SCORE -1> key is used to
decrement the team score.
LCD Display Action
TEAM SCORE-+1
HOME nnn
nnn = current setting
2.7 Alt Key Functions
The <ALT> key allows the user to access the following function keys. First, press
<ALT>, and then press the key for the function that you want to perfor m.
New Game
Press <ALT> and <NEW GAME> to display the New Game prompt.
Press the appropriate score key to increment or
decrement the score for the home or guest team.
The LCD shows which key was pressed and the new
value for the team score of the corresponding team.
LCD Display Action
NEW GAME?
ENTER TO ACCEPT
NEW CODE?
ENTER TO ACCEPT
Press <ENTER> to start a new game.
Press <CLEAR> to enter a new sport code.
Press any other key to return to the current game.
Note: If New Game is not selected, the
console will prompt for the New Code.
Press <ENTER> to enter a new sport code.
Press <CLEAR> or any other key to return to the
current game.
2-14 Basic Operation
Page 28
Dim
LCD Display Action
DIMMING
LEVEL (0-9): NN%
NM = current level
NONE = bright <0>
90% = <1>
80% = <2>
70% = <3>
60% = <4>
50% = <5>
40% = <6>
30% = <7>
20% = <8>
10% = <9>
MENU-TIME OF DAY
TOD hh:mm:ss*
hh:mm:ss = current setting
Press <0> through <9> or use the arrow keys <←>
<→>, to select the intensity for the digits on the
scoreboard.
Press <NO> to resume the game in progress using the
current data, and exit the Menu
Press the down arrow key <↓> to scroll to the next
selection.
Note: Dim levels pertain to outdoor LED products
only. Incandescent and indoor LED products only
support one level of dimming at 50%.
Enter the time of day in hours, minutes, and seconds
using the selected format on the number pad and press
<ENTER>.
The time of day clock is now displayed on the console.
Segment Timer
Press <ALT> and <SEGMENT> to display the Segment Timer prompt.
LCD Display Action
SEGMENT TIMER?
ENTER TO ACCEPT
Press <ENTER> to start the Segment Timer function.
The Segment Timer (LL-2472) insert must be
installed to operate the Segment Timer. Refer to
Section 3: Segment Timer.
Press any other key to return to the current sport.
Basic Operation 2-15
Page 29
Lamp Test
Press <ALT> and <LAMP TEST> to display the Lamp Test prompt.
LCD Display Action
Lamp test mode
Enter to accept
Lamp test mode
Any key to exit
Press <ENTER>to start the basic Lamp Test mode
Press any other key to return to the current sport.
This prompt will display while in the lamp test.
Press any key to return to the current sport.
1/10 Second
Notes: this key functions only when the clock is stopped.
The <1/10 SEC> key toggles the scoreboard between displaying full seconds or
tenths of a second in the main scoreboard clock.
Press <ALT> and <1/10 SEC> to change the main clock between full seconds and
tenths of a second.
2.8 Remote Start/Stop Controls
Main Clock Control
The remote start/stop control box plugs into J4 on the back of the All Sport 3000
console. This unit has a rocker switch for Start/Stop and a momentary button for
Horn. The Start/Stop switch starts and stops the main timer. The Horn button
sounds the horn as long as the button is pressed.
Shot Clock Control
The remote shot clock control box plugs into J7 on the back of the All Sport 3000
console. This unit has a rocker switch for Start/Stop and a momentary button for
Reset. When the Reset button is pressed, the shot clock timer is changed to the reset
value and stops the timer from decrementing. The shot clock timer restarts when the
Reset button is released. The shot clock timer will not run unless the main clock is
running.
Play Clock Control
The remote play clock control box plugs into J7 on the back of the All Sport 3000
console. This unit has a rocker switch for Start/Stop and a momentary button for
Reset. When the Reset button is pressed, the play clock timer is changed to the reset
value and stops the timer from decrementing. The play clock timer restarts when the
Reset button is released. The Start/Stop switch always starts and stops the play
clock.
2-16 Basic Operation
Page 30

2.9 General Multipurpose Timer Information
The sport insert for the timer is LL-2472 and Code 90 is used to run the timer. The
Multipurpose Timer is a general timer used for two-, four- and six-digit time
displays. The timer will count up or down through hours, minutes and seconds. The
information will shift on the two- and four-digit displays to show the most significant
time values as the time changes.
Standard Keys
Keys used by the Multipurpose Timer are <START>, <STOP>, <SET MAIN
CLOCK>, <COUNT UP/DOWN>, <AUTO HORN>, <MANUAL HORN>,
<DIM>, and <TOD>. Key functions are explained in detail in Section 2.6.
Accessing Time of Day
To access and display Time of Day, press the <ALT> key and then the <TOD> key.
Enter the correct time of day and press <ENTER>. To return to the timer display,
press the <ALT> key and then the <TOD> key again.
Basic Operation 2-17
Page 31

Page 32

Section 3: Segment Timer
Sport Insert LL-2472 (Code 91 used for the Dedicated Segment Timer)
Reference Drawing:
Insert, Segment Timer, A/S 3000 Series ..................................Drawing A-129566
The sport insert drawing is located in Appendix A.
Refer to the information in Section 2: Basic Operation to start the console and use the sport
insert. The insert drawing, A-129566 shows the function for each button for the segment timer
portion of the All Sport 3000 control console. Read Basic Operation carefully to fully
understand the following operation instructions.
If you lose or damage an insert, use a photocopy of the insert until you can order a
replacement.
If you do not know the code number to enter for your scoreboard, refer to Appendix B in this
manual. If you do not know the model number of your scoreboard, refer to the installation and
maintenance manual provided with the scoreboard.
3.1 Segment Timer Information
The Segment Timer is used to time events such as practice sessions. The operation of
the segment timer is determined by 99 segments of preprogrammed length. The
Segment Timer will count down starting at the segment number that is set as First
Segment. When the First Segment is completed, the timer will count the Interval
Time and proceed with the next segment. The timer will continue counting segments
until it counts down to the segment number set as Last Segment. It then will reset to
the segment saved as First Segment and, depending on the Auto Stop At Last Seg
setting, will either begin counting down or wait for the operator to press the
<START> key. To stop the timer after each segment is completed, use the Auto
Stop feature.
The First and Last Segment values can be used to set up specific practice sessions.
For example, the practice session for one sport could be programmed to use
Segments 1-10 while another might use Segments 11-20. Set the First Segment and
Last Segment values to the desired segment numbers for the session, and the
console will count down each of the segments in order, either stopping on the last
segment or looping through included segments again, based on the Auto Stop At
Last Seg setting.
The segment values will be saved when the console is turned off and will be the
same values regardless of the sport that was used to access the Segment Timer.
3.2 Accessing the Segment Timer
To run the Segment Timer for the dedicated segment timer display, enter Code 91
at the Enter Code command.
Segment Timer 3-1
Page 33

To run the Segment Timer for a specific scoreboard, enter the sport code used for
the scoreboard with which you would like to run the Segment Timer and press
<ENTER>.
For some specific scoreboards, the Segment Timer program in the All Sport 3100
may be accessed through the Alternate Function Segment of each individual sport.
Press the <ALT> and <SEGMENT> keys to get the LCD prompt for the Segment
Timer.
LCD Display Action
Segment Timer
Enter to accept
The Segment Timer function is disabled while the
clock is running.
Press <ENTER> to exit the sport code and run the
segment timer program.
3.3 Segment Timer Keys
First Segment
LCD Screen Action
FIRST SEGMENT
NN
nn = current first segment
Last Segment
LCD Screen Action
This setting determines the first segment in a range of
segments to run when <START> is pressed.
The console will be reset to the segment saved as First
Segment when the <RESET TO FIRST> key is
pressed.
Enter the number desired for the first segment and press
<
ENTER>.
LAST SEGMENT
NN
nn = current last segment
This setting determines the Last Segment in a range of
segments to run when <START> is pressed.
The console will automatically reset to the segment
saved as First Segment after the segment saved as Last
Segment is completed.
Enter the number desired for the last segment and press
<ENTER>.
3-2 Segment Timer
Page 34

Interval Time
LCD Screen Action
INTERVAL TIME:
nn:nn
nn = current setting
Display Interval
LCD Screen Action
DISPLAY INTERVAL
CLEAR=n*ENTER=y
* = current setting
Interval Time is the time between each segment.
Interval Time can be displayed on the guest scoreboard
digits using the <DISPLAY INTERVAL> key.
Press <INTERVAL TIME> to display the current
value of Interval Time on the bottom line of the LCD.
Edit the value of the Interval Time and press
<ENTER>.
This setting determines whether the interval count
will be displayed on the scoreboard.
Press <ENTER> to display the Interval Time on the
scoreboard.
Press <CLEAR> to disable Interval Time display.
The Interval Time will be displayed only on the
console.
Notes: Regardless of the Display Interval setting,
the value saved in Interval Time will be counted
down between segments. Set the Interval Time to
zero if you desire no interval between segments.
When the Interval Time is being displayed, the
segment number on the scoreboard flashes to
indicate that the time displayed is Interval Time. To
disable the segment number flash, set Display
Interval to <CLEAR>.
Segment Timer 3-3
Page 35

Segment Time
LCD Screen Action
SEGMENT: xx
TIME EDIT
xx = segment number
SEGMENT: xx
TIME EDIT nn:nn
xx = segment number
nn:nn = segment time
Copy Range
LCD Screen Action
COPY: nn:nn*
SEG xx to yy
nn:nn = segment value to be
copied
xx = starting segment value
yy = ending segment value
Press <SEGMENT TIME> to set an individual
segment time.
Enter the segment to be edited and press <ENTER>.
Enter the time for the segment and press <ENTER>
to accept and move to the next segment time.
Press <ENTER> again to exit the function.
Press the Up or Down Arrow keys, <>, to move
to the previous or next segment.
Press <COPY RANGE> to set a range of segments to
a specific value.
All segments from XX to YY (inclusive) will be set to
the value specified by NN:NN.
Enter the value specified by the asterisk and press
<ENTER> to move to the next field.
3-4 Segment Timer
Page 36

Auto Stop
LCD Screen Action
EACH SEG Y/N*
CLEAR=n*ENTER=y
* = current setting
Last seg *y/n
CLEAR=n*ENTER=y
* = current setting
This setting determines the operation of the console
when each segment is completed.
Press <ENTER> to set the console to stop after each
segment is completed, and wait for the <START>
key to proceed with the next segment.
Press <CLEAR> to set the console to automatically
begin the next segment when each segment is
completed.
If the setting of Auto Stop At Each Seg is No, the
console will prompt for the Auto Stop At Last Seg
setting.
Press <ENTER> to set the console to stop when the
Last Segment has been completed.
Press <CLEAR> to set the console to start over at
the First Segment when the Last Segment is
completed
Warning Time
LCD Screen Action
Warning time
00:00
00:00 = default
Enter the Warning Time in minutes and seconds and
press <ENTER>.
Enter 00:00 for no Warning Time.
When Warning Time is reached, the segment number
flashes until the main clock reaches zero.
Current Segment
Press <CURRENT SEGMENT +1> to increment the segment number.
Reset Current Segment
Press <RESET CURRENT SEGMENT> to reset the segment time to the value
specified by the current segment. The segment number will remain at the current
value.
Segment Timer 3-5
Page 37

Reset to First
Note: The Reset to First function is disabled while the clock is running.
Press <RESET TO FIRST> to reset the segment number and segment time to the
values saved as the First Segment.
3.4 Edit
Current Segment
LCD Screen Action
CURRENT SEGMENT:
EDIT nn
nn = current setting
Press <EDIT> <CURRENT SEGMENT + 1> to display the
Current Segment for editing.
Enter the new value for the Current Segment number and press
<ENTER>.
3-6 Segment Timer
Page 38

Section 4: Baseball Operations
Sport Insert LL-2469 (Code 05)
Codes used by the All Sport 3000 console to replace the All Sport 2500 console are as
follows:
531; 532; 533; 535; 537; 544
Refer to Appendix C.5 for a list of the codes of the All Sport 2500 console and which code
for the 3000 system takes its place.
Reference Drawings:
Insert, Baseball .........................................................................Drawing A-129370
Block Diagrams,
A/S5000/3000, Outdoor Sports..........................................Drawing A-124690
The sport insert and block diagram drawings are located in Appendix B.
Refer to the information in Section 2: Basic Operation to start the console and use the sport
insert. Read Basic Operation carefully to fully understand the following operation
instructions.
If you lose or damage an insert, use a photocopy of the insert until you can order a
replacement.
If you do not know the code number to enter for your scoreboard, refer to Appendix B in this
manual. If you do not know the model number of your scoreboard, refer to the installation and
maintenance manual provided with the scoreboard.
4.1 Baseball Keys
Out +1, Inning +1
The <OUT +1> and <INNING +1> keys are used to increment their respective
totals.
LCD Screen Action
Out-+1
n
n = current setting
Baseball Operations 4-1
Press <OUT +1> or <INNING +1> to increment their
respective totals.
The LCD shows which key was pressed and the new
value.
Page 39

Batter
The <BATTER> key is used to display the uniform number and batting average of
the player currently at bat.
LCD Screen Action
At bat
nn*
nn = current setting
When the <BATTER> key is pressed, enter the number
of the player and press <ENTER>.
Ball, Strike, Clear Ball/Strike
The <BALL+1> and <STRIKE+1> keys increment the Ball and Strike digits.
Pressing the <CLEAR BALL AND STRIKE> key clears the digits. (In the
following illustration, <BALL+1> is used as an example.)
If the ball count value is 4 when <BALL+1> is pressed, the value is blanked out.
If the strike count value is 3 when <STRIKE+1> is pressed, the value is blanked
out.
LCD Screen Action
Ball: +1
n
nn = current setting
Press the <BALL+1> or <STRIKE+1> to increment the
Ball and Strike digits.
Press the <CLEAR BALL AND STRIKE> key to clear
the digits.
Hit, Error, Clear Hit/Error
The <HIT> and <ERROR> keys are used to turn on the Hit and Error indicator or
digits. Pressing the <CLEAR HIT/ERROR> key turns off the Hit and Error
indicators and clears the digits.
<ERROR> is used as an example below.
LCD Screen Action
Error: ON
4-2 Baseball Operations
Press the <HIT> or <ERROR> key to turn on the Hit or
Error indicator or digits.
This display appears briefly.
Page 40

HIT: OFF
Error: OFF
Press the <CLEAR HIT/ERROR> key to turn off the
Hit and Error indicators and clear the digits.
This display appears briefly.
At Bat
The <AT BAT> keys turn the Home and Guest At Bat indicators on and off.
LCD Screen Action
HOME at bat
ON
HOME at bat
off
Runs +1
LCD Screen Action
Team RUNS: +1
HOME nn
nn = current setting
Press the Home or Guest <AT BAT> key, to turn on the
at bat indicator for that team.
This display appears briefly.
Press the <CLEAR BALL AND STRIKE> key to clear
the digits.
To turn off the Possession indicator, press the same <AT
BAT> key a second time or press the opposite <AT
BAT> key.
This display appears briefly.
Press the appropriate <RUNS +1> key to increment the
total number of runs for the home or guest team.
The LCD shows which key was pressed and the new
value for the corresponding team.
Hits, Errors
The Home and Guest <HITS +1> and <ERRORS +1> keys are used to increment
their respective totals.
<HITS +1> is used as an example.
Baseball Operations 4-3
Page 41

LCD Screen Action
Hits: +1
HOME nn
nn = current setting
4.2 Edit
The <EDIT> key allows the user to select and edit the following scoreboard fields.
Press <EDIT> and the key for the Home or Guest field to be edited.
Inning +1
LCD Screen Action
Inning edit
nn
nn = current setting
Press the appropriate key to increment statistics for the
home or guest team.
The LCD shows which key was pressed and the new
value for the corresponding team.
Press <EDIT> <INNING +1> to display the current
setting.
Enter the correct inning number on the number pad and
press <ENTER>.
Runs +1
LCD Screen Action
Team RUNS: edit
nn
nn = current setting
Press <EDIT> and the appropriate <RUNS +1> key to
display the current setting for the home or guest team.
Enter the correct number on the number pad and press
<ENTER>.
Hits +1, Errors +1
The Home and Guest <HITS +1> and <ERRORS +1> keys are edited in the same
way. <HITS +1> is used as an example.
LCD Screen Action
TEAM hits: edit
HOME nn
nn = current setting
Press <EDIT> and the appropriate statistic key to display
the current value.
Enter the correct number on the number pad and press
<ENTER>.
4-4 Baseball Operations
Page 42

Section 5: Basketball Operations
Sport Insert LL-2539 (Code 01)
Tuff Sport
Codes used by the All Sport 3000 console to replace the All Sport 2500 console are as
follows:
Refer to Appendix C.5 for a list of the codes of the All Sport 2500 console and which All
Sport 3000 code takes its place.
Reference Drawings:
Refer to the information in Section 2: Basic Operation to start the console and use the
sport insert. Read Basic Operation carefully to fully understand the following operation
instructions.
If you lose or damage an insert, use a photocopy of the insert until you can order a
replacement.
If you do not know the code number to enter for your scoreboard, refer to Appendix B in
this manual. If you do not know the model number of your scoreboard, refer to the
installation and maintenance manual provided with the scoreboard .
Note: Replacement insert for software version prior to 1.0.4, use Sports Insert LL-2465.
Refer to the block diagram drawings are located in Appen dix A and the sport insert
drawings in Appendix B for more information.
™
model scoreboards are included on software version 1.0.4 and higher
103; 104; 111; 112
Insert, Basketball, A/S3000 Series
(Valid Through Version 1.0.3).............................................Drawing A-129362
Block Diagrams,
A/S5000/3000, BB, VB & WR #1........................................Drawing A-124686
Block Diagrams,
A/S5000/3000, BB, VB & WR #2........................................Drawing A-125415
Block Diagram;
A/S 3000 or 5000 BB, VB & WR #4 ...................................Drawing A-125417
Insert, Basketball,
A/S3000, Tuff Sport Basketball..........................................Drawing A-159649
Basketball Operations
5-1
Page 43

5.1 Basketball Keys
Set Shot Time
LCD Screen Action
SHOT CLOCK-EDIT
CURRENT mm:ss
mm:ss = minutes, seconds
* SHOT CLOCK-EDIT
RESET mm:ss
mm:ss = minutes, seconds
Press <SET SHOT TIME> to display the configured
shot clock time length.
To accept the shot clock time length, press <ENTER>.
To decline the selection of the shot clock time length,
press <CLEAR>.
To change the shot clock time length and set the shot
clock, enter the new time in minutes and seconds on the
number pad and press <ENTER>.
Press <CLEAR> twice to clear changes and return to
the game.
Press <SET SHOT TIME> a second time to display
the configured time for shot clock reset length.
To accept the shot clock reset length, press <ENTER>.
To decline the selection of the shot clock reset length,
press <CLEAR>.
To change the shot clock reset length and set the shot
clock, enter the new time in minutes and seconds on the
number pad and press <ENTER>.
Press <CLEAR> twice to clear changes and return to
the game.
5-2 Basketball Operations
Page 44

Time Out On/Off
<TIME OUT ON/OFF> stops and starts the time out clock. By using the <EDIT>
key, the operator can change the length of both the full and partial time outs when
the time out clock is stopped.
LCD Screen Action
TIME OUTs-SELECT
FULL MM:SS
mm:ss = minutes, seconds
TIME OUT-SELECT
PARTIAL MM:SS
mm:ss = minutes, seconds
Press <TIME OUT ON/OFF> to display the
configured time for full time out length.
To accept the full time out length, press <ENTER>.
To decline the selection of the full time out length, press
<CLEAR>.
Press <TIME OUT ON/OFF> a second time to display
the configured time for partial time out length.
To accept the partial time out length, press <ENTER>.
To decline the selection of the partial time out length,
press <CLEAR>.
Time Out
<TIME OUT e> selects full or partial time outs. By using the <EDIT> key, the
operator can change the number of full and partial time outs for each team.
LCD Screen Action
TIME Outs - home
FULL 3
TIME OUTs - home
Partial 2
Basketball Operations
Press <TIME OUT e> to display the number of full
time outs remaining. If the time out is on, pressing this
key will turn the time out off.
To start a full time out, press <ENTER>.
To decline the selection of a full time out, press
<CLEAR>.
Press <TIME OUT e> to display the number of partial
time outs remaining. If the time out is on, pressing this
key will turn the time out off.
To start a partial time out, press <ENTER>.
To decline the selection of a partial time out, press
<CLEAR>.
5-3
Page 45

Period +1
LCD Screen Action
PERIOD-+1
n
nn = current setting
Team Fouls +1
LCD Screen Action
TEAM FOULS-+1
HOME nn
nn = current setting
TEAM FOULS-+1
Home Player nn *
nn = Player Number
Press <PERIOD +1> to increment the period number.
The full and partial time outs and team fouls are
automatically reset at halftime.
Press the Home or Guest <TEAM FOULS +1> key to
increment the number of team fouls for the
corresponding team.
If Update Player Fouls is ON, the console will ask for a
player number when this key is pressed.
Enter the player number and press <ENTER>.
Update Player Fouls
LCD Display Action
Fouls
Update player? Y
Team fouls - mode
1-on-1 bonus N *
N = Number Fouls to initiate
this bonus mode
5-4 Basketball Operations
Press <ALT> and then <FOUL ON/OFF> and the
LCD will show current status of the update player fouls
mode.
Press <ENTER> to turn it on or <CLEAR> to turn it
off.
If the update player foul mode is ON, the 1-on-1-bonus
level can be viewed and changed.
Enter the desired foul level and press <ENTER>.
When the number of fouls for a team reaches this
number, the Bonus indicator on the display will turn
on.
Page 46

LCD Display Action
Team fouls - Mode
2 shot bonus N *
N = Number Fouls to initiate
this bonus mode
Bonus
LCD Screen Action
HOME BONUS
ON
HOME BONUS
OFF
If the update player foul mode is ON, the 2-shot bonus
level can also be viewed and changed.
Enter the desired foul level and press <ENTER>.
When the number of fouls for a team reaches this
number, the Bonus indicator on the display will turn
on.
Press the Home or Guest <BONUS> key, to turn on
the Bonus indicator for that team.
Press the <BONUS> key a second time to turn off the
indicator.
Possession
LCD Screen Action
HOME POSSESSION
ON
HOME POSSESSION
OFF
Press the Home or Guest <POSS> key, to turn on the
Possession indicator for that team.
To turn off the Possession indicator, press the same
<POSS> key a second time or press the opposite
<POSS> key.
Basketball Operations
5-5
Page 47

Blank Player Foul (Update Player Foul is Set to ON)
Press <BLANK PLAYER FOUL> to blank player foul data on the scoreboard.
Blank Player Foul (Update Player Foul is Set to OFF)
LCD Screen Action
Edit
Player/Foul pp f*
PP = player number
F = fouls
Player
LCD Display Action
HOME PLAYER nn*
nn = Player Number
HOME PLAYER nn
NOT FOUND, add?
nn = Player number
HOME PLAYER nn
ROSTER FULL
nn = Player Number
This key will allow editing the Player/Fouls if the
console is not set for Update Player Foul.
Enter the player number and the fouls and press
<ENTER>.
When the home or guest <PLAYER> key is pressed,
this prompt asks for the jersey number of the player to
edit.
Enter the jersey number on the number pad and press
<ENTER>.
If the player is not in the roster, this prompt asks if the
player should be added.
Press <ENTER> to add the player to the roster.
Press <CLEAR> to decline the entry of the player
number.
This message displays when the answer to the previous
prompt is YES and the roster is full.
5-6 Basketball Operations
Page 48

LCD Display Action
HOME PLAYER nn
f - 0
nn = Player Number
5.2 Edit
The <EDIT> key allows the user to select and edit the following scoreboard fields.
Press <EDIT> and the key for the Home or Guest field to be edited.
Score +1, +2, +3, -1
TEAM SCORE-EDIT
HOME nnn**
nn = current setting
If the player is found or added, the player's number of
fouls is displayed and can be changed.
Enter the number of fouls the player has and press
<ENTER>.
Press <CLEAR> or <ENTER> to exit.
LCD Screen Action
Press <EDIT> and any of the <SCORE> keys for the
home or guest team to display the current team score
setting.
Enter the correct team score on the number pad and
press <ENTER>.
Team Fouls +1
LCD Screen Action
TEAM FOULS-EDIT
HOME nn*
nn = current setting
Press <EDIT> <TEAM FOULS> for the home or
guest team to display the curren t team foul setting.
Enter the correct number of team fouls on the number
pad and press <ENTER>.
Basketball Operations
5-7
Page 49

Player
LCD Screen Action
HOME Player NN*
NN = Player number
HOME Player NN*
Edit Player NN*
NN = Player number
Period +1
LCD Screen Action
PERIOD-EDIT
n*
n = current setting
Press <EDIT> <PLAYER> for the home or guest team
to edit a player number. Enter the player's number that
is to be changed.
If the player is found, the LCD screen to the left will
display and the new number can be entered.
Press <ENTER> to accept the new number.
Press <CLEAR> twice to abort the operation.
Press <EDIT> <PERIOD+1> for the home or guest
team to display the period setting.
Enter the correct period number on the number pad and
press <ENTER>.
Time Out On/Off
LCD Screen Action
TIME OUTs-edit
FULL MM:SS
mm:ss = minutes, seconds
TIME OUT- edit
PARTIAL MM:SS
mm:ss = minutes, seconds
5-8 Basketball Operations
Press <EDIT> <TIME OUT ON/OFF> to display the
current time setting for full time outs.
Enter the correct time on the number pad and press
<ENTER>.
Press the <ENTER> key to display the configured time
for partial time out length.
Enter the correct time on the number pad and press
<ENTER>.
Page 50

Time Out e, Time Out f
LCD Screen Action
TIME OUTs - Home
FULL 3
TIME OUTs - Home
Partial 2
Press <EDIT> <TIME OUT e> to display the
number of time outs for the home team.
Enter a new number for full time outs and press
<ENTER>.
Enter a new number for partial time outs and press
<ENTER>.
Basketball Operations
5-9
Page 51

Page 52

Section 6: Football Operations
Sport Insert LL-2470 (Code 06)
Codes used by the All Sport 3000 console to replace the All Sport 2500 console are as
follows:
620; 622; 625
Refer to Appendix C.5 for a list of the codes of the All Sport 2500 console and which code
for the 3000 system takes its place.
Section 15:
Reference Drawings:
Insert, Football, A/S3000 Series...............................................Drawing A-129372
Block Diagrams,
A/S5000/3000, Outdoor Sports..........................................Drawing A-124690
The sport insert drawing is located in Appendix B and the block diagram drawing is located
in Appendix A.
Refer to the information in Section 2: Basic Operation to start the console and use the sport
insert. Read Basic Operation carefully to fully understand the following operation
instructions. The football insert drawing, A-129372 displays the function for each key on the
All Sport 3000 series consoles while in football mode. The block diagram drawing, A-
124690 displays how to correctly set up the All Sport 3000 control console(s) to its proper
scoreboard and proper plug-ins.
If you lose or damage an insert, use a photocopy of the insert until you can order a
replacement.
If you do not know the code number to enter for your scoreboard, refer to Appendix B in this
manual. If you do not know the model number of your scoreboard, refer to the installation and
maintenance manual provided with the scoreboard.
6.1 Football Keys
Set Play Clock
The remote play clock console uses the Play Clock setting. The configured play
clock times are set using the Edit Settings function when a new code is selected.
Gymnastics Operations 6-1
Page 53

LCD Screen Action
PLAY CLOCK-EDIT
CURR mm:ss
mm:ss = minutes, seconds
PLAY CLOCK-EDIT
RESET 1 mm:ss
mm:ss = minutes, seconds
PLAY CLOCK-EDIT
RESET 2 mm:ss
mm:ss = minutes, seconds
Press <SET PLAY CLOCK> to display the current
time for the play clock length.
To accept the play clock time length, press <ENTER>.
To decline the selection of the play clock time length,
press <CLEAR>.
To change the play clock time length and set the play
clock, enter the new time in minutes and seconds on the
number pad and press <ENTER>.
Press <SET PLAY CLOCK> a second time to display
the configured time for Reset 1 length.
To accept the play clock Reset 1 length, press
<ENTER>.
To decline the selection of the play clock Reset 1
length, press <CLEAR>.
To change the play clock Reset 1 length and set the
play clock, enter the new time in minutes and seconds
on the number pad and press <ENTER>.
Press <CLEAR> twice to clear changes and return to
the game.
Press <SET PLAY CLOCK> a third time to display
the configured time for Reset 2 length.
To accept the play clock Reset 2 length, press
<ENTER>.
To decline the selection of the play clock Reset 2
length, press <CLEAR>.
To change the play clock Reset 2 length and set the
play clock, enter the new time in minutes and seconds
on the number pad and press <ENTER>.
Press <CLEAR> twice to clear changes and return to
the game.
6-2 Gymnastics Operations
Page 54

Quarter +1
LCD Screen Action
quarter-+1
n
n = current setting
Yards To Go
LCD Screen Action
to go edit
nn*
nn = current setting
Down +1
Press <QUARTER +1> to increment the quarter
number. The full time outs are automatically reset at
halftime.
Enter the number of yards to go for a first down and
press <ENTER>.
Press <CLEAR> twice to clear changes and return to
the game.
LCD Screen Action
down +1
n
n = current setting
Press <DOWN +1> to manually increment the down
number.
A prompt showing down number displays briefly.
Ball On
The <BALL ON> key is used to manually enter the field position (yard line) of the
ball.
LCD Screen Action
BALL ON nn*
nn = current setting
Enter the field position (yard line) of the ball and press
<ENTER>.
Press <CLEAR> twice to clear changes and return to
the game.
Press <CLEAR> and <ENTER> to blank the Ball On,
Down, and To Go sections of the scoreboard.
Gymnastics Operations 6-3
Page 55

First & 10
The <FIRST & 10> key is used to set the Down to 1 and Yards To Go to 10.
Possession
The <POSS> keys turn the Home and Guest Possession indicators on and off.
LCD Screen Action
HOME POSSESSION
ON
HOME POSSESSION
Off
6.2 Edit
The <EDIT> key allows the user to select and edit the following scoreboard fields.
Press <EDIT> and the key for the Home or Guest field to be edited.
Score +1, +2, +3, +6, -1
TEAM SCORE-EDIT
HOME nnn*
nnn = current setting
Press the Home or Guest <POSS> key, to turn on the
Possession indicator for that team.
To turn off the Possession indicator, press the same
<POSS> key a second time or press the opposite
<POSS> key.
LCD Screen Action
Press <EDIT> and any of the <SCORE> keys for the
home or guest team to display the current team score
setting.
Enter the correct team score on the number pad and
press <ENTER>.
Quarter +1
LCD Screen Action
Quarter-EDIT
n*
n = current setting
6-4 Gymnastics Operations
Press <EDIT> <QUARTER +1> to display the
current quarter setting.
Enter the correct quarter number on the number pad
and press <ENTER>. The full outs may be reset.
Page 56

Time Out On/Off
LCD Screen Action
TIME Outs-edit
FULL MM:SS
mm:ss = minutes, seconds
TIME OUT- edit
PARTIAL MM:SS
mm:ss = minutes, seconds
Press <EDIT> <TIME OUT ON/OFF> to display the
current time setting for full time outs.
Enter the correct time on the number pad and press
<ENTER>.
Press the <ENTER> key a second time to display the
configured time for partial time out length.
Enter the correct time on the number pad and press
<ENTER>.
Gymnastics Operations 6-5
Page 57

Page 58

Section 7: Gymnastics Operations
Sport Insert OG-207640 (Code 04)
Reference Drawings:
Block Diagram; A/S 5000 BB, VB, & WR #1............................................ A-124686
Block Diagram; A/S 3000 or 5000 BB, VB, & WR #2 ..............................A-125415
Block Diagram; A/S 5000 BB, VB, & WR #4............................................ A-125417
Insert; 0G-207640, A/S 3100 Gymnastics...............................................A-207640
Refer to Appendix C for a list of the codes of the All Sport 2500 console and which code for
the 3000 system takes its place.
The sport insert and block diagram drawings are located in Appendix A.
Refer to the information in Section 2: Basic Operation to start the console and use the sport
insert. Read Basic Operation carefully to fully understand the following operation
instructions. The gymnastics insert drawing, A-207640, displays the function for each key on
the All Sport 3000 series consoles during gymnastics mode. The block diagram drawing,
A-124686, displays the installation of the All Sport 3000 series control consoles to the main
scoreboard and other Daktronics products.
If you lose or damage an insert, use a photocopy of the insert until you can order a
replacement.
If you do not know the code number to enter for your scoreboard, refer to Appendix B in this
manual. If you do not know the model number of your scoreboard, refer to the installation and
maintenance manual provided with the scoreboard.
7.1 Gymnastics
Competitor
The <COMPETITOR> key is used to enter the competitor number.
LCD Display Action
Competitor
Press the <COMPETITOR> key to display the current
competitor number.
nnn
n = current setting
Gymnastics Operations 7-1
Enter the desired number on the number pad and press
<ENTER*>.
Page 59

Score
LCD Display Action
Score
nn.nnn
n = current setting
Press the <SCORE> key to edit the score for the current
competitor.
Enter the score using the number keys and press
<ENTER*>.
Blank Display
Press the <BLANK DISPLAY> key to blank the competitor number and score
information. This key will blank the information on the scoreboard and in the
console.
.
7-2 Gymnastics Operations
Page 60

Section 8: Hockey Operations
Sport Insert LL-2468 (Code 04)
Codes used by the All Sport 3000 console to replace the All Sport 2500 console are as
follows:
461
Refer to Appendix C.5 for a list of the codes of the All Sport 2500 console and which code
for the 3000 system takes its place.
Section 16:
Reference Drawings:
Insert, Hockey/Lacrosse A/S3000 Series.................................Drawing A-129368
Block Diagrams, A/S5000/3000 Hockey...................................Drawing A-124689
The sport insert and block diagram drawings are located in Appendix A.
Refer to the information in Section 2: Basic Operation to start the console and use the sport
insert. Read Basic Operation carefully to fully understand the following operation
instructions. The hockey insert drawing, A-129368, displays the function for each key on the
All Sport 3000 series consoles during hockey and lacrosse mode. The block diagra m
drawing, A-124689, displays the installation of the All Sport 3000 series control consoles to
the main scoreboard and other Daktronics products.
If you lose or damage an insert, use a photocopy of the insert until you can order a
replacement.
If you do not know the code number to enter for your scoreboard, refer to Appendix B in this
manual. If you do not know the model number of your scoreboard, refer to the installation and
maintenance manual provided with the scoreboard.
8.1 Hockey Keys
Enable Penalty Clocks
Press <ENABLE PENALTY CLOCKS> to allow the penalty clocks to count when
the main clock is on.
Disable Penalty Clocks
Press <DISABLE PENALTY CLOCKS> to disable the penalty clocks from
counting when the main clock is on.
Minor/Major Penalty
Use <MINOR PENALTY> and <MAJOR PENALTY> to enter the penalty time
when you select <PLAYER PENALTY>. (Refer to the Player Penalty subsection
that follows.)
Hockey Operations 8-1
Page 61

Period +1
LCD Screen Action
Period +1
N
n = current setting
Penalty
LCD Screen Action
HOME penalty
ON
HOME penalty
OFF
Press <PERIOD +1> to increment the period number.
A prompt showing period number displays briefly.
Press the Home or Guest <PENALTY>key to turn on
the Penalty indicator for that team.
To turn off the Penalty indicator, press the same
<PENALTY> key a second time or press the opposite
<PENALTY> key.
Player Penalty
LCD Screen Action
Home plyr/pen
1 pnn pn nn:nn
nn = current setting
Press <PLAYER PENALTY> to add a new penalty or
edit an existing penalty for the home or guest team.
To edit an existing penalty, use the Up or Down
Arrow keys, <>, to scroll to the desired penalty
and press <ENTER>.
Enter the jersey number of the player with the penalty
on the number pad and press <ENTER>.
Press <CLEAR> twice to clear changes and return to
the game.
(Continued on next page)
8-2 Hockey Operations
Page 62

(Continued from preceding page)
LCD Screen Action
Home plyr/pen
1 pnn pn mm:ss
nn = player number
mm:ss = penalty time
The default penalty time initially displayed is the minor
penalty value that was entered in Settings.
Enter the penalty time by pressing the <MINOR
PENALTY> or <MAJOR PENALTY> key, or use
the number pad to enter the correct penalty time and
then press <ENTER>.
Delete Penalty
Press <DELETE PENALTY> to delete a single penalty for the home or guest team.
LCD Screen Action
home del pen?
1 pnn pn nn:nn
nn = current setting
Use the Up or Down Arrow keys, <>, to scroll to
the correct penalty and press <ENTER>.
Press <CLEAR> to decline the selection and return to
the game.
8.2 Edit
The <EDIT> key allows the user to select and edit the following scoreboard fields.
Press <EDIT> and the key for the Home or Guest field to be edited.
Score
TEAM score-edit
HOME nnn
nnn = current setting
LCD Screen Action
Press <EDIT> and the appropriate statistic key to
display the current setting. For example, <SCORE +1,
-1>.
Enter the correct number on the number pad and press
<ENTER>.
Hockey Operations 8-3
Page 63

Period +1
LCD Screen Action
Period-EDIT
N*
n = current setting
Time Out On/Off
LCD Screen Action
TIME Outs-edit
FULL MM:SS
mm:ss = minutes, seconds
TIME OUT- edit
PARTIAL MM:SS
mm:ss = minutes, seconds
Press <EDIT> <PERIOD +1> to display the current
quarter setting.
Enter the correct quarter number on the number pad and
press <ENTER>. The full time outs are reset.
Press <EDIT> <TIME OUT ON/OFF> to display the
current time setting for full time outs.
Enter the correct time on the number pad and press
<ENTER>.
Press <TIME OUT ON/OFF> a second time to
display the configured time for partial time out length.
Enter the correct time on the number pad and press
<ENTER>.
8-4 Hockey Operations
Page 64

Section 9: Soccer Operations
Sport Insert LL-2471 (Code 07)
Codes used by the All Sport 3000 console to replace the All Sport 2500 console are as
follows:
765; 766; 767
Refer to Appendix C.5 for a list of the codes of the All Sport 2500 console and which code
for the 3000 system takes its place.
Reference Drawings:
Insert, Soccer, A/S3000 Series.................................................Drawing A-129374
Block Diagrams, A/S5000/3000, Outdoor Sports ....................Drawing A-124690
The sport insert and block diagram drawings are located in Appendix A.
Refer to the information in Section 2: Basic Operation to start the console and use the sport
insert. Read Basic Operation carefully to fully understand the following operation
instructions. The soccer insert drawing, A-129374, displays the function for each key on the
All Sport 3000 series control consoles during soccer mode. The block diagrams drawing, A-
124690, displays the installation of your All Sport 3000 series control consoles to the main
scoreboard and other Daktronics products that require the All Sport 3000.
If you lose or damage an insert, use a photocopy of the insert until you can order a
replacement.
If you do not know the code number to enter for your scoreboard, refer to Appendix B in this
manual. If you do not know the model number of your scoreboard, refer to the installation and
maintenance manual provided with the scoreboard.
9.1 Soccer Keys
Half +1
LCD Screen Action
Half; +1
n
n = current setting
Soccer Operations 9-1
Press <HALF +1> to increment the half number.
A prompt showing period number displays briefly.
Page 65

Shots on Goal +1, -1
The Home and Guest <SHOTS ON GOAL +1, -1> key are used to increment or
decrement their respective statistics.
LCD Screen Action
SHOTS: +1
HOME nn
nnn = current setting
9.2 Edit
The <EDIT> key allows the user to select and edit the following scoreboard fields.
Press <EDIT> and the key for the Home or Guest field to be edited.
Half +1
Half: EDIT
n*
n = current setting
Press the <SHOTS +1, -1> key to increment or
decrement the statistics for the home or guest team.
The LCD shows which key was pressed and the new
value for the corresponding team.
LCD Screen Action
Press <EDIT> <HALF +1> to display the current half
setting.
Enter the correct half number on the number pad and
press <ENTER>. The full outs are reset.
9.3 Time Out On/Off
LCD Screen Action
TIME Outs-edit
FULL MM:SS
mm:ss = minutes, seconds
TIME Outs-edit
PARTIAL MM:SS
mm:ss = minutes, seconds
9-2
Soccer Operations
Press <EDIT> <TIME OUT ON/OFF> to display the
current time setting for full time outs.
Enter the correct time on the number pad and press
<ENTER>.
Press the <ENTER> key to display the configured time
for partial time out length.
Enter the correct time on the number pad and press
<ENTER>.
Page 66

Score +1, -1
LCD Screen Action
TEAM SCORE: EDIT
HOME nnn*
nnn = current setting
Press <EDIT> and any of the <SCORE> keys for the
home or guest team to display the current team score
setting.
Enter the correct team score on the number pad and
press <ENTER>.
Shots on Goal +1, -1
The Home and Guest <SHOTS ON GOAL +1, -1> are edited in the same way.
LCD Screen Action
SHOTS: edit
HOME nn
nnn = current setting
Press <EDIT> and the <SHOTS ON GOAL +1> or
<SHOTS ON GOAL -1> key to display the current
setting.
Enter the correct number on the number pad and press
<ENTER>.
Soccer Operations 9-3
Page 67

Page 68

Section 10: Tennis Operations
Sport Insert LL-2481 (Code 08)
Reference Drawings:
Insert, A/S3000 Tennis .............................................................Drawing A-130828
Block Diagrams, A/S 5000/3000 Outdoor Sports .....................Drawing A-12469 0
The sport insert and block diagram drawings are located in Appendix A.
Refer to the information in Section 2: Basic Operation to start the console and use the sport
insert. Read Basic Operation carefully to fully understand the following operation
instructions. The tennis insert drawing, A-130828, displays the function for each key on the
All Sport 3000 series control consoles during tennis mode. The block diagr a ms drawing,
A-124690, displays the installation of your All Sport 3000 series control consoles to the main
scoreboard and other Daktronics products that require the All Sport 3000.
If you lose or damage an insert, use a photocopy of the insert until you can order a
replacement.
If you do not know the code number to enter for your scoreboard, refer to Appendix B in this
manual. If you do not know the model number of your scoreboard, refer to the installation and
maintenance manual provided with the scoreboard.
10.1 Tennis Keys
Serve
LCD Screen Action
TOP SERVE
ON
Games Won
LCD Screen Action
GAMES WON +1
TOP N
<SERVE> turns the Serve indicators on or off for the
respective player.
Press <GAMES WON +1> to increment the number of
games won in the current set for the respective player.
Point
The <POINT> key increments the point value for the respective player. If Tie
Break scoring mode is selected, the points will increment by 1. Otherwise, the points
Tennis Operations
10-1
Page 69

will increment as 15, 30, 40 AD or GM. The current point values will be shown on
the LCD.
Advantage
The <ADVANTAGE> key sets an advantage score for the chosen player. The score
digits for this player will display AD. The opposite player score will display - (dashes).
Note: The <ADVANTAGE> key is disabled when Tie Break scoring mode is
selected.
Deuce
The <DEUCE> key sets both scores to 40.
Note: The <DEUCE> key is disabled when Tie Break scoring mode is
selected.
Tie Break
The <TIE BREAK> key sets the mode of scoring to Tie Break mode. In Tie Break
scoring mode, points for each player are incremented by one when the <POINTS>
key is pressed.
Notes:
Tie Break scoring mode may only be selected when both player point
values are 0.
To change scoring mode back to normal, use the
<RESET GAME SCORE> key.
Reset Match
LCD Screen Action
TOP=nn BOT=nn
RESET MATCH?
nnn = current setting
Press <ENTER> to reset the current match. All set
scores and current game score will be cleared and the
set number will be set to 1.
Reset Game Score
Press <RESET GAME SCORE> to reset the player points values for the current
game.
Set +1
Press <SET> to increment the current set number. The new set number and new set
games won values will be displayed on the LCD.
10-2
Tennis Operations
Page 70

10.2 Edit
The <EDIT> key allows the user to select and edit the following scoreboard fields.
Press <EDIT> and the key for the Home or Guest field to be edited.
Games Won
LCD Screen Action
GAMES WON EDIT
SET 1 TOP N
Nn = current setting
Points
LCD Screen Action
TOP=nn BOT=nn
EDIT TOP
nn = current setting
Press <EDIT> <GAMES WON +1> to edit the
number of games won in the current set for the
respective player.
Press the number keys to edit any of these games won
values.
Press <ENTER> to accept.
Press <EDIT> <POINT> to set the point value for
the respective player. The current editing score is
shown by the bottom line on the LCD.
Use keypad to enter the correct value. Press
<ENTER> to accept.
Set +1
LCD Screen Action
SET: EDIT
n
n = current setting
Tennis Operations
Press <EDIT> <SET> to edit the current set number.
Use keypad to enter the correct set number. Press
<ENTER> to accept.
10-3
Page 71

Page 72

Section 11: Volleyball Operations
Sport Insert LL-2466 (Code 02)
Codes used by the All Sport 3000 console to replace the All Sport 2500 console are as
follows:
271; 273
Refer to Appendix C.5 for a list of the codes of the All Sport 2500 console and which code
for the 3000 system takes its place.
Reference Drawings:
Insert, Volleyball ..............................................................................Drawing A-129364
Block Diagrams,
A/S5000/3000, BB, VB & WR #1..............................................Drawing A-124686
Block Diagrams,
A/S5000/3000, BB, VB & WR #2..............................................Drawing A-125415
Block Diagram;
A/S 3000 or 5000 BB, VB & WR #4..........................................Drawing A-125417
The sport insert drawings are located in Appendix B and the block diagram drawings are
located in Appendix A.
Refer to the information in Section 2: Basic Operation to start the console and use the sport
insert. Read Basic Operation carefully to fully understand the following operation
instructions.
If you lose or damage an insert, use a photocopy of the insert until you can order a
replacement.
If you do not know the code number to enter for your scoreboard, refer to Appendix B in this
manual. If you do not know the model number of your scoreboard, refer to the installation and
maintenance manual provided with the scoreboard.
11.1 Volleyball Keys
Match Number +1, Games +1
The <MATCH NUMBER +1> and <GAMES +1> keys are both used to increment
their respective totals. <GAME +1> is used as an example in the table below.
LCD Screen Action
game no.: -+1
n
n = current setting
Volleyball Operations
Press the appropriate key to increment statistics for the
home or guest team.
The LCD shows which key was pressed and the new
value.
11-1
Page 73

Games Won +1
The Home and Guest keys are used to increment their respective totals.
LCD Screen Action
GAMES WON: +1
HOME nn
nn = current setting
Serve
LCD Screen Action
HOME serve
ON
HOME serve
off
Press the <GAMES WON +1> key to increment the
number of games won by the home or guest team.
The LCD shows which key was pressed and the new
value for the corresponding team.
Press the Home or Guest <SERVE> key to turn on the
Possession indicator for that team.
To turn off the Possession indicator, press the same
<SERVE> key a second time or press the opposite
<SERVE> key.
11.2 Edit
The <EDIT> key allows the user to select and edit the following scoreboard fields.
Press <EDIT> and the key for the field to be edited.
Match Number +1, Games +1
The <MATCH NUMBER +1>and <GAMES +1> keys are edited in the same way.
<GAME +1> is used as an example on the table below.
LCD Screen Action
game no: edit
n*
n = current setting
11-2 Volleyball Operations
Press <EDIT> and the appropriate statistic key to
display the current setting.
Enter the correct number on the number pad and press
<ENTER>.
Page 74

Score +1, -1
LCD Screen Action
TEAM SCORE: EDIT
HOME nnn*
nnn = current setting
Games Won +1
LCD Screen Action
GAMES WON: edit
HOME nn*
n = current setting
Time Out On/Off
Press <EDIT> and either of the <SCORE> keys for the
home or guest team to display the current team score
setting.
Enter the correct team score on the number pad and
press <ENTER>.
Press <EDIT> <GAMES WON +1> for the home or
guest team to display the current setting of games won.
Enter the correct number of games won on the number
pad and press <ENTER>.
LCD Screen Action
TIME OUTs-edit
FULL MM:SS
mm:ss = minutes, seconds
TIME OUT- edit
PARTIAL MM:SS
mm:ss = minutes, seconds
Press <EDIT> <TIME OUT ON/OFF> to display the
current time setting for full time outs.
Enter the correct time on the number pad and press
<ENTER>.
The LCD will now display the configured time for
partial time out length.
Enter the correct time on the number pad and press
<ENTER>.
Volleyball Operations
11-3
Page 75

Page 76

Section 12: Wrestling Operations
Sport Insert LL-2467 (Code 03)
Codes used by the All Sport 3000 console to replace the All Sport 2500 console are as
follows:
351; 352; 353; 354
Refer to Appendix C.5 for a list of the codes of the All Sport 2500 console and which code
for the 3000 system takes its place.
Reference Drawings:
Insert, Wrestling........................................................................Drawing A-129366
Block Diagrams,
A/S5000/3000, BB, VB & WR #1...........................................Drawing A-124686
Block Diagrams,
A/S5000/3000, BB, VB & WR #2...........................................Drawing A-125415
Block Diagrams,
A/S 3000 or 5000 BB, VB & WR #4.......................................Drawing A-125417
The sport insert drawings are located in Appendix B and the block diagram drawings are
located in Appendix A.
Refer to the information in Section 2: Basic Operation to start the console and use the sport
insert. Read Basic Operation carefully to fully understand the following operation
instructions.
If you lose or damage an insert, use a photocopy of the insert until you can order a
replacement.
If you do not know the code number to enter for your scoreboard, refer to Appendix B in this
manual. If you do not know the model number of your scoreboard, refer to the installation and
maintenance manual provided with the scoreboard.
12.1 Wrestling Keys
Match Number +1
LCD Screen Action
match- +1
n
n = current setting
Wrestling Operations 12-1
Press <MATCH +1> to increment the match number.
A prompt showing match number displays briefly.
Page 77

Period +1
LCD Screen Action
period +1
n
n = current setting
Reset Match
LCD Screen Action
reset match?
ENTER TO ACCEPT
Press <PERIOD +1> to increment the quarter number.
A prompt showing period number displays briefly.
Press <RESET MATCH> to select the operation that
will clear all of the data for the last match or the match
in progress and begin a new individual match.
Press <ENTER> to accept or <CLEAR> to resume the
match in progress using the current data and exit the
menu.
Match Score +1, +2, +3, -1
The Home and Guest <MATCH SCORE +1>, <MATCH SCORE +2>, and
<MATCH SCORE +3> keys are used to increment the match score, and the
<MATCH SCORE -1> key is used to decrement the match score.
LCD Screen Action
match SCORE-+1
HOME nnn
nnn = current setting
Press the appropriate <SCORE> key to increment or
decrement the match score for the home or guest team.
The LCD shows which key was pressed and the new
value for the match score of the corresponding team.
Pressing a <MATCH SCORE> key will cause the
match scores to show on the LCD (MAT will show up
on the LCD to indicate this). Pressing a <TEAM
SCORE> key will cause the team scores to show up on
the LCD (TM will show on the LCD to indicate this).
12-2 Wrestling Operations
Page 78

Start Injury Time
LCD Screen Action
g injury n:nn
H = 2 G = 0
n:nn = injury timer
g or h = guest or home
The maximum allowed injury time is set for ea ch
competitor at the beginning of a match and reset to this
time when the Reset Match function is performed.
When enabled, the injury times are displayed in the
main clock digits and the appropriate (Home or Guest)
match score digits flash.
The main clock must be stopped to use the injury timer.
Press <START INJURY TIME> to start the injury
timer for the home or guest competitor. The injury
timer counts down from the maximum allowed time
until <STOP> is pressed or 0:00 is reached. The injury
time is shown on the LCD display with H for Home or G
for Guest.
Press the <STOP> key to stop the injury timer and
return the period time to the main clock digits.
Start Blood Time
LCD Screen Action
g blood n:nn
h = 2 g = 0
n:nn = injury timer
g or h = guest or home
Maximum allowed blood time is set for each
competitor at the beginning of a match and reset to this
time when the Reset Match function is performed.
When enabled, the blood times are displayed in the
main clock digits and the appropriate (Home or Guest)
match score digits flash.
The main clock must be stopped to use the blood timer.
Press <START BLOOD TIME> to start the blood
timer for the home or guest competitor. The
injury/blood timer counts down from the maximum
allowed time until the timer reaches 0:00 or the
operator presses <STOP>. The LCD screen shows
blood time with H for Home or G for Guest.
Press the <STOP> key to stop the blood timer and
return the period time to the main clock digits.
Wrestling Operations 12-3
Page 79

12.2 Edit
The <EDIT> key allows the user to select and edit the following scoreboard fields.
Press <EDIT> and the key for the Home or Guest field to be edited.
Blood Time
LCD Screen Action
blood time-EDIT
HOME mm:ss
mm:ss = current setting
Set as a default
Enter to accept
Injury Time
LCD Screen Action
injury time-EDIT
HOME mm:ss*
mm:ss = current setting
Set as default
Enter to accept
Press <EDIT> and either of the <BLOOD TIME>
keys for the home or guest team to display the current
blood time setting.
Enter the new blood time in minutes and seconds on
the number pad and press the <ENTER> key. For
example, 5:00.
After the blood time is set, the prompt to accept as
default will be displayed. Press <ENTER> if this is to
be the new default time for blood time.
To display the current injury time setting, press
<EDIT> and either of the <INJURY TIME> keys for
the home or guest team.
Enter the maximum allowed injury time in minutes and
seconds on the number pad and press the <ENTER>
key. For example, 5:00.
After the injury time is set, the prompt to accept as
default will be displayed.
Press <ENTER> if this is to be the new default time
for injury time.
12-4 Wrestling Operations
Page 80

Match Number, Period, Team Score and Match Score
The Home a nd Guest <MATCH NUMBER +1>, <PERIOD +1>, <TEAM
SCORE+1, -1> and <MATCH SCORE +1, +2, +3, -1> keys are all edited in the
same way. Team Score is used as an example in the table below.
LCD Screen Action
TEAM score-edit
HOME nnn
nnn = current setting
Press <EDIT> and the appropriate statistic key to
display the current setting. For example, <TEAM
SCORE +1, -1>.
Enter the correct number on the number pad and press
<ENTER>.
Wrestling Operations 12-5
Page 81

Page 82

Section 13: Cricket Operations
Sport Insert OG-235056 (Code 16)
Reference Drawings:
Insert, Cricket............................................................................Drawing A-235056
Block Diagrams,
A/S5000/3000, Outdoor Sports..........................................Drawing A-124690
The sport insert and block diagram drawings are located in Appendix B.
Refer to the information in Section 2: Basic Operation to start the console and use the sport
insert. Read Basic Operation carefully to fully understand the following operation
instructions.
If you lose or damage an insert, use a photocopy of the insert until you can order a
replacement.
If you do not know the code number to enter for your scoreboard, refer to Appendix B in this
manual. If you do not know the model number of your scoreboard, refer to the installation and
maintenance manual provided with the scoreboard.
13.1 Cricket Keys
Extras (+1,-1), Overs (+1,-1), Wickets (+1,-1)
The <EXTRAS +1>, <OVERS +1> and <WICKETS +1> keys are used to
increment their respective totals. The –1 keys are used for correcting a wrong value.
LCD Screen Action
EXTRA RUNS: +1
nN
nN = current setting
Press <EXTRAS +1>, <OVERS +1> or <WICKETS
+1> to increment their respective totals.
The LCD shows which key was pressed and the new
value.
The Extras +1,-1 keys will also increment and decrement
from the total score
When the <WICKETS +1> key is pressed it will
transfer the total score to the Last Wicket and also
transfer the Batsman score of the Batsman selected as
facing to the Last Man. Make sure the facing selection is
set for the Batsman that is to be out.
Cricket Operations 13-1
Page 83

Batsman Number (Alternative Function)
The < BATSMAN NUMBER > key is used to display the uniform number of
Batsman A and B currently in the game.
LCD Screen Action
Batsman A
nn*
nn = current setting
First press the < ALT > key and then the
< BATSMAN NUMBER > key. Enter the number of the
player and press <ENTER>.
Batsman Facing
The <BATSMAN FACING> keys turn the batsman A and batsman B indicators on.
LCD Screen Action
BATSMAN A FACING
ON
Press the <BATSMAN FACING> key, to turn on the
facing indicator for that batsman.
This display appears briefly.
Score +1, +4, +6, -1
LCD Screen Action
Bat a RUNS: +1
nn
nn = current setting
Press the appropriate <SCORE +1>, <SCORE +4>, or
<SCORE +6> key to increment the total number of
runs for the batsman A or batsman B.
Press the <SCORE -1> to decrement the batsman score.
The LCD shows which key was pressed and the new
value for the corresponding player.
These keys will also increment and decrement from the
total score.
13-2 Cricket Operations
Page 84

Bowler A Info, Bowler B Info
The <BOWLER INFO> keys are used to enter information about the bowlers.
LCD Screen Action
Bowler A nn*
nn = current value
Press the appropriate <BOWLER INFO> key and enter
the desired value and press <ENTER>.
Last Man
The <LAST MAN> key is used to enter or edit score for the last man that was out.
LCD Screen Action
Last man nnn*
nn = current value
Press the <LAST MAN> key and enter the desired value
and press <ENTER>.
Last Wicket
The <LAST WICKET> k ey is used to enter or edit score that was shown at the last
wicket.
LCD Screen Action
Last wicket nnn*
nnn = current value
Press the <LAST WICKET > key and enter the desired
value and press <ENTER>.
Runs Reqd
The <RUNS REQD> key is used to enter or edit the value for runs required to win.
LCD Screen Action
Runs reqd nnn*
nnn = current value
Cricket Operations 13-3
Press the <RUNS REQD> key and enter the desired
value and press <ENTER>.
Page 85

1st Inns
The <1ST INNS> key is used to enter or edit the value for the number of 1st inning
runs.
LCD Screen Action
1st inns nnn*
nnn = current value
Press the <1ST INNS> key and enter the desired value
and press <ENTER>.
Total
The <TOTAL> key is used to enter or edit the value for the total team runs.
LCD Screen Action
Total score
nnn*
nnn = current value
Press the <TOTAL> key and enter the desired value and
press <ENTER>.
The Batsman Score keys (+1, +4, +6,-1) and the Extra
keys (+1,-1) will also increment/decrement to the total
score.
Team Out/ Declare
The <TEAM OUT/DECLARE> key is used when the team is out or if they want to
declare the end of their inning.
LCD Screen Action
Out/declare
Y/n?
nnn = current value
If the team is set out the total score will be copied to the 1st Inns value, and the Runs
required will be set to the current total Score +1. The Wickets will be set to 0 and all
other scores will be set to blank.
Press the <TEAM OUT/DECLARE> and the prompt
shown at the left will appear. Press <CLEAR> if you do
not want to set the team out. Press <ENTER> if you
want to set the team out.
Umpire Light
When this <UMPIRE LIGHT> key is pressed the umpire light will come on and
stay on until the key is released.
13-4 Cricket Operations
Page 86

13.2 Edit
The <EDIT> key allows the user to select and edit the following scoreboard fields.
Press <EDIT> and the key for the field to be edited.
Wickets +1, -1
LCD Screen Action
Wickets: edit
nn
nn = current setting
Press <EDIT> <WICKETS +1> to display the current
setting.
Enter the correct inning number on the number pad and
press <ENTER>.
Score +1, +4, +6
LCD Screen Action
Bat a runs: edit
nn
nn = current setting
Press <EDIT> and the appropriate <SCORE +1> key to
display the current setting for the batsman A or B.
Enter the correct number on the number pad and press
<ENTER>.
Overs +1, Extras +1
The <OVERS +1> and <EXTRAS +1> keys are edited in the same way. <OVERS
+1> is used as an example.
LCD Screen Action
OVERS: edit
nn
nn = current setting
Cricket Operations 13-5
Press <EDIT> and the appropriate statistic key to display
the current value.
Enter the correct number on the number pad and press
<ENTER>.
Page 87

Page 88

Appendix A: Reference Drawings
Address Table, 1 Through 128........................................................Drawing A-115078
Address Table, 129 through 256.....................................................Drawing A-115079
4 Column LED Driver II....................................................................Drawing A-123783
16 Column Driver III.........................................................................Drawing A-123940
8 Column Driver III...........................................................................Drawing A-123941
Block Diagram, A/S 5000/3000 BB, VB & WR #1............................. Drawing A-124686
Block Diagram, A/S 5000/3000 BB, VB & WR #3............................. Drawing A-124688
Block Diagram, A/S 5000/3000 Hockey.............................................. Drawing A-124689
Block Diagram, A/S 5000/3000 Outdoor Sports................................Drawing A-124690
Schematic,
Dual ¼" Phone J-Box w/Shunt Jack............................................. Drawing A-125316
Block Diagram,
A/S 5000/3000 BB, VB & WR #2.................................................. Drawing A-125415
Block Diagram,
A/S 3000 or 5000 BB, VB & WR #4..........................................Drawing A-125417
16 Column LED Driver II..................................................................Drawing A-126174
Rear View, A/S 3000 Connector Assignments.................................. Drawing A-131941
Indoor Shot Clock Scbds
Radio Receiver Installation.......................................................Drawing A-135163
A/S 3110R Battery Option ..............................................................Drawing A-135794
Channel Selection
Single Control Console, Gen IV................................................Drawing A-180566
Channel Selection
Single Broadcast Group, Gen IV...............................................Drawing A-180922
Channel Selection
Multiple Broadcast Group, Gen IV............................................Drawing A-180923
Reference Drawings A-1
Page 89

Page 90

Page 91

Page 92

Page 93

Page 94

Page 95

Page 96

Page 97

Page 98

Page 99

Page 100

 Loading...