

Daikin R71KV1, R71KY1, R71KVAL, RY71KY1, RY71KV1 Service Manual
REMOVAL
PROCEDURE
SERVICE MANUAL
Outdoor Unit
Non-Inverter
Multi Type
3 HP Class
Si211311E

Service Manual
Removal Procedure
Outdoor Unit
Applicable Models
zCooling Only
R71KV1
R71KY1
R71KVAL
zHeat Pump
RY71KV1
RY71KY1

Si211311E
Removal Procedure 1
Table of Contents
1. Procedure to Remove External Casing...................................................2
2. Procedure to Remove Outdoor Unit Fan and Fan Motor ........................3
3. Procedure to Remove Outdoor Unit PCB ...............................................5
4. Procedure to Remove Electrical Parts Box .............................................6
5. Procedure to Remove Electronic Expansion Valve and
Solenoid Valve ........................................................................................8
6. Procedure to Remove Four Way Valve and Coil ....................................9
7. Procedure to Remove Compressor.......................................................10
Procedure to Remove External Casing Si211311E
2 Removal Procedure
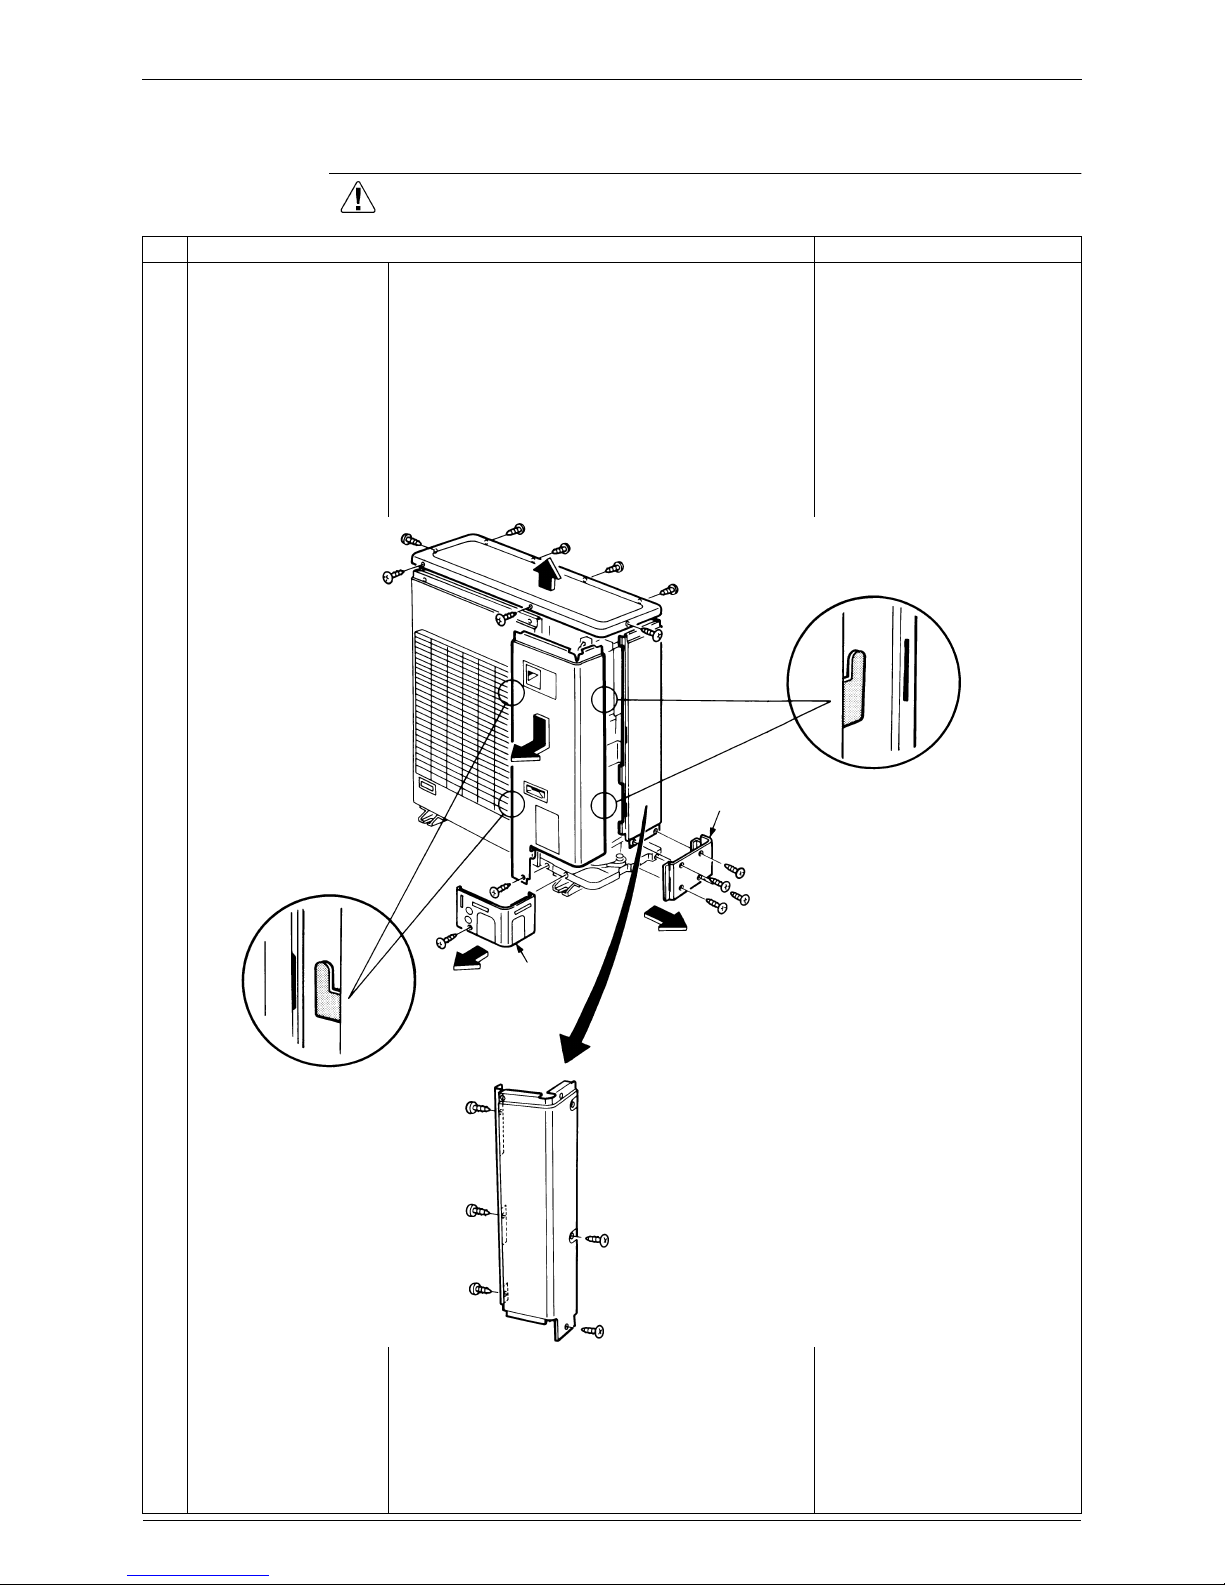
1. Procedure to Remove External Casing
Procedure Warning Be sure to wait for 10 minutes or more after turning off all power
supplies before disassembling work.
Step
Procedure Points
1
Remove the 8 top plate
screws.
2
Remove the screw of
the front piping cover.
3
Remove the screw of
the front casing and
remove by pushing
downward.
4
Remove the 4 screws
of the side piping cover.
5
Remove the 5 screws
of the rear/side casing.
Side piping
cover
Front piping
cover
Si211311E Procedure to Remove Outdoor Unit Fan and Fan Motor
Removal Procedure 3
2. Procedure to Remove Outdoor Unit Fan and Fan
Motor
Procedure Warning Be sure to wait for 10 minutes or more after turning off all power
supplies before disassembling work.
Step
Procedure Points
∗ Remove the front piping
cover, etc., according to the
procedure for removing the
external casing.
1
Remove the 4 screws
and disconnect the 8
tabs fastening the air
discharge grille on the
top/bottom and left/
right, and remove the
air discharge grille.
2
Remove the fan clamp
fastening the propeller
fan; remove the nut and
washer.
Note:
The fan motor’s lead wire
cannot be disconnected as is.
You must first remove the screw
on the right side of the front
casing (1).
3
Disconnect the motor
connector from the
PCB’s wiring connector,
and remove the
condenser.
Connector
Condenser
 Loading...