

Daikin KDBHQ56B140 Installation manuals

INSTALLATION MANUAL
Air discharge outlet sealing member
KDBHQ56B140
KDBHQ56B140 Air discharge outlet sealing member Installation manual
3×
1×
1×
1×
1×
1×
2×
1×
2×
Drain pipe side
Air outlet (A)
Air outlet (2)
Air outlet (D)
Air outlet
Air outlet (3)
Air outlet (4)
(1)
Drain
pipe side
■ Read this manual attentively before installation. Do
not throw it away. Keep it in your files for future
reference.
■ Refer to the installation manual for both indoor unit
and the decoration panel.
■ If a separately provided sealing material kit is
installed, the 3-way flow may not be selectable. For
details, please refer to the technical materials or
catalogues.
The English text is the original instruction. Other languages are
translations of the original instructions.
Accessories
Make sure you have all parts before installation.
e
b
a
Installation manual
a
Sealing material (longitudinal air outlet)
b
Sealing material A, B (Air outlet at the corner)
c
Sealing material C (Air outlet at the corner)
d
Sealing material D (Air outlet at the corner)
e
Tape for fixing the sealing (longitudinal air outlet)
f
Tape for fixing the sealing (air outlet at the corner)
g
Tape for fixing the sealing (air outlet at the corner)
h
Sealing block
i
d
c
g
f
h
i
ZD\ÀRZ
ZD\ÀRZ
Preparing the sealing material
Air outlet (B)
The direction of air discharge and the
positioning of sealing material
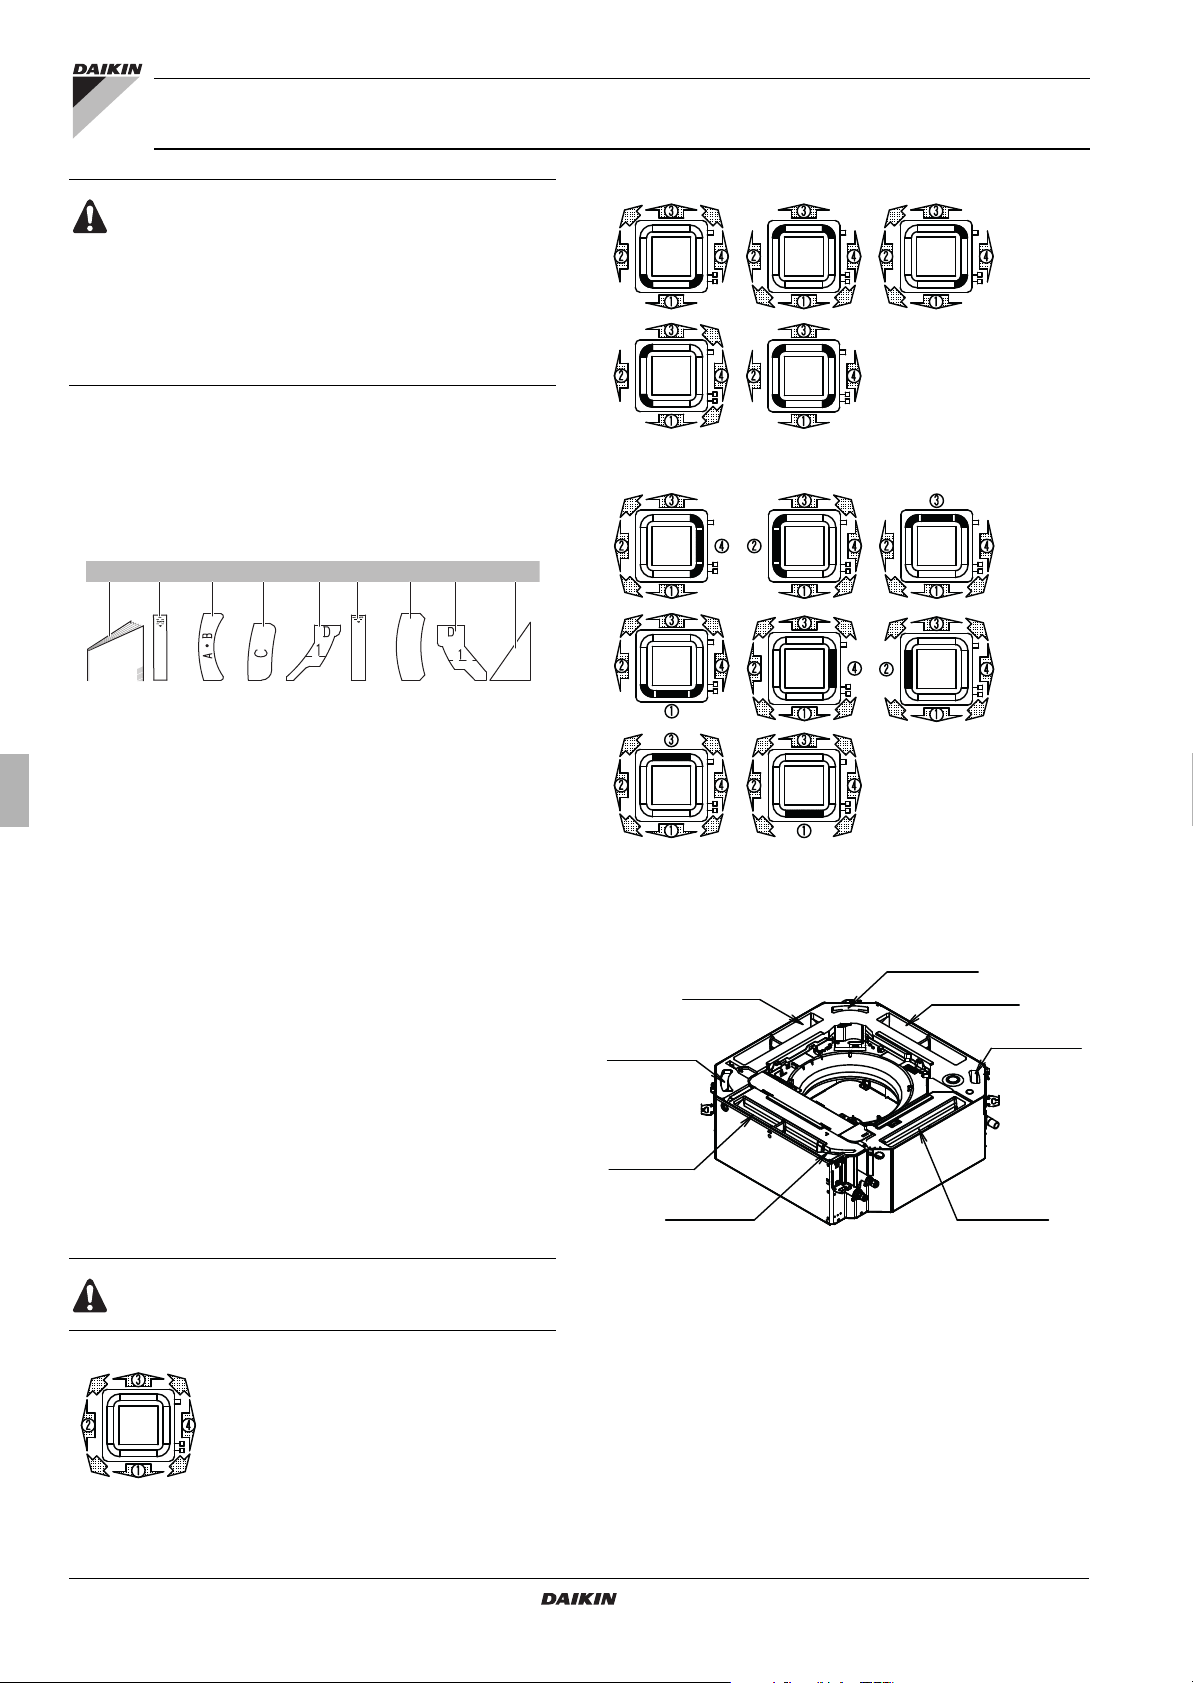
Selection of the air outlet
1 Select the direction of air discharge from the following figures
2 Refer to On-site setting for setting position number.
3 Refer to the installation manual attached to the indoor unit for
Installation manual
1
according to the location of the indoor unit.
selection of installation location.
Discharge direction patterns other than those shown in
folowing figures cannot be selected. (Dew condensation
may occur.)
$OOURXGÀRZ
Refrigerant pipe side
(C)
Air outlet
Refrigerant pipe side
Prepare the sealing material and the tape for fixing the sealing
material according to the air outlet (1) to (4) to be closed.
1 Cut off the sealing material and sealing material fixing tape on
the tear line (dotted line) while leaving the number of the air
outlet to be closed. Cut off the sealing material fixing tape using
scissors.
2 Peel off the released paper from the sealing material and the
tape for fixing the sealing material.
3 Adhere the sealing material to the sealing material fixing tape.
(Adhere the sealing material to the center of the sealing material
fixing tape unless otherwise instructed.)
KDBHQ56B140
Air discharge outlet sealing member
4P564848-1B 2020.12
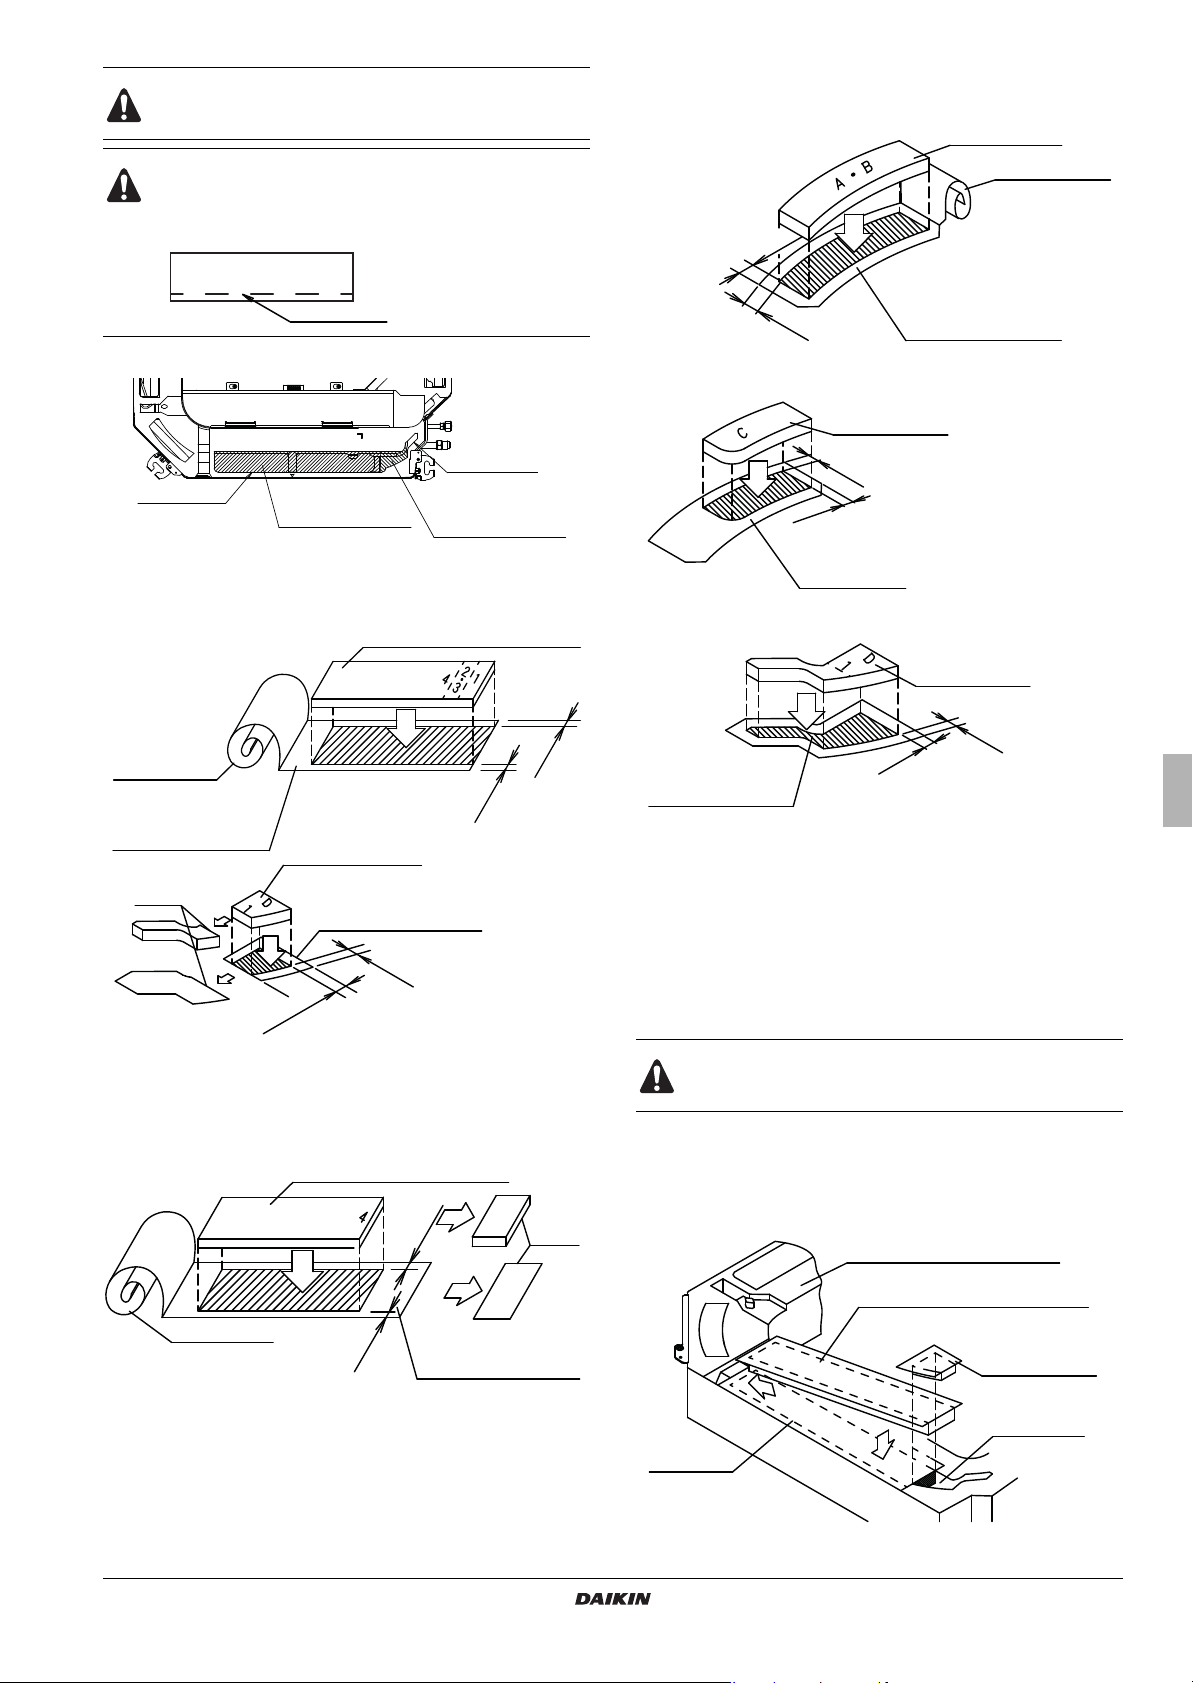
Make sure the printed number remains visible while
Air outlet
(1)
Sealing material
(accessory b)
Cut off sealing
material D
(accessory
)
Refrigerant
pipe side
Air outlet (D)
f)
10mm
10mm
6HDOLQJPDWHULDO'
(accessory e)
7DSHIRU¿[LQJ
WKHVHDOLQJPDWHULDO
(accessory h)
Cut off*
12mm
Release paper 7DSHIRU¿[LQJ
WKHVHDOLQJPDWHULDO
10mm
10mm
(accessory c)
Released paper
7DSHIRU¿[LQJ
the sealing material
12mm
(accessory d)
7DSHIRU¿[LQJ
the sealing material
(accessory
)
12mm
12mm
(accessory e)
7DSHIRU¿[LQJ
12mm
12mm
Sealing material for air outlet (1)
for air outlet (D)
Air outlet (D)
A
(1)
attaching the sealing material to the sealing material fixing
tape, so that the sealing material can be identified.
■ Do not cut on the tear line for the long air outlet
sealing material (accessory b) and sealing material
fixing tape (accessory f) as shown below. If the tear
line is cut off, it may cause condensation.
Preparing the sealing material for the air outlet (A), (B),
(C), (D)
Air outlet (A), (B)
Sealing material
Do not cut off
Preparing the sealing material for the air outlet (1)
To close the air outlet (1) use sealing material (accessory b) and
■
sealing material D (accessory e). Be careful not to throw away
the sealing material.
6HDOLQJPDWHULDODFFHVVRU\b)
Release paper
7DSHIRU¿[LQJ
WKHVHDOLQJPDWHULDO
(accessory
12mm
(accessory g)
Air outlet (C)
e
Air outlet (D)
the sealing material
(accessory h)
Sealing material
g
Sealing material
12mm
* Cut off only in case you want to close only the air outlet (1). Do not
cutt off in case you want to close both air outlet (1) and air outlet (D).
Preparing the sealing material for the air outlet (2), (3), (4)
6HDOLQJPDWHULDODFFHVVRU\b)
(accessory f)
KDBHQ56B140
Air discharge outlet sealing member
4P564848-1B 2020.12
Cut o
Closing the air outlet
1 Align the end of the shorter face of the sealing material with air
outlet on both sides.
2 Adhere the sealing material created in previous steps to the air
outlet of the indoor unit.
Adhere the sealing material without creating a gap and
detachment between the sealing material and air outlet. Air
discharge and dew condensation may occur.
Closing the air outlet (1)
1 Close the air outlet (1).
2 Close the air outlet (D) partially.
Indoor unit (drain pan)
Sealing material
ir outlet
Installation manual
2
 Loading...