

Page 1
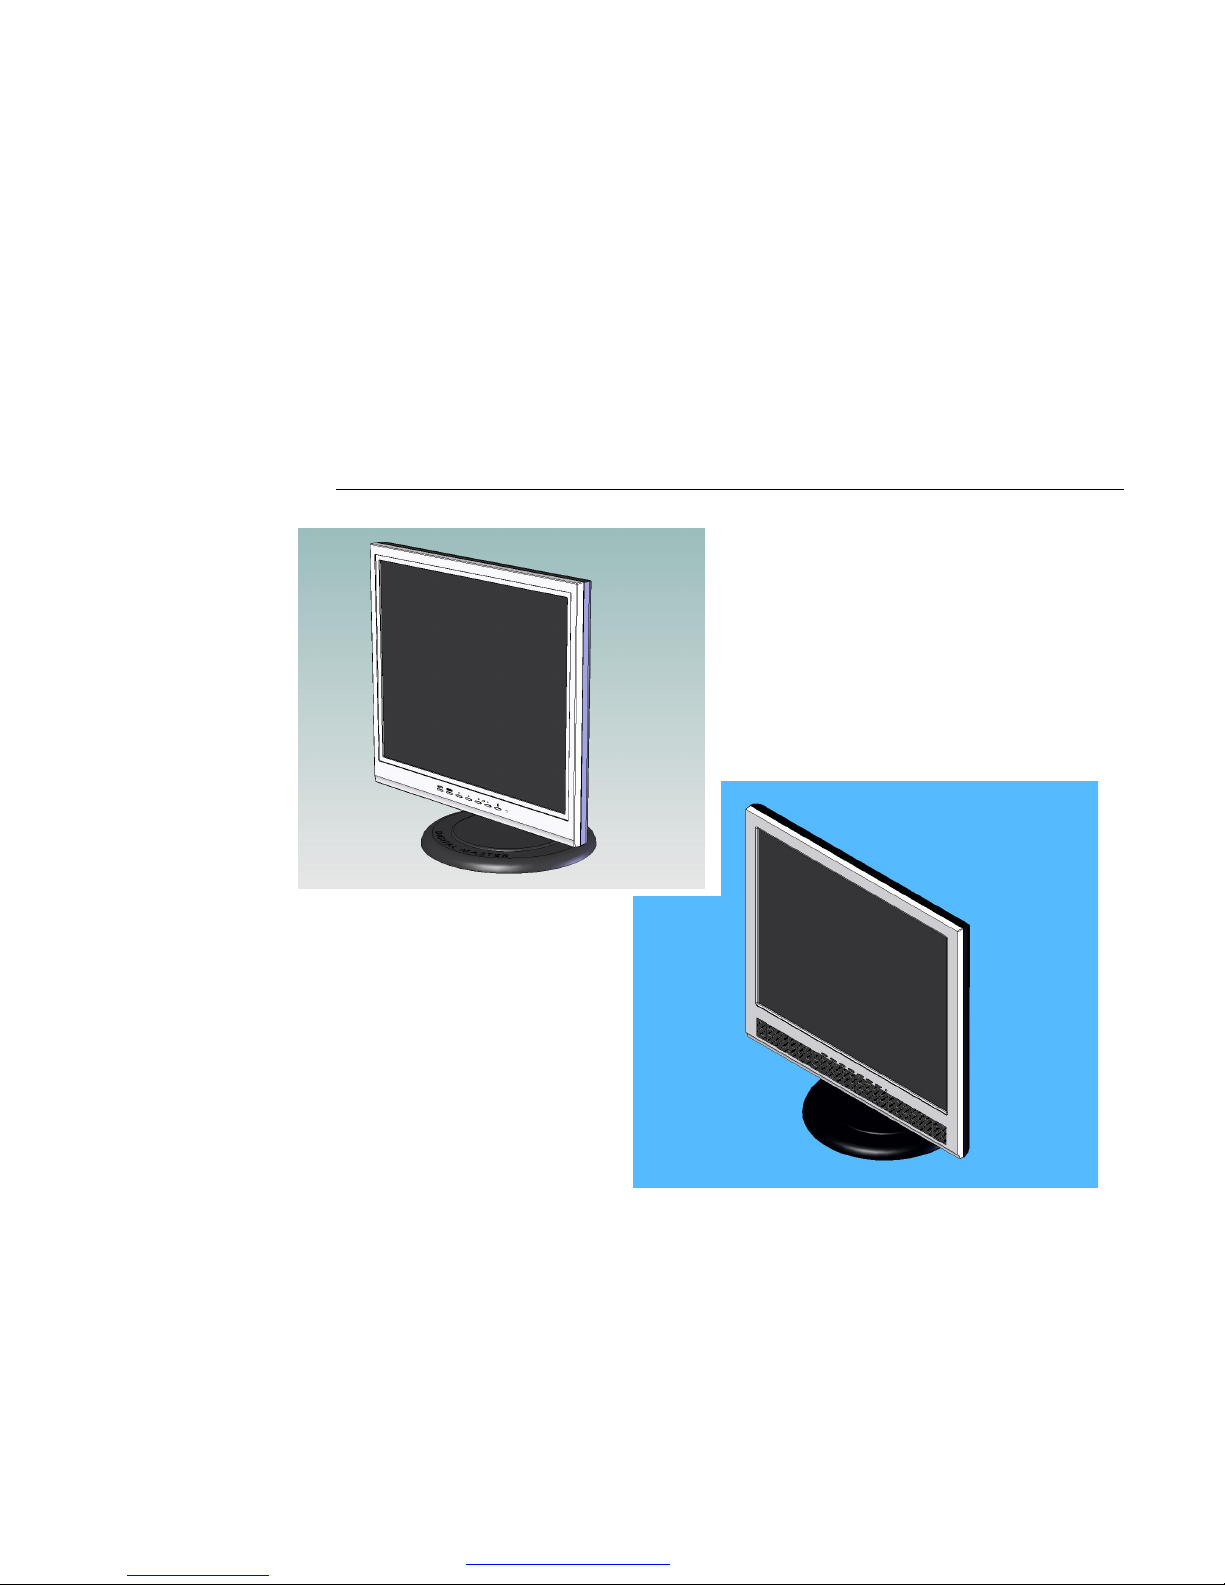
TFT LCD MONITOR
Model L1711MN
Model L1911MN
User’s Manual
PDF created with pdfFactory trial version www.pdffactory.com
Page 2
ii
PREFACE
Thank you for purchasing the active matrix TFT LCD Monitor. The LCD Monitor display sharp and
brilliant images of text and graphics with a maximum supported resolution up to 1280 x 1024 (SXGA)
pixels. The monitor was designed to accommodate the performance of PC Monitor for use in the home,
office, or large corporate environment. The fine resolution will allow wide range of monitor capabilities
including word processing, e-mail, spreadsheets, and Internet browsing.
NOTE: This equipment has been tested and found to comply with the limits for a Class B digital device,
pursuant to part 15 of the FCC Rules. These limits are designed to provide reasonable protection against
harmful interference in a residential installation. This equipment generates, uses and can radiate radio
frequency energy and, if not installed and used in accordance with the instructions, may cause harmful
interference to radio communications. However, there is no guarantee that interference will not occur in a
particular installation. If this equipment does cause harmful interference to radio or television reception,
which can be determined by turning the equipment off and on, the user is encouraged to try to correct the
interference by one or more of the following measures:
- Reorient or relocate the receiving antenna.
- Increase the separation between the equipment and receiver.
- Connect the equipment into an outlet on a circuit different from that to which the receiver is
connected.
- Consult the dealer or an experienced radio/TV technician for help.
Notice
:
All Rights Reserved
This document is protected by copyright with all rights reserved.
No part of the document may be reproduced or transmitted by any
means or in any form, without prior consent in writing from the
manufacturer.
Trademark Acknowledgement
VGA is a trademark of International Business Machines Corporation.
ENERGY STAR is a trademark of U.S Environmental Protection Agency
WARNING: FCC Regulations state that any unauthorized changes or modifications to this
equipment not expressly approved by the manufacturer could void the user’s authority to
operate this equipment.
U.S.A. ONLY
THIS DEVICE COMPLIES WITH PART 15 OF THE FCC RULES. OPERATION IS
SUBJECT TO THE FOLLOWING TWO CONDITIONS:
(1) THIS DEVICE MAY NOT CAUSE HARMFUL INTERFERENCE, AND
(2) THIS DEVICE MUST ACCEPT ANY INTERFERENCE RECEIVED, INCLUDING
INTERFERENCE THAT MAY CAUSE UNDESIRED OPERATION.
CAUTION: TO PREVENT ELECTRICAL SHOCK.
DO NOT REMOVE ALL COVERS.
NO USER-SERVICABLE PARTS INSIDE.
REFER SERVICING TO QUALIFIED SERVICE PERSONNEL.
CAUTION
RISK OF ELECTRICAL SHOCK
DO NOT OPEN
WARNING: TO PREVENT DAMAGE WHICH MAY RESULT IN FIRE
OR SHOCK HAZARD. DO NOT EXPOSE THIS APPLIANCE TO RAIN
OR MOISTURE.
PDF created with pdfFactory trial version www.pdffactory.com
Page 3
iii
CONTENT&
ACCESSORIES
Preface i
Content ii
Accessories ii
Safety 1
Unpacking the LCD Monitor 2
Installation 3
Control Panel 4
On-Screen Display (OSD) 6
Troubleshooting 8
Specification 9
Technical Information 10
Certification 11
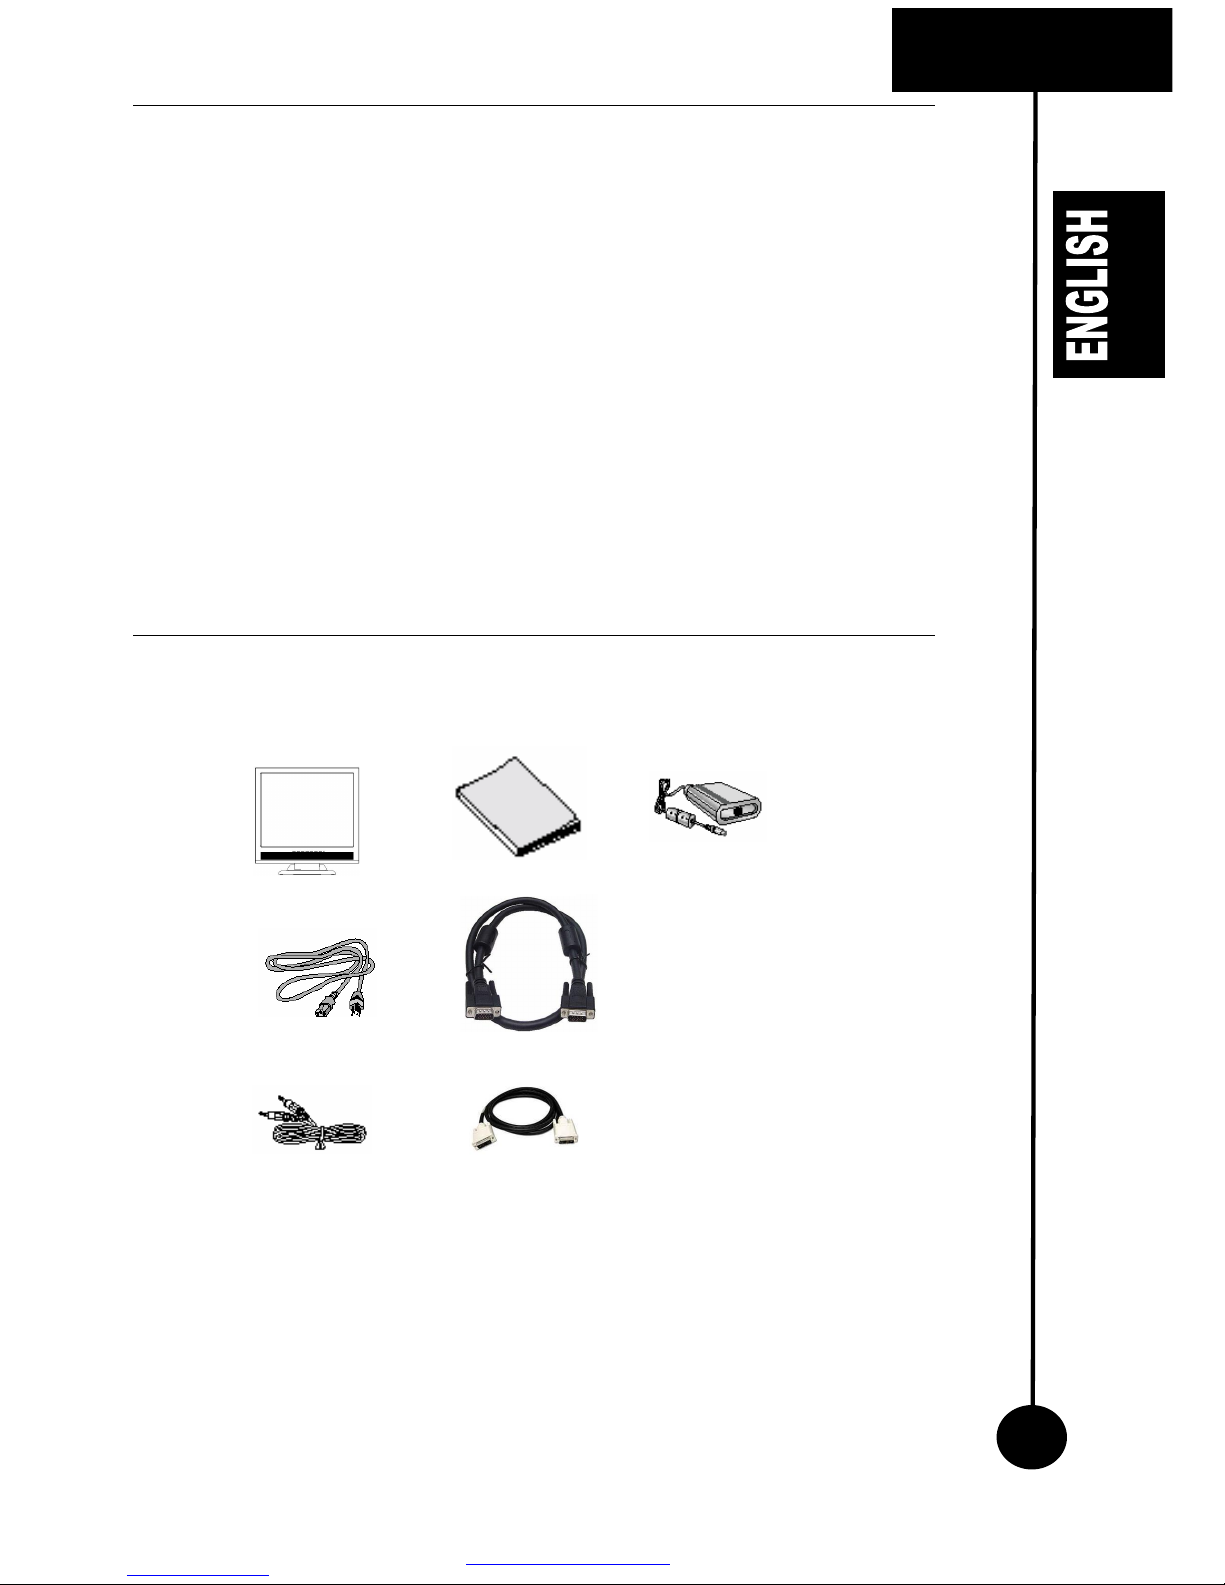
Your purchase will have the following items from a complete package:
If there is any item missing, please contact your local dealer.
TFT-LCD Monitor User’s Manual
Power Cable
VGA Cable
AC to DC Power
Adaptor (DC 12V, 4A)
PC Stereo Cable
Optional DVI Cable
(Optional)
PDF created with pdfFactory trial version www.pdffactory.com
Page 4
Caution: Use of controls, adjustments, or procedures other than those specified in this
document may result in exposure to shock, electrical hazards, and/ or mechanical
hazard.
Read and follow these instructions when connecting and using the LCD monitor:
To help avoid damaging your computer, be sure that the voltage selection switch on
the power supply for the computer is set to match the alternating current (AC) power
available at your location:
§ 110 volts (V)/60 hertz (Hz) in most of North and South America and some Far Eastern countries
such as Japan (100 volts), South Korea (220 volts (V)/60 hertz (Hz)), and Taiwan.
§ 230 volts (V)/50 hertz (Hz) in most of Europe, the Middle East, and the Far East.
§ Always be sure that you are operating within the valid electrical rating in your location
§ Never insert anything metallic into the LCD monitor openings. Doing so may create the danger
of electric shock
§ Never touch the inside of the LCD monitor. Only a qualified technician should open the case.
§ Never use the LCD monitor if the power cable has been damaged. Do not allow anything to rest
on the power cable.
§ Keep the power cable away from where people could trip over it.
§ Be sure to grasp the plug, not the cable, when disconnecting the LCD monitor from an electric
socket.
§ Do not remove the ground pin. By doing so, you will defeat the safety. A polarized plug has two
blades wider than the other. A grounding type plug has two blades and third grounding prong.
The wide blade or third prong is provided for your safety.
§ When the provided plug does not fit into your electrical outlet, consult an electrician for the
replacement of the plug.
§ To prevent overheating, do not block or covered openings of the LCD monitor.
§ Avoid using the LCD Monitor on a bed, sofa, rug, or other soft surface, as doing so may block
ventilation openings in the bottom of the cabinet. If you place the LCD monitor in a bookcase or
an enclosed space, make sure to provide adequate ventilation and air flow.
§ Place the LCD monitor in a location with low humidity and minimum dust.
§ Avoid places such as a damp base and a dusty hallway.
§ Do not expose the LCD monitor to rain or use it near water (in kitchens, next to swimming pools,
etc.). If the LCD monitor accidentally gets wet, unplug it and contact your dealer immediately.
You can clean the LCD monitor with a damp cloth if necessary, being sure to unplug the LCD
monitor first.
§ Place the LCD monitor on a solid surface and treat it carefully. The LCD monitor is fragile and
cannot be damaged, dropped or hit sharply. When use with a cart, stand, tripod, bracket, or table,
being sure that the LCD monitor is adequately supported.
§ Unplug the LCD monitor during lightning storms or when unused for long periods of time.
§ Locate the LCD monitor near an easily accessible electric outlet.
§ If the LCD monitor does not operate normally - in particular, if there are any unusual sounds or
smells arising from the LCD monitor unplug it immediately and contact your local dealer.
SAFETY
4
PDF created with pdfFactory trial version www.pdffactory.com
Page 5
5
SAFETY &
UNPACKING
§ High temperatures can cause problems. Do not use the LCD monitor in direct sunlight, and
keep it away from hot stoves, fireplaces, and other sources of heat.
§ Unplug the LCD monitor from the electric outlet before any service is performed.
§ Unplug the LCD monitor before cleaning the panel of the LCD monitor.
§ Use slightly damp (not wet) cloth.
§ Do not throw away the carton and packing materials. They make an ideal container to
transport the unit. When shipping the unit to another location, repack it in its original material.
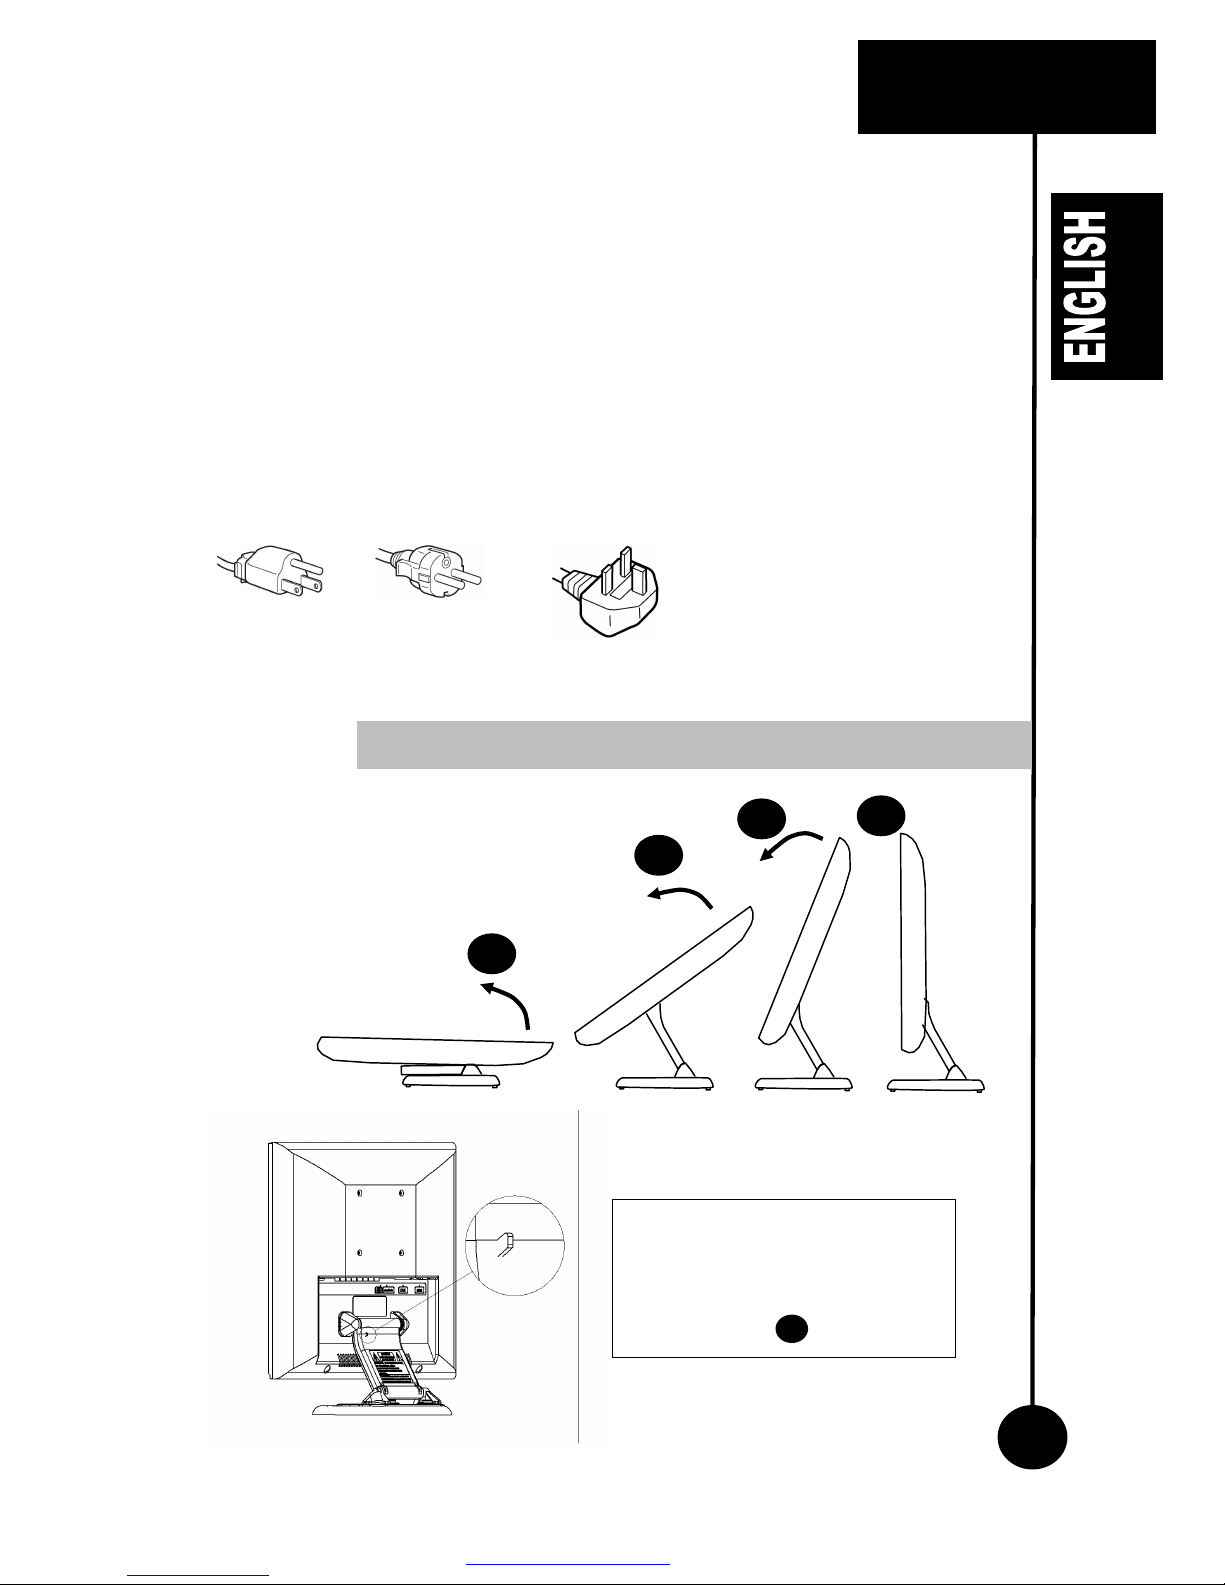
Warning on power connections
§ Use only the power cord supplied together with the LCD monitor in the accessory pack.
Example of plug types
AC: 100 to 120 V AC: 200 to 240 V AC: 240 V only
2 3 4 1
Unpacking your LCD monitor as easy
as 1, 2, 3, and 4.
Unpacking/ Repacking the LCD Monitor
The indicated safety lock will keep
the monitor’s base arm in the up-right
position. Pressing the button will
release the lock and allow the stand
to be folded back to the monitor as
indicated as step above.
1
PDF created with pdfFactory trial version www.pdffactory.com
Page 6

INSTALLATION
6
This connection described herein applies to PC compatible with Video Graphics Array (VGA) port and
optional Digital Video Input (DVI). This also applies to any graphics video card for PC or workstation
that has a VGA connector.
1. Before connecting, power off both the monitor and PC.
2. Connect the VGA connector of the supplied signal cable to the output VGA connector on the PC
and the matching input connector on the rear of the LCD monitor. If your package include optional
DVI cable, connect the DVI cable to the output DVI connector from the PC and the matching input
connector to the rear of the LCD monitor.
3. Secure the connector by tightening the thumbscrew at the connector.
4. Connect your audio output connector on the PC to the audio input jack behind the monitor with the
supplied 3.5mm stereo speaker audio cable.
5. Connect the supplied power adapter to the DC input jack.
6. Connect the supplied power cable to the power adapter and plug in the supplied power cable to a
power outlet.
7. Power ON the PC, then the monitor.
8. If you are using Microsoft Windows Operating System, please refer to Windows driver installation
guide to proceed with software driver setup.
9. If you see the “No signal” message, check the signal cable and connectors. Please refer to
Troubleshooting section for further instruction.
10. After using the LCD monitor, power OFF the monitor, before turning off the PC.
Connection setup for LCD Monitor using VGA signal cable, DVI-D optional cable, 3.5 mm stereo
speaker audio cable and the connection to power supply.
Cable Connection: VGA & DVI (optional) cable
Audio
Out
put
To AC
Power
Outlet
PDF created with pdfFactory trial version www.pdffactory.com
Page 7

7
CONTROL
PANEL
`
Front View
Rear View
Connectors
Power
DVI-D VGA
Stereo
Audio
L1911MN 19” Monitor
L1711MN 17” Monitor
VESA mounting
holes
Dual hinge
Kensington lock
Stereo speakers
Swivel base
OSD Control Panel
Location
of OSD control panel
PDF created with pdfFactory trial version www.pdffactory.com
Page 8

PANEL
8
You can access two operational modes from the control panel:
1. Normal mode
When the MENU is not activated, the user can control the volume using ◄ and ► buttons, select toggle
between RGB and DVI sources using ▼ button, and mute the speakers using ▲ button.
2. OSD mode
When the MENU button is pressed, the user can have access to the LCD monitor’s settings.
The supported languages for our OSD are as follows
1. English,
2. French,
3. German,
4. Spanish,
5. Italian,
6. Japanese, and
7. Korean.
Auto Menu
▼ ▲
Normal mode
Auto adjustment
for RGB
connection only
To enter
OSD Menu
To select between
RGB and DVI
(optional) sources
Mute speakers
OSD mode
Quit from OSD
Menu
To select item in
OSD
Move cursor
downward
Move cursor
upward
◄ ►
Normal mode
Decrease volume Increase volume To turn the LCD Monitor ON or
OFF
OSD mode
Move cursor to left Move cursor to right
None
AUTO MENU
▼ ▲
◄ ►
Amber: Standby
Green: ON
Power indicator
OSD Control Panel Location
Supported On
-
Screen Display (OSD) Languages
PDF created with pdfFactory trial version www.pdffactory.com
Page 9

ON-SCREEN
DISPLAY
OSD selection will allow you to adjust your pictures, colors, size, and other options to your
requirement.
Typical way of accessing the OSD menu is as follows:
On
-
Screen Display (OSD) Selection and Navigati
on On
-
Screen Display (OSD) Features
FEATURE DESCRIPTION
1. Picture Adjustment
Brightness
Contrast
Phase
Adjust the brightness of the screen.
Adjust the display to the contrast desired
Adjust focus, clarity and image stability.
2. Color Adjustment
sRGB
sRGB is a standard encode luminance into 8 bits (or
into any integer space). It is designed to maintain
color consistency between devices which comply to
the sRGB standard.
5000K, 6500K, 7500K, 9300K
To select a respective color temperature
User
To customize the desired color temperature through
red, green, blue color controls.
9
Press to select the
main setting configuration.
Press to
select the submenu
item.
Press to exit to the
main setting configuration.
PDF created with pdfFactory trial version www.pdffactory.com
Page 10

ON-
SCREEN
DISPLAY
10
FEATURE DESCRIPTION
3. Size Adjustment
Screen width
Horizontal position
Vertical position
Note: Size adjustment is not available under DVI
connection (optional)
Adjust screen width.
Adjust screen in horizontal position
Adjust screen in vertical position.
4. Other options
OSD Timeout
OSD Horizontal Position
OSD Vertical Position
OSD Language
Factory Reset
Information
Set timeout period for OSD menu to disappear.
Timeout range is between 2 to 20 seconds
Adjust OSD in horizontal position
Adjust OSD in vertical position
Select your OSD language preference
Restore the LCD monitor’s settings to it original factory
settings. Please allow 5 to 10 seconds for the restore
process.
During the restoring process, two dialog boxes as
shown below will pop up:
Display the current LCD monitor’s settings information
as shown in the following:
PDF created with pdfFactory trial version www.pdffactory.com
Page 11

11
TROUBLESHOOTING
This guideline will prepare you to a self-checking test before calling for service.
PROBLEM ACTION
OUT OF RANGE Either the frequency of the sync input is beyond the operating range
or the resolution is beyond the supported range of the LCD monitor
o Horizontal Frequency: 31.5-91.1kHz
o Vertical Frequency: 43-85Hz
o Maximum supported resolution 1280 x 1024
For you to change to a valid frequency setting, refer to you Technical
Info. section for more detail on compatible display mode
POWER LED is
illuminated amber
Display power management mode
There is no sync signal
The signal cable is not properly secure
Check the computer power and graphic adapter configuration
If the problem persists, please contact your local authorized dealer.
IMAGE IS NOT
CENTERED
Image adjustment has not been configured in the current operating
mode. Use OSD buttons to set up the image according to your
comfortable configuration or press “Auto” button for auto adjustment
LCD MONITOR
DOES NOT ENTER
POWER SAVING
MODE (AMBER)
Computer video signal is not VESA DPMS standard. Either the PC or
the video controller card is not using the VESA DPMS power
management function
POWER LED not
light up (NO
POWER)
Check power cable is properly plug in to power adapter and power
outlet.
NO VIDEO FROM
SCREEN
Check if the VGA cable or the optional DVI cable is properly connected
between the LCD monitor and the computer.
NO SIGNAL Check if the VGA cable or the optional DVI cable is properly connected
between the LCD monitor and the computer.
Check if the power adapter is properly connected to the power outlet.
OSD buttons not
functioning
Reset the LCD monitor by power off and power on from the power
switch.
NO SOUND Check if the 3.5 mm stereo audio cable is properly connected at both
ends. Check if the speakers are muted.
FUZZY LINES Depending on the images displayed. You may occasionally see some
horizontal fuzzy lines appearing on the images. This is a normal
condition and can be corrected by activating the Automatic Adjustment
feature as described in page 5.
PDF created with pdfFactory trial version www.pdffactory.com
Page 12

L1711MN L1911MN
DISPLAY
LCD type
Active matrix Active matrix
Viewable TFT LCD area
432.75 mm (17-inch) 482 mm (19-inch)
Pixel pitch
0.264 mm (H) x 0.264mm (V) 0.294 mm (H) x 0.294mm (V)
Picture aspect ratio
4:3 4:3
Brightness
270 cd/m2 (nit) 250 cd/m2 (nit)
Contrast ratio
350:1 500:1
Supported resolution
1280 x 1024 (SXGA) 1280 x 1024 (SXGA)
Color
16.7 million colors 16.7 million colors
View angle
(Left/ Right/ Up/ Down)
70o/ 70o/ 60o/ 60o 85o/ 85o/ 85o/ 85o
Response time
25 milliseconds 25 milliseconds
VIDEO INPUTS
Horizontal freq.
31.5-80 kHz 31.5-80 kHz
Vertical freq.
56-75 Hz 56-75 Hz
Signal input
Analog/ RGB (VGA),
DVI-D (optional)
Analog/ RGB VGA),
DVI-D (optional)
AUDIO FEATURE
Power amplifier
2W + 2W (8 Ω) 2W + 2W (8 Ω)
Built-in speakers
Yes, stereo speakers Yes, stereo speakers
Audio input
3.5mm mini stereo jack 3.5mm mini stereo jack
DIMENSION
W x H x D without stand
375 x 333 x 52 (mm)14.8 x 13.1
x 2 (inch)
426 x 397 x 56 (mm)
16.8 x 15.6 x 2.2 (inch)
W x H x D with stand
375 x 401 x 235 (mm)14.8 x
15.8 x 9.3 (inch)
426 x 445 x 235 (mm)
16.8 x 17.5 x 9.3 (inch)
POWER
Power Adapter
AC Input
100-120/ 200-240 VAC,
50/ 60 Hz.
100-120/ 200-240 VAC,
50/ 60 Hz.
DC Output
DC 12 V, 3.33A. DC 12 V, 3.33A.
Power Consumption
On mode
Less than 40 W Less than 40 W
Standby mode
Less than 5 W Less than 5 W
Off mode
Less than 5 W Less than 5 W
WEIGHT
Net weight
6.3 kg (13.89 lbs) 7.8 kg (17.20 lbs)
ENVIRONMENT CONDITIONS
Operating Condition
Temperature
5oC to 35oC 5oC to 35oC
Humidity
20% - 80% non-condensing 20% - 80% non-condensing
Storage Condition
Temperature
-15oC to 60oC -15oC to 60oC
Humidity
20% - 90% non-condensing 20% - 90% non-condensing
NOTE:
Specification is subjected to change without notice.
SPECIFICATION
12
PDF created with pdfFactory trial version www.pdffactory.com
Page 13

TECHNICAL INFO
The monitor has 23 display modes; all supported modes are listed in the following table:
*Note: Factory recommended settings
Display Modes (Resolution) Horizontal Freq Vertical Freq
640 x 480 31.5 kHz 60 Hz
640 x 480 37.8 kHz 72 Hz
640 x 480 37.5 kHz 75 Hz
640 x 480 35.1 kHz 66 Hz
720 x 400 31.5 kHz 70 Hz
800 x 600 35.1 kHz 56 Hz
800 x 600 37.8 kHz 60 Hz
800 x 600 48.0 kHz 72 Hz
800 x 600 46.8 kHz 75 Hz
832 x 624 49.7 kHz 75 Hz
1024 x 768 48.3 kHz 60 Hz
1024 x 768 56.4 kHz 70 Hz
1024 x 768 57.8 kHz 72 Hz
1024 x 768 60.0 kHz 75 Hz
1152 x 864 67.5 kHz 75 Hz
1152 x 870 68.7 kHz 70 Hz
1152 x 900 61.8 kHz 66 Hz
1152 x 900 71.7 kHz 76 Hz
1280 x 960 60.0 kHz 60 Hz
1280 x 1024 63.9 kHz 60 Hz
1280 x 1024 74.4 kHz 70 Hz
1280 x 1024 78.1 kHz 72 Hz
1280 x 1024 79.9 kHz 75 Hz *
13
Display Modes (Resolution)
PDF created with pdfFactory trial version www.pdffactory.com
Page 14

CERTIFICATION
CE
FCC
14
PDF created with pdfFactory trial version www.pdffactory.com
Page 15

TFT LCD MONITOR
Version: 1.0
Part Number: QR0003901
PDF created with pdfFactory trial version www.pdffactory.com
 Loading...