

Page 1

FS-8002
INSTRUCTION MANUAL
COLOR TELEVISION
Page 2

1
Table of contents
Safeguards 2
INTRODUCTION
Features 3
Installation 3
To connect the aerial 4
To prepare the remote control 4
Identification of controls 5
Remote control 7
Turning the Power ON/OFF 8
To turn the power on/off 8
Auto power off 8
Last mode menory 8
Tuning the TV channels 9
Auto setup system 9
Edit 10
Convenient picture control 11
To select the picture mode 11
Enjoying wide and zoom picture 12
Convenient sound control 13
To volume control 13
To mute the sound 13
To display the position number 13
To select the sound mode 14
To adjust the headphone volume 14
To adjust the sound balance 15
To adjust sound frequency 15
To select sound effect 15
Enjoying stereo and bilingual broadcasts
16
Stereo programs 16
Bilingual programs 16
Using other menus 17
To set clock 17
To turn on the TV automatically(wake time) 18
To turn off the TV automatic(off time) 18
Sleep time setting 19
To select the screen color 20
To select the auto volume control 21
To select channel lock 21
To select child lock 21
Watching picture in picture 22
To watch a TV or an external source as a sub-picture
23
To switch the main and sub picture of the pip
24
To connect other machines like VIDEO 25
Name and functions of connective terminals 25
Connecting VIDEO 26
Connecting at AV2(SCART) 27
Connecting with S picture VIDEO 28
Connecting with VIDEO CAMERA(CAMCORDER)
29
Connecting with AUDIO set 30
Connecting DVD PLAYER 31
Broadcast transmission systems in each country
31
Viewing teletext(option)/use of the teletext buttons
32
To select the text mode 32
Split screen 32
Page select 32
Index 32
Mix 32
Size 32
Reveal 33
Hold 33
Cancel 33
Subcode 33
Specification 34
NEC Service Centres 35
Page 3

2
SAFEGUARDS
To operate your receiver at the peak performance, please read this Instruction Manual carefully and retain it for the
future reference.
M Water and Moisture : Never install the set in the following places : in the bathroom, in a wet basement(Dripping or
splashing water).
M Heat : Never place the set near sources(e.q. radiator).
M Ventilation : Do not cover the ventilation opening in the cabinet. Accidental contact with high voltage components
could result in electric shock. Never place the set in a confined space such ac a bookcase or built-in
cabinet, unless proper ventilation is provided.
M Object Entry : Do not insert foreign objects, such as needles and coins, into the ventilation openings.
M Lightning Striking : You should disconnect your set from the main and the aerial system during thunderstorms.
M Cleaning : Unplug the set from the main before cleaning. Do not use liquid cleaners of aerosol cleaners. Use only a
lightly dampened soft cloth.
M Do not place liquids including flower vases and vessels filled with chemicals or water, etc. on the top of the unit.
Keep the inside of the unit free from foreign objects such as hairpin. If hazardous objects fall inside of the unit,
unplug it immediately and call a qualified technician for removal.
M When you don’t use the set for an extended period during vacation or other occasions, always make sure of
switching off the MAIN POWER(ON/OFF) SWITCH of the TV set.
M Do not place this television equipment on an unstable cart, stand, or table.
The television equipment may fall, causing serious injury to a child or adult, and serious damage to the
equipment. Use only with a cart or stand recommend by the manufacture’s instructions, and should use a
mounting kit approved by the manufacture.
M When replacement parts are required, be sure the service technician has used replacement parts specified by the
manufacture that have the same characteristics as the original parts. Unauthorized substitutions may result fire,
electric shock, or other hazards.
M Upon completion of any service or repairs to the set, ask the service (as specified by the manufacture) to
determine that the set is in safe operating condition.
M If anything goes wrong, don’t try any fix it yourself, get a qualified service agent to look at it.
M When Install the TV set, make the gap at least 10cm from the wall(at back, bottom, top and side of the TV set).
M The appliance is not intended for use by young children or infirm persons without supervision.
M Young children should be supervised to ensure that they do not play with the appliance.
NOTE
If the receiver is moved or placed in a different direction, the MAIN POWER (ON/OFF) SWITCH must be switched off for
at least 15 minutes in order to take out a colour strain on the screen.
Page 4

3
Features
INTRODUCTION
Installation
Double Window
You can enjoy two programs simultaneously by splitting the screen in two.
16:9 screen
You can select a desired 16:9 (wide screen) screen mode for movies as well as the normal 4:3 picture mode.
A variety of A V terminals for external equipment connection.
MTwo sets of video/audio inputs on the rear and one set on the front.
MS-VIDEO terminals.
MOne set of A/V output (TV signal) terminals.
MOne set of SCART JACK input/output on the rear.
Selectable picture and selectable sound
Allows one-touch selection of your favorite picture quality and tone quality.
NICAM and German stereo/bilingual broadcasts receivable
PIP (Picture-in-Picture)
The PIP function can show another picture on the main picture simultaneously.
Off-timer and Wake-timer
Turns off the TV automatically and will turn it back on at a preset time.
Curtain Effect
When the power on/off, the screen is displayed like a curtain and you can hear a beep.
Split screen
You can enjoy two programs simultaneously (Main picture & Teletext Picture).
Exclusive terminals of DVD (Cr & Cb)
You can enjoy better DVD-Picture with use the Exclusive terminals of DVD (Cr & Cb).
M INSTALL the unit in a room where direct light will not fall upon the screen.
Tonal darkness or a reflection on the picture screen may cause eyestrain. Soft and indirect lighting is recommended
for comfortable viewing.
M ALLOW enough space between the unit and the wall for proper ventilation.
M AVOID excessively warm locations to prevent possible damage to the cabinet or components.
M RATED VOLTAGE: 110-240V~, 50/60Hz.
Automatic degaussing
All colour television receivers are sensitive to magnetic influences usually caused by either moving the receiver from one
place to another or using certain electrical appliances near the receiver. This residual magnetism, as it is called,
sometimes causes distortion which gives rise to "blotchy" areas of colour in the picture. To avoid these effects, the
receiver incorporates an automatic degaussing switch.
This circuit removes any residual magnetism in the metal parts of the picture tube and ensures that each time the
receiver is turned "ON" using the main switch, the purity of the colours displayed on the screen remains true and lifelike.
If the unit is moved or made to face a different direction, the main switch must be off at least 30 minutes in order for the
automatic degaussing circuit to operate properly.
INTRODUCTION
Page 5

4
To connect the aerial
To prepare the remote control
Installation
Optimum reception of colour requires a good signal and will generally mean that an outdoor aerial must be used. The
exact type and positioning of the aerial will depend upon your particular area.
Notes
M When using an outdoor aerial, disconnect the
leads of the indoor aerial, if connected, from the
aerial terminal socket.
M It is recommended that the 75-ohm coaxial cable
be used to eliminate interference and noise
which may occur due to radio wave conditions.
M The aerial cable should not be bundled with the
power cord and the like.
Using the ANT(attenuator) switch (See page 6)
When visual interference occurs, set the ANT switch to
ON using a small screwdriver.
Battery installation Tips for remote operation
1
2
Remove the battery cover.
Insert two size AA batteries matching the +/polarities of the battery to the +/- marks inside the
battery compartment.
M When the remote control will not be used for a long
period of time or when the batteries are worn out,
remove the batteries to prevent leakage.
M Do not throw the batteries into a fire. Dispose of
used batteries in the specified manner.
M Do not drop, dampen or disassemble the remote
control.
Effective range
Page 6
5
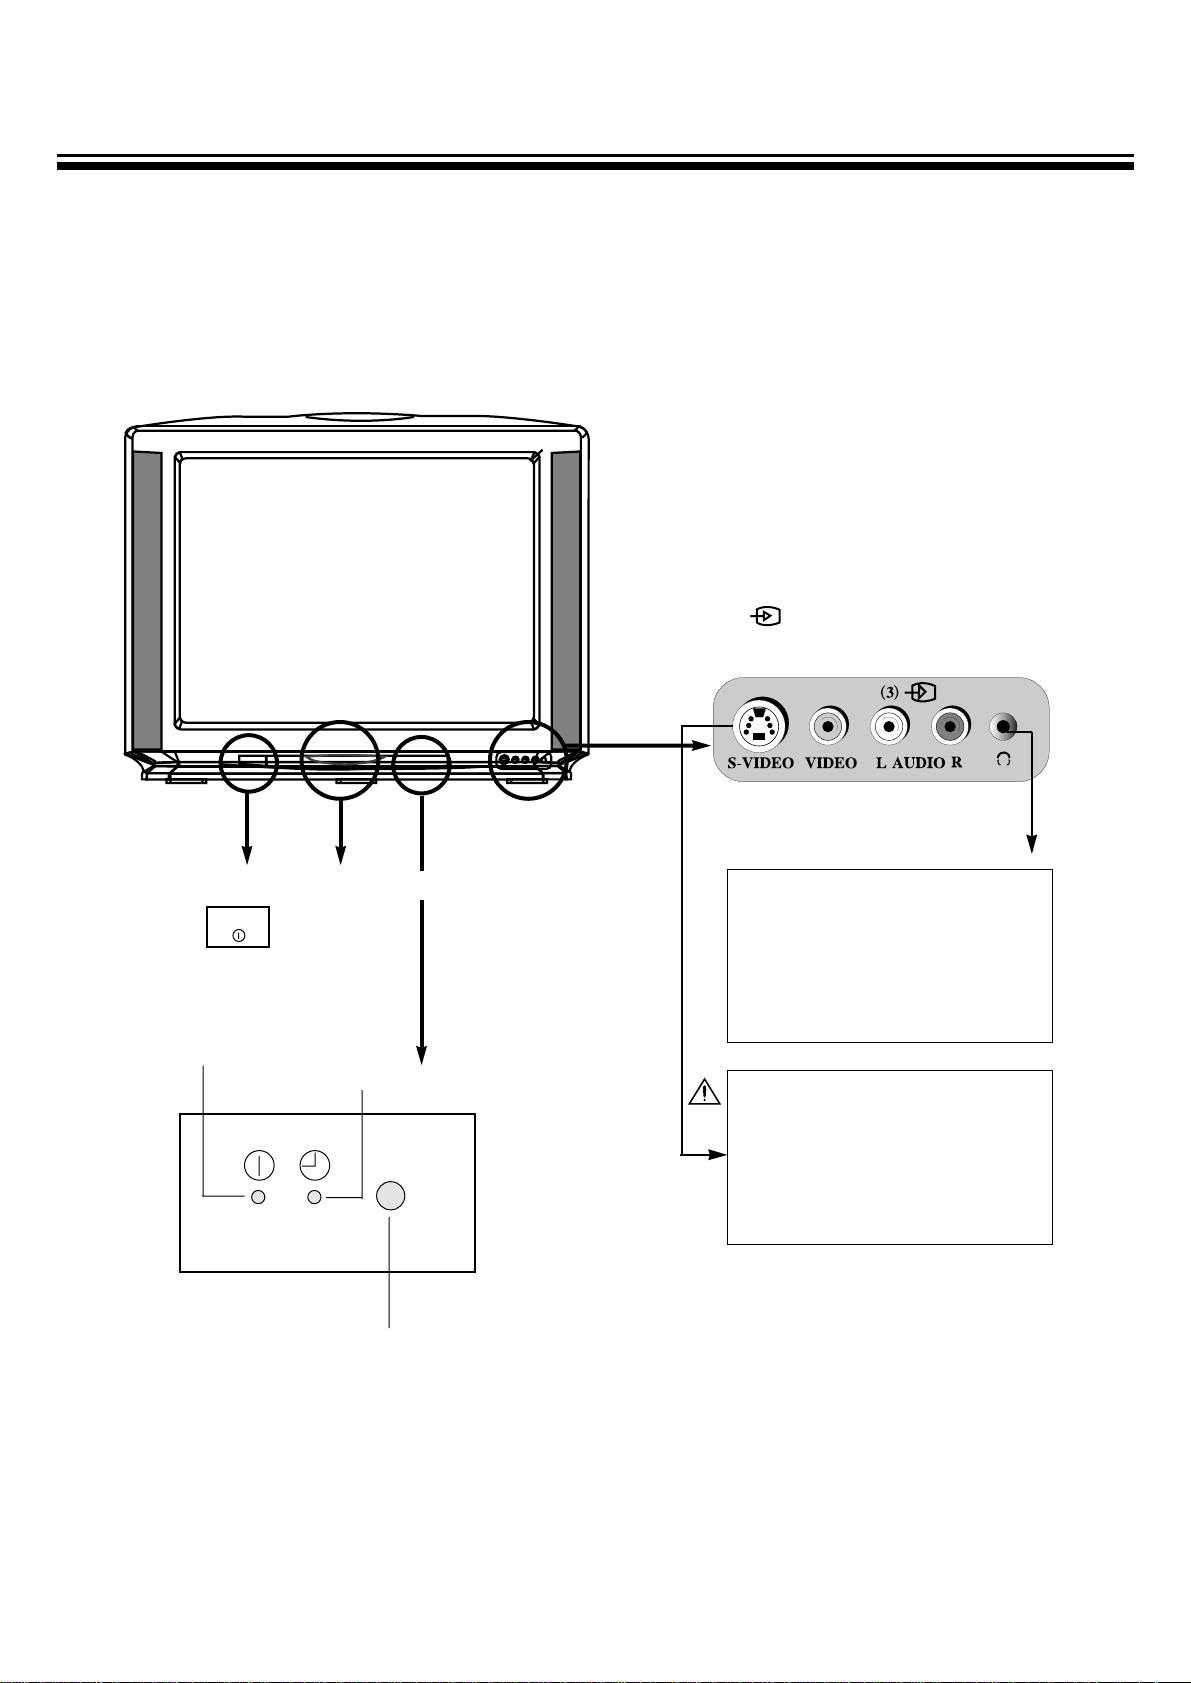
(3) VIDEO 3 input terminals
(S-VIDEO, VIDEO, AUDIO L, R)
Use this Jack when listening to the
sound outputted to the speaker
with the headphone, and you can
listen to the sound of the left side
screen(main picture) when the
double window on the picture-inpicture mode is selected.
Don’t attatch the ‘s-video cable’ &
‘composit video cable’ together.
The picture becomes bad if the ‘svideo cable’ & ‘composit video
cable’ are attatched together in
VIDEO 3 input terminal.
Identification of controls
*
The following describes the name of each part of the TV and remote control.
Infrared sensor
ON TIMER indicator
Main power switch
FRONT
POWER indicator
POWER
Digital EYE sensor
Page 7
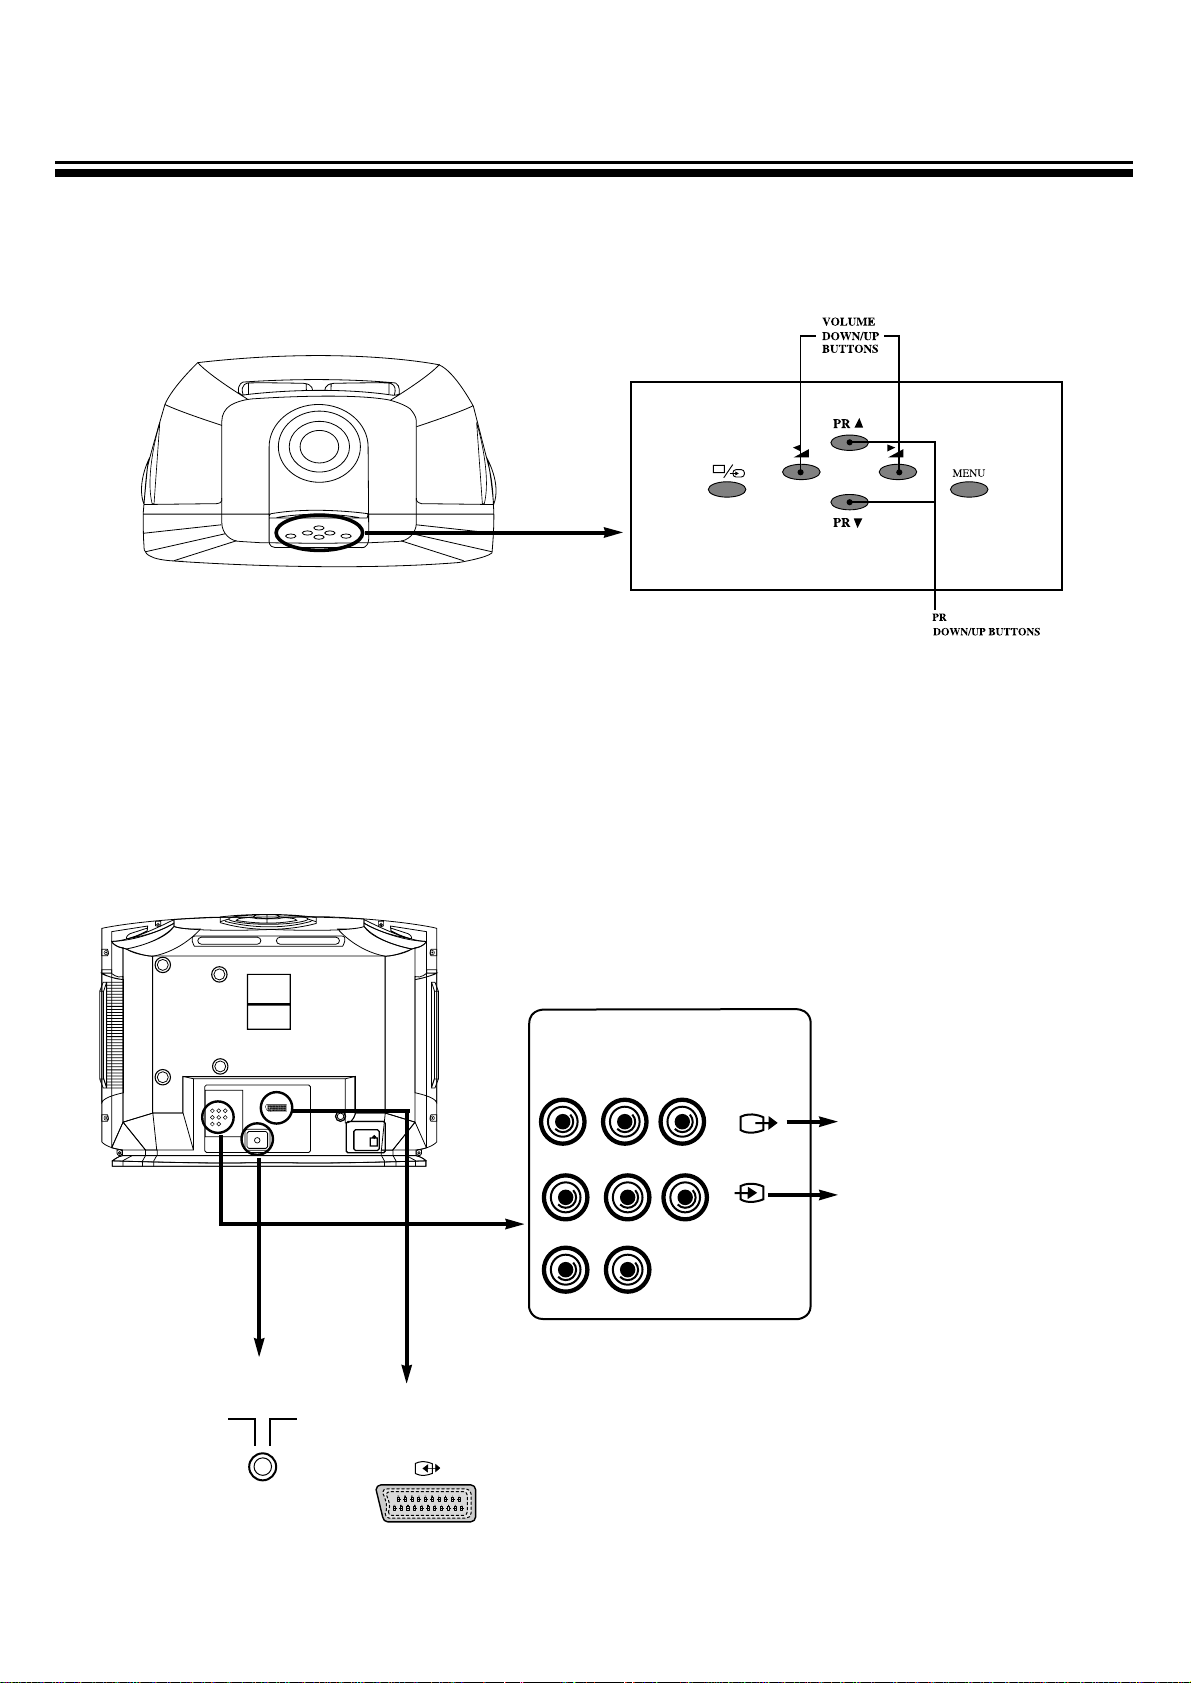
6
R-AUDIO-L VIDEO
R-AUDIO-L
Cr-DVD-Cb
VIDEO(DVD-Y)
(1)(1)
BACK
This always provides with TV
Video 1 input terminals
ANT
TOP
VIDEO 2(SCART JACK) input/output terminal
(SCART does not supports S-VIDEO)
signal output of the selected channel.
A/V OUT OF SCART TERMINAL
will provide with TV signal output of the selected channel.
(2)
Page 8
7
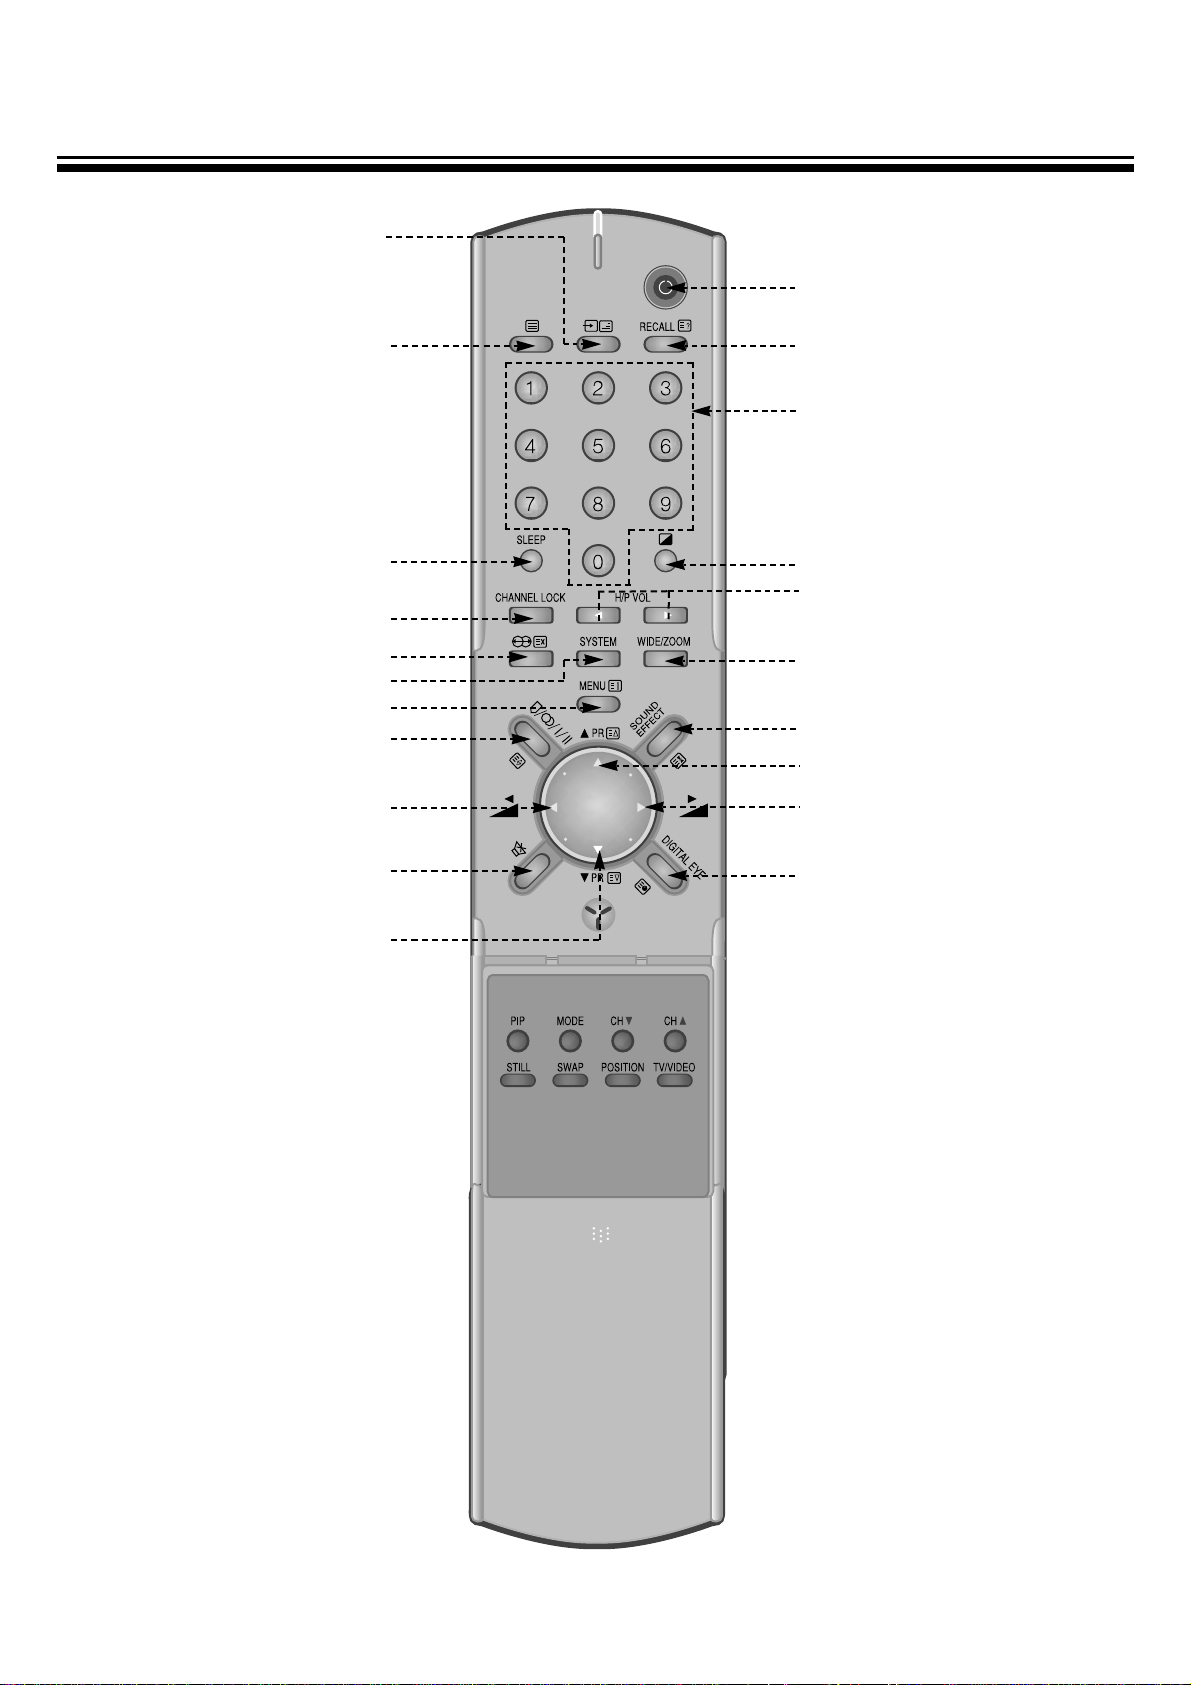
REMOTE CONTROL
TV /VIDEO /DVD
INPUT SELECT
TEXT
SOUND MUTE
PR DOWN(PAGE DOWN)
SLEEP TIME SELECT
CHANNEL LOCK
SELECTABLE SOUND
SYSTEM
MENU
STEREO /BILINGUAL
SELECT
VOLUME DOWN
POWER ON/OFF
RECALL
PR SELECT 0~9
(PAGE SELECTOR 0~9)
SELECTABLE PICTURE
HEADPHONE
VOLUME UP/DOWN
WIDE/ZOOM SELECT
SOUND EFFECT
PR UP(PAGE UP)
VOLUME UP
DIGITAL EYE
Page 9
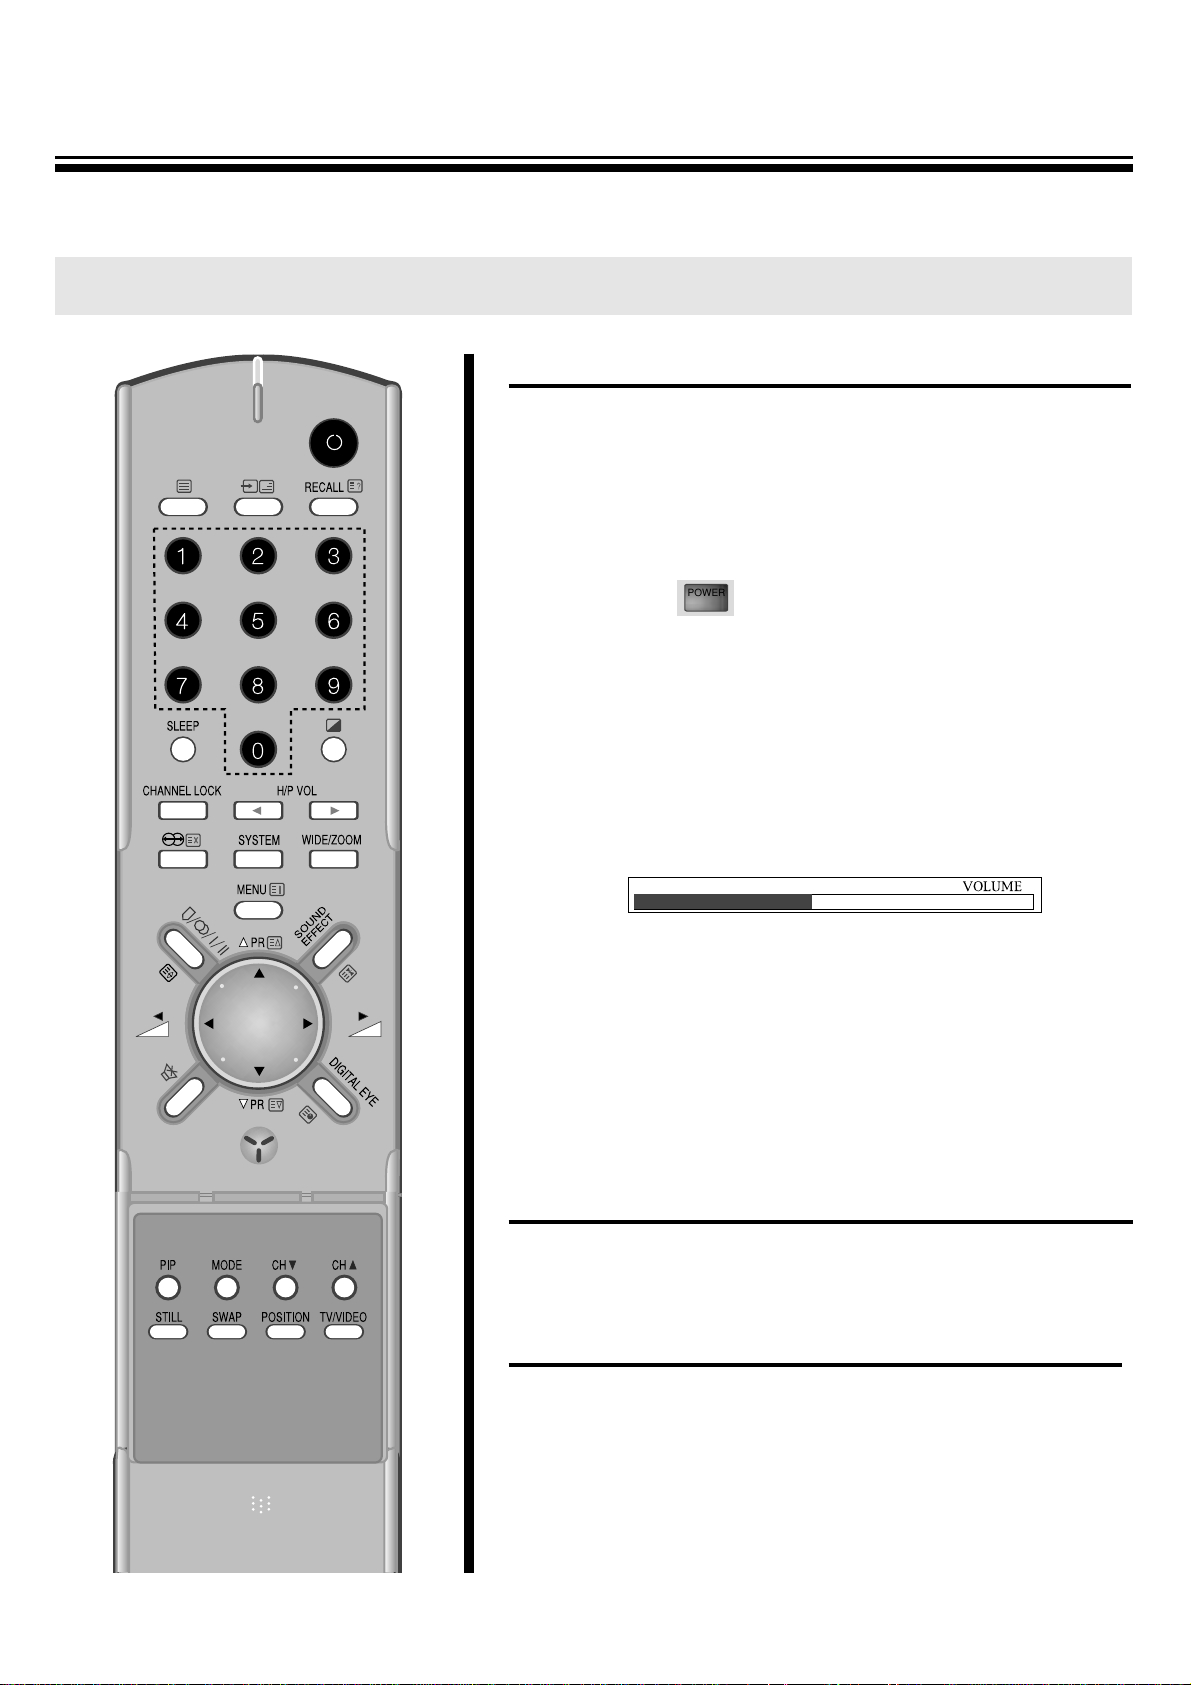
Turning the power on/off
The following describes how to turn the TV on/off using the main
switch and the remote control.
< To turn the power on/off >
1. Press the main power switch.
The power indicator lit up red or amber.
In displays the standby mode that the power indicator lit up red.
2. If no picture appears, press the “POWER ON/OFF, PR y/x, direct
select buttons(0~9)”. By pressing the number(one digit only) where
the program you want to watch is preset, you can turn on the set
program selection at the same time. When the TV is on, the power
indicator will lit up amber.
M When the remote control is not at hand, you can turn on the set by
pressing the PR y/x buttons on the TV set.
3. Adjust the sound volume with the C/B buttons in receiver or remote
control.
4. To switch to the standby mode, press the POWER ON/OFF button.
At the same time the power indicator is lit up red.
5. To turn off completely, press the main power switch. At the same time
the power indicator is turned off.
M If you don’t use the TV set for a long time, turn off completely by
using the main power switch on the TV set. You can decrease
unnecessary power consumption.
M When you turn off completely by using the main power switch,
Sleep Time and Timer setting are cleared.
Auto-power-off
If TV broadcast for a day is finished, the TV will automatically turn off
after about 30 minutes. However, if the Off -time or Sleep time is
operating, it takes precedence. This Auto-Power-Off feature does not
operate in the VIDEO mode.
Last-Mode-Memory
Settings of picture and sound conditions and preset programs are stored
in the memory even after turning off the power, therefore, next time the
power is turned on, the system will function in the last setting modes.
8
Turning the power on/off
TURNING THE POWER ON/OFF
MThe following describes how to turn the TV on/off using the main switch and the remote control.
VOLUME
POWER
Page 10
9
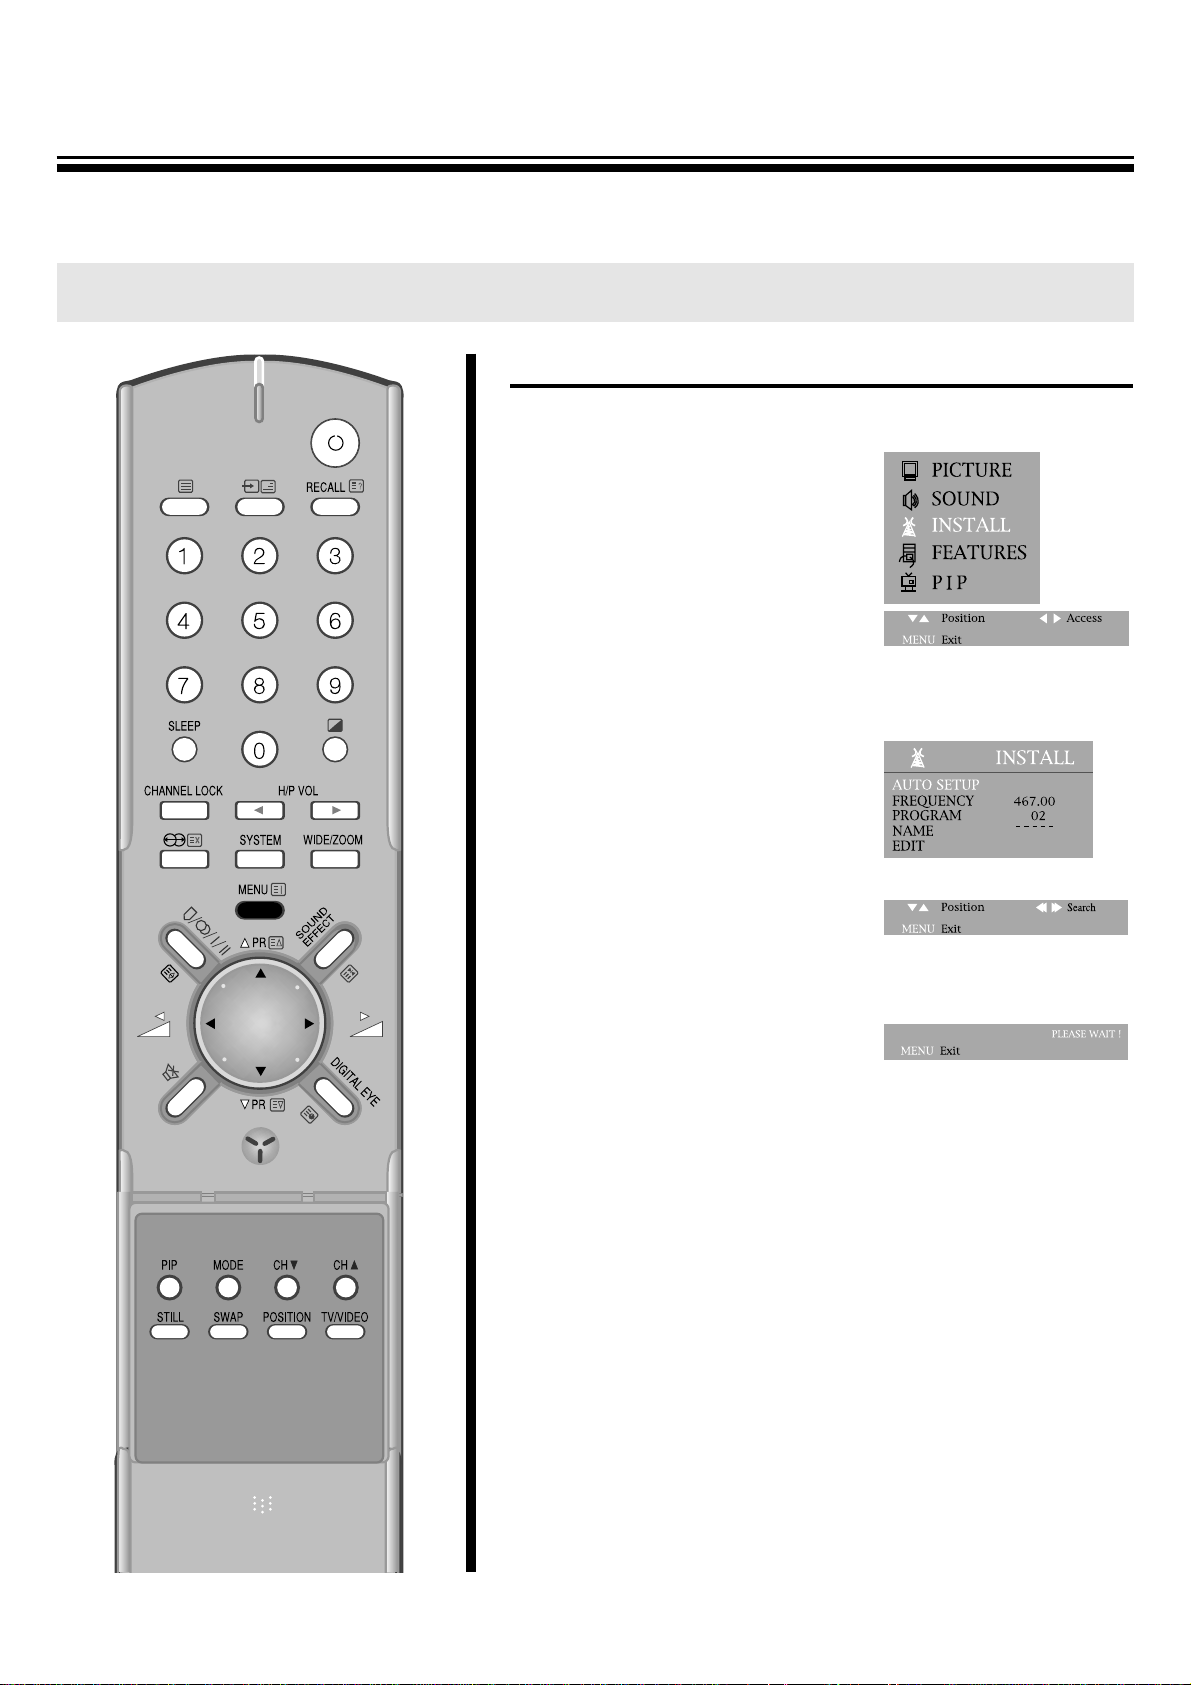
AUTO SETUP SYSTEM
1. Press the MENU button to select to INSTALL.
2. Press the C/B buttons and then
INSTALL SYSTEM.
3. Select AUTO SETUP with the
PRy/x buttons and the C
/
B
buttons to start AUTO SETUP.
4. Please wait until the EDIT menu
appears.
M NOTE
Press the C/B buttons and keep it pressing for 2seconds, the AUTO
SETUP will be started.
M Warning
This television has been factory pretuned to channels 2, 7, 9, 10
and 28. If the auto search function is activated, these preset
channels will be deleted and new channels tuned to 1, 2, 3 ETC..
TUNING THE TV CHANNELS
AUTO SETUP SYSTEM
Page 11
10
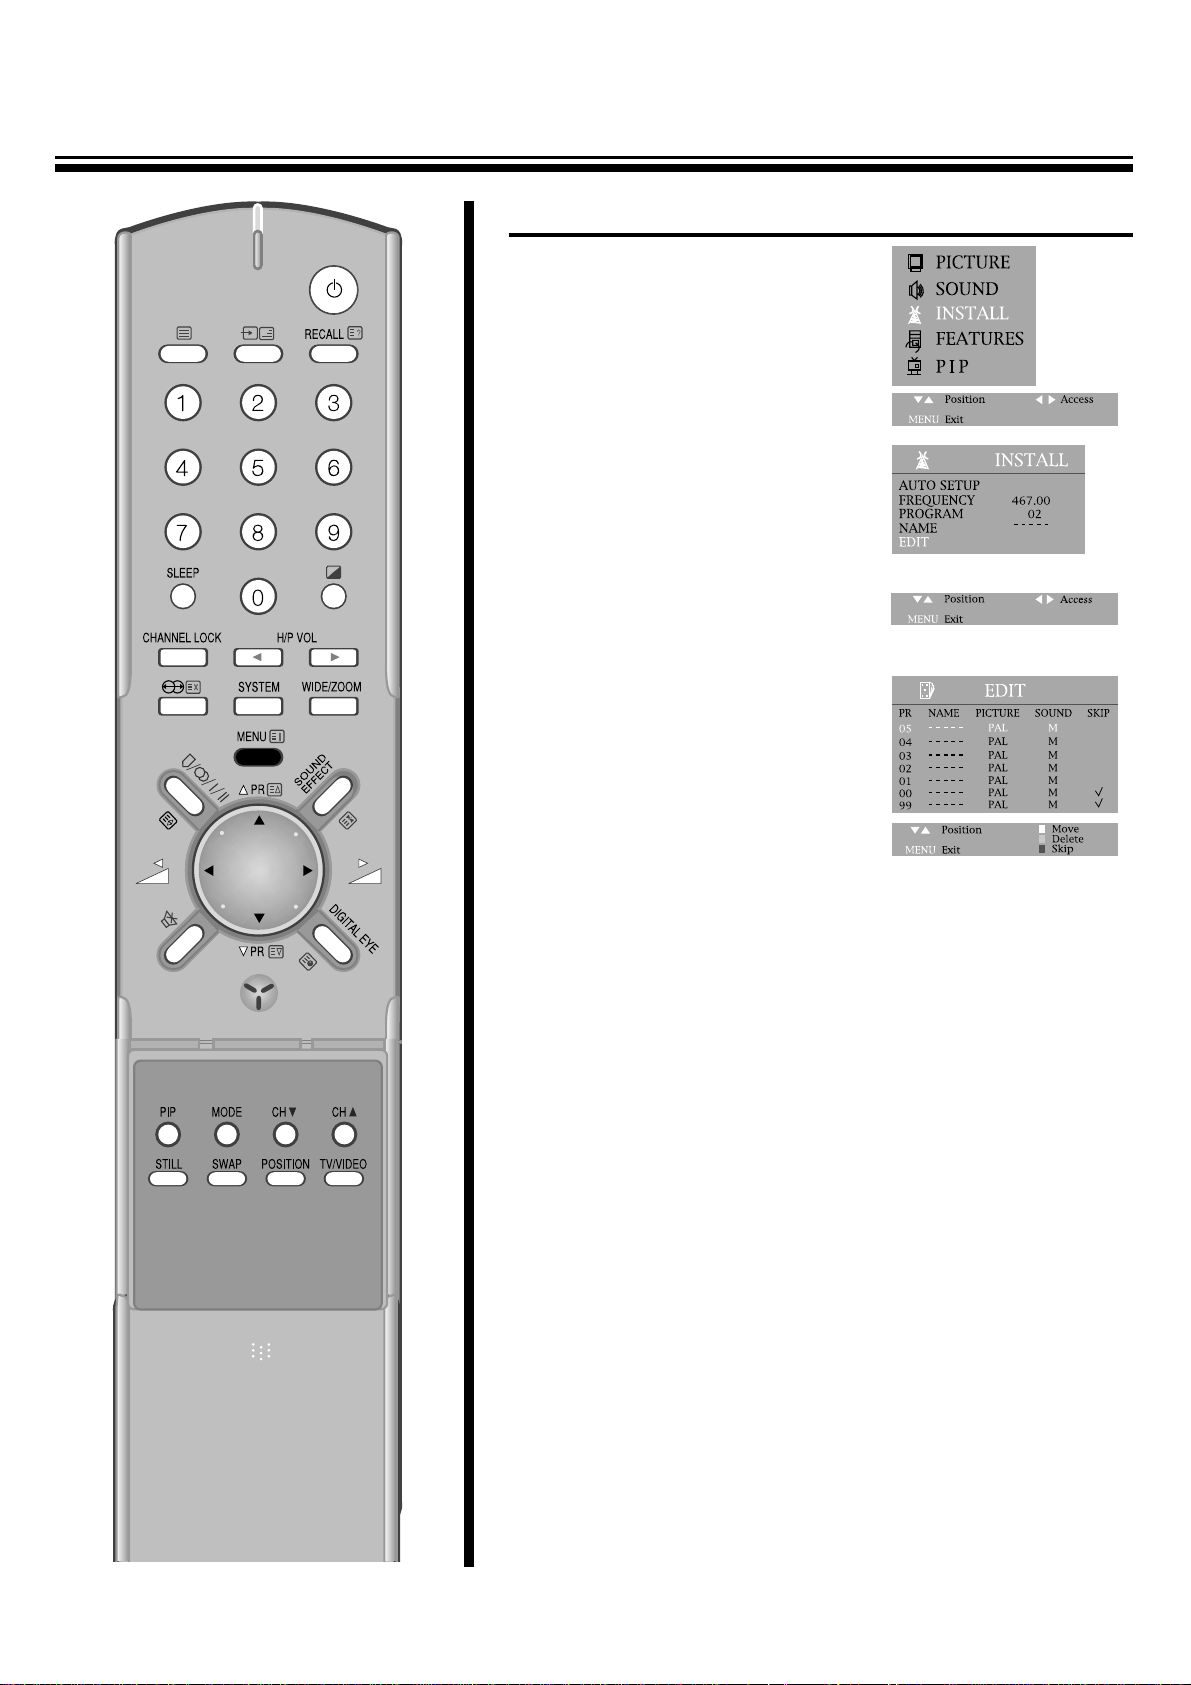
EDIT
1. Press the menu button to select
INSTALL.
2. Press the C/B buttons and then
INSTALL SYSTEM.
3. Select EDIT with the PR y
/
x
buttons and press the C
/
B
buttons to start EDIT.
4. DELETE PROGRAM POSITION DATA.
Position the blue-line to the
program to delete with the PR
y
/
x buttons and the DELETE
button.
5. CHANGING THE ORDER OF THE CHANNELS
Position the blue-line to a program to move with the PR y
/
x
buttons and the move button.
Press the PR y/x buttons to position the blue-line to another
program to exchange.
By pressing the MOVE button again, selected two program will
be exchanged.
6. ENTER A STATION NAME
Locate the cursor to below NAME with the C/B buttons.
Using the PR y/x buttons, select the desired letter, number or
blank.
Press the B(right button) to select the next position.
7. SELECT THE PICTURE SYSTEM
Position the blue-line to the PICTURE to select with the C
/
B
buttons and change the picture (ex. PAL, SECAM, NTSC, ..) with
the PR y/x buttons or you can select the PICTURE mode with the
SYSTEM button on the remote controller.
8. SELECT THE SOUND SYSTEM
Position the blue-line to the SOUND to select with the C/B buttons
and change the SOUND (ex. BG, DK, I, M, ..) with the PR y
/
x
buttons.
9. SKIPPING THE CHANNELS
You can select SKIP with the SKIP button in EDIT mode or
locate in the cursor to below SKIP with the C/B buttons and then
press the PR y/x buttons to skip the desired program.
A program marked with skip “V” is skipped when changing
channel using the program UP/DOWN(on normal operation).
Press the NUMBER buttons 0~9 or the PR y/x buttons to select
program number you want. The screen will change according to
the selected program number.
Page 12

11
TO SELECT THE PICTURE MODE
1. Press the SELECTABLE PICTURE
( ) button at remote control to select
the desired picture quality.
Normal, Mild and Favourite can be selected cyclically.
2. Or press the MENU button to
select the PICTURE and then to
be displayed on the right
appearance.
BY pressing the C/B buttons, the
following four mode change
cyclically.
3.You can select the BRIGHTNESS,
CONTRAST, COLOUR, and
SHARPNESS with the PR y
/
x
buttons.
Select the desired item with the
PR y/x buttons and press with
the C/B buttons adjust the level.
CONVENIENT PICTURE CONTROL
M
You can select the picture quality instantly.
MODE Picture Quality
NORMAL hard picture
MILD soft picture
DIGITAL EYE picture by optical-
sensor
FAVOURITE adjustable
Item
Pressing
CB
BRIGHTNESS darker lighter
CONTRAST weaker stronger
COLOUR paler deeper
SHARPNESS softer sharper
NORMAL
NICAM STEREO
- - : - -
Page 13

12
TO SELECT THE WIDE OR ZOOM 1~ZOOM 4 SCREEN
1.By pressing the WIDE/ZOOM button in remote control, the following
six modes change cyclically.
2. Or press the MENU button to
FEATURES.
3. And then to be displayed on the
right appearance.
Select the ZOOM with the PR
y
/
x buttons.
4. By pressing the C/B buttons, the following six mode change
cyclically.
ENJOYING WIDE AND ZOOM PICTURE
M
You can enjoy WIDE picture and ZOOM 1~ZOOM 4 picture with TV.
In addition to regular wide/zoom screen mode.
NORMAL WIDE ZOOM1 ZOOM2
ZOOM3 ZOOM4 NORMAL
Page 14

13
TO VOLUME CONTROL
Adjust the volume with the volume Down/Up button on the upper of
the set, or with the C/B buttons on the remote control.
TO MUTE THE SOUND
The muting function is convenient when you need to pay attention to
surround sounds, answer a phone call, receive a visitor, etc.
1.Press the SOUND MUTE button.
2. To restore the sound, press the SOUND
MUTE button again.
TO DISPLAY THE POSITION NUMBER
Generally, the programme number and stereo or bilingual reception
indicator will disappear within 4seconds once the program number
has been changed, and the menu display will disappear within few
seconds once the menu button has been pressed.
To display the position number, press RECALL button and this
display will disappear automatically within a few seconds.
CONVENIENT SOUND CONTROL
M
You can select and adjust the sound quality as you like.
VOLUME
Page 15

14
TO SELECT THE SOUND MODE
1. Press the SELECTABLE SOUND
( ) button to select the desired
sound quality.
NORMAL, FAVOURITE, MUSIC,
SPEECH can be selected cyclically.
2.Or press the MENU button to
select the SOUND and then to be
displayed on the right
appearance.
Select the PRESET with the
PR y/x buttons.
By pressing the C/B buttons, the
following four mode change
cyclically.
TO ADJUST THE HEADPHONE VOLUME
1. Press the CH/P VOLB button in the remote control to adjust
Headphone Volume.
2. Or press the MENU button to
select the SOUND and then to be
displayed on the right
appearance.
Select the HP VOLUME with the
PR y/x buttons.
By pressing the C/B buttons,
Headphone Volume can be
adjusted.
SPEECH
MONO
- - : - -
HP VOLUME
Page 16

15
TO ADJUST THE SOUND BALANCE
Press the MENU button to select the
SOUND and then to be displayed on
right appearance.
Select the BALANCE with the
PR y/x buttons.
Adjust the BALANCE with the C
/
B
buttons.
Press C button to decrease the right
speaker volume and the B button to
decrease the left speaker volume.
TO ADJUST SOUND FREQUENCY
Press the MENU button to select the SOUND and then to be
displayed on the right appearance.
Select the sound frequency(120HZ,
500HZ, 1500HZ, 5000HZ, 10KHZ)
with the PR y/x buttons.
By pressing the C/B buttons to
activate the sound frequency.
TO SELECT SOUND EFFECT
Press the SOUND EFFECT button at remote control to select sound
effect.
The display of SURROUND, DYNAMIC, OFF change cyclically
whenever you press the SOUND EFFECT button.
Item
Pressing
CB
120HZ Decrease 120HZ Increase 120HZ
500HZ Decrease 500HZ Increase 500HZ
1500HZ Decrease 1500HZ Increase 1500HZ
5000HZ Decrease 5000HZ Increase 5000HZ
10KHZ Decrease 10KHZ Increase 10HZ
SURROUND
MONO
- - : - -
DYNAMIC
MONO
- - : - -
OFF
MONO
- - : - -
Page 17

16
Stereo Programs
Press the STEREO/BILINGUAL SELECT
( )button to select to nicam-
stereo/mono mode.
BILINGUAL PROGRAMS
1. When a bilingual program is received
DUAL 1, DUAL 2 appears.
2.Press the STEREO/BILINGUAL SELECT button to be heard.
The sound differs according to transmission system : DUAL 1 and
DUAL 2 appear cyclically on the screen.
ENJOYING STEREO AND BILINGUAL BROADCASTS
M The unit receivers both stereo and bilingual broadcasts transmitted in either the NICAM or
German stereo/bilingual broadcasts system.
PR08
MONO
- - : - -
PR08
DUAL 1
- - : - -
Sound to be heard
NICAM German stereo
DUAL 1 Main sound Main sound
DUAL 2 Sub sound Sub sound
Page 18

17
TO SET CLOCK
1. Press the MENU button to select
the FEATURES and then to be
displayed on the right
appearance.
2. Select the CLOCK with PR y
/
x
buttons.
3. Press the C/B buttons to activate
the hour or the minute and preset
the hour or minute with the
direct(0~9) buttons.
USING OTHER MENUS
Page 19

18
TO TURN ON THE TV AUTOMATICALLY(WAKE TIME)
With the CLOCK, the WAKE TIME,
the WAKE PR.
Preset, the TV will automatically turn
on to a preset program number at a
reset time.
Select the WAKE TIME with
PR y/x buttons.
Then, press direct key(0~9) to set
the wake up time.
TO TURN OFF THE TV AUTOMATIC(OFF TIME)
With the CLOCK and the OFF TIME preset, the TV will automatically
switch to stand-by mode at a preset
time.
Select the OFF time using PR y
/
x
buttons and then press direct key
(0~9) to set the OFF TIME.
Page 20

19
SLEEP TIME SETTING
1.When this button, up to 2 hours
every 20 minutes can be set to
the sleep timer.
2. If you press the SLEEP button for the first time, SLEEP 0 sign of
the non set sleep-timer appears on the upper left side of the
screen.
3. When this button pressed again, 20 minute are set to the sleeptimer.
4. This display disappears within 4 seconds useless any button is
pressed.
Whenever pressed again, the setting time is increased by 20
minute.
(SLEEP 0 SLEEP 20 SLEEP 40 SLEEP 60
SLEEP 80 SLEEP 100 SLEEP 120)
5. If this button is pressed again, during the sleep-timer operation,
the remaining time of the sleep-timer appears on the screen.
6. In addition, if this button is pressed repeatedly, the setting time is
increased by 20 minute continuously.
7.When the remaining time become “0”, the TV receiver is turn
off automatically.
PR04
SLEEP 20
MONO
Page 21

20
TO SELECT THE SCREEN COLOR
When no signal is being received,
the TV will automatically turn blue
or red at the time SCREEN BLUE or
SCREEN RED on.
1. Press the MENU button to select
the and then to be displayed on
the right appearance.
Press PR y/x buttons to select
the SCREEN.
2.Press the C/B buttons to change OFF, BLUE and RED.
Page 22

21
TO SELECT THE AUTO VOLUME CONTROL
Different sound source (eg.
Advertisement during movies) fairly
often do not have the same volume
level.
In the case, you can equalize the
volume with the AVC(auto volume
control) ON.
1. Press the MENU button to select the FEATURES and then to be
displayed on the right appearance.
2.Press the PR y/x buttons to select the AVC(auto volume control).
3.Press the C/B buttons to change AVC (auto volume control) ON.
*
NOTE
With the AVC(auto volume control) ON, the maximum volume
level can be down. You can maximize the volume level with the
AVC(auto volume control) OFF.
TO SELECT CHANNEL LOCK
1. You can prevent the watching of
some channel without the remote
controller.
2. Press the CHANNEL LOCK
button to select the CHANNEL
LOCK.
3. The TV can be switched back on only using the remote controller.
4. If you want to watch this channel, you must select CHANNEL
LOCK OFF.
TO SELECT CHILD LOCK
1.You can prevent the use of the TV
set without the remote control.
Press the MENU button to select
the FEATURES and press the PR
y
/
x buttons to select the CHILD
LOCK.
2. Press the C/B buttons to change CHILD LOCK ON. Then the
program will be locked.
3.The TV can be turn on only using the remote controller.
PRO1
MONO
LOCK
ON
Page 23

22
The unit is capable of displaying two picture with the small sub picture
simultaneously.
This is called the Picture-In-Picture function. A TV picture or a picture
from external source equipment such as a VTR can be displayed as
another picture.
PIP
MODE
SUB CH UP
SUB CH DOWN
SUB TV/VIDEO
SUB POSITION
SWAP
STILL
Page 24

23
TO WATCH A TV OR AN EXTERNAL SOURCE AS A SUB-PICTURE
1.Select the desired program.
2.Press the PIP button to display a
sub-picture.
SUB-PICTURE
3. Press the sub TV/VIDEO button repeatedly to select the input for
the sub picture(the small picture). A TV picture, the picture from the
TV, AV1, AV2, AV3 will appear cyclically.
4.When a TV picture appears, select the desired TV program using
the CH y/x buttons.
Press the CH y/x buttons to select lower program numbers and
CH y/x buttons to select higher ones.
5.To turn off the sub-picture, press the PIP button again.
6.Or press the MENU button to
select the PIP and then to be
displayed on the right
appearance.
Select the PIP with the PR y
/
x
buttons. Press the C/B buttons to
select the PIP ON(or OFF).
7.Select SELECT with the PR y/x buttons.
Press the C/B buttons to select the input the sub-picture(the small
picture). A TV picture, the picture from the TV, AV1, AV2, AV3 will
appear cyclically.
8.When a TV picture appears, select the Pr with the PR y
/
x
buttons.
Select the desired TV program using the C/B buttons.
Press the C button to select lower program buttons.
Press the B button to select higher ones.
9.Select MODE with the PR
y
/
x buttons. Press the C
/
B
buttons to select the
mode(LARGE, SMALL, 3PIC,
9PIC, 12PIC, 2PIC).
The mode will be appear
cyclically.
M When SUB-PICTURE mode, you can’t select DVD.
LARGE SMALL 3PIC
2PIC12PIC9PIC
Page 25

24
TO SWITCH THE MAIN AND SUB-PICTURE OF THE PIP
Press the SWAP button when a picture-in-picture is displayed.
The main picture(the large picture) and sub-picture(the small picture)
are switched.
Press the SWAP button again to switch again.
TO FREEZE THE SUB-PICTURE
Press the STILL button when a sub-picture is displayed.
The Sub- picture will be a still picture. To return to a moving picture,
Press the STILL button again.
TO CHANGE THE POSITION OF THE SUB PICTURE(WHEN
SMALL or LARGE MODE)
Press the position button repeatedly when a sub-picture is displayed.
The display position of the sub-picture will changed in order to
PIP mode.
1
4
Page 26

25
CONNECTING OTHER MACHINES LIKE VIDEO
NAMES AND FUNCTIONS OF CONNECTIVE TERMINALS
R-AUDIO-L VIDEO
R-AUDIO-L
Cr-DVD-Cb
VIDEO(DVD-Y)
(1)
AUDIO SET
GAME PLAYER
VCR
CAMCORDER
LASER DISC PLAYER
DVD
Input terminals of VIDEO1
(picture, sound on left, right)
DVD Input terminals
VIDEO 2 Input/Output terminal
(Scart Jack Input/Output)
This always provides with TV
signal output of the selected
channel.
Page 27

26
CONNECTING VIDEO
L
When connecting the VIDEO to the back of the TV
1. Prepare the connective plug for picture/sound.
2. Connect the VIDEO picture output terminal with the TV picture input terminal.
3. Connect the VIDEO sound output terminal with the TV sound input terminal.
4. Press the TV/VIDEO/DVD( ) button on the Remote control and select AV1.
M Both VIDEO1 and VIDEO2 are OK.
R-AUDIO-L VIDEO
R-AUDIO-L
Cr-DVD-Cb
VIDEO(DVD-Y)
L
Front Connector
MThe connection method is as same as back.
MIn front connector, it’ better to connect the materials which are unusually used such like camcorder,
game player, etc.
MPress the TV/VIDEO/DVD( ) button on the Remote Control, and select AV3.
SOUND OUTPUT
PICTURE OUTPUT
PICTURE OUTPUT
HI-FI STEREO VIDEO
HI-FI STEREO VIDEO
M In case of mono VIDEO, connect the VIDEO sound output
terminal with right or left sound input one of TV.
SOUND OUTPUT
PICTURE OUTPUT
MONO
VIDEO
SOUND OUTPUT
M When connecting other equipment, please ensure you turn the main switch OFF to prevent any
damage to the equipment.
Page 28

27
CONNECTING AT AV2(SCART)
L
Connecting to a HI-FI STEREO VIDEO(STEREO mode is defaulted)
1. Prepare the connective plug for picture/sound.
2. Connect the VIDEO input/output terminal with the VIDEO2(AV2) terminal.
3. Press the TV/VIDEO/DVD( ) button on the Remote control and select AV2.
4. Select the STEREO mode with the STEREO/BILINGUAL SELECT button.
(2)
L
Connecting to a MONO VIDEO(STEREO mode is defaulted)
1. Use a two wire RCA cable to make a connection with a MONO VIDEO.
If L audio input of TV is connected to audio out of VIDEO, the sound will come from both speakers.
2. If L-INPUT of the TV is connected to the audio out of VIDEO, the mode will be
M STEREO : The sound will only come from one speaker.
M L-INPUT : The sound will come from both speaker.
M R-INPUT : The sound will not come at all.
3. If R-INPUT of the TV is connected to the audio out of VIDEO, the mode will be
M STEREO : The sound will only come from one speaker.
M L-INPUT : The sound will not come at all.
M R-INPUT : The sound will come from both speaker.
SOUND OUTPUT
REAR SCART TERMINAL
PICTURE OUTPUT
HI-FI STEREO VIDEO
(2)
SOUND OUTPUT
PICTURE OUTPUT
MONO VIDEO
M When connecting other equipment, please ensure you turn the main switch OFF to prevent any
damage to the equipment.
REAR SCART TERMINAL
Page 29

28
CONNECTING WITH S PICTURE VIDEO
SOUND
OUTPUT
S-PICTURE
OUTPUT
HI-FI STEREO VIDEO
L
Front Connector
M To watch TV in clear field by inputting S picture.
When repeating high-quality field VIDEO, you can enjoy clear and sharp picture by connecting it with TV S-VHS
terminal.
1. Connect S-VHS connective plug with S-VHS output terminal of VIDEO set and S-VIDEO picture input terminal of
TV set.
2. Connect sound connective plug with sound output terminal of VIDEO set and sound input terminal of TV set.
3. Press the TV/VIDEO/DVD( ) button on the Remote control, and select VIDEO 3(AV3).
M When connecting other equipment, please ensure you turn the main switch OFF to prevent any
damage to the equipment.
L
Connecting SCART to SCART(STEREO mode is defaulted)
1. Prepare the connective plug for picture/sound.
2. Connect the SCART input/output terminal of VIDEO with the SCART input/output terminal of TV.
(2)
SCART INPUT/ OUTPUT
HI-FI STEREO VIDEO
REAR SCART TERMINAL
Page 30

29
CONNECTING WITH VIDEO CAMERA(CAMCORDER)
L
To connect VIDEO CAMERA with the TV
M When watching a recording by VIDEO CAMERA, it’s convenient to connect with the TV front connector.
1. Prepare the connective plug of picture/sound.
2. Connect the picture/sound connective terminal to VIDEO CAMERA picture/sound output terminal
and the TV front picture/sound input one.
3. Press the TV/VIDEO/DVD( ) button on the Remote control, and select AV3.
4. Set the transfer switch of VIDEO CAMERA picture in/output, then replay the VIDEO CAMERA.
PICTURE OUTPUT
SOUND OUTPUT
M When connecting other equipment, please ensure you turn the main switch OFF to prevent any
damage to the equipment.
Page 31

30
CONNECTING WITH AUDIO SET
MWhen listening to sound in powerful AUDIO, while watching the picture on TV.
MConnect external input terminal of AUDIO to right & left sound output of TV signal.
R-AUDIO-L VIDEO
R-AUDIO-L
Cr-DVD-Cb
VIDEO(DVD-Y)
RIGHT LEFT
M When connecting other equipment, please ensure you turn the main switch OFF to prevent any
damage to the equipment.
Page 32

31
BROADCAST TRANSMISSION SYSTEMS IN EACH COUNTRY
Broadcast Transmission Systems in Each Country
Area
System
Color Sound
Country
Asia
M. E.
Oceania
China, etc.
Hong Kong
Iraq, Islamic Republic of lran, Lebanon, Saudi Arabia, etc.
Russian Federation, etc.
Myanmar, etc.
Australia
PAL B/G
PAL D/K
PAL I
SECAM B/G
SECAM D/K
NTSC M
PAL B/G(H)
Bahrain, Kuwait, Israel, Oman, Qatar, United Arab Emirates,
Yemen, etc.
India, Indonesia, Malaysia, Singapore, Thailand, etc.
CONNECTING DVD PLAYER
MWhen connecting the DVD player.
1. Prepare the connective plug for picture/sound.
2. Connect the DVD-Y output terminal of DVD player with the DVD-Y input terminal of TV.
3. Connect the Cr-DVD-Cb output terminal of DVD player with the Cr-DVD-Cb input terminal of TV.
4. Press the TV/VIDEO/DVD( ) button on the Remote Control to turn the TV into the DVD.
M You can connect the DVD PLAYER with VIDEO 1 INPUT TERMINALS, VIDEO3 INPUT TERMINALS or SCART
JACK(VIDEO2) input/output terminal.
R-AUDIO-L VIDEO
R-AUDIO-L
Cr-DVD-Cb
VIDEO(DVD-Y)
LEFT
Y
Cb
Cr
Y
Cb
Cr
RIGHT
SOUND OUTPUT
PICTURE OUTPUT
VIDEO 1 and DVD
is common.
This terminal are
possession of DVD.
M When connecting other equipment, please ensure you turn the main switch OFF to prevent any
damage to the equipment.
Page 33

32
TO SELECT THE TEXT MODE
First, turn on your TV SET and choose your TV program.
Then press the TEXT button to switch the receiver to Teletext mode.
To select any other page, simply press the three of the PAGE
SELECTOR buttons or PR y/x buttons. The page number
requested is displayed on the upper left hand side of the screen.
To return to normal TV operation, the TEXT button is pressed.
Note that if the new page requested is a news flash or a subtitle page,
the normal TV picture is automatically turned on and the news flash or
subtitle displayed in a box within the picture.
SPLIT SCREEN
In Teletext mode, press the TEXT button to select the SPLIT
SCREEN mode and then to be displayed split screen.
PAGE SELECT
In Teletext mode, the PAGE SELECTOR buttons are used to enter a
page number or a subcode.
During digit entry page, acquisition is stopped.
Or PR y/x buttons decrease or increase the current page number
by 1.
INDEX
When the INDEX button is pressed in the FLOF mode, the Teletext
decoder is set up to display the index page.
Press once for Main Index Page : press again for full index.
When the TV is in LIST mode, the teletext decoder is set up to
display the Red Bank.
MIX
In normal Teletext mode, TV picture and character data are not
displayed simultaneously.
The MIX button allows a combined display of TV picture and charater
data.
SIZE
By pressing the SIZE button, either the top half or the bottom half of
the Text display can be expanded.
Press the SIZE button once and the top half of the display expanded.
Press again and the bottom half is expanded.
Press again and the display return to normal size characters.
VIEWING TELETEXT(OPTION) / USE OF THE TELETEXT BUTTONS
M The teletext service is carried on a TV transmission signal, therefore it is only available when a TV program can
be received on your TV.
Your choice of TV program also governs which Teletext service you will receive.
Page 34

33
REVEAL
Some Teletext pages play a role in concealing part of the display in,
for example, a quiz page with concealed answer.
The REVEAL button releases the concealed text as long as the
REVEAL button is not again.
HOLD
Some Teletext pages contain more information than can be
displayed simultaneously and are therefore sub-divided into a series
of two or more pages.
The first sub-page of a series of four sub-pages will. For example, be
indicated by a 1/4 displayed on the top right hand side of the next
page. These sub-pages are automatically rotated, each page being
displayed for a set time before being replaced by the next page. If you
need to read a certain page for longer than allowed, or retain a
particular sub-page, then the HOLD button should be pressed.
The HOLD symbol will be displayed on the top left hand side instead
of the page number and page acquisition will be stopped.
Normal operation is restored by pressing the HOLD button again or
by entering a new page number.
CANCEL
The CANCEL button suppresses the Text display and restores the
normal TV picture while the receiver remain in the Teletext mode.
This function allows you to request Teletext page and after Teletext
controls without interrupting a TV program.
To return to normal TV operation, the cancel button is pressed again.
SUBCODE
For Teletext information witch is longer than one page, it may take
some time for the automatically changing of sub-pages to reach the
sub-page you require.
It is possible, however, to enter the sub-page you require and
continue watching a normal TV program until the correct sub-page
has been reached.
Press SUBCODE button.
The character S(Z)***** will be displayed on the top left hand side of
the Text screen. Enter the desired sub-page number. EG. To select
sub-page 10, press 0, 0, 1, 0 buttons.
Press CANCEL button to return to normal TV program. When the
requested sub-page is reached, the main page number will be superimposed on the normal TV picture. Press the Teletext button to
display the stored sub-page.
Page 35

34
SPECIFICATION
TV Standard
Color system
Sound system
Rated voltage
Sound Output Power
Channel Coverage
Tuning System
Program No. Indication
Program Selection
Aux. Terminal
Power consumption
PAL/SECAM, NTSC 3.58/4.43(AV)
B/G, D/K, I, M, H
110-240V~, 50/60Hz
MAIN: 8W X 8W
HYPER + CHINA + IVORY COAST
VHF L : E2(48.25MHz)~S6(147.25MHz)
VHF H : S7(147.25MHz)~S36(423.25MHz)
UHF : A37(431.25MHz)~E69(855.25MHz)
Frequency Synthesizer Tuning System
ON-Screen Display
100 Programs
A/V INPUT 1, 2 (SCART), 3, DVD
A/V OUTPUT 1 (RCA) [TV Signal]
A/V OUTPUT 2 (SCART) [TV Signal]
148W
Dimension
Remote Control Unit.
R-50F(Required two 1.5V battries type with AA size)
Weight
Picture tube
845(W) x 669(H) x 556(D) mm
60kg
34" NF TYPE
Page 36

35
NEC Service Centres
NEC Australia Pty. Ltd.
ABN 86 001 217 527
Home Electronics Group
NEC Service Centres
NEW South Wales
Sydney 184 Milperra Rd, Revesby 2212 (02)9780 8688
Newcastle 120 Parry Street, Newcastle 2302 (02)4926 2466
Victoria
Melbourne 480 Princes Highway, Noble Park 3174 (03)9554 6245
Queensland
Brisbane 116 lpswich Rd, Woollongabba 4102 (07)3361 5858
Southport Shop 1, 48 Ferry Rd, Southport 4215 (07)5591 3670
South Australia
Adelaide 84A Richmond Rd, Keswick, 5053 (08)8375 5710
Western Australia
Perth 45 Sarich Court, Osborne Park 6017 (08)9445 5901
For Service in outer areas, please contact your NEC retailer for the address of the nearest
Authorized NEC Service Centre.
NEC Australia Pty. Ltd.
244 Beecroft Road EPPING 2121
Tel. 131-632 Fax. (02)9930 2380
 Loading...