

Daewoo DUA-3270GB User Manual

DIGITAL TELEVISION
INSTRUCTION MANUAL
DUA-3291GB
DUA-3270GB
PAL B/G , D/K, I/I,
SECAM B/ G , D/ K, L/ L’, NTSC(AV)
TELETEXT
SCART/ VIDEO / S-VIDEO
Help line Number: 0870 100 2525
Caution
CAUTION
RISK OF ELECTRIC SHOCK
DO NOT OPEN
CAUTION : TO REDUCE THE RISK OF ELECTRIC SHOCK,
DO NOT REMOVE COVER (OR BACK).
NO USER-SERVICEABLE PARTS INSIDE.
REFER SERVICING TO QUALIFIED SERVICE PERSONNEL.
The lightning flash with arrowhead symbol, within an equilateral triangle, is intended to
alert the user to the presence of uninsulated “dangerous voltage” within the product’s
enclosure that may be of sufficient magnitude to constitute a risk electric shock.
The exclamation point within an equilateral triangle is intended to alert the user to the
presence of important operating and servicing instructions in the literature accompanying
the appliance.
WARNING:
DISPOSAL OF USED ELECTRICAL & ELECTRONIC EQUIPMENT
The meaning of the symbol on the product, its accessory or packaging indicates that this product
shall not be treated as household waste. Please, dispose of this equipment at your applicable collection point for the recycling of electrical & electronic equipments waste. In the European Union
and Other European countries which there are separate collection systems for used electrical and
electronic product. By ensuring the correct disposal of this product, you will help prevent potential
hazards to the environment and to human health, which could otherwise be caused by unsuitable
waste handling of this product. The recycling of materials will help conserve natural resources.
Please do not therefore dispose of your old electrical and electronic equipment with your household waste. For more detailed information about recycling of this product, please contact your local
city office, your household waste disposal service or the shop where you purchased the product.
To reduce the risk of fire or electric shock hazard, do not expose this appli-
ance to rain or moisture.
2
Safety
Precautions
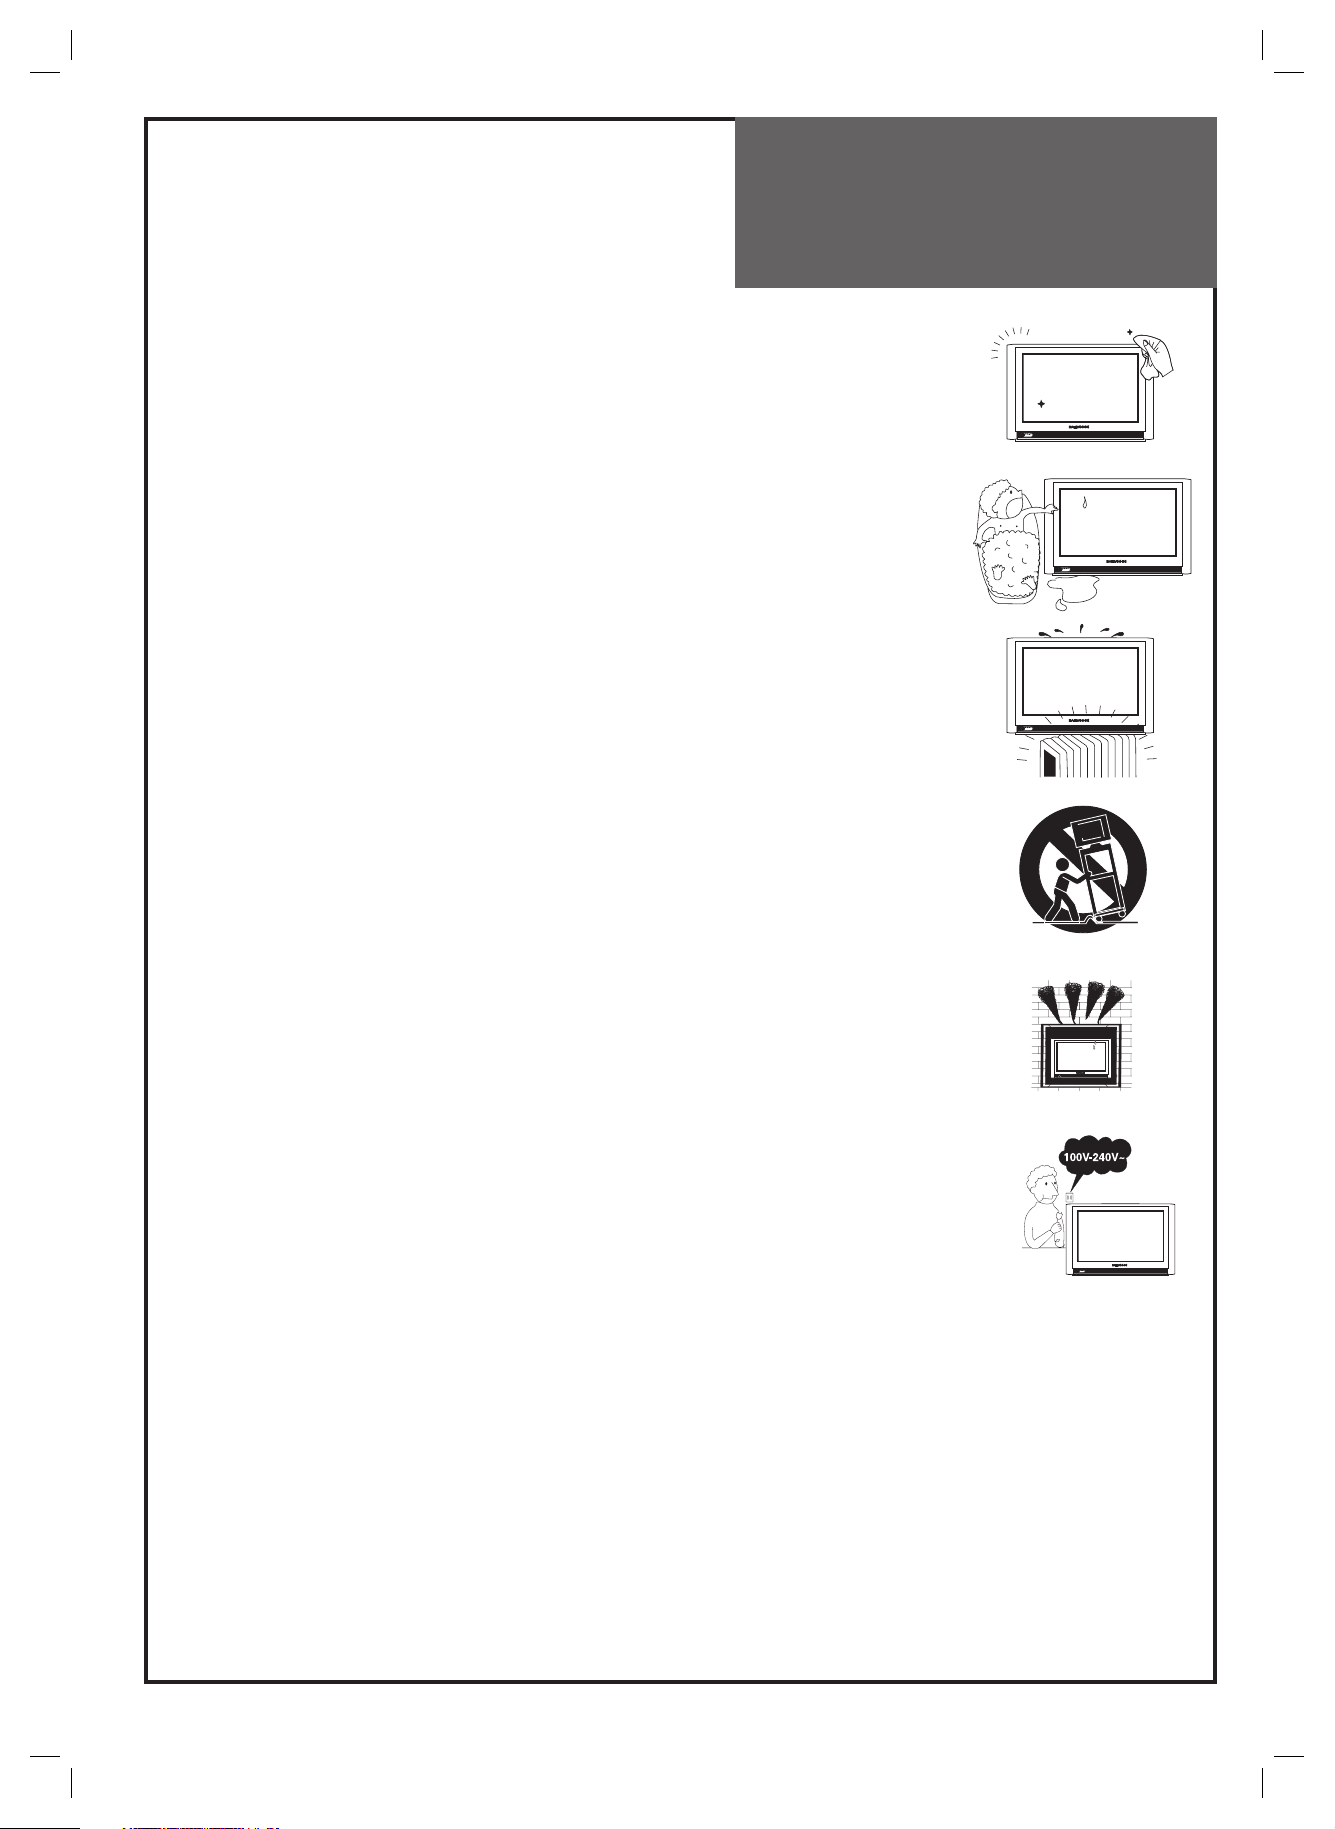
1. CLEANING
Unplug this TV equipment from the AC power outlet before cleaning.
Do not use liquid cleaner or aerosol cleaners. Use a soft and damp cloth for
cleaning.
2. ATTACHMENTS
Do not use attachments not recommended by the TV equipment manufac-
turer as they may result in the risk of fire, electric shock or other injury.
3. WATER AND MOISTURE
Do not place this TV equipment near water, for example, near bathtub, kitch-
en sink, laundry tub, in a wet basement, or near a swimming pool, or the like.
4. HEAT
Keep the TV equipment away from the heat sources such as radiator, heater,
stoves and other heat-generating products.
5. SETTING
Do not place this TV on an unstable cart, stand, or table. Placing the TV on
an unstable base can cause the TV to fall, resulting in serious personal injuries as well as damage to the TV. Use only a cart, stand, bracket or table
recommended by the manufacturer or salesperson.
6. WALL OR CEILING MOUNTING
When mounting the product on a wall or ceiling, be sure to install the product
using the designated mounting tool according to the method recommended
by the manufacturer.
7. P OW E R
This TV equipment should be operated only from the type of power source
indicated on the marking label. If you are not sure of the type of power supplied to your home, consult your TV dealer or local power company.
3
Contents
Important Safeguards . . . . . . . . . . . . . . . . . . . . . . . . . . . . . . . . . . . . . . . . . . 5
Supplied Accessories. . . . . . . . . . . . . . . . . . . . . . . . . . . . . . . . . . . . . . . . . . . 6
Remote control and TV connections . . . . . . . . . . . . . . . . . . . . . . . . . . . . . . . . 7
Local control . . . . . . . . . . . . . . . . . . . . . . . . . . . . . . . . . . . . . . . . . . . . . . . . . . . . . . . . . . . . . . . . 7
Remote Control Unit . . . . . . . . . . . . . . . . . . . . . . . . . . . . . . . . . . . . . . . . . . . . . . . . . . . . . . . . . . . 8
Installation . . . . . . . . . . . . . . . . . . . . . . . . . . . . . . . . . . . . . . . . . . . . . . . . . 9
Inserting Batteries into the Remote Control Unit and Mains connection . . . . . . . . . . . . . . . . . . . . . . . 9
Switching ON and OFF . . . . . . . . . . . . . . . . . . . . . . . . . . . . . . . . . . . . . . . . . . . . . . . . . . . . . . . . . . 9
Connecting External Equipment . . . . . . . . . . . . . . . . . . . . . . . . . . . . . . . . . . 10
Rear connections . . . . . . . . . . . . . . . . . . . . . . . . . . . . . . . . . . . . . . . . . . . . . . . . . . . . . . . . . . . . 10
Side connections. . . . . . . . . . . . . . . . . . . . . . . . . . . . . . . . . . . . . . . . . . . . . . . . . . . . . . . . . . . . . 10
TV/AV selection . . . . . . . . . . . . . . . . . . . . . . . . . . . . . . . . . . . . . . . . . . . . . . . . . . . . . . . . . . . . . 10
Menus Description . . . . . . . . . . . . . . . . . . . . . . . . . . . . . . . . . . . . . . . . . . . 11
Automatic Tuning of TV Channels . . . . . . . . . . . . . . . . . . . . . . . . . . . . . . . . . . . . . . . . . . . . . . . . . 11
Programme Editing . . . . . . . . . . . . . . . . . . . . . . . . . . . . . . . . . . . . . . . . . . . . . . . . . . . . . . . . . . . 11
Manual tuning. . . . . . . . . . . . . . . . . . . . . . . . . . . . . . . . . . . . . . . . . . . . . . . . . . . . . . . . . . . . . . . 12
Main Menu . . . . . . . . . . . . . . . . . . . . . . . . . . . . . . . . . . . . . . . . . . . . . . . . . . . . . . . . . . . . . . . . . 13
How to use the SUB-MENUS . . . . . . . . . . . . . . . . . . . . . . . . . . . . . . . . . . . . . . . . . . . . . . . . . . . . 13
Digital or analogue channels? . . . . . . . . . . . . . . . . . . . . . . . . . . . . . . . . . . . . . . . . . . . . . . . . . . . 13
Daily Use. . . . . . . . . . . . . . . . . . . . . . . . . . . . . . . . . . . . . . . . . . . . . . . . . . 14
Programme Selection . . . . . . . . . . . . . . . . . . . . . . . . . . . . . . . . . . . . . . . . . . . . . . . . . . . . . . . . . 14
Picture Control . . . . . . . . . . . . . . . . . . . . . . . . . . . . . . . . . . . . . . . . . . . . . . . . . . . . . . . . . . . . . . 14
Sound Control . . . . . . . . . . . . . . . . . . . . . . . . . . . . . . . . . . . . . . . . . . . . . . . . . . . . . . . . . . . . . . 14
Special Features . . . . . . . . . . . . . . . . . . . . . . . . . . . . . . . . . . . . . . . . . . . . . . . . . . . . . . . . . . . . . 16
Time setting . . . . . . . . . . . . . . . . . . . . . . . . . . . . . . . . . . . . . . . . . . . . . . . . . . . . . . . . . . . . . . . . 16
Wake up time Setting . . . . . . . . . . . . . . . . . . . . . . . . . . . . . . . . . . . . . . . . . . . . . . . . . . . . . . . . . 17
Sleep . . . . . . . . . . . . . . . . . . . . . . . . . . . . . . . . . . . . . . . . . . . . . . . . . . . . . . . . . . . . . . . . . . . . . 17
Teletext (Option) . . . . . . . . . . . . . . . . . . . . . . . . . . . . . . . . . . . . . . . . . . . . . . . . . . . . . . . . . . . . 18
DIGITAL PART ANALOG PART
Channel Banner (Digital) . . . . . . . . . . . . . . . . . . . . . . . . . . . . . . . . . . . . . . . 19
General Information . . . . . . . . . . . . . . . . . . . . . . . . . . . . . . . . . . . . . . . . . . . . . . . . . . . . . . . . . . 19
View The Channel Information . . . . . . . . . . . . . . . . . . . . . . . . . . . . . . . . . . . . . . . . . . . . . . . . . . . 19
Select The User Profile List . . . . . . . . . . . . . . . . . . . . . . . . . . . . . . . . . . . . . . . . . . . . . . . . . . . . . 19
Select The Audio Language . . . . . . . . . . . . . . . . . . . . . . . . . . . . . . . . . . . . . . . . . . . . . . . . . . . . . 19
DVB Setup Menu . . . . . . . . . . . . . . . . . . . . . . . . . . . . . . . . . . . . . . . . . . . . . 20
Automatic Tuning of DVB . . . . . . . . . . . . . . . . . . . . . . . . . . . . . . . . . . . . . . . . . . . . . . . . . . . . . . 20
Set Up DVB SYSTEM. . . . . . . . . . . . . . . . . . . . . . . . . . . . . . . . . . . . . . . . . . . 21
Banner Display Time . . . . . . . . . . . . . . . . . . . . . . . . . . . . . . . . . . . . . . . . . . . . . . . . . . . . . . . . . . 21
Subtitle Language . . . . . . . . . . . . . . . . . . . . . . . . . . . . . . . . . . . . . . . . . . . . . . . . . . . . . . . . . . . . 21
Audio Language . . . . . . . . . . . . . . . . . . . . . . . . . . . . . . . . . . . . . . . . . . . . . . . . . . . . . . . . . . . . . 21
Common Interface . . . . . . . . . . . . . . . . . . . . . . . . . . . . . . . . . . . . . . . . . . . . . . . . . . . . . . . . . . . 22
Signal Strength . . . . . . . . . . . . . . . . . . . . . . . . . . . . . . . . . . . . . . . . . . . . . . . . . . . . . . . . . . . . . . 22
Over Air Download To System Update. . . . . . . . . . . . . . . . . . . . . . . . . . . . . . . . . . . . . . . . . . . . . . 22
Electronic Program Guide (EPG) . . . . . . . . . . . . . . . . . . . . . . . . . . . . . . . . . . 24
Channel Select . . . . . . . . . . . . . . . . . . . . . . . . . . . . . . . . . . . . . . . . . . . . . . . . . . . . . . . . . . . . . . 24
Program Select . . . . . . . . . . . . . . . . . . . . . . . . . . . . . . . . . . . . . . . . . . . . . . . . . . . . . . . . . . . . . 24
Category / Theme Select . . . . . . . . . . . . . . . . . . . . . . . . . . . . . . . . . . . . . . . . . . . . . . . . . . . . . . 25
Day Select . . . . . . . . . . . . . . . . . . . . . . . . . . . . . . . . . . . . . . . . . . . . . . . . . . . . . . . . . . . . . . . . . 25
User Profiles . . . . . . . . . . . . . . . . . . . . . . . . . . . . . . . . . . . . . . . . . . . . . . . . . . . . . . . . . . . . . . . 25
Common Interface Module Menu . . . . . . . . . . . . . . . . . . . . . . . . . . . . . . . . . . 26
Setting CI Card . . . . . . . . . . . . . . . . . . . . . . . . . . . . . . . . . . . . . . . . . . . . . . . . . . . . . . . . . . . . . 26
CI Main Menu . . . . . . . . . . . . . . . . . . . . . . . . . . . . . . . . . . . . . . . . . . . . . . . . . . . . . . . . . . . . . . . 26
Module Information . . . . . . . . . . . . . . . . . . . . . . . . . . . . . . . . . . . . . . . . . . . . . . . . . . . . . . . . . . 27
Smart Card Information . . . . . . . . . . . . . . . . . . . . . . . . . . . . . . . . . . . . . . . . . . . . . . . . . . . . . . . 27
Software Download . . . . . . . . . . . . . . . . . . . . . . . . . . . . . . . . . . . . . . . . . . . . . . . . . . . . . . . . . . 27
Digital Teletext (MHEG 5) . . . . . . . . . . . . . . . . . . . . . . . . . . . . . . . . . . . . . . 28
User Profile . . . . . . . . . . . . . . . . . . . . . . . . . . . . . . . . . . . . . . . . . . . . . . . . 29
General Troubleshooting . . . . . . . . . . . . . . . . . . . . . . . . . . . . . . . . . . . . . . . 30
DVB Troubleshooting . . . . . . . . . . . . . . . . . . . . . . . . . . . . . . . . . . . . . . . . . 31
Specifications . . . . . . . . . . . . . . . . . . . . . . . . . . . . . . . . . . . . . . . . . . . . . . 32
4
Important
Safeguards
Location
Heat, Moisture, Dust, Vibration
Position your set so that bright light or sunlight doesn’t fall directly onto the screen.
Care should be taken not to expose the set to any unnecessary vibration, moisture, dust or heat.
Do not expose the set to dripping or splashing.
Ventilation
Also ensure that the set is placed in a position to allow a free flow of air.
Do not cover the ventilation openings on the back cover.
Leave at least 10 cm around each side of the TV set.
Object Entry
Do not insert foreign objects, such as needles and coins, into the ventilation openings.
Lightning striking
You should disconnect your set from the mains and the aerial system during thunderstorms.
Cleaning
Unplug the set from the mains before cleaning.
Dust the set by wiping the screen and cabinet with a soft, clean and damp cloth.
Do not use liquid cleaners or aerosol cleaners.
After moving the set
If the set is moved or turned, the MAIN POWER button must be switched off for
at least 15 minutes in order to take out patches on the screen.
Heat
Never place the set near heat sources.
Never put a naked flame, such as a candle, on the top of TV set.
Service
Never remove the back cover of the set as this can expose you to high voltage and other hazards.
If the set does not operate properly, unplug it and call the help line number on the front of this manual.
5
Supplied
Accessories
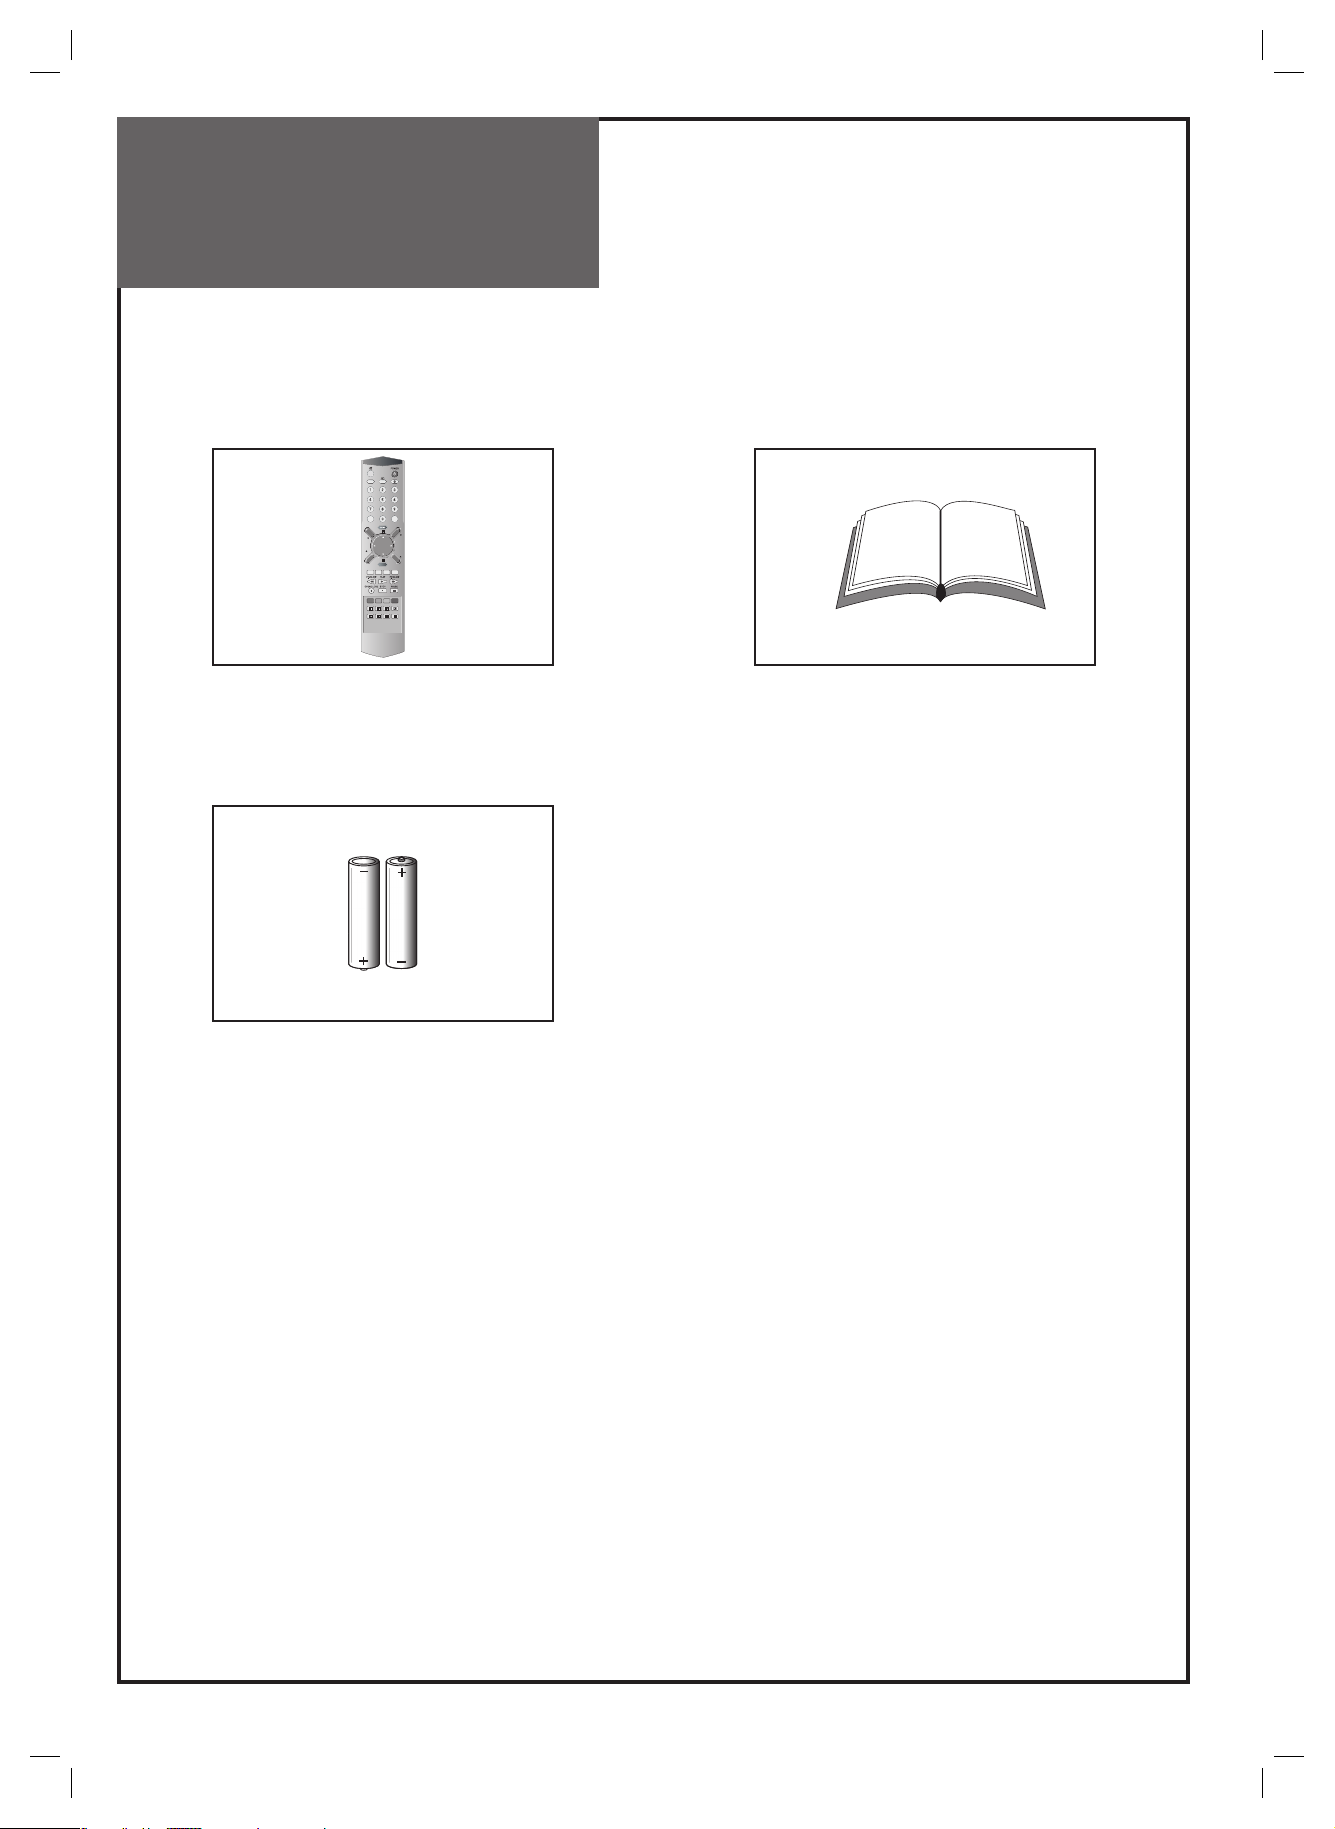
Make sure that the following accessories are provided with the product.
NORMAL
RECALL
ABC–"· DEF
JKLGHI MNO
TUVPQRS WXYZ
OK/SELECT
GUIDE
PR
PAGE
VOL
VOL
PR
PAGE
D/A
CANCEL
3D
SUB TITLE
ZOOM
/EXIT
SLEEPMTS
Remote controller Instruction manual
Batteries
(2x1.5V, AAA)
6
Front
Top & Side
Remote control
and TV connections
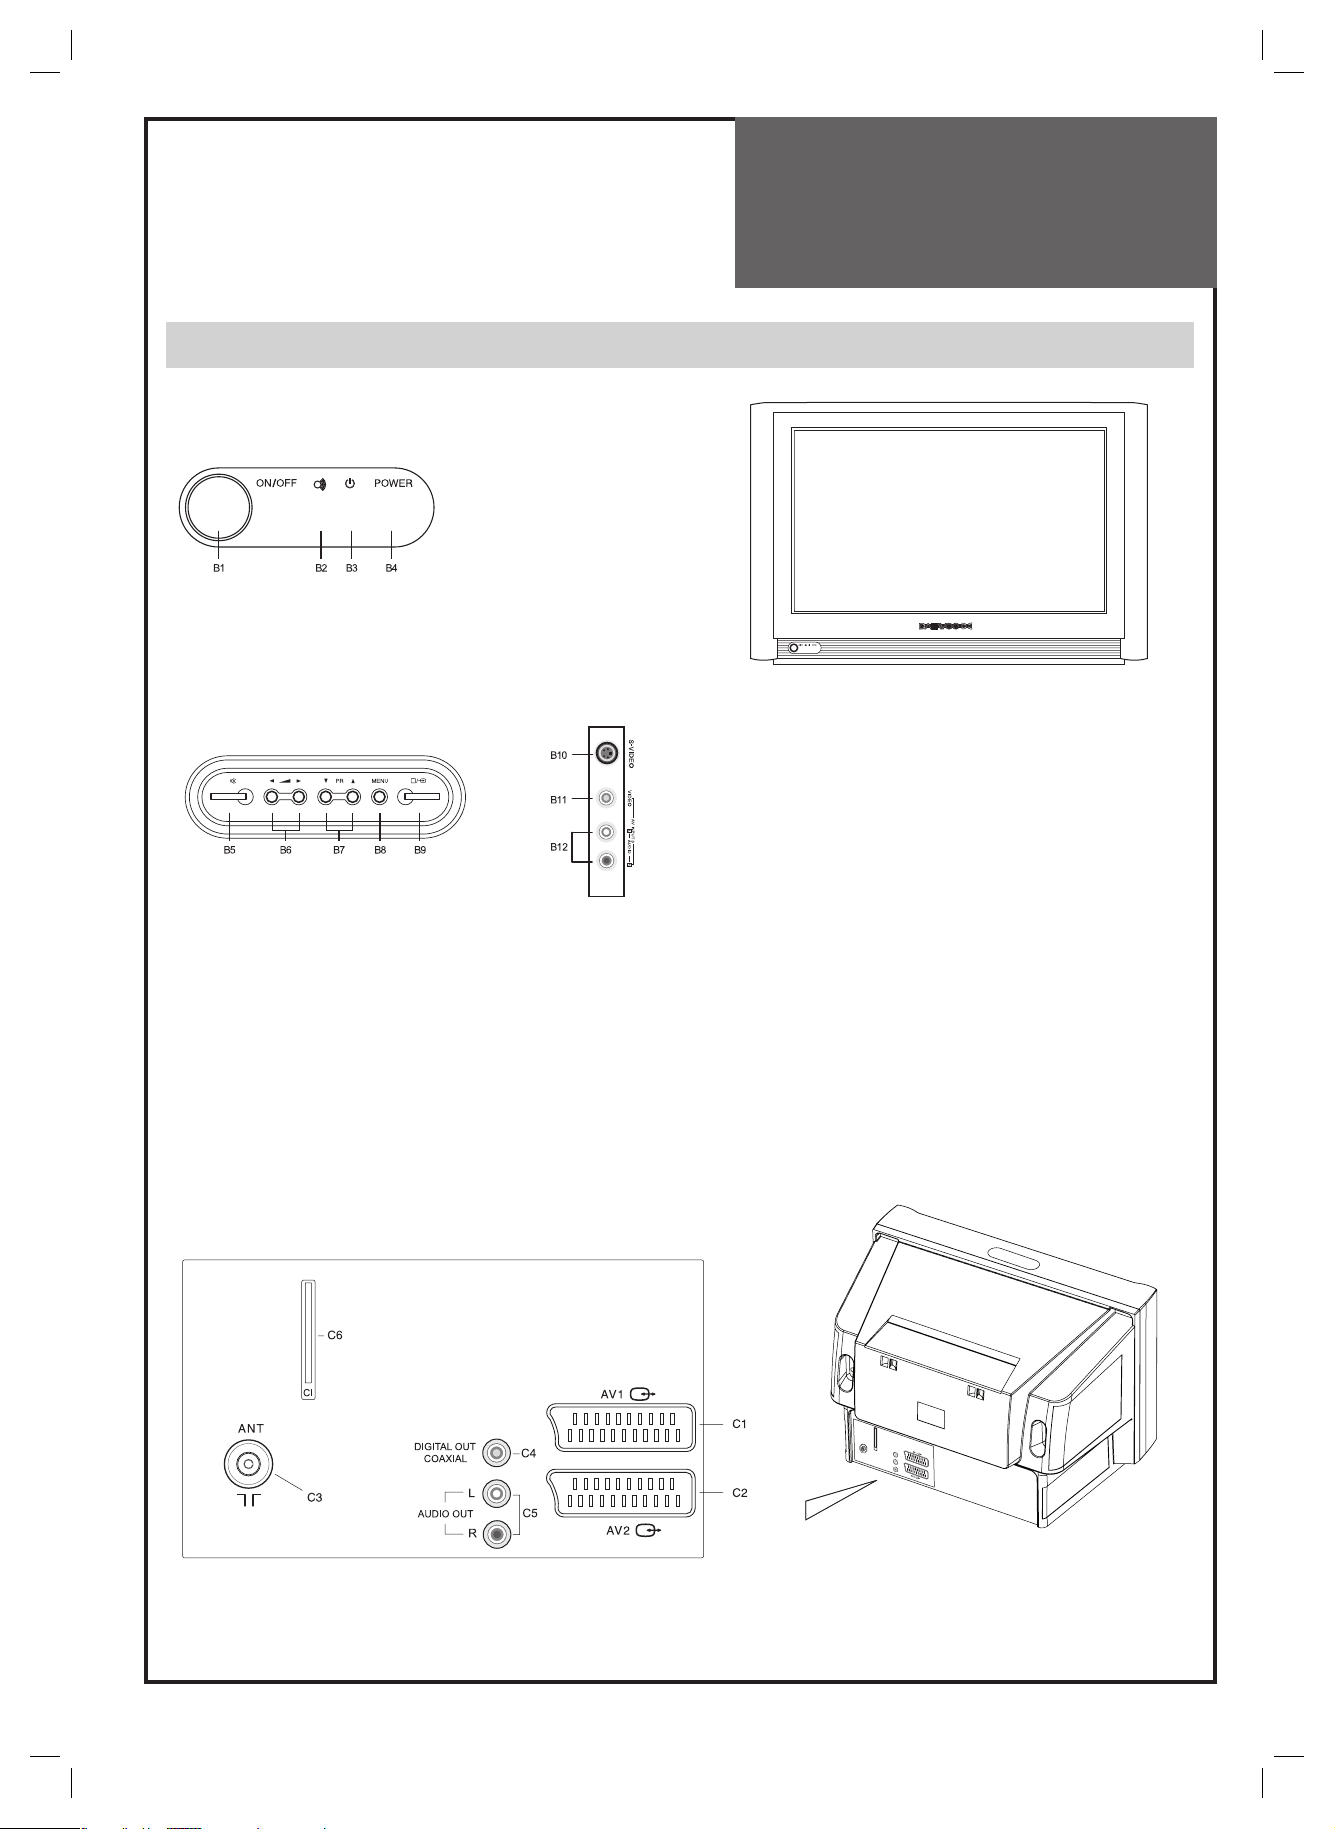
Local control
B1 MAIN POWER button
B2 REMOTE sensor
B3 STAND-BY indicator
B4 POWER ON indicator
B5 MUTE button
B6 VOLUME UP/DOWN button
B7 PROGRAM UP/DOWN button
B8 MENU button
B9 TV/AV button
B10 PANEL S-VIDEO jack
B11 VIDEO INPUT socket
B12 AUDIO INPUT (L+R) socket
Rear
C1 SCART 1 socket
C2 SCART 2 socket
C3 AERIAL jack
C4 DIGITAL OUT Coaxial
C5 AUDIO OUT (L+R)
C6 CI
7
Remote control
and TV connections
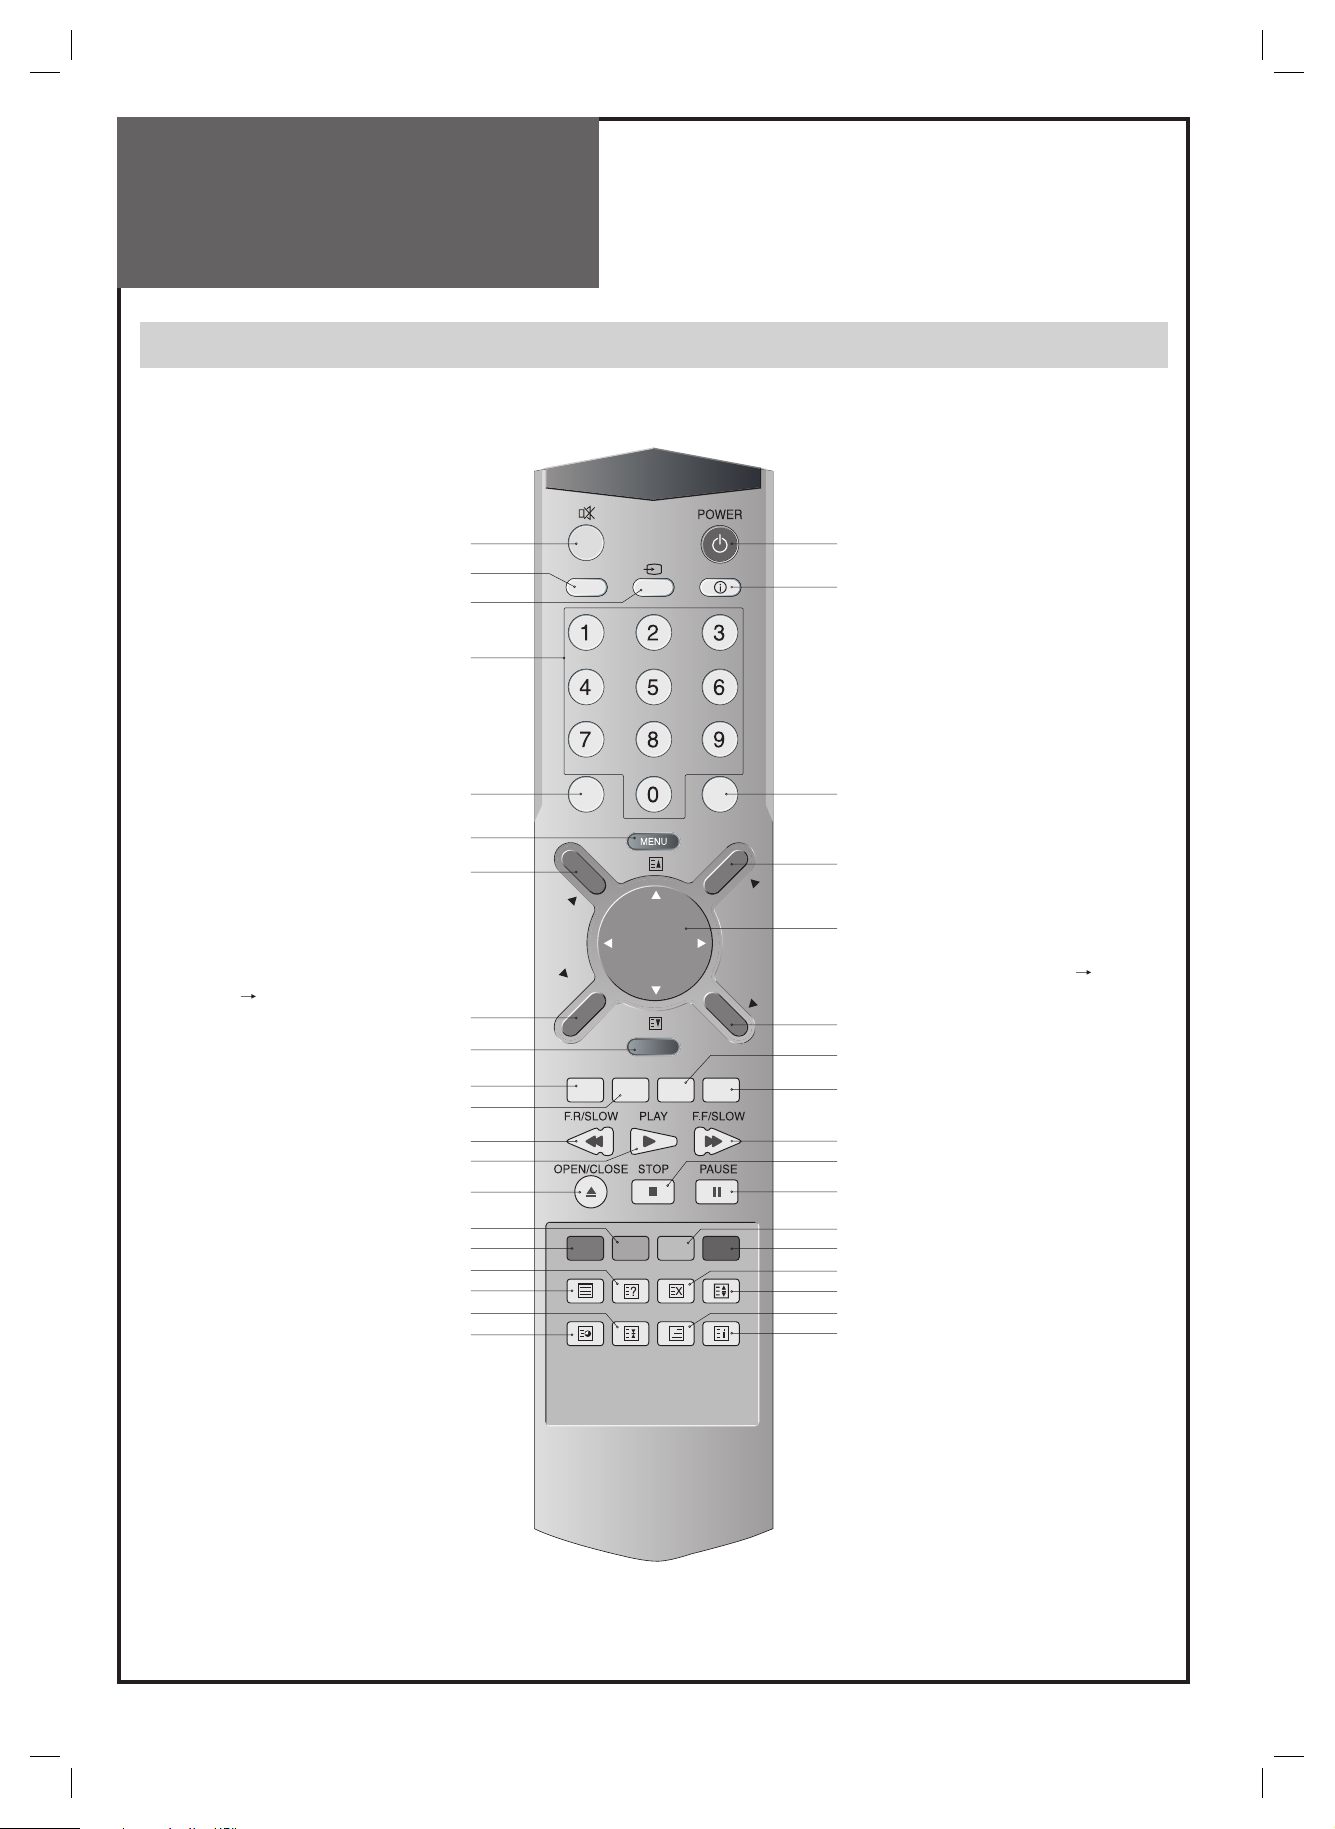
Remote Control Unit
TV mode
A1 POWER
A2 SOUND MUTE
A3 NUMBER 0..9 / ALPHABET
A4 SUB TITLE
A5 TV / AV
A6 PROGRAM UP
(PAGE UP)
A7 VOLUME DOWN
A8 .
A9 .
A10 MTS
A11 SKIP
A12 MOVE
A13 3D (SOUND EFFECT)
A15 ZOOM
A16 RECALL / INFO
A17 NORMAL
A18 OK / SELECT
A19 MENU
A20 VOLUME UP
A21 PROGRAM DOWN
(PAGE DOWN)
A22 TV TELETEXT
A23 .
A24 .
A25 .
A26 DELETE / FREEZE
A27 GUIDE
A28 CURSOR
(UP, DOWN, LEFT, RIGHT)
A29 DIGITAL / ANALOGUE
A30 CANCEL / EXIT
A31 F. R / SLO W
A32 F.F / SLOW
A33 PLAY
A34 STOP
A35 PAUSE
A36 OPEN / CLOSE
A37 .
A38 SLEEP
A17
A5
A3
A18
A19
A6
A21
A29
A30
A13
A31
A33
A36
A12
A11
A24
A22
A9
A10
NORMAL
OK/SELECT
PR
PAGE
PR
PAGE
CANCEL
/EXIT
ABC–"· DEF
JKLGHI MNO
TUVPQRS WXYZ
D/A
3D
SUB TITLE
RECALL
GUIDE
VOL
ZOOM
SLEEPMTS
VOL
A1A2
A16
A27
A20
A28
A7
A4
A15
A32
A34
A35
A26
A25
A8
A23
A37
A38
TELETEXT mode
A1 POWER
A2 SOUND MUTE
A3 NUMBER 0..9
A4 .
A5 .
A6 PAGE UP
A7 VOL/BRIGHT
A8 CANCEL
A9 PAGE HOLD
A10 SUBPAGE
A11 RED
A12 GREEN
A13 .
A15 .
A16 .
A17 .
A18 .
A19 VOL/BRIGHT
MENU SELECTION
A20 VOL/BRIGHT
A21 PAGE DOWN
A22 TELETEXT TV
A23 HEIGHT
A24 REVEAL
A25 CYAN
A26 YELLOW
A27 .
A28 .
A29 .
A30 .
A31 .
A32 .
A33 .
A34 .
A35 .
A36 .
A37 MIX
A38 INDEX
* A31 ~ A36 - These keys are not available
in this TV
8
Installation
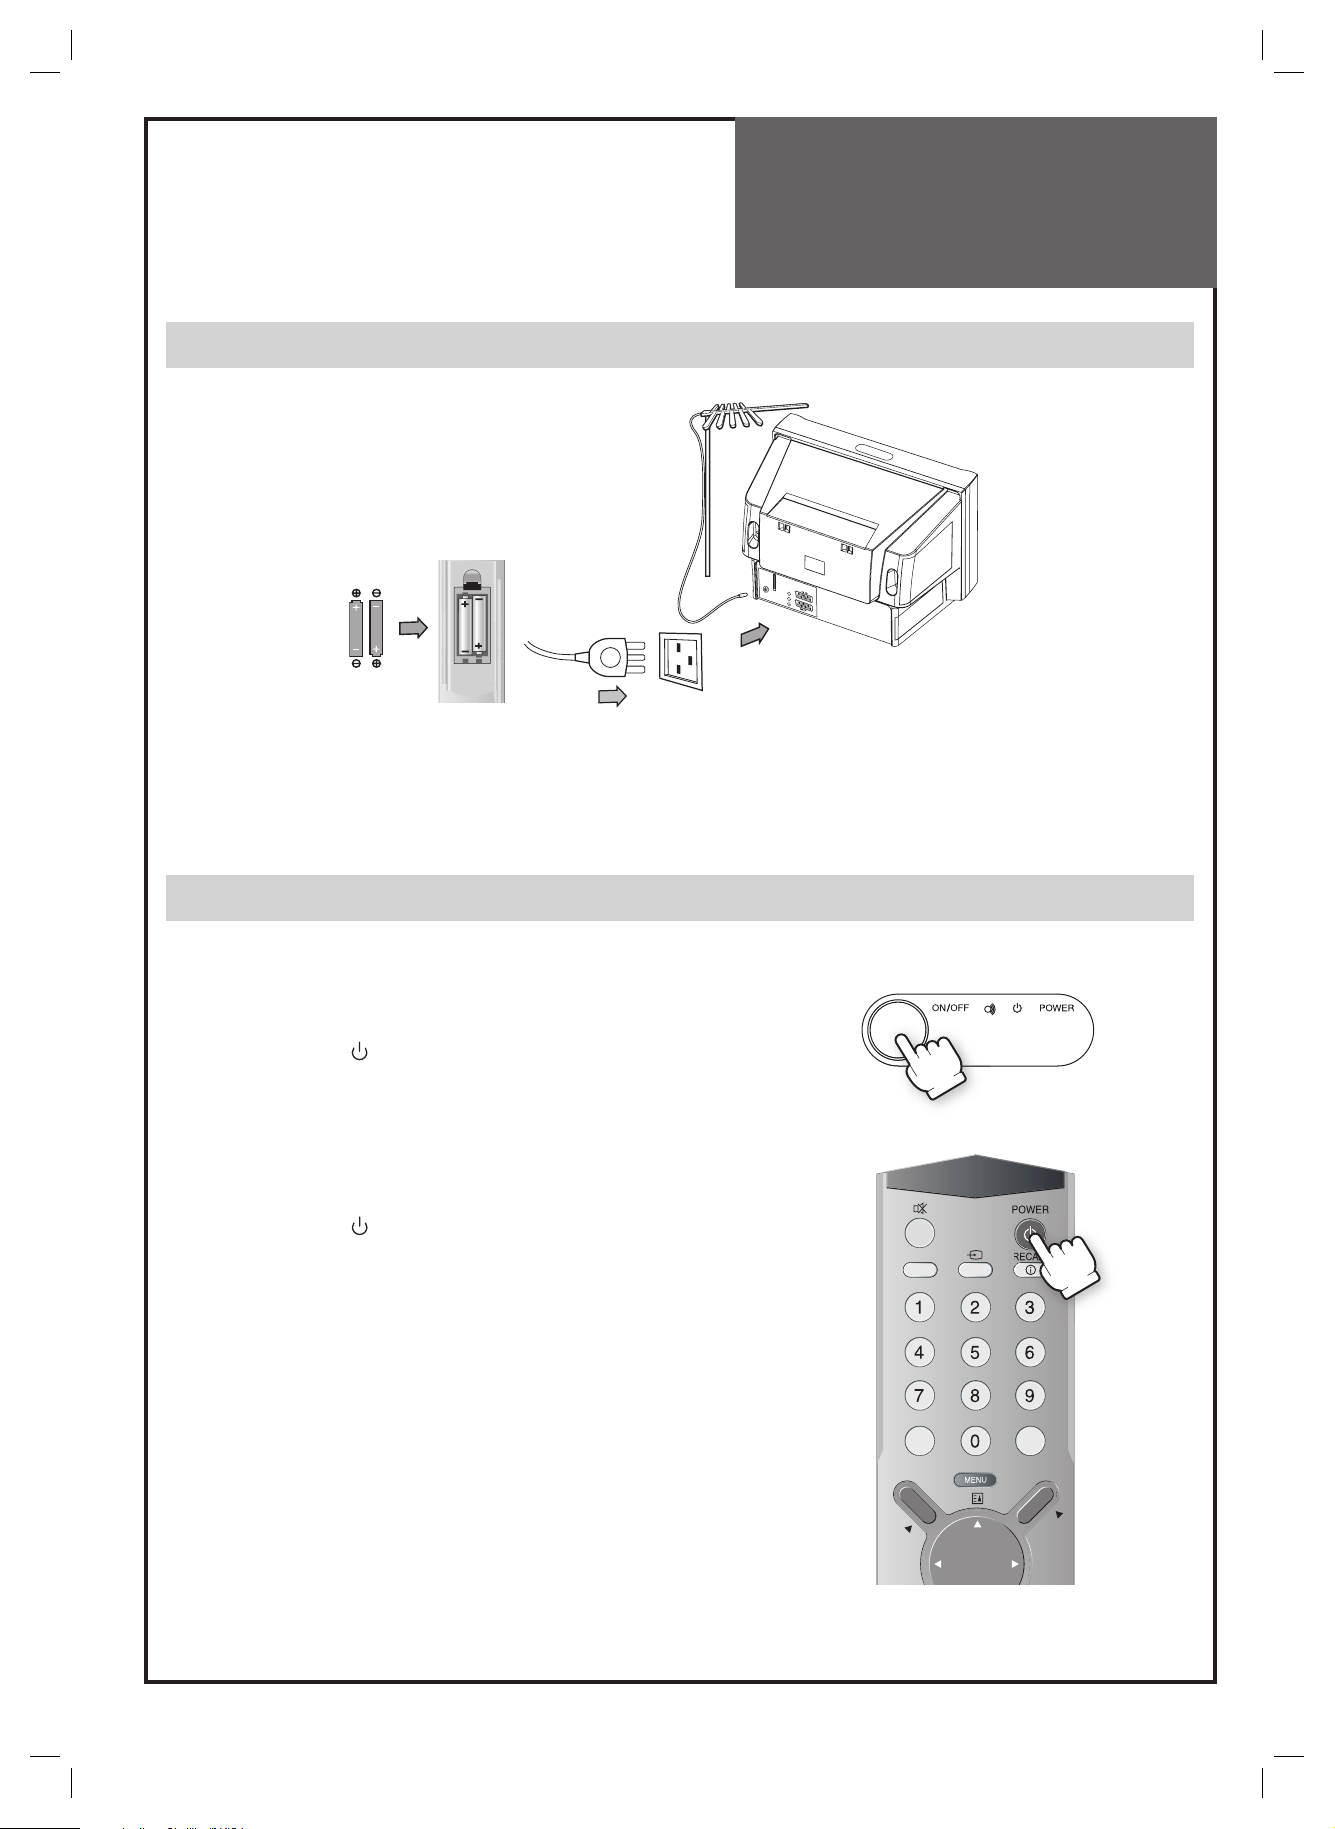
Inserting Batteries into the Remote Control Unit and Mains connection
Batteries
1. Open remote control battery compartment (at the rear) and insert two 1.5V type AAA batteries.
Warning:
2. Insert the main plug into a 220~240V 50Hz AC power socket.
3. Connect aerial to aerial jack (C3).
be careful to respect battery polarities.
Switching ON and OFF
SWITCHING ON
1. If the Indicator is not lit, then the TV set is powered off. You must
press the button on the TV set. The set will switch to stand-by mode
and then the Indicator will illuminate in Red.
2. Press the POWER button, UP/DOWN [/] button or
NUMBER button on the remote controller or UP/DOWN button on
the TV set.
The TV set will be switched on and then the Indicator will change to
Green.
SWITCHING OFF
1. Press the POWER button on the remote controller to return the
set to its stand-by mode.
The Indicator will illuminate in Red.
2. Press the ON/OFF button on the TV set to switch the TV set off
completely.
NOTE:
If you don’t use the set for extended periods of time, unplug
the AC cord from the Power outlet.
NORMAL
OK/SELECT
RECALL
ABC–"· DEF
JKLGHI MNO
TUVPQRS WXYZ
GUIDE
PR
PAG E
VOL
9
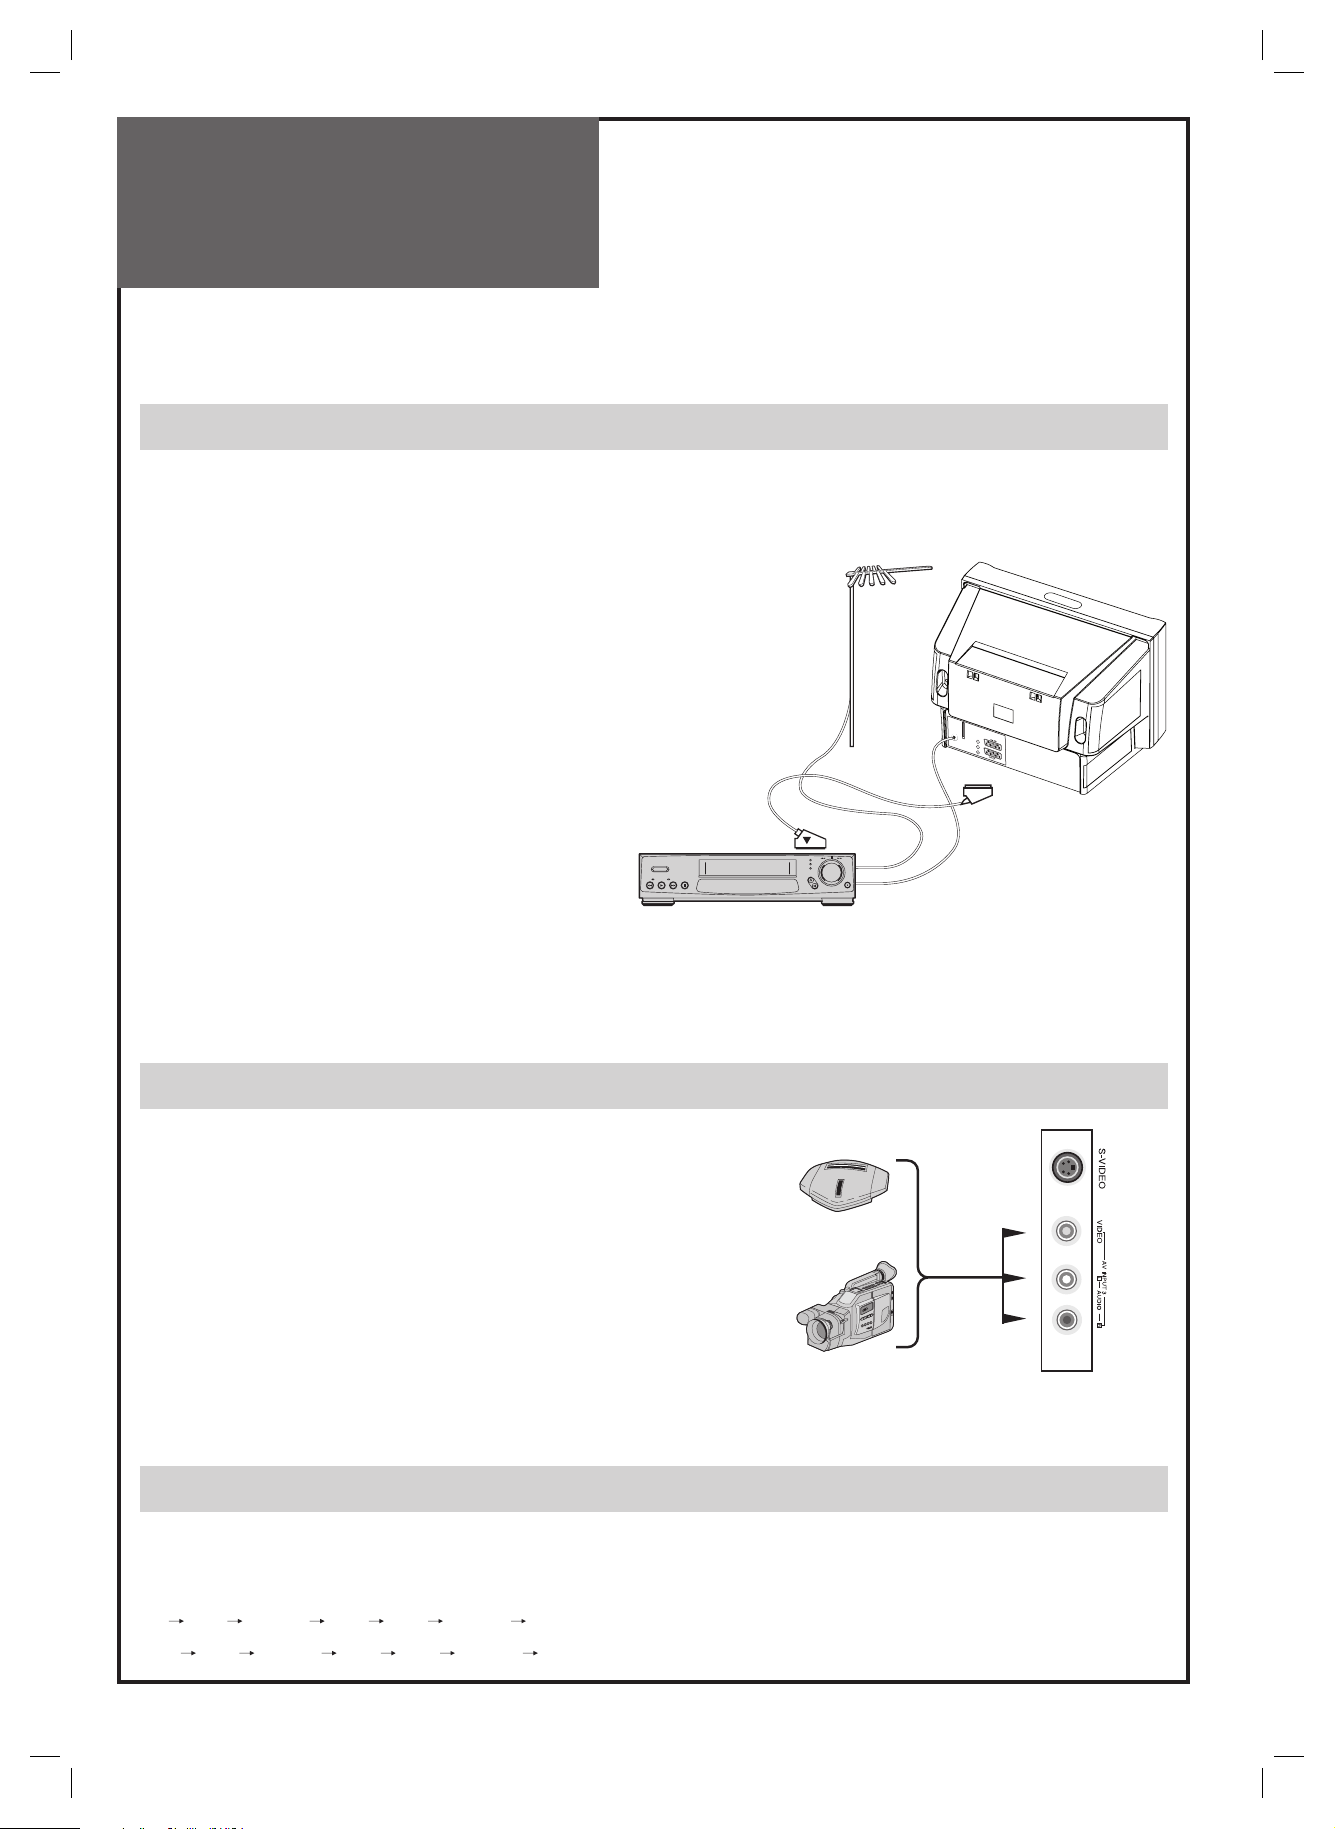
Connecting
External Equipment
The rear Scart1 (C1), Scart2 (C2) sockets, the side AV socket (B11) (B12), and the S-VHS socket (B10) are three dedicated
sockets to connect audio-video equipment.
Rear connections
REAR SCART 1 SOCKET (AV1)
This socket (C1) has video / audio inputs and outputs. When the TV set is in analogue mode, output is RF analogue signal.
It is recommended to connect to this socket automatic AV switching equipment such as pay-TV decoders, video games,
DVD players and most VCR’s. In most cases, when connecting powered equipment to this socket, the TV set
switches automatically to AV mode. If not, then use the
TV/AV buttons (A5) or (B9) to select AV1. You can also
receive an S-VHS signal with REAR SCART 1 socket, by
selecting SVHS1 with the TV/AV buttons (A5 or B9).
REAR SCART 2 SOCKET (AV2)
This socket (C2) has video / audio inputs and outputs.
The signal output is a monitor of the picture displayed on
screen.
DIGITAL AUDIO/AUDIO (L+R) JACK
This model has functions that can output digital audio/
audio signals. Digital audio out jack outputs digital audio
signal and Audio L, R jack output audio signal.
VCR / DVD / Video Game / Pay-TV decoder
Important:
socket(s), or if you wish to use only the aerial (RF) connection
(not recommended), then you should make use of PR 00 on the
TV set for best performance.
If your video equipment does not have SCART
Side connections
S-VIDEO JACK
The side S-VIDEO jack (B10) has video inputs only. It is necessary to connect the audio inputs to socket (B12) in order to have audio and video. To
switch from TV to these inputs, use the TV / AV buttons (A5) or (B9) and
select SVHS3.
SIDE AV SOCKET (AV3)
The side AV socket (B11) - (B12) has audio and video inputs. To switch
from TV to these inputs, use the TV / AV buttons (A5) or (B9) and select
AV3.
Remark:
The side S-VIDEO jack (B10) and the VIDEO socket (B11)
must not be connected at the same time.
Monitor out (AV2) signal has the signal connected to S-VIDEO/VIDEO jack.
Video Game
Camcorder
TV/AV selection
Allows to switch between TV and external modes.
By repeatedly pressing the remote control TV / AV (A5) or the TV front panel TV / AV (B9) button, the on-screen display
is changed as shown:
AV1 SVHS1 AV2 AV3 SVHS3 TV (Analog channels)
TV
DVB AV1 SVHS1 AV2 AV3 SVHS3 DVB (Digital channels)
10
 Loading...