

Daewoo DLP-3212L User Manual

LCD TELEVISION
INSTRUCTION MANUAL
DLP-2612
DLP-3212
DLP-2612L
DLP-3212L
Caution
WARNING:To reduce the risk of fire or electric shock hazard, do not expose this appliance
to rain or moisture.
2
CAUTION
RISK OF ELECTRIC SHOCK
DO NOT OPEN
CAUTION : TO REDUCE THE RISK OF ELECTRIC SHOCK,
DO NOT REMOVE COVER (OR BACK).
NO USER-SERVICEABLE PARTS INSIDE.
REFER SERVICING TO QUALIFIED SERVICE PERSONNEL.
The lightning flash with arrowhead symbol, within an equilateral triangle, is
intended to alert the user to the presence of uninsulated “dangerous voltage” within the product’s enclosure that may be of sufficient magnitude to constitute a risk
electric shock.
The exclamation point within an equilateral triangle is intended to alert the user to
the presence of important operating and servicing instructions in the literature
accompanying the appliance.
Safety
Precautions
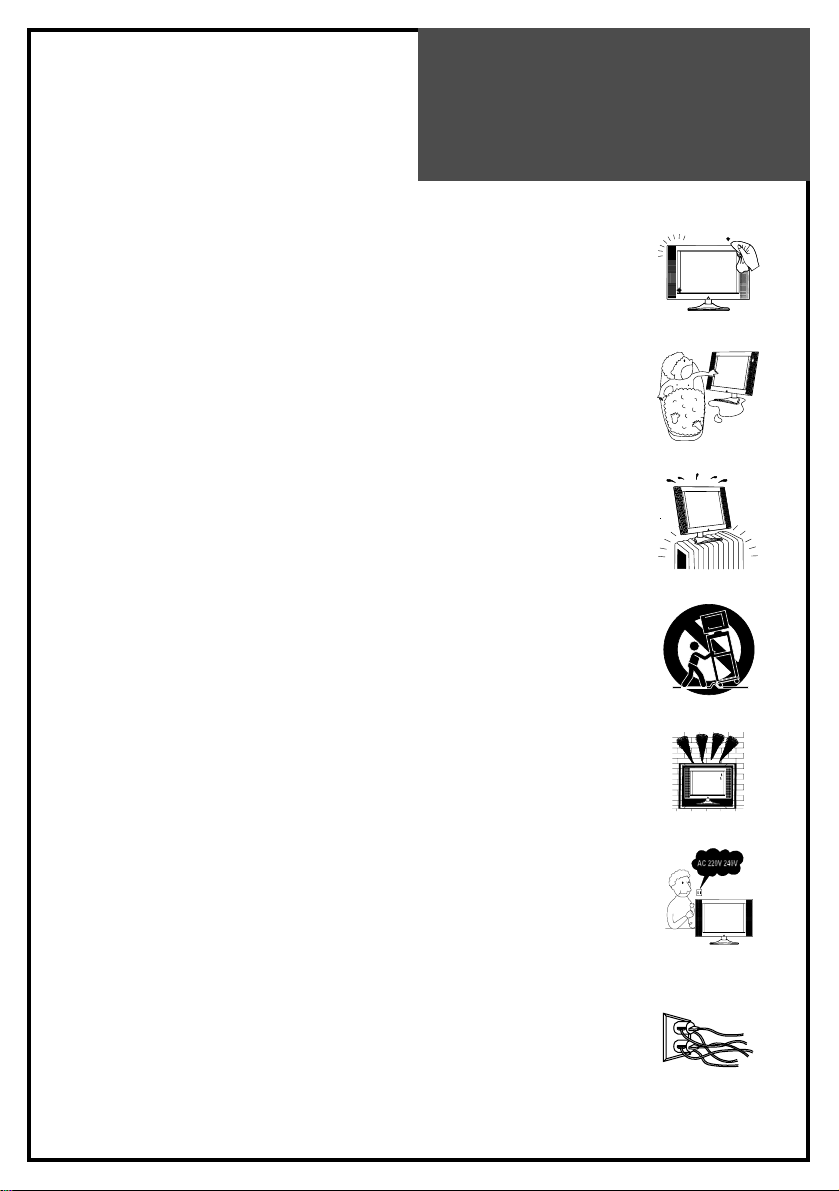
1. CLEANING
Unplug this TV equipment from the AC power outlet before cleaning.
Do not use liquid cleaner or aerosol cleaners. Use a soft and damp cloth for
cleaning.
2. ATTACHMENTS
Do not use attachments not recommended by the TV equipment manufacturer
as they may result in the risk of fire, electric shock or other injury.
3. WATER AND MOISTURE
Do not place this TV equipment near water, for example, near bathtub,
kitchen sink, laundry tub, in a wet basement, or near a swimming pool, or
the like.
4. HEAT
Keep the TV equipment away from the heat sources such as radiator, heater,
stoves and other heat-generating products.
5. SETTING
Do not place this TV on unstable cart, stand, or table. Placing the TV on an
unstable base can cause the TV to fall, resulting in serious personal injuries
as well as damage to the TV. Use only a cart, stand, bracket or table
recommended by the manufacturer or salesperson.
6. WALL OR CEILING MOUNTING
When mounting the product on a wall or ceiling, be sure to install the
product using the designated mounting tool according to the method
recommended by the manufacturer.
7. POWER
This TV equipment should be operated only from the type of power source
indicated on the marking label. If you are not sure of the type of power
supplied to your home, consult your TV dealer or local power company.
8. PIXEL
The LCD panel is a very high technology product with 1,049,088(26", 32”)
thin film transistors which give you fine picture details. Occasionally, a few
non-active pixels may appear on the screen as a fixed point of blue, green or
red please note that this does not affect the performance of your product.
A fixed image should not be displayed during hours, otherwise trace of this
image may appear on the screen.
9. SET MOVING
When moving the product, place your fingers of one hand in the socket on
the back of the CTV and support the front of the TV with the other hand.
10. OVERLOADING
Do not overload AC outlets or extension cords. Overloading can result in fire
or electric shock.
3
Contents
Important Safeguards 5
Supplied Accessories 6
Functional Overview 7
Front, Side(Control Panel) 7
Remote Controller 8
Preparation 10
Inserting Batteries into the Remote Control Unit 10
Mains Connection 10
Aerial Connection 10
Aerial Connection with VCR 11
Connecting PC(15Pin D-SUB) 12
Connecting DVI 13
Connecting Component 14
Installation 18
Language Selection 18
Automatic Tuning of TV Channels 18
Channel Edit 19
Manual Tune 20
Fine Tune 20
Basic Operation 21
Switching On and Off 21
Recall 21
Programme Selection 22
Sound Control 22
Menu Opreration 23
Picture 23
Screen 24
Sound 30
Features 32
Sleep 33
Teletext 34
Trouble Shooting 36
Product Specifications 38
4
Important
Safeguards
5
Location
Heat, Moisture, Dust, Vibration
Position your set so that bright light or sunlight doesn't fall directly onto the screen.
Care should be taken not to expose the set to any unnecessary vibration, moisture, dust or
heat.
Do not expose the set to dripping or splashing.
Ventilation
Also ensure that the set is placed in a position to allow a free flow of air.
Do not cover the ventilation openings on the back cover.
Leave at least 10 cm around each side of the TV set.
Mounting
This set can be positioned by using the table top stand or wall mounting bracket.
When you install the set using the wall mounting bracket, fix it carefully so it is secure.
Object Entry
Do not insert foreign objects, such as needles and coins, into the ventilation openings.
Main Connection
TV set shall be connected to amains socket outlet with a protection earthing connection.
Main plug shall remain readily operable.
Lightning striking
You should disconnect your set from the mains and the aerial system during thunderstorms.
Cleaning
Unplug the set from the mains before cleaning.
Dust the set by wiping the LCD screen and the cabinet with a soft, clean cloth.
If the screen requires additional cleaning, use a clean, damp cloth.
Do not use liquid cleaners or aerosol cleaners.
Do not rub or strike the LCD with anything hard as this may scratch, or damage the LCD
permanently.
Service
Never remove the back cover of the set as this can expose you to high voltage and other
hazards.
If the set does not operate properly,unplug it and call your dealer.
Supplied
Accessories
Make sure that the following accessories are provided with the product.
6
AC cord
AC cord
Instruction manual
PIP
MGDI
N.R
MULTI
MEDIA
POSTION
PICTURE
LOCK SLEEP
ASPECT
MENU
PREV PR
EDIT
STILL RECALL
SOUND
MODE
SWAP INPUT
Remote controller Batteries (Option)
(2x1.5V, AA)
Functional
Overview
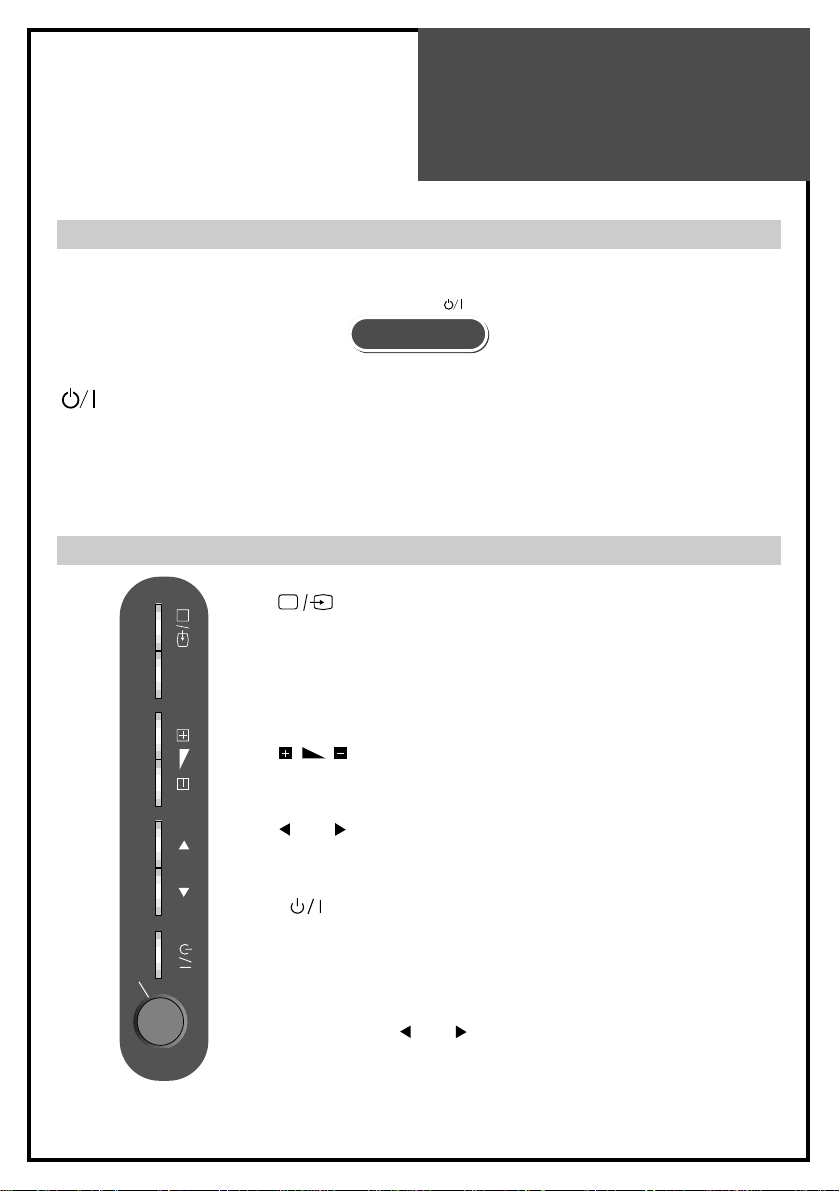
Front
7
TIMER
<LED Indicator> : Lights up red in Stand-By mode and Lights up green in TV on mode.
When TV is Child Lock mode, LED will cycle through red / green.
TIMER<LED Indicator> :
When On time/Off time in time setting mode is selected, the LED is red.
Remote Sensor : Receives signals from the remote controller.
Button : Each time you press this button, the TV will cycle
through:
TV / Video1 / Video2 / Video3(S-Video) /
Component 1 / Component 2 / PC RGB / DVI
MENU Button : Use this button to enter and exit the MENU.
Buttons : Use these buttons to change your TV’s volume
or to move the cursor in the menu.
Buttons : Use these buttons to change channels on your
TV or to move the cursor in the menu.
Button :
Use this button to TV STAND-BY mode/TV ON mode.
Power On/Off Button :
Use this button to to turn the power on or off.
Note: When the current state is ST-BY, you can turn on the TV
using the Buttons.
PR
PR
MENU PR
ON/OFF
Side
Functional
Overview
Remote Controller
8
PIP
MGDI
N
.R
M
U
L
T
I
M
E
D
IA
POSTION
PICTURE
LOCK SLEEP
ASPECT
MENU
PREV PR
EDIT
STILL RECALL
SOUND
MODE
SWAP INPUT
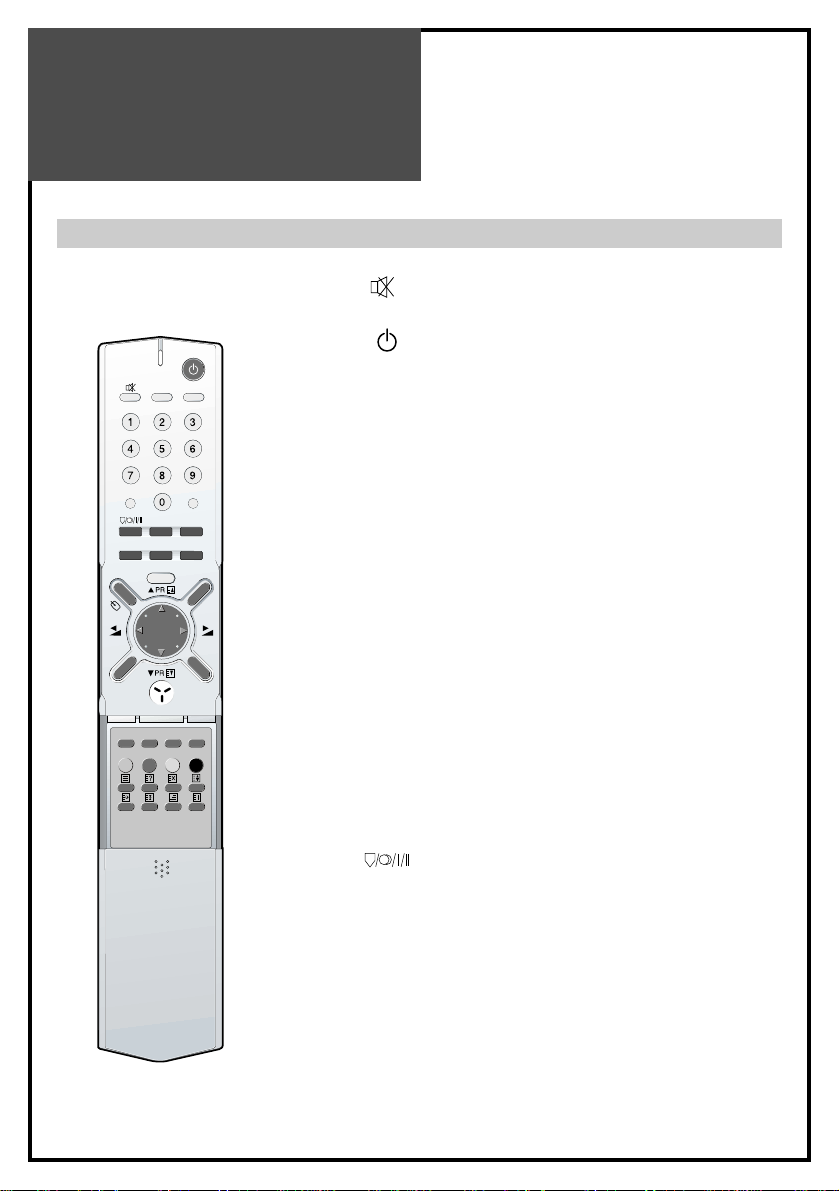
1. (MUTE) : Press this button, and the sound goes off.
Press again, and the sound returns.
2. (POWER) : TV on/off button in Stand-By mode.
Note. When the current state is ST-BY, you turn on the
TV using the digit key
3. STILL : Press this button to freeze the picture.
4. RECALL : The present modes(TV, Video, Component,
PC) and Signal information for 4 seconds.
In TV mode, the Programme number, Signal, PIP/POP,
MGDi and Current Time are displayed.
5. NUMBER : Press the numbers on this board, you can
select channels directly in TV mode. (EX. When you
want to select PR10, you should press down “1” and
“0” within 2second. If you only press down “1”, after
2second, PR1 will be selected.)
Note) When the current state is ST-BY, you can turn on
the TV using the digit key. Then, PROGRAMME
is selected according to digit number.
6. LOCK : This prevents the use of the TV set without the
remote control.
7. SLEEP : Sleep Timer setting. (Sleep 10 > Sleep 20 >
Sleep 30 > Sleep 60 > Sleep 90 > Sleep 120)
8. (MTS): You can select sound mode in Mono,
Stereo, Dual1, Dual2, NiCAM STEREO. It works only
in TV mode.
9. EDIT : You can enter the channel edit mode.
10. SOUND MODE : Using the this button, Select the
desired sound mode.
Standard > Music > Cinema > News > Favourite
11. PICTURE MODE : Picture modes change as follows :
Standard / Dynamic / Cinema / Favourite
Functional
Overview
9
Remote Controller
PIP
MGDI
N
.R
M
U
L
T
I
M
E
D
IA
POSTION
PICTURE
LOCK SLEEP
ASPECT
MENU
PREV PR
EDIT
STILL RECALL
SOUND
MODE
SWAP INPUT
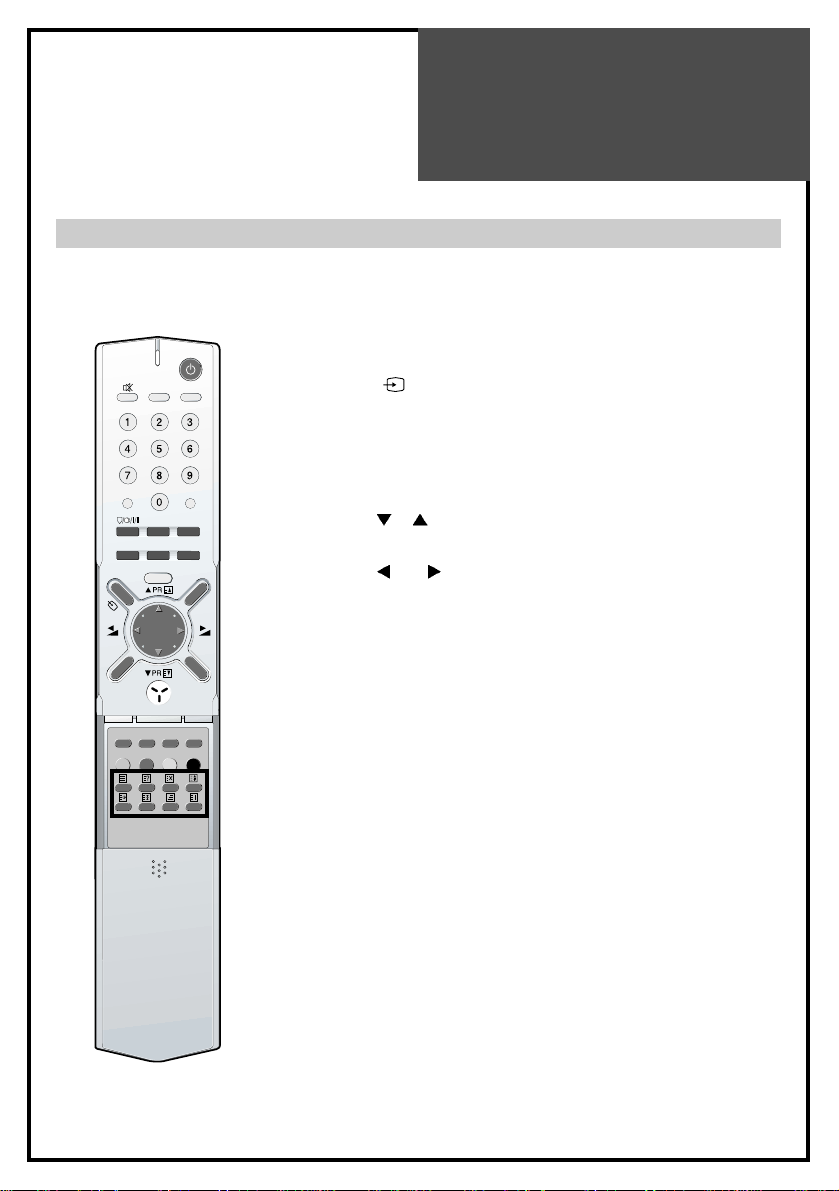
12. ASPECT : Select screen aspect ratio :
16:9 / Zoom1 / Zoom2 / Panorama / Auto / 4:3
13. PREV PR : Previous PROGRAMME button.
14. MENU : Menu display button.
15. :
Each time you press this button, the TV will cycle
through: TV / Video1 / Video2 / Video3(S-Video)
16. MULTIMEDIA : Each time you press this button, the TV
will cycle through:
Component 1 / Component 2 / PC RGB / DVI
17.
PR : Change channels on your TV or move the
cursor (UP / DOWN) in the menu.
18.
VOL : Adjust the volume or move the cursor
(LEFT / RIGHT) in the menu.
19. MGDi : Using this button, Change MGDi mode (Yes /
Demo/ No).
20. N.R : Using this button, Select either Noise Reduction
or Off.
21. PIP : Using this button, Select either PIP / POP On or
Off.
22. POSITION : Using this button, you can move the sub
window position in PIP mode.
Position : right bottom > right top
> left top > left bottom
23. SWAP : Using this button, you can swap the main
screen for sub screen.
24. INPUT : Sub Screen input mode change as follows PIP
table mode or POP table mode.
25. Red : for channel skip and teletext.
26. Green : for channel move and teletext.
27 Teletext : see page 34.
Preparation
10
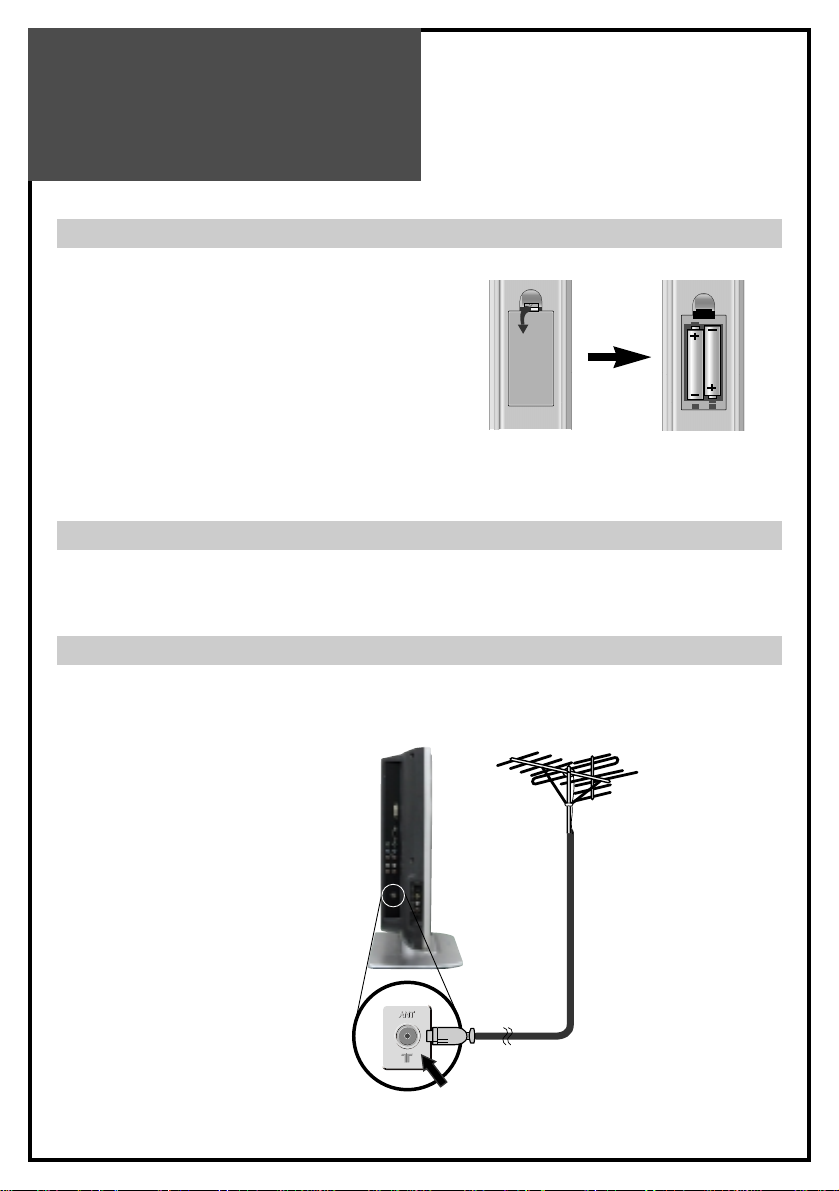
To load the batteries, turn the remote control
handset over and open the battery compartment.
Insert the batteries (Two 1.5v, type R03 or AA).
Make sure that the polarity matches with the (+)
and (-) marks inside of the battery compartment.
Note: To avoid damage from possible battery
leakage, remove the batteries if you do not
plan to use the remote control handset for
an extended period of time.
Aerial Connection
CONNECTING THE TV DIRECTLY TO AN AERIAL
Connect an aerial cable (75 ohm coaxial cable) to the Aerial terminal on the back of the TV
set.
Aerial cable
Aerial Terminal
Aerial
Inserting Batteries into the Remote Control Unit
Mains Connection
1. Connect the AC plug to AC input terminal, rear of the set.
2. Plug the other end of AC cord into a Power outlet with 220 - 240V ~, 50Hz.
Preparation
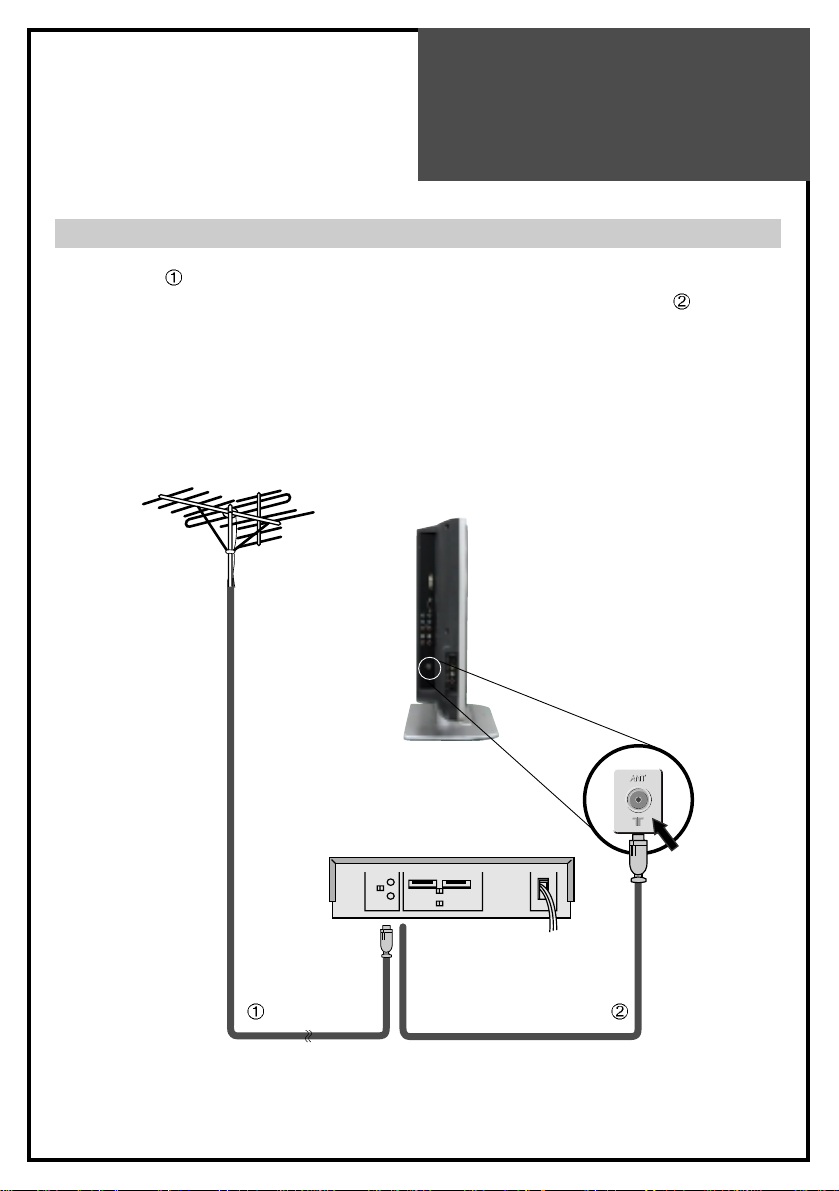
Aerial Connection with VCR
Connect your aerial cable to the RF(aerial) IN terminal on the VCR.
Connect the RF OUT terminal of the VCR to the Aerial terminal on the TV set with
RF cable.
NOTE: If you wish to use only the Aerial (RF) connection to match the VCR, then you should
store the VCR channel on the TV to programme number “ZERO”using the “Manual
tuning”function (See page 20). Now you can watch the VCR in TV mode by selecting the
programme number.
11
RF IN RF OUT
VCR
Preparation
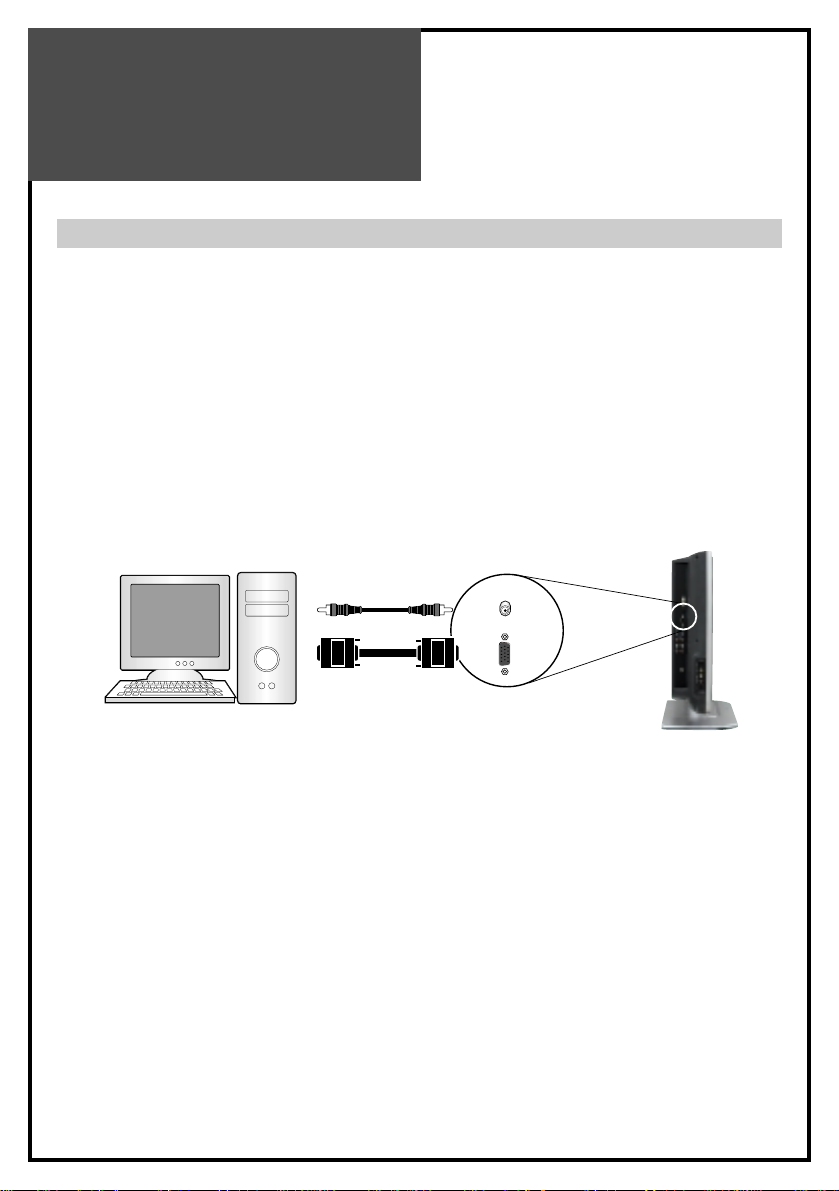
Connecting PC(15Pin D-SUB)
1. Prepare the PC cable (D-sub 15pin) and the PC audio cable(Sold separately).
2. Connect the PC(Output) to the LCD(Input) as shown below.
3. Turn on the LCD and PC.
4. INPUT SELECT : Select [PC] by pressing the “MULTIMEDIA” button of the Remote Control of
LCD unit.
Each time you press the “MULTIMEDIA” button, a different input mode appears. The sequence
is as follows: Component1 > Component2 > PC RGB > DVI > Component1
This set offers a variety of the resolutions in PC mode : 640x480(60,66,72,75Hz),
576P(50Hz), 720x400(70,85Hz), 800x600(60,75,85Hz), 832x624(74Hz),
1024x768(60,70Hz), 720P(50,60Hz), 1080i(50,60Hz)
NOTES:
1) The resolution of the PC monitor is best at 1024 x 768.
2) If there is a [Vertical Frequency]setting menu in the [Display] Menu of the PC, adjust the
frequency to 60Hz.
3) If the PC resolution is too high, it may be hard to read letters.
Select a suitable resolution.
12
PC INPUT
AUDIO INPUT
D-sub 15pin
PC LCD TV
Audio cable
 Loading...