

Page 1

Cybex VR Owner’s Manual
Safety
Page 1-1
1 - Safety
Safety
Read the Owner’s Manual carefully before assembling, servicing or using the VR equipment.
It is the responsibility of the facility owner and/or owner of the equipment to instruct users on
proper operation of the equipment and review all labels.
! WARNING: Serious injury could occur if these safety precautions are not
observed:
• DO NOT use the VR equipment if it is not set up and located on a solid level surface.
• Read all cautions/warnings and obtain proper instruction on use of the machines prior to
using. Use appropriate positioning, speed and controlled movements.
• Obtain a medical exam prior to beginning an exercise program.
• If at any time during exercise you feel faint, dizzy or experience pain, stop and consult
your physician.
• Keep head, limbs, fingers and hair clear of all moving parts.
• DO NOT wear loose or dangling clothing while using the VR equipment. Keep away from
all moving parts.
• Inspect the VR equipment prior to use. DO NOT use if damaged or inoperable.
• DO NOT attempt to fix a broken or jammed machines. Notify floor staff.
• Use the machine only for the intended use. Obtain instruction and DO NOT modify the
machines.
• Children must not be allowed near these machines. Teenagers must be supervised.
• DO NOT use if guards are missing or damaged.
• DO NOT remove any labeling from the VR equipment. Replace any damaged labels.
• Load plates evenly and carefully to avoid tipping equipment and crushing injuries.
• Use a spotter.
• DO NOT use dumbbells or other incremental weights, except those provided by the
manufacturer.
Page 2

Cybex VR Owner’s Manual
Safety
Page 1-2
Facility Safety Precautions
• Read the Owner’s Manual carefully before assembling, servicing or using the VR
equipment.
• Securely anchor each machine to the floor using the anchor holes provided in each
machine.
• Make sure that all users are properly trained on how to use the VR equipment.
• Make sure there is enough room for safe access and operation of the VR equipment.
When the VR equipment is in use, there must be a minimum of at least three feet on all
sides for safe access, operation and passage.
• Perform regular maintenance checks on the VR equipment. Also pay close attention to all
areas most susceptible to wear.
• Immediately replace worn or damaged components. If unable to immediately replace worn
or damaged components then remove from service until the repair is made.
• Use only Cybex supplied components to maintain/repair the VR equipment.
• Keep a repair log of all maintenance activities.
• Inspect all cables and belts and connections prior to use. DO NOT use if any components
are worn, frayed, or damaged.
NOTE: It is the sole responsibility of the user/owner or facility operator to ensure that regular
maintenance is performed.
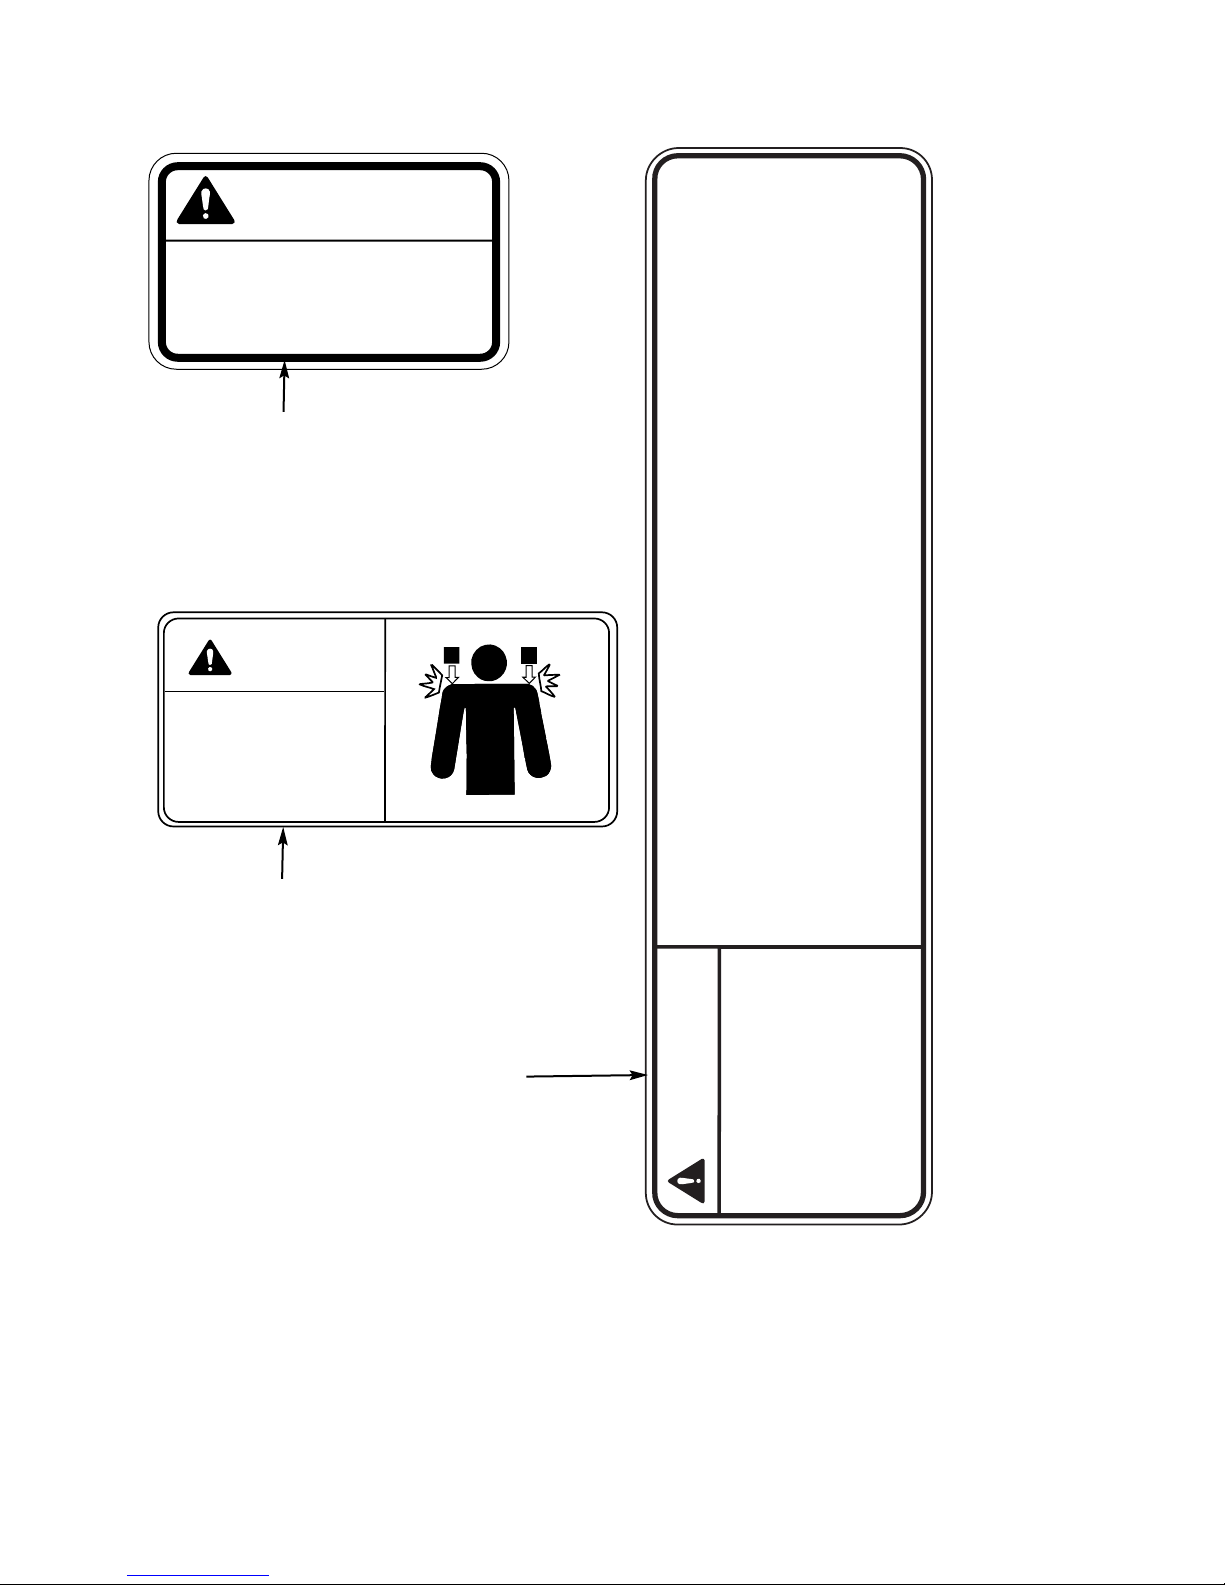
Warning/Caution Decals
Warning decals indicate a potentially hazardous situation, which, if not avoided, could result
in death or serious injury.
Caution decals indicate a potentially hazardous situation, which, if not avoided, could result in
minor or moderate injury.
The warning and caution decals are shown on the following page. The diagrams following the
decals show where each decal is located.
NOTE: Cybex is not responsible for the actual anchoring of equipment. Consult
with a professional contractor.
NOTE: Use fasteners having a minimum of 500 lbs. tensile capacity (3/8” grade 2
bolts or better).
NOTE: If legs/frame does not contact surface, DO NOT pull down with anchors.
Shim any leg or frame not in contact with surface using flat washers.
Page 3
Cybex VR Owner’s Manual
Safety
Page 1-3
See all machines except
Row/Rear Delt and
Arm Curl, letter A.
Personal injury may occur.
CAUTION
4000Y316 C
Keep away from moving
parts to avoid injury.
CAUTION
4875-300 B
Support arm with hands
or shoulder while making
height adjustments to
avoid injury.
4800-381 C
SERIOUS INJURY
COULD OCCUR IF
THESE PRECAUTIONS
ARE NOT OBSERVED
WARNING
2. Read and understand warning
labels and user manual prior to
exerci sing. Obtain instruction
prior to use.
1. Obtain a medical exam prior to
beginning an exercise program.
3. Keep body and clothing free from
and clear of all moving parts.
4. Inspect machine prior to use. DO
NOT use if it appears damaged or
inoperable.
5. DO NOT attempt to fix
a broken or
jammed machine. Notify floor staff.
6. Use the machine only for the
intended use. DO NOT modify the
machine.
7. Be sure that the weight pin is
completely inserted. Use only the pin
provided by the manufacturer. If unsure
seek assistance.
8. Never pin the weights in an elevated
position. DO NOT use the machine if
found in this condition. Seek assistance
from floor staff.
9. Children must not be allowed near
thi
s machine. Teenagers must be
supervised.
10. DO NOT use if guards are missing
or damaged.
11. DO NOT use dumbbells or other
incremental weights, except those
provided by the manufacturer.
12. Inspect all cables and belts and
connections prior to use. DO NOT use
if any components are worn, frayed,
or damaged
.
13. DO NOT REMOVE THIS LABEL.
REPLACE IF DAMAGED.
See Standing Calf, letter B.
See all machines, letter C.
Page 4

Regular Maintenance Activities
Preventative maintenance activities must be performed to maintain normal operation of your
VR equipment. Keeping a log sheet of all maintenance actions will assist you in staying
current with all preventative maintenance activities. The preventative maintenance actions are
described in detail in Chapter 7. Briefly, they include:
Daily
1. Clean upholstery.
Weekly
1. Inspect all nuts and bolts for looseness. Tighten as required.
2. Inspect all cables for damage or wear (see Chapter 7). Immediately discontinue use if a
cable is worn or damaged.
3. Check for worn handles, worn snap links, and worn warning labeling. Replace all worn
parts immediately.
4. Inspect weight stacks for proper alignment and operation. Correct all improper alignment
and operation issues immediately.
5. Lubricate guide rods using automotive engine oil only.
Yearly
1. Replace all cables at least annually.
As Required
1. Inspect grips and replace as necessary.
Using Proper Form
Before working out, read and understand the training suggestions listed in Chapter 3. See
Chapter 4 for proper form during exercise.
Cybex VR Owner’s Manual
Safety
Page 1-19
Page 5
Cybex VR Owner’s Manual
Assembly
Page 4-1
4 - Assembly
Installing Weight Stacks
! WARNING: Use extreme caution when installing the weight stacks, failure to do so
could result in injury.
NOTE: Two people will be required to perform this procedure.
NOTE: Read and understand all instructions thoroughly before installing weight stacks.
1. Place machine in desired location.
2. Remove all banding and shipping supports.
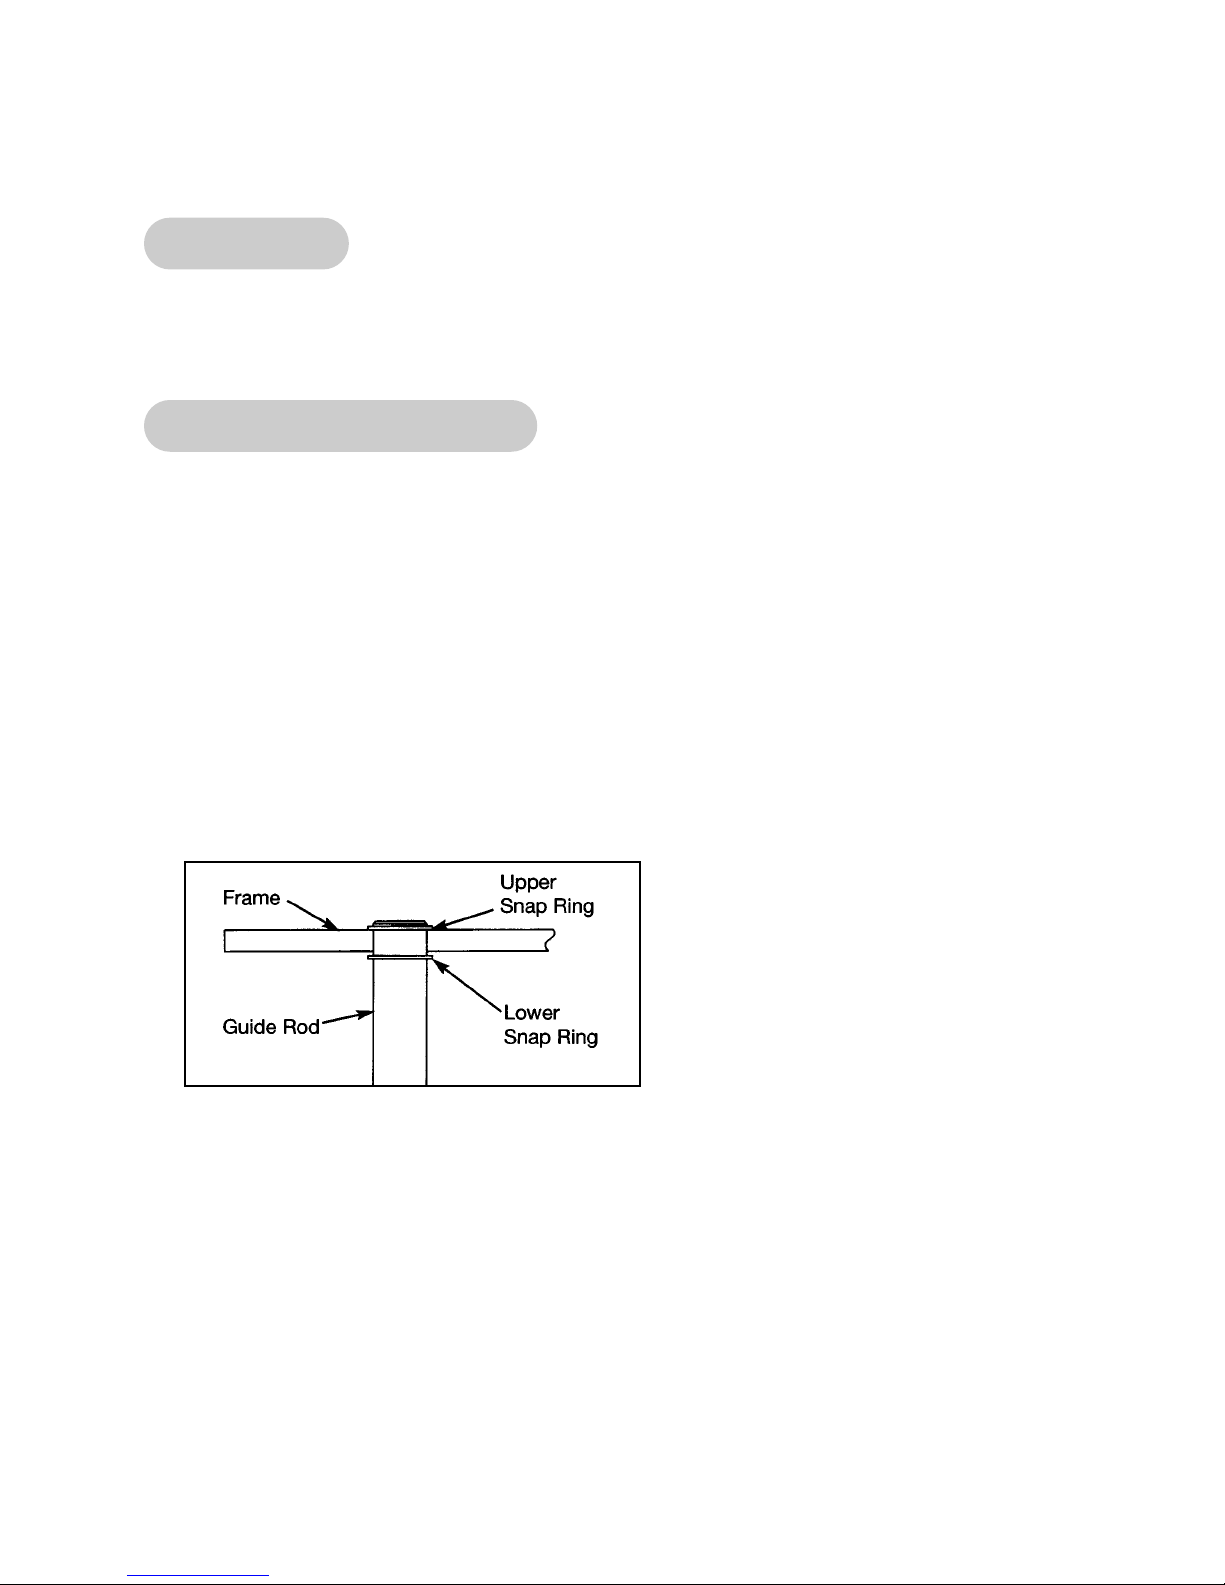
3. Using an external snap ring pliers, remove the upper snap ring from one of the guide rods
and carefully lower the guide rod. See Figure 1.
• External snap ring pliers
• Hammer
• Medium weight automotive engine oil
Tools Required
Figure 1
4. Remove lower snap ring from the guide rod. Repeat steps 3 and 4 to remove both snap
rings from other guide rod.
5. Lean guide rods in the direction that will provide the most room for installing weight plates
(direction may vary, depending upon machine).
6. Slide top weight up and out of machine and carefully set it aside.
7. Wipe guide rods clean over entire length. Lubricate with light coating of medium weight
automotive engine oil.
8. Carefully install weight plates one at a time.
Page 6
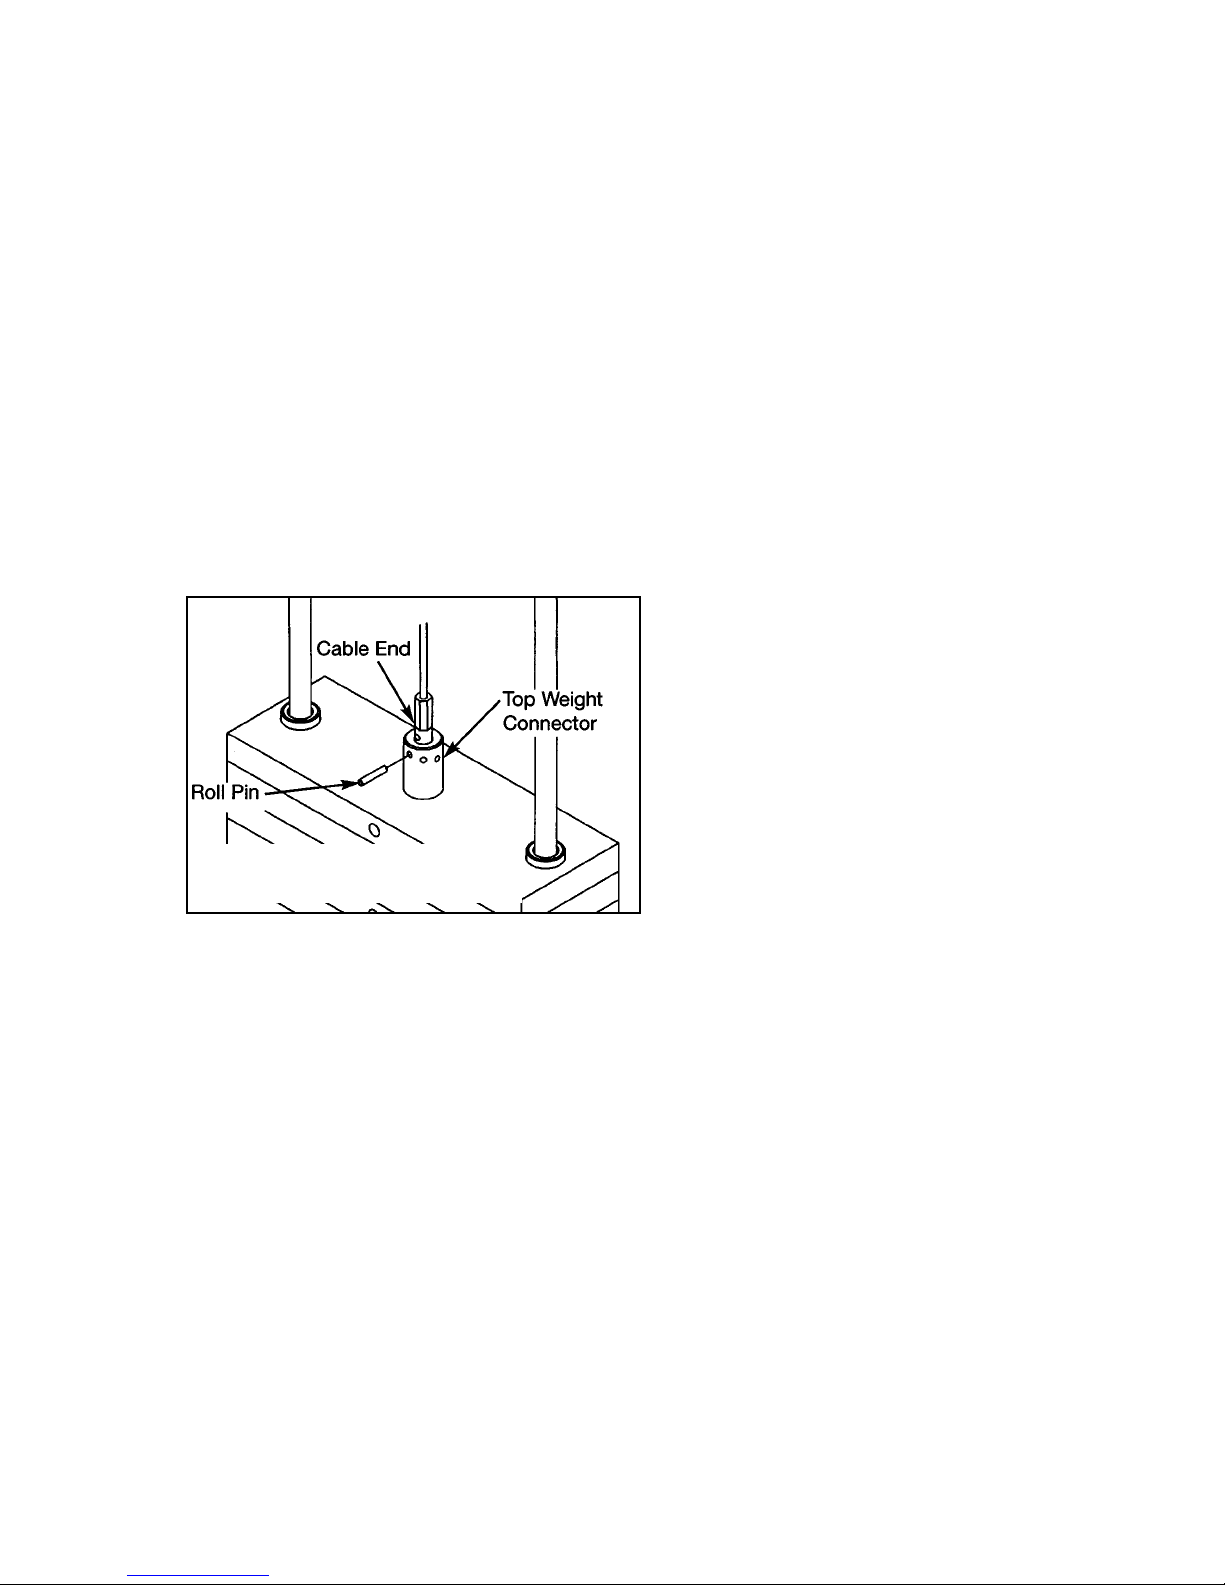
9. Slide top weight onto guide rods.
10. Place lower snap ring onto guide rod (about 3” from top end of guide rod).
11. Raise guide rod up through mounting hole and install the upper snap ring. Lower guide rod
and secure lower snap ring. Repeat steps 10 and 11 for the other guide rod.
12. Verify that the ring securing the weight selector pin to the machine is inserted around the
top weight connector.
13. Insert cable end connector into top weight and align cable fitting opening with opening in
top weight for proper cable tension. NOTE: Top weight should just rest on the second
weight plate.
14. Using a hammer, drive roll pin through top weight cable connector holes and cable fitting.
Assure pin is flush with top weight connector. See Figure 2.
Figure 2
15. Insert weight stack selector pin into each plate to verify proper alignment.
16. Verify proper cable tension.
A. If there is too much tension then the top weight plate will not properly rest on second
weight and the weight selector pin may be difficult to insert into weight plates.
B. Too much slack is indicated if top weight plate does not lift immediately after raising top
weight plate (in normal fashion). A slight slack in cable is ok.
NOTE: Weight Selector Pin is
not shown.
Cybex VR Owner’s Manual
Assembly
Page 4-2
Page 7

Cybex VR Owner’s Manual
Assembly
Page 4-3
17. Place decals on weight plates according to steps listed below and Figures 3 and 4.
A. Slowly and carefully peel off back side of decal. NOTE: When peeling off back cover,
make sure that the decals remain attached to the front sticker.
B. Align holes in decal with appropriate holes in weight stack. NOTE: Do not allow the
adhesive to touch weight stack at this time.
C. Insert a guide pin through each hole of the template. NOTE: A guide pin can be
anything that fits through the weight stack hole, such as a weight stack selector pin.
D. Carefully align decal and rub it onto weight plates.
E. Carefully remove front side, leaving decals adhering to weight plates. See Figure 4.
Figure 3
Guide Rod
Weight Stack
Pounds
Front
Back
Figure 4
18. Place half weight on weight peg.
NOTE: It is important that you perform regular inspection and maintenance activities on
your equipment. See Chapter 7.
Kilograms
Page 8

Cybex VR Owner’s Manual
Service
Page 6-2
Note: Refer to each individual machine for standard (Heavy Stack) cofiguration.
Refer below if you have a Light Stack configuration.
LIGHT VR STACK CONFIGURATION
ITEM
1
2
3
4
1
6
2
4
3
7
QTY PART NO. DESCRIPTION
2 4700-019 Flange Bearing .62 x .95 x 1.50 L
2 BR030206
4
HS760106
Retaining Ring
Flat Washer 1.75 X .68 8 X .140 T
2 PR060005 Weight Bumper
Weight Rods
1
2
4
3
5
Machine
Name
Chest Press
Overhead Press
Lat Pulldown
Row/Rear Delt
Arm Curl
Arm Extension
Fly
Leg Extension
Prone Leg Curl
Seated Leg Press
Rotary Hip
Standing Calf
Glute
3
Model
Number
4800
4805
4810
4815
4820
4825
4840
4850
4855
4860
4865
4875
4880
7
3
Note: #8 is not shown.
Balloon #5
Half Weight
QTY 1
4301C096 4700C070 4800-329 4800-557
4301C096 4700C073 4800-330 4800-557
C-ZA000200 4800-252 4800-331 4800-554
C-ZA000200 4800-252 4800-328 4800-554
4301C096 4700C073 4800-327 4800-557
4301C096 4700C073 4800-327 4800-557
C-ZA00200 4800-260 4800-327 4800-554
4301C096 4700C070 4800-326 4800-557
4301C096 4700C073 4800-327 4800-557
C-ZA00200 4800-261 4800-331 4800-556
4301C096 4700C073 4800-330 4800-557
C-ZA000201 4800-253 4800-329 4800-556
4301C096 4700C073 4800-327 4800-557
Balloon #6
Top Weight
QTY 1
Balloon #7
Spacer
QTY 2
Balloon #8
Weight Decal
QTY 1
Page 9

Cybex VR Owner’s Manual
Maintenance
Page 5-1
5 - Maintenance
All preventive maintenance activities must be performed on a regular basis. Performing
routine preventive maintenance actions can aid in providing safe, trouble-free operation of
your Cybex VR equipment.
NOTE: Cybex is not responsible for performing regular inspection and maintenance
actions for your machines. Instruct all personnel in equipment inspection and
maintenance actions and also in accident reporting/recording. Cybex phone
representatives are available to answer any questions or concerns that you may
have.
Daily Procedures
1. Upholstery - Wipe down all upholstery as per the recommendations listed below for light
soiling and more difficult stains.
Light Soiling
• A solution of 10% household liquid dish soap with warm water applied with a soft damp
cloth.
• If necessary, a solution of liquid cleanser and water applied with a soft bristle brush. Wipe
away the residue with a water dampened cloth.
Cybex will void warranty if
non-Cybex replacement parts
are used.
Page 10

Cybex VR Owner’s Manual
Maintenance
Page 5-2
More Difficult Stains
• Dampen a soft white cloth with a solution of household bleach (sodium hypochlorite),
10% bleach, 90% water. Rub gently. Rinse with a water dampened cloth to remove
bleach concentration.
• The same procedure can be used with full strength household bleach, if necessary.
• Allow bleach to puddle on the affected area or apply with a soaked cloth for
approximately 30 minutes. Rinse with a water dampened cloth to remove any
remaining bleach concentration.
Alternative Method for Difficult Stains
• Dampen a soft white cloth with rubbing alcohol and rub gently. Rinse with a water
dampened cloth to remove any remaining rubbing alcohol concentration.
NOTE: To restore luster, a light coat of spray furniture wax can be used. Apply for 30
seconds and follow with a light buffing using a clean white cloth.
Please Review Carefully
When using strong cleaning agents such as rubbing alcohol or bleach, it is advisable to
first test in an inconspicuous area. Other cleaning agents may contain harsh or unknown
solvents and are subject to formula changes by the product manufacturer without notice.
Should you desire to use other cleaning agents, carefully try them in an inconspicuous
area to determine potential damage to the material. Never use harsh solvents or cleaners
which are intended for industrial applications. To clean stained or soiled areas, a soft white
cloth is recommended. Avoid use of paper towels.
Cleaning products may be harmful/irritating to your skin, eyes, etc. Use protective gloves
and eye protection. Do not inhale or swallow any cleaning product. Protect surrounding
area/clothing from exposure. Use in a well ventilated area. Follow all product
manufacturer’s warnings. Cybex and its vendors cannot be held responsible for damage
or injuries resulting from the use or misuse of cleaning products.
2. Frames - Wipe down all frames using a mild solution of warm water and car wash soap.
Be sure to dry thoroughly. AVOID acid or chlorine based cleaners and also cleaners
containing abrasives as these could scratch or damage the equipment.
3. Chrome - Clean chrome tubes, first using chrome polish and then using a car wax seal.
Neutral cleaners with a pH between 5.5 and 8.5 are recommended. Be sure to dry
thoroughly. AVOID acid or chlorine based cleaners and also cleaners containing abrasives
as these could scratch or damage the equipment.
Page 11

Cybex VR Owner’s Manual
Maintenance
Page 5-3
1. Inspect all nuts and bolts for looseness. Tighten as required.
2. Inspect all cables for wear or damage and proper tension. When inspecting cables, run you
fingers on the cable, paying particular attention to bends in the cable and attachment points.
! WARNING: Replace all worn cables immediately. The following conditions may
indicate a worn cable:
Figure 1
• A kink in the cable. See Figure 2.
• A curled sheath. See Figure 3.
Figure 2
Figure 3
Figure 4
• “Necking”, a stretched cable sheath. See Figure 4.
Weekly Procedures
• A tear or crack in the cable sheath that exposes the cable. See Figure 1.
Page 12

Cybex VR Owner’s Manual
Maintenance
Page 5-4
Attachment Hole
NOTE: Replace bar if less
than 1/8” of material
remains to the edge.
Figure 5
3. Inspect bars and handles for wear, paying particular attention to tab area connecting points.
Replace all worn handles immediately.
! CAUTION: Replace all worn handles immediately. Do not use if less than 1/8” of
material remains to the edge. See Figure 5.
4. Inspect snap links for proper latching (indicates wear).
Replace all worn snap links immediately.
5. Inspect all labeling for readability. This includes instructional placards, warning and caution
decals.
Replace all warning labeling immediately.
6. Inspect all weight stacks for proper alignment and operation.
NOTE: Correct all improper alignment and operation issues immediately.
7. Wipe Weight Stack Guide Rods and Leg Press Linear bearings clean over entire length.
Lubricate with a light coat of medium weight automotive engine oil.
Page 13

Cybex VR Owner’s Manual
Maintenance
Page 5-5
Yearly Procedures
Replace all cables at least annually.
“As Required” Procedures
1. Inspect grips and replace as necessary.
2. Clean Range Limiting Device so that the cam tracks are wiped clean and lightly lubricated
with a Teflon base spray lubricant (Superlube®).
3. Remove Cable End Bearings and lubricate thoroughly with a medium-weight automotive
engine oil. To lubricate: Loosen rod end bearing jam nut with a 9/16” wrench. Using a 7/32”
Allen wrench, remove the socket head cap screw (SHCS) and rod end bearing from unit.
Coat bearing thoroughly with oil inside and out and reattach to unit.
Page 14

Cybex VR Owner’s Manual
Maintenance
Page 5-6
Cables Adjustments
Three types of cable tension adjustment are used on Cybex Strength Systems:
1. Jam Nut Adjustment - This type uses a jam
nut and a tension adjustment nut at the cable
cam end as the primary adjustment. The other
end of the cable usually contains a roll pin
adjustment. See Figures 6 and 8.
2. Rod End Adjustment - This type of adjustment
contains a socket head cap screw (SHCS)
securing a cable rod end bearing to the
machine. Primary adjustment is by returning
cable usually contains a roll pin cable
adjustment. See Figures 7 and 8.
3. Roll Pin Adjustment - This type of adjustment
utilizes a roll pin and series of holes in the
weight stack top plate connector. See Figure 8.
Figure 6
Figure 7
Figure 8
Page 15

Cybex VR Owner’s Manual
Exercises
Page 2-1
2 - Exercises
Seated Leg Press - 4860
The Machine
• Arc of Motion - The machine pivots from
below creating an arc congruent with the
functional movement of the legs. This also
decreases the detrimental forces on the knee
by maintaining an optimum knee/foot
relationship throughout the range of motion. A
leg press that pivots from above or that moves
in a linear path is inconsistent with the natural
arc of motion and creates excessive forces
within the knee during flexion.
• Accommodating Foot Plate - The movement
of the foot plate eliminates excessive motion
at the ankle and maintains a near neutral position,
decreasing undue forces throughout the lower extremity.
• Range of Motion Adjustment - The starting position and range of motion limit are both
adjusted from a pull pin below the legs.
• Variable Resistance - The drive system provides appropriately varying resistance that is
maximal at the end of the motion where the body’s mechanical advantage increases.
4860
Read and understand all instructions and warnings prior to using this machine. See
Chapter 1, Safety in the VR Owner’s Manual or consult with floor staff.
The intended use of this equipment is to aid or improve general physical fitness and exercise.
For Commercial use.
Intended Use
Instructions
Page 16

Cybex VR Owner’s Manual
Exercises
Page 2-2
Closed Kinematic Chain Leg Extension
• Hip/Knee Extension - The quadriceps are
responsible for extension of the knee joint.
The gluteus maximus and hamstring are
responsible for hip extension. The hip-knee
relationship in closed kinematic chain extension
represents an indirect proportion. An increase
in hip motion will increase hip extensor work
and proportionally decrease knee extensor
work, and vice versa.
• Knee Tracking - Functioning as a hinge, it is
imperative that the knee be directed toward the
toes when eccentrically flexing or concentrically
extending during closed chain movements.
Exactly which toe(s) the knee is to be directed
towards is dependent upon the anatomical
structure of the user. It is commonly suggested
that the knee track between the big and
second toes. However, if a marked Q-angle is
noted, tracking is recommended more toward the fifth (little) toe. Comfort is also a factor
in the decision. Ultimately, once the proper tracking has been determined, it must be
monitored and maintained throughout each repetition.
• Range of Motion - The range of motion is limited by spinal alignment during eccentric
flexion and at full knee extension concentrically. Hyperextension of the knee is to be
avoided in closed chain leg work.
• Associated Muscles - Hip adductor involvement varies with foot placement. As the feet
are placed wider and the knees track accordingly, hip adduction is increased.
MUSCLES TRAINED
Page 17

Cybex VR Owner’s Manual
Exercises
Page 2-3
The Positioning
• Adjust the seat starting position (pull pin found
below the legs) to allow approximately a 90
degree bend in the knee. The need for more or
less knee flexion is determined by the users goal
and limitations. The degree of knee bend must
allow the pelvis/hips to remain firmly pressed
against the back pad.
• Check the weight to insure that the appropriate
resistance has been selected. Body position and
control of the motion should never be
compromised by excessive weight.
• Position the feet approximately shoulder width
with the toes and knees pointing slightly outward
at the same angle.
• Position the shoulders and hips/pelvis against the
back pad and maintain to eliminate spinal
flexion.
The Motion
• Keeping the feet flat, tighten the legs, push
through the heels and smoothly straighten the
legs. Do not lock/hyperextend the knees.
• Slowly return to the starting position without
resting.
• Maintain the hips/pelvis and shoulders against the back pad and the knees pointing
toward the toes throughout each repetition.
START POSITION
FINISH POSITION
Page 18

Cybex VR Owner’s Manual
Exercises
Page 2-4
This page intentionally left blank
 Loading...