

Page 1

CyberLink
StreamAuthor 3
User’s Guide
Page 2

Copyright and Disclaimer
All rights reserved. No part of this publication may be reproduced, stored in a retrieval system, or transmitted
in any form or by any means electronic, mechanical, photocopying, recording, or otherwise without the prior
written permission of CyberLink Corporation.
To the extent allowed by law,
KIND, EITHER EXPRESS OR IMPLIED, INCLUDING WITHOUT LIMITATION ANY WARRANTY FOR
INFORMATION, SERVICES, OR PRODUCTS PROVIDED THROUGH OR IN CONNECTION WITH
StreamAuthor IS PROVIDED “AS IS”, WITHOUT WARRANTY OF ANY
STREAMAUTHOR AND ANY IMPLIED WARRANTIES OF MERCHANTABILITY, FITNESS FOR A
PARTICULAR PURPOSE, EXPECTATION OF PRIVACY, OR NON-INFRINGEMENT.
BY USING THIS SOFTWARE, YOU AGREE THAT CYBERLINK WILL NOT BE LIABLE FOR ANY DIRECT,
INDIRECT, OR CONSEQUENTIAL LOSS ARISING FROM THE USE OF THIS SOFTWARE OR MATERIALS
CONTAINED EITHER IN THIS PACKAGE.
The terms and conditions here under shall be governed and construed in accordance with the laws of Taiwan.
StreamAuthor is a registered trademark along with other company and product names mentioned in this
publication, used for identification purposes and remain the exclusive property of their respective owners.
International Headquarters
Mailing Address CyberLink Corporation
15F, #100, Min Chuan Road, Hsin Tian City
Taipe i C ounty, Ta iwan
Web Site www.cyberlink.com
Telephone 886-2-8667-1298
Fax 886-2-8667-1300
Copyright © 2005 CyberLink Corporation. All rights reserved.
Page 3

Contents
Introduction.................................................................................... 1
Welcome! ............................................................................................................................. 2
What is StreamAuthor? ......................................................................................................2
What’s New in this Version? ............................................................................................... 3
What is “E-Learning”? ....................................................................................................... 3
The StreamAuthor Program .....................................................................................................4
StreamAuthor Projects ............................................................................................................5
Project Types .................................................................................................................... 5
Presentation Formats ......................................................................................................... 6
Templates ........................................................................................................................ 6
Encoding Profiles ..............................................................................................................6
Preferences ....................................................................................................................... 7
System Requirements .............................................................................................................. 9
Full-Screen Mode.......................................................................... 11
Creating a Full-Screen Presentation File ................................................................................. 12
Create a Full-Screen Presentation in CSS Format ............................................................... 12
Create a Full-Screen Presentation in Multiple Frame Window Format ..................................13
Opening a Full-Screen Presentation ....................................................................................... 14
Saving a Full-Screen Presentation .......................................................................................... 15
Convert a Full-Screen Project to a Studio Project ..................................................................... 16
Presentation Window ............................................................................................................17
Acquire Content in a Full-Screen Presentation ................................................................... 18
Record in the Presentation Window ................................................................................... 19
Author Window .................................................................................................................... 29
Using the Timeline .......................................................................................................... 29
i
Page 4

CyberLink StreamAuthor
Editing Clips in the Timeline .............................................................................................33
Using the Supplement Pane ............................................................................................. 37
Preview Window .............................................................................................................47
Publish Window ................................................................................................................... 48
Studio Mode................................................................................. 49
Creating a Studio Presentation File ........................................................................................ 50
Create a Studio Presentation in CSS Format ...................................................................... 50
Create a Studio Presentation in Multiple Frame Window Format .........................................51
Opening a Studio Presentation File ........................................................................................ 52
Saving a Studio Presentation File ........................................................................................... 53
Studio Window .................................................................................................................... 54
Using the Library ............................................................................................................. 54
Inserting Content into the Timeline ...................................................................................60
Editing Clips in the Timeline .............................................................................................67
Capturing in the Studio Window ....................................................................................... 67
Preview Your Production .................................................................................................. 72
Capture Window .................................................................................................................73
Author Window .................................................................................................................... 82
Publish Window ................................................................................................................... 82
Editing CSS Templates................................................................... 83
The Template Editor ............................................................................................................. 84
Opening Templates .............................................................................................................85
Modifying Templates ............................................................................................................86
Modify a Template’s Layout .............................................................................................86
Modify a Template Component’s Settings ......................................................................... 86
Previewing a Template ..........................................................................................................89
Saving a Template ............................................................................................................... 90
Encoding Profiles .......................................................................... 91
What are Encoding Profiles? ................................................................................................. 92
Selecting the Right Encoding Profile ....................................................................................... 93
Creating Encoding Profiles .................................................................................................... 94
Managing Encoding Profiles .................................................................................................94
ii
Page 5

Content
Publishing Profiles ......................................................................... 95
Creating a Publishing Profile ................................................................................................. 96
Publish as a Presentation ................................................................................................. 96
Publish as an EXE File .................................................................................................... 100
Publish as a ZIP File ...................................................................................................... 104
Modifying Publishing Profiles ...............................................................................................109
Delete a Publishing Profile ............................................................................................. 110
Edit a Publishing Profile ................................................................................................. 111
Technical Support ....................................................................... 113
Web Support ................................................................................................................113
Fax Support ..................................................................................................................113
Telephone Support ........................................................................................................ 114
Index ......................................................................................... 115
iii
Page 6

CyberLink StreamAuthor
iv
Page 7

Chapter 1:
Introduction
StreamAuthor combines video, audio, images, HTML, and PowerPoint slides to create richmedia presentations that can be published to your local drive or to a remote server.
StreamAuthor offers advanced, yet simple to use tools that can provide the means to train
employees more quickly at minimal cost, deliver customized rich-media sales presentations,
vivid product demonstrations, and more. Plus, with StreamAuthor's flexible output options,
these files can be viewed practically anywhere and at any time.
This chapter contains the following sections:
• Welcome! on p.2
• The StreamAuthor Program on p.4
• StreamAuthor Projects on p.5
• System Requirements on p.9
1
Page 8

CyberLink StreamAuthor
Welcome!
Welcome to the CyberLink family of e-learning tools! CyberLink is a leading provider of elearning software, including creation of media and management of training content.
What is StreamAuthor?
CyberLink StreamAuthor is an advanced, yet easy to use, authoring tool that enables both
professional and general users to incorporate video, audio, images, HTML, and PowerPoint
slides to create and edit rich-media presentations that can be published to your local drive or
to a remote server. StreamAuthor offers tools that can provide the means to train employees
effectively with minimal cost, deliver customized rich-media sales presentations or product
demonstrations, and much more. Given StreamAuthor's flexible publishing options, these
files can be viewed anywhere, anytime.
StreamAuthor’s main features include the following:
• synchronizes video, audio, images, HTML, and PowerPoint files for publication to
your local drive or to a remote server
• edits your project’s PowerPoint slides without affecting the original files
• records Full-Screen Presentations, including cursor movements and the pen tool
• adds watermarks and background audio
• creates tests
• provides a variety of presentation templates
• exports SCORM 1.2-compliant/SCORM 2004-compliant ZIP files
2
Page 9

What’s New in this Version?
New features in StreamAuthor 3.5 include:
• Multiple Format Support for Full-Screen Presentation
• Recording Slides and Monitor Screen in One Presentation
• Inserting Blank Slides Dynamically
• Pen Tools for Screen Capture
• Editing Published Presentations
• Presentation Template Editing Tool
• Voice-Over Narration
• Content Security Enhancement (Encryption, Expiration, Copy Protection)
• Assessment Capabilities with MS Word
• Content Sequencing Rules Support
• Multiple chapters production
• SCORM 2004 support
Introduction
What is “E-Learning”?
“E-Learning,” or “online learning,” is the use of computer-based materials to provide
training content over a network, such as a company’s intranet. Many companies provide tests
for employment candidates, information for new hires, and training materials for current
employees.
How does StreamAuthor fit into e-learning?
StreamAuthor enables you to create rich-media presentations by combining images, video
and audio files, documents, and other file types with PowerPoint files or other slides. The
final presentation can be viewed in a browser window or as a stand-alone video file.
3
Page 10

CyberLink StreamAuthor
The StreamAuthor Program
StreamAuthor can be run in two basic modes: Full-Screen mode or Studio mode. Each of
these modes, in turn, has several windows.
Full-Screen mode has the following windows:
• Presentation: record video/audio and slide presentations simultaneously. For more
information, see Presentation Window on p.17.
• Author: compile and organize your presentation. For more information, see Author
Window on p.29.
• Publish: compile your presentation in one of a number of different formats, then save
it to the destination of your choice. For more information, see Publish Window on
p.48.
Studio mode has the following windows:
• Studio: import video/audio clips as well as PowerPoint slides for presentation
authoring. For more information, see Studio Window on p.54.
• Capture: acquire video and audio from a wide variety of sources, including a
camcorder, TV, webcam, microphone, Audio CD, as well as on-screen motion. For
more information, see Capture Window on p.73.
• Author: compile and organize your presentation. For more information, see Author
Window on p.29.
• Publish: compile your presentation in one of a number of different formats, then save
it to the destination of your choice. For more information, see Publish Window on
p.48.
The appearance of the program and the available options depend on the mode, the open
window, and the template selected during the project file creation process.
4
Page 11

StreamAuthor Projects
Whether you have an entire project planned out in advance, or are experimenting with new
styles, StreamAuthor offers a number of options for creating exactly the presentation that
suits your specific e-learning requirements.
Project Types
There are a number of different possible presentation styles, requiring a slightly different
procedure to create each kind. The two basic styles are Full-Screen presentations and Studio
presentations.
Full-Screen presentations display one slide at full-screen, allowing you to project a larger
image of your presentation. These presentations are generally used with a live speaker.
Full-Screen Presentations are suitable mostly for:
• public speakers who are making speeches in front of an audience
• company meetings that need to be recorded and used for future training sessions
• sales presentations delivered to clients
Studio presentations display a smaller window - often with supplementary media.
Introduction
Studio Presentations are suitable mostly for:
• presentations or training materials that can be accessed over the Internet or your
company’s intranet and viewed at leisure.
5
Page 12

CyberLink StreamAuthor
Presentation Formats
StreamAuthor includes two presentation formats: CSS and Multiple Frame Window formats.
These are described in the following section.
CSS
Using the CSS format allows you to edit your project’s template as you work on the project
file. However, audience will be unable to resize the final presentation window. For more
information, see Editing CSS Templates on p.83.
Multiple Frame Windows
Using the Multiple Frame Windows format allows your audience to resize the final
presentation window. However, you cannot edit the template while you are creating the
project file.
Tem p l ates
The project template you use determines the number and position of slide windows and the
presence or absence of a table of contents, video file, audio file, etc. There are a number of
default templates in the StreamAuthor program, which you can either use as-is or copy and
customize to your specific requirements. For more on using templates, see Manage Templates
on p.39. For information on editing templates for customized use, see Editing CSS Templates
on p.83.
Encoding Profiles
An encoding profile determines the video/audio quality of your final presentation.
StreamAuthor allows you to select, copy and configure your own encoding profiles. For more
information, see Encoding Profiles on p.91.
6
Page 13
Preferences
CyberLink StreamAuthor offers a range of choices to set your production environment to
better suit the way you work.
Project Preferences
Before you begin working on a presentation, make sure your project preferences are set
according to your preferred working methods.
1. To set your general preferences, click Too ls > Preferences.... The Preferences dialog box
opens.
Introduction
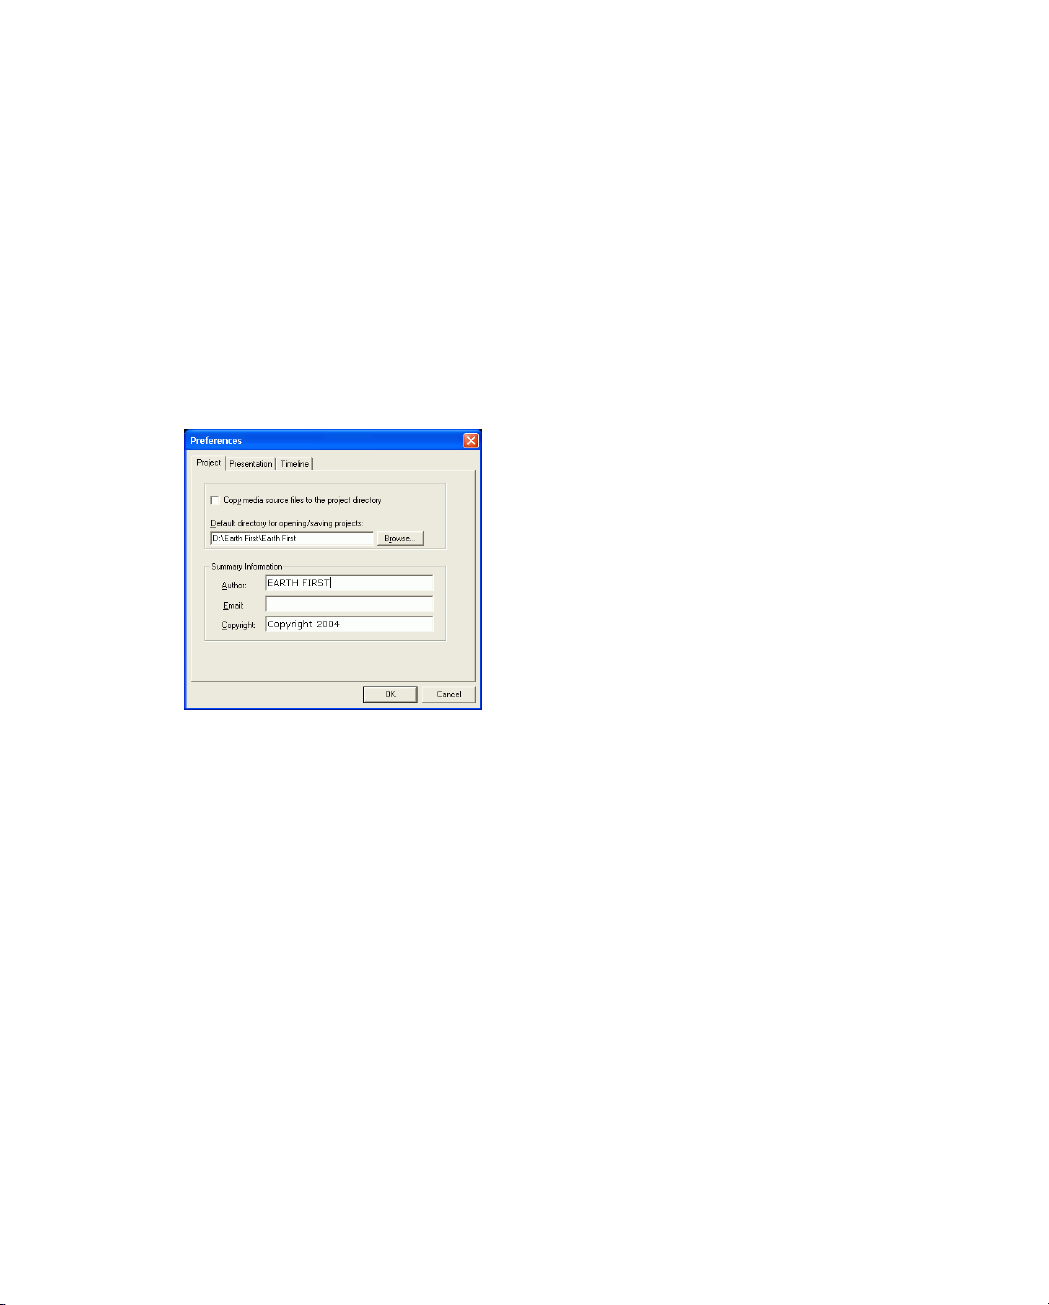
2. Click the Project tab, then set your preferences:
• Copy media source files to the directory: Check this option to keep all of your source
files in one location.
Note: Checking this option uses more hard disc space.
• Default directory for opening/saving projects: Specify the working directory where
you want StreamAuthor to save projects to by default. To specify a directory, click
Browse..., then locate and open the desired directory.
• Summary Information: Enter the author’s name, email address, and copyright
information in these fields.
3. Click OK.
Presentation Preferences
Presentation preferences allow you to set default options for working in your presentation.
7
Page 14
CyberLink StreamAuthor
1. To set your Presentation preferences, click To ol s > Preferences.... The Preferences dialog
box opens.
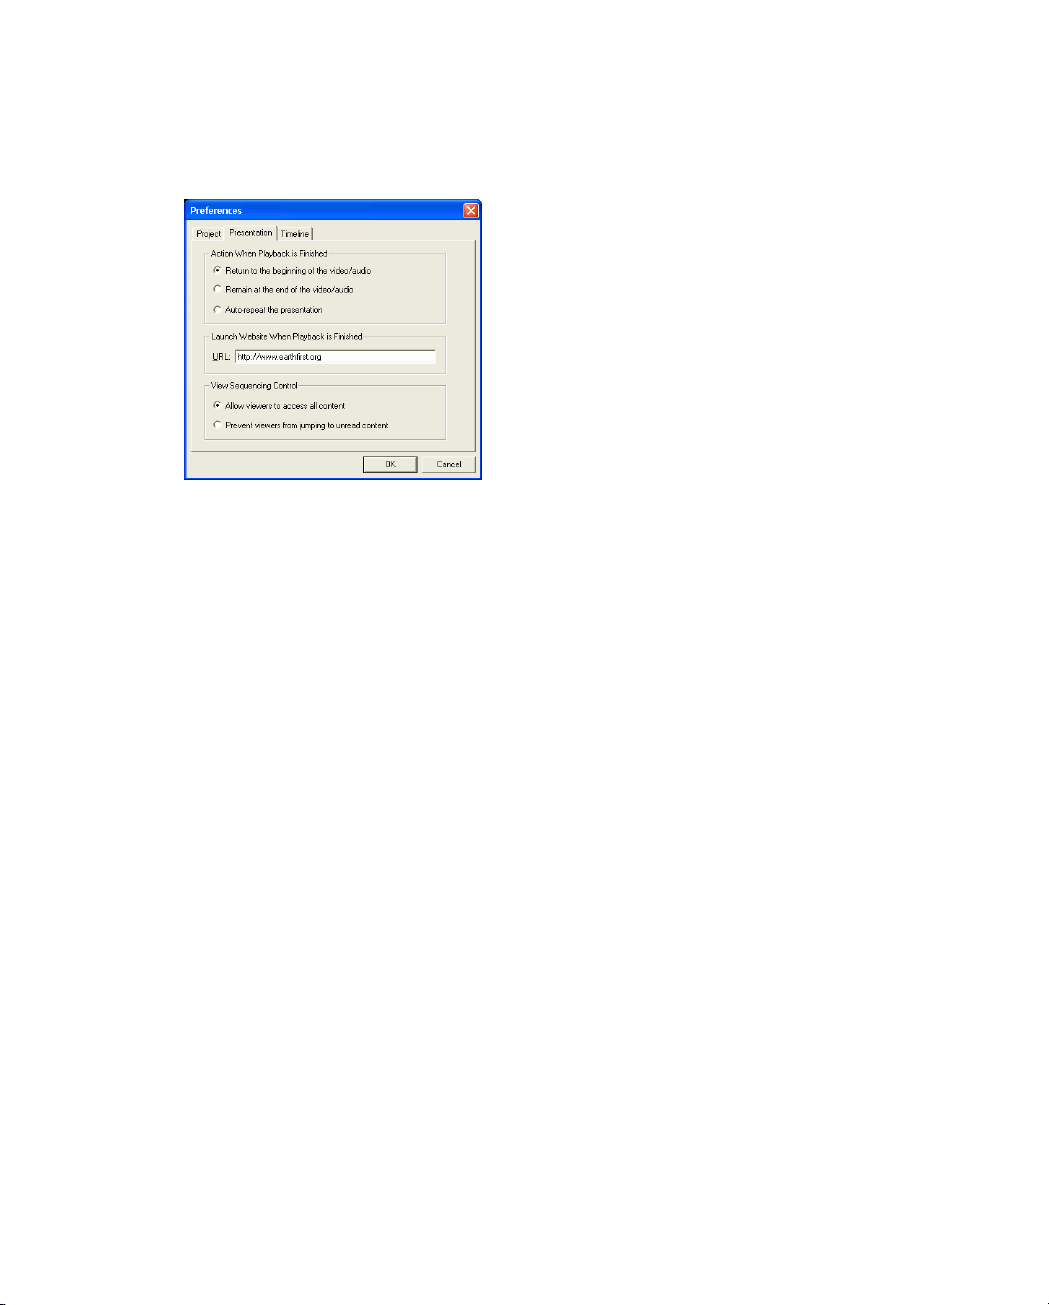
2. Click the Presentation tab, then set your preferences:
• Action When Playback is Finished: sets the action that StreamAuthor takes when
the published presentation finishes playing back.
• Launch URL When Playback is Finished: opens a website after the published
presentation finishes playing back. To launch a website, enter the URL here.
• View Sequencing Control: select Allow viewers to access all content or Prevent
viewers from jumping to unread content while the published presentation plays.
3. Click OK.
8
Page 15

Timeline Preferences
Timeline preferences allow you to set default options for working in the Timeline.
1. To set your Timeline preferences, click To o l s > Preferences.... The Preferences dialog box
opens.
2. Click the Timeline tab, then set your preferences:
• Default Durations: sets the default duration of each file type in the Timeline.
• Automatically insert TOC markers when inserting new slides: adds a TOC marker
for each new slide.
3. Click OK.
Introduction
9
Page 16

CyberLink StreamAuthor
System Requirements
The system requirements listed below are recommended as minimums for using this
program. To create presentations, your system requirements are as follows:
Minimum System Requirements
OS Windows 2000/XP
Memory 256 MB RAM
CPU Pentium III 700 MHz or above or AMD Athlon
700 or above
Disk Space 100 MB
Audio Sound card/chip, speakers
Video VGA card/chip with 8 MB video RAM or above
PowerPoint Office 2000/XP/2003
Capture
(Optional)
Create Tests Microsoft Word 2000/2002/2003
The system requirements for viewing presentations are as follows:
• Windows Media Player 7.0 or above
• Internet Explorer 5.5 or above
• Sound card/chip, speakers
The system requirements for streaming presentations are as follows:
• Windows 2000 Server with 512 MB RAM or above
• Microsoft Media Server 4.0 or above
10
Video capture device with WDM driver support:
PC Camera, Capture Card, TV Tuner, DV
Camcorder with IEEE 1394 (Firewire) Interface
Audio Capture Device: microphone
Page 17

Chapter 2:
Full-Screen Mode
Full-Screen mode allows you to record your live delivery of a presentation. These functions,
including recording a Full-Screen presentation, are described in this chapter.
This chapter contains the following sections:
• Creating a Full-Screen Presentation File on p.12
• Opening a Full-Screen Presentation on p.14
• Saving a Full-Screen Presentation on p.15
• Convert a Full-Screen Project to a Studio Project on p.16
• Presentation Window on p.17
• Author Window on p.29
• Publish Window on p.48
11
Page 18
CyberLink StreamAuthor
Creating a Full-Screen Presentation File
You can create a Full-Screen Presentation project in CSS format or multiple frame windows
format. The procedures for both are given below.
Create a Full-Screen Presentation in CSS Format
To create a new Full-Screen Presentation in CSS format, do this:
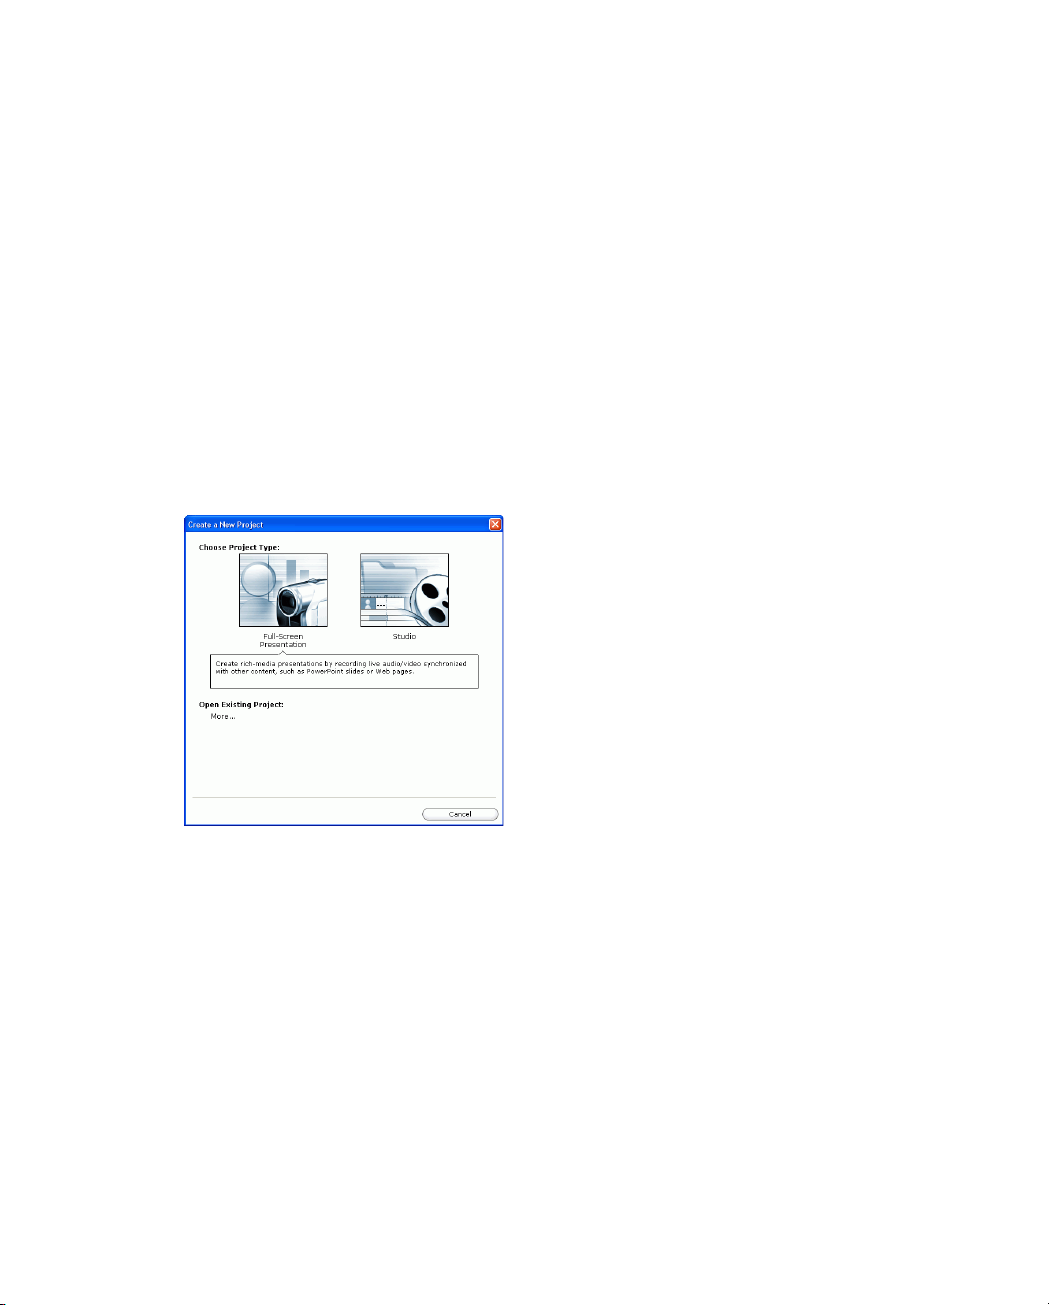
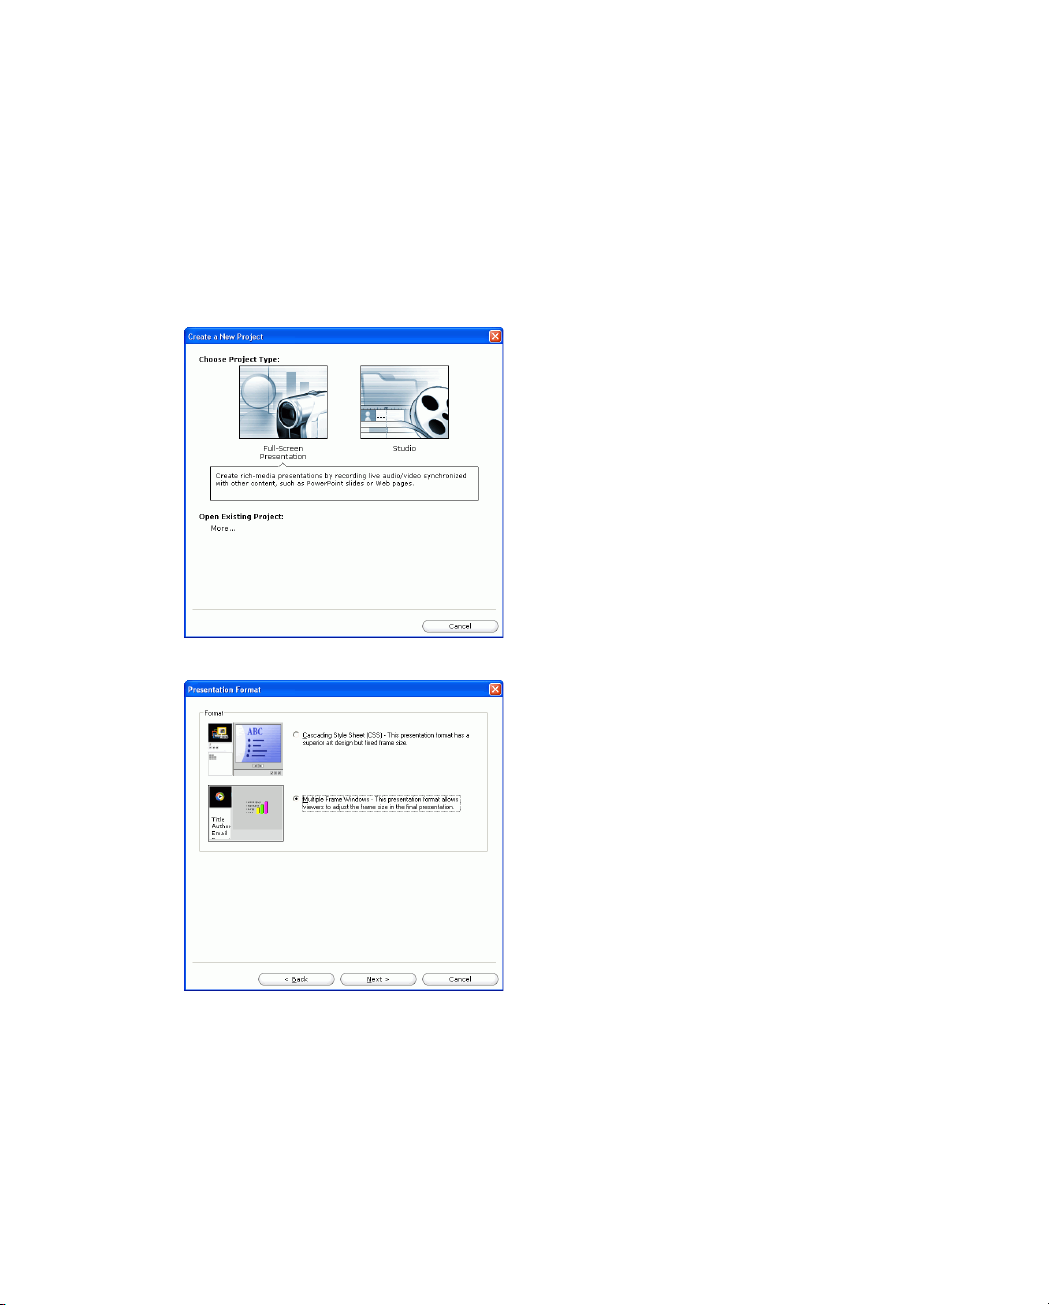
1. Start StreamAuthor, or select the File > New Project... command from within an existing
presentation. In the dialog box that opens, select Full-Screen Presentation.
12
Page 19
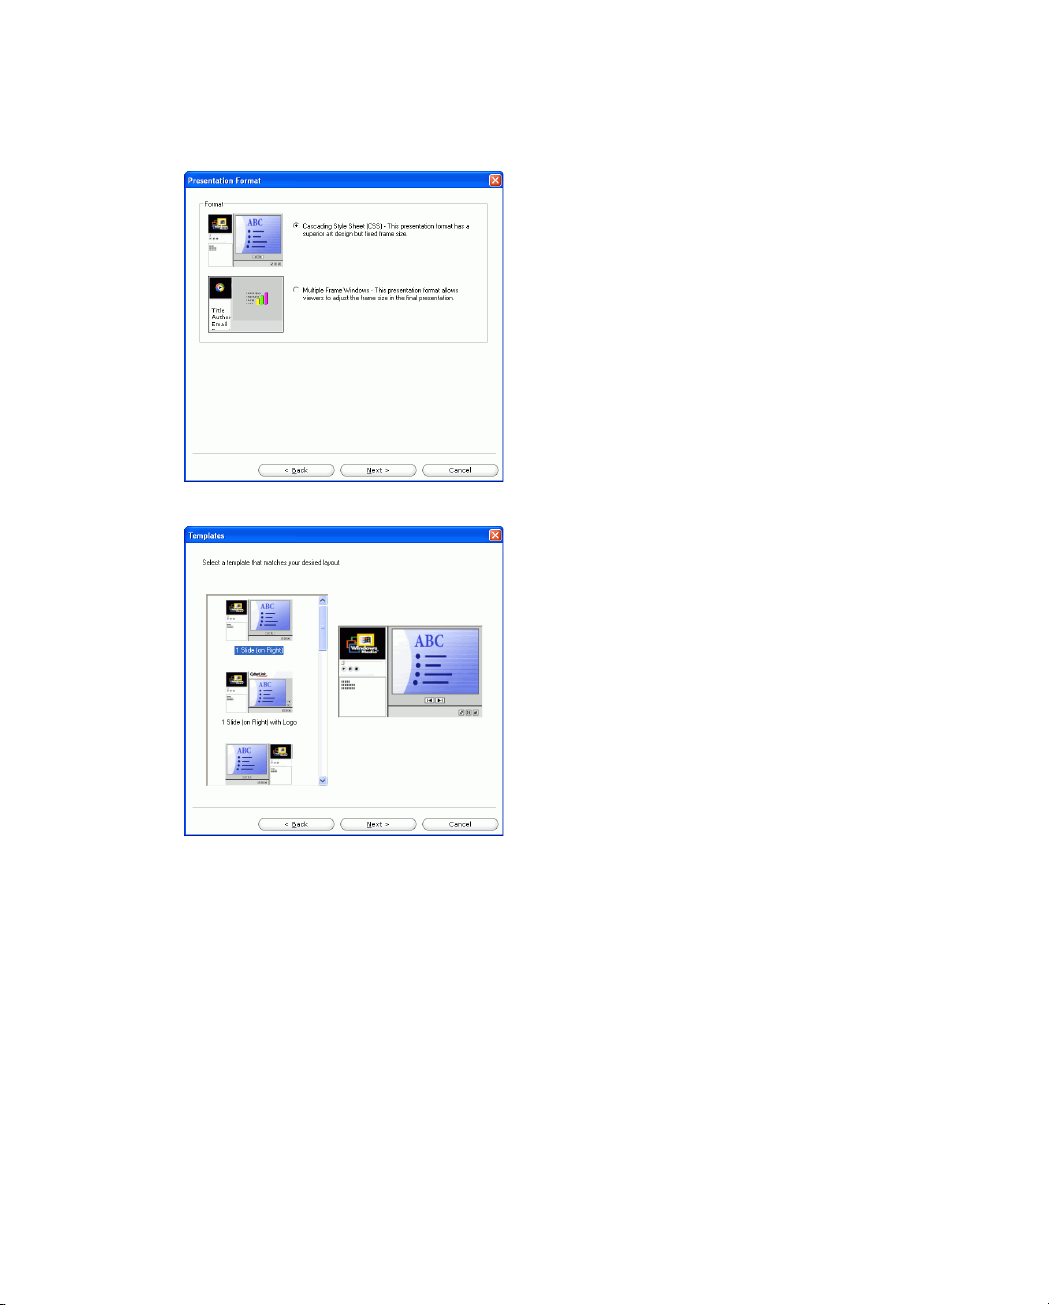
2. Select Cascading Style Sheet (CSS), then click Next.
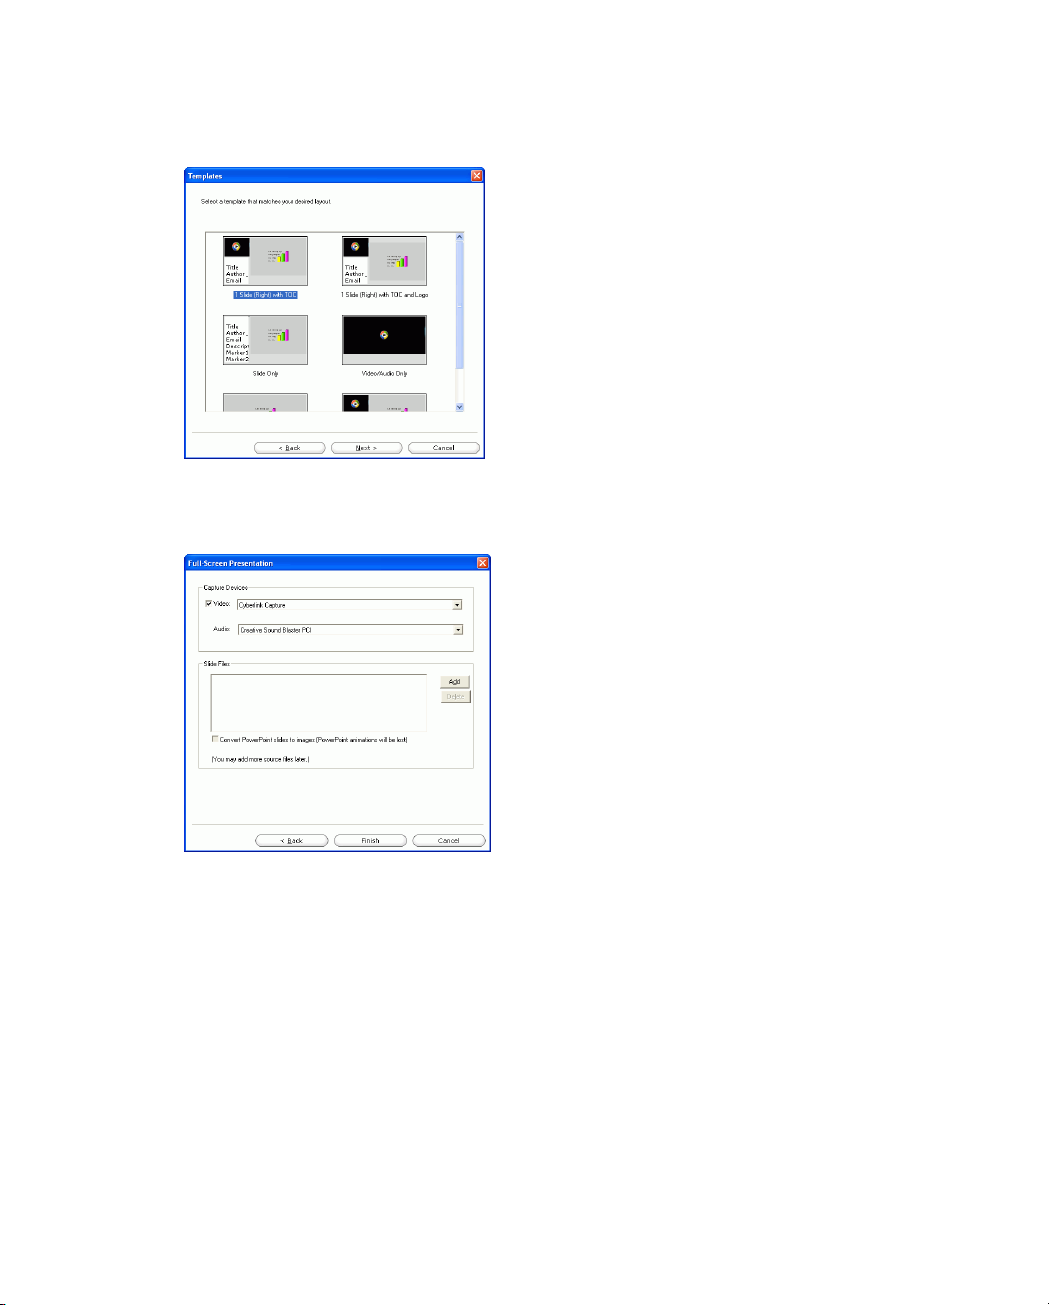
3. Select the template you would like to use, then click Next.
Full-Screen Mode
• If you have created a custom template, you can select it in the list. For more
information, please see Editing CSS Templates on p.83.
13
Page 20
CyberLink StreamAuthor
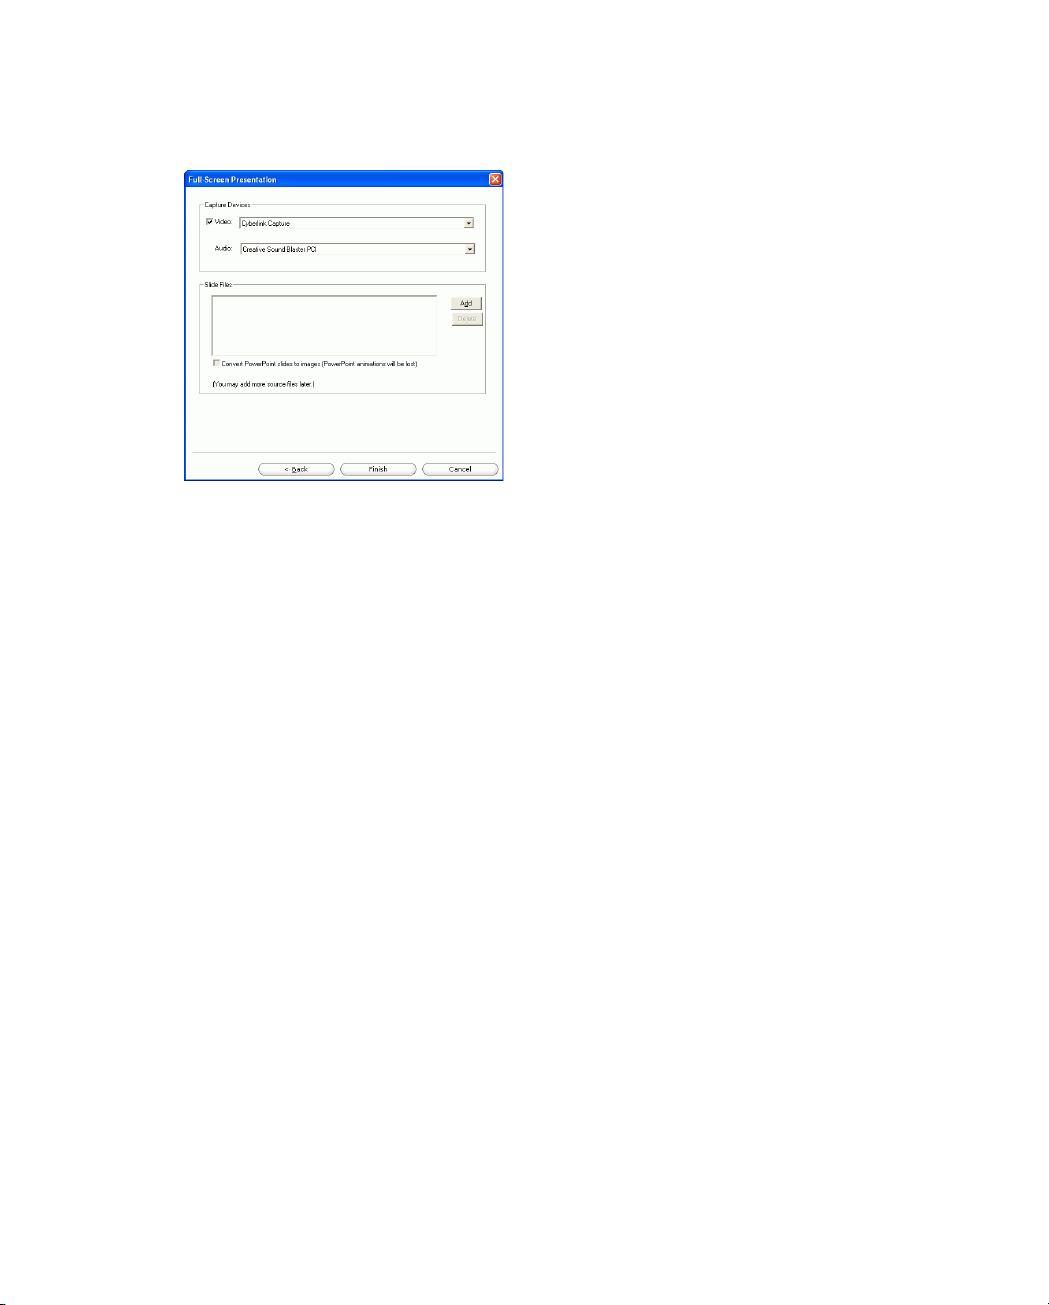
4. Add your source media files, then click Finish.
• To enable video capture, select the Video option, then select your video capture
device from the drop-down box (if necessary). You can also select your audio capture
device from the Audio drop-down box (if necessary).
• To add slides, click Add, then locate and open the source files of the slides you want
to use.
14
Page 21
Full-Screen Mode
Create a Full-Screen Presentation in Multiple Frame Window Format
To create a new Full-Screen Presentation in multiple frame window format, do this:
1. Start StreamAuthor, or select the File > New Project... command from within an existing
presentation. In the dialog box that opens, select Full-Screen Presentation.
2. Select Multiple Frame Windows, then click Next.
15
Page 22
CyberLink StreamAuthor
3. Select the template you would like to use, then click Next.
• If you have created a custom template, you can select it in the list. For more
information, please see Editing CSS Templates on p.83.
4. Add your source media files, then click Finish.
16
• To enable video capture, select the Video option, then select your video capture
device from the drop-down box (if necessary). You can also select your audio capture
device from the Audio drop-down box (if necessary).
• To add slides, click Add, then locate and open the source files of the slides you want
to use.
Page 23

Full-Screen Mode
Opening a Full-Screen Presentation
You may begin authoring a presentation immediately after creating a new project file, or you
may wish to work on an existing project file.
To open an existing project file for authoring, do one of the following:
• Select the File > New Project... command, then click a recent project’s name to open it
directly or click More..., then locate and open a project file.
• Select the File > Open Project... command, then locate and open a project file.
• Select the File > Open Published Project... command, then locate and open a
presentation file that has been previously published. This command allows you to
open and edit a previously published presentation whose source file has been lost.
When you select this command, StreamAuthor opens and captures the published
presentation, recreating the source files for you.
Note: StreamAuthor can only open published projects created in version 2.5 or later.
17
Page 24
CyberLink StreamAuthor
Saving a Full-Screen Presentation
Saving a Full-Screen presentation file is very straightforward.
To save a Full-Screen presentation file, do this:
1. Create or open a Full-Screen presentation project.
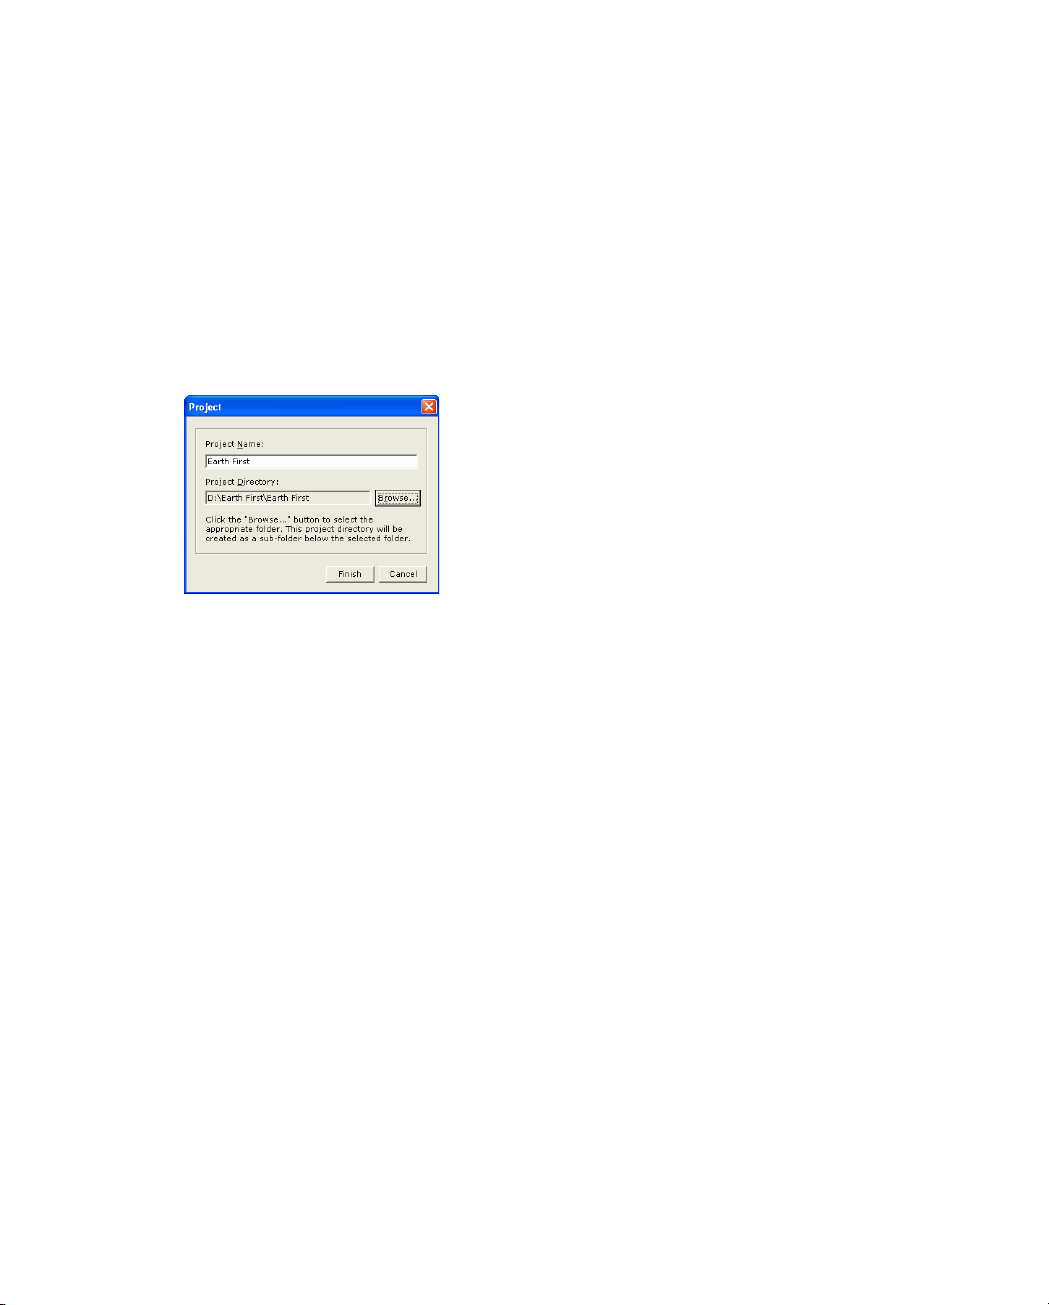
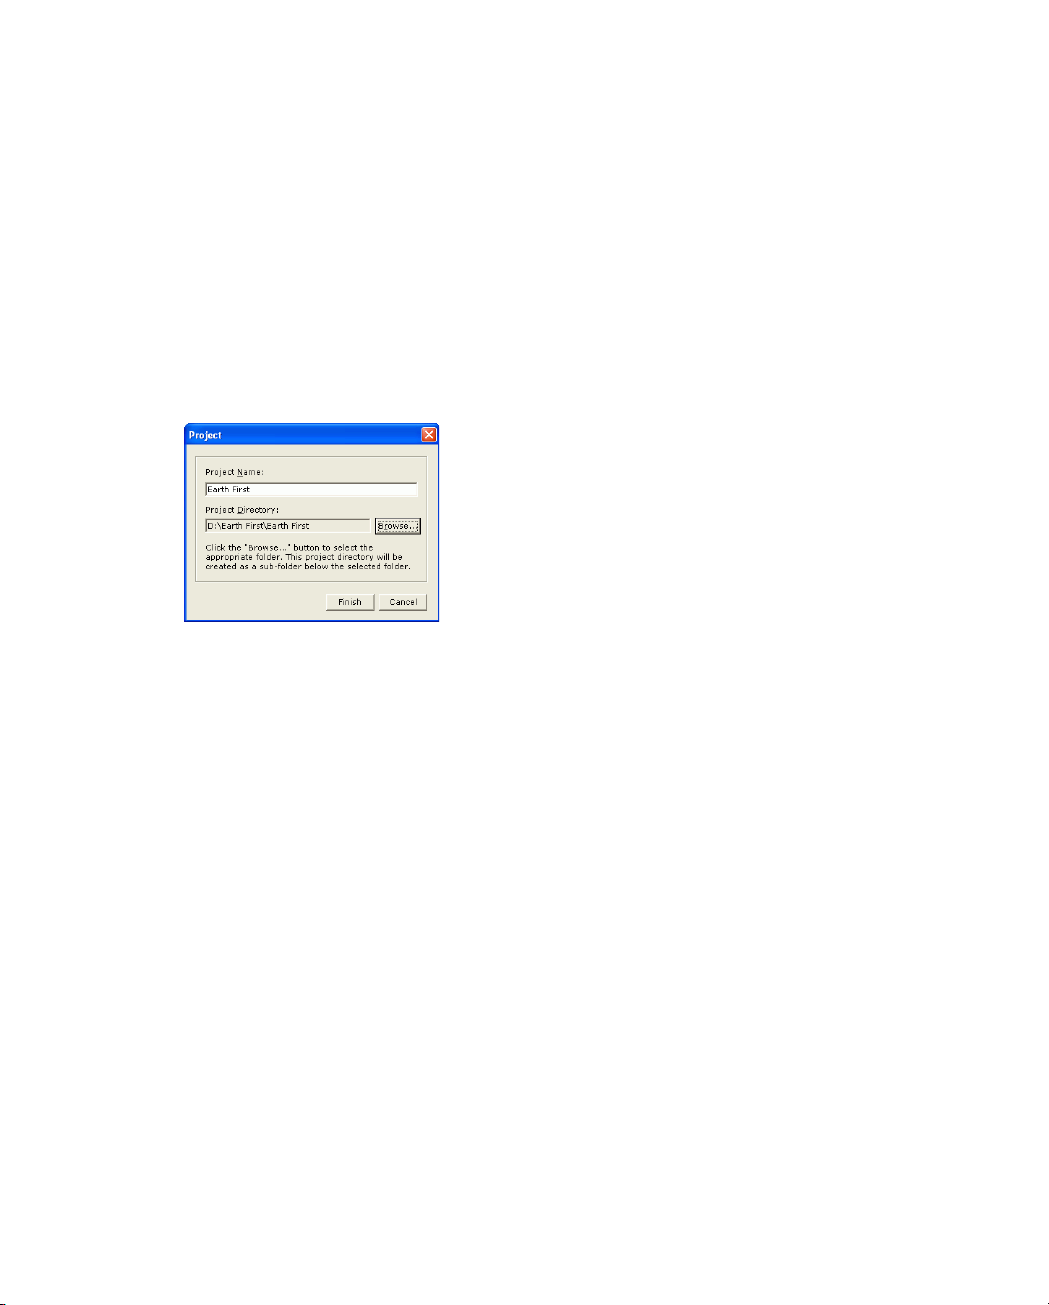
2. Select the File > Save Project or File > Save Project As... command. The standard Project
dialog box opens.
3. Enter a project file name, then set the directory where you want to save the project file.
• To specify a directory, click Browse..., then locate and open the desired directory.
4. Click Finish.
18
Page 25
Full-Screen Mode
Convert a Full-Screen Project to a Studio Project
You can convert a Full-Screen Presentation project file to a Studio project file.
To convert a Full-Screen presentation into a Studio presentation, do this:
1. Create or open a Full-Screen Presentation project.
2. Select the File > Convert to Studio Project... command. The Project dialog box opens.
3. Enter the directory in which you would like to save the new file.
• Click Browse... to locate the directory.
4. Click Finish.
19
Page 26
CyberLink StreamAuthor
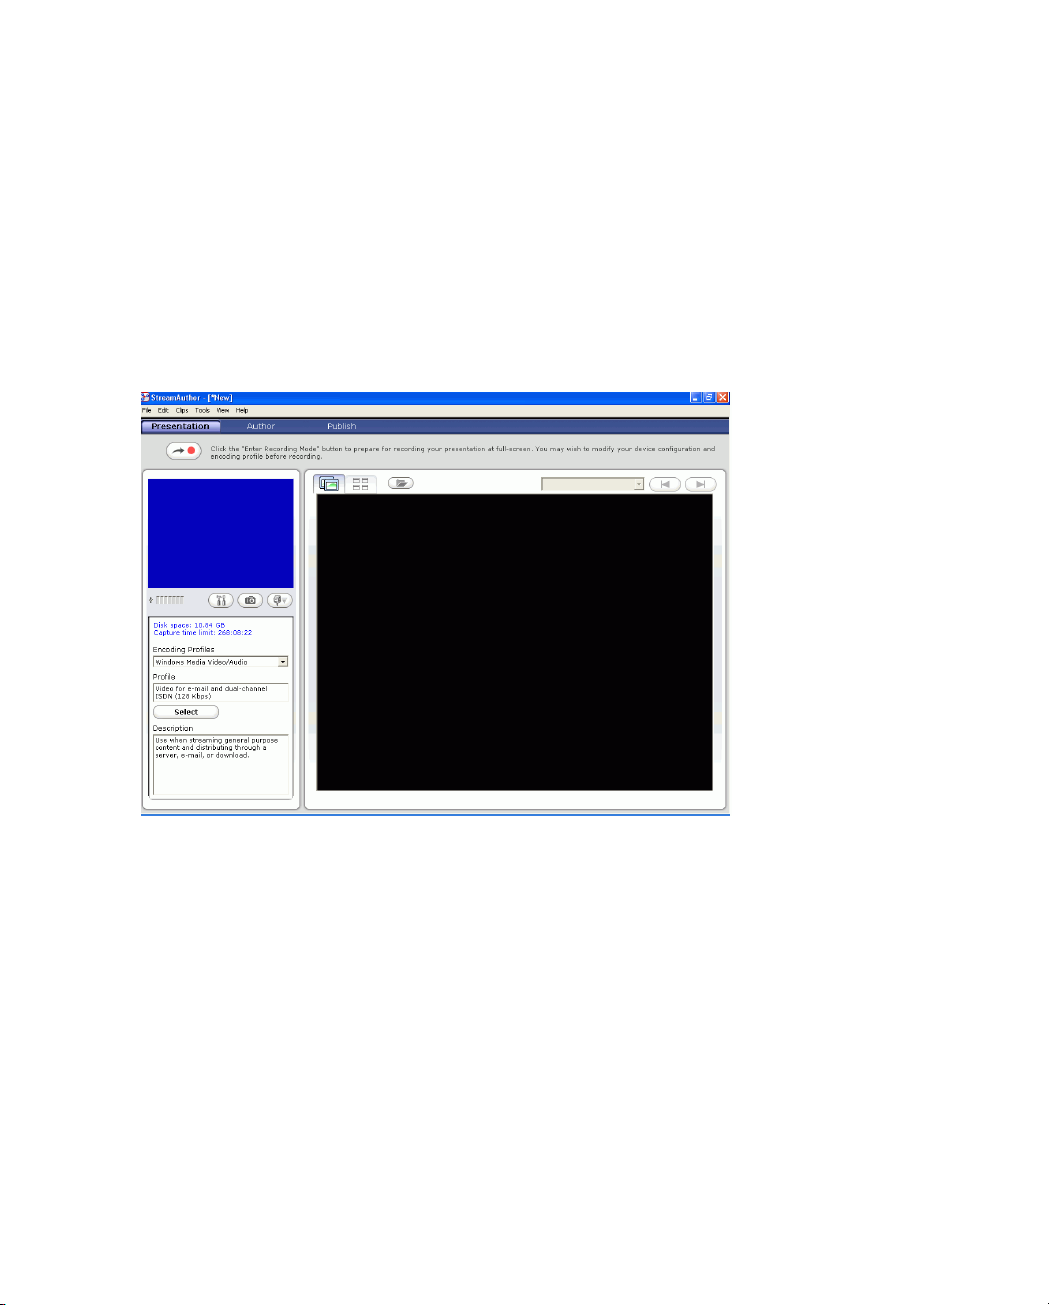
Presentation Window
This section describes the functions in the Presentation window of Full-Screen mode. The
Presentation window records video/audio and slide presentations simultaneously. You
might, for example, wish to record yourself by webcam while your PowerPoint presentation
plays in a different window. To enter the Presentation window, click the Presentation tab in
Full-Screen mode.
The Presentation window appears as follows:
20
Page 27
Full-Screen Mode
Acquire Content in a Full-Screen Presentation
You can acquire content in a Full-Screen presentation by importing slides or zipped HTML
files, or taking a snapshot of video playback.
Import Slides into a Full-Screen Presentation
To import slides into a Full-Screen presentation, do this:
1. Create or open a Full-Screen Presentation project.
2. Click the Presentation tab.
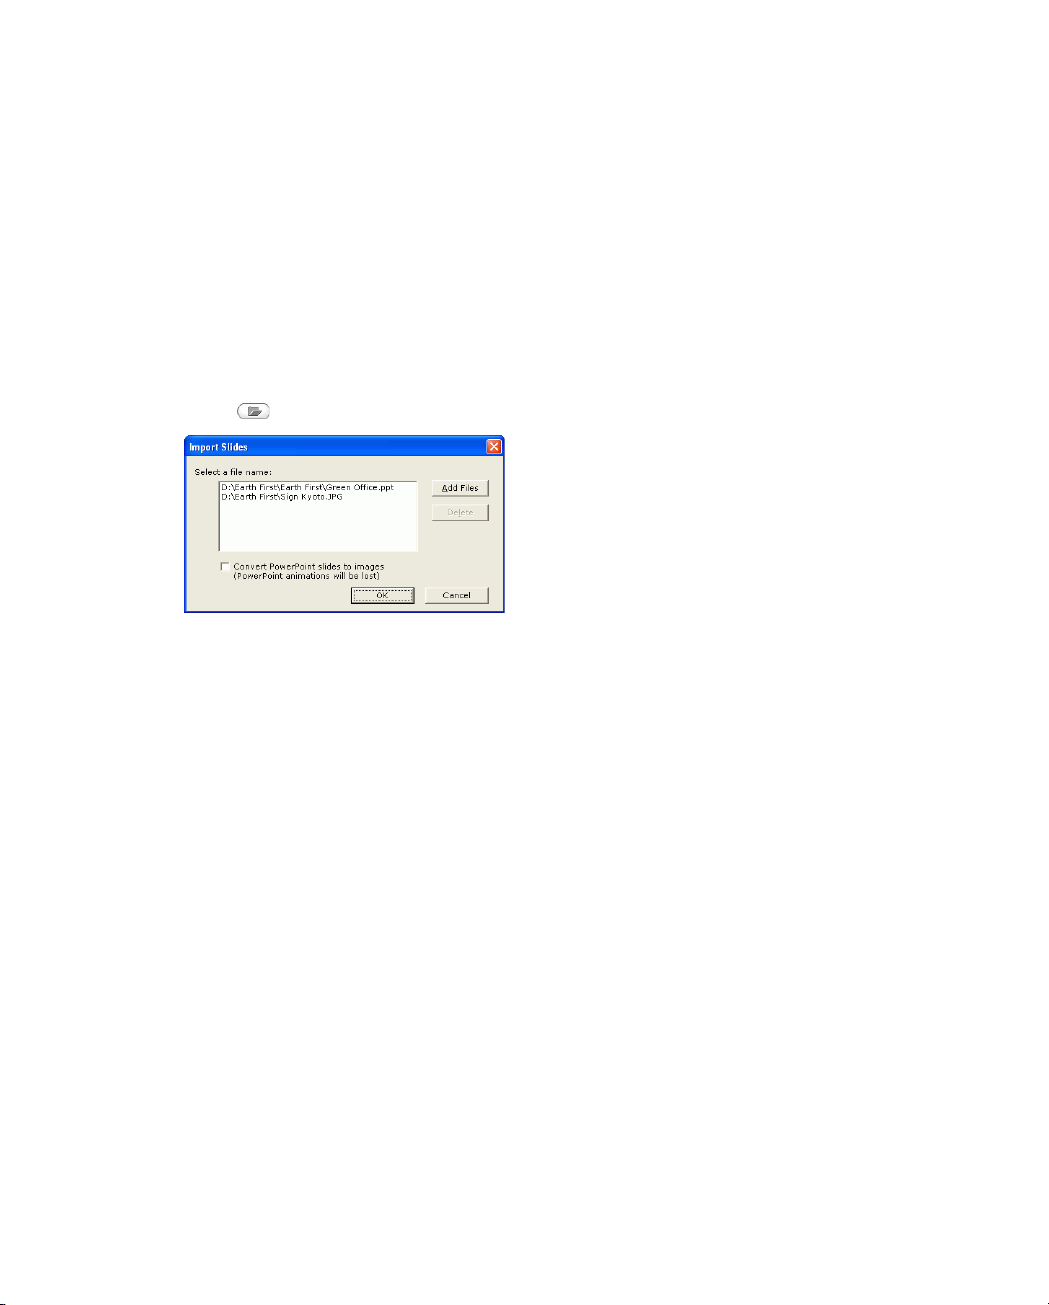
3. Click . The Import Slides/URL dialog box opens.
4. Click Add Files, then locate and open the files you want to import.
• You can remove a file from the list of files to be imported by selecting it in the list,
then clicking Delete.
• Convert PowerPoint slides to images: Check this option to ensure that PowerPoint
slides appear exactly as in the original PowerPoint presentation. (Animations are not
supported when slides are converted to images.)
5. Click OK.
21
Page 28

CyberLink StreamAuthor
Take a Snapshot of Video Playback
You can capture a single frame from a video clip and save it to the directory you specify as a
.bmp file.
To take a snapshot of a video clip, do this:
1. Begin playback or navigate to the frame you want to capture.
2. Click . The current frame of video is captured and a dialog box opens, prompting
you to save the file.
3. Save the file to the desired directory.
Record in the Presentation Window
You can record your presentation or record video in the Presentation window of Full-Screen
mode.
Set the Recording Volume
You can set the recording volume level to ensure that the volume of the audio track that
accompanies your video plays at a suitable level.
To set the recording volume level, do this:
1. Create or open a Full-Screen Presentation project.
2. Click the Presentation tab.
3. Click . The recording volume slider appears.
4. Adjust the volume as desired.
• Drag the slider up to increase the recording volume.
• Drag the slider down to decrease the recording volume.
• Click to mute the recording volume. Click to unmute the recording volume.
5. Click outside the slider area to close the volume slider.
Record Your Presentation
You can record your presentation at full-screen in the Presentation window. After you record
your presentation, it is automatically loaded into the Timeline in the Author tab. For more
information, see Using the Timeline on p.29.
To record a full-screen presentation, do this:
1. Create or open a Full-Screen Presentation project.
22
Page 29
Full-Screen Mode
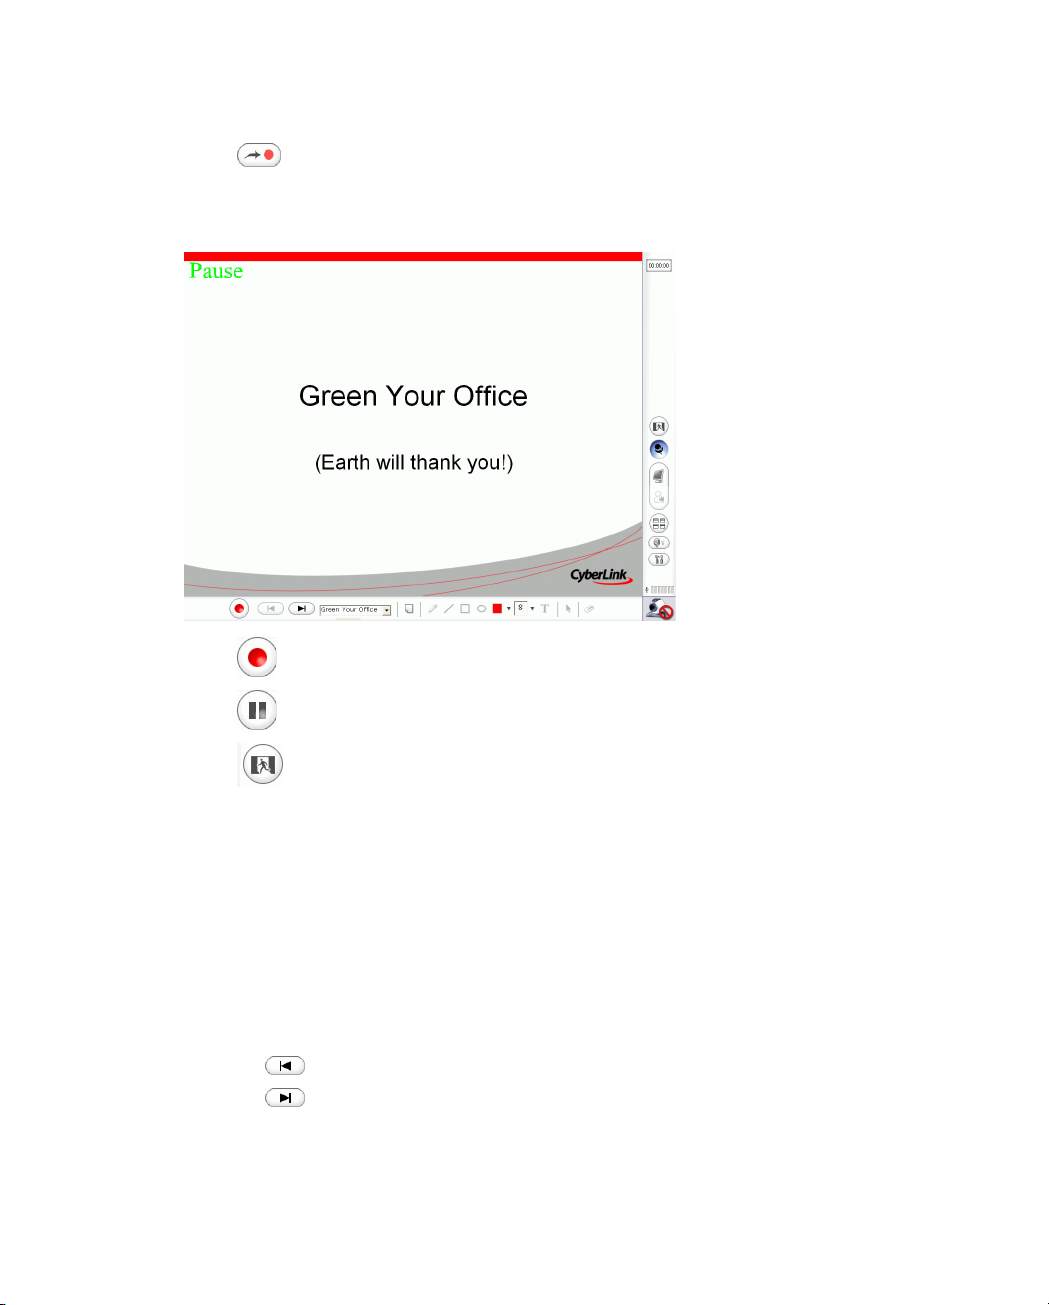
2. Click . A message box opens, reminding you to click the Record icon in order to
begin recording. Click OK to enter recording mode. (To prevent this message box from
opening in the future, check the Do not display this message again option before
clicking OK.)
3. Click to begin recording.
4. Click to stop recording.
5. Click to exit the recording function.
Navigate Through Presentation Slides
You can navigate through your slides while you are delivering your presentation.
Note: You may prefer to pause your presentation before navigating to a different slide, as
the time required to navigate is included in the recording.
To navigate through slide pages while recording, do this:
1. Start recording your presentation.
2. Select a navigation option from the following:
• Click to display the previous slide
• Click to display the next slide
• Select a slide from the drop-down menu to display that slide.
23
Page 30

CyberLink StreamAuthor
•
Click to display individual slide pages.
• Click to display thumbnails of all slide pages. Click a slide thumbnail to jump to
that slide.
Insert a Blank Slide While Recording
You can insert a blank slide into your presentation, then use the pen and text tools to add
color, shapes, and wording. You can insert and create a blank slide at any point while
recording your presentation.
To insert a blank slide into your presentation, do this:
1. Create or open a Full-Screen presentation project.
2. Click . A message box opens, reminding you to click the Record icon in order to
begin recording. Click OK to enter recording mode.
3. Click to insert a blank slide.
24
Page 31

Full-Screen Mode
4. Use the drawing and text tools to create your slide.
• (Free Draw): draws irregular shapes.
• (Line): draws straight lines.
• (Rectangle): draws rectangular and square outlines.
• (Ellipse): draws elliptical and circular outlines.
• (Tool Wid t h ): controls the size of each of the drawing tools.
• (Tool C o l o r): controls the color of each of the drawing tools.
• (Insert Te x t ): inserts text in a text box. Clicking this tool simultaneously opens a
standard Font toolbar, which allows you to control font attributes, including size and
color.
Note: To resize the text box, drag one of its corners. To position the text box, drag one of its
edges.
• (Record Cursor): records the cursor movement.
• (Eraser): erases all of the content on the blank slide.
Note: The drawing tools are not supported in PDF, HTML, and Flash files.
25
Page 32

CyberLink StreamAuthor
Select an Encoding Profile
Before recording your presentation, you may wish to select a different encoding profile in
order to record in a specific format.
To select an encoding profile, do this:
1. Create or open a Full-Screen Presentation project.
2. Click the Presentation tab.
3. Click . The Profile Configuration dialog box opens.
4. Select an encoding profile, then click OK. For more information, see Encoding Profiles
on p.91.
5. Click OK.
26
Page 33

Full-Screen Mode
Configure Your Capture Devices
Before capturing, you may wish to configure your capture devices. Normally, you should not
need to modify the default device configuration.
To configure your capture devices, do this:
1. Create or open a Full-Screen Presentation project.
2. Click the Presentation tab.
3. Click . The Device Configuration dialog box opens.
4. Configure your devices as necessary:
• Video: Select your video capture device from the Video Capture Device drop-down
menu. Select the source of video input from among the available Video Source
options. (Available options vary from computer to computer.) Select a video option
from the Video Option drop-down menu.
• Audio: Check Audio only at the top of the dialog box to record audio without video.
Select your audio capture device from the Audio Capture Device drop-down menu.
Select the source of audio input from among the available Audio Source options.
(Available options vary from computer to computer.) Select an audio option from the
Audio Option drop-down menu.
5. Click OK.
Record Video in the Presentation Window
To record a full-screen presentation, do this:
1. Create or open a Full-Screen Presentation project.
2. Click . A message box opens, reminding you to click the Record icon in order to
begin recording. Click OK to enter recording mode. (To prevent this message box from
opening in the future, check the Do not display this message again option before
clicking OK.)
27
Page 34

CyberLink StreamAuthor
3. Click . The video capture window opens.
• Click to set the recording volume.
• Click to take a snapshot of the current video frame.
• Click to configure your capture device. See Configure Your Capture Devices on
p.23.
4. Click to begin recording.
5. Click to stop recording.
6. Click to exit the video capture window.
7. Click to exit the recording function.
28
Page 35

Full-Screen Mode
Screen Capture
You can capture on-screen motion, such as cursor movement or the addition of text or
drawings, as your presentation plays. You can specify the on-screen area to capture, then
(depending on your settings) capture as video with or without audio. Each of these methods
is presented in this section.
When you enter the Screen Capture function, the following toolbar appears:
If you minimize the toolbar during capture, you can still access its function using the
following hotkeys:
Hotkey Function
F11 Start/Pause capture
F12 Stop capture
F Free Draw tool
E Ellipse tool
L Line tool
R Rectangle tool
AArrow tool
UUndo
Esc Stop drawing
Note: The Arrow tool and the Undo function are available only by using hotkeys.
Configure Your Screen Capture Settings
To configure your screen capture settings, do this:
1. Open the screen capture function.
29
Page 36

CyberLink StreamAuthor
2. In the toolbar that opens, click . The Screen Capture Configuration dialog box opens.
3. Configure your screen capture settings:
• Capture Audio: check to enable audio capture.
• Audio source: select the source of audio input from among the available options.
• Audio device: select the audio hardware on your system. (Many systems have only
one audio hardware device.)
• Frames/second: check Auto-select by system to let StreamAuthor select the most
appropriate setting. If you require a specific fps count, uncheck the automatic option
and select a number from the drop-down list.
• Screen Setting: select the area that you want to capture. Full-screen captures
everything that is visible on the desktop. Region allows you to draw the capture area
yourself. When you select Region, the coordinate fields on the right also become
active. You can enter values in these fields to define the region you capture, or even
drag the capture frame that appears when you capture a region. Window allows you
to capture the active window.
• Minimize toolbar to system tray while capturing: check this option to minimize the
screen capture interface while capturing.
• Output directory: specify the directory where you want StreamAuthor to save screen
capture files by default. To specify a directory, click Browse..., then locate and open
the desired directory.
• Disk Information: a read-only field that displays information about the current disk
drive.
30
Page 37

• Current Cursor Position: a read-only field that displays the current coordinates of
the cursor.
4. Click OK.
Capture On-Screen Motion as Video
To capture on-screen motion as video, do this:
1. Open the screen capture function.
2. Click to begin recording.
3. Use the drawing and text tools to draw and write while capturing. For more
information, see Insert a Blank Slide While Recording on p.20.
4. Click to stop recording.
5. Click to exit the screen capture function.
Full-Screen Mode
31
Page 38

CyberLink StreamAuthor
Capture the Full Screen
To capture your full screen, do this:
1. Open the screen capture function.
2. In the toolbar that opens, click . The Screen Capture Configuration dialog box opens.
3. Select Full-screen, then click OK.
4. Click to begin recording.
5. Use the drawing and text tools to draw and write while capturing. For more
information, see Insert a Blank Slide While Recording on p.20.
6. Click to stop recording.
7. Click to exit the screen capture function.
32
Page 39

Full-Screen Mode
Capture a Region
To capture a region, do this:
1. Open the screen capture function.
2. In the toolbar that opens, click . The Screen Capture Configuration dialog box opens.
3. Select Region, then set the size and position of the capture box by doing one of the
following:
• Drag the cursor to create a capture region.
• Drag one of the corners to freely resize the capture region.
• Enter values in the coordinate fields to set a specific capture region size.
• Drag one of the sides to position the capture region.
4. Click OK to close the dialog box.
5. Click to begin recording.
6. Click to stop recording.
7. Click to exit the screen capture function.
Capture a Window
To capture a window, do this:
1. Open the screen capture function.
33
Page 40

CyberLink StreamAuthor
2. In the toolbar that opens, click . The Screen Capture Configuration dialog box opens.
3. Select Window, then select the window you want to capture by doing one of the
following:
• Select a window in the Screen Setting pane.
• Click Other Window, then drag the Windows Finder icon onto the window you want
to capture.
4. Click OK to close the dialog box.
5. Click to begin recording.
6. Click to stop recording.
7. Click to exit the screen capture function.
34
Page 41

Full-Screen Mode
Author Window
The Author window, available in both Full-Screen and Studio modes, allows you to compile
and organize your presentation. You can import slides, add supplementary items into the
Timeline, preview your presentation, and edit Timeline clips. To enter the Author window,
click the Author tab in Full-Screen mode.
The Author window (in Full-Screen mode) appears as follows:
35
Page 42

CyberLink StreamAuthor
Using the Timeline
The Author window contains a Timeline in which you can insert and organize media clips,
tests, and even pause markers.
Timeline sli der.
Begins playback from the current Timeline slider
position.
Pauses playback.
Jumps to the previous clip edge.
Jumps to the next clip edge.
Splits a video/audio clip at the current Timeline
slider position.
Trims video to the left of the current Timeline slider
position.
Trims video to the right of the current Timeline slider
position.
Adds a Pause marker into the Timeline at the current
Timeline slider position.
To lock a track in the Timeline, click at the extreme left of the track. When a track is locked,
you cannot add new clips to the track, nor move or edit the clips it contains. To unlock a track
in the Timeline, click at the extreme left of the track. When a track is unlocked, you can
freely add, move, and edit clips.
36
Page 43

Navigating in the Timeline
You can navigate to different positions in the Timeline.
To navigate in the Timeline, do one of the following:
• Click anywhere on the Timeline ruler to place the slider at that position.
• Click to jump to the previous clip edge.
• Click to jump to the next clip edge.
• Drag the Timeline slider to zoom in or zoom out on the Timeline. Zooming out allows
you to take in your entire presentation, while zooming in allows you to view more
detail.
Delete a Clip in the Timeline
To delete a clip in the Timeline, do one of the following:
• Right-click the clip, then select Delete.
• Select the clip, then press the Delete key.
• To clear the Timeline of all clips, choose the Edit > Clear Timeline command or right-
click on any track and choose Clear Timeline.
Full-Screen Mode
Move a Clip in the Timeline Quickly
To move a clip in the Timeline quickly, drag and drop it to a new location. Moving a clip in a
track also moves all of the following clips in the same track in the Timeline, as well as all clips
in tracks below it that have been inserted within that clip’s duration. This allows you to
synchronize all of your clips automatically.
Move a Clip in the Timeline Precisely
This is the most precise way to move a clip in the Timeline.
To move a clip in the Timeline precisely, do this:
1. Right-click the clip, then select Time Adjustment. The Clip Timeline Position dialog box
opens.
37
Page 44

CyberLink StreamAuthor
2. Enter a new time position, then press OK.
Rename a Clip in the Timeline
To rename a clip in the Timeline, do this:
1. Right-click the clip, then select Rename.
2. Enter a new name, then press the Enter key.
Insert a Pause Marker in the Timeline
Inserting a pause marker in the Timeline pauses your presentation during playback when the
Timeline slider reaches the pause marker position. You may wish to insert a pause marker at a
certain point to initiate a discussion, or for a question and answer session or an intermission.
When you are ready to resume playback of the presentation, simply press OK in the message
that appears.
To insert a pause marker in the Timeline, do this:
1. Drag the Timeline slider to the point at which you want to insert a pause marker.
2. Click . The Pause Marker Settings dialog box opens.
3. Enter the text you would like to display.
• If necessary, you can enter a precise Timeline position in the entry boxes.
4. Click OK.
Insert a TOC Marker in the Timeline
To insert a TOC marker in the Timeline, do this:
1. Click the TOC tab in the Supplement pane.
38
Page 45

Full-Screen Mode
2. Click Add. The Add TOC Marker dialog box opens.
3. Enter a name and (if necessary) a precise position in the Timeline, then click OK. The
new TOC marker is added to your presentation at the position of the Timeline slider (or
at the position you have specified).
For more information on TOC markers, see Manage TOC Markers on p.38.
Add a Watermark
A watermark is an image that appears on top of your presentation. Often it is a company logo
or copyright information. You can use any image file in .bmp, .gif, .jpg, or .jpeg formats
To add a watermark, do this:
1. Right-click the media clip in the Timeline, then select Watermark.... The Watermark
dialog box opens.
2. Click Browse... to locate the image you would like to use as a watermark.
• Drag the watermark to the desired position.
• Drag one of the corners to freely resize the watermark.
• To modify the opacity of the image, drag the Opacity slider.
3. Click OK.
39
Page 46

CyberLink StreamAuthor
Remove a Watermark
To remove a watermark, do this:
1. Right-click the media clip in the Timeline, then select Watermark.... The Watermark
dialog box opens.
2. Click Remove Watermark, then click OK.
40
Page 47

Full-Screen Mode
Editing Clips in the Timeline
‘Editing clips’ is a broad term that encompasses a number of different functions: you can, for
example, trim unwanted sections from video or audio clips, adjust the color of a video clip,
and more. Since your presentation may contain audio portions as part of the imported video
clips as well as independent audio files in the Audio track - all of which have probably been
recorded at different levels - StreamAuthor also allows you to mix the audio levels of these
different clips to produce a more harmonious sound track for your presentation. All of the
editing processes that you can perform on the different types of media clips are described in
this section.
Split a Video/Audio Clip
You can split a video/audio clip into two clips at the current position of the Timeline slider.
Splitting a video/audio clip does not delete any portion of the content. Both halves of a split
clip can be stretched back to any length up to the original duration.
To split a video/audio clip, do this:
1. Select a clip in the Timeline.
2. Drag the Timeline slider to the point at which you want to split the clip.
3. Click . The clip is split into two independent clips that can be moved or modified
separately in the Timeline.
Trim a Video/Audio Clip
Video/audio clips captured from external capture devices often contain unwanted portions
that can easily be removed using the Trim function.
To trim a video/audio clip, do this:
1. Select the clip in the Timeline.
2. Drag the Timeline slider to the point at which you want to perform the trim, then do one
of the following:
• Click to trim video to the left of the current Timeline slider position.
• Click to trim video to the right of the current Timeline slider position.
41
Page 48

CyberLink StreamAuthor
Adjust a Video Clip’s Color Attributes
You may wish to adjust the color attributes of a video or image clip in order to brighten or
clarify the image. You can easily correct or enhance a clip’s color using the Adjust Video
function.
To adjust video, do this:
1. Right-click on the media clip in the Timeline, then select Adjust Video.... The Adjust
Video dialog box opens.
2. Drag the sliders to adjust the brightness, contrast, hue, and saturations levels to your
satisfaction.
• To undo all of the adjustments you have made, click Reset, then begin again.
3. Click OK.
42
Page 49

Add Background Audio to Your Presentation
To add background audio to your presentation, do this:
1. Right-click anywhere in the Video or Audio track in the Timeline, then select
Background Audio.... The Background Audio dialog box opens.
2. Click Browse to locate the audio file you would like to use.
• To modify the volume of the audio file, drag the Volume slider.
3. Click OK.
Remove Background Audio from Your Presentation
To remove background audio from your presentation, do this:
Full-Screen Mode
1. Right-click anywhere in the Video or Audio track in the Timeline, then select
Background Audio.... The Background Audio dialog box opens.
2. Click Remove Background Audio, then click OK.
Adjust Audio at Any Point
You can change the level of volume of any clip in the Timeline using audio keys, which you
can place at any point inside the clip.
To change the volume level of a clip at any point, do this:
1. Select the clip you want to modify.
43
Page 50

CyberLink StreamAuthor
2. Click on the audio level line at the point where you want to change the audio level to set
a volume key. Drag the volume key up to increase the volume or down to decrease the
volume.
Adjust a Clip’s Overall Volume
You can adjust the overall volume of an audio clip or the audio portion of a video clip.
To adjust a clip’s overall volume, do this:
1. Right-click the clip in the Timeline, then select Adjust Audio.... The Adjust Audio dialog
box opens.
2. Drag the slider to adjust volume level to your satisfaction.
3. Click OK.
44
Page 51

Full-Screen Mode
Add an Audio Fade In/Fade Out Effect
You can add a fade in or fade out effect to an audio clip or the audio portion of a video clip.
To add a fade in/fade out effect, do this:
1. Right-click the clip in the Timeline, then select Adjust Audio.... The Adjust Audio dialog
box opens.
2. Select one or both fade options and enter the duration of the fade (in seconds):
• Check Fade In to start an audio track with a fade-in from silence.
• Check Fade Out to end an audio track with a fade-out to silence.
3. Click OK.
Mute a Clip
You may wish to mute the audio output of an entire clip.
To mute a clip, do this:
1. Right-click on the clip in the Timeline, then select Adjust Audio.... The Adjust Audio
dialog box opens.
2. Drag the slider to 0.
3. Click OK.
Unmute a Clip
You may wish to unmute a previously muted clip.
To unmute a clip, do this:
45
Page 52

CyberLink StreamAuthor
1. Right-click on the clip in the Timeline, then select Adjust Audio.... The Adjust Audio
dialog box opens.
2. Drag the slider to adjust volume level to your satisfaction.
3. Click OK.
Restore an Audio Clip’s Volume Levels
If you are dissatisfied with the volume level of any audio clip after adjusting it, you can easily
restore the clip’s original volume level.
To restore a clip’s original volume level, right-click the clip, then select Restore original
volume level. Any audio volume keys you have added are removed.
46
Page 53

Full-Screen Mode
Using the Supplement Pane
The Supplement pane has several tabs across the top that allow you to access diverse options.
Each of these options allows you to add supplementary materials to your presentation.
Manage Chapters
You can add or change chapters in your presentation. To manage chapters, click the Chapters
tab in the Supplement pane.
Chapters allow for ease of navigation on a presentation. If you set chapters on your
presentation, viewers can jump to different chapters in order to skip previous content.
However, you may choose not to include chapters. If you do not set chapters, your
presentation will start from the beginning.
Insert Chapters Automatically
To set chapters automatically, do this:
1. Click the Chapter tab in the Supplement pane.
2. Set chapter markers by doing one of the following:
• To set a chapter at the beginning of each slide, click .
• To set a chapter at the beginning of each video clip, click .
• To set chapters at fixed intervals, enter an interval (in minutes), then click .
• To specify the number of chapters in your presentation, enter the number of chapters
in the entry box, then click .
Insert Chapters Manually
To manually insert a chapter marker into the Timeline, do this:
47
Page 54

CyberLink StreamAuthor
1. Click the Chapter tab in the Supplement pane.
2. Navigate to a location on the Timeline with the slider, then click Add. The Add Chapter
Marker dialog box opens.
3. Enter a chapter name and (if necessary) a precise position in the Timeline, then click OK.
The new chapter marker is added to your presentation at the position of the Timeline
slider (or at the position you have specified).
Delete a Chapter Marker
To delete a chapter marker, do this:
1. Click the Chapter tab in the Supplement pane.
2. Select the chapter you want to delete from the chapter list and click Delete. A message
box opens.
3. Click Yes. The chapter marker is removed.
Note: You can also delete all the chapter markers by clicking Delete All.
Manage TOC Markers
TOC markers appear in the TOC pane below the Preview window.
Clicking a TOC marker jumps to the beginning of the associated clip in the Timeline.
48
Page 55

To manage TOC markers, click the TOC tab in the Supplement pane.
Full-Screen Mode
49
Page 56

CyberLink StreamAuthor
Insert a TOC Marker
To insert a TOC marker into the Timeline, do this:
1. Click the TOC tab in the Supplement pane.
2. Click Add. The Add TOC Marker dialog box opens.
3. Enter a name and (if necessary) a precise position in the Timeline, then click OK. The
new TOC marker is added to your presentation at the position of the Timeline slider (or
at the position you have specified).
Edit a TOC Marker
To edit a TOC marker, do this:
1. Click the TOC tab in the Supplement pane.
2. Select a TOC marker, then click Edit. The Add TOC Marker dialog box opens.
3. Modify the TOC marker as necessary, then click Yes. The TOC marker is modified in
your presentation.
Delete a TOC Marker
To delete a TOC marker, do this:
1. Click the TOC tab in the Supplement pane.
2. Click Delete. A message box opens.
3. Click Yes. The TOC marker is removed.
50
Page 57

Full-Screen Mode
Manage Templates
You can add or change templates in your presentation. To manage templates, click the
Te mp la t e s tab in the Supplement pane.
Note: To change display options, click to switch to large slide view or to switch to
thumbnail view.
The template you select controls the appearance of your presentation. Since you can insert
more than one template in the Timeline, you can change the look of your presentation at
different points in time. For example, you might begin with a template containing a slide
window and TOC, then change to a template containing video/audio only at a point when
you play a video file.
Insert a Template Anywhere in the Timeline Using Drag-and-Drop
This is the arguably the most natural way to insert a template in the Timeline.
To insert a template anywhere in the Timeline, drag it from the Supplement pane to the
desired position in the Timeline. The dropped template overwrites any template (or portion
of a template) that may happen to lie at the point of insertion.
51
Page 58

CyberLink StreamAuthor
Insert a Template in the Timeline at the Timeline Slider Position
This is the quickest way to insert a template in the Timeline.
To insert a template in the Timeline at the Timeline slider position, do this:
1. Position the Timeline slider to the point at which you want to insert the new template.
2. Double-click the template you want to use. The template is inserted in the Timeline at
the position of the Timeline slider.
Insert a Template in the Timeline Precisely
This is the most precise way to insert a template in the Timeline.
To insert a template in the Timeline precisely, do this:
1. Right-click the template you want to insert, then click Insert in Timeline. The Clip
Timeline Position dialog box opens.
2. Enter a precise position in the Timeline, then click OK. The template is added to your
presentation at the position you have specified.
Delete a Template
To delete a template do this:
1. Right-click the template you want to delete, then click Delete. A message box appears.
2. Click OK to delete the template.
Note: You can only delete custom templates.
Rename a Template
To rename a template, do this:
52
Page 59

Full-Screen Mode
1. Right-click the template you want to rename, then click Rename. The Rename Template
dialog box opens.
2. Enter a new name, then click OK. The template is renamed.
Edit a CSS Template
Editing an existing CSS template allows you to create customized templates for your specific
needs.
To edit a CSS template, do this:
1. Right-click the CSS template you want to edit, then click Edit. The Template Editor
opens.
2. Modify the template as desired:
• For information on specific procedures, see Editing CSS Templates on p.83.
3. Save the template under a new name. The new template is now available to be imported.
Import a Template
To import a template, do this:
53
Page 60

CyberLink StreamAuthor
1. Click . The Import New Template dialog box opens.
2. Select the directory to which you want to import the template.
3. Enter the template’s name, then click Finish. The template is imported into the
Supplement pane.
View a Template’s Properties
To view a template’s properties, do this:
1. Right-click the template whose properties you want to view, then click Properties. The
Template Properties dialog box opens.
2. Click OK to close the dialog box.
54
Page 61

Full-Screen Mode
Manage Project Properties
You can add or edit a presentation project file’s properties. To manage project properties, click
the Properties tab in the Supplement pane.
Note: If your presentation is a part of a large database, adding keywords can aid your
target audience in locating your presentation quickly.
Edit a Project’s Properties
To edit a project’s properties, enter or modify information in the different fields. The updated
information is saved automatically.
55
Page 62

CyberLink StreamAuthor
View a Template’s SCORM Properties
To view or modify a template’s SCORM properties, do this:
1. Click . The SCORM 1.2 Metadata dialog box opens.
2. Enter or modify information in the fields, then click OK.
56
Page 63

Full-Screen Mode
Manage Attachments
You may add reference files and URLs to your presentation. To manage attachments, click the
Attachments tab in the Supplement pane.
Add an Attachment
Attachments can include any kind of supplementary files or URLs that you would like to
attach to your presentation. To add an attachment, do this:
1. Click Add. The Add a Reference File/URL dialog box opens.
2. Select a file or enter a URL for viewers to download/view.
3. Enter the text link that points to the above file/URL. (This text will appear in the
viewer's browser.)
• To stop the presentation in order to allow viewers time to view or download your
attachment, select the Pause video when the viewer clicks on this file/URL option.
4. Click OK. The new attachment is added to your presentation.
Edit an Attachment
To edit an attachment, do this:
57
Page 64

CyberLink StreamAuthor
1. Select an attachment, then click Edit. The Edit a Reference File/URL dialog box opens.
2. Modify the attachment as necessary, then click OK. The attachment is modified in your
presentation.
Delete an Attachment
To delete an attachment, do this:
1. select the attachment, then click Delete.
2. When the warning message appears, click Yes.
Manage Tests
To manage tests, click the Te s t s tab in the Supplement pane.
Create a Test
To create a test, do this:
58
Page 65

Full-Screen Mode
1. Click Create. The Create Test dialog box appears.
2. Click to add a question.
• To remove a question, select it, then click .
• To move a question up, select it, then click .
• To move a question down, select it, then click .
3. Select the question type.
• Single Answer: a multiple-choice question that has only one correct answer.
• Multiple Answer: a multiple-choice question that has two or more possible correct
answers.
• Tr u e/ F a ls e : an either/or-type question that has one possible correct answer.
• Short Answer: a descriptive question that requires the learner to supply an answer.
4. Select the number of selections from which the test-taker can choose the correct answer.
Note: This option does not apply to True/False and Short Answer-type questions.
5. Enter the weight of the question.
59
Page 66

CyberLink StreamAuthor
6. Click OK. StreamAuthor generates the test in Microsoft Word.
7. Enter the test title, the question wording and support files (if required), and the correct
answer in the appropriate table cells.
Note: Enter the correct answer(s) in the Answer cell.
8. Save the test. You may now import the test for use in StreamAuthor.
Import a Test
After creating or editing a test, you must import it in order to make the test available in your
presentation.
To import a test, do this:
1. Click Import. The Import Test dialog box opens.
60
Page 67

Full-Screen Mode
2. Enter the location of the Word file.
3. Modify the test’s settings.
• Enter the directory where the Word file you created for the test is located. Click
Browse... to locate and open the file.
• Enter the test’s weight. If there is only one test in your presentation, leave the weight
at 100%
• Enter the number of questions you would like to appear on each page of the test
when if opens in your presentation.
• Specify whether or not learners must pass the test in order to proceed on to the rest of
the presentation - and if so, what the test’s passing score is. If you would like to allow
learners to continue on with the presentation even after failing the test a number of
times, enter that number here.
• Select the Shuffle the question order each time the test is opened option if you
would like the questions to appear in a different order each time the test opens.
• Select the Allow learners to view correct answers after testing option if you would
like to display the test answers after learners have taken the test.
• Select the Ask learners to send their answers by email option if you would like
learners to send their answers by email after taking the test. If so, enter the email
address you would like them to send their test answers to.
4. Click Import. The test appears in the Supplement pane and the preview area.
Edit a Test
After you have created a test, you can go back and edit the content as required. Note that you
must re-import an edited test in order for it to be available in your presentation.
To edit a test, do this:
1. Click Edit. The test opens in Microsoft Word.
2. Edit the test as necessary, then save it. (The options available when editing a test are the
same as those available when creating a test. For more information, see Create a Test on
p.44.)
3. Import the test in order to make it available in your presentation. For more information,
see Import a Test on p.44.
Delete a Test
To delete a test, do this:
1. Select the test, then click Delete. A message box opens.
2. Click Yes. The test is removed.
61
Page 68

CyberLink StreamAuthor
Edit a Test’s Settings
To edit a test’s settings, do this:
1. Select the test, then click Settings. The Test Settings dialog box opens.
2. Modify the test’s settings as necessary, then click OK.
Note: The settings are the same as in the test importing process. For more information, see
Import a Test on p.44.
Edit a Test’s Passing Score
To edit a test’s passing score, do this:
1. Select the test.
2. Enter a new passing score in the Passing Score entry box.
62
Page 69

Manage Second Slides
If you use a second slide in your presentation, you can manage it here. To manage second
slides, click the Slide 2 tab in the Supplement pane.
Note: To change display options, click to switch to large slide view or to switch to
thumbnail view.
Clicking the Slide 2 tab in the Supplement pane displays the Slide 2 track in the Timeline.
Once you have imported slides into the Slide 2 tab of the Supplement pane, you can add
them to the Slide 2 track (but not the Slide 1 track) of the Timeline.
Full-Screen Mode
Note: In order to display the second slide, your project’s template must support two slides.
If the original template does not support two slides, you must insert a template that
supports two slides over the entire duration of the second slide.
63
Page 70

CyberLink StreamAuthor
Import Slides for Use as Second Slides
To import slides for use as second slides, do this:
1. Click . The Import Slides/URL dialog box opens.
2. Click Add Files, then locate and open the files you want to import.
• You can remove a file from the list of files to be imported by selecting it in the list,
then clicking Delete.
• Convert PowerPoint slides to images: Check this option to ensure that PowerPoint
slides appear exactly as in the original PowerPoint presentation. (Animations are not
supported when slides are converted to images.)
3. Click OK.
Preview Window
You can preview your presentation at any time during the authoring process in order to
ensure that your editing is going smoothly. Using the Timeline slider, you can start your
preview from any point within the presentation.
1. Locate the point at which you want to begin your preview.
2. Click Play. The preview starts in the Preview window from the point you have specified.
3. Use the playback buttons to control the preview.
64
Page 71

Full-Screen Mode
Publish Window
The Publish window (in both Full-Screen and Studio modes) allows you to compile your
presentation in one of a number of different formats, then save it to the destination of your
choice. To enter the Publish window, click the Publish tab in either Full-Screen or Studio
mode.
The Publish window appears as follows:
To publish your presentation, do this:
1. Create or open a Full-Screen or Studio presentation project.
2. Click the Publish tab.
65
Page 72

CyberLink StreamAuthor
3. Select an encoding profile
• For information on configuring encoding profiles, see Creating Encoding Profiles on
p.94.
4. Select a publishing destination.
• For information on publishing destinations, see Publishing Profiles on p.95.
5. Enter a subfolder name, if desired. Doing so creates a subfolder under the publication
destination that you set in the above step.
6. Click Publish to publish your files to the selected folder. StreamAuthor compiles your
presentation and saves it to your selected publication destination.
7. Click View to view the final result.
66
Page 73

Chapter 3:
Studio Mode
Working in Studio mode is similar to editing a movie in a video editing suite. Because you
work “offline” in Studio mode, you can add video, audio, images, and transition effects to
create a multimedia presentation that plays like a video file. The various kinds of media are
stored in the Library, which is described first in this chapter.
This chapter contains the following sections:
• Creating a Studio Presentation File on p.50
• Opening a Studio Presentation File on p.52
• Saving a Studio Presentation File on p.53
• Studio Window on p.54
• Capture Window on p.73
• Author Window on p.82
• Publish Window on p.82
49
Page 74

CyberLink StreamAuthor
Creating a Studio Presentation File
You can create a Studio Presentation project in CSS format or multiple frame windows
format. The procedures for both are given below.
Create a Studio Presentation in CSS Format
To create a new Studio presentation in CSS format, do this:
1. Start StreamAuthor, or select the File > New Project... command from within an existing
presentation. In the dialog box that opens, select Studio Presentation.
2. Select Cascading Style Sheet (CSS), then click Next.
50
Page 75

3. Select the template you would like to use, then click Next.
• If you have created a custom template, you can select it in the list. For more
information, please see Editing CSS Templates on p.83.
4. Add your source media files, then click Finish.
Studio Mode
• To enable video capture, select the Video option, then select your video capture
device from the drop-down box (if necessary). You can also select your audio capture
device from the Audio drop-down box (if necessary).
• To add slides, click Add under the Slide Files heading, then locate and open the
source files of the slides you want to use.
• To add media files, click Add under the Media Files heading, then locate and open
the files you want to use. You can remove a file from the list of files to be opened by
selecting it in the list, then clicking Delete.
51
Page 76

CyberLink StreamAuthor
Create a Studio Presentation in Multiple Frame Window Format
To create a new Studio presentation in multiple frame window format, do this:
1. Start StreamAuthor, or select the File > New Project... command from within an existing
presentation. In the dialog box that opens, select Studio Presentation.
2. Select Multiple Frame Windows, then click Next.
52
Page 77

3. Select the template you would like to use, then click Next.
• If you have created a custom template, you can select it in the list. For more
information, please see Editing CSS Templates on p.83.
4. Add your source media files, then click Finish.
Studio Mode
• To enable video capture, select the Video option, then select your video capture
device from the drop-down box (if necessary). You can also select your audio capture
device from the Audio drop-down box (if necessary).
• To add slides, click Add under the Slide Files heading, then locate and open the
source files of the slides you want to use.
• To add media files, click Add under the Media Files heading, then locate and open
the files you want to use. You can remove a file from the list of files to be opened by
selecting it in the list, then clicking Delete.
53
Page 78

CyberLink StreamAuthor
Opening a Studio Presentation File
You may begin authoring a presentation immediately after creating a new project file, or you
may wish to work on an existing project file.
To open an existing project file for authoring, do one of the following:
• Select the File > New Project... command, then click a recent project’s name to open it
directly or click More..., then locate and open a project file.
• Select the File > Open Project... command, then locate and open a project file.
• Select the File > Open Published Project... command, then locate and open a
presentation file that has been previously published. This command allows you to
open and edit a previously published presentation whose source file has been lost.
When you select this command, StreamAuthor opens and captures the published
presentation, recreating the source files for you.
54
Page 79

Studio Mode
Saving a Studio Presentation File
Saving a Studio presentation file is very straightforward. The only exception of note is an
option to save your media files in your project directory.
To save a Studio presentation file, do this:
1. Create or open a Studio presentation project.
2. Select the File > Save Project or File > Save Project As... command. A message box
opens.
3. Select a save option.
• To copy all of your original media files to your project directory, click Yes . This option
keeps all of your source files in one location, but uses more hard disc space.
• To leave your source files in their original locations without copying them to your
project folder, click No. This option saves hard disc space, but you may spend more
time looking for your media files.
• To set your selected option as the default and avoid seeing the message box in the
future, check the Set this option as default and do not display this message again
option.
4. Click OK. The standard Project dialog box opens.
5. Enter a project file name, then set the directory where you want to save the project file.
55
Page 80

CyberLink StreamAuthor
• To specify a directory, click Browse..., then locate and open the desired directory.
6. Click Finish.
56
Page 81

Studio Window
This section describes the functions available in the Studio window of Studio mode. The
Studio window allows you to import video/audio clips as well as PowerPoint slides for
presentation authoring. To enter the Studio window, click the Studio tab in Studio mode.
The Studio window appears as follows:
Studio Mode
57
Page 82

CyberLink StreamAuthor
Using the Library
The Library in the Studio window allows you to import slides and media files (where they
become “clips”) in order to make them available in your presentation.
Note: To change display options, click to switch to large slide view or to switch to
thumbnail view.
Import Media Files into the Library
You can import the following types of files as media files:
• Video files: .avi, .asf, .dat, .mpe, .mpeg, .mpg, .m1v, .mwv formats
• Audio files: .aif, .aiff, .au, .mp3, .snd, .wav, .wma formats
• Image files: .bmp, .gif, .jpg, .jpeg formats
Note: Some formats can be imported as either media files or slides. Importing a file as one
or the other type allows you to take advantage of different functions. For example, the
Video track offers the Adjust Video and Watermark options for media files, while the Slide
1 track offers the drawing tools for slides.
To import media files into the Library, do this:
1. Create or open a Studio presentation project.
2. Click the Studio tab.
3. Click the tab in the Library.
4. Click . The standard Open dialog box opens.
5. Locate and open the files you want to import.
58
Page 83

Import Slides into the Library
You can import the following types of files as slides:
• PowerPoint files (.ppt format)
• Excel files (.xls format)
• Word files (.doc format)
• Image files (.bmp, .gif, .jpg, .jpeg, .png formats)
• HTML files (.htm, .html, .zip formats)
• PDF files (.pdf format)
• Flash files (.swf format)
• Text files (.txt format)
Note: Only PowerPoint and Excel files are divided into multiple slides when imported
(provided that the original file contains multiple pages). Other files are imported as a
single slide.
1. Create or open a Studio presentation project.
2. Click the Studio tab.
3. Click the tab in the Library.
4. Click . The Import Slides/URL dialog box opens.
Studio Mode
5. Click Add Files, then locate and open the files you want to import.
• You can remove a file from the list of files to be imported by selecting it in the list,
then clicking Delete.
• Convert PowerPoint slides to images: Check this option to ensure that PowerPoint
slides appear exactly as in the original PowerPoint presentation. (Animations are not
supported when slides are converted to images.)
• Home page of the zipped web pages: Enter the home page of the zipped website.
(This file is often named “Index.html”.)
• To add a URL, enter the URL, then click Add URL.
Note: Make sure your URL begins with the proper prefix (such as “http://”).
59
Page 84

CyberLink StreamAuthor
6. Click OK.
Manage Clips in the Library
Once clips are imported into the Library, there are a number of ways that you can manage
them.
Re-Order Slides in Your Presentation
Once you have imported slides into the Library, you can re-order them before you insert them
into the Library, to ensure that your presentation is ordered correctly.
To re-order slides in the Library, drag a slide to a new position.
Delete a Clip from the Library
To delete a clip from the Library, do this:
1. Click the tab or the tab in the Library.
2. Right-click a clip, then select Delete.
60
Page 85

Insert a Clip from the Library into the Timeline
To insert a clip from the Library in the Timeline, do this:
1. Click the tab or the tab in the Library.
2. Right-click the clip you want to insert, then click Insert in Timeline. The Clip Timeline
Position dialog box opens.
3. Enter a precise position in the Timeline, then click OK. The clip is added to your
presentation at the position you have specified.
Edit a Slide in the Library
To edit a slide in the Library, do this:
1. Click the tab in the Library.
2. Right-click the slide, then select Edit....
3. The slide appears in a PowerPoint window.
4. Edit then save the slide. The slide is updated in the Library to reflect your edits.
Studio Mode
61
Page 86

CyberLink StreamAuthor
View the Properties of a Clip in the Library
To view the properties of a clip in the Library, do this:
1. Click the tab or the tab.
1. Right-click the clip, then select Properties.
• If you select a media clip, the Media Properties dialog box opens.
• If you select a slide, the Slide Properties dialog box opens.
2. Click OK.
62
Page 87

Convert an Audio/Video Clip to WMV Format
To convert an audio/video clip to WMV format, do this:
1. Click the tab in the Library.
2. Right-click the clip, then select Convert to WMV. The Convert Clip dialog box opens.
3. Select en encoding profile from the list.
4. Enter the directory in which you would like to save the new file.
• Click Browse... to locate the directory.
• To import the converted file into the Library after conversion, check the Import the
converted clip into the Library option.
5. Click Convert. The file is converted to WMV format.
• To play the converted file, click Play Converted File.
Studio Mode
63
Page 88

CyberLink StreamAuthor
Inserting Content into the Timeline
The Studio window contains a Timeline, in which you can organize your presentation. This
section describes the functions available using the Timeline in the Studio window.
Note: This Timeline is somewhat simpler than the Timeline in the Author window, though
some of the functions are shared. For more information on Timeline functions, see Using
the Timeline on p.29.
Insert Your Entire Presentation into the Timeline
To insert your entire presentation into the Timeline, do this:
1. Click the tab in the Library.
2. Press Ctrl + A inside the Slides pane to select your entire presentation.
3. Drag your entire presentation from the Library into the Timeline.
Insert a Clip Anywhere in the Timeline Using Drag-and-Drop
This is the arguably the most natural way to insert a clip in the Timeline.
To insert a clip anywhere in the Timeline, drag it from the Library to the desired position in
the Timeline. The dropped clip overwrites any clip (or portion of a clip) that may happen to
lie at the point of insertion.
Insert a Clip in the Timeline at the Timeline Slider Position
This is the quickest way to insert a clip in the Timeline.
Note: You can only insert single clips using this method.
To insert a clip in the Timeline at the Timeline slider position, do this:
1. Position the Timeline slider to the point at which you want to insert the new clip.
2. Double-click the clip you want to use. The clip is inserted in the Timeline at the position
of the Timeline slider.
64
Page 89

• You can also insert a slide at the current Timeline slider position by selecting the slide,
then clicking . To insert the following slide, click .
Insert a Clip in the Timeline Precisely
This is the most precise way to insert a clip in the Timeline.
To insert a clip in the Timeline precisely, do this:
1. Right-click the clip you want to insert, then click Insert in Timeline. The Clip Timeline
Position dialog box opens.
Enter a precise position in the Timeline, then click OK. The clip is added to your presentation
at the position you have specified.
Studio Mode
65
Page 90

CyberLink StreamAuthor
Insert a Blank Slide into the Timeline
You can insert a blank slide into your presentation, then use the pen and text tools to add
color, shapes, and wording. You can insert and create a blank slide at any point in the
Timeline.
To insert a blank slide into the Timeline, do this:
1. Create or open a Studio presentation project.
2. Click . The Slides pane displays a blank slide.
3. Use the drawing and text tools to create your slide. For more information, see Insert a
Blank Slide While Recording on p.20.
66
Page 91

Add a Watermark
A watermark is an image that appears on top of your presentation. Often it is a company logo
or copyright information. You can use any image file in .bmp, .gif, .jpg, or .jpeg formats
To add a watermark, do this:
1. Right-click the media clip in the Timeline, then select Watermark.... The Watermark
dialog box opens.
2. Click Browse... to locate the image you would like to use as a watermark.
• Drag the watermark to the desired position.
• Drag one of the corners to freely resize the watermark.
• To modify the opacity of the image, drag the Opacity slider.
3. Click OK.
Studio Mode
67
Page 92

CyberLink StreamAuthor
Remove a Watermark
To remove a watermark, do this:
1. Right-click the media clip in the Timeline, then select Watermark.... The Watermark
dialog box opens.
2. Click Remove Watermark, then click OK.
Navigating in the Timeline
You can navigate to different positions in the Timeline.
To navigate in the Timeline, do one of the following:
• Click anywhere on the Timeline ruler to place the slider at that position.
• Click to jump to the previous clip edge.
• Click to jump to the next clip edge.
• Drag the Timeline slider to zoom in or zoom out on the Timeline. Zooming out allows
you to take in your entire presentation, while zooming in allows you to view more
detail.
68
Page 93

Delete a Clip in the Timeline
To delete a clip in the Timeline, do one of the following:
• Right-click the clip, then select Delete.
• Select the clip, then press the Delete key.
• To clear the Timeline of all clips, choose the Edit > Clear Timeline command or right-
click on any track and choose Clear Timeline.
Move a Clip in the Timeline Quickly
To move a clip in the Timeline quickly, drag and drop it to a new location. Moving a clip in a
track also moves all of the following clips in the same track in the Timeline, as well as all clips
in tracks below it that have been inserted within that clip’s duration. This allows you to
synchronize all of your clips automatically.
Move a Clip in the Timeline Precisely
This is the most precise way to move a clip in the Timeline.
To move a clip in the Timeline precisely, do this:
1. Right-click the clip, then select Time Adjustment. The Clip Timeline Position dialog box
opens.
2. Enter a new time position, then click OK.
Studio Mode
69
Page 94

CyberLink StreamAuthor
Rename a Clip in the Timeline
To rename a clip in the Timeline, do this:
1. Right-click the clip, then select Rename.
2. Enter a new name, then press the Enter key.
Insert a Pause Marker in the Timeline
Inserting a pause marker in the Timeline pauses your presentation during playback when the
Timeline slider reaches the pause marker position. You may wish to insert a pause marker at a
certain point to initiate a discussion, or for a question and answer session or an intermission.
When you are ready to resume playback of the presentation, simply press OK in the message
that appears.
To insert a pause marker in the Timeline, do this:
1. Drag the Timeline slider to the point at which you want to insert a pause marker.
2. Click . The Pause Marker Settings dialog box opens.
3. Enter the text you would like to display.
• If necessary, you can enter a precise Timeline position in the entry boxes.
4. Click OK.
70
Page 95

Insert a Transition into the Timeline
Transition effects add a touch of professionalism to your presentation as you progress from
one slide to the next. You can insert a transition effect between two adjacent video or image
clips in the Video track in the Timeline.
To insert a transition into the Timeline, do this:
1. Create or open a Studio presentation project, then click the tab.
2. Drag the transition between two clips in the Video track.
• To extend the length of the transition effect, drag one of its edges.
Add Notes to a Slide
The notes you add to your PowerPoint presentation automatically appear in StreamAuthor’s
Notes pane. You can also add notes to accompany a slide in your presentation.
To add notes to a slide in the Timeline, do this:
1. Create or open a Studio presentation project, and add a slide to the Timeline.
2. Select the slide in the Timeline or position the Timeline slider within the slide.
3. Enter your notes in the Notes pane.
Studio Mode
Editing Clips in the Timeline
The same editing functions are available in the Timeline in the Studio window that are
available in the Timeline in the Author window. For more information, see Editing Clips in
the Timeline on p.33.
Capturing in the Studio Window
You can capture video and audio in Studio mode. You mostly likely may wish to use this
function to record video or audio while watching your presentation, in order to ensure that
your media synchronizes with your presentation.
71
Page 96

CyberLink StreamAuthor
Capture Video in the Studio Window
You can capture video from a variety of sources.
To capture video in the Studio window, do this:
1. Create or open a Studio presentation project.
2. Click .
3. Click . The Device Configuration dialog box opens.
4. Uncheck the Audio only option.
5. Modify your capture configuration if necessary, then click OK. For more information,
see Configure Your Capture Devices on p.23.
Note: Make sure that your capture device is connected, turned on, and ready to record.
6. Click to begin recording.
• To modify the recording volume, click (next to the Record button), then drag the
slider up to increase recording volume or down to decrease recording volume. Click
to mute the recording volume. Click to unmute the recording volume.
7. Click to stop recording.
72
Page 97

Take a Snapshot of Video Playback
You can capture a single frame from a video clip as a .bmp file.
To take a snapshot of a video clip, do this:
1. Begin playback or navigate to the frame you want to capture.
2. Click . The current frame of video is captured.
Note: To use this image in your presentation, you must import it into the Library. For more
information, see Import Media Files into the Library on p.54.
Insert a Display Image
If you have no video to accompany your presentation, you can insert a display image that
appears during your entire presentation.
Note: If any content is inserted into the Video track in the Timeline, the display image will
not appear in your final presentation.
To insert a display image, do this:
1. Create or open a Studio presentation project.
2. Click in the Preview pane.
Studio Mode
3. Locate and open the image file you want to use as a display image.
73
Page 98

CyberLink StreamAuthor
Capture Audio from a Capture Device in the Studio Window
To capture audio from a capture device in the Studio window, do this:
1. Create or open a Studio presentation project.
2. Click .
3. Click . The Device Configuration dialog box opens.
Note: Make sure that your capture device is connected, turned on, and ready to record.
4. Check the Audio only option.
5. Modify your capture configuration if necessary, then click OK. For more information,
see Configure Your Capture Devices on p.23.
6. Click to begin recording.
• To modify the recording volume, click , then drag the slider up to increase
recording volume or down to decrease recording volume. Click to mute the
recording volume. Click to unmute the recording volume.
7. Play your audio source.
8. Click to stop recording.
74
Page 99

Record a Voice-Over Narration in the Studio Window
To record a voice-over narration in the Studio window, do this:
1. Create or open a Studio presentation project.
2. Navigate to a section of the Timeline in which there is no audio clip in the Audio track.
3. Click in the Audio track. A three-second countdown appears in the Preview window
to allow you to prepare for recording.
4. Recite your narration into your microphone.
5. Click in the Audio track to stop recording.
Studio Mode
75
Page 100

CyberLink StreamAuthor
Preview Your Production
You can preview your presentation at any time during the authoring process in order to
ensure that your editing is going smoothly. Using the Timeline slider, you can start your
preview from any point within the presentation.
1. Locate the point at which you want to begin your preview.
2. Click Play. The preview starts in the Preview window from the point you have specified.
• To preview the entire presentation, use the playback controls.
76
• To maximize the current slide in the Preview pane, click . The video window
disappears.
• To switch panes that display the test and the video preview, click . The video and
slide previews exchange panes.
• If your presentation contains a test, you can preview the test in the Preview window.
To simulate taking the test, answer the questions accordingly. After you have
responded to all of the questions, click Finish. A message box appears. Click OK.
Your simulated test results appear in the Preview pane. Click Continue. The
presentation continues playing in the Preview pane. To view the test results, click .
A window opens, displaying the test results.
 Loading...