

Page 1

CyberLink
PresenterLink+
User's Guide
Page 2

Copyright and Disclaimer
All rights reserv ed.
To the e xtent allowed by law, PresenterLink+ IS PROVIDED “AS IS”, W ITHOUT W ARRANTY OF
ANY KIND, EITHER E XPRES S OR IMPLIED, INCLUDING W ITHOUT LIMITAT ION ANY W ARRANTY
FO R INFO RMATION, S ERVICES, OR PRODUCTS PRO VIDED THROUGH O R IN CONNECTION
W ITH PresenterLink+ AND ANY IM PLIED W ARRANTIES O F ME RCHANTABILITY, FITNESS FOR A
PARTICULAR PURPOSE, E XPECTATIO N OF PRIVACY, OR NO N-INFRINGEM ENT.
BY USING THIS S OFTW ARE, YO U AGREE T HAT CYBERLINK W ILL NOT BE LIABLE FO R ANY
DIRECT, INDIRECT, OR CONSE QUENTIAL LOSS ARISING FROM THE USE OF THIS SO FTW ARE
OR M ATERIALS CONTA INED EITHER IN THIS PA CKAGE.
The terms and conditions here under shall be gov erned and construed in accordance with the
laws of Taiwan.
PresenterLink+ is a registered trademark along with other company and product names
mentioned in this publication, used for identification purposes and remain the exclusiv e
property of their res pectiv e owners.
Manufactured under license from Dolby Laboratories. Dolby and the double-D symbol are
registered trademarks of Dolby Laboratories. Confidential unpublished works. Copyright
1995- 2005 Dolby Laboratories. All rights rese rv ed.
Manufactured under license under U.S . Patent #’s : 5,451,942; 5,956,674; 5,974,380; 5,978,762;
6,226 ,616; 6,487,535; 7,003,467 ; 7,212,87 2 & other U.S. and worldwide patents iss ued &
pending. DTS and DTS Digital Surround are registe red trademarks and the DTS logos, Sym bol
and DTS 96/24 are trademarks of DTS , Inc. © 199 6-2007 DTS , Inc. All Rights Reserv ed.
Manufactured under license under U.S . Patent #’s : 5,451,942; 5,956,674; 5,974,380; 5,978,762;
6,226 ,616; 6,487,535 & other U.S. and worldwide patents issued & pending. DTS is a registere d
trademark and the DTS logos, Sy mbol, DTS-HD and DTS- HD Master A udio are trademarks of
DTS, Inc. © 1996-20 07 DTS, Inc. All Rights Rese rve d.
International Headquarters
Mailing Address CyberLink Corporation
15F., No. 100, Minquan Rd., Xindian Dist.
New Taipei City 231, Taiwan (R.O.C.)
Web Site http://www.cyberlink.com
Telephone 886-2-8667-1298
Fax 886-2-8667-1385
Copyright © 2016 CyberLink Corporation. All rights reserved.
Page 3

Contents
Introduction
................................................................................................1Welcome
................................................................................................1Updating PresenterLink+
................................................................................................2System Requirements
Setting Up PresenterLink+
Enabling PresenterLink+ With Video Conferencing
Services
................................................................................................4
Preparing Presentations
................................................................................................6Importing PowerPoints and Images
................................................................................................7Managing Slides
................................................................................................9PresenterLink+ Projects
..................................................1
..................................................4
..................................................6
Presenting and Recording
Presentations
Presenting to Local Audience on Extended
Monitor/Projector
Broadcasting to Global Audience Via Video
Call/Conference
..................................................10
................................................................................................11Presenting a Presentation to an Audience
..............................................................................................11
..............................................................................................12
................................................................................................13Recording a Presentation
..............................................................................................14Recording Additional Content
................................................................................................15Presentation Tools
..............................................................................................15Configuring Webcam Video Display
..............................................................................................16Adding Annotations
..............................................................................................16Presenting Your Desktop
..............................................................................................17Taking a Break/Be Right Back
..............................................................................................17Full Screen Toolbar
i
Page 4

Cyb erLink Presen terLink+ Help
Editing and Producing
Presentations
Editing Video Clips on the Storyboard (Record to
Replace)
PresenterLink+ Settings
PresenterLink+ Hotkeys
Technical Support
..................................................18
................................................................................................19Previewing Presentations
................................................................................................19Editing Presentations
..............................................................................................19Rearranging Clips in the Storyboard
..............................................................................................20
..............................................................................................21Deleting Slides From Presentations
................................................................................................21Outputting Presentations as a Video File
..................................................22
................................................................................................22Camera/Microphone Settings
..................................................23
..................................................24
................................................................................................24Before Contacting Technical Support
................................................................................................25Web Support
................................................................................................25Help Resources
ii
Page 5

Introduction
Note: this document is for reference and informational use only. Its content
and the corresponding program are subject to change without notice.
Chapter 1:
Introduction
This chapter provides an introduction to CyberLink PresenterLink+, outlines its key
features, and reviews the minimum system requirements for the program.
Welcome
Welcome to the CyberLink family of digital media tools. CyberLink PresenterLink+ is
a tool that helps users create, present, and record video presentations.
Within CyberLink PresenterLink+ you can:
· import PowerPoint slides and images to quickly create presentations from
other sources.
· show presentations to a local audience via an extended monitor or projector.
· broadcast presentations to a global audience via your video conferencing
services, such as Skype, Google Hangouts, YouTube Live Events, WebEx,
Join.me, and more.
· record videos presentations that can be edited and then outputted as video
files in the MP4 format.
· add annotations over presentation slides and live webcam video.
· share your computer's desktop within the presentation for demonstration and
reference purposes.
Updating PresenterLink+
Software updates (patches) are periodically available from CyberLink, so make sure
you have the latest version installed. To determine your version of CyberLink
PresenterLink+, click on the PresenterLink+ logo in the top right corner.
To update your software, do this:
1
Page 6
Cyb erLink Presen terLink+ Help
Minimum System R equirements
OS
· Microsoft Windows 10/8.1/8/7.
Memory
· 4 GB required.
CPU
· Intel 2nd generation Intel Core i5 or above
Note: PresenterLink+ is optimized for 2nd ~ 6th generation
Intel® Core™ processors with Intel QuickSync video
technology.
· For desktop presenting or recording, Intel Core i5-4200U
CPU, AMD A10-5750M APU, or above are recommended
HDD S pace
· 150 MB required.
GPU
· Intel HD Graphics (Independent graphics card
recommended).
· For 720p or above video camera, the VGA must support
H.264/AVC Hardware Acceleration features.
· For desktop presenting or recording, Intel HD Graphics
3000, Nvidia GT 330, AMD HD 4250 or above are
recommended.
Screen
Resolution
· 1024x768, 16-bit color or above.
Capture D evice
· Web camera (built-in or external USB) and a microphone
device.
Supported
· Skype, Skype for Business, Google Hangouts, LINE,
1. Click the button to open the Notifications window.
2. Check the New Updates and U pgrade Info sections.
3. Select an item in these sections to open your web browser, where you can
purchase product upgrades or download the latest patch update.
System Requirements
The system requirements listed below are recommended as minimums for running
CyberLink PresenterLink+.
2
Page 7

Introduction
Video
Conferencing
Services
Facebook, WebEx, Join.me, GotoMeeting.
Other Software
· Microsoft ®PowerPoint 2007 or above is required.
Note: to ensure you can enjoy all the features in CyberLink PresenterLink+,
make sure your computer meets or exceeds the minimum system
requirements.
3
Page 8

Cyb erLink Presen terLink+ Help
Chapter 2:
Setting Up PresenterLink+
Before you get started presenting and recording presentations, be sure to set up
CyberLink PresenterLink+ as follows, to get the most out of the program:
· set the camera and microphone used to record and broadcast your
presentation. See Camera/Microphone Settings for more information.
· enable CyberLink PresenterLink+ with your video conferencing service, such
as Skype, Google Hangouts, etc. See Setting up PresenterLink+ With Video
Conferencing Services for more information.
Enabling PresenterLink+ With Video Conferencing Services
When on a video call or conference using a video conferencing service on your
computer, you can broadcast a presentation with CyberLink PresenterLink+. Before
you can do this however, you must first enable PresenterLink+ by selecting it as the
microphone and video camera used with your video conferencing services.
The following examples demonstrates how to enable CyberLink PresenterLink+
within Skype and Google Hangouts.
To set up Skype, do this:
1. In the Skype main window, select Tools > Options > Video settings.
2. On this page, select Camera for V ideoMeeting+/PresenterLink+ from the
select webcam drop-down menu.
3. Select Audio settings from the settings list on the left.
4. On this page, select Microphone for VideoMeeting+/PresenterLink+ from the
Microphone drop-down menu.
5. Click the Save button to save your changes.
To set up Google Hangouts, do this:
1. Start a video call in Google Hangouts.
4
Page 9

Setting Up Presente rLink+
Note: depending on the version of Skype or Google Hangouts, the procedure
to set up CyberLink PresenterLink+ may be different. If you want to use a
different video conferencing service, the set up procedure to enable
CyberLink PresenterLink+ will differ. Consult the help for the video
conferencing service you are using and see the section on selecting a
webcam/microphone, video/audio settings, or something similar.
2. In the video call main window, select to enter settings.
3. Select Camera for VideoMeeting+/PresenterLink+ from the select Video drop-
down menu.
4. Select Microphone for VideoMeeting+/PresenterLink+ from the select
Microphone drop-down menu.
5. Click the Done button to save your changes.
Once enabled, you can start using CyberLink PresenterLink+ to broadcast
presentations within a Skype video call and on YouTube (YouTube Live Events)
using Google Hangouts On Air. See Broadcasting to Global Audience Via Video Call/
Conference for more information.
5
Page 10
Cyb erLink Presen terLink+ Help
Chapter 3:
Preparing Presentations
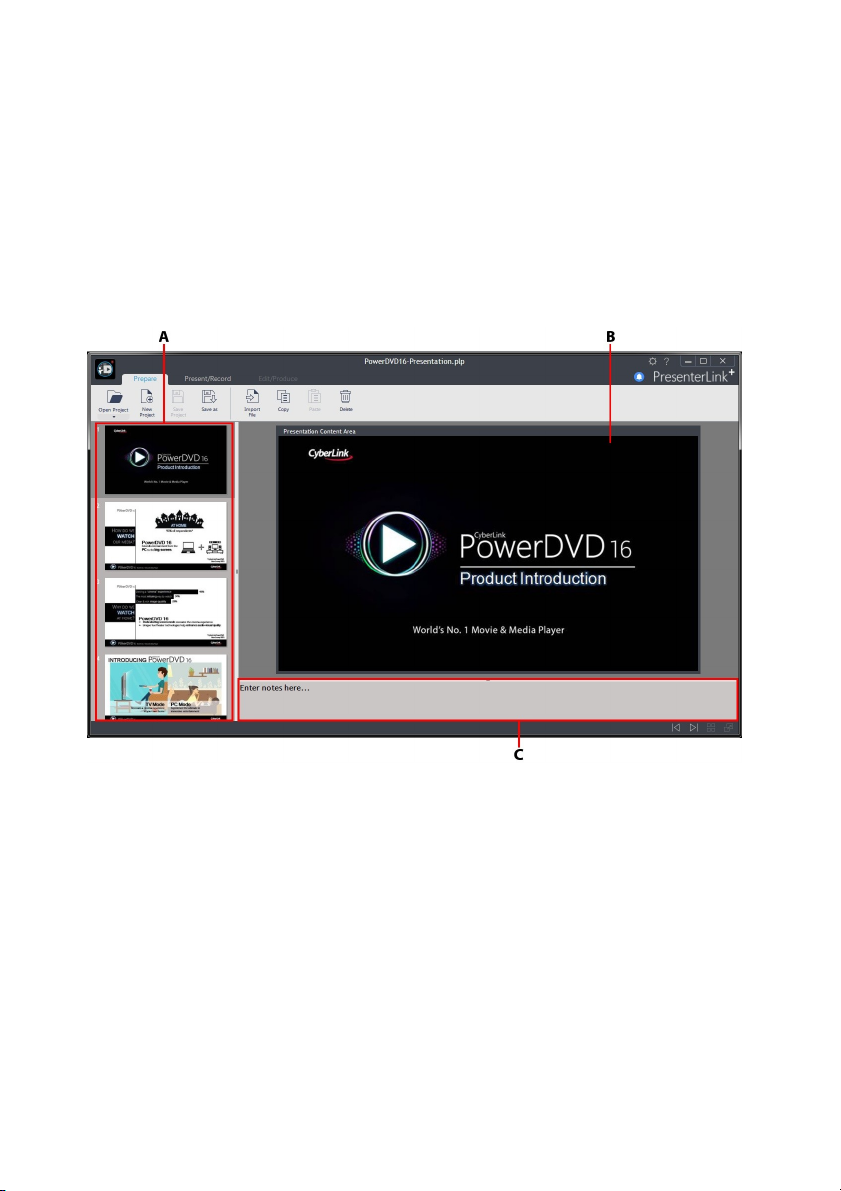
Go to the Prepare tab to start preparing your presentation. Here you can import
PowerPoint slides or images, and then manage the slides as necessary to prepare
your presentation. The Prepare window displays as below:
A - P resentation Slides Pane, B - P resentation Preview Window, C - Presenter Notes Pa ne
Importing PowerPoints and Images
You can import existing PowerPoint slides or images directly into CyberLink
PresenterLink+. During the import process, each PowerPoint slide/image is
converted to a PresenterLink+ presentation slide and placed in the presentation
slides pane on the left.
6
Page 11
Preparing Presentation s
Note: the aspect ratio of your presentation, and any recorded videos, is
determined by the aspect ratio of the first slide imported into a new project.
Note: you can also drag and drop files into the presentation slide pane on the
left to import them into the current project.
Note: CyberLink PresenterLink+ supports the import of PowerPoint files
(PPT and PPTX) and images in the BMP, JPEG, JPG, and PNG formats.
Note: at any time you can import additional PowerPoint slides or images into
your presentation. Just note that newly imported files are placed at the end of
the current presentation.
To import files, do this:
1. Select the I mport File button.
2. Select the PowerPoint or image file you want to import.
3. Click Open to import and convert the file into PresenterLink+ presentation
slides.
Managing Slides
Once you have all the PowerPoint slides and images imported into CyberLink
PresenterLink+ you can then manage the slides in your presentation by doing the
following tasks.
Rearranging Slides
You can rearrange the order of the slides by simply clicking them, and then
dragging and dropping them in a new position.
7
Page 12

Cyb erLink Presen terLink+ Help
Deleting Existing Slides
You can delete any of the slides in your presentation by selecting them, and then
clic king the Delete button above the presentation preview window.
Adding Presenter Notes
Each slide in your presentation includes a section for presenter notes. Just use the
field provided to enter any notes or points you want to remember while you are
making the presentation. The presenter notes will not be displayed to the audience
during the actual presentation.
8
Page 13

Preparing Presentation s
Note: when opening an existing project, click the down arrow beneath the
Open Project button to find a list of the most recent projects.
PresenterLink+ Projects
When working on a new video presentation, click the Save Pr oject button to save it
as a .plp file, a project file format that is used exclusively by CyberLink PresenterLink
+. You can also use the available options to create new projects, save the current
one with a different name (Save As), or open existing projects.
9
Page 14

Cyb erLink Presen terLink+ Help
Chapter 4:
Presenting and Recording Presentations
Click on the Present/Record tab to show your presentation, or record a presentation
that can be outputted as video file. The Present/Record window displays as below:
A - P resentation Slides Pane, B - P resent/Rec ord Controls, C - Presentation Tool s, D - Presentation
Windo w, E - Go to Ful l Screen, F - Presentation Navigatio n Controls, G - Webca m Vid eo Disp lay
In the Present/Record window you can do the following three main tasks:
· Show a presentation to a local audience (in a meeting/conference room) on an
extended monitor or projector.
· Broadcast a presentation to a global audience via a Skype video call, Google
Hangouts, and more.
· Record a presentation that can be outputted as a video file.
10
Page 15

Presentin g and Reco rding Prese ntations
Note: before you can show a presentation on an extended monitor/projector,
make sure it is properly setup and connected, and that you enabled extend
desktop in the Windows Display Properties Settings (press Windows+P on
your keyboard and then select Extend). See the Windows help and device
manufacturer user manual for more detailed instructions.
Note: presentations are not automatically recorded when you are presenting
on an extended monitor/projector. You must also record the presentation if
you want a video recording of your presentation. See Recording a
Presentation for more information.
Note: if you have more than one display connected to your computer, you
must fir st cli ck under the Extend M onitor button and then select the
device you want to show the presentation on.
Presenting a Presentation to an Audience
Once you have your presentation ready, you can begin presenting it to your
audience. You can show a presentation by:
· Presenting it to a local audience (in a meeting/conference room) on an
extended monitor or projector. See Presenting to Local Audience on Extended
Monitor/Projector for more information.
· Broadcasting it to a global audience via a Skype video call, Google Hangouts,
and more. See Broadcasting to Global Audience Via Video Call/Conference for
more information.
Presenting to Local Audience on Extended Monitor/Projector
In CyberLink PresenterLink+ you can show a presentation on an extended monitor
or projector. Follow these steps when presenting to colleagues, students, a seminar,
etc. that are in the same room as you.
To present to a local audience on an extended monitor/projector, do this:
1. Prepare your presentation or open an existing presentation project. See
Preparing Presentations for more information.
2. Click on the Present/Record tab.
3. Next, click the Extend Monitor button.
11
Page 16

Cyb erLink Presen terLink+ Help
Note: if required you can click to switch to the grid view if you need to
quickly find a slide during your presentation.
Note: before you can broadcast your presentation, you must first enable
CyberLink PresenterLink+ in your video conferencing service. See Enabling
PresenterLink+ With Video Conferencing Services for details.
Note: presentations are not automatically recorded when you are
broadcasting in a video call/conference. You must also record the
presentation if you want a video recording of your presentation. See
Recording a Presentation for more information.
4. When you are ready, click the Start Presentation button. The content in the
presentation window will display on the extended monitor/projector.
5. Begin your presentation. You can go through your presentation by:
· clicking on the slides in the presentation slides pane.
· using the presentation navigation controls and to go through the
slides.
· using the up/down arrow keys on your keyboard to go through the slides.
6. If required, use the Presentation Tools to add annotations, present your
computer's desktop, and more.
7. When you are finished your presentation, click the Stop Presentation button
to stop the presentation.
Broadcasting to Global Audience Via Video Call/Conference
In CyberLink PresenterLink+ you can broadcast a presentation through a video
conferencing service, such as Skype, Google Hangouts, and many more.
To broadcast your presentation via video call/conference, do this:
1. Prepare your presentation or open an existing presentation project. See
Preparing Presentations for more information.
2. Click on the Present/Record tab.
3. Start the video call or conference through your video conferencing service.
4. When you are ready, click the Start Presentation button. The content in the
12
Page 17

Presentin g and Reco rding Prese ntations
Note: if your presentation is not displaying in the video call/conference, it
may be because you have not enabled CyberLink PresenterLink+ in your
video conferencing service. See Enabling PresenterLink+ With Video
Conferencing Services for details.
Note: when you are broadcasting your presentation in a video call/
conference, the content will display as the mirror opposite in your video
conferencing window view. However, your presentation will be seen by your
audience in the correct orientation.
Note: if required you can click to switch to the grid view if you need to
quickly find a slide during your presentation.
Note: you can only record one presentation video for each PresenterLink+
project. If you want to record a second video for a prepared presentation, go
to the Prepare window and then click the Save as button to create a new
project first.
presentation window will display in the video call/conference to your
audience.
5. Begin your presentation. You can go through your presentation by:
· clicking on the slides in the presentation slides pane.
· using the presentation navigation controls and to go through the
slides.
· using the up/down arrow keys on your keyboard to go through the slides.
6. If required, use the Presentation Tools to add annotations, present your
computer's desktop, and more.
7. When you are finished your presentation, click the Stop Presentation button
to stop the presentation.
Recording a Presentation
You can record a presentation while it is being presented to a local audience,
broadcast through a video conferencing service, or offline for later use.
To record a presentation, do this:
1. Prepare your presentation or open an existing presentation project. See
Preparing Presentations for more information.
2. Click on the Present/Record tab.
13
Page 18

Cyb erLink Presen terLink+ Help
Note: you do not have to be presenting a presentation to an audience to
record it. If you are not presenting to an audience, just skip the above step.
Note: if required you can click to switch to the grid view if you need to
quickly find a slide during your presentation.
Note: each time you select or go to a different slide in your presentation,
CyberLink PresenterLink+ starts recording a new video clip. Each of these
clips can then be edited later if required. See Editing Presentations for more
information.
Note: you can also pause the recording process by clicking the Pause
button. Just clic k Resume once you want to continue recording the
presentation.
3. If you want to present your presentation to an audience while recording, click
the Start Presentation button. See Presenting a Presentation to an Audience
for detailed information.
4. When you are ready, click the Record button to starting.
5. Begin your presentation by speaking into your microphone and going
through the slides. You can go through your presentation slides by:
· clicking on the slides in the presentation slides pane.
· using the presentation navigation controls and to go through the
slides.
· using the up/down arrow keys on your keyboard to go through the slides.
6. If required, use the Presentation Tools to add annotations, present your
computer's desktop, and more.
7. When you are finished your presentation, click the Stop button to stop the
recording.
Recording Additional Content
When you have finished your presentation, you may find that there is additional
information or slides you want to include in the final recorded presentation video.
You can add this additional content by:
· starting the recording process again from a specific slide in your current
presentation.
14
Page 19

Presentin g and Reco rding Prese ntations
Note: if you want to rerecord content from your presentation, you can just use
record to replace. See Editing Video Clips on the Storyboard (Record to
Replace) for more information.
Note: if the webcam video is streaming from the wrong device, you can
change the webcam feed in Camera/Microphone Settings.
· importing additional PowerPoint slides or images into the current
presentation. Then just record the new segment using the newly imported
content.
When you are done recording the additional content, click Stop. The new video clip
will be placed at the end of the current storyboard in the Edit/Produce window,
where you can edit it in your final presentation video.
Presentation Tools
While presenting and recording presentations, there are several tools and features
you can use to enhance your presentation. In the Present/Record window you can:
· modify or show your webcam's video. See Configuring Webcam Video Display
for more information.
· draw within the presentation window and webcam video to annotate and
highlight important points. See Adding Annotations for more information.
· present your desktop in a presentation. See Presenting Your Desktop for more
information.
· pause presentations using the "Be right back" feature. See Taking a Break/Be
Right Back for more information.
Configuring Webcam Video Display
When you enter the Present/Record window, video from a connected webcam will
begin displaying in the bottom right corner of the current slide in the presentation
window. This allows for the viewing audience during videos calls/conferences and
recordings to see the presenter.
There are several options available for this webcam video:
· click on the webcam video window and drag it to a different position in the
presentation window.
15
Page 20

Cyb erLink Presen terLink+ Help
Note: all annotations on the current slide will disappear when you go to the
next slide. If you return to the previous slide, the annotations will not be
available. You can also click Undo to remove the last annotation, or Reset to
clear all the annotations on the current slide.
Note: the PresenterLink+ mini toolbar is available at the top of your
computer's desktop when in present desktop mode, allowing you to add
annotations on your desktop, and more.
· click to display the webcam video at full screen in the presentation
window. The viewing audience will only see the webcam video when at full
screen. Click to restore the webcam video window.
· click to hide the webcam video window from your audience. Click to
once again show the webcam video to your viewing audience.
Adding Annotations
When presenting and recording presentations, click the Annotate button to enable
annotations and turn your mouse into a virtual pen. You can then draw within the
presentation window by clicking and dragging your mouse. Use this feature to
highlight specific points, draw on a slide, etc. To disable annotations, just click the
Annotate button again.
Setting Annotation Options
Click the down arrow below the Annotate button to set the following options:
· Color: set the color of the line the virtual pen will draw the next time you click
and drag your mouse in the presentation window.
· Size: set the size of the line the virtual pen will draw the next time you click
and drag your mouse in the presentation window.
Presenting Your Desktop
During your presentation, click the Present D esktop button to show your audience
your computer desktop in the presentation window. Your desktop will be broadcast
to your audience and/or recorded in your video presentation, allowing you to
perform a software demonstration, show media on your computer, etc.
Click the button on the PresenterLink+ mini toolbar to return to presentation
16
Page 21

Presentin g and Reco rding Prese ntations
Note: switching to full screen mode does not affect the view seen by your
audience or content in your recorded video.
mode.
Taking a Break/Be Right Back
While presenting to an audience, click the B e Right B ack button if you want to take
break. Once clicked, a selected background image is displayed on your extended
monitor/projector and is broadcast in your video call/conference. To resume your
presentation, click the Continue Presentation button in the bottom right corner of
the presentation window.
Changing the Be Right Back (BRB)
Background Image
Click the down arrow below the B e Right Back button to change the background
image used when Be Right Back is enabled. You can just select from the available
images, or clic k I m port More B R B I m ages to import a custom background from
your computer's hard drive.
Full Screen Toolbar
When presenting and recording presentations, you can click to view your
presentation at full screen on your display, hiding the presentation slides pane and
the toolbar.
When in full screen mode, the full screen toolbar displays at the top of the
presentation window, providing access to the navigation and present/record
controls, and the presentation tools.
Click the button or press the Esc key on your keyboard to exit full screen mode.
17
Page 22

Cyb erLink Presen terLink+ Help
Chapter 5:
Editing and Producing Presentations
Click on the Edit/Produce tab to preview and edit a recorded presentation, and then
output it as video file on your computer.
A - P rodu ce Vi deo, B - Preview Window , C - P layer Con trols, D - Storyboard
When a presentation is recorded, each time you selected or went to a different slide,
CyberLink PresenterLink+ recorded a new video clip. Each of these video clips is
available in the storyboard in the Edit/Produce window.
The length of each video clip is equal to the length of time you remained on that
slide in your presentation. In the Edit/Preview window, you can preview, rearrange,
rerecord, or delete any of these clips before producing.
18
Page 23

Editin g and Produ cing Presentation s
Previewing Presentations
In the Edit/Produce window use the player controls to play back your recorded
video presentation.
To browse through the presentation, just select each of the video clips in the
storyboard at the bottom of the window, or use the and controls. Click the
button to play back the presentation from the beginning of the currently
selected slide.
Editing Presentations
Video presentations that you recorded can be edited, allowing you to replace
specific video clip, and rearrange or delete the video clips.
Rearranging Clips in the Storyboard
If required, you can rearrange the order of the clips in the storyboard. To do this,
just click and drag them to different positions.
19
Page 24

Cyb erLink Presen terLink+ Help
Note: video clips in the storyboard cannot be manually trimmed in CyberLink
PresenterLink+. If you want to make a clip shorter, you must rerecord the
video clip.
Editing Video Clips on the Storyboard (Record to Replace)
You can edit a video clip on the storyboard by rerecording the webcam video, voice
over audio, and added annotations on the presentation slide.
When you are done, the clip will be inserted into your presentation at the same
position as the previous video clip.
To edit a video clip on the storyboard, do this:
1. Select the video clip in the storyboard that you want to replace/rerecord.
2. Click the icon that's on the slide thumbnail. The Edit window displays.
3. When you are ready, click the Record Again button and then record the new
content as required by speaking into your microphone.
4. Click Annotate to add annotations on the new video clip. See Adding
Annotations for detailed information.
5. Click the Stop button when you're finished.
6. Click OK to close the Edit window and replace the selected video clip on the
storyboard with the newly recorded clip.
20
Page 25

Editin g and Produ cing Presentation s
Deleting Slides From Presentations
You can delete video clips on the storyboard and from your recorded presentations.
To delete a video clip, do this:
1. Select the video clip in the storyboard that you want to delete.
2. Click the icon that's on the video clip thumbnail.
3. Click Yes to delete the video clip from the storyboard and your recorded
presentation.
Outputting Presentations as a Video File
Once you are done recording, previewing, and editing your presentation, you can
output is as video file in the MP4 format.
To output your presentation, do this:
1. On the Edit/Produce tab, click the Produce button above the preview window.
2. If required, set the output folder where the produced video file will be saved.
Click the button to change the output folder.
3. Click on Produce. CyberLink PresenterLink+ will produce the video file, and
save it to the specified location.
Once the production is complete, click the Open Folder link to view the outputted
file in its saved location.
21
Page 26

Cyb erLink Presen terLink+ Help
Chapter 6:
PresenterLink+ Settings
To configure the settings in CyberLink PresenterLink+, click the button in the
top right corner. Once you are done configuring the settings, select OK to set your
changes.
Camera/Microphone Settings
On the Camera/Microphone settings tab you can configure the following settings:
· Camera: select the web cam or other video recording device you want to use
to record/broadcast video from when using CyberLink PresenterLink+.
· Microphone: select the microphone or other audio recording device you want
to use to record/broadcast audio from when using CyberLink PresenterLink+.
22
Page 27

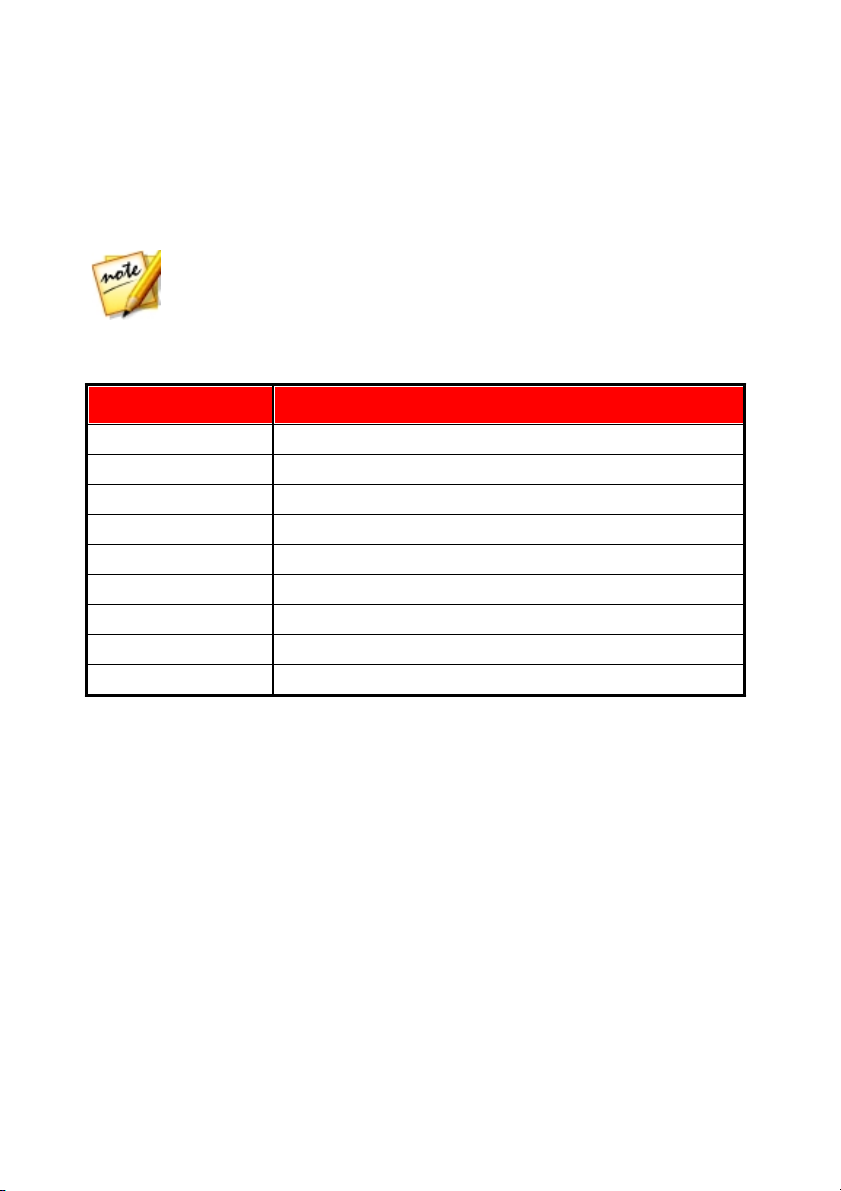
PresenterL ink+ Hotke ys
Hotkey
Description
Prepare Presentations Controls
Delete
Remove the current slide from the presentation.
Ctrl+C
Copy selected content.
Ctrl+V
Paste copied content.
Ctrl+S
Save the latest changes to the presentation.
Ctrl+A
Select all content.
Page Up/
Down, Up/
Down Left/
Right Arrow
Go to next/previous slide.
Present/Record Presentations Controls
Page Up/
Down, Up/
Down Left/
Right Arrow
Go to next/previous slide.
Ctrl+P
Toggle webcam on/off.
F5/Esc
Start/Stop presentation.
Editing Controls
Left/Right
Arrow
Scroll in the storyboard.
Chapter 7:
PresenterLink+ Hotkeys
This section lists all the hotkeys that are available in CyberLink PresenterLink+.
23
Page 28

Cyb erLink Presen terLink+ Help
Note: here are the steps to generate the system info DxDiag.txt file: Click
Windows (start) button, and then search for "dxdiag". Click Save All
Information button to save the DxDiag.txt file.
Chapter 8:
Technical Support
If you require technical support, then this chapter can help. It includes all the
information you need to find the answers you are looking for. You may also find
answers quickly by contacting your local distributor/dealer.
Before Contacting Technical Support
Before contacting CyberLink technical support, please take advantage of one or
more of the following free support options:
· consult the user’s guide or the online help installed with your program.
· refer to the Knowledge Base at the following link on the CyberLink web site:
http://www.cyberlink.com/support/search-product-result.do
· check the Help Resources page in this document.
When contacting technical support by e-mail or phone, please have the following
information ready:
· the product name, version and build number, which generally can be found
by clicking on the product name image on the user interface.
· the version of Windows installed on your system.
· list of hardware devices on your system (capture card, sound card, VGA card)
and their specifications. For fastest results, please generate and attach your
system info using the DxDiag.txt.
· the wording of any warning messages that were displayed (you may want to
write this down or take a screen capture).
· a detailed description of the problem and under what circumstances it
occurred.
24
Page 29
Technical Sup port
Note: you must first register as a member before using CyberLink web
support.
Language
Web Support UR L
English
http://www.cyberlink.com/cs-help
Traditional Chinese
http://tw.cyberlink.com/cs-help
Japanese
http://jp.cyberlink.com/cs-help
Spanish
http://es.cyberlink.com/cs-help
Korean
http://kr.cyberlink.com/cs-help
Simplified Chinese
http://cn.cyberlink.com/cs-help
German
http://de.cyberlink.com/cs-help
French
http://fr.cyberlink.com/cs-help
Italian
http://it.cyberlink.com/cs-help
Web Support
Solutions to your problems are available 24 hours a day at no cost on the CyberLink
web site:
CyberLink provides a wide range of web support options, including FAQs, in the
following languages:
Help Resources
The following is a list of help resources that may assist you when using any of
CyberLink's products.
· Acc ess CyberLink's Know ledge base and FAQ (frequently asked questions):
http://www.cyberlink.com/cs-resource
· View video tutorials for your software: http://directorzone.cyberlink.com/
tutorial/
· Ask questions and get answers from our users on the CyberLink Community
Forum: http://forum.cyberlink.com/forum/forums/list/ENU.page
25
Page 30

Cyb erLink Presen terLink+ Help
Note: CyberLink’s user community forum is only available in English and
German.
26
Page 31

Full screen 17
Index
Index
A
Annotations 16
Aspect ratio 6
B
Be right back 17
C
Camera
settings 22
Clips
rearranging 19
D
Desktop
presenting 16
E
G
Google Hangouts 4
H
Help 25
Hotkeys 23
I
Images 6
Import 6
K
Keyboard
hotkeys 23
M
Microphone
enabling 4
settings 22
Edit 19
F
File formats 6
P
PowerPoint 6
Prepare 6
Present 11
27
Page 32

Cyb erLink Presen terLink+ Help
Presentations
annotations 16
broadcasting 12
editing 19
local audience 11
meeting 11
output 21
pausing 17
prevewing 19
producing 21
recording 13
streaming 12
tools 15
Preview 19
Produce 21
Projects 9
R
Record
desktop 16
presentations 13
to replace 20
Render 21
importing 6
rearranging 7
System requirements 2
T
Take a break 17
Technical support 24
U
Updates 1
W
Web support 25
Webcam
display 15
enabling 4
settings 22
S
Setting up 4
Settings
Skype 4
Slides
28
Camera 22
Microphone 22
deleting from presentation 21
 Loading...