

Page 1

CyberLink
ColorDirector
User's Guide
Page 2

Copyright and Disclaimer
All rights reserved.
To the extent allowed by law, ColorDirector IS PROVIDED “AS IS”,
WITHOUT WARRANTY OF ANY KIND, EITHER EXPRESS OR IMPLIED,
INCLUDING WITHOUT LIMITATION ANY WARRANTY FOR
INFORMATION, SERVICES, OR PRODUCTS PROVIDED THROUGH OR IN
CONNECTION WITH ColorDirector AND ANY IMPLIED WARRANTIES OF
MERCHANTABILITY, FITNESS FOR A PARTICULAR PURPOSE,
EXPECTATION OF PRIVACY, OR NON-INFRINGEMENT.
BY USING THIS SOFTWARE, YOU AGREE THAT CYBERLINK WILL NOT BE
LIABLE FOR ANY DIRECT, INDIRECT, OR CONSEQUENTIAL LOSS
ARISING FROM THE USE OF THIS SOFTWARE OR MATERIALS
CONTAINED EITHER IN THIS PACKAGE.
The terms and conditions here under shall be governed and
construed in accordance with the laws of Taiwan.
ColorDirector is a registered trademark along with other company and
product names mentioned in this publication, used for identification
purposes and remain the exclusive property of their respective
owners.
Manufactured under license from Dolby Laboratories. Dolby and the
double-D symbol are registered trademarks of Dolby Laboratories.
Confidential unpublished works. Copyright 1995-2005 Dolby
Laboratories. All rights reserved.
International Headquarters
Mailing Address CyberLink Corporation
15F., No. 100, Minquan Rd., Xindian Dist.
New Taipei City 231, Taiwan (R.O.C.)
Web Site
Telephone 886-2-8667-1298
Fax 886-2-8667-1385
Copyright © 2015 CyberLink Corporation. All rights reserved.
http://www.cyberlink.com
Page 3

Contents
Introduction
................................................................................................1Welcome
.................................................................................................1Latest Features
.................................................................................................2DirectorZone and CyberLink Cloud
.................................................................................................2ColorDirector Versions
................................................................................................4System Requirements
Importing Videos
................................................................................................5Supported File Formats
................................................................................................5Importing Videos into the Program
................................................................................................6Downloading Videos from CyberLink Cloud
The ColorDirector Workspace
................................................................................................7ColorDirector Modules
.................................................................................................8Library
.................................................................................................8Adjustment
.................................................................................................8Production
................................................................................................8Library/Adjustment/Production Panel
.................................................................................................8Library Panel
.................................................................................................11Adjustment Panel
.................................................................................................11Production Panel
................................................................................................11Keyframe Settings Panel
................................................................................................11Storyboard Panel
................................................................................................12Video Viewer Window
.................................................................................................13Trimming Video Clips
..................................................1
..................................................5
..................................................7
i
Page 4

CyberL ink Co lorD irecto r
.................................................................................................14Detecting Scenes in Video Clips
.................................................................................................15Splitting Video Clips
.................................................................................................16Selecting Viewer Display Mode
.................................................................................................17Selecting View Mode
.................................................................................................17Viewer Zoom
.................................................................................................18Video Player Controls
ColorDirector Projects
................................................................................................21Setting Project Aspect Ratio
................................................................................................22Exporting Projects
................................................................................................22CyberLink Cloud Projects
Utilizing Keyframes
................................................................................................25Keyframe Timeline
.................................................................................................27Timeline Markers
................................................................................................29Adding Keyframes
.................................................................................................30Setting Keyframe Behavior
.................................................................................................31Modifying and Removing Keyframes
Making Video Adjustments
..................................................21
..................................................23
..................................................33
................................................................................................34Histogram
.................................................................................................34Applying Color Look-up Tables (CLUT)
.................................................................................................35Converting Videos to Black and White
.................................................................................................35Viewing Exposed Areas
................................................................................................36Regional Adjustment Tools
.................................................................................................36Using a Selection Mask
.................................................................................................41Using a Motion Tracking Mask
.................................................................................................46Using a Gradient Mask
.................................................................................................50Using a Radial Filter
.................................................................................................53Regional Adjustment Options
................................................................................................56Global Adjustment Tools
.................................................................................................56White Balance
.................................................................................................56Tone
ii
Page 5

.................................................................................................58HDR Effect
.................................................................................................59Curve
.................................................................................................60Detail
.................................................................................................61Hue
.................................................................................................61Saturation
.................................................................................................61Lightness
.................................................................................................62Black and White
.................................................................................................62Split Toning
.................................................................................................63Color Replacement
.................................................................................................64Blur
.................................................................................................64Tint Filter
.................................................................................................64Vignetting Effect
Using Adjustment Presets
.................................................................................................68My DirectorZone Presets
Turning Adjustments On/Off
..................................................67
................................................................................................67Downloading Presets from DirectorZone
................................................................................................68Downloading Presets from CyberLink Cloud
................................................................................................69Saving Custom Presets
................................................................................................69Applying Presets on Videos
................................................................................................70Sharing and Backing Up Presets
................................................................................................71Exporting/Import Presets
..................................................73
Production
.................................................................................................76Customizing Profiles
.................................................................................................77Configuring Production Options
.................................................................................................77Uploading Videos to YouTube
.................................................................................................79Uploading Videos to Vimeo
ColorDirector Preferences
..................................................75
................................................................................................75Producing Video Files
................................................................................................77Sharing Videos
..................................................81
................................................................................................81General Preferences
iii
Page 6

CyberL ink Co lorD irecto r
................................................................................................82DirectorZone Preferences
................................................................................................82Color Preferences
................................................................................................82Hardware Acceleration Preferences
................................................................................................83Production Preferences
................................................................................................83CyberLink Cloud Preferences
ColorDirector Hotkeys
..................................................85
Licenses and Copyrights
Technical Support
..................................................89
..................................................91
................................................................................................91Before Contacting Technical Support
................................................................................................92Web Support
................................................................................................92Help Resources
iv
Page 7
In tro du ctio n
Note: this document is for reference and informational use only. Its content
and the corresponding program are subject to change without notice.
Chapter 1:
Introduction
This chapter introduces CyberLink ColorDirector and provides an overview of all its
features. It also outlines the system requirements for installing and using the
CyberLink ColorDirector program.
Welcome
Welcome to the CyberLink family of digital media tools. CyberLink ColorDirector is
a video editing program that turns your video footage into eye-catching movies
through the use of video color creating and correcting. You can then render the
videos for use in other editing programs, or for upload to YouTube and Vimeo.
Latest Features
This section outlines the latest features within the CyberLink ColorDirector program.
Improved program performance and editing times with the latest
TrueVelocity engine.
Adds import/export format support for XAVC S video and QuickTime with
alpha (animated .PNG).
Use the radial filter tool to highlight a specific area of a video clip or manually
create a vignetting effect.
Apply a soft focus blur effect on a selected region or a video clip's entire video
image.
Create mono-tone colors on just a selected area of a video's image with the
Tint Filter.
Import or export video clips with frame rates up to 240 frames per second.
1
Page 8
CyberL ink Co lorD irecto r
Note: CyberLink Cloud is a subscription cloud storage service that is
included with some CyberLink products, and is available for purchase
through our web site. For more detailed information, see http://www.
cyberlink.com/products/cyberlink-cloud/.
DirectorZone and CyberLink Cloud
You can upload/download color presets, and back up media, preferences, projects,
and more with the DirectorZone and CyberLink Cloud features.
DirectorZone
DirectorZone is a web service that lets you download adjustment presets created by
other users, so you can use them on your videos. You may also share your own
custom presets by uploading them to DirectorZone.
To access the benefits of DirectorZone, you can sign in by clicking the button
at the top of the window to open the ColorDirector preferences, and then on the
DirectorZone tab. See DirectorZone Preferences for more information.
Also, be sure to periodically click the button to check out the latest
DirectorZone Bulletin. Just click in this section in the Notifications window to view
the bulletin. Or go to http://directorzone.cyberlink.com to find out more
information on the features and benefits of the DirectorZone web service.
CyberLink Cloud
CyberLink Cloud is a cloud storage service from CyberLink where users can upload
and download their presets, ColorDirector projects, produced video clips, and
more. CyberLink Cloud allows users to back up media, preferences, projects, etc.,
and ensure their working environment is the same on multiple computers.
ColorDirector Versions
The features that are available in CyberLink ColorDirector are completely dependent
on the version you have installed on your computer.
Click the CyberLink ColorDirector logo in the top right, or select Help > About
CyberLink ColorDirector from the menu, to determine the version and build
number for your copy of CyberLink ColorDirector.
2
Page 9
In tro du ctio n
Note: you must connect to the Internet to use this feature.
ColorDirector Live
ColorDirector Live is a subscription based version of CyberLink ColorDirector that
provides all the editing and color correcting features you expect, and adds the
CyberLink Cloud storage service and more.
With a ColorDirector Live subscription, you get:
All the advanced video color grading features of the Ultra version of
CyberLink ColorDirector, including the production of 4K ultra HD video.
The ability to back up program preferences, projects, custom output profiles,
and presets on the cloud storage space CyberLink Cloud.
Guaranteed updates to the latest versions of CyberLink ColorDirector Ultra.
ColorDirector Live is the must-have solution for on-the-go video editors who want
easy access to their media and the latest up-to-date editing technologies.
Updating ColorDirector
Software upgrades and updates (patches) are periodically available from CyberLink.
CyberLink ColorDirector automatically prompts you when either is available.
To update your software, do this:
1. Click the button to open the Notifications window.
2. Check the New Updates and Upgrade Info sections.
3. Select an item in these sections to open your web browser, where you can
purchase product upgrades or download the latest patch update.
3
Page 10
CyberL ink Co lorD irecto r
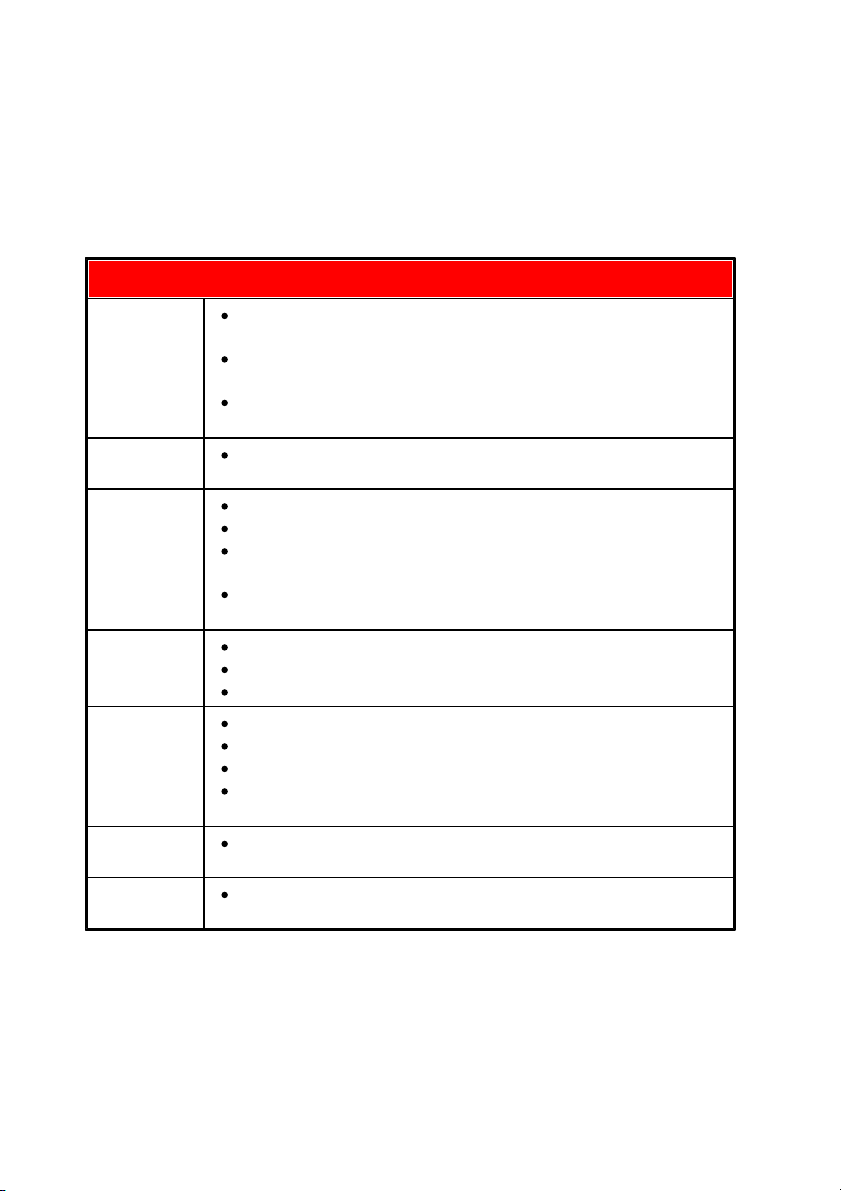
System Requirements
CPU
Processor
SD video editing and export: Pentium 4 3.0 GHz or AMD
Athlon 64 X2 or above (Required).
Full-HD video editing and export: Intel Corei5/7 or AMD
Phenom II X4 (Recommended).
2K/4K video editing profile: Intel Corei7 or AMD FX with 64bit
OS and 6 GB RAM (Recommended).
Screen
Resolution
1024 X 768, 16-bit color or above.
Operating
System
Microsoft Windows 10 (32 bit and 64 bit).
Microsoft Windows 8/8.1 (32 bit and 64 bit).
Microsoft Windows 7 Home Basic, Home Premium,
Professional, Ultimate (32 bit and 64 bit).
Microsoft Windows Vista Home Basic, Home Premium,
Business, Ultimate (32 bit and 64 bit).
Memory
2 GB required.
3 GB or above recommended for 32 bit OS.
6 GB or above recommended for 64 bit OS.
Graphics
Card
ATI/AMD: Radeon HD 2000 series or above.
NVIDIA: GeForce 8000 series or above.
Intel: GMA X3100 or above (including HD Graphics).
128 MB VGA VRAM or higher (1 GB or higher VRAM is
recommended).
Hard Disk
Space
1 GB of disk space for application and documentation.
Internet
Connection
Required for program activation and other online services.
System Requirements
The system requirements listed below are recommended as minimums for using
the CyberLink ColorDirector program.
4
Page 11
Im po rting Vid eo s
Chapter 2:
Importing Videos
The first step when using CyberLink ColorDirector is to import your videos into the
program library. You can import videos one by one, or import the entire contents
of a folder into CyberLink ColorDirector.
Supported File Formats
CyberLink ColorDirector supports the following video file formats:
Videos: AVI, FLV (H.264), M2TS (H.264 AVC, H.265 HEVC), MKV (H.264 AVC, H.265
HEVC), MOD, MOV, MPEG-1, MPEG-2, MPEG-4 (H.264 AVC, H.265 HEVC), TOD, VOB
(with Dolby Digital 2ch or 5.1ch), VRO (with Dolby Digital 2ch or 5.1ch), WMV, XAVC
S.
CyberLink ColorDirector also supports Canon & Nikon DSLR video files.
Importing Videos into the Program
You can import videos into CyberLink ColorDirector from your computer's hard
drive, and from removable devices, such as memory cards and portable hard
drives.
To import videos into CyberLink ColorDirector, do this:
1. Click on Library, and then on one of the following import options:
- select to import individual video files. Once selected, browse to and
then select all of the videos on your computer/removable device that you
want to import, and then click Open.
- select to import a folder that contains your videos. Once selected,
browse to and then select the folder on your computer/removable device that
you want to import videos from, and then click Select Folder.
- select to download video files you previously uploaded to CyberLink
5
Page 12
CyberL ink Co lorD irecto r
Note: you can also drag and drop video files onto the CyberLink
ColorDirector window to import them into the program.
Cloud. See Downloading Videos from CyberLink Cloud for more information.
2. CyberLink ColorDirector imports the video files into the library.
Downloading Videos from CyberLink Cloud
If you have a CyberLink Cloud subscription you can download videos from your
CyberLink Cloud storage directly into the library.
To download videos from CyberLink Cloud, do this:
1. Click on the File menu item and then select Download Media from CyberLink
Cloud. You can also click the button in the library panel.
2. Browse to and then select all the video files you want to download.
3. Click on the Download button. CyberLink ColorDirector downloads the
selected files and then imports them into the library.
6
Page 13

Th e Co lorDirector Wo rksp ace
Chapter 3:
The ColorDirector
Workspace
This chapter outlines the CyberLink ColorDirector workspace, and all of its features.
Getting familiar with the workspace is helpful, because it is where you spend all of
your time when using CyberLink ColorDirector.
A - ColorDirector M od ules, B - Key fram e Settings P anel, C - ColorDirector Preferen ces, D - Libra ry/
Adjustm ent/P roduction Pa nel, E - V ideo View er Windo w, F - Storyb oa rd P anel
ColorDirector Modules
CyberLink ColorDirector is comprised of three main modules: Library, Adjustment,
and Production.
7
Page 14

CyberL ink Co lorD irecto r
Library
Click the Library button to import video clips into CyberLink ColorDirector and view
detailed information video file information. Once imported into the library, you can
add them to the storyboard panel for adjusting and editing. See Library Panel for
more information.
Adjustment
The Adjustment module is where you touch up and make adjustments to the video
clips you imported into CyberLink ColorDirector. Click the Adjustment button to
apply presets, use motion track masks and gradients, adjust video saturation, hue,
white balance, and much more. See Making Video Adjustments for detailed
information.
Production
Once you finish adjusting your video clips, you must render them in the
Production module to apply the adjustments you made. All the video clips in the
storyboard panel will be rendered into one longer video once produced in the
Production module. For more detailed information see Production.
Library/Adjustment/Production Panel
The panel on the left side of the CyberLink ColorDirector window that displays is
dependent on which module of the program you are in. The following outlines
each of the panels and some of the available features.
Library Panel
The library panel is where you import all of the video clips into CyberLink
ColorDirector. It also provides access to the metadata information for each
individual video clip. You can double-click on any video clip in the library to begin
playing it in the preview window.
8
Page 15
Th e Co lorDirector Wo rksp ace
Importing Videos
You can import video files individually or by importing all the videos in a specific
folder. See Importing Videos for detailed information.
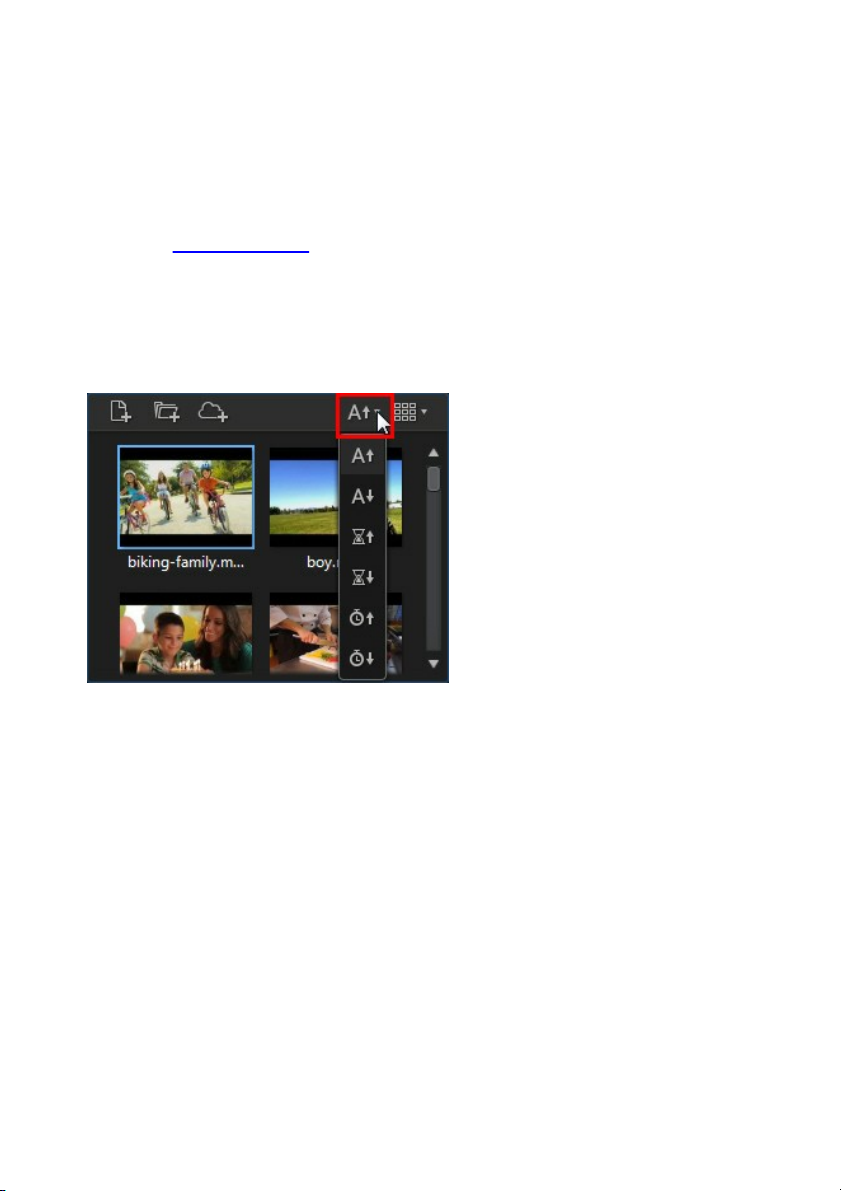
Sorting Videos in the Library
You can easily sort the videos in the ColorDirector library by selecting a sort option
from the list.
You have the option of sorting the videos in ascending or descending order by file
name, duration, or the date the videos were created.
Setting Library View
If required you can change the library view to fit your personal preference. By
default the video clips in the library display in thumbnail view, but you can click the
button in the top right corner of the library panel to change the view.
9
Page 16

CyberL ink Co lorD irecto r
Note: you can click and drag on the divider between the clips library and
video information for a larger view of the clips in the library.
Select to view the video clips by file name. Select to view them by their
video thumbnails.
Video Information
When you select video clips in the library, CyberLink ColorDirector displays each
clip's detailed embedded information in the library panel. Included in the
information is video and audio codec information, file size and type, video
resolution, frame rate, aspect ratio, and more.
Adding Video Clips to the Storyboard
Once you have video clips in the library, you must add them to the storyboard to
make adjustments and edit them. You can adjust and produce them one at a time,
or add multiple video clips that are merged into a longer video.
To add a video clip to the storyboard, do either of the following:
drag it from the library to the storyboard.
select it in the library and then click on its thumbnail.
10
Page 17

Th e Co lorDirector Wo rksp ace
Note: all the video clips in the storyboard panel will be rendered into one
longer video once produced in the Production window. If you do not want the
video clips rendered together, you must add each of them to the storyboard
separately, and then adjust and produce them one by one.
Adjustment Panel
The adjustment panel displays when in the Adjustment module and contains all of
the tools you use to color correct and adjust your videos. See Making Video
Adjustments for a detailed description of the all the tools available on the
adjustment panel.
Production Panel
When in the Production module, you can set produce preferences in the
production panel before rendering your adjusted video clips. See Producing Videos
for detailed information about the controls on the production panel.
Keyframe Settings Panel
When in the Adjustment module, click on the Manual tab and then the button
to display the keyframe settings panel. You can use keyframes when adjusting your
video clips to define the start and end points of the applied changes.
See Utilizing Keyframes for more detailed information on this feature.
Storyboard Panel
The storyboard panel is where the videos you want to adjust are located.
A - Video Clips, B - Scene D etectio n
Select a video in the storyboard panel to display it in the video viewer window for
playback and adjustment.
While browsing through video clips in the storyboard panel, you can:
11
Page 18

CyberL ink Co lorD irecto r
Note: you cannot detect scenes in a video clip that was previously trimmed
or split.
rearrange the order of the video clips in the storyboard panel, just select it in
the panel and then drag it to the new position.
remove a clip from the storyboard panel, right-click on it and then select
Remove. You can also remove multiple video clips at once by holding down
the Ctrl key on your keyboard, selecting the clips in the panel, and then
clicking the button at the top of the video viewer window.
right-click on a video clip in the storyboard panel and then select Open File
Location to view the file in Windows Explorer.
a video clip thumbnail with the icon in the storyboard indicates that
adjustments were made on the clip.
click on the icon in a video clip's thumbnail to detect any scenes that the
clip may contain. The detected scenes are added to the storyboard panel like
any other video clip. See Detecting Scenes in Video Clips for more detailed
information on this feature.
double-click in the video viewer canvas area to hide the storyboard panel
from view and get a larger view of the current video (viewer only mode).
Double-click on it again to redisplay the storyboard panel (viewer &
storyboard mode).
Video Viewer Window
The video viewer window displays a preview of the video selected in the storyboard
panel. Any adjustments you make to videos are viewable this window.
12
Page 19

Th e Co lorDirector Wo rksp ace
Note: the trim function is only available when in the Library and Adjustment
modules.
A - Trim Vi deo , B - Scen e Detection, C - Split Video, D - R emove Video, E - View at Fu ll Sc reen, F Sec onda ry M on itor Displa y M ode, G - Selec t View er Di spl ay M ode, H - Selec t Vi ew M od e, I - V iew er
Zoom , J - Pla yer Controls, K - Pl ayba ck Options, L - M otion Tra cking Control s, M - Video Tim ecode
Displa y
Trimming Video Clips
Use the trim function to quickly trim off unwanted portions at the beginning and
end of a video clip in the storyboard panel.
To trim a video clip, do this:
1. Select the video clip in the storyboard panel you want to trim, and then click
on the button at the top of the video viewer window to open the Trim
window.
2. Use the player controls to find where you want the trimmed clip to begin, or
13
Page 20
CyberL ink Co lorD irecto r
Note: the detected scenes are not split from the original clip, but can be
separately moved around or removed from the storyboard panel.
Note: you cannot detect scenes in a video clip that was previously trimmed
or split. The detect scenes function is only available when in the Library and
Adjustment modules.
the mark in position.
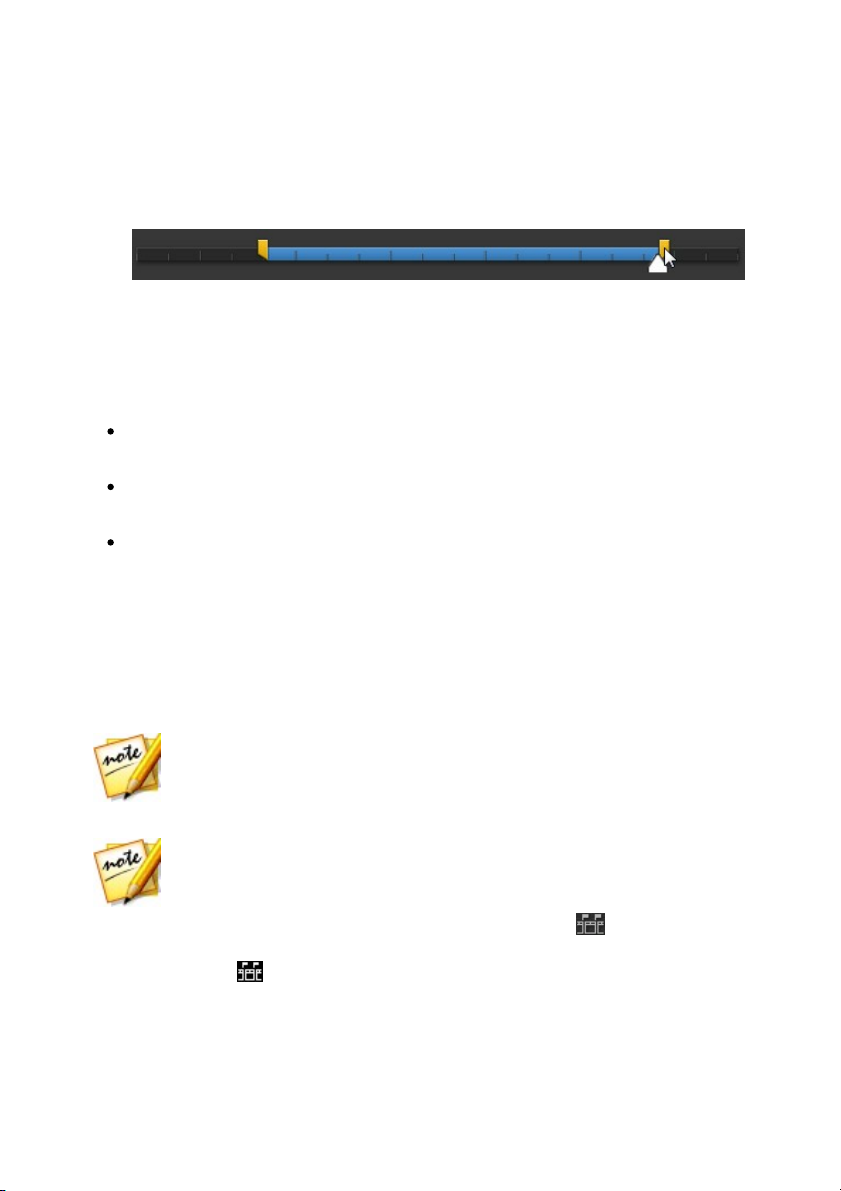
3. Click and drag the mark in and mark out indicators to positions where you
want the clips trimmed.
You can also manually set the timecodes for the In position and Out position
using the up and down arrows as required.
4. Click OK to set your changes and trim the clip as specified.
When trimming videos clips, please note:
use the Duration controls if you want to trim the video clip to a specific
length.
to preview what the trimmed clip will look like, ensure Output is selected and
then click the play button.
if required, you can reenter the Trim window to refine the trimmed clip at any
time.
Detecting Scenes in Video Clips
The scene detection function automatically detects the individual scenes (or preedited shots) contained within a video clip, and then separates them into multiple
clips. The detected scenes are added to the storyboard panel like any other video
clip.
To detect the scenes in a video clip, do this:
1. Select a clip it in the storyboard panel and then click the button at the top
of the video viewer window to open the Scene Detection window. You can
also click the icon on the video clip's thumbnail in the storyboard panel.
2. The scenes in the video clip are automatically detected and then displayed in
14
Page 21

Th e Co lorDirector Wo rksp ace
the Scenes panel.
3. Once you are done detecting the scenes in the video clip, click the OK button.
All the separate clips that were detected are now visible in the storyboard
panel.
When using scene detection, please note:
if required, use the Sensitivity slider to increase or decrease scene detection
sensitivity. Doing this may yield an increased or decreased number of scenes
that are detected. Click Start to redetect the scenes in the video clip. You are
asked to confirm the clearing of the previously detected clips and then the
updated scenes are detected and displayed in the Scenes panel.
click on the button to configure the Advanced Scene Detection Settings. If
the selected video clip is a DV-AVI file, you have the option to Detect by
change of video frame (used on all other file formats) or Detect by change of
timecodes (i.e.: time codes are automatically set when you start and stop
recording). Select the Disable preview during detection option to speed up
the detection process if you find your computer runs slow during the
process.
to stop the scene detection process before completion, click the stop button
on the playback controls.
to detect scenes manually, drag the slider (in Clip mode) to the beginning of
each new scene and then click .
to preview a detected scene, just select it in the Scenes panel (ensure Scene is
selected) and then click the play button.
to view all the detected scene markers on the clip timeline, ensure that Clip is
selected.
to merge two or more detected scenes into one longer scene, select them in
the Scenes panel and then click Merge. Click Remove All if you want to
restore the clip to the original.
Splitting Video Clips
You can quickly split a video clip that is in the storyboard panel into two separate
clips. To do this, move the timeline slider (or use the player controls) to the position
in the clip where you want to split it. Next, click the button to separate it into
15
Page 22
CyberL ink Co lorD irecto r
Note: the split function is only available when in the Library and Adjustment
modules.
Note: these display mode buttons are only available when in the Adjustment
module of CyberLink ColorDirector.
two clips that you can then move around and adjust separately from one another.
You can also use it to quickly remove unwanted portions of a video clip, or if you
want to insert other media between the two portions.
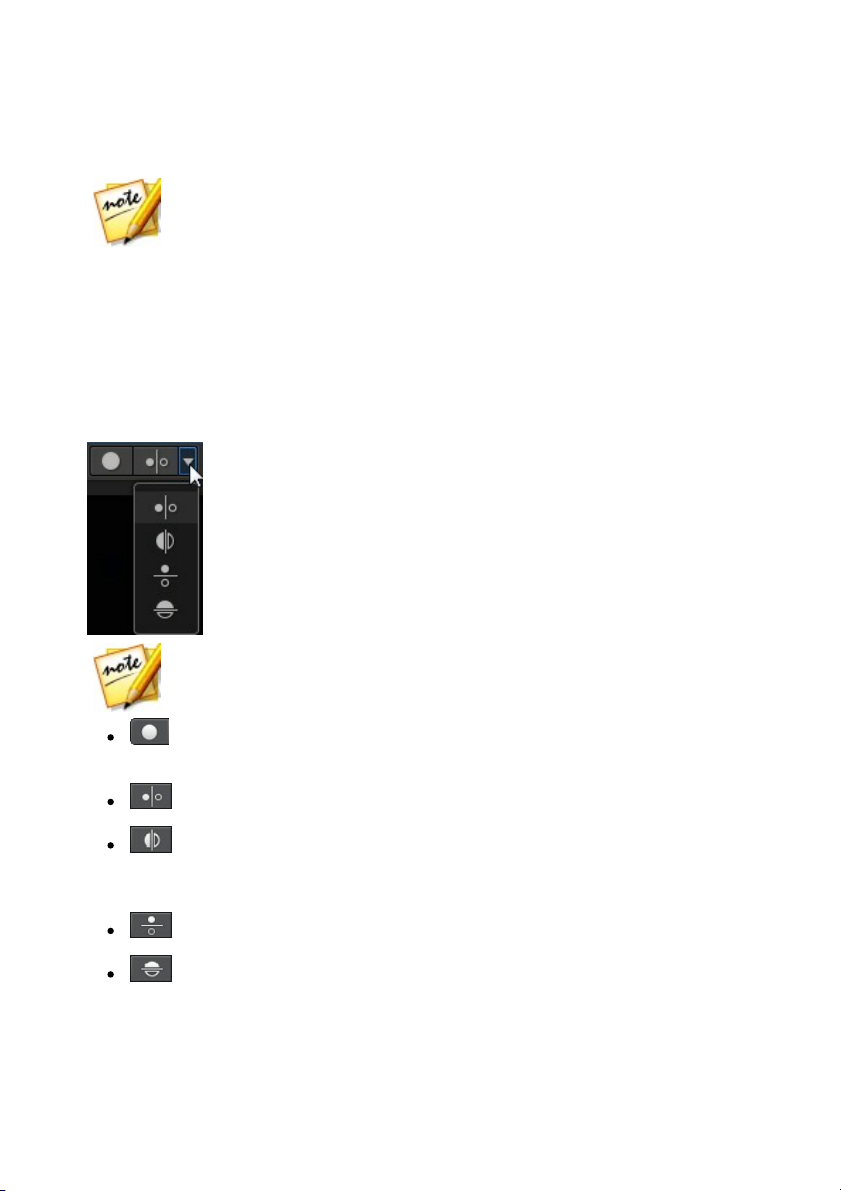
Selecting Viewer Display Mode
The video viewer window has several display modes that let you more easily view
the adjustments made to video clips. Click the arrow next in the viewer display
mode section to view all of the available display modes.
Show one - shows one preview window for the selected video clip in the
storyboard panel.
Side by side - select to compare adjustments to videos side by side.
Split - left/right - select to split the video, with the left half containing
the original video, and the right half of the video with the adjustments
applied.
Top/bottom - select to compare adjustments to videos top to bottom.
Split - top/bottom - select to split the video, with the top half containing
the original video, and the bottom half of the video with the adjustments
applied.
16
Page 23

Th e Co lorDirector Wo rksp ace
Note: for this button to display, you must connect a secondary display to
your computer and then enable extend desktop to a secondary display in the
Windows Display Properties Settings.
Note: you can double-click in the video viewer canvas area to hide the
storyboard panel from view and get a larger view of the current video (viewer
only mode). Double-click on it again to redisplay the storyboard panel
(viewer & storyboard mode).
Secondary Monitor Display Mode
If you have more than one monitor connected to your computer, click the
button and then select the display mode for the secondary monitor.
Mirror: duplicates the viewer display on the secondary monitor.
Alternate: provides a secondary view of the videos you are adjusting. For
example, if you are adjusting a video in side by side mode, the "After" video
displays at full screen on the secondary monitor.
None: select if you don't want anything displayed on your secondary
monitor.
Selecting View Mode
In the top left of the video viewer window, select one of the following view modes
when browsing through and viewing videos in CyberLink ColorDirector:
Viewer & Storyboard Mode - select to display the video viewer window
and the storyboard panel for easy browsing and viewing of videos.
Viewer Only Mode - select to display a larger view of the videos.
When playing back videos in the program or when making adjustments, select
to view the current video at full screen. When in full screen mode, click to exit.
Viewer Zoom
When previewing videos in the video viewer window, use the zoom drop-down in
the top right corner to set the size of the video preview.
17
Page 24

CyberL ink Co lorD irecto r
Note: you can also hold down the Ctrl key on your keyboard and then use the
mouse scroll wheel to zoom in or out on the video viewer window.
Note: if you find that the size of the video in the video preview window seems
quite small when 100% zoom is selected, and becomes distorted after
selecting Fit, check that the quality setting of the video is correct. See
Playback Options for more information.
Select Fit to resize the selected video so that is fits in the viewer window.
When you zoom in or out on a video clip, a navigation thumbnail for the viewer
displays in the bottom right of the video frame. Click and drag the available box to
change the focus area to suit your zooming requirements.
Video Player Controls
Select a video clip in the storyboard panel and then click the button to begin
playing it back. CyberLink ColorDirector will just play back the selected clip when
the play button is clicked. If you want to play all the clips in the storyboard, click
the button to enter full screen mode, and then click to play the whole
movie.
Use the video playback controls available in the video viewer window to control
playback, including pausing/stopping playback, fast forwarding videos, jumping to
the previous/next frame, or adjusting the volume. You can also click and drag the
playback slider to quickly go to a specific timecode in the timecode display, if
necessary.
Playback Options
Click the button to access the following playback options:
18
Page 25

Th e Co lorDirector Wo rksp ace
Quality: select to set the quality of the video in the video viewer window. For
best results it is recommended that you set this based on the quality of the
original video.
Real-time Preview: select one of the following preview modes:
Real-time Preview: synchronizes and renders clips and effects in real-time,
displaying a preview of your video at the standard 25 (PAL)/30 (NTSC)
frames per second.
Non Real-time Preview: mutes the audio and displays a preview at a
reduced speed to help make editing much more fluid. Useful when editing
high-definition video on a less powerful computer, or when you receive
dropped frames when previewing. By muting the audio and slowing down
the video, CyberLink ColorDirector lets you view more frames per second
when your computer has trouble providing a smooth preview during
editing.
Motion Tracking Controls
The motion tracking controls are available when on the motion tracking mask tab
of the Regional Adjustment Tools. They are used when applying regional
adjustments on moving objects in videos. See Using a Motion Tracking Mask for
more detailed information.
19
Page 26

CyberL ink Co lorD irecto r
20
Page 27

Co lorD irector Pro jects
Note: a CyberLink ColorDirector project (.cds) file essentially contains a
list of the video clips in the storyboard panel, and a log of all the edits and
adjustments you want to make to them. Project files do not include the video
clips in them. If you want to save all your video production files in one place,
use the Pack Project Materials function. To do this select, File > Pack
Project M aterials from the menu.
Note: when you create a new project, CyberLink ColorDirector resets your
library. If you want to create a new video production using the same media
that's currently in your library, select File > New Workspace.
Chapter 4:
ColorDirector Projects
When adjusting video clips in CyberLink ColorDirector, click the button to save
your work as a project in the .cds file format, which is used exclusively by CyberLink
ColorDirector.
Use the options in the File menu to save, create new, or open existing projects in
CyberLink ColorDirector. If you have a CyberLink Cloud subscription you can also
upload saved projects and more to CyberLink Cloud. See CyberLink Cloud Projects
for more information.
The changes you make to your video clips in CyberLink ColorDirector do not affect
the original videos you imported into the program. Since your edits are all saved in
the project file, you can trim and make adjustments to your clips, but still keep
your original files on your hard drive, untouched. So let yourself get creative. If you
end up changing things too drastically, you can always start over.
Setting Project Aspect Ratio
To set the aspect ratio for your project, select 4:3 or 16:9 from the aspect ratio drop
down at the top of the window.
The video viewer window changes according to the aspect ratio you select.
21
Page 28

CyberL ink Co lorD irecto r
Note: if you have CyberLink PowerDirector 11 or above installed on your
computer, you can also select File > Export Project to PowerDirector
from the menu to quickly send all the individual adjusted video clips in the
storyboard directly to the PowerDirector timeline.
Note: when you open a packed project stored on CyberLink Cloud, the
project file and all the project media is downloaded to your local computer
and stored in the download folder specified in CyberLink Cloud Preferences
.
Exporting Projects
You can export your CyberLink ColorDirector projects by packing all the materials
in a folder on your computer's hard drive or CyberLink Cloud*. Exported projects
can then be imported into another computer running CyberLink ColorDirector.
To export your project, select File > Pack Project Materials. If you have a CyberLink
Cloud subscription you can select File > Pack Project Materials and Upload to
CyberLink Cloud to back it up in a folder on CyberLink Cloud.
CyberLink Cloud Projects
If you have a CyberLink Cloud subscription you can select File > Upload Project to
CyberLink Cloud to store project files on CyberLink Cloud.
To open a project that was saved on CyberLink Cloud, including projects that were
packed in a folder with their media (materials), select Download Project from
CyberLink Cloud from the File menu or in the Welcome window. In the window that
displays, select a project and then click Download.
22
Page 29
Utilizin g K eyfram es
Chapter 5:
Utilizing Keyframes
By default when you are color correcting and adding color grading on video clips,
the adjustments are applied to every single frame in the video, i.e. the entire video
clip. However, you can use keyframes to only apply the adjustments on just the
frames of video you want modified, by defining the start and end points in the
keyframe settings panel.
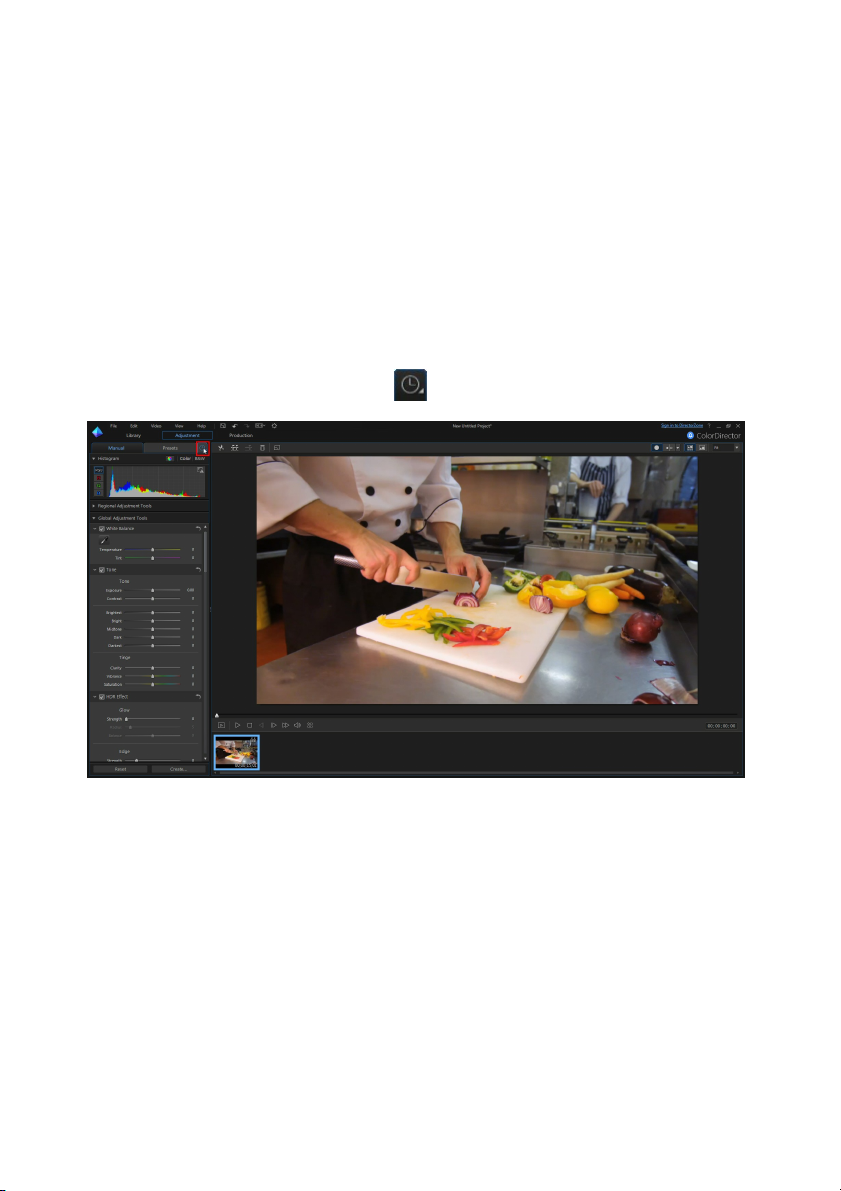
When in the Adjustment module, click to open the keyframe settings panel.
23
Page 30
CyberL ink Co lorD irecto r
You can use keyframes to define the start and end points of every type of
adjustment in CyberLink ColorDirector, giving you full control over the process.
Every adjustment item has keyframe controls for the timeline in the keyframe
settings panel.
To use keyframes when making adjustments to video clips, do this:
1. Select the video clip in the storyboard and then click the button to
display the keyframe settings panel.
2. Use the keyframe timeline to find the frame in your video clip where you want
the adjustments to begin and end. See Keyframe Timeline for more
information.
3. Add keyframes as required to mark where the adjustments begin and end.
See Adding Keyframes for more information.
24
Page 31

Utilizin g K eyfram es
Note: keyframes are also added to the keyframe timeline if you change the
shape, position, or size of a regional adjustment mask.
4. Make adjustments to your video clip as required. See Making Video
Adjustments for more information.
Keyframe Timeline
A custom keyframe timeline is generated for each video clip you import into the
storyboard panel and is visible in the keyframe settings panel. In the below
example, because the video clip is 15 seconds long, the keyframe timeline is also 15
seconds.
The timeline slider position corresponds to the position of the playback slider and
the timecode display in the video viewer window.
25
Page 32

CyberL ink Co lorD irecto r
You can click and drag the edge of the keyframe settings panel to change the size
of the timeline and the video in the preview window.
You can also zoom in on the keyframe timeline for a more precise placement of
keyframes. To zoom in or out on the timeline, just click on the timeline ruler and
26
Page 33

Utilizin g K eyfram es
Note: all timeline markers added to the timeline in CyberLink
ColorDirector, are available on the clip marker track if you export your
project to PowerDirector. See Exporting Projects for more information on
exporting projects.
drag it left or right, or use the slider at the bottom of the adjustment
panel.
In the above example, the timeline is zoomed in to the frame level. Each line on the
timeline ruler, now represents a frame of video.
Timeline Markers
You can add timeline markers to the keyframe timeline ruler for more precise
adding of keyframes.
Adding Timeline Markers
To add a timeline marker, do this:
1. Hover your mouse over the keyframe timeline ruler. The blue timeline marker
27
Page 34

CyberL ink Co lorD irecto r
Note: use the keyframe timeline ruler to expand the timeline for a more
precise placement of timeline markers.
indicator displays the current time.
2. Once you have found the time where you want to place the timeline marker,
right-click on the ruler and then select Add Timeline Marker, or press the M
key on your keyboard.
3. Input a Note for the new timeline marker, if required.
4. Click on OK to add the new timeline marker.
Note that the timeline marker is also added to the storyboard timeline.
5. You can then just click on the added timeline marker to align the timeline
slider to it. This makes it easy to add keyframes at this precise moment in your
video clip.
28
Page 35

Utilizin g K eyfram es
Note: you can manually drag a keyframe timeline marker to different
position if the original is not in the exact location you wanted it. Expand the
keyframe timeline ruler for a more precise placement, if necessary.
Note: even if you want an adjustment to be made on the entire duration of a
video clip, CyberLink ColorDirector automatically adds a keyframe at the
beginning of the keyframe timeline.
Right-click on the keyframe timeline ruler and then select Manage Markers to view
a list of all the timeline markers you have added. In this list you can remove any of
the existing markers, or hover your mouse over the Note column and then click
to edit the associated text.
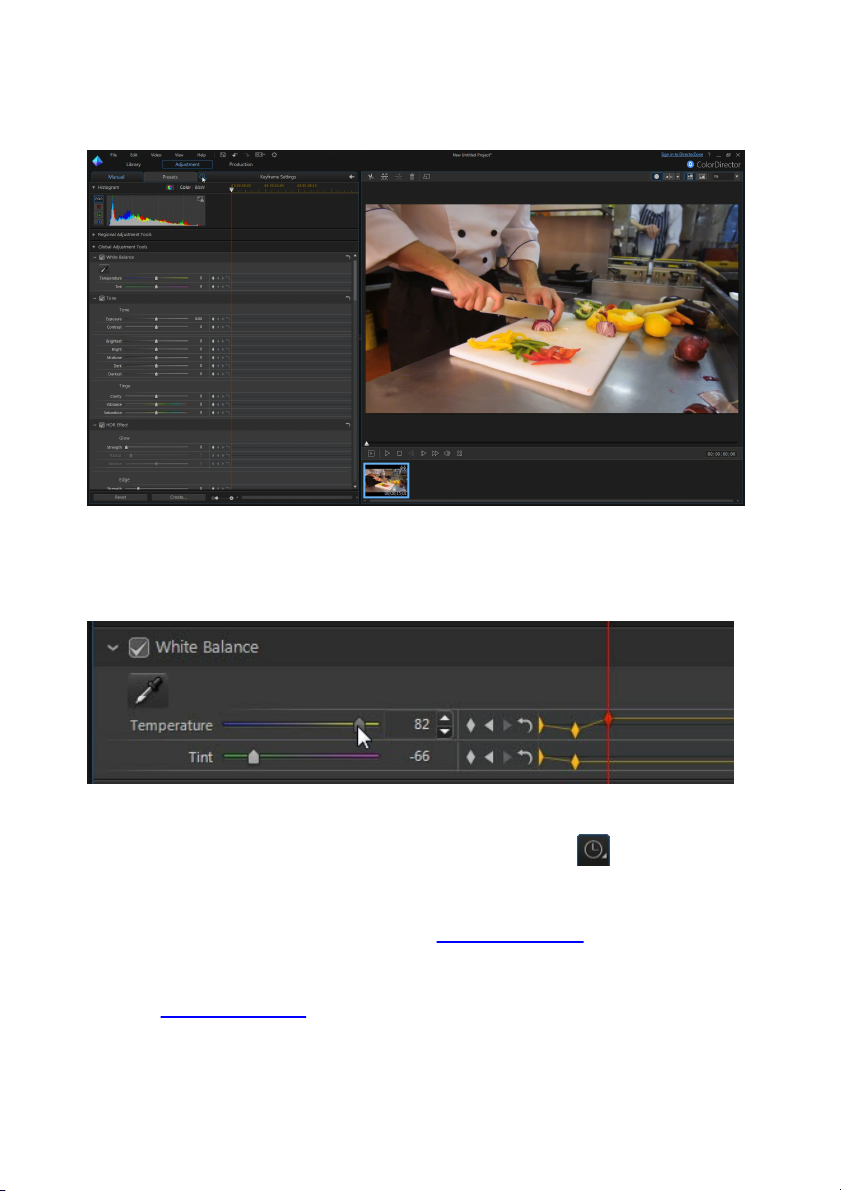
Adding Keyframes
Any time you make a change to an adjustment item using one of the sliders, or
change the size, shape, or position of a regional adjustment mask, a keyframe is
automatically added to the keyframe timeline.
To manually add keyframes to the keyframe timeline, do this:
1. Click on to open the keyframe settings panel.
2. Click on next to the adjustment item you want to change to add a
keyframe at the beginning of the keyframe timeline.
29
Page 36

CyberL ink Co lorD irecto r
Note: you can add timeline markers to the keyframe timeline to ensure the
keyframe is placed at the exact moment you want to make the adjustment.
See Timeline Markers for more information.
3. Use the player controls to find the moment in your video clip where you want
its properties to change (make adjustments).
4. Drag the sliders as required, making the adjustments to the video clip that
you want to make. Note that a keyframe marker is added at that moment in
timeline.
5. Right click on the first of the two keyframes to set how and when the
adjustment/change is applied. See Setting Keyframe Behavior for more
detailed information.
6. Repeat these steps to add more keyframes to the timeline, and for all the
adjustments you want to make on the video clip, if required.
Setting Keyframe Behavior
If you have added two keyframes to the timeline and made the some adjustments,
right click on the first keyframe to set the behavior, or when the adjusted properties
will display in the video clip.
To set the behavior, right click on the first keyframe and then select one of the
following keyframe behavior options:
Gradual Change from Current Keyframe: select this option if you want the
adjustment/change to be made gradually between the two keyframes. By the
time the playback slider reaches the second keyframe, the adjustment/change
30
Page 37

Utilizin g K eyfram es
is fully applied.
Instant Change at Next Keyframe: select this option if you want the
adjustment/change to be applied instantly once the playback slider has
reached the second keyframe.
Instant Change at Current Keyframe: select this option if you want the
adjustment/change to be applied instantly once the playback slider has
reached the first keyframe.
Modifying and Removing Keyframes
At any time you can modify the keyframes added, by selecting it in the timeline
and changing the corresponding adjustments.
You can also do the following:
to remove a keyframe, select it on the timeline and then click .
click to quickly jump to the previous keyframe, or to jump to the next
one.
31
Page 38

CyberL ink Co lorD irecto r
click on to remove and reset all keyframes on the selected timeline.
right click on any keyframe on the keyframe timeline and then select Reset to
Default Value to reset the adjustment back to the original setting. Note that
the keyframe is not removed, the adjustment is just reset.
32
Page 39

M akin g Vid eo Adju stm en ts
Note: you can add more than one video clip to the storyboard panel for
adjusting. However, all the video clips in the storyboard panel will be
rendered into one longer video once produced in the Production window. If
you do not want the video clips rendered together, you must add each of them
to the storyboard separately, and then adjust and produce them one by one.
Note: you can also choose to apply adjustment presets to instantly transform
your video clips. See Using Adjustment Presets for more information.
Chapter 6:
Making Video Adjustments
Click on the Adjustment button and then on the Manual tab to begin making
adjustments to your video clips. Any adjustments you make are not auto-applied to
the original video file. CyberLink ColorDirector keeps a log of all the adjustments
you want to make, and then applies them to each video clip when it is rendered in
the Production module. This leaves the original video clip untouched.
Adjustments can be made both globally (on the entire video frame, see Global
Adjustment Tools) or regionally (on a specified area of the video frame only, see
Regional Adjustment Tools). You can also apply adjustments to only the video
frames you want to using keyframes. See Utilizing Keyframes for detailed
information.
To make adjustments on video clips in the library, do this:
1. Select the video clips in the library panel that you want to adjust, and then
drag and drop them into the storyboard panel.
2. Click on the Adjustment button.
3. Select the specific video clip in the storyboard that you want to adjust.
4. Make all the adjustments on the video clip as required.
5. If required, select another video clip in the storyboard and make adjustments.
6. When you are done adjusting each video clip in the storyboard panel, click on
the Production button to render them with the adjustments applied. See
Production for more detailed information.
33
Page 40

CyberL ink Co lorD irecto r
Histogram
The histogram is a graphical representation of the color tone distribution in a
selected video. During the playback of a video clip, the histogram values will
continually change, indicating how the lighting in the video image changes.
The X axis of the graph represents the RGB color tone value between 0 and 255,
while the Y axis indicates the number of pixels in the video that have this value.
The histogram is created with the three RGB (red, green, and blue) color values
given to each pixel in the video image. The gray portions indicate where all three
colors overlap on the histogram, while yellow, magenta, and cyan appear when
two of the colors overlap. Click R, G, or B to view the red, green, or blue color
channel values only in the histogram. Click RGB to return to the original histogram
display and display all the channels.
Applying Color Look-up Tables (CLUT)
Use the color look-up table (CLUT) to transform the range of colors in a video clip to
another range. Doing this can completely change the color scheme of the video,
and ensure all your video clips have the same look.
To apply a color look-up table to a video clip, do this:
1. Select the video clip on the storyboard you want to apply the color look-up
table to.
2. Click on in the histogram.
3. Select the Apply color look-up table check box.
4. Click on and then select the color look-up table you want to use. Click
on Open to finish the selection.
34
Page 41

M akin g Vid eo Adju stm en ts
Note: once the color look-up table is selected you can preview how the video
will look with in applied. Based on the before and after preview, you can
choose to apply the changes, select another color look-up table, or cancel
out of the window.
Note: after you convert a video to black and white, the Black and White
section of the adjustment panel is enabled. See Black and White for details
on adjusting the lightness in black and white videos.
5. If required, select the Apply to All button if you want to apply the selected
color look-up table on all of the video clips that are currently on the
storyboard.
6. Click Apply to set the changes.
Converting Videos to Black and White
You can instantly convert a selected video clip to black and white, i.e. replace the
colors with grayscale.
To convert, select B&W at the top of the adjustment panel. To convert back, select
Color.
Viewing Exposed Areas
The histogram can also be used to determine if the video was shot correctly. A
video clip with a histogram that arcs towards the left, indicates the video was
underexposed (contains a lot of dark pixels), while one that arcs towards the right
means there was an overexposure (lots of lighter pixels).
Click to view the areas of the video image that were so over and underexposed
that all detail was lost, or clipped, in that area.
35
Page 42

CyberL ink Co lorD irecto r
Note: the selection mask is ideal for adjusting areas of video in videos clips
where the camera or objects in the area are motionless. If the camera is
moving or objects move in the frame, try using a motion tracking mask. See
Using a Motion Tracking Mask for more information.
The areas that are overexposed are indicated in red. The areas of the video image
that are underexposed, in blue. Click to hide these areas.
Regional Adjustment Tools
Use the regional adjustment tools if you want to modify only a specific area of the
video frame in your selected video clip.
The following sections outline the features and functions available in the regional
adjustment tools of CyberLink ColorDirector. To begin using a regional adjustment
tool, just select it from the available icons.
Using a Selection Mask
A selection mask lets you select only the pixels in a video clip that you want to
adjust. This allows you to select and adjust static objects in the video clip.
36
Page 43

M akin g Vid eo Adju stm en ts
Note: you can adjust multiple areas of the video using selection masks. See
Using Multiple Selection Masks for more information.
Creating a Selection Mask
To create a selection mask and use it to make adjustments, do this:
1. Click to open the selection mask controls.
2. Use your mouse to manually select the area of the video frame you want to
adjust. You do this by clicking around the outline of the area until an
enclosed section is selected.
37
Page 44

CyberL ink Co lorD irecto r
Note: to create horizontal or vertical lines using straight line control, just hold
down the Shift key on your keyboard when adding node points.
Note: you can adjust the shape of the selection mask by clicking and dragging
the nodes. Click a node to select it, and then press the Delete key on your
keyboard to delete it. To add a new node, just hover your mouse over the line
edge and click to add the required node.
38
Page 45

M akin g Vid eo Adju stm en ts
Note: CyberLink ColorDirector displays a mask color marker on the area you
select. Right click on the mask color marker for more selection mask options.
Note: if required, click the button to invert the selected pixels. When
selected, CyberLink ColorDirector will apply the adjustments to areas that
were not selected. Click it again to revert the adjustments back to the pixels
selected originally.
Note: when you adjust the position or shape of a selection mask, CyberLink
ColorDirector automatically adds a keyframe to the keyframe settings timeline
to mark the change. See Utilizing Keyframes for more information on
keyframes.
3. Use the Feather slider to set the transition level between the area being
selected and the pixels around the area. This slider is not enabled until a
masked area has been defined on the video frame.
4. Make the required adjustments to the selected part of the video frame using
the regional adjustment options. See Regional Adjustment Options for a
detailed description of all the available adjustments you can make.
Adjusting Mask Position and Shape
If the selection mask you created appears off at any point during the duration of
the video clip, you can easily adjust its position or shape.
To adjust the selection mask position/shape, pause the video clip playback at the
point when you want to make the adjustment and then do any of the following:
click on a mask node to select it and then drag it to a new position.
click on a mask node to select it, and then press the Delete key on your
keyboard to delete it, if required.
to add a new mask node, just hover your mouse over the line edge and click
to add the required node.
click on the mask color label and then drag the entire mask to a new position.
right click on the mask color label for more options, including selecting all
nodes, deleting the mask, resetting the adjustments, and more.
39
Page 46

CyberL ink Co lorD irecto r
Using Multiple Selection Masks
You can make up to five different selected adjustments on a video. When you
select areas of the video and modify the adjustment options, a mask is auto created
and labeled by color.
The mask label is visible in the Mask drop-down at the top of the selection mask
tab.
To create a new adjustment mask, do this:
1. Select New from the Mask drop-down to create a new mask.
2. Use your mouse to manually select the area of the video frame you want to
adjust, and then use the sliders to set the adjustments as required for the
second adjustment.
3. CyberLink ColorDirector labels the mask with another color in the Mask drop-
down.
4. CyberLink ColorDirector marks each mask on the video with the color label.
40
Page 47

M akin g Vid eo Adju stm en ts
5. Click the color label to quickly select the mask, and view the selected areas
(pixels) of the video where each of the adjustments was applied.
Using a Motion Tracking Mask
Use a motion tracking mask to adjust areas of the video that have moving objects,
or when the camera moves in a video clip. When you apply the motion tracking
mask on a set of pixels, CyberLink ColorDirector will auto track the pixels as they
move through each video frame, adjusting the mask shape and applying the same
adjustments to them.
Creating a Motion Tracking Mask
To create a motion tracking mask and use it to make adjustments, do this:
1. Click to open the motion tracking mask controls.
2. Use the playback controls to find the first frame of video where the object or
camera begins moving.
3. Set the mask options as follows:
Brush/Eraser: click on Brush and then use the mouse to select the pixels of
the object or area you want to track. Click on Eraser if you make some errors
41
Page 48

CyberL ink Co lorD irecto r
Note: the Feather slider is not enabled until a masked area has been
defined on the video frame.
using the brush and want to remove pixels that are selected.
Size: use the slider to set the size of the brush or eraser. You can also use the
mouse scroll wheel to adjust the diameter of the brush/eraser.
Feather: use the slider to set the transition level between the area being
selected and the pixels around the area.
4. When you are done selecting all the pixels of the object for tracking, click on
. CyberLink ColorDirector starts tracking the pixels as they move through
the frame. Click the button if you only want to track the movement for
one frame of video.
42
Page 49

M akin g Vid eo Adju stm en ts
Note: you can check the mask details in the keyframe settings panel.
CyberLink ColorDirector adds a keyframe for the start and end points of the
motion tracking to the mask's keyframe timeline.
Note: if required, click the button to invert the selected pixels. When
selected, CyberLink ColorDirector will apply the adjustments to areas that
were not selected. Click it again to revert the adjustments back to the pixels
selected originally.
5. Click the button at any time if you want to stop the motion tracking. If you
don't click this button, CyberLink ColorDirector tracks the pixels until it can no
longer detect movement or the pixels are no longer available, i.e. off screen or
obstructed.
6. Once the motion tracking has stopped, make the required adjustments to the
selected part of the video frame using the regional adjustment options. See
Regional Adjustment Options for a detailed description of all the available
adjustments you can make.
43
Page 50

CyberL ink Co lorD irecto r
Note: when you adjust the re-track the position or shape of a motion tracking
mask, CyberLink ColorDirector automatically adds a keyframe to the
keyframe settings timeline to mark the change. See Utilizing Keyframes for
more information on keyframes.
Re-tracking a Motion Tracking Mask's Position and
Shape
If the motion tracking mask you created appears off at any point during the
duration of the video clip, you can easily adjust its position or shape, and then retrack the movement.
To re-track a motion tracking mask's position or shape, do this:
1. Pause the video clip playback at the point when you want to make the
change to the mask.
2. Do either of the following:
use the brush or eraser to adjust the mask shape as required.
right click on the mask color label for more options, including deleting the
mask, resetting the adjustments, and more.
3. Click to re-track the movement with the adjusted shape or position. Click
if you want to track the pixels one frame at a time.
4. CyberLink ColorDirector re-tracks the pixels within the mask from this point,
adding a keyframe to the keyframe settings panel to note the change.
Using Multiple Motion Tracking Masks
You can make up to five different selected adjustments on a video. When you
select areas of the video and modify the adjustment options, a mask is auto created
and labeled by color.
The mask label is visible in the Mask drop-down at the top of the motion tracking
mask tab.
To create a new adjustment mask, do this:
44
Page 51

M akin g Vid eo Adju stm en ts
1. Select New from the Mask drop-down to create a new mask.
2. Repeat the steps in Creating a Motion Tracking Mask to create the motion
tracking mask, and then use the regional adjustment option sliders to set the
adjustments as required for the second adjustment.
3. CyberLink ColorDirector labels the mask with another color in the Mask drop-
down.
4. CyberLink ColorDirector marks each mask on the video with the color label.
5. Click the color label to quickly select the mask, and view the selected areas
(pixels) of the video where each of the adjustments was applied.
45
Page 52

CyberL ink Co lorD irecto r
Note: the gradient mask is ideal for adjusting areas of video in videos clips
where the camera or objects in the area are motionless.
Using a Gradient Mask
Use the gradient mask to apply adjustments gradually across a large area of a
video.
Adding a Gradient Mask
To add a gradient mask and use it to make adjustments, do this:
1. Click to open the gradient mask controls.
2. Click and drag on the video to set the gradient across a portion of the video.
CyberLink ColorDirector displays a mask color on the area you apply.
46
Page 53

M akin g Vid eo Adju stm en ts
Note: the mask's color disappears as soon as you start adjusting the
gradient mask options. Right click on the mask color marker for more
selection mask options.
Note: when you adjust the position or size of a gradient mask, CyberLink
ColorDirector automatically adds a keyframe to the keyframe settings
timeline to mark the change. See Utilizing Keyframes for more information on
keyframes.
3. Make the required adjustments to the selected part of the video frame using
the regional adjustment options. See Regional Adjustment Options for a
detailed description of all the available adjustments you can make.
Adjusting Mask Position and Size
If the gradient mask you created appears off at any point during the duration of the
video clip, you can easily adjust its position or size.
To adjust the gradient mask position/size, pause the video clip playback at the
point when you want to make the adjustment and then do any of the following:
click on a mask line and expand/contract the size, or rotate the mask if
clicking on the middle line.
click on the mask color label and then drag the entire mask to a new position.
47
Page 54

CyberL ink Co lorD irecto r
right click on the mask color label for more options, including deleting the
mask, resetting the adjustments, and more.
Using Multiple Gradient Masks
You can use up to five gradient masks on a video in CyberLink ColorDirector. When
you modify the adjustment options and use the gradient mask on the video,
CyberLink ColorDirector auto creates a mask labeled by color.
The mask label is visible in the Mask drop-down at the top of the gradient mask
tab.
To create a new gradient mask, do this:
1. Select New from the Mask drop-down to create a new mask.
2. Click and drag on the video to set the gradient across a different portion of
the video.
3. Use the sliders to set the adjustments as required for the second gradient
mask.
4. CyberLink ColorDirector labels the mask with another color in the Mask drop-
down.
5. CyberLink ColorDirector marks each gradient mask on the video with the
color label.
48
Page 55

M akin g Vid eo Adju stm en ts
6. Click the color label to toggle the masks on and off, and view the areas of the
video where the gradient was applied.
49
Page 56

CyberL ink Co lorD irecto r
Note: CyberLink ColorDirector displays a mask color on the area in the
ellipse. The mask disappears as soon as you start adjusting the radial filter
options. See Using Multiple Radial Filter Masks for more information.
Using a Radial Filter
The radial filter tool lets you apply regional adjustments in an elliptical shaped
masked area. You can use the radial filter to highlight a specific area of the video
image, or to manually create a vignette effect.
To use the radial filter, do this:
1. Click to open the radial filter tools.
2. Click and drag on the video image to create an ellipse around the area you
want to highlight. Once the ellipse is drawn, you can resize it by clicking and
dragging any of the four white nodes to create the exact shape you need.
Click the green node to rotate the ellipse. You can also click anywhere inside
the ellipse to move it to another location on the video image.
3. Make the required adjustments to the selected part of the video image using
the regional adjustment options. See Regional Adjustment Options for a
detailed description of all the available adjustments you can make.
50
Page 57

M akin g Vid eo Adju stm en ts
Note: when you start making adjustments on the video image, CyberLink
ColorDirector applies the adjustments outside the created ellipse. Select
the button if you want the adjustments applied inside the ellipse. You
can also use the Gradient slider to set the size of the gradient on the edges
of the radial filter ellipse.
Using Multiple Radial Filter Masks
You can use up to five radial filter masks on a video in CyberLink ColorDirector,
allowing to highlight multiple areas of the video image. When you create a radial
filter ellipse on a video image, CyberLink ColorDirector auto creates a new mask
labeled by color.
The mask label is visible in the Mask drop-down at the top of the radial filter panel.
To create a new radial filter mask, do this:
1. Select New from the Mask drop-down to create a new mask.
2. Click and drag on the video image to create an ellipse around the new area
you want to adjust.
3. Use the sliders to set the adjustments as required for the second radial filter
mask.
4. CyberLink ColorDirector labels the mask with another color in the Mask drop-
down.
5. CyberLink ColorDirector marks each radial filter mask on the video image with
the color label.
51
Page 58

CyberL ink Co lorD irecto r
Note: to remove a mask from a video image, just click its color label node
and then press the Delete key on your keyboard.
6. Click the color label to toggle the masks on and off, and view the areas of the
video image where the radial filter was applied.
52
Page 59

M akin g Vid eo Adju stm en ts
Regional Adjustment Options
When making regional adjustments with the selection mask, motion tracking mask,
or a gradient mask, the following options are available to you.
White Balance
Temperature: use to adjust the color temperature in the selected region of
the video image. A negative value applies a colder temperature, while a
positive value applies an atmosphere that is warmer.
Tint: use to adjust the color level in the selected region of the video.
Tone
Exposure: use to adjust areas of the video image that are over or
underexposed. A negative value darkens overexposed areas, while a positive
value lightens underexposed areas.
Brightness: use to adjust the brightness in parts of the video image.
Contrast: use to adjust contrast, or the difference between light and dark
areas of the video image.
53
Page 60

CyberL ink Co lorD irecto r
Note: if you converted the selected video to black and white, the Hue section
is not available. The tool is not available when adjusting the Hue
options with the regional adjustment tools.
Note: if you converted the selected video to black and white, the Saturation
section is not available. The tool is not available when adjusting the
Saturation options with the regional adjustment tools.
Note: if you converted the selected video to black and white, the Lightness
section is not available. The tool is not available when adjusting the
Lightness options with the regional adjustment tools.
Clarity: use to adjust the clarity of details in the video image.
Vibrance: use to make the colors in areas of the video image brighter and
more vivid, by enhancing the duller colors.
Saturation: use to adjust the intensity of a color in certain areas of the video
image.
Hue
Use the Hue sliders to fine tune the shade or purity of a specific color in the
selected region of the video image. Use the sliders to adjust the eight color band
ranges as required.
Saturation
Click on Saturation to adjust the saturation of color in the selected region of the
video image. Dragging the sliders to right increases the amount of that color in the
video image, while dragging it to the left reduces it. If you drag the slider all the
way to the left, you can completely remove a color from the selected section of the
video image.
Lightness
Click on Lightness to adjust color brightness in the selected region of the video
image. For each of the eight colors listed, you can adjust how light or dark the
specific color is.
54
Page 61

M akin g Vid eo Adju stm en ts
Note: if you converted the selected video to black and white, the Color
Replacement section is not available.
Color Replacement
In the Color Replacement section, you can replace a color in the selected region of
the video image with a completely different color.
To replace a colorthe selected region of the video image, do this:
1. Click the button and then use the eye dropper to select the color in the
video image you want to replace. You can also click the box in the Original
Color section and choose the color you want to replace in the color palette
window.
2. In the New Color section, click on . In the Color window choose the color
you want to replace the original with and then click OK.
3. Use the Tolerance slider to set the strength and amount of the replaced color.
Blur
Enable the Blur option to apply a soft focus blur effect on the selected region of the
video image. Use the Blur degree slider to adjust the amount of blur applied.
Tint Filter
Enable the Tint Filter option to apply a mono-tone color on the selected region of
the video image.
Once enabled, use the Tint Filter controls on the selected region as follows:
Hue: use this slider to set the mono-tone color used on the selected region of
the video image.
Intensity: use this slider to set the intensity of the mono-tone color. Dragging
the slider right makes the colors more saturated, while dragging it left makes
them less saturated.
55
Page 62

CyberL ink Co lorD irecto r
Global Adjustment Tools
Use the global adjustment tools to modify the entire frame of a video clip. The
following sections outline the features and functions available in the global
adjustment tools of CyberLink ColorDirector.
White Balance
Use white balance for color correction or you can use it to adjust the color
temperature of the video image to create a specific atmosphere. A warmer color
shifts light toward the yellows and reds; a colder color shifts light toward the blues
and greens.
To adjust the atmosphere of a video using white balance, do this:
1. Drag the Temperature slider to adjust the color temperature in the video
image. A negative value applies a colder temperature, while a positive value
applies an atmosphere that is warmer.
2. Drag the Tint slider to adjust the color level of the video image.
To use white balance to color correct the video image, click and then use the
eye dropper to select a pixel in the video image that you believe should be grey.
CyberLink ColorDirector auto corrects the color in the video image.
Tone
In this section of the adjustment panel, the sliders available adjust the tone of the
entire video image, while the Tinge sliders let you modify the clarity, vibrancy, and
saturation levels.
To adjust the tonal level of your videos, do this:
1. Manually adjust color tone using the available sliders as follows:
Exposure: use on videos that are over or underexposed. A negative value
56
Page 63

M akin g Vid eo Adju stm en ts
darkens the all the colors in the video, while a positive value lightens them.
Contrast: use to adjust contrast, or the difference between light and dark
areas of the video image.
Brightest: use to brighten/darken the colors in the video image that are close
to whites. Darkening the lighter colors can enhance their contrast and make
highlights stand out more. Drag the slider left to darken, reducing the
clipping in highlights. Drag it right to brighten and clip the colors that are
close to white.
Bright: is applied to areas of the video image that are overexposed, which can
recover detail in the highlights and brighter areas. Drag the slider left to
recuperate lost detail in highlights by darkening them. Drag it right to
brighten the video image without clipping the brighter areas.
Midtone: use to adjust the overall brightness of the video image by changing
the midtone colors only. Drag the slider left to darken, or right to brighten.
Dark: can be used to help enhance detail in dark sections of the video image
by brightening shadows and underexposed areas. Drag the slider left to
darken the video image without clipping the shadows. Drag it right to
recuperate lost detail in shadows by brightening them.
Darkest: use to brighten/darken the colors in the video image that are close
to blacks. Brightening the darker colors can enhance their contrast and make
shadows stand out more. Drag the slider left to darken and clip the dark
colors. Drag it right to brighten and reduce clipping in shadows.
2. Manually adjust the sliders to adjust the video image tinge as follows:
Clarity: use to adjust video image clarity. Dragging the slider to the right
makes the video image appear crisper, while to the left makes it appear more
"dreamy".
Vibrance: use to make the colors in the video image brighter and more vivid,
by enhancing the duller colors.
Saturation: use to adjust the saturation of color in the video image. A
negative value moves the colors towards black and white, while a positive
value increases the overall intensity of color in the video image.
57
Page 64

CyberL ink Co lorD irecto r
HDR Effect
In this section of the adjustment panel, use the sliders to apply an HDR effect on
your videos. The HDR (high dynamic range) effect adjusts the lighting range on the
edges in the video image, allowing you to recover any loss of detail caused by
contrasting brightness during video exposure. Users can also use this effect to give
videos a more dramatic tone.
Glow
Use the Glow sliders as follows to apply an HDR glow effect, or a "halo" edge, on
contrast edges in the video image:
Strength: use this slider to adjust the amount of the HDR glow effect applied
to the video image.
Radius: use the slider to adjust the radius of the HDR glow effect, or the
amount of contrast applied to the edges in the video image.
Balance: use the slider to adjust the balance (where it is applied) of the HDR
glow effect. Moving the slider right applies it on the brighter parts (highlights)
of edges. Moving it left applies it to the darker parts (shadows) of edges.
Edge
Use the Edge sliders as follows to apply the HDR effect on contrast edges in the
video image:
Strength: use this slider to adjust the amount of the HDR edge effect applied
to the video image. Dragging it right will reveal more detail on the contrast
edges. Dragging it left will blur them.
Radius: use the slider to adjust the radius of the HDR edge effect, or the
amount of contrast applied to the edges in the video image.
Balance: use the slider to adjust the balance (where it is applied) of the HDR
edge effect. Moving the slider right applies it on the brighter parts (highlights)
of edges. Moving it left applies it to the darker parts (shadows) of edges.
58
Page 65

M akin g Vid eo Adju stm en ts
Note: click the curve graph's corresponding button at any time to reset
a curve back to its default setting.
Curve
In the Curve section you can use the tone curve graphs to change the tonal scale,
or overall contrast of a video's image.
You can use one or all of the four tone curve graphs to adjust tonal scale of the
video image. Just click on a curve and drag it up or down, or use the tool to
target the adjustments on a specific tonal region of the video image.
You can adjust each tone curve graph as follows:
RGB channel: use this graph to adjust all of the colors in the video image. If
you click on the curve and drag it down, the video image becomes darker.
When dragged up, the video image becomes lighter.
Red channel: use this graph to only adjust the red in the video pixels. If you
click on the curve and drag it down, you will remove the red from the video
image. When dragged up, the video image becomes darker red.
Green channel: use this graph to only adjust the green in the video pixels. If
you click on the curve and drag it down, you will remove the green from the
video image. When dragged up, the video image becomes darker green.
Blue channel: use this graph to only adjust the blue in the video pixels. If you
click on the curve and drag it down, you will remove the blue from the video
image. When dragged up, the video image becomes darker blue.
59
Page 66

CyberL ink Co lorD irecto r
Note: to see the radius mask, ensure that Show affected areas is selected.
When enabled, dragging the slider lets you see the applied range of
sharpness.
Note: to see the edge mask, ensure that Show affected areas is selected.
When enabled, dragging the slider lets you see the detected edges in the
video.
Detail
You can adjust the sharpness in a video in the Detail section. The sharpness is
applied to edges in the video image to enhance detail in the video clip, where
possible.
Adjusting Sharpness
To adjust the sharpness in the video image, use the available sliders as follows:
Amount: use this slider to adjust the amount of sharpness applied to the
video image.
Radius: use the slider to adjust the radius or range of sharpness applied to
edges in the video image.
Edge Mask: use the slider to apply a mask on the detected edges in the video
image. Once a mask is applied, CyberLink ColorDirector only applies the
sharpness to the masked areas, leaving the surrounded areas untouched.
Noise Reduction
Applying sharpness and other adjustments to videos may result in some image
noise appearing on them. Use the following sliders to reduce the noise as required:
Luminance: use this slider to slightly adjust the color brightness, by reducing
any unwanted light grey spots in the video image that cause luminance noise.
Detail: use this slider to adjust/recover detail in the video image that may be
lost when reducing luminance noise from a video.
Color: use this slider to slightly adjust the overall color saturation, by reducing
any unwanted color spots in the video image that cause color noise.
Detail: use this slider to adjust/recover detail in the video image that may be
lost when reducing color noise from a video.
60
Page 67

M akin g Vid eo Adju stm en ts
Note: if you converted the selected video to black and white, the Hue section
is not available, and is replaced by the Black and White section. See Black
and White for details on adjusting the lightness in black and white videos.
Note: if you converted the selected video to black and white, the Saturation
section is not available, and is replaced by the Black and White section.
See Black and White for details on adjusting the lightness in black and white
videos.
Note: if you converted the selected video to black and white, the Lightness
section is not available, and is replaced by the Black and White section.
See Black and White for details on adjusting the lightness in black and white
videos.
Hue
Click on Hue to fine tune the shade or purity of a specific color the video image.
Use the sliders to adjust the eight color band ranges as required.
You can also use the tool to target the adjustments on a specific color in the
video image. To do this, click to enable the tool, and then click and (while
holding the mouse button down) drag on the color. Drag the mouse up to increase
its hue, or down to decrease it in the targeted color.
Saturation
Click on Saturation to adjust the saturation of color in the video image. Dragging
the sliders to the right increases the amount of that color in the video image, while
dragging it to the left reduces it. If you drag the slider all the way to the left, you
can completely remove a color from the video image.
You can also use the tool to target the adjustments on a specific color in the
video image. To do this, click to enable the tool, and then click and (while
holding the mouse button down) drag on the color. Drag the mouse up to increase
the color's saturation, or drag it down to decrease it in the targeted color.
Lightness
Click on Lightness to adjust color brightness. For each of the eight colors listed, you
can adjust how light or dark the specific color is.
61
Page 68

CyberL ink Co lorD irecto r
You can also use the tool to target the adjustments on a specific color in the
video image. To do this, click to enable the tool, and then click and (while
holding the mouse button down) drag on the color. Drag the mouse up to increase
the color's brightness, or drag it down to decrease, making the color darker.
Black and White
When you convert videos to black and white, this section becomes enabled,
replacing the Hue, Saturation, and Lightness sections. In it you can adjust the
grayscale levels, or overall video image lightness on the converted clips.
To change the grayscale levels, use the Lightness sliders to adjust the brightness of
the original colors, which are now black and white.
You can also use the tool to target the adjustments on a specific color (shade
of gray) in the video image. To do this, click to enable the tool, and then click
and (while holding the mouse button down) drag on the color. Drag the mouse up
to increase the brightness of the color, or drag it down to decrease it.
Split Toning
In the Split Toning section of the Adjustment panel you can produce creative
effects on your videos, such as the Lomo effect. You can also add color to
62
Page 69

M akin g Vid eo Adju stm en ts
monochrome videos, or videos you converted to black and white.
Use the Split Toning controls on a selected video, as follows:
Highlights
Use the sliders to adjust the hue and saturation of the highlights, or the brightest
areas of a selected video.
Hue: use this slider to set the hue or color of the highlights in the video
image. You can also click and then use the eye dropper to select the
precise color (both hue and saturation) you want used in the highlights.
Saturation: use this slider to set the saturation of the color used, or its
amount/strength. Dragging the slider right makes the color more saturated,
while dragging it left makes it less saturated.
Balance
use the Balance slider to set the balance between the split toning effect
applied on the highlights and shadows in the video image. Drag the slider left
to increase the influence of the Shadows sliders on the video image, drag it
right to increase the influence of the Highlights sliders. Set the Balance slider's
value to 0 if you want both the effects on the highlights and shadows equally
applied.
Shadows
Use the sliders to adjust the hue and saturation of the shadows, or the darkest areas
of a selected video.
Hue: use this slider to set the hue or color of the shadows in the video image.
You can also click and then use the eye dropper to select the precise
color (both hue and saturation) you want used in the shadows.
Saturation: use this slider to set the saturation of the color used, or its
amount/strength. Dragging the slider right makes the color more saturated,
while dragging it left makes it less saturated.
Color Replacement
In the Color Replacement section you can replace a color in a video clip with a
completely different color.
63
Page 70

CyberL ink Co lorD irecto r
Note: if you converted the selected video to black and white, the Color
Replacement section is not available.
To replace a color in the selected video clip, do this:
1. Click the button and then use the eye dropper to select the color in the
video image you want to replace. You can also click the box in the Original
Color section and choose the color you want to replace in the color palette
window.
2. In the New Color section, click on . In the Color window choose the color
you want to replace the original with and then click OK.
3. Use the Tolerance slider to set the strength and amount of the replaced color.
Blur
Enable the Blur option in the Adjustment panel to apply a soft focus blur effect on
the entire video image. Use the Blur degree slider to adjust the amount of blur
applied.
Tint Filter
Enable the Tint Filter option in the Adjustment panel to apply a mono-tone color
on the entire video image.
Once enabled, use the Tint Filter controls on the selected video clip as follows:
Hue: use this slider to set the mono-tone color used on the video image.
Intensity: use this slider to set the intensity of the mono-tone color. Dragging
the slider right makes the colors more saturated, while dragging it left makes
them less saturated.
Vignetting Effect
You can add custom vignetting effects to videos in CyberLink ColorDirector.
Shade: use this slider to adjust the shade of the vignetting effect. Dragging
the slider to the left darkens the corners of the video image towards black,
while dragging it right lightens them towards white.
Size: use this slider to adjust the size of the vignetting effect. Dragging the
64
Page 71

M akin g Vid eo Adju stm en ts
slider to the left increases the size of the vignette effect, closing in a circle on
the center of the video image.
Roundness: use this slider to adjust the overall shape of the vignetting effect.
Feather: use this slider to adjust the edge sharpness of the vignetting effect.
Dragging the slider to the left makes the edge blunt, while to right uses more
of a gradient.
65
Page 72

CyberL ink Co lorD irecto r
66
Page 73

Usin g Ad justm en t Presets
Chapter 7:
Using Adjustment Presets
Adjustment presets are a saved set of adjustments that you can apply to your video
clips. You can also download and import presets created by other users, or save
your own to use on other video clips or share them by uploading to DirectorZone.
Click on the Presets tab to display the available adjustment presets.
Downloading Presets from DirectorZone
CyberLink ColorDirector supplies you with some custom adjustment presets that
you can use on your videos. On the Presets tab, these default adjustment presets
are available in the Default Presets section.
To download additional adjustment presets from DirectorZone, do this:
1. Click on or the Download more from DirectorZone link. CyberLink
ColorDirector launches DirectorZone in your default web browser.
2. You must first sign in to DirectorZone to download templates. If you don't
have an account, click the Create Account link at the top of the page to get
one for free.
3. Select the ColorDirector tab to display all the available adjustment presets
you can download.
4. Find a preset you want to download, and then click the Download link
underneath it.
5. Click Download again.
6. Save the template to your computer. Find the location on your computer
where you saved the preset file, and then double-click on it to install it in the
Presets window.
67
Page 74

CyberL ink Co lorD irecto r
Note: the presets you download are available in the Downloaded Presets
section of the Presets tab.
My DirectorZone Presets
In the My DirectorZone window you can conveniently download the custom
presets that you previously uploaded to DirectorZone. You can also access and
download presets from your DirectorZone download history and also your favorite
presets.
To download My DirectorZone presets, do this:
1. Click on the Presets tab.
2. Click the My DirectorZone tab.
3. Filter the presets by My Uploads, Download History, or My Favorites, or enter
a search keyword in the field provided.
4. Select all of the presets you want to download.
5. Click Download to download them to your computer and import them into
the library.
Downloading Presets from CyberLink Cloud
If you have a CyberLink Cloud subscription you can download the presets you
previously backed up to CyberLink Cloud. Once downloaded, these presets are
stored in the download folder specified in CyberLink Cloud Preferences, and
imported into the presets library on the Presets tab.
To download presets from CyberLink Cloud, do this:
1. Click on the Presets tab.
2. Click the My CyberLink Cloud tab.
3. Filter the presets by selecting a collection from the drop-down, or enter a
search keyword in the field provided.
4. Select all of the presets you want to download.
68
Page 75

Usin g Ad justm en t Presets
Note: the presets you download are available in the Downloaded Presets
section of the Presets tab.
Note: by default, all adjustment types are selected.
Note: before saving the preset, click the Upload button if you want to
upload it to DirectorZone or back it up on CyberLink Cloud. See Sharing and
Backing Up Presets for more information on uploading presets to
DirectorZone.
5. Click Download to download them to your computer and import them into
the presets library.
Saving Custom Presets
You can save all the adjustments you made on a video into a custom preset, so that
you can use them on other video clips.
To save a custom adjustment preset, do this:
1. Click on when on the Presets tab, or at the bottom of the Manual tab
click on Create.
2. In the New Preset window, enter the following information:
Preset name: enter a custom name for the new preset.
Save in: select which preset folder on the Presets tab you want to save the
preset in. Select New Folder if you want to save the custom preset in a new
folder.
3. Select or deselect any adjustment types as required. This allows you to
customize the adjustment if required.
4. Click the Save button.
Applying Presets on Videos
You can apply any of the adjustments presets on the Presets tab on video clips in
the storyboard.
To apply adjustment presets on videos, do this:
69
Page 76

CyberL ink Co lorD irecto r
Note: separate each tag you enter with a space. If you want to use two
words as the tag, just put quotes around them, e.g. "dollar bill".
1. Select the video clips that you want to apply presets to in the storyboard
panel and then click on the Presets tab.
2. Hover your mouse over each available preset to preview the current video
with the adjustment applied.
3. Click on the adjustment preset you want to use to apply it.
Sharing and Backing Up Presets
You can share your customized presets with other CyberLink ColorDirector users by
uploading them to DirectorZone. If you have a CyberLink Cloud subscription you
can back up all your customized presets by storing them on CyberLink Cloud.
To share and back up your presets, do this:
1. Do one of the following:
in the New Preset window, enter a name for the custom preset, and then click
Upload.
select the preset in the My Created Presets section of the Presets tab, and then
click .
right click on the preset in the My Created Presets section of the Presets tab,
and then select Upload to DirectorZone/CyberLink Cloud.
2. In the upload window, enter the information as follows:
Destination: select where you want to upload the preset.
Preset name: name of the preset as it will display once uploaded.
This preset belongs to which styles: select the styles or category for the preset.
Description: enter a short description of your preset.
Collection: enter the name of the collection you want the preset added to.
Tags: enter one or more keyword search tags that will help users find the
preset when searching.
3. Click Next to proceed.
70
Page 77

Usin g Ad justm en t Presets
Note: if you are not signed into DirectorZone, you will first be asked to sign
in to continue.
Note: you can import adjustment presets in the .pdadj and .cdadj file formats
via this import method. If you are trying to import an adjustment preset in
either of these formats that you downloaded from DirectorZone, just double
click on it.
4. Confirm the copyright disclaimer, and then click Next to proceed with the
upload.
5. Click on Close to close the upload window.
Exporting/Import Presets
You can export your adjustment presets for import and use on another computer.
To export an adjustment preset, do this:
1. Right-click on a preset and then select Export.
2. Enter a file name for the preset, and then select the location where you want
to export it.
3. Click Save. CyberLink ColorDirector saves the preset in the .cdadj file format.
To import an adjustment preset, do this:
1. Within the Downloaded Preset or My Created Presets section, click on and
then select Import.
2. Browse to location of the preset file and then select Open to complete the
import.
71
Page 78

CyberL ink Co lorD irecto r
72
Page 79

Tu rning Ad justm en ts On /Off
Note: you can also click the button if you would like to reset a set of
adjustments back to the default values.
Chapter 8:
Turning Adjustments
On/Off
You can turn off a set of adjustments applied to a video instantly. This allows you
to reset the one type of adjustments, instead of resetting all the adjustments by
clicking Reset.
To do this, just deselect the check box associated to the applied adjustments.
At any time you can turn the adjustments back on by re-selecting the check box.
73
Page 80

CyberL ink Co lorD irecto r
74
Page 81

Pro duction
Note: if you have CyberLink PowerDirector 11 or above installed on your
computer, you can also select File > Export Project to PowerDirector
from the menu to quickly send all the individual adjusted video clips in the
storyboard directly to the PowerDirector timeline.
Note: if you have a CyberLink Cloud subscription you can select the
Upload a copy to CyberLink Cloud option if you also want the program to
upload the produced file to your CyberLink Cloud storage space after
production.
Note: if you select the HEVC (H.265) or AVC (H.264) output format, you
must also select the container from the drop-down. You can choose from
the .M2TS, .MKV, or .MP4 container file format.
Chapter 9:
Production
When you make adjustments to videos, the last step is to produce them, or render
them with the edits and adjustments applied. CyberLink ColorDirector keeps a log
of all the edits and adjustments you want to make to each video clip, and
producing it applies all these adjustments and creates a new video file for you.
If there are multiple video clips in your project's storyboard panel, the production
feature renders all the clips into one longer video movie file. You can render them
in a variety of video file formats.
To produce your video clips, click the Production button to open the Production
module.
Producing Video Files
You can produce your videos and render them as video files in the HEVC (H.265),
AVC (H.264), XAVC S, MPEG-2, or WMV format.
To produce a video, do this:
1. Click the Production button, and then on the Video File tab if necessary.
2. Specify the Output folder, or the location where the produced video file is
saved. Click if you want to select another output folder or change the
name of the produced file.
3. Select an output format by selecting the corresponding button.
75
Page 82

CyberL ink Co lorD irecto r
Note: if you previously created a custom profile, it is available in Profile
name/quality drop down when you select Custom in the Profile type drop-
down.
Note: if you selected to upload a copy of the produced file to CyberLink
Cloud, ColorDirector will ask you if you want to convert it before uploading.
Click Yes to convert it to an .MP4 file that is playable on a portable device,
or No if you want to upload the original produced file.
4. Select the Country/Video format (NTSC or PAL) for your video. This format
should correspond to the region in which you plan to play your video.
5. Select the Profile name/quality you want to use to create the file. If you are
producing the video in the .WMV format, select the Profile type. This selection
determines the video resolution, file size, and overall quality of the outputted
file. See Customizing Profiles for more information.
6. Configure the production options as required. See Configuring Production
Options for more information.
7. Click Start to begin. CyberLink ColorDirector proceeds to produce and create
the video file.
Customizing Profiles
After you select a file format for your outputted file, depending on the format you
selected, there may be quality settings you can customize in the profiles section.
These quality settings are called profiles, and can consist of a video file's resolution,
bitrate compression, audio compression type, and more.
In the production options section you can:
click to create your own custom video profile from scratch.
select an existing profile, and then click to edit it to fit your
requirements.
click to view a profile's details, or to delete a custom profile you
created previously.
Before you output your production, you may want to create a new quality profile,
edit an existing one, or select a different existing profile, and other options from
one of the available drop-downs in the production options section.
76
Page 83

Pro duction
Note: if the size/length of the your video exceeds the maximum allowed,
CyberLink ColorDirector will separate the video into smaller/shorter videos,
upload these videos, and then create a playlist for you on YouTube.
Configuring Production Options
Before you begin producing your file, you can select from the following production
options:
Enable preview during production: select this option to preview your video
during production. Selecting this option will increase the time required to
produce your video file.
Hardware video encoding: select this option to reduce production time. The
Hardware video encoding option is only enabled if your computer supports
hardware acceleration (NVIDIA graphics card that supports CUDA, an AMD
graphics card that supports AMD Accelerated Parallel Processing, or a
computer with Intel Core Processor Family technology), and you are
outputting in a format that's supported by your graphics card.
Intel Quick Sync Video: if your computer supports Intel Quick Sync Video, and
you are outputting in a format that's supported by your graphics card, then
this option is available. Select it to reduce production time.
Dolby Digital 5.1: select this option if you want to include Dolby Digital 5.1
audio in your produced video file.
x.v.Color: x.v.Color is a color system that can display a wider color range than
usual. CyberLink ColorDirector can generate an x.v.Color-compliant stream,
which is backward compatible with RGB displays, while offering the
opportunity to achieve better visual quality if your playback environment is x.
v.Color ready.
Sharing Videos
You can share the changes you made to the videos on the storyboard by uploading
them to YouTube or Vimeo. To do this, click on the Production button and then
select the Online tab.
Uploading Videos to YouTube
To upload your video to YouTube, do this:
1. Specify the Output folder, or the location where the produced video file that
77
Page 84

CyberL ink Co lorD irecto r
Note: the quality option available on YouTube is also dependent on the
original captured video quality and the bandwidth of the user who is
watching the video.
Note: sign in to DirectorZone and then select Share in CyberLink
DirectorZone Video Gallery if you want to show others how you adjusted
the clips in your video production. When selected, an animated version of
your project's storyboard displays, along with your uploaded video, on
DirectorZone.
will be uploaded is saved. Click if you want to select another output
folder or change the name of the produced file.
2. Click the YouTube Videos button.
3. Select the desired quality of your video from the Profile type drop-down. The
quality you select will result in the corresponding quality option being
available after the video is fully processed on YouTube.
4. Enter a Title and Description for your video in the fields provided. The text
you enter is included on YouTube once uploaded. Also select one of the
Video categories and enter in some keyword Tags that users can search for to
find your video.
5. Set whether you want the video to be Public or Private once it is uploaded to
YouTube.
6. Configure the production options as required. See Configuring Production
Options for more information.
7. Click Start to begin.
8. Click Authorize and then grant CyberLink ColorDirector permission to upload
videos to your YouTube account by following the steps in the YouTube
Authorization windows.
9. CyberLink ColorDirector proceeds to produce and upload the video file. Click
Close when done to return to the program.
Configuring Production Options
Before you begin producing, you can select the following production options:
Hardware video encoding: this option is only enabled if your computer
supports hardware acceleration (an AMD graphics card that supports AMD
Accelerated Parallel Processing), and you are outputting in a file format that
78
Page 85

Pro duction
Note: if the size/length of the your video exceeds the maximum allowed,
CyberLink ColorDirector will separate the video into smaller/shorter videos,
upload these videos, and then create a playlist for you on Vimeo.
Note: the quality option available on Vimeo is also dependent on the
original captured video quality and the bandwidth of the user who is
watching the video.
Note: sign in to DirectorZone and then select Share in CyberLink
DirectorZone Video Gallery if you want to show others how you adjusted
the clips in your video production. When selected, an animated version of
your project's storyboard displays, along with your uploaded video, on
DirectorZone.
supports it.
Enable preview during production: select this option to preview your movie
during production. Selecting this option will increase the time required to
produce your file.
Uploading Videos to Vimeo
To upload your video to Vimeo, do this:
1. Specify the Output folder, or the location where the produced video file that
will be uploaded is saved. Click if you want to select another output
folder or change the name of the produced file.
2. Click the Vimeo button.
3. Select the desired quality of your video from the Profile type drop-down. The
quality you select will result in the corresponding quality option being
available after the video is fully processed on Vimeo.
3. Enter a Title and Description for your video in the fields provided. The text
you enter is included on Vimeo once uploaded. Also enter in some keyword
Tags that users can search for to find your video.
4. Set whether you want the video to be Public or Private once it is uploaded to
Vimeo.
5. Configure the production options as required. See Configuring Production
Options for more information.
6. Click Start to begin.
7. Click Authorize and then grant CyberLink ColorDirector permission to upload
79
Page 86

CyberL ink Co lorD irecto r
videos to your Vimeo account by following the steps in the Vimeo
Authorization windows.
8. CyberLink ColorDirector proceeds to produce and upload the video file. Click
Close when done to return to the program.
Configuring Production Options
Before you begin producing, you can select the following production options:
Hardware video encoder: this option is only enabled if your computer
supports hardware acceleration (an AMD graphics card that supports AMD
Accelerated Parallel Processing), and you are outputting in a file format that
supports it.
Enable preview during production: select this option to preview your movie
during production. Selecting this option will increase the time required to
produce your file.
80
Page 87

Co lorD irector Prefere nces
Chapter 10:
ColorDirector Preferences
To set your program preferences in CyberLink ColorDirector, just click the
button or press the Alt+C keys on your keyboard.
General Preferences
In the Preferences window, select the General tab. The available options are as
follows:
Application:
Frame rate: select the frame rate and TV format (NTSC or PAL) for your video.
The frame rate should correspond to the source video footage being adjusted.
The TV format should correspond to the region in which you plan to play your
produced video (if you burn it to disc).
Drop frame timecode: if your selected TV format is NTSC, select "Yes" to
synchronize the timecode of your video to its video length in the storyboard
panel.
Internet:
Automatically check for software updates: select to periodically check for
updates or new versions of ColorDirector automatically.
Language:
Use system default language: select this option for the language display to be
the same as the language of your operating system.
User defined: select this option and then select the language from the dropdown list that you want to use.
Messages:
Click the Reset button to reset the all the "Never show again" checkboxes in
the program's message dialogs back to the default settings. All of the
message dialogs that contain the "Never show again" checkbox will display
again after this button is clicked.
81
Page 88

CyberL ink Co lorD irecto r
Note: see Applying Color Look-up Tables (CLUT) for more information on
applying color look-up tables.
DirectorZone Preferences
In the Preferences window, select the DirectorZone tab. The available options are
as follows:
Auto sign in:
Auto sign in to DirectorZone: select this option and then enter in your e-mail
address and password to automatically sign in to DirectorZone when the
program is opened. If you do not have a DirectorZone account, click on the
Get an Account button.
Privacy rules:
Allow DirectorZone to gather editing information: select this option to allow
DirectorZone to make a list of all the adjustments you made to the video clips
when uploading them to social media web sites.
Color Preferences
In the Preferences window, select the Color tab. The available options are as
follows:
Apply color look-up table: select this option and then click to import a
color look-up table (CLUT) and apply it to all of the video clips on the
storyboard. The imported color look-up table will be applied to all future
imported video clips until you deselect this option or apply another color
look-up table.
Hardware Acceleration Preferences
In the Preferences window, select the Hardware Acceleration tab. The available
options are as follows:
82
Page 89

Co lorD irector Prefere nces
Note: click the Account Information link in the bottom right corner of the
preferences windows if you want to know your CyberLink Cloud
subscription expiry date, how much storage space you have, and more.
Hardware acceleration:
Enable hardware acceleration for video decoding: if your computer supports
NVIDIA CUDA/AMD Accelerated Parallel Processing/Intel Core Processor
Family technology, select this option to use hardware acceleration to decode
the video during the adjustment process and when previewing videos.
Production Preferences
In the Preferences window, select the Production tab. The available options are as
follows:
Produce:
Reduce video blocky artifacts (Intel SSE4 optimized): select this option to
improve the overall production quality of produced video, if your computer
supports Intel SSE4 optimization.
CyberLink Cloud Preferences
In the Preferences window, select the CyberLink Cloud tab. The available options
are as follows:
Back up and restore your preferences: if you have a CyberLink Cloud
subscription you can click Back up to CyberLink Cloud to back up program
preferences and custom output profiles to CyberLink Cloud. Click Restore
from CyberLink Cloud to replace your current program preferences with the
ones you previously backed up on CyberLink Cloud.
Download folder: click the button to change the folder where
CyberLink Cloud presets, projects, and media are stored when downloaded.
Clear CyberLink Cloud cache: click the Clear Offline Cache button to free up
some disk space by emptying the temp files stored when downloading
content from CyberLink Cloud.
Sign out from CyberLink Cloud service: if you are currently signed in to
CyberLink Cloud, click the button to sign yourself out.
83
Page 90

CyberL ink Co lorD irecto r
84
Page 91

Co lorD irector Ho tkey s
Hotkey
Description
Module Available
File/Project Features
Ctrl+N
Create new project.
All
Ctrl+Shift+W
New workspace and return to
Library module.
All
Ctrl+O
Open existing project.
All
Ctrl+S
Save current project.
All
Ctrl+Shift+S
Save as a new project.
All
Ctrl+P
Pack project materials.
All
Ctrl+Q
Import video files.
Library
Ctrl+I
Import video folder.
Library
Alt+F4
Exit CyberLink ColorDirector.
All
Alt+C
Open CyberLink ColorDirector
preferences window.
All
Workspace
Alt+F9
Go to Library module.
Adjustment, Production
Alt+F10
Go to Adjustment module.
Library, Production
Alt+F11
Go to Production module.
Library, Adjustment
F6
Switch to viewer & storyboard
mode in video viewer window.
AllF7Switch to viewer only mode in
video viewer window.
All
Alt+Z
Open video zoom list view.
Library, Adjustment
F
Go to full screen.
Library, Adjustment
Chapter 11:
ColorDirector Hotkeys
The following is a list of the hotkeys available in CyberLink ColorDirector for your
convenience:
85
Page 92

CyberL ink Co lorD irecto r
Alt+1
Toggle show one mode on/off.
Adjustment
Alt+2
Toggle compare before/after
mode on/off.
Adjustment
Alt+3
Toggle split left/right mode on/
off.
Adjustment
Alt+4
Toggle top/bottom mode on/
off.
Adjustment
Alt+5
Toggle split top/bottom mode
on/off.
Adjustment
Ctrl+Alt+A
Toggle alternate mode on/off
(secondary monitor only).
Adjustment
Ctrl+Alt+M
Toggle mirror mode on/off
(secondary monitor only).
Adjustment
Ctrl+Alt+N
Select to display nothing on the
secondary monitor.
Adjustment
Alt+B
Set video viewer background
color.
AllF1Open CyberLink ColorDirector
help.
All
Shift+F12
View CyberLink ColorDirector
hotkeys list.
All
Operational
Ctrl+Z
Undo last adjustment setting.
Library, Adjustment
Ctrl+Y
Redo last adjustment setting.
Library, Adjustment
Ctrl+R
Reset adjustments to default
settings.
Adjustment
Ctrl+A
Select all videos in the
storyboard panel.
Library, Adjustment
Ctrl+D
Deselect all videos in the
storyboard panel.
All
Ctrl+C
Copy.
Library, Adjustment
Ctrl+V
Paste.
Library, Adjustment
86
Page 93

Co lorD irector Ho tkey s
Delete
Remove the selected videos
from the library/storyboard.
Library, Adjustment
Ctrl+T
Split the select video clip and
the current location.
Library, Adjustment
Ctrl+Alt+T
Open the Trim window.
Library, Adjustment
Ctrl+Alt+D
Open the Detect Scene window.
Library/Adjustment
Home
Go to beginning of video clip.
All
End
Go to end of video clip.
All
Ctrl+Left Arrow
Go to previous clip/scene.
All
Ctrl+Right Arrow
Go to next clip/scene.
All
Left Arrow
-1 unit on the selected tool
slider.
Adjustment
Right Arrow
+1 unit on the selected tool
slider.
Adjustment
Shift+Enter
Add new keyframe.
Adjustment
Shift+Delete
Delete selected keyframe.
Adjustment
Ctrl+Shift+Left
Go to previous keyframe.
Adjustment
Ctrl+Shift+Right
Go to next keyframe.
Adjustment
M
Add timeline marker to the
keyframe timeline.
Adjustment
Space Bar
Play/Pause video playback.
All
Ctrl+/
Stop video playback.
All
Up Arrow
Scroll up when mouse over
adjustment slider.
All
Down Arrow
Scroll down when mouse over
adjustment slider.
All
, or Shift+Mouse
Wheel Up
Go to previous frame.
All
. or Shift+Mouse
Wheel Down
Go to next frame.
All
Ctrl+F
Fast forward video playback.
All
87
Page 94

CyberL ink Co lorD irecto r
Ctrl+U
Access video volume control.
All
Ctrl+Backspace
Toggle mute on/off.
All
Shift
Uses straight line control to
create horizontal and vertical
lines when creating a selection
mask.
Adjustment
Mouse Wheel Up
Increase motion tracking brush
size.
Adjustment
Mouse Wheel
Down
Decrease motion tracking brush
size.
Adjustment
Alt+Mouse Wheel
Switch to and resize eraser
when using the motion tracking
mask brush.
Adjustment
Ctrl+Mouse Wheel
Up
Zoom in on video viewer
window.
Library, Adjustment
Ctrl+Mouse Wheel
Down
Zoom out on video viewer
window.
Library, Adjustment
Esc
Cancel regional adjustment/
current action.
All
Ctrl+K
Show/Hide keyframe settings
panel.
Adjustment
+
Zoom in on keyframe timeline.
Adjustment
-
Zoom out on keyframe
timeline.
Adjustment
Shortcuts
Alt+F
Open [File] menu.
All
Alt+E
Open [Edit] menu.
All
Alt+V
Open [Video] menu.
All
Alt+I
Open [View] menu.
All
Alt+H
Open [Help] menu.
All
Shift+F12
View hotkey list.
All
88
Page 95

Licenses and C op yrig hts
Chapter 12:
Licenses and Copyrights
Below are the applicable licenses and copyright information that pertain to the
components listed in the List of Components.
Dolby Laboratories
Manufactured under license from Dolby Laboratories. Dolby and the double-D
symbol are registered trademarks of Dolby Laboratories. Confidential unpublished
works. Copyright 2003-2005 Dolby Laboratories. All rights reserved.
89
Page 96

CyberL ink Co lorD irecto r
90
Page 97

Te chnical Su pp ort
Note: here are the steps to generate the system info DxDiag.txt file: Click
Windows (start) button, and then search for "dxdiag". Click Save All
Information button to save the DxDiag.txt file.
Chapter 13:
Technical Support
If you require technical support, then this chapter can help. It includes all the
information you need to find the answers you are looking for. You may also find
answers quickly by contacting your local distributor/dealer.
Before Contacting Technical Support
Before contacting CyberLink technical support, please take advantage of one or
more of the following free support options:
consult the user’s guide or the online help installed with your program.
refer to the Knowledge Base at the following link on the CyberLink web site:
http://www.cyberlink.com/support/search-product-result.do
check the Help Resources page in this document.
When contacting technical support by e-mail or phone, please have the following
information ready:
registered product key (your product key can be found on the software disc
envelope, the box cover, or in the e-mail received after you purchased
CyberLink products on the CyberLink store).
the product name, version and build number, which generally can be found
by clicking on the product name image on the user interface.
the version of Windows installed on your system.
list of hardware devices on your system (capture card, sound card, VGA card)
and their specifications. For fastest results, please generate and attach your
system info using the DxDiag.txt.
the wording of any warning messages that were displayed (you may want to
write this down or take a screen capture).
91
Page 98

CyberL ink Co lorD irecto r
Note: you must first register as a member before using CyberLink web
support.
Language
Web Support URL
English
http://www.cyberlink.com/cs-help
Traditional Chinese
http://tw.cyberlink.com/cs-help
Japanese
http://jp.cyberlink.com/cs-help
Spanish
http://es.cyberlink.com/cs-help
Korean
http://kr.cyberlink.com/cs-help
Simplified Chinese
http://cn.cyberlink.com/cs-help
German
http://de.cyberlink.com/cs-help
French
http://fr.cyberlink.com/cs-help
Italian
http://it.cyberlink.com/cs-help
a detailed description of the problem and under what circumstances it
occurred.
Web Support
Solutions to your problems are available 24 hours a day at no cost on the CyberLink
web site:
CyberLink provides a wide range of web support options, including FAQs, in the
following languages:
Help Resources
The following is a list of help resources that may assist you when using any of
CyberLink's products.
Access CyberLink's Knowledge base and FAQ (frequently asked questions):
http://www.cyberlink.com/cs-resource
View video tutorials for your software: http://directorzone.cyberlink.com/
tutorial/
92
Page 99

Te chnical Su pp ort
Note: CyberLink’s user community forum is only available in English and
German.
Ask questions and get answers from our users on the CyberLink Community
Forum: http://forum.cyberlink.com/forum/forums/list/ENU.page
93
Page 100

CyberL ink Co lorD irecto r
94
 Loading...