

Cuisinart DLC-2014 User Manual
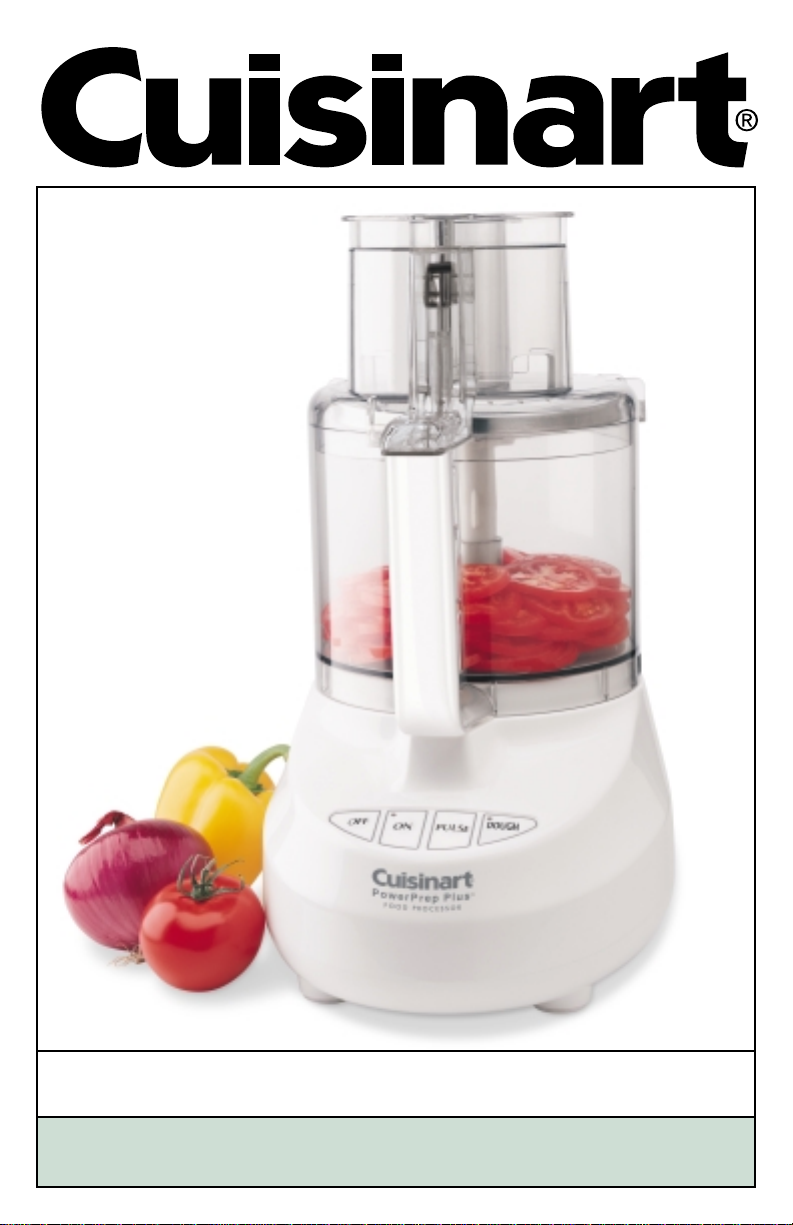
PowerPrep Plus®Food Processor
Instruction Booklet DLC-2014
For your safety and continued enjoyment of this product, always read the instruction book before using.

Recommended work bowl capacity for various foods
FOOD CAPACITY
Chopped and Puréed 14 cups
Fruits and Vegetables
Chopped or Puréed 2-1/4 pounds
Meat, Poultry,
Fish or Seafood
Bread Dough 3 pounds (6 cups flour, yielding two 1-1/2 pound loaves)
Nuts for Nut Butters 3 cups
Sliced or Shredded 14 cups
Fruit, Cheese,
or Vegetables
Cake Batter batter for 5 8-inch layers
Cookie Dough dough for 90 cookies

2
IMPORTANT
UNPACKING
INSTRUCTIONS
This package contains a
Cuisinart
®
Premier™Series
food processor, and the
standard parts for it:
PowerPrep
®
metal dough
blade, metal chopping
blade, slicing disc,
shredding disc, detachable
stem for discs, spatula,
recipe and instruction
books, and how-to video.
CAUTION:
THE CUTTING TOOLS
HAVE VERY SHARP
EDGES. To avoid injury
when unpacking the
parts, please follow
these instructions:
1. Place the box on a low
table or on the floor
next to the kitchen
counter or table where
you intend to keep the
food processor. Be
sure the box is right
side up.
2. Remove the instruction
and recipe book
package.
3. Remove the cardboard
insert. You will see a
rectangular block of
plastic foam that holds
the processor parts,
each fitted into a cavity
of the foam.
4. The PowerPrep
®
metal dough blade (A)
and detachable stem
for the discs (B) are in
cavities on one short
side of the foam block.
Remove them first.
5. The plastic spatula (C)
is on the other short
side of the foam block.
Remove it next.
6. The Slicing disc (D)
is on the edge of one
of the long sides of
the foam block; the
Shredding disc (E)
is on the other side.
Slide them out of their
grooves WITH GREAT
CARE; THE BLADES
ARE VERY SHARP.
7. Only the workbowl
cover (F) and pusher
assembly (G) now
remain in the foam
block. Grasp an edge
of the work bowl cover
and pull it straight up.
The pusher assembly
will slide away from the
workbowl cover and
remain in place. Lift it
straight up to remove.
8. Lift out the foam block.
9. Lift out the video
from its space in the
cardboard frame on
one side of the box.
Then lift out the
cardboard frame.
10. The machine base and
workbowl with metal
blade are at the bottom
of the box. The metal
blade is loose in the
workbowl. Do not turn
over workbowl without
first removing metal
blade.
11. Remove the base
and bowl together
by grasping the plastic
bowl at the top with
both hands and lifting
the bowl straight up.
Do not rotate the bowl
clockwise on the base.
This will cause the
bowl to separate from
the base.
12. Place the food
processor on a
counter or table and
read the instructions
thoroughly before using
the machine.
13. Save the shipping
cartons and plastic
foam blocks. You may
want to use them at a
later date.
Please watch the
enclosed How-To Video
before using the food
processor.
NOTE: Remember to
return your completed
warranty card with all
information carefully
filled out.
WHEN
REMOVING BLADE:
CAREFULLY REMOVE
THE METAL BLADE BY
GRASPING THE CENTER
WHITE HUB AND LIFTING
IT STRAIGHT UP. NEVER
TOUCH THE BLADES
AS THEY ARE RAZOR
SHARP.

4
TABLE OF CONTENTS
IMPORTANT SAFEGUARDS. . . . . . . . . 5
INTRODUCTION. . . . . . . . . . . . . . . . . . 6
ASSEMBLY INSTRUCTIONS . . . . . . . . 7
THE MACHINE FUNCTIONS . . . . . . . . 8
OPERATING INSTRUCTIONS. . . . . . . . 8
THE TECHNIQUES FOR CHOPPING
AND PURÉEING WITH METAL BLADE 9
TO CHOP RAW FRUITS
AND VEGETABLES . . . . . . . . . . . . . . 9
TO PURÉE FRUITS AND COOKED
VEGETABLES . . . . . . . . . . . . . . . . . . 9
TO CHOP HARD FOODS. . . . . . . . . . 9
TO CHOP PARSLEY AND OTHER
FRESH HERBS . . . . . . . . . . . . . . . . 10
TO CHOP PEEL FROM CITRUS FRUIT
OR TO CHOP STICKY FRUIT LIKE
DATES ORRAISINS . . . . . . . . . . . . 10
TO CHOP MEAT, POULTRY, FISH
AND SEAFOOD . . . . . . . . . . . . . . . . 10
TO PURÉE MEAT, POULTRY, FISH
AND SEAFOOD . . . . . . . . . . . . . . . . 10
TO CHOP NUTS . . . . . . . . . . . . . . . 10
TO MAKE PEANUT BUTTER AND
THE OTHER NUT BUTTERS . . . . . . 10
TO MAKE FLAVORED BUTTERS,
SPEADS AND DIPS. . . . . . . . . . . . . 10
TO MAKE MAYONNAISE . . . . . . . . . 11
TO BEAT EGG WHITES . . . . . . . . . . 11
TO WHIP CREAM . . . . . . . . . . . . . . . 11
TO MAKE CRUMBS AND
CRUMB CRUSTS. . . . . . . . . . . . . . . 11
TO MAKE PASTRY. . . . . . . . . . . . . . 11
TO MAKE QUICK BREADS AND
CAKES. . . . . . . . . . . . . . . . . . . . . . . 11
TO MAKE CAKE MIX . . . . . . . . . . . . 12
PREPARING FOOD FOR SLICING
AND SHREDDING. . . . . . . . . . . . . . . . 12
ROUND FRUITS
AND VEGETABLES . . . . . . . . . . . . . 12
WHOLE PEPPERS. . . . . . . . . . . . . . 12
LARGE FRUITS LIKE PINEAPPLE . . 12
CABBAGE AND
ICEBERG LETTUCE . . . . . . . . . . . . 12
PACK THE FEED TUBE FOR
DESIRED RESULTS. . . . . . . . . . . . . 12
PRACTICING SLICING
AND SHREDDING. . . . . . . . . . . . . . . . 13
REMOVING SLICED OR
SHREDDED FOOD . . . . . . . . . . . . . . . 13
TECHNIQUES FOR SLICING
AND SHREDDING. . . . . . . . . . . . . . . . 13
SMALL, ROUND FRUITS AND
VEGETABLES . . . . . . . . . . . . . . . . . 13
LONG FRUITS AND VEGETABLES . 13
SMALL AMOUNTS OF FOOD. . . . . . 13
FRENCH-CUT GREEN BEANS . . . . 13
MATCHSTICKS OR
JULIENNE STRIPS . . . . . . . . . . . . . 13
SLICING MEAT AND POULTRY . . . . . 14
COOKED MEATAND POULTRY . . . 14
UNCOOKED MEATAND POULTRY. 14
FRANKFURTERS, SALAMI AND
OTHER SAUSAGES . . . . . . . . . . . . 14
FIRM CHEESE LIKE SWISS AND
CHEDDAR . . . . . . . . . . . . . . . . . . . . 14
SLICING AND SHREDDING CHEESE. 14
TECHNIQUES FOR KNEADING YEAST
DOUGH WITH DOUGH BLADE . . . . . 15
MACHINE CAPACITY. . . . . . . . . . . . 15
USING THE RIGHT BLADE . . . . . . . 15
MEASURING THE FLOUR. . . . . . . . 15
PROOFING THE YEAST . . . . . . . . . 15
PROCESSING DRY INGREDIENTS. 16
ADDING LIQUIDS . . . . . . . . . . . . . . 16
KNEADING BREAD DOUGH . . . . . . 16
KNEADING SWEET DOUGH . . . . . . 16
RISING. . . . . . . . . . . . . . . . . . . . . . . 16
SHAPING, FINISHING AND BAKING 16
MAKING CONSECUTIVE BATCHES 16
PROBLEMS AND SOLUTIONS WHEN
MAKING DOUGH . . . . . . . . . . . . . . . . 16
PROBLEMS AND SOLUTIONS WITH
TYPICAL SWEET DOUGHS . . . . . . . . 18
CLEANING AND STORING. . . . . . . . . 18
FOR YOUR SAFETY . . . . . . . . . . . . . . 19
SOME TECHNICAL DATA. . . . . . . . . . 19
WARRANTY . . . . . . . . . . . . . . . . . . . . 20

5
Carefully Read All These
Instructions Before Using
This Appliance.
IMPORTANT
SAFEGUARDS
Always follow these
safety precautions when
using this appliance.
Getting Ready
1. Read all instructions.
2. Blades are sharp. Handle
them carefully.
3. Always unplug from
outlet when not in use,
before putting on or
taking off parts, before
removing food and before
cleaning. To unplug, grasp
plug and pull from electrical
outlet. Never pull cord.
4. Do not use outdoors.
5. Do not let cord hang over
edge of table or counter,
or touch hot surfaces.
6. Do not operate any
appliance with damaged
cord or plug, or after
appliance has been
dropped or damaged in
any way. Return appliance
to the nearest authorized
service facility for
examination, repair or
electrical or mechanical
adjustment.
Operation
1. Keep hands as well
as spatulas and other
utensils away from
moving blades or discs
while processing food, to
prevent the possibility of
severe personal injury or
damage to food processor.
A plastic scraper may be
used, but only when the
food processor motor is
stopped.
2. Avoid contact with moving
parts. Never push food
down by hand when
slicing or shredding.
Always use pusher, or
injury could occur.
3. Make sure motor has
completely stopped
before removing cover.
(If machine does not stop
within 4 seconds after you
remove the pusher
assembly, call
1-800-762-0190 for
assistance. Do not use
the machine).
4. Never store any blade or
disc on motor shaft. To
reduce the risk of injury,
no blade or disc should
be placed on the shaft
except when the bowl
is properly locked in place
and the processor is in
use. Store blades and
discs, as you would sharp
knives, out of reach of
children.
5. Be sure cover and feed
tube are securely locked
in place before operating
food processor.
6. Never try to override or
tamper with cover
interlock mechanism.
Cleaning
To protect against risk of
electrical shock, do not put
base in water or other liquid.
General
1. Close supervision is
necessary when any
appliance is used by or
near children.
2. Do not operate this, or
any other motor-driven
appliance, while under the
influence of alcohol or
other substances that
affect your reaction time
or perception.
3. This food processor is UL
listed for household use.
Use it only for food
preparation as described
in the accompanying
recipe and instruction book.
4. The use of attachments
not recommended or sold
by Cuisinart may cause
fire, electrical shock or
personal injury, or
damage to your food
processor.
5. To avoid possible
malfunction of work bowl
switch, never store
processor with pusher
assembly in locked position.
6. Maximum rating of 6.0
amperes is based on
attachment that draws
greatest current.
Other recommended
attachments may draw
significantly less current.
NOTICE: This appliance
has a polarized plug (one
blade is wider than the
other). As a safety feature,
this plug will fit in a polarized
outlet only one way. If the
plug does not fit fully in the
outlet, reverse the plug. If it
still does not fit, contact a
qualified electrician. Do not
attempt to defeat this safety
feature.
SA VE THESE
INSTRUCTIONS
FOR
HOUSEHOLD
USE ONLY
INTRODUCTION
Congratulations on your
purchase of the Cuisinart
®
PowerPrep Plus®Food
Processor. This product
is the ultimate food
preparation tool, and it
comes from the originator
of the American food
processor, Cuisinart.
The Cuisinart
®
PowerPrep
Plus
®
has all the elements
of quality that Cuisinart is
known for, including a
powerful motor, the largest
work bowl, and the longest
warranty in the industry.
It also introduces some
new features that will set
the industry standard.
These are:
• The Cuisinart
®
Supreme™Wide Mouth
Feed Tube, which is more
than twice the size of any
other available. Perfect for
slicing whole fruits and
vegetables.
• The Cuisinart
®
Dough
Control Button. We have
engineered a dough
process speed along with
the PowerPrep
®
Metal
Dough Blade, which work
together to give you the
ability to make perfect
dough in seconds.
These features, plus the
ability to use all your
existing Cuisinart specialty
blades and discs make the
PowerPrep Plus
®
the select
choice in food processors.
6
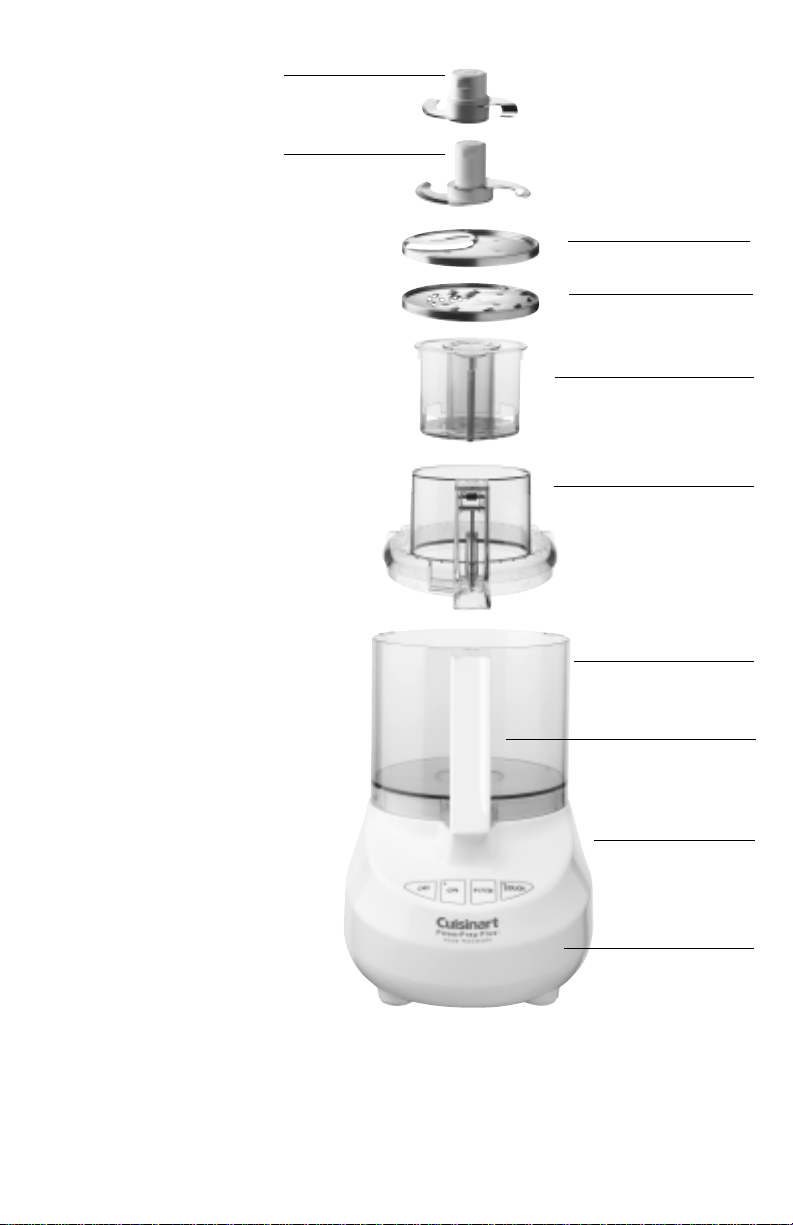
PowerPrep
®
Metal Dough
Blade and Hub
Chopping/Mixing
Blade
4mm Slicing Disc
Medium
Shredding Disc
Pusher Assembly
Cover with
Cuisinart
®
Supreme
™
Wide Mouth
Feed Tube
Housing Base
Cord Wra p
14-cup
Work bowl
Shaft
(not shown)

THE MACHINE
INCLUDES:
1. Housing base with a
vertically projecting
shaft and convenient
touchpad control panel.
2. 14-cup work bowl.
3. Cover with extra
large feed tube.
4. Pusher assembly
that slides inside
the feed tube.
5. Unique metal dough
blade, designed
specifically for our
dough speed control.
6. Sharp metal chop-
ping/mixing blade.
8. Serrated slicing disc.
10. Shredding disc.
11. Detachable stem
for discs (not shown).
12. Plastic spatula
(not shown).
The metal chopping blade
chops raw and cooked
fruits, vegetables, meat,
fish and cheese to the
exact consistency you
want, from coarse to fine,
even to a purée. It chops
nuts, makes nut butters,
mayonnaise and sauces,
and mixes tender, flaky
pastry. The metal chopping
blade also mixes cakes,
frostings, cookies,
quick breads, muffins,
and biscuits.
The Power Prep™Metal
Dough Blade is specifically
designed to work in
conjunction with our
DOUGH control. One touch
of the DOUGH button
makes “perfect dough
in seconds”.
A locking device prevents
heavy dough from driving
the blade up on the shaft.
The slicing disc makes
beautiful whole slices
without torn edges.
It slices whole fruits and
vegetables, cooked meat,
semi-frozen raw meat and
loaves of bread.
The shredding disc
processes most firm and
hard cheeses into long,
attractive shreds. It also
shreds vegetables like
potatoes, carrots and
zucchini, and processes
nuts and chocolate to a
grated texture.
The detachable stem fits
both discs, making disc
storage compact in
limited space.
The pusher assembly
has two parts.
1. A small, removable,
clear pusher that fits into
a small center-located
feed tube. This tube is
for narrow food like
carrots, for adding liquid,
and for continuous
feeding of small food
like garlic.
2. Alarge pusher that fits
into the Cuisinart
®
Supreme™feed tube
opening and moves
freely within it.
3. Upon contact, the large
pusher meets an
activating rod in the
center of the work bowl
handle, permitting the
motor to start.
ASSEMBLY
INSTRUCTIONS:
Blade Operation
1. Plug in the Housing
Base and place the work
bowl on top, with the
work bowl handle just to
the left of center. Turn
the work bowl counterclockwise to lock it onto
the Housing Base.
2. CAREFULLY lift and
place the chosen blade
over the work bowl
center hub. Line up the
markings on the blade
hub with the motor shaft.
It should fit snugly and
rest on the bottom of
the work bowl.
3. Add desired ingredients
to work bowl.
4. Place Work Bowl Cover
onto work bowl, with
the handle area just to
the left of center. Turn
counterclockwise to
lock onto work bowl.
5. Align Pusher Assembly
and activating rod with
the feed tube opening on
the work bowl cover and
slide the activating rod
down to the bottom.
6. You are now ready to
operate the machine.
Disc Operation
1. Plug in the Housing
Base and place the work
bowl on top, with the
work bowl handle just to
the left of center. Turn
the work bowl counterclockwise to lock it onto
the Housing Base.
2. Choose desired disc
and place underside-up
on tabletop. Pick up
detachable disc stem
and align it with the
raised plastic crescent
on the disc underside.
The raised ‘lock’ indicator on the left corner of
the stem should be to
the left of the mounting
plate on disc.
3. Turn the stem to the
right, so the locking
tabs are covered by
the metal supports
and a ‘click’ locks
the stem in place.
7
 Loading...