

CTEK MXTS 70 User Manual
MANUAL
CONGRATULATIONS
to the purchase of your new professional switch mode battery charger. This
charger is included in a series of professional chargers from CTEK SWEDEN AB
and represents the latest technology in battery charging. MXTS 70 is the first
charger with multiple adjustable parameters.
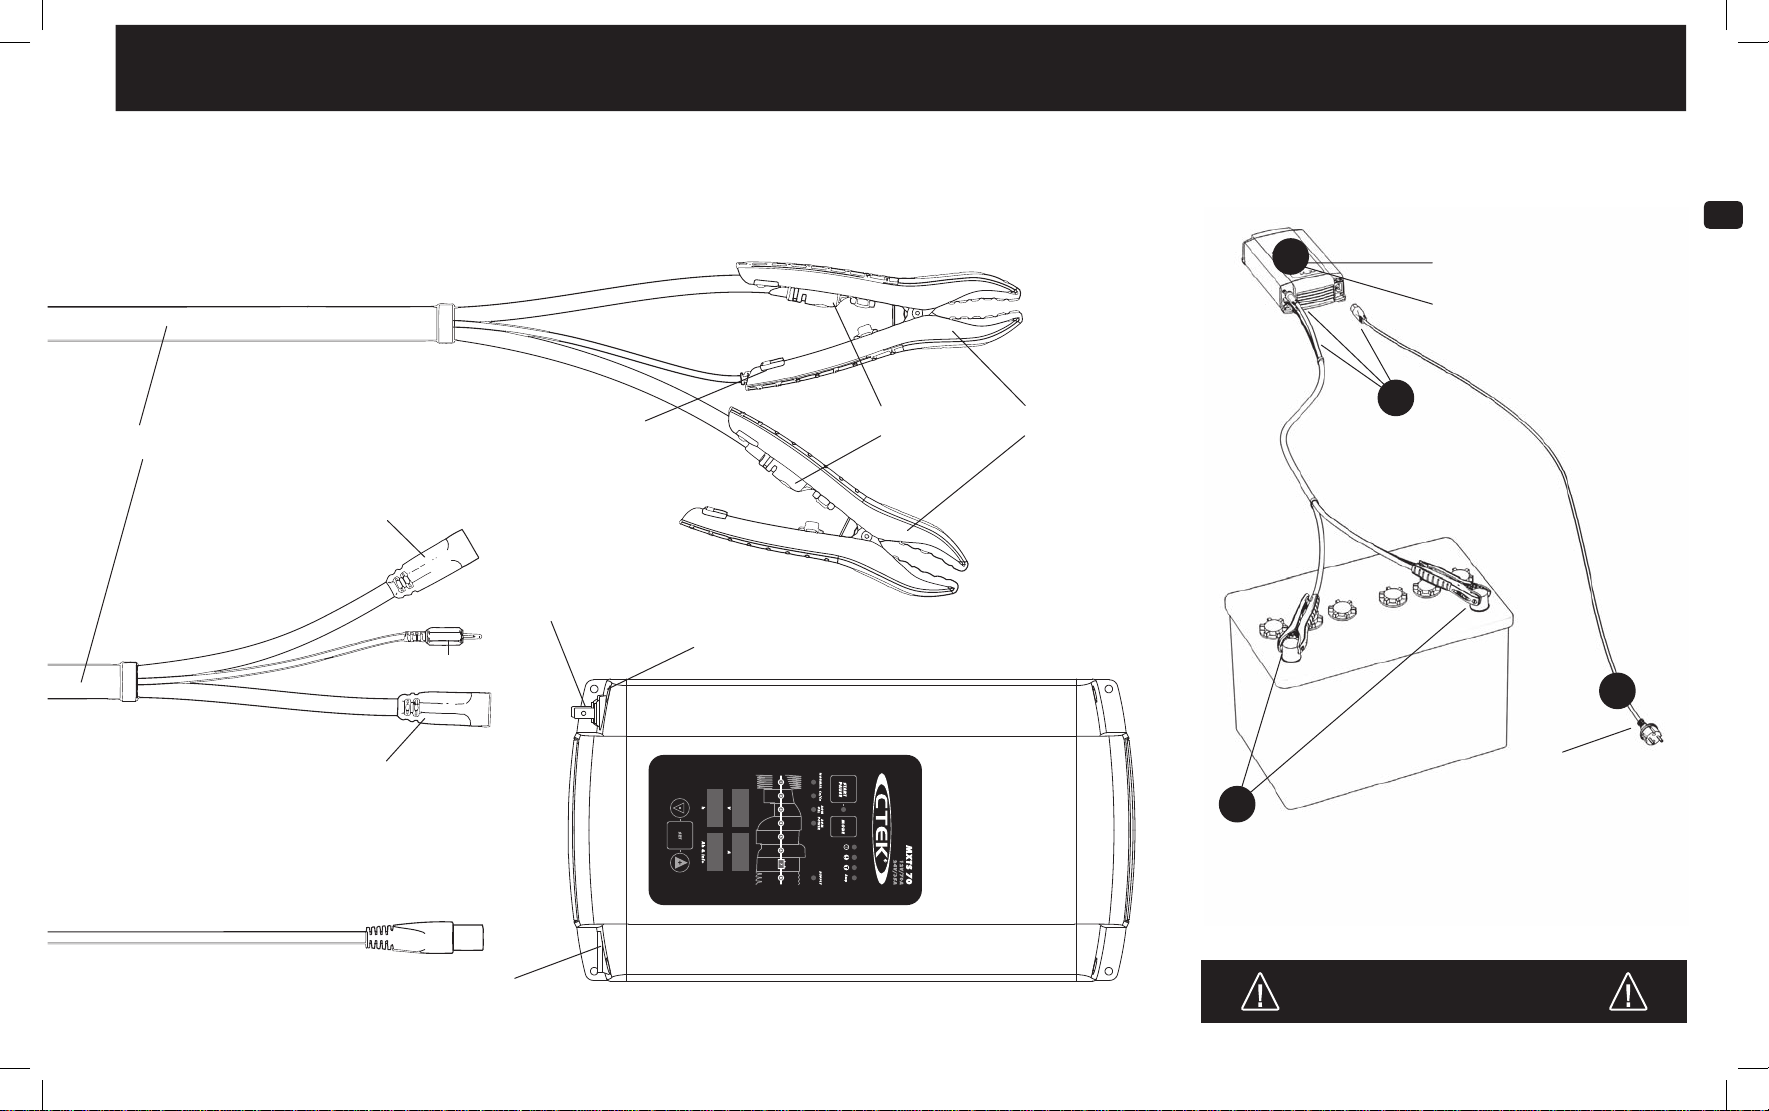
Battery cable
Battery cable
female connector +
Temperature sensor
male connector
Temperature sensor
Charger cable
male connector +/-
Eyelets M8
Temperature sensor female connector
Clamps
QUICK GUIDE
To charge, with last used program settings
4
Attach the cables
to the charger.
Press START/PAUSE-button
to start charging
Press the START/PAUSE-
button to interrupt
charging
1
EN
3
Battery cable
female connector -
2
Connect
the charger
to mains supply
Connect the charger
to the battery
Mains cable
Mains cable connector
20015126D Manual MXTS70, All languages, Print file 003.indd 3 2011-10-11 13:01:26
Batteries and electronics will be damaged if 12V batteries
WARNING!
are charged in 24V-setting.
EN • 3
CHARGING
For best possible charging of your batteries the voltage and current is
adjustable. In addition to that temperature compensated charging is
selectable. See below how to set the parameters for customized charging.
1. Connect the charger cables to the charger
(see connect the cables)
2. Connect the charger to the battery
(see connect the cables)
3. Connect the charger to the wall socket
The power lamp will indicate that the mains cable is connected
to the wall socket. The error lamp will indicate if the battery
clamps are incorrectly connected. The reverse polarity protection
will ensure that the battery or charger will not be damaged.
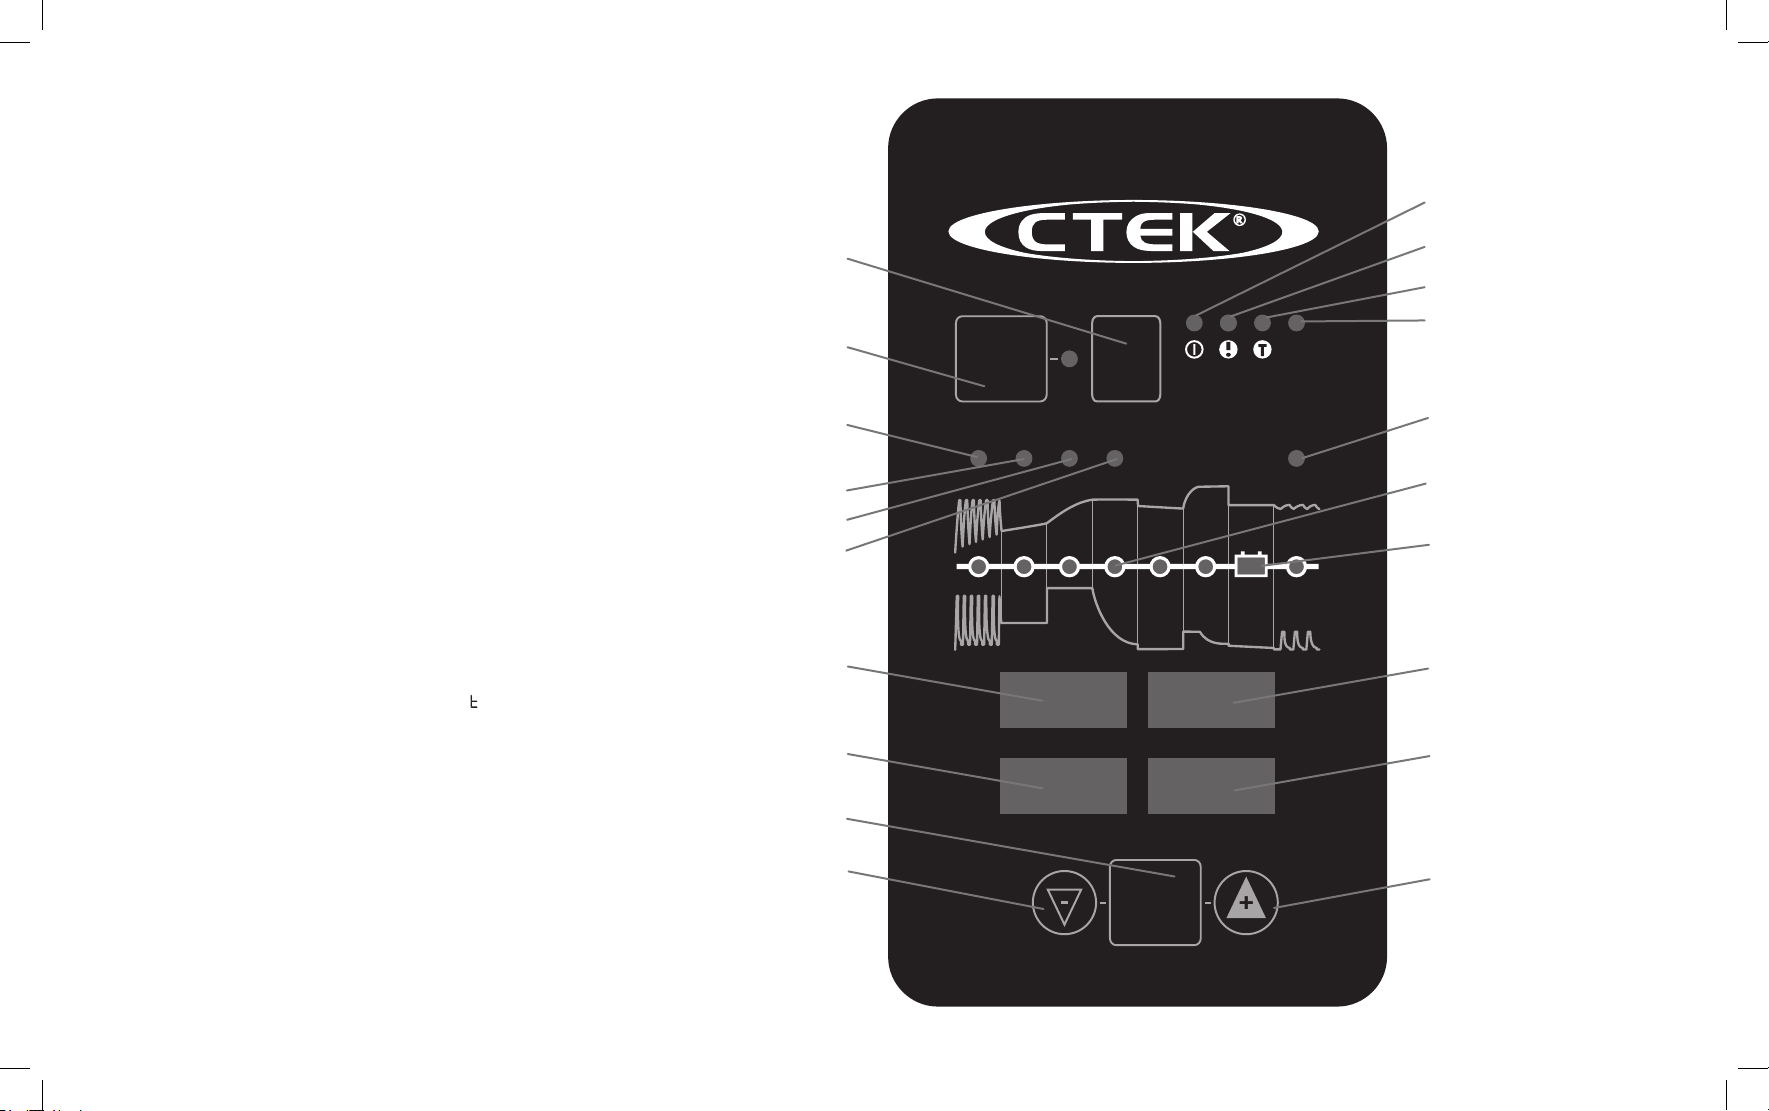
4. Press the MODE-button to select
charging program
5. Press SET-button to set parameters
MODE-BUTTON
START/PAUSE-BUTTON
NORMAL PROGRAM
START
PAUSE
NORMAL
Ca/Ca SUPPLY
AGM
GEL
MODE
AGM
POWER
MXTS 70
12V/70A
24V/35A
Amp
POWER LAMP
ERROR LAMP
TEMPERATUR SENSOR LAMP
REDUCED CURRENT LAMP
SUPPLY PROGRAM
6. Select voltage
•Display (h) will indicate that voltage (
U) is selectable
•Display (V) will indicate set voltage
•Press +/- to change
•Press SET-button to confirm
7. Select current
•Display (h) will indicate that current (
A) is selectable
•Display (A) will indicate set current
•Press +/- to change
•Press SET-button to confirm
8. Select temperature compensation
• Display (h) will indicate that temperature compensation (
) is selectable
•Temperature sensor lamp will indicate activated temperature sensor
•Press +/- to change
•Press SET-button to confirm
9. Press the START/PAUSE-button to start
charging cycle or press MODE-button to change
charging program
10. Follow the 8-step display through
the charging process
The battery is ready to start the engine when STEP 4 is lit.
The battery is fully charged when STEP 7 is lit.
11. Stop charging at any time by pressing
the START/PAUSE-button
12. Press START/PAUSE-button
to resume charging cycle
4 • EN
Ca/Ca PROGRAM
AGM/GEL PROGRAM
AGM POWER PROGRAM
DISPLAY (V)
DISPLAY (h)
SET-BUTTON
DECREASE BUTTON
1 2 3 4 5 6 7 8
V
h
SET
A
Ah & info
READY TO START
FULLY CHARGED
DISPLAY (A)
DISPLAY (Ah & info)
INCREASE BUTTON
20015126D Manual MXTS70, All languages, Print file 003.indd 4 2011-10-11 13:01:26
 Loading...