

Page 1
RTX™100-3Q
USER MANUAL
Revised 12-12-2011
Features
• TrayFree technology – no need to install your hard drives into trays. Simply slide in a
SATA drive and shut the door.
• Patented, custom SATA drive interface is built to withstand thousands of drive
insertions.
• Fast data connection options: USB 3.0, eSATA, and dual FireWire 800.
• Sturdy aluminum case provides excellent heat dissipation and rugged durability.
• Passive cooling system incorporating thermal pads and plates allows silent, fanless
operation.
• Slide lock secures drives during transport
RTX100-3Q User Manual A9-100-0006 REV 1.0 - 1 -
Page 2
CRU
Table of Contents
1. Pre-Installation Steps 2
1.1 Accessories 2
1.2 Identifying Parts 3
2. Using RTX100-3Q 3
2.1 Installing a Hard Drive 3
2.2 Connecting and Powering RTX100-3Q 4
3. Usage with Mac and Windows Operating Systems 4
3.1 Usage with Macintosh Computers 4
3.1.1 Compatibility 4
3.1.2 Mounting and Ejecting Volumes 4
3.2 Usage with Windows Computers 4
3.2.1 Compatibility 4
3.2.2 Formatting Volumes 4
3.2.3 Ejecting Volumes 5
4. Warnings and Notices 5
5. Frequently Asked Questions 5
6. Technical Specifications 7
1. Pre-Installation Steps
1.1 Accessories
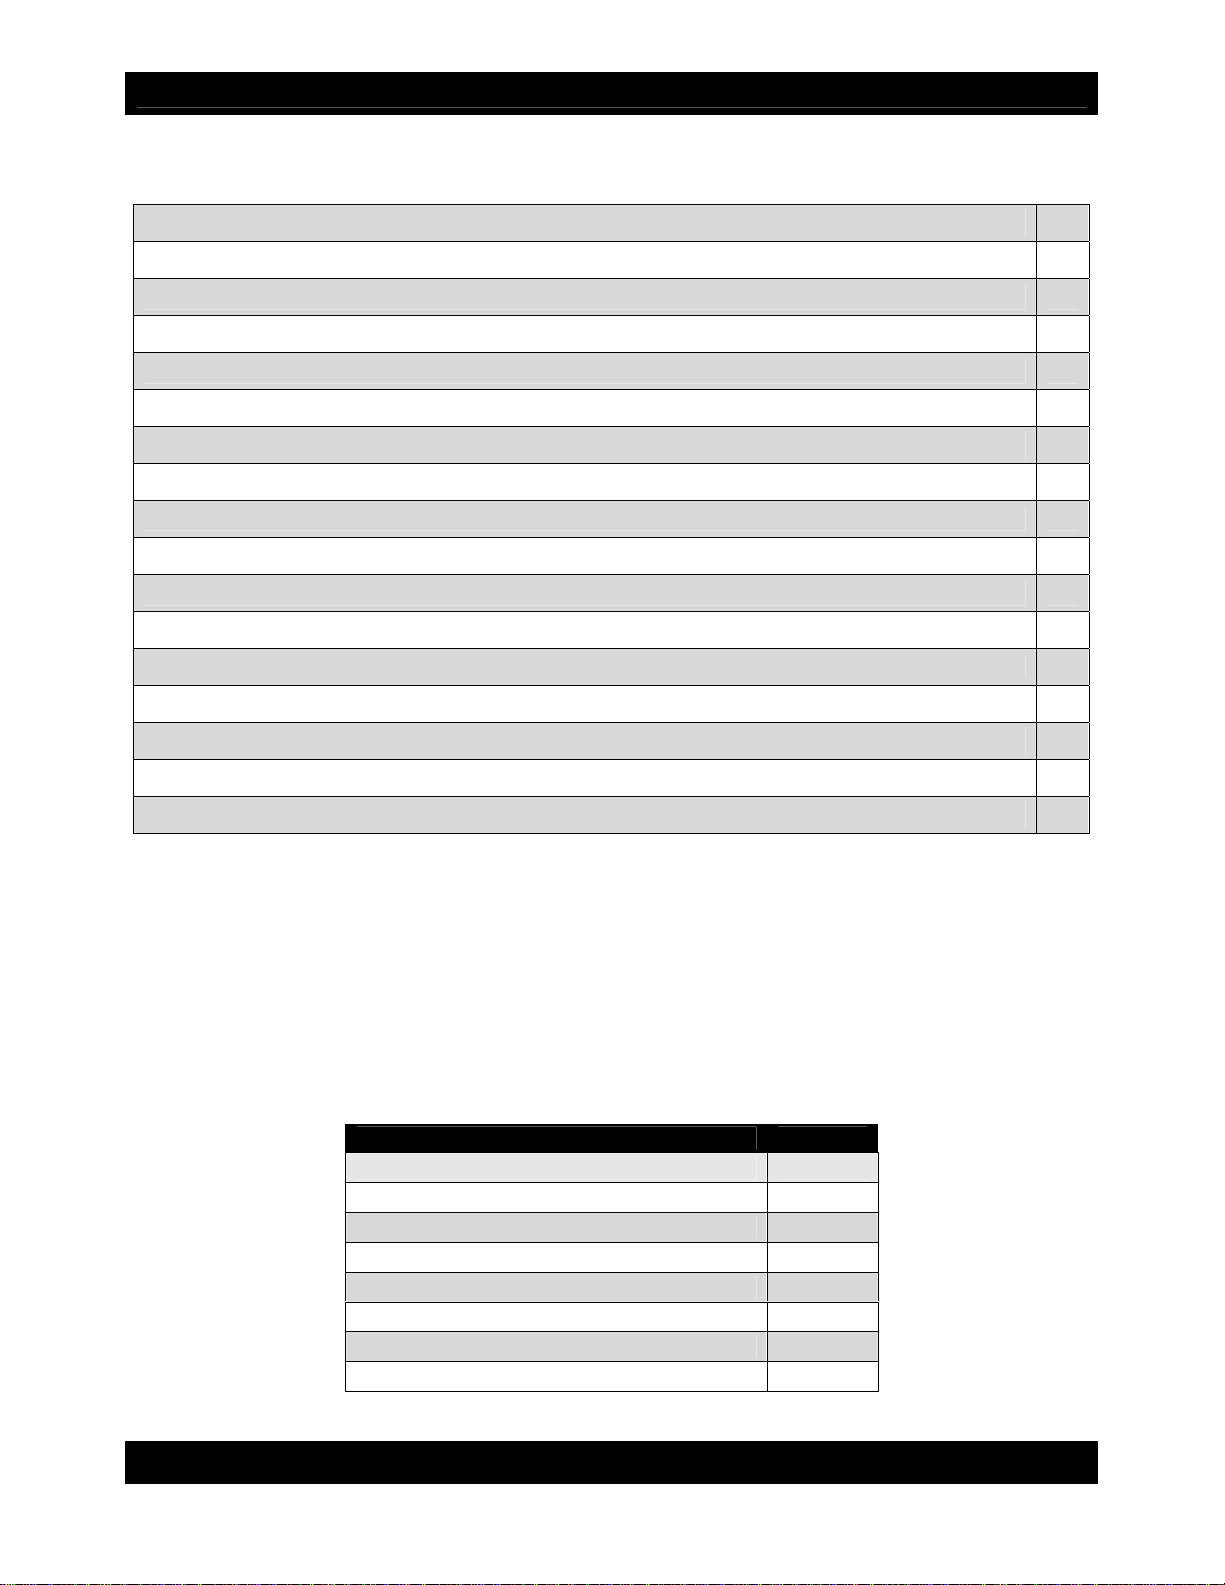
Check the accessories with your RTX100-3Q. The box should contain the following
items:
Item Quantity
RTX100-3Q unit 1
USB 3.0 cable 1
eSATA cable 1
FireWire 800 cable 1
AC adapter & power cord 1
Stand 1
Tool for sliding lock 1
Quick Start Guide and Warranty Information 1
RTX100-3Q User Manual A9-100-0006 REV 1.0 - 2 -
Page 3
CRU
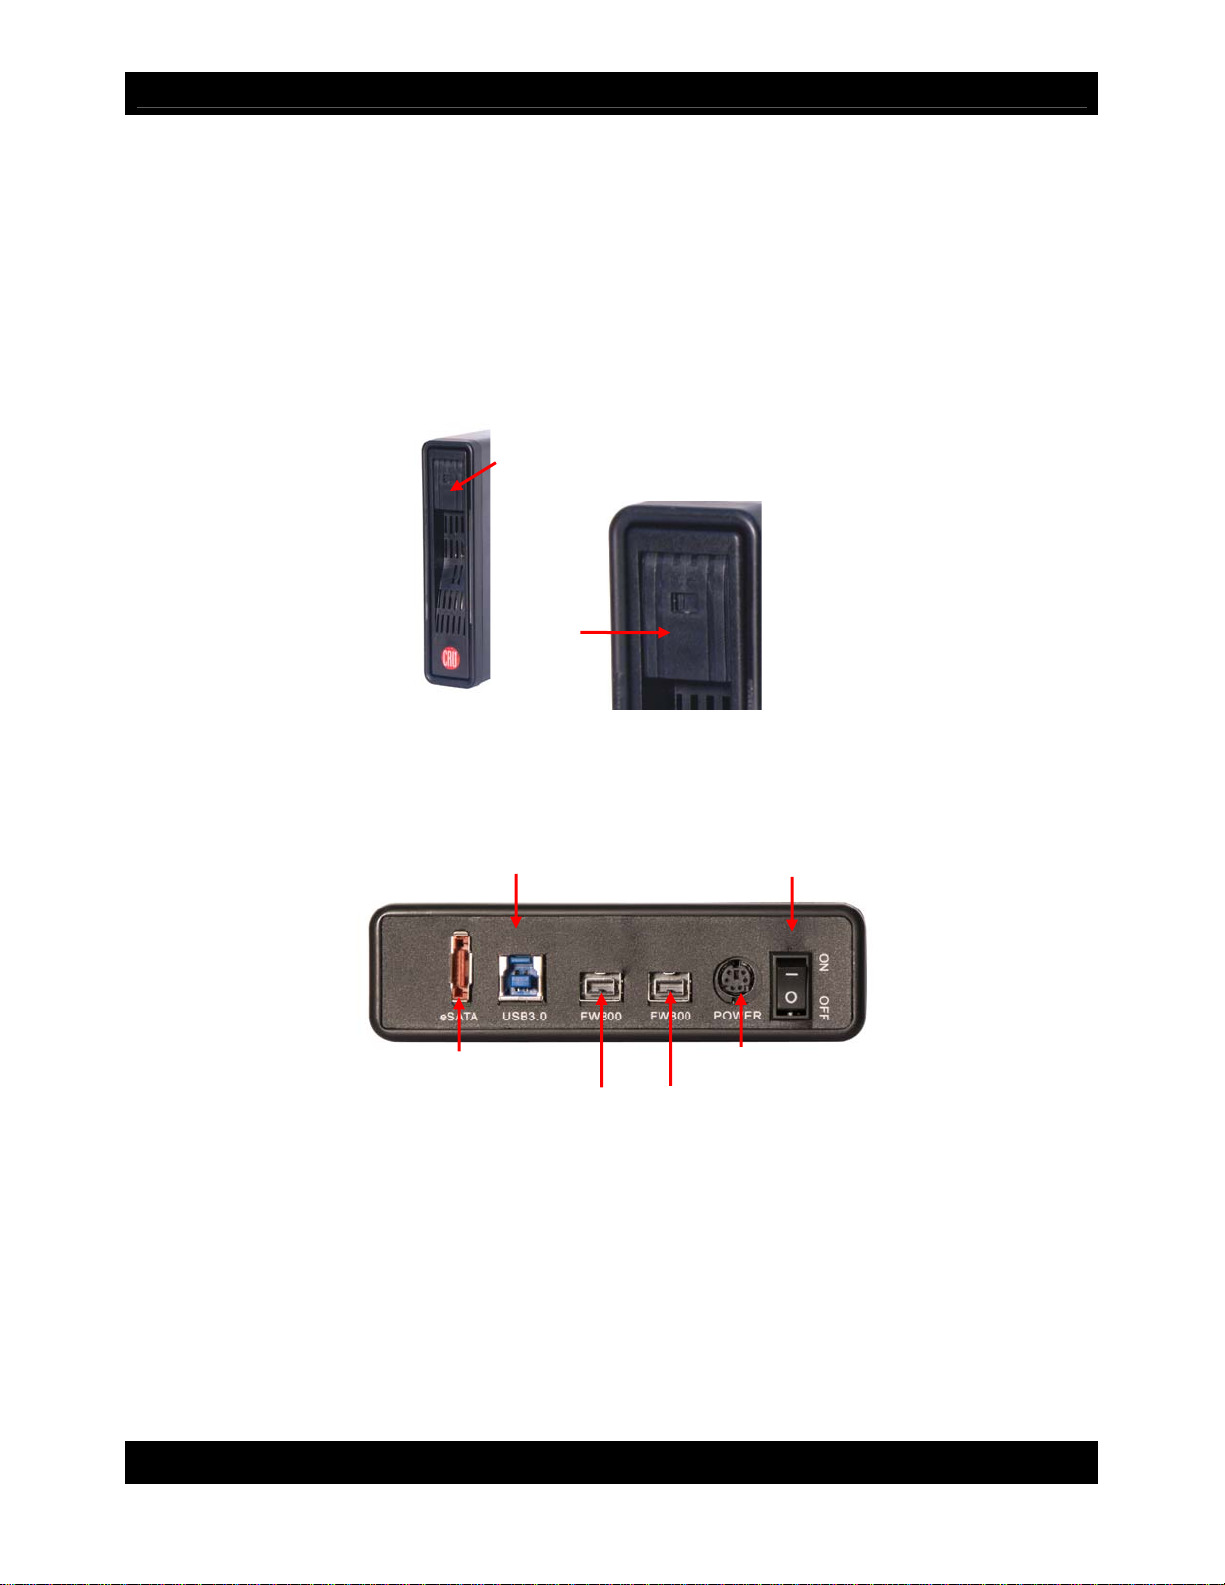
1.2 Identifying Parts
Take a moment to familiarize yourself with the parts of RTX100-3Q. This will help you
to better understand the remaining instructions.
Front View of RTX100-3Q
and RTX100-3SJ
eSATA Port
Ejection Handle
Lock
Rear View of RTX100-3Q
USB Port
FireWire 800 Ports
Power Switch
Power Connection Port
2. Using RTX100-3Q
2.1 Installing a Hard Drive
RTX100-3Q features TrayFree technology, so installing a hard drive couldn’t be easier!
Simply pull the ejection handle to open the door, slide a SATA drive inside, and shut the
door behind it.
RTX100-3Q User Manual A9-100-0006 REV 1.0 - 3 -
Page 4

CRU
2.2 Connecting and Powering RTX100-3Q
Plug in the data cable and power cord. RTX100-3Q can connect to your computer in
one of several ways. Cables for all data connection types are included for your
convenience. Plug the power adapter cable into a grounded electrical outlet.
Your RTX is now ready to use! Turn on the power switch on the back of the unit. If
your drive is already formatted, you can begin using it right away. New hard drives will
need to be formatted before they can be used.
3. Usage with Mac and Windows Operating Systems
3.1 Usage with Mac OS X
3.1.1 Compatibility
RTX uses 3.5-inch SATA (Serial-ATA) hard drives only. RTX does not require drivers
for operation under Mac OS X. However, if you install a host card specifically to work
with this product, that card may require drivers. See your card’s User Manual for drivers
and instructions.
3.1.2 Formatting a drive
If you purchased your RTX pre-populated with hard drives, this step should not be
necessary unless you wish to change the format or erase the drive. To format, use Mac
OS X’s Disk Utility (found in the applications folder).
a) Click on the drive in the window to the left (see picture below).
b) Click the Erase tab in the window to the right (see picture below).
c) Select the format type. Most users prefer Mac OS Extended with Journaling (HFS+),
which is required for compatibility with Time Machine (OS 10.5 or newer). If you need
to use your drive with both Mac and Windows computers, select MS-DOS File System
instead.
d) Enter a name for the new volume and then click “Erase” to start the process.
RTX100-3Q User Manual A9-100-0006 REV 1.0 - 4 -
Page 5

CRU
3.1.3 Mounting and unmounting volumes
If the hard drives installed in the product are already formatted, an icon
representing the drive’s volume will appear (mount) on the desktop.
You can begin using the volume right away. If the drive is
unformatted, a message will appear on the desktop saying that the
disk is unreadable. You can use OS X’s Disk Utility to easily format
the drive (see section above).
Unmount the volume before powering down the unit by dragging the volume’s icon to
the trash bin, or by selecting the volume then pressing Command-E. Disconnecting the
unit without first unmounting the volume can result in data loss.
3.1.4 Creating a Boot Drive
To activate this feature, you must first install OS X on the hard drive in your carrier. The
easiest way to do this is to clone an existing system drive using a utility such as Carbon
Copy Cloner or Super Duper. Next, go to System Preferences Æ Startup Disk. A
window will list the available bootable volumes. Select the volume from which you wish
to boot. Another method is to hold down the Option key during boot up. A screen should
appear that allows you to select the volume you wish to use. This is useful if you wish to
boot from your RTX hard drive only some of the time.
3.2 Usage with Windows operating systems
3.2.1 Compatibility
RTX uses 3.5-inch SATA (Serial-ATA) hard drives only. RTX does not require drivers
for operation under Windows XP, Vista, or 7. However, if you install a host card
specifically to work with this product, that card may require drivers. See your card’s
User Manual for drivers and instructions.
3.2.2 Formatting a drive
If you purchased your RTX pre-populated with a hard drive, this step should not be
necessary unless you wish to change the format or erase the drive. To format, use the
Disk Management utility.
a) Right-click on My Computer, then select Manage. The Computer Management
window will open.
b) In the left pane of this window, left-click on Disk Management.
c) The drive should appear in the list of Disks in the lower middle/right pane (see picture
below). You may need to scroll down to see it. If the drive is already formatted, you
can identify it easily by its volume name. If it’s unformatted, the Drive Properties Box
will say “Unallocated” and you’ll need to initialize the disk before formatting it. Initialize
the disk by right-clicking the Device Properties Box and selecting
Initialize Disk.
RTX100-3Q User Manual A9-100-0006 REV 1.0 - 5 -
Page 6

CRU
Device
Properties
Drive
Properties
d) To format the drive, right-click the Drive Properties Box and select Format.
e) If you are prompted to select a partition type, select MBR for volumes 2TB or smaller,
or GPT for volumes larger than 2TB. Note: Windows XP does not support GPT or
volumes larger than 2TB.
f) Click through several more windows, leaving the default settings, until you see a
window that allows selection of a file system. Choose NTFS and enter a name for the
new volume. Be sure to check the box labeled “Perform a quick format” unless you
want to completely erase any data on the drive and have time to wait. A quick format
should take less than a minute, while standard formatting may take several hours.
g) Click “Next” and then “Finish” to start the format process. When the format is
complete, the Drive Properties Box will update to show the new volume name. The new
volume can now be found in My Computer.
3.2.3 Mounting and ejecting volumes
If the hard drives attached to RTX are already formatted, you can begin using the
volume right away. When the unit is properly connected and turned on, a window may
open to allow you access to the volume. If no window appears, you can find the volume
by double-clicking “My Computer.”
Eject RTX before powering it down by single-clicking the green arrow icon on the task
bar, then selecting “Safely remove….” Windows will indicate when it is safe to
disconnect RTX. Disconnecting the unit without first ejecting it can result in data loss.
3.2.4 Creating a Boot Drive
Some PC motherboards support booting from an external device. To activate this
feature, you will need to adjust the motherboard’s BIOS settings. Check with your
motherboard’s manufacturer or owner’s manual for details.
RTX100-3Q User Manual A9-100-0006 REV 1.0 - 6 -
Page 7

CRU
4. Warnings and Notices
• If your drive is inserted incorrectly it may cause damage to the internal connections.
Be sure to only insert 3.5″ SATA drives and to insert them properly. Do not eject the
drive while it is being accessed. Data loss could result.
• RTX100-3Q is made of aluminum to help with cooling. Although it can be used lying
flat, we recommend that you position it vertically on its stand to aid heat dissipation.
1000GB+ drives get hotter than smaller capacity drives, so the usage of additional
external cooling (such as a fan) is recommended.
• Do not move RTX while the drive has power.
• Although a drive can be accessed without locking the ejection handle, locking is
recommended to keep from accidentally ejecting a drive while in use. Use caution
when pulling on the ejection handle so that if it is locked you do not break the
handle.
5. Frequently Asked Questions
Q: Can you tell me why my eSATA device appears as a Parallel SCSI device in System
Profiler?
A: The "Serial ATA" tab in System Profile shows devices attached to the internal SATA
bus, but not always devices attached to an eSATA host card. Sometimes these devices
will appear under the heading "Parallel SCSI" instead. This is entirely normal and does
not indicate a problem with the device or its drivers.
Q: Why is my hard drive experiencing data corruption?
A: Many things can cause data corruption on hard drives, whether they are inside your
computer or inside an external storage product. Malicious software, OS bugs, failure to
properly disconnect external devices, or no reason at all. Data corruption or loss is
therefore not covered by warranty (this is the case with all rational companies in the
storage industry).
The first thing to try is restarting both the computer and the external device. If the data is
still corrupted, try running built-in OS utilities (such as Mac OS X's Disk Utility First Aid)
on the hard drive. For best results, boot your computer with a Mac OS X Installation CD,
and launch Disk Utility from the CD. When you reach the Mac OS Installation program,
you can run Disk Utility from one of the menus at the top of the screen. From Disk
Utility, you can run "Verify Disk" and "Repair Disk" to find and fix any errors that may be
present in your Mac OS installation.
If the OS utility doesn't help, you may need Data Rescue. This is a great solution for
recovering lost data from a hard drive which has suffered data loss or corruption. If
there is a true hardware failure of your hard drive that prevents it from communicating
with your computer, there is no software solution in existence that can fix this problem.
However, since we cannot tell you with any certainty whether or not you are
RTX100-3Q User Manual A9-100-0006 REV 1.0 - 7 -
Page 8

CRU
experiencing hardware failure in your particular hard drive, we would encourage you to
download a free demo version of ProSoft’s Data Rescue from www.prosofteng.com. It is
limited, in that it only allows you to recover one file per session, but it will tell you if it
even sees any files.
Q: I just connected my eSATA product to my computer for the first time. I turned on the
power, but the drive did not spin up. Is the drive dead?
A: SATA drives will not power up if a SATA cable is plugged into them, but no valid
connection is established with a host. To test this, unplug the SATA cable, but leave the
power plugged in. If the drive spins up in this configuration, then the problem can be
attributed to the SATA host (i.e. eSATA host card).
Q: Can I hot-swap drives with this product?
A: Only if the eSATA/SATA host supports this feature. All eSATA host cards currently
sold by CRU-WiebeTech support hot swapping. Third-party host cards may or may not
support this feature.
Q: It is possible to boot to the external drive(s) in this product?
A: Only if that feature is supported by the eSATA host to which you are connecting.
Many eSATA hosts do not support booting. If this feature is important to you, you should
read the technical specifications of any host card you're considering to make sure it
supports booting.
Q: Why won't the computer let me eject or unmount my drive?
A: There may be a software application running in the background with an active link to
the drive. Sometimes, you may see a message such as "The disk is in use and could
not be ejected. Try quitting applications and try again."
It could be a background application like Sherlock or the Finder. This is not a defect or
issue caused by the WiebeTech device. Try invoking the Force Quit feature in OS X to
see what software may be running. For Windows XP, the equivalent command is CTRLALT-DEL.
Drives connected to the computer via eSATA cannot be ejected in Windows the way
FireWire drives can. However, freeware utilities are available on the internet that
provide a similar function.
Q: Can I access drives formatted NTFS on my Mac?
A: Mac OS 10.3 or higher allows drives formatted in NTFS to mount and be seen as
read-only volumes. Data may not be written to the drives, but it may be copied from the
drives.
RTX100-3Q User Manual A9-100-0006 REV 1.0 - 8 -
Page 9

CRU
6. Technical Specifications
Product name
Interface Types &
Speeds*
Drive Types Supported
Support for Drives over
2 Terabytes
LED
Operating System
Requirements
Power Switch
Power Supply
Compliance
External Material
Product Weight
Dimensions
Support
© 2011 CRU Acquisitions Group, LLC. All rights reserved. RTX and TrayFree are trademarks of CRU Acquisitions Group, LLC.
Other marks are the property of their respective owners.
Limited Product Warranty
CRU-DataPort (CRU) warrants RTX to be free of significant defects in material and workmanship for a period of one year from the
original date of purchase. CRU’s warranty is nontransferable and is limited to the original purchaser.
Limitation of Liability
The warranties set forth in this agreement replace all other warranties. CRU expressly disclaims all other warranties, including but
not limited to, the implied warranties of merchantability and fitness for a particular purpose and non-infringement of third-party rights
with respect to the documentation and hardware. No CRU dealer, agent or employee is authorized to make any modification,
extension, or addition to this warranty. In no event will CRU or its suppliers be liable for any costs of procurement of substitute
products or services, lost profits, loss of information or data, computer malfunction, or any other special, indirect, consequential, or
incidental damages arising in any way out of the sale of, use of, or inability to use any CRU product or service, even if CRU has
been advised of the possibility of such damages. In no case shall CRU’s liability exceed the actual money paid for the products at
issue. CRU reserves the right to make modifications and additions to this product without notice or taking on additional liability.
FCC Compliance Statement: “This device complies with Part 15 of the FCC rules. Operation is subject to the following two
conditions: (1) This device may not cause harmful interference, and (2) this device must accept any interference received, including
interference that may cause undesired operation.”
This equipment has been tested and found to comply with the limits for a Class A digital device, pursuant to Part 15 of the FCC
Rules. These limits are designed to provide reasonable protection against harmful interference when the equipment is operated in a
commercial environment. This equipment generates, uses, and can radiate radio frequency energy and, if not installed and used in
accordance with the instruction manual, may cause harmful interference to radio communications. Operation of this equipment in a
residential area is likely to cause harmful interference in which case the user will be required to correct the interference at this own
expense.
RTX100-3Q
USB 3.0: up to 5.0 Gbps
eSATA 3G: up to 3.0 Gbps
FireWire 800: up to 800 Mbps
*Actual throughput is drive dependant.
3.5” SATA hard drives
Yes
Power/HDD Activity
Windows 7, Vista, XP
Mac OS X
Linux distributions that support the desired connection type
2 position: On / Off
Input: 100-240VAC
Output: +12/+5 V, +2/+2 A
CE/FCC, ROHS
Aluminum alloy case
4 pounds empty, 6 pounds with drive
228mm x 133mm x 37mm
We don’t expect anything to go wrong with your CRU product. But if it does, Tech Support is
standing by and ready to help. Contact us through www.cru-dataport.com/support
or wiebetech.com/techsupport. WiebeTech is a brand of CRU.
We also offer phone support at (800) 260-9800 and (866) 744-8722.
In the event that you experience Radio Frequency Interference, you should take the following steps to resolve the problem:
1) Ensure that the case of your attached drive is grounded.
2) Use a data cable with RFI reducing ferrites on each end.
3) Use a power supply with an RFI reducing ferrite approximately 5 inches
from the DC plug.
4) Reorient or relocate the receiving antenna
FOR OFFICE OR COMMERCIAL USE
Tested to comply
with FCC standards
RTX100-3Q User Manual A9-100-0006 REV 1.0 - 9 -
 Loading...