

CRU RAX 8 Bay-XJ User Manual
RAX
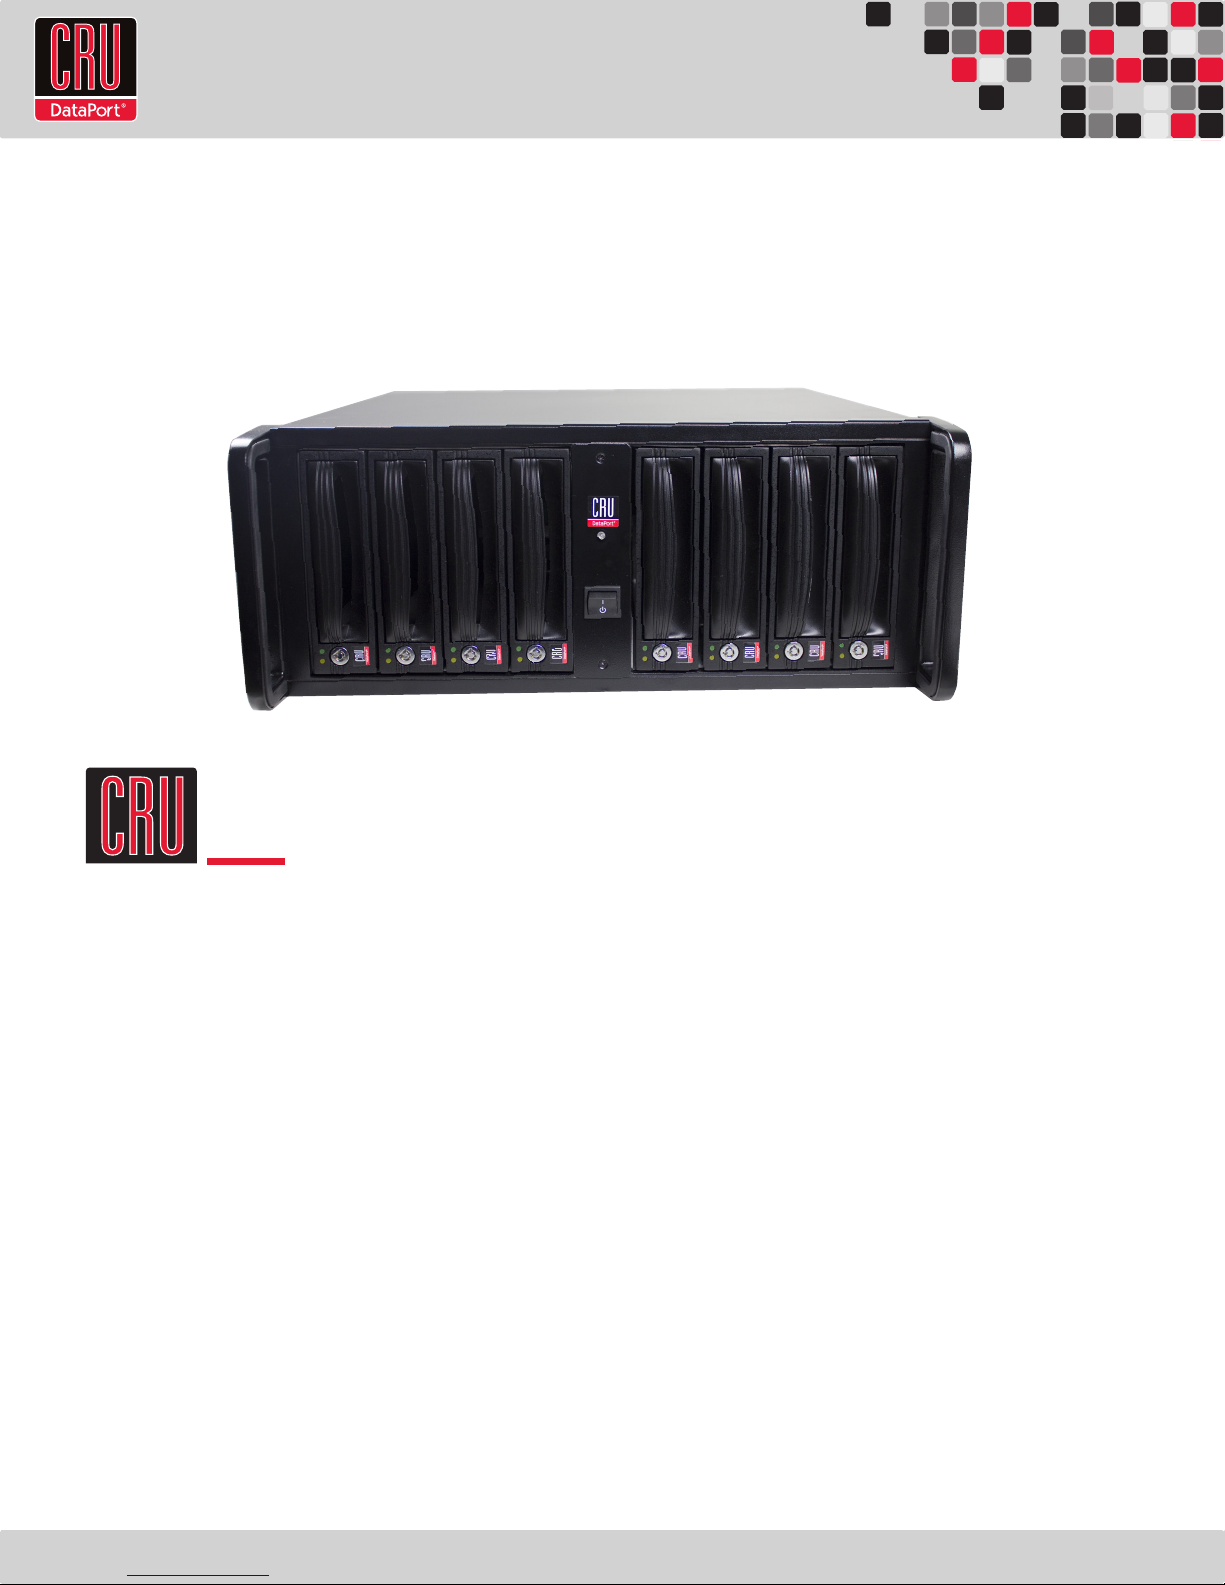
RAX™ 8 Bay-XJ User Manual
RAX841-XJ
Models Covered:
RAX840-XJ, RAX841-XJ, and RAX845-XJ
TM
• Two LEDs per bay for power and access.
• Fast multi-lane SAS/SATA host connection.
• Each SATA hard drive has its own data channel for maximum speed.
• Sturdy aluminum case provides excellent heat dissipation and rugged durability.
A9-840-0006 Revision: 1.0
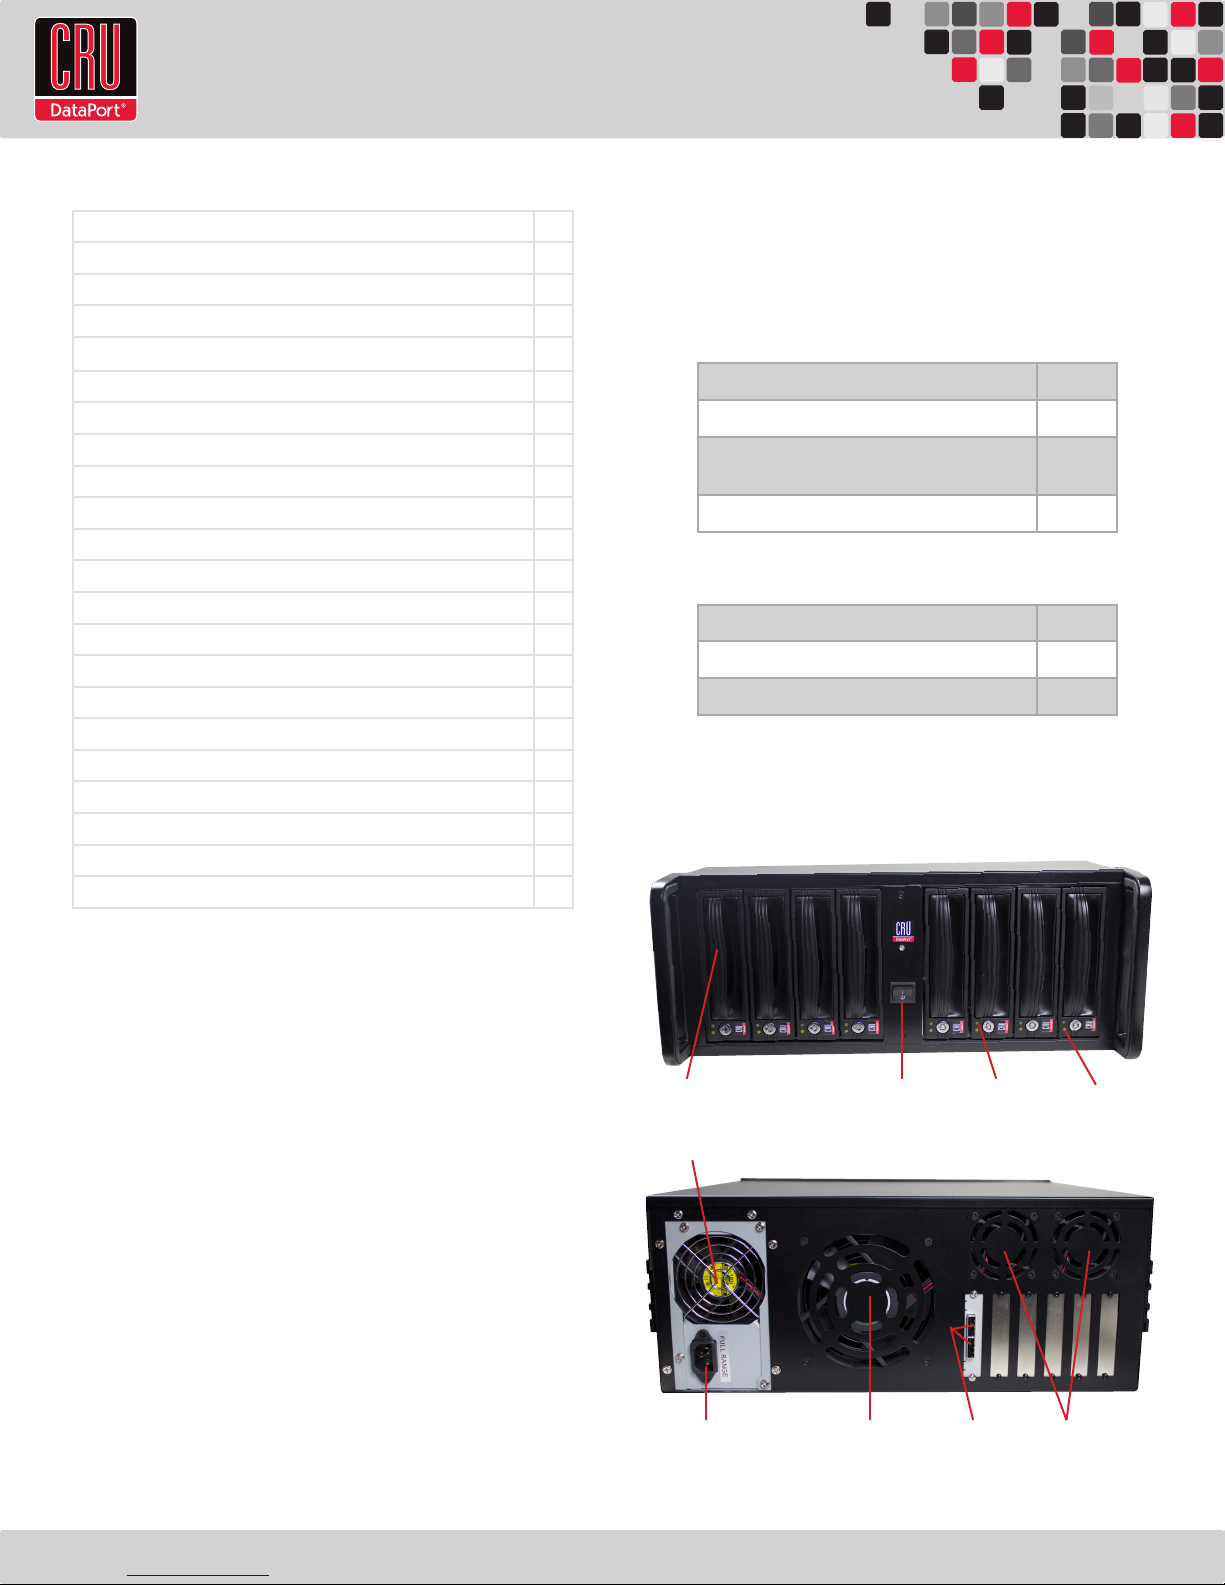
Table of Contents
1. Pre-Installation Steps
Table of Contents
1. Pre-Installation Steps
1.1 RAX-XJ Accessories 1
1.2 Identifying Parts 1
2. Installation Steps
2.1 Installing a Host Bus Adapter (HBA) 2
2.2 Tips for Rack Mounting 2
2.3 Installing Hard Drives 2
2.4 Connecting and Powering RAX-XJ 3
3. Usage with Mac and Windows Operating Systems
3.1 Usage with Macintosh Computers 3
3.1.1 Compatibility 3
3.1.2 Formatting a drive 3
3.1.3 Mounting and Ejecting Volumes 3
3.1.4 Creating a boot drive 3
3.2 Usage with Windows Operating System 3
3.2.1 Compatibility 3
3.2.2 Formatting a drive 4
3.2.3 Mounting and Ejecting Volumes 4
3.2.4 Creating a boot drive 4
4. Frequently Asked Questions
5. Technical Specifications
1
1
1.1 RAX-XJ Accessories
Check the accessories with RAX-XJ. Contact CRU if any parts are missing
or damaged.
Accessories Included with RAX 8-Bay-XJ:
2
Accessories Quantity
RAX-XJ unit 1
Power cords (RAX 840 and RAX841 are available
with single or dual power supplies)
3
Quick Start Guide and warranty information 1
1 or 2
RAX 8-Bay -XJ Bundle also includes the following:
Accessories Quantity
Compatible host card 1
Multi-lane SAS/SATA cables 2
1.2 Identifying Parts
Take a moment to familiarize yourself with the parts of RAX-XJ. This
will help you to better understand the remaining instructions.
4
5
Power Supply Fan
Power Outlet
Power SwitchCarrier Handle
Chassis Fan
Drive Activity
LED
SAS/ SATA ports
(SFF-8088)
Drive Ready/
Error LED
Bay FansDual multi-lane
Page 1
 Loading...