

Page 1
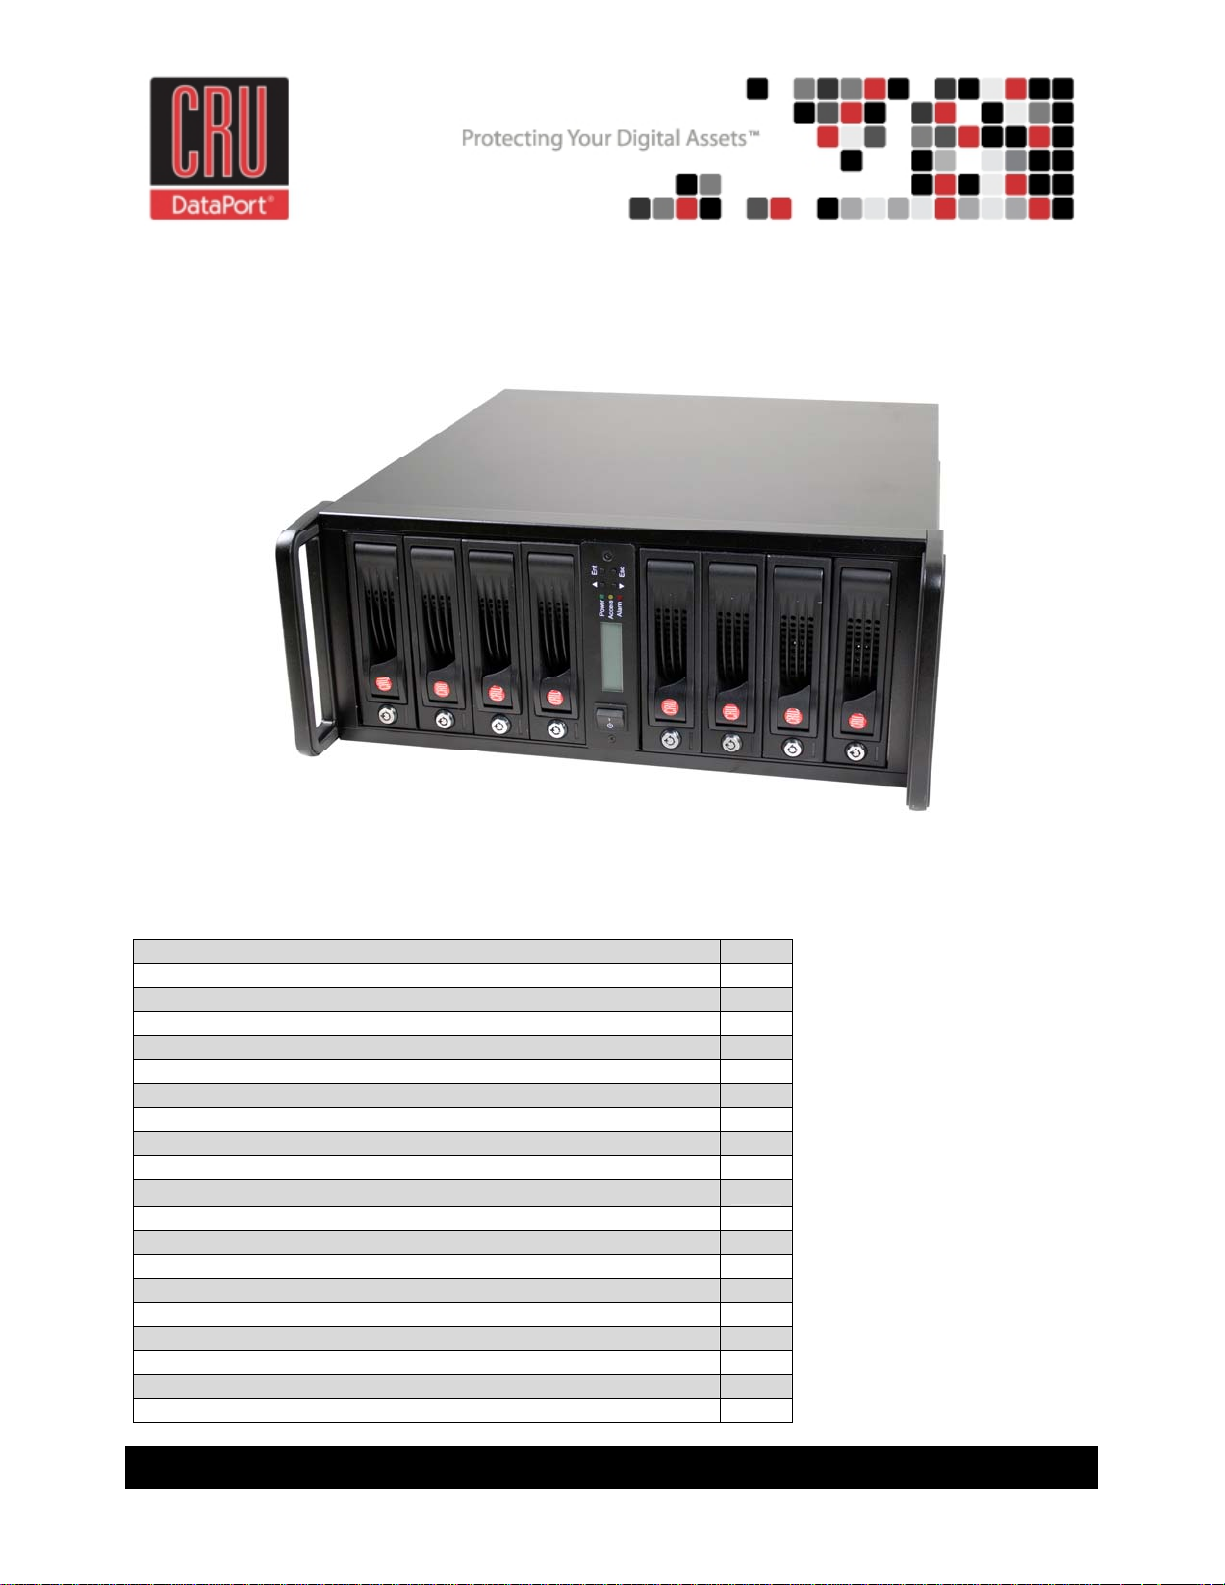
RAX™840-IR Quick Start
Guide
Revised March 3, 2012
This guide covers the essentials for getting your product up and running. For more comprehensive
technical information, see the full User Manual, available for download at cru-dataport.com.
Table of Contents
1. About iSCSI Technology 2
2. Pre-Setup Steps 2
2.1 iSCSI Initiator software 2
2.2 RAX-IR accessories 3
2.3 Hard Drive Installation 3
2.4 Tips for Rack Mounting RAX 3
3. Setting up Your RAX 3
3.1 Connecting to your network (or computer) for configuration 3
3.2 Using a web browser to access the GUI 3
3.3 Using the GUI to configure the RAID. 5
3.4 Manually Creating a Usable RAID Set
3.5 Manually Creating a Virtual Disk 7
3.6 Manually Attaching a Logical Unit 8
3.7 Quick Installation 8
3.8 Connecting to your network (or computer) for data access 9
3.9 Accessing RAX Using iSCSI Initiator Software 9
3.10 Creating volumes over 2TB in size 9
4. Usage with Mac and Windows Operating Systems
5. Warnings and Notices
6. Technical Specifications
5
10
12
13
RAX840-IR Quick Start Guide A9-840-0004-1 REV 1.0 - 1 -
Page 2

CRU
1. A Brief Description of iSCSI Technology
What is iSCSI?
iSCSI is a technology that allows a data storage device to be accessed over a TCP/IP network using
SCSI protocols. When your computer’s OS receives a request for data access, it generates a SCSI
command and then sends an IP packet across a network or direct ethernet connection. A software utility
known as an iSCSI Initiator is used to generate the SCSI commands. Such a utility must be installed on
the computer before it can access an iSCSI storage device.
What is the benefit of iSCSI?
An iSCSI storage device can be placed anywhere throughout a network, so the device can reside at a
great distance from the computer which accesses it. It is also a very fast connection when used on a
gigabit network, achieving speeds of 100MB/sec or more. The connection it uses (RJ45 – standard
ethernet port) is commonly found on desktop and laptop computers, so there is no need to purchase
potentially expensive host bus adapters to provide a connection.
What is iSCSI not?
iSCSI storage devices are not Network Attached Storage (NAS) devices. They have no built-in server
capabilities and therefore cannot be accessed by more than one computer at a time. Multiple computers
can only access the data if the iSCSI device is first attached to a single computer which is then set up as
a server.
2. Pre-Setup Steps
2.1 Install iSCSI Initiator software on your computer. This is a required step. Any
computer must have Initiator software installed before it can connect to an iSCSI device such as RAX-IR.
Both freeware and commercial software utilities are available for this purpose. Note: Initiator software is
not required for additional computers that share files with the host computer attached to RAX. In such a
scenario, the host computer acts as a server to the other computers. Only the computer directly
accessing RAX needs Initiator software.
Windows
Windows Vista and 7 already include the iSCSI software, no download is necessary.
If needed, users can download free Microsoft iSCSI Initiator software at the following URL:
http://www.microsoft.com/download/en/details.aspx?id=18986
Mac OS X
Studio Network Solutions makes globalSAN iSCSI initiator, a free-to-try utility for MacOS X, available
here:
http://www.studionetworksolutions.com/support/faq.php?pi=11&fi=51
ATTO Technologies also makes a commercial iSCSI Initiator for Mac: http://www.attotech.com/xtend.html
Linux
Open-iSCSI initiator software is available for Linux users to download.
Website: http://www.open-iscsi.org/
Readme: http://www.open-iscsi.org/docs/README
RAX840-IR Quick Start Guide A9-840-0004-1 REV 1.0 - 2 -
Page 3
CRU
2.2 Check the accessories with your RAX-IR. Please contact CRU if any parts are missing or
damaged. The box should contain the following items:
Accessories Quantity
Ethernet Cables 2
Power Cables 2
Packet of Keys 1
Manual and Warranty Info 1
2.3 Hard Drive Installation
a) Pull the ejection handle on the TrayFree
bay to open the bay door.
b) Insert a bare SATA hard drive into the bay.
Make sure it is label-side to the left with the
SATA connection on the drive inserted first.
c) Shut the bay door.
d) You can optionally secure each bay door. Doing so is not necessary to operate RAX.
NOTE: If any of the drives are inaccessible after
powering on the unit, try the following steps:
1. Turn off the power.
2. Remove the drive(s) in question.
3. Reinsert the drive(s).
4. Turn on the power.
Insert an RAX Key into its key lock and turn it 90 degrees clockwise.
2.4 Tips for mounting RAX840-IR
Use a support system to mount the unit. RAX840-IR requires slide rails or other support
system to be rack-mounted. The front mounting brackets will not allow the unit to be mounted
without additional support.
Operating temperature: Ensure that the unit is mounted in a room that is kept below 40° C (104°
F) and that the unit receives proper air flow.
Make sure that the unit is level before securing it into place.
Connections: Do not overload the supply circuit when connecting the equipment and ensure that
the unit is properly grounded.
3. Setting up Your RAX
The steps below explain how to get your RAX ready to use. If you purchased your RAX pre-configured,
you may skip step 3.
3.1 Connecting RAX to your network (or computer) for configuration.
a) Plug an ethernet cable into the “Config GUI” port on the rear of RAX.
b) Connect the other end of the ethernet cable to your network. Usually, this means plugging it
into a router or hub. In an office environment, you may have a network jack built into your office
wall. If a network connection is not available, you can connect the ethernet cable directly to an RJ45
(ethernet) port on your computer.
c) Connect the power cables to the rear of the RAX and to a grounded electrical outlet.
d) Turn on the RAX unit’s power using the switches on the rear panel and on the front of the unit..
RAX840-IR Quick Start Guide A9-840-0004-1 REV 1.0 - 3 -
Page 4

CRU
3.2 Using a web browser to access the GUI (Graphical User Interface).
3.2.1 If you are connected to a DHCP-enabled
network
On DHCP networks, a new IP address is dynamically
assigned to RAX’s Config GUI port as soon as the
network detects it. You can determine this address by
checking the LCD interface on the front of RAX. It will
appear in this format: xxx.xxx.xxx.xxx. Simply type this
IP address into a web browser on your computer. This will access RAX’s GUI, which you will use to
configure the unit.
3.2.2 If you are connected to a static network
a) Check your computer’s IP address, subnet mask, and gateway. Mac users can find this information in
System Preferences Network.
To do this in Windows, open Network and Sharing Center in the Control Panel (Also called “View Network
Status and Tasks” under the “Network and Internet” category). On the left pane, select “Change adapter
settings”. Right-click on your network (likely called Local Area Connection) and select Properties. On the
new window that opens, select “Internet Protocol Version 4 (TCP/IPv4)” and click the Properties button.
Your computer’s IP address, subnet mask, and gateway will be displayed.
b) On the RAX LCD interface, press ENT and then scroll up or down to Change IP Setting. Press ENT.
Not sure what type of network you
have? If the IP address displayed on the
LCD starts with 169.254 this indicates
that the network is probably not DHCPenabled. Use the instructions for a static
network.
c) Scroll up or down to find Static. Press ENT.
d) Change the IP address to closely match what your computer is using. Or, if you are on a business
network, have your IT administrator assign you an IP address. The IP address you select must NOT be in
use by another device.
For example, if your computer's IP address is 192.168.0.9, you might change the RAX’s IP to
192.168.0.7. On smaller networks, each of the first three octets must be the identical to your
computer’s IP address! When changing the IP address you'll notice that a box flashes over the digit to
be changed. While the digit is selected, press ▲ (Up) or ▼ (Down) to change it. Press ENT to move to
the next digit.
e) After the IP address is set, enter the subnet mask address exactly as it is shown on your computer’s
TCP/IP settings.
f) Next, enter the gateway address exactly as it is shown on your computer’s TCP/IP settings.
g) Confirm the settings change. To confirm, press ▲ (Up) for “yes” and then press ENT again.
h) Type the RAX’s new IP address into a web browser on your computer. This will access the RAX’s GUI,
which you will use to configure the unit.
3.2.3 If you are connected directly to a computer
The instructions are similar to those for a static network (see paragraph above), except that your
computer will not have IP address assigned if it’s not a part of a network. Since the RAX and your
computer must have similar IP addresses, you will assign an IP address to your computer based on the
default IP address of RAX.
RAX840-IR Quick Start Guide A9-840-0004-1 REV 1.0 - 4 -
Page 5

CRU
a) Check RAX’s LCD to find out the IP address of the Config GUI configuration port. It will appear in this
format: xxx.xxx.xxx.xxx.
b) Next, change your computer’s IP address so that all but the last three digits match RAX’s address. For
example, if RAX’s IP is 169.254.12.62, you might assign your computer the number 169.254.12.63
(assuming no other computer on the network is already using that number). The process of changing
your computer’s IP address varies depending on its operating system. (For Windows XP, open Network
Connections in the Control Panel. Right-click on your network and select Properties. On the new window
that opens, select TCP/IP and click the Properties button. Mac users can go to System Preferences
Network.) By default, your computer is probably set to receive a new IP address automatically. Change
the setting to manual configuration and then type in the IP address.
c) Using the same process as the previous step, change the computer’s Mask setting to match RAX’s
Mask setting.
d) Finally, use RAX’s LCD interface to change RAX’s Gateway setting. It should match the IP address
you assigned to your computer.
e) Launch a web browser and type RAX’s IP address into the URL bar, as if it were a website. This will
access RAX’s GUI, which you will use to configure the unit.
The tables below show example settings. The table on the left shows the type of settings that will appear
by default. The table on the right shows how the settings might look after you’ve made changes.
RAX Computer
IP Address
Mask
Gateway
169.254.12.62 (blank)
255.255.000.000 (blank)
000.000.000.000 (blank)
Before making changes
RAX Computer
IP Address
Mask
Gateway
169.254.12.62 169.254.12.63
255.255.000.000 255.255.000.000
169.254.12.63 (blank)
After making changes
3.3 Using the GUI to configure the RAID.
(You may skip this step if you purchased a pre-configured unit.)
You will use the web browser-based GUI to set up a RAID and create logical volumes on RAX. After
accessing the GUI the GUI’s main page should load, displaying a picture of RAX with several options to
the left. When you click on any option, you will be prompted for a user name and password. The user
name is "admin" and the default password is "1234."
3.4 Manually Creating a Usable RAID Set
To manually create a usable RAID set, you will first need to create a new RAID Group.
a) Click the “Create” button at the bottom of the page to open the RAID Group creation screen.
b) Enter a name for the new RAID Group in the first field, and then select your desired RAID type or
JBOD from the dropdown box. CRU-DataPort recommends RAID 5 for maximum performance,
capacity, and security. For more information on RAID, see Section 3. Click “Select PD” to select
the drives that will be added to the RAID Group.
RAX840-IR Quick Start Guide A9-840-0004-1 REV 1.0 - 5 -
Page 6

CRU
Note: Drives must be marked as Free Disks before they can be added to a RAID Group.
c) All available Free Disks will be displayed. Check the drives that you wish to add to the RAID
Group, then click “Confirm”.
d) The selected Physical Disks will now be displayed in the RAID Group creation screen. Enable or
Disable Write Cache, Standby, Readahead, and Command Queuing based on your needs. Most
RAID Groups will be fine with the default settings. Then click “Next” to proceed to the confirmation
screen.
RAX840-IR Quick Start Guide A9-840-0004-1 REV 1.0 - 6 -
Page 7

CRU
e) On the co
are displayed under “RAID PD slot”, then click “Confirm” to create the RAID Group.
The RAID Group will now display on the main RAID Group screen. To finish manually creating a usable
RAID set, a Virtual Disk still must be created and a Logical Unit must be attached. Go to the next section,
“Manually Creating a Virtual Disk”
nfirmation screen, verify that the RAID level is correct and all of the disks you selected
3.5 Manually Creating a Virtual Disk
After a RAID Group has been created, you can create associated Virtual Disks. You must create at least
one Virtual Disk to access the drives of RAX with a computer.
a) Click the “Create” button at the bottom of the page to open the Virtual Disk creation screen.
b) You will see the screen below. Fill in the information and then click “Confirm”.
c) The Virtual Disk will now display on the main Virtual Disk screen. If you have enabled an Erase
option, do not shut down or reboot RAX while the Virtual Disk is initializing or the erase process will
stop.
To finish manually creating a usable RAID set, at least one Logical Unit must be attached. Go to the
next section, “Manually Attaching a Logical Unit”.
RAX840-IR Quick Start Guide A9-840-0004-1 REV 1.0 - 7 -
Page 8

CRU
p
3.6 Manually Attaching a Logical Unit
You will need to attach at least one Logical Unit to a Virtual Disk to access its RAID Group, although
multiple Logical Units can be attached to the same Virtual Disk.
a) Click the “Attach” button to attach a Logical Unit to a Virtual Disk.
b) You will see the screen below. Fill in the information. Select the Virtual Disk to which you wish to
attach a Logical Unit. The Host name can remain as an asterisk if you want any host to access
the Virtual Disk. Otherwise, change the field to limit access to specific hosts. Then select the LUN
that will be used. The default setting on this is acceptable. Finally, select the permissions that
hosts accessing this Logical Unit will have. Then click “Confirm”.
c) The main Logical Unit Screen will now display the Logical Unit you have just created. If you’ve
been following the instructions for manually creating a usable RAID set, you have now completed
setup and can now access the RAID set through iSCSI initiator software.
WARNING: Changing RAID levels will
erase any data on the drives. Make a
backup copy of any data you wish to
kee
before changing the RAID.
3.7 Quick Installation
CRU-DataPort does not recommend using the Quick Installation option to set up your RAX.
Quick Install uses all physical disks in RAX and the maximum amount of space they contain to create a
RAID Group using one Virtual Disk. There will be no space set aside for spares. If some disks are used in
other RAID Groups, Quick Install cannot be run.
RAX840-IR Quick Start Guide A9-840-0004-1 REV 1.0 - 8 -
Page 9

CRU
3.8 Connecting RAX to your network (or computer) for data access.
Connect RAX to a computer or network using the included Ethernet cable. Plug one cable into the
“CH-1” port. You can optionally plug a second cable into the “CH-2” port. Having multiple iSCSI
channels provides redundancy/failover and increased performance.
If you created a second data volume during the RAID initialization process, you can access it
using a second computer connected to the “CH-2” port. Each of the two iSCSI ports allows
connection by a single computer.
3.9 Accessing RAX using iSCSI Initiator Software
This software can by launched by double-clicking on the iSCSI Initiator icon in the Administrative Tools
folder in the Control Panel.
3.9.1 Windows XP
After you launch the initiator you'll see a window with several tabs, with the "General" tab opened by
default.
a) If you have set up CHAP in the RAX GUI, input the proper information by clicking on “General” tab and
then clicking on the “Secret” button.
b) Select the "Discovery" tab. Under Target Portals, click the "Add" button and enter the IP address for
the RAX’s CH-1 or CH-2 port (depending which connection link is shown as “Up” on the NIC screen).
c) Next, select the "Targets" tab. You should see a selection for the RAX in this Targets tab.
d) Select that target and click "Log on." Leave the default settings alone and click “OK”.
If the log-on is successful you'll now be able to use the RAX just like any other disk attached to your
computer.
3.9.2 Windows Vista and Windows 7
a) After you launch the initiator, input the IP address for the RAX’s CH-1 or CH-2 port (depending which
connection link is shown as “Up” on the NIC screen.
b) Click on the “Quick Connect…” button.
If the log-on is successful you'll now be able to use the RAX just like any other disk attached to your
computer.
Note: The Quick Connect feature does not support advanced connection types like CHAP. For
instructions on connecting to an iSCSI target using advanced settings, visit the following URL:
http://technet.microsoft.com/en-us/library/ee338480(v
3.9.3 GlobalSAN iSCSI Initiator for MacOS
This software can be launched by double-clicking on the globalSAN iSCSI icon in System Preferences.
a) After you launch the initiator you’ll see the globalSAN window pop up. Press the Add button (“+”) and
choose Portal from the dropdown menu to add a new portal.
b) On the Add Portal dialog box, enter the IP address for the RAX’s CH-1 or CH-2 port depending which
connection link is shown as “Up” on the NIC screen, and then click OK.
c) If you have set up CHAP in the RAX GUI input the proper information by clicking on the “Authentication
Settings” button.
d) Select the new target in the list to the left, then select the appropriate connection from the list that
opens up on the right side and click the “Connect” button.
If the log-on is successful you'll now be able to use the RAX just like any other disk attached to your
computer.
=ws.10).aspx#BKMK_ConnectAdvanced
RAX840-IR Quick Start Guide A9-840-0004-1 REV 1.0 - 9 -
Page 10

CRU
3.10 Creating volumes over 2TB in size
Although RAX can create data volumes larger than 2TB, some older operating systems cannot access
such volumes. This is because they support only 32-bit LBA (Logical Block Addressing).
Newer operating systems should be able to use 2TB+ volumes without difficulty. You will simply need to
do one of the following two things while creating a Virtual Disk:
Change the LBA to 64-bit
Increase the block size to 4096
Windows
Neither of the options above will work for operating systems older than Windows XP. You need to make
more than one Virtual Disk, each less than 2000GB in size. Each Virtual Disk also needs a different LUN.
Mac OS X
Although Mac OS 10.4.x supports only 32-bit LBA, increasing the block size to 4096 will allow you to
create a 2TB+ volume that is usable by the OS.
Linux
Versions of Linux vary, but using one of the above methods may allow you to create a 2TB+ volume that
your distribution can use.
4. Usage with Mac and Windows Operating Systems
4.1 Usage with Mac OS X
4.1.1 Compatibility
RAX uses 3.5-inch SATA (Serial-ATA) hard drives only. RAX does not require drivers for operation under
Mac OS X. However, if you install a host card specifically to work with this product, that card may require
drivers. See your card’s User Manual for drivers and instructions.
4.1.2 Formatting a drive
If you purchased your RAX pre-populated with hard drives, this step should not be necessary unless you
wish to change the format or erase the drive. To format, use Mac OS X’s Disk Utility (found in the
applications folder).
a) Click on the drive in the window to the left (see picture below).
b) Click the Erase tab in the window to the right (see picture below).
c) Select the format type. Most users prefer Mac OS Extended with Journaling (HFS+), which is required
for compatibility with Time Machine (OS 10.5 or newer). If you need to use your drive with both Mac and
Windows computers, select MS-DOS File System instead.
d) Enter a name for the new volume and then click “Erase” to start the process.
RAX840-IR Quick Start Guide A9-840-0004-1 REV 1.0 - 10 -
Page 11

CRU
4.1.3 Mounting and unmounting volumes
If the hard dri
the drive’s volume will appear (mount) on the desktop. You can begin using the
volume right away. If the drive is unformatted, a message will appear on the desktop
saying that the disk is unreadable. You can use OS X’s Disk Utility to easily format
the drive (see section above).
unt the volume before powering down the unit by dragging the volume’s icon to
Unmo
the trash bin, or by selecting the volume then pressing Command-E. Disconnecting
the unit without first unmounting the volume can result in data loss.
4.1.4 Creating a Boot Drive
To activate this feature, you must first install OS X on the hard drive in your carrier. The easiest way to do
this is to clone an existing system drive using a utility such as Carbon Copy Cloner or Super Duper. Next,
go to System Preferences Startup Disk. A window will list the available bootable volumes. Select the
volume from which you wish to boot. Another method is to hold down the Option key during boot up. A
screen should appear that allows you to select the volume you wish to use. This is useful if you wish to
boot from your RAX hard drive only some of the time.
ves installed in the product are already formatted, an icon representing
4.2 Usage with Windows operating systems
4.2.1 Compatibility
RAX uses 3.5-inch SATA (Serial-ATA) hard drives only. RAX does not require drivers for operation under
Windows XP, Vista, or 7. However, if you install a host card specifically to work with this product, that
card may require drivers. See your card’s User Manual for drivers and instructions.
4.2.2 Formatting a drive
If you purchased your RAX pre-populated with a hard drive, this step should not be necessary unless you
wish to change the format or erase the drive. To format, use the Disk Management utility.
a) Right-click on My Computer, then select Manage. The Computer Management window will open.
b) In the left pane of this window, left-click on Disk Management.
c) The drive should appear in the list of Disks in the lower middle/right pane (see picture below). You
may need to scroll down to see it. If the drive is already formatted, you can identify it easily by its volume
name. If it’s unformatted, the Drive Properties Box will say “Unallocated” and you’ll need to initialize the
disk before formatting it. Initialize the disk by right-clicking the Device Properties Box and selecting
Initialize Disk.
Device
Properties
d) To form
at the drive, right-click the Drive Properties Box and select Format.
Drive
Properties
RAX840-IR Quick Start Guide A9-840-0004-1 REV 1.0 - 11 -
Page 12

CRU
e) If you are prompted to select a partition type, select MBR for volumes 2TB or smaller, or GPT for
volumes larger than 2TB. Note: Windows XP does not support GPT or volumes larger than 2TB.
f) Click through several more windows, leaving the default settings, until you see a window that allows
selection of a file system. Choose NTFS and enter a name for the new volume. Be sure to check the box
labeled “Perform a quick format” unless you want to completely erase any data on the drive and have
time to wait. A quick format should take less than a minute, while standard formatting may take several
hours.
g) Click “Next” and then “Finish” to start the format process. When the format is complete, the Drive
Properties Box will update to show the new volume name. The new volume can now be found in My
Computer.
4.2.3 Mounting and ejecting volumes
If the hard dri
When the unit is properly connected and turned on, a window may open to allow you access to the
volume. If no window appears, you can find the volume by double-clicking “My Computer.”
Eject RAX before powering it down by single-clicking the green arrow icon on the task bar, then selecting
“Safely remove….” Windows will indicate when it is safe to disconnect RAX. Disconnecting the unit
without first ejecting it can result in data loss.
4.2.4 Creating a Boot Drive
Some PC mo
to adjust the motherboard’s BIOS settings. Check with your motherboard’s manufacturer or owner’s
manual for details.
ves attached to RAX are already formatted, you can begin using the volume right away.
therboards support booting from an external device. To activate this feature, you will need
5. Warnings and Notices
Use only hard drives that are in perfect condition. Avoid using drives that have ever developed
bad sectors during previous usage. This could lead to possible device failure or loss of data.
RAX supports SATA hard drives of various specifications and different capacities. However, we
recommend using drives of the same brand and type for optimal performance. If drives of different
capacities are used in a RAID, the capacity of the smallest drive will determine how much of each
drive is used. The additional capacity on the larger drives will not be used by the RAID.
RAID level 0 will allow you to use the full combined capacity of the drives, and offers the best data
transfer speeds. However, RAID 0 offers no protection for the data. If one drive fails in a RAID 0,
the data on all of the drives is irretrievably lost. Before creating a RAID, investigate the various
RAID types and choose the one that is best for your needs.
Always back up data before switching RAID types. You must reformat your drives afterwards.
Before starting any type of hardware installation, please ensure that all power switches have been
turned off and all power cords have been disconnected to prevent personal injury and damage to
the hardware.
To avoid overheating, RAX should be operated in a well-ventilated area and in such a way that
sufficient airflow is maintained across the controller chips.
Remove the drives before transporting RAX to prevent damage to the drive interfaces.
RAX840-IR Quick Start Guide A9-840-0004-1 REV 1.0 - 12 -
Page 13

CRU
6. Technical Specifications
Product Models:
Raid Levels Supported:
Host Interfaces:
Data Interface Speeds:
Drive Types Supported:
Online Auto-Rebuild:
LED Indicators:
Operating System
Requirements:
Power Switch:
Power Supply:
Cooling Fans:
Compliance:
Unit Weights:
Dimensions:
Technical Support
RAX and TrayFree are trademarks of CRU Acquisitions Group, LLC. Other marks are the property of their respective owners.
© 2008, 2012 CRU Acquisitions Group, LLC.
Product Warranty
CRU-DataPort (CRU) warrants this product to be free of significant defects in material and workmanship for a period of three years
from the original date of purchase. CRU’s warranty is nontransferable and is limited to the original purchaser.
Limitation of Liability
The warranties set forth in this agreement replace all other warranties. CRU expressly disclaims all other warranties, including but
not limited to, the implied warranties of merchantability and fitness for a particular purpose and non-infringement of third-party rights
with respect to the documentation and hardware. No CRU dealer, agent, or employee is authorized to make any modification,
extension, or addition to this warranty. In no event will CRU or its suppliers be liable for any costs of procurement of substitute
products or services, lost profits, loss of information or data, computer malfunction, or any other special, indirect, consequential, or
incidental damages arising in any way out of the sale of, use of, or inability to use any CRU product or service, even if CRU has
been advised of the possibility of such damages. In no case shall CRU’s liability exceed the actual money paid for the products at
issue. CRU reserves the right to make modifications and additions to this product without notice or taking on additional liability.
FCC Compliance Statement: “This device complies with Part 15 of the FCC rules. Operation is subject to the following two conditions: (1) This device
may not cause harmful interference, and (2) this device must accept any interference received, including interference that may cause undesired
operation.”
This equipment has been tested and found to comply with the limits for a Class A digital device, pursuant to Part 15 of the FCC Rules. These limits are
designed to provide reasonable protection against harmful interference when the equipment is operated in a commercial environment. This equipment
generates, uses, and can radiate radio frequency energy and, if not installed and used in accordance with the instruction manual, may cause harmful
interference to radio communications. Operation of this equipment in a residential area is likely to cause harmful interference in which case the user will
be required to correct the interference at this own expense.
In the event that you experience
1) Ensure that the case of your
2) Use a data cable with RFI reducing ferrites on each end.
3) Use a power supply with an RFI reducing ferrite approximately 5 inches from the DC plug.
4) Reorient or relocate the receiving antenna.
Radio Frequency Interference, you should take the following steps to resolve the problem:
RAX840-IR
RAID 0, 1, 0+1, 3, 5, 6, 10 & JBOD
Dual Gigabit Ethernet
Up to 200MB/s (network dependent)
3.5-inch SATA (Serial-ATA) hard disk drives
Yes
Alarm Indicator
Power Indicator
Access Indicator
Windows XP, Vista, Windows 7
Mac OS X 10.2.6 or later
Linux distributions using Kernel version 2.4 or above
2 position: On / Off
Input: 100-240VAC
Output: 350 Watts
Two 60mm and one 120mm fans
EMI Standard: FCC Part 15 Class A, CE
EMC Standard: EN55022, EN55024
FIPS: FIPS 140-2, FIPS PUB 197
52.6 lbs with drives, 41.4lbs without drives
177mm (H) x 481mm (W) x 503mm (D)
We don’t expect anything to go wrong with your CRU product. But if it
does, Tech Support is standing by and ready to help.
Contact us at http://www.cru-dataport.com/support. We also offer phone
support at (800) 260-9800 and (866) 744-8722.
attached drive is grounded.
Tested to comply
with FCC standards
FOR OFFICE OR COMMERCIAL
USE
RAX840-IR Quick Start Guide A9-840-0004-1 REV 1.0 - 13 -
 Loading...