

Page 1
Protecting Your
Digital Assets
™
Protecting Your
Digital Assets
™
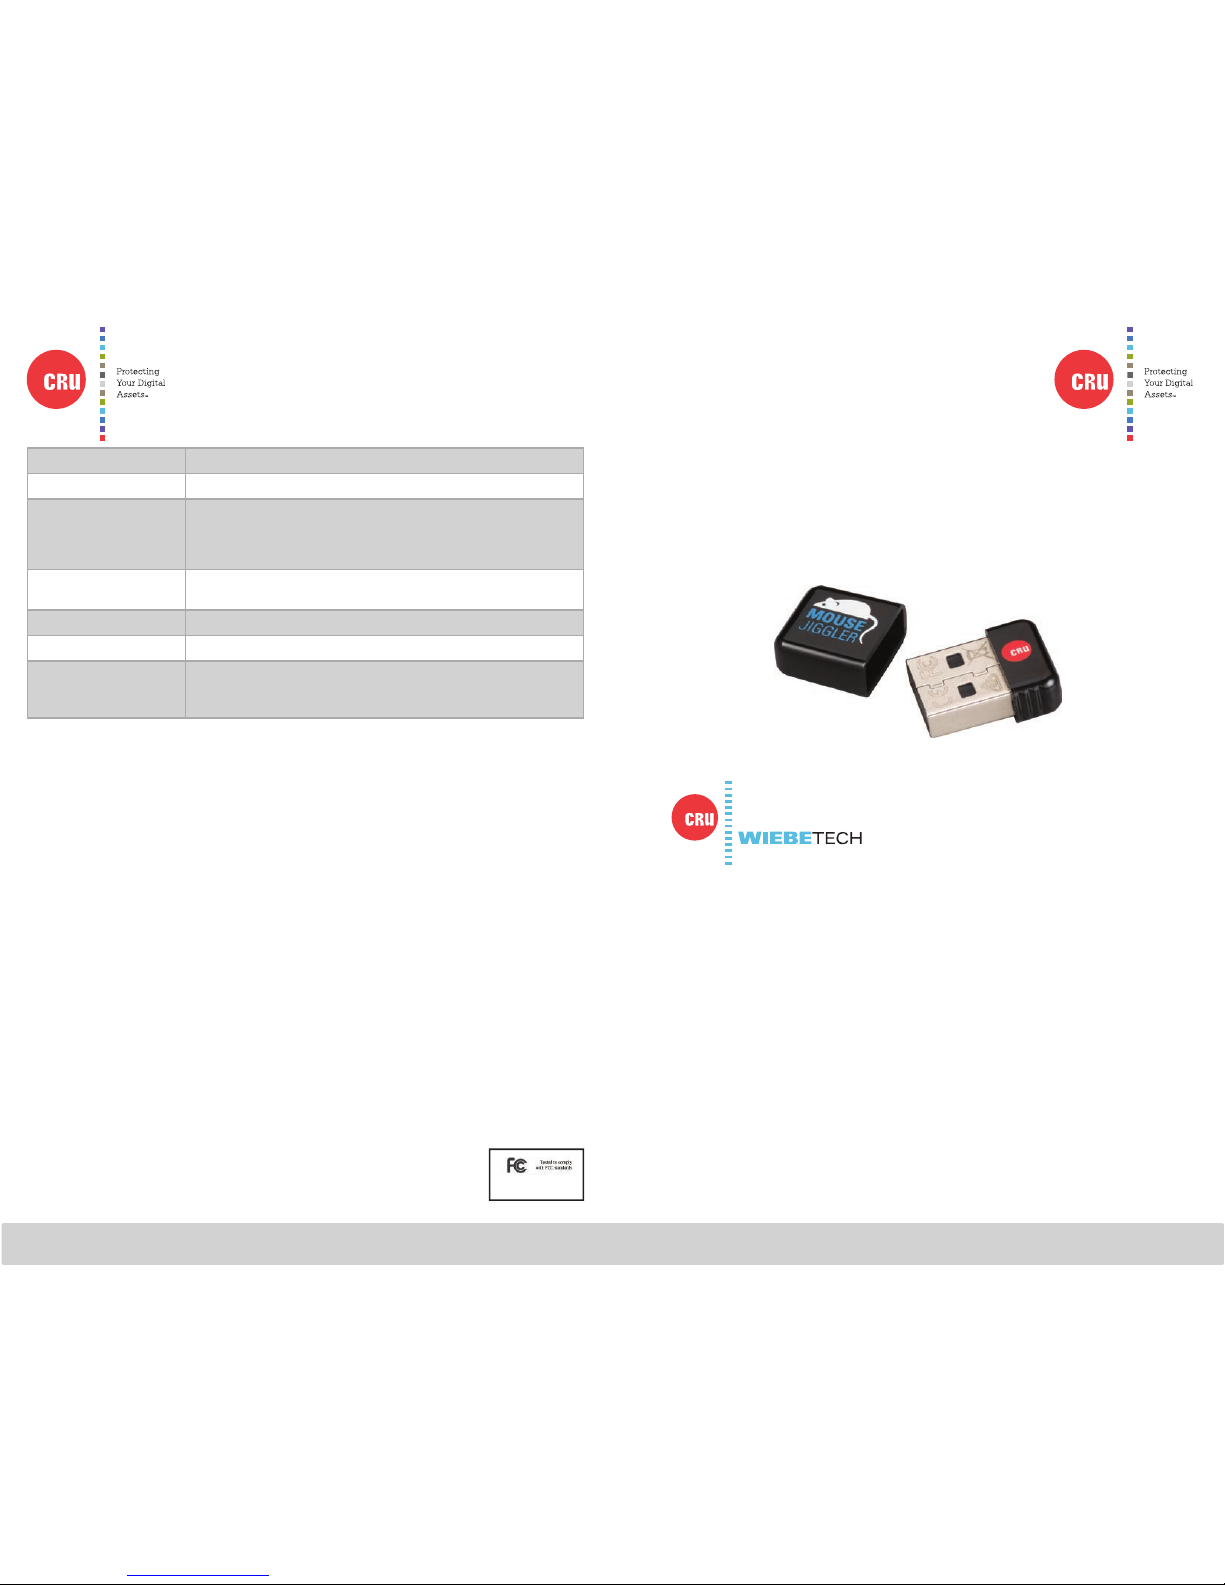
CRU® Mouse Jiggler™ MJ-3
Quick Start Guide
Thank you for purchasing CRU’s Mouse Jiggler MJ-3. The Mouse Jiggler
MJ-3 prevents your computer from sleeping while you work or play, and is
ideal for repetitive IT or gaming tasks. You can create customized scripts
with programmed mouse movement, mouse clicks, and keystrokes. The size
of the MJ-3 keeps it out of the way and is unobtrusive when installed.
Features
• Overrides your computer’s sleep mode settings
• Plugs into standard USB ports
• Work while Mouse Jiggler MJ-3 operates in the background
• Customize your settings with our Mouse Jiggler software available
on www.cru-inc.com/mj3
Wiebetech Branding
Product Model Mouse Jiggler MJ-3
Data Connectors One (1) USB 2.0 Type A connector
Operating System
Requirements
• Windows 8, 8.1, 7, and Vista
• Windows Server 2012, 2008, and 2003 product families
• Mac OS X 10.4.x or higher
• Linux distributions that support the connection type used
Compliance EMI Standard: FCC Part 15 Class B, CE
EMC Standard: EN55022, EN55024
Shipping Weight 0.022 pounds
Product Dimensions 0.83” x 0.57” x 0.27” (21.06mm x 14.5mm x 6.75mm)
Technical Support Your investment in CRU products is backed up by our free technical
support for the lifetime of the product. Contact us through our website,
cru-inc.com/support or call us at 1-800-260-9800 or +1-360-816-1800.
©2014 CRU Acquisition Group LLC, ALL RIGHTS RESERVED. Mouse Jiggler™ and CRU® are trademarks of CRU Acquisition Group, LLC and are protected by trademark law.
Product Warranty
CRU warrants this product to be free of signifi cant defects in material and workmanship for a period of two years from the
original date of purchase. CRU’s warranty is nontransferable and is limited to the original purchaser.
Limitation of Liability
The warranties set forth in this agreement replace all other warranties. CRU expressly disclaims all other warranties,
including but not limited to, the implied warranties of merchantability and fi tness for a particular purpose and noninfringement of third-party rights with respect to the documentation and hardware. No CRU dealer, agent, or employee is
authorized to make any modifi cation, extension, or addition to this warranty. In no event will CRU or its suppliers be liable
for any costs of procurement of substitute products or services, lost profi ts, loss of information or data, computer malfunction, or any other special, indirect, consequential, or incidental damages arising in any way out of the sale of, use of, or
inability to use any CRU product or service, even if CRU has been advised of the possibility of such damages. In no case
shall CRU’s liability exceed the actual money paid for the products at issue. CRU reserves the right to make modifi cations
and additions to this product without notice or taking on additional liability.
FCC Compliance Statement: “This device complies with Part 15 of the FCC rules. Operation is subject to the following two conditions: (1) This device may not cause harmful interference, and (2) this device must accept any interference
received, including interference that may cause undesired operation.”
This equipment has been tested and found to comply with the limits for a Class B digital device, pursuant to Part 15 of
the FCC Rules. These limits are designed to provide reasonable protection against harmful interference when the equipment is operated in a home or commercial environment. This equipment generates, uses, and can radiate radio frequency
energy and, if not installed and used in accordance with the instruction manual, may cause harmful interference to radio
communications.
In the event that you experience Radio Frequency Interference, you should take the following steps to resolve the problem:
1) Ensure that the case of your attached drive is grounded.
2) Use a data cable with RFI reducing ferrites on each end.
3) Use a power supply with an RFI reducing ferrite approximately 5 inches from the DC plug.
4) Reorient or relocate the receiving antenna.
A9-000-0019-3 Rev. 2.3
FOR HOME OR OFFICE USE
Page 2

CRU Mark
1. Installation
Plug the Mouse Jiggler into your computer’s USB port.
That’s it! The Mouse Jiggler prevents your computer from going to sleep or
displaying the screen saver by automatically moving the mouse pointer. You
can continue to use your computer while Mouse Jiggler is plugged in and
working in the background. To customize your MJ-3’s mouse movement, or add
emulated button clicks or keystrokes, begin by downloading the free utility from
www.cru-inc.com/mj3.
Unplug the Mouse Jiggler to return to your normal screen saver and sleep mode
settings.
2. Finding Mouse Jiggler’s Serial Number in Windows
To find the vendor ID, product ID, and serial number of the Mouse Jiggler you have
plugged into your computer, follow the instructions below. The text displayed on
the final window contains all three pieces of information.
a. Connect the Mouse Jiggler to the computer.
b. Open the Control Panel. For Windows Vista and Windows 7, open the Start
Menu, and click on Control Panel.
For Windows 8 and 8.1, press
WINKEY + X and click on Control
Panel.
c. Under the Hardware and Sound
category, click on View devices
and printers. Or, if you are viewing
the Control Panel as icons, click on
Devices and Printers.
d. Right-click on USB Input Device
and select Properties.
e. Select the Hardware tab and
double-click on HID-compliant
mouse to open the HID-compliant
mouse Properties window.
f. Select the Details tab. Click on the
Property drop-down box and
choose Device instance path.
The last set of numbers listed in the Value
string under the “Device instance path”
property represents the serial number of the
Mouse Jiggler MJ-3.
NOTE: Mouse Jiggler appears as a USB mouse to the host computer it’s
plugged into—and its presence and use will be logged by some operating
systems. (Mouse Jiggler should be used only in compliance with applicable
workplace IT policies.)
 Loading...