

Page 1
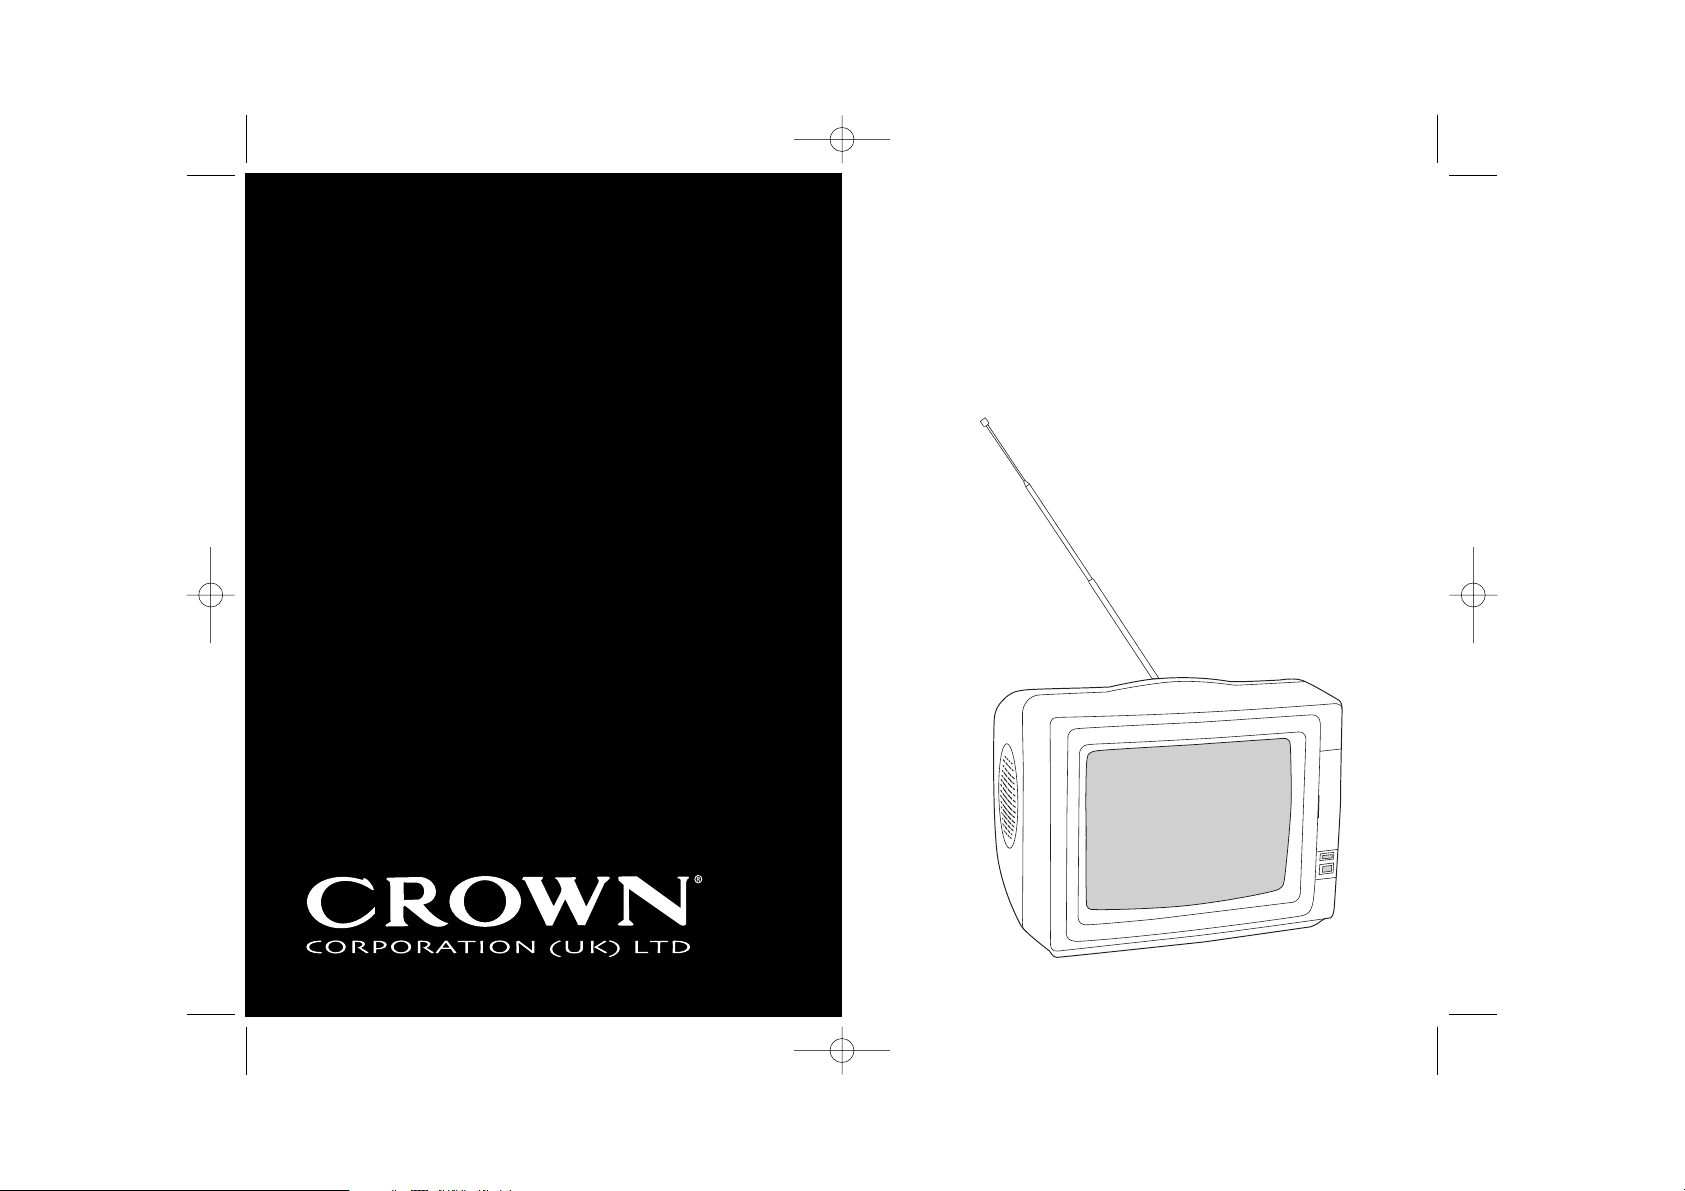
10" Portable Colour Television
Model CTF 101
guidelines for use
TV 10" CTF 101 D3 JN.qxd 8/23/05 1:20 PM Page 1
Page 2

2
TV 10" CTF 101 D3 JN.qxd 8/23/05 1:20 PM Page 2
Tsunami Disaster Appeal
This charity has been launched to support people in the village of
Thirukovil, the home town of the Rev Sam the Methodist minister
from Morley who lost 31 relatives in the Tsunami. Around four hundred
families now live in temporary tented camps.
Your generous donation will provide much needed support for the
poorest survivors; primarily children, elderly and disabled who, in most
cases, have lost the majority of their families.
In an endeavour to develop skills following the loss of their fishing
industry, and give hope of rebuilding lives in the future, training programmes are planned - carpentry, brick laying and cycle repairs
for males, and sewing and embroidery classes for ladies.
The charity offers - help with love - money with pride - commitment
with concern.
Any contribution you are able to make will go directly to this much
needed area - no administration fees or expenses are levied.
Morley For Thirukovil
Registered Charity No. 1108832
Please Help, by using the donation form at the back of this booklet
For more information please visit www.samsappeal.com
Page 3

3
CONTENTS
Please read these guidelines and the ‘Maintenance and Safety’ section on page
16 carefully, before using your new colour television.
WARNING
IT IS HAZARDOUS FOR ANYONE OTHER
THAN AUTHORISED SERVICE PERSONNEL TO
CARRY OUT SERVICING OR REPAIRS WHICH
INVOLVE THE REMOVAL OF COVERS.
TO AVOID THE RISK OF AN ELECTRIC
SHOCK DO NOT REMOVE THE COVER
AT THE BACK OF THE TELEVISION.
Getting to know your TV •installation 4
•unpacking
Quick Start Guide •run through this section to start 5-8
using your television
Controls •television controls 9
•remote control
Tuning your television •manual tuning 10-11
•automatic tuning
•fine tuning
Picture menu •adjusting the picture 11
•preset picture settings
Everyday settings •adjusting the volume 12
•direct program selection
More features •setting the sleep timer 12-13
•setting the time
•system settings
Connections 14
System settings 14
Troubleshooting 15
Safety 16
Maintenance 16
Technical specifications 17
Electrical connections 18
TV 10" CTF 101 D3 JN.qxd 8/23/05 1:20 PM Page 3
Page 4

4
GETTING TO KNOW YOUR COLOUR TELEVISION
Before use
• Keep this user guide, your guarantee and the
sales receipt for future reference.
• The Television is for indoor, domestic use only.
• Check that the voltage printed on the rating
plate at the back of the Television and top of
the Adaptor corresponds to the mains voltage
in your home.
Unpacking
• Remove all packaging materials and check
the Television and Adaptor carefully for
damage before installation.
• Keep all the packaging until you are sure that
the product is operating correctly.
Location and installation
• The Television should be placed on a firm, secure base with good ventilation to ensure reliable
operation and to prevent overheating.
• Do not place the Television where there is heat, moisture or high humidity, for example - next to a
radiator or near an open flame.
• Do not block air vent openings or cover with a cloth, as obstructions may cause overheating or a fire.
• The Television is unsuitable for installing into fitted units unless correct ventilation is provided.
• The Television must be placed so that there is at least 5cm (2”) of free space at the rear, above and on
both sides.
• The quality of the picture may deteriorate and colour spots may appear if the Television is placed next
to appliances that radiate magnetic fields, such as loud speakers or any appliance that has an electric
motor.
•
Make sure the power cord and Adaptor are undamaged and that they are not placed where they can be
walked on or where they can cause obstruction.
• Do not place anything on top of the Television.
• Total darkness or reflection on the screen can cause eyestrain. Soft and indirect light is recommended.
TV 10" CTF 101 D3 JN.qxd 8/23/05 1:20 PM Page 4
Page 5
5
QUICK START GUIDE
Attach an aerial
You have two options.
If you have a fitted (coaxial) Television aerial, you should
use it. Check the lead and plug for wear or corrosion before
connecting to your Television. Remove the telescopic aerial
plug from the socket at the rear of your Television and
insert the plug of your fitted aerial cable into the socket.
If you don’t have a fitted aerial use the integrated
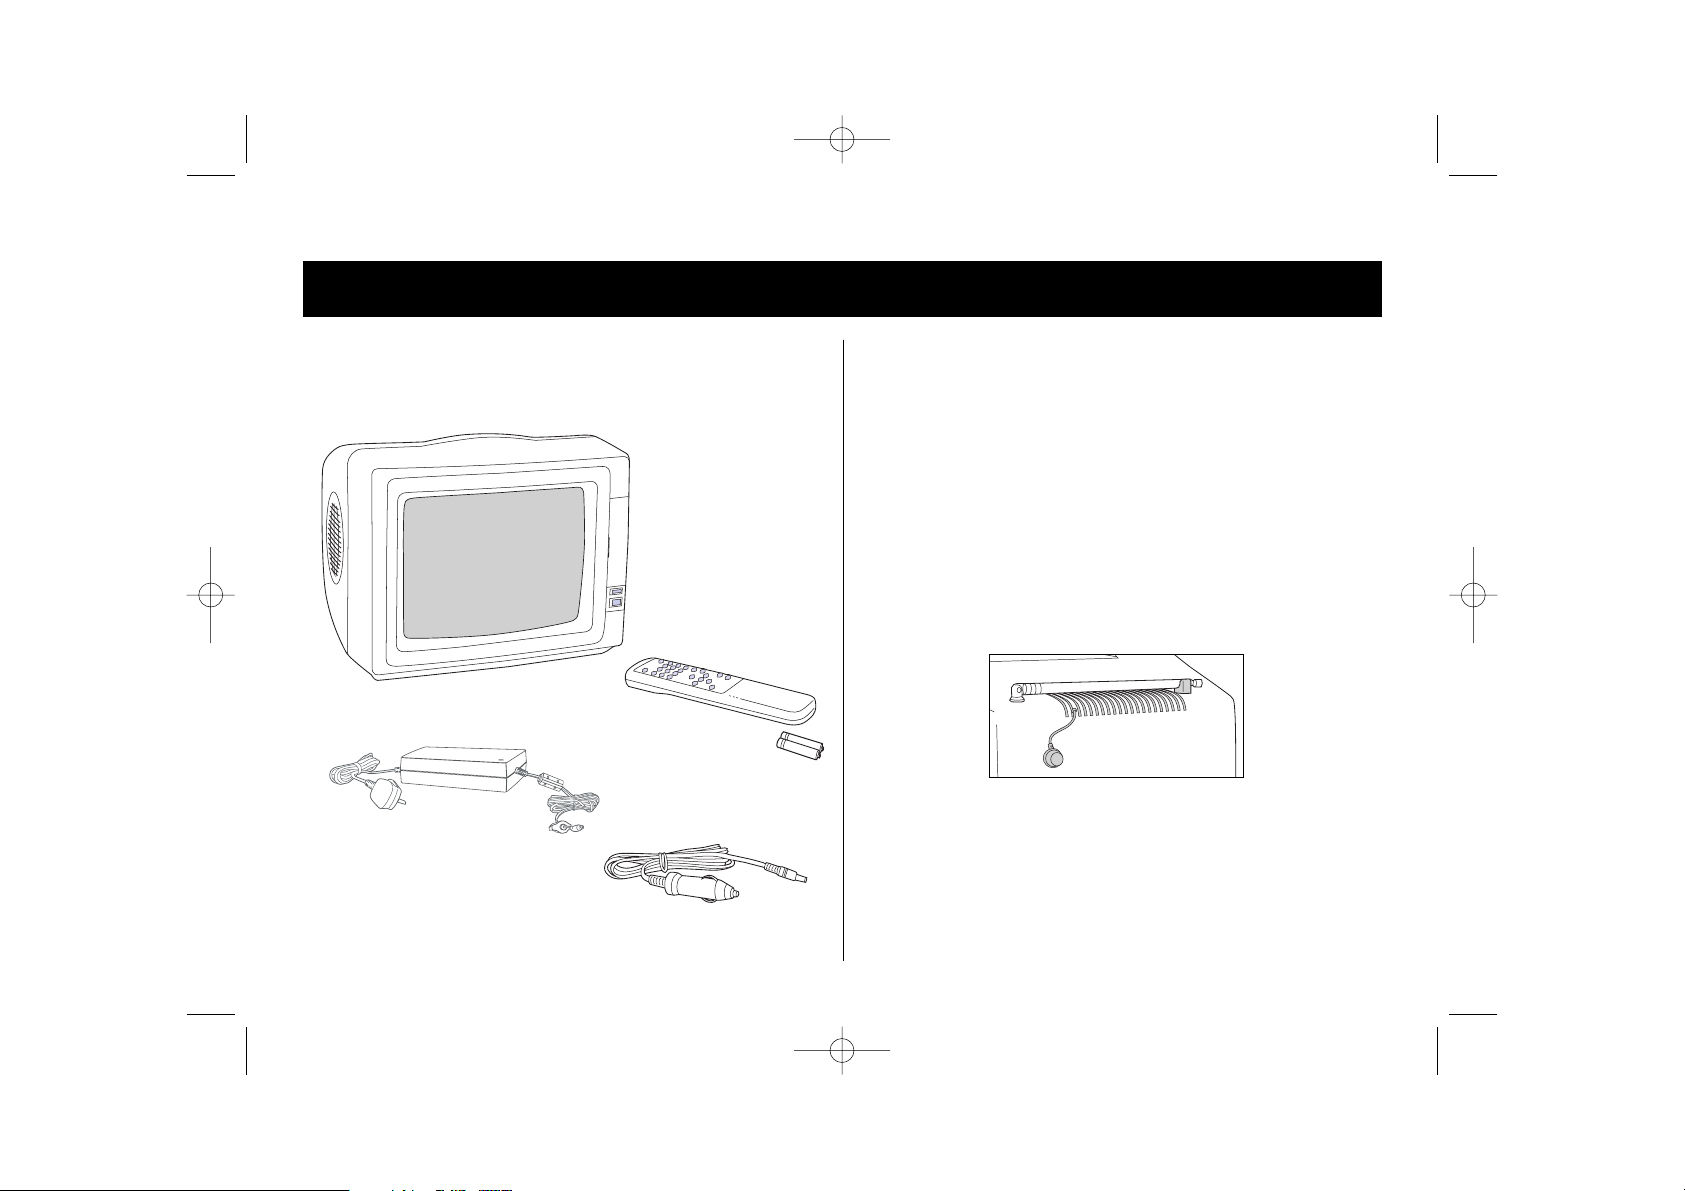
telescopic aerial. Unclip the telescopic aerial on the top of
the Television and pull to fully extend it. You may have to
rotate the aerial to improve reception.
Check that you have these items
1 2
DC CABLE
AC ADAPTOR &
MAINS LEAD
REMOTE CONTROL
and 2 x AA batteries
(not supplied)
TV 10" CTF 101 D3 JN.qxd 8/23/05 1:20 PM Page 5
Page 6
Alternatively you can connect to a
Direct Current (DC) power source
such as a vehicle battery use the DC
connection cable. Insert the jack
into the socket marked DC IN at the
rear of your Television.
Check the cigarette lighter socket in
the vehicle is clean and insert the
cigarette lighter plug into it, make
sure that there is a good connection.
You may need to turn the vehicle
ignition on before the cigarette
lighter socket has power.
The Television is now ready to be
switched on.
6
QUICK START GUIDE
Plugging in
You have two options.
If you are connecting your television
to the household (AC) mains supply
use the AC adaptor. Insert the jack of
the adaptor into the socket labelled
DCIN at the rear of your Television.
Now insert the mains plug into a
convenient mains socket and switch
it on.
The Television is now ready to be
switched on.
4
Fit the battery into the
remote control
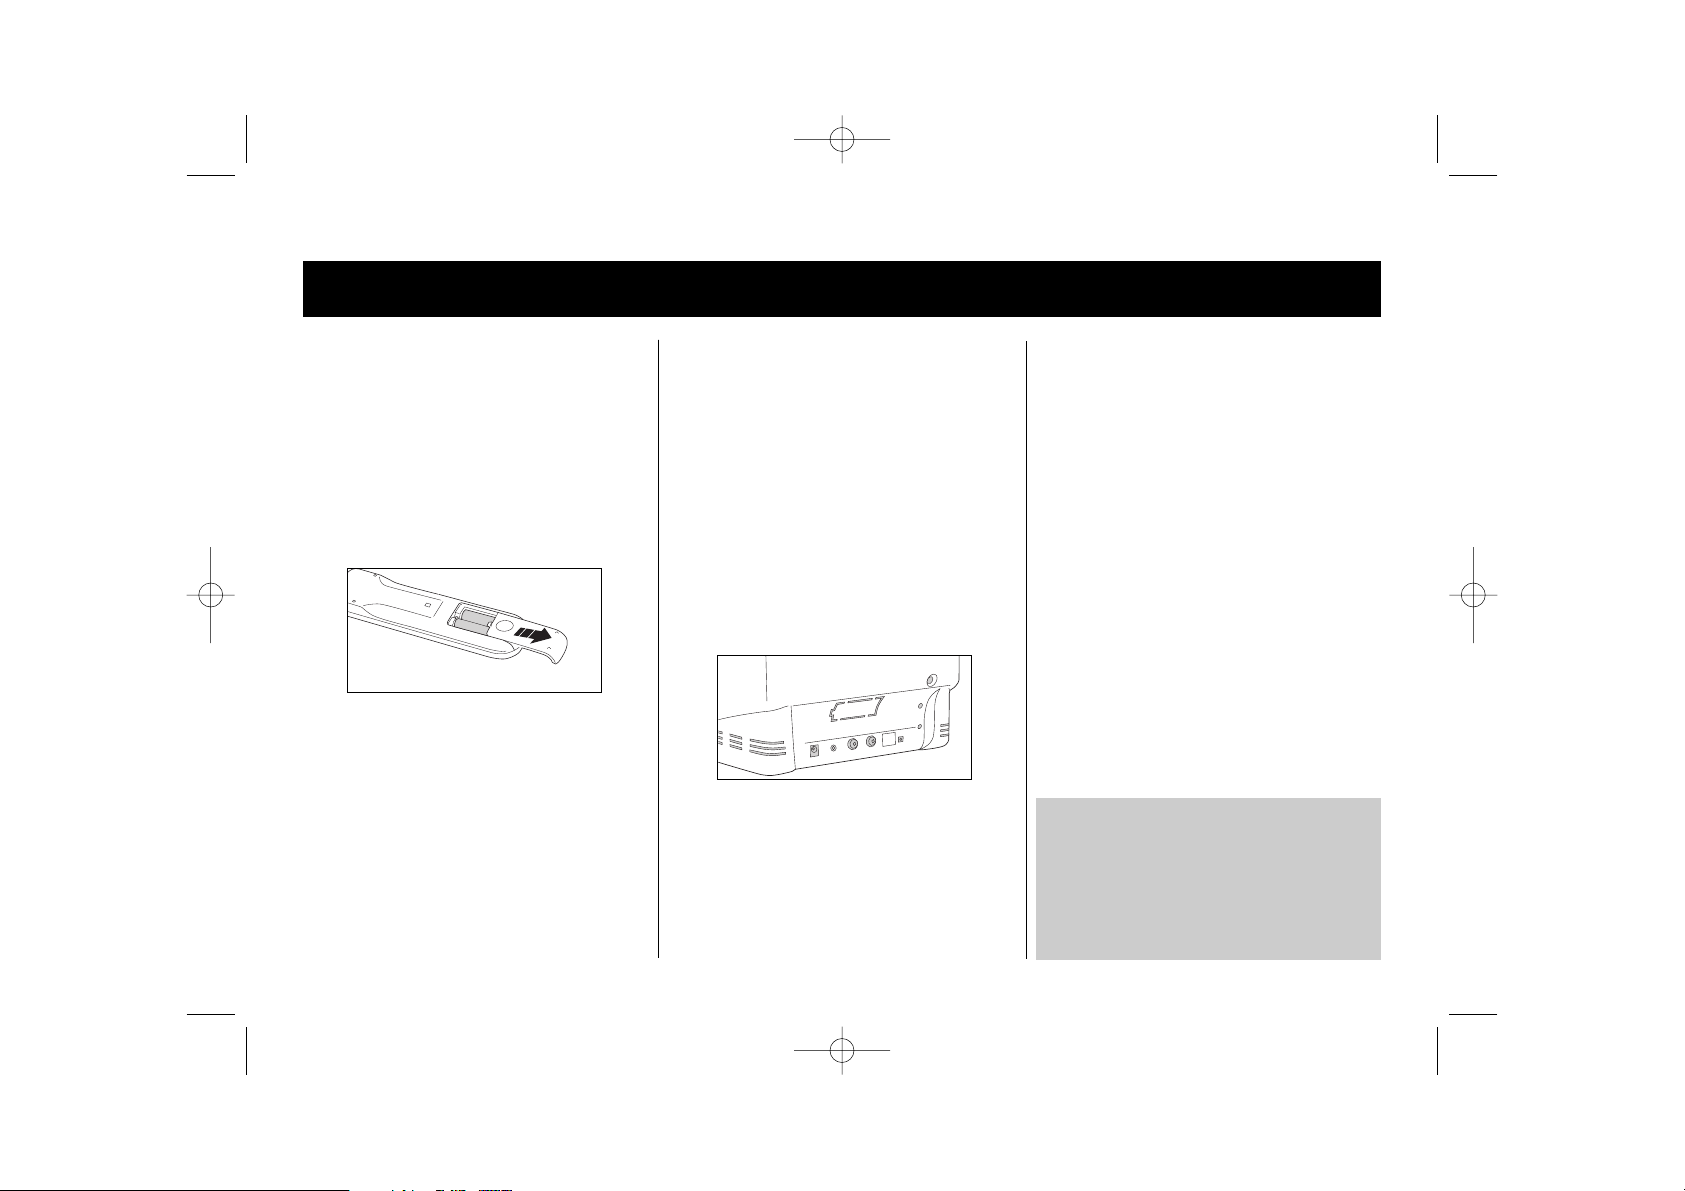
Remove the battery cover by sliding
it in the direction of the arrow. Lift
the cover and remove.
Insert two size AA batteries (not
supplied) so that the ‘+’ and ‘-’
marks on the batteries match the
‘+’ and ‘-’ marks inside the unit.
Replace the battery cover.
3
NOTE: To avoid a flat car battery do not leave
the Television plugged into the cigarette lighter
socket for extended periods while the engine is
switched off.
The Television MUST be disconnected from the
vehicle before high speed battery chargers are
being used.
TV 10" CTF 101 D3 JN.qxd 8/23/05 1:20 PM Page 6
Page 7

7
QUICK START GUIDE
Tune the channels
Before you can watch your Television it needs to be
tuned to receive signals from the transmitters nearest to
your home.
To quickly tune your Television flip open the Control
Panel cover on the front of the Television and press the
AUTO button. The Television will find all the available
channels and set them as they find them.
Your Television will then be ready to use.
Alternatively you can manually tune the Television, this
is a very easy operation which takes about 5 minutes.
See ‘Manual tuning’ on page 10 of this guide and follow
the simple instructions.
NOTE: If you receive a good picture on each channel and they all appear
correctly when you press numbers 1-5 on your Remote Control, your
Television may already have been tuned by the shop where you bought
your Television. You do not need to re-tune it.
6
Switching on and off
To switch the Television on to standby
• Press the ON/OFF button
on the front of the
Television. The power
indicator illuminates red to
show that the power is on.
To turn the Television on from standby
• Press the POWER button on your Remote Control.
To put the Television on standby
• Press the POWER button on your Remote Control.
To switch the Television off
• Press the ON/OFF button on the front of the set. The
power indicator will cease to be illuminated.
5
NOTE: You should always switch your Television off at the ON/OFF power
button on the front of the set if you do not intend to watch television
for a long period of time - e.g. over night.
ON/OFF BUTTON
POWER INDICATOR
TV 10" CTF 101 D3 JN.qxd 8/23/05 1:20 PM Page 7
Page 8

8
QUICK START GUIDE
Connecting to an external device
You can connect your Television to several external
devices such as a video recorder, camera, DVD player etc.
You will need cables which are compatible with the
chosen device. The connection panel is at the rear of the
television.
Use the TV/AV button to select the connection interface.
Always refer to the manufacturer’s user guide for any
external device. For more details on connections see
‘Connections’ on page 14.
7
TV 10" CTF 101 D3 JN.qxd 8/23/05 1:20 PM Page 8
Page 9

9
CONTROLS
Television controls
The Control Panel is on the top of the Television.
You can use either the controls on the Control
Panel or the Remote Control - choose whichever
you find easier for you.
Remote Control
The other buttons on the Remote Control and
Control Panel are explained in the text elsewhere in
this guide.
Control Panel
ON/OFF BUTTON for
turning the power
on or off
to adjust the volume up
or down and to adjust
the menus settings
for quick
scrolling
through the
channels and
menu items
to adjust the
volume
for turning
standby on
or off
for quick scrolling
through the channels
and menu items
to enter the main menu
to switch to an auxiliary
device such as a video
cassette recorder
to start the auto tuning
function
power indicator
to silence the
volume
to open the
main menu
TV 10" CTF 101 D3 JN.qxd 8/23/05 1:20 PM Page 9
Page 10

10
TUNING YOUR TELEVISION
Setting the channels
You may find it useful to have the current TV schedule
(e.g. Radio Times, TV Times) to make it easier to assign
program numbers to channels. Use Manual Tuning if
you prefer your Television to show TV channels set to
certain program numbers, for example:
BBC1 1
BBC2 2
ITV 3
Channel 4 4
Channel 5 5
If you prefer to let the Television find all the
channels and set them as they find them, then use
Automatic Tuning.
Manual tuning
1 Press the MENU button 5 times to bring up
the Main Menu and to select the PRESET
(tuning) menu. The Menus will automatically
disappear from the screen if no buttons are
pressed for 3 seconds.
2 If POSITION is not highlighted, use the CH+ or
CH- buttons on the Remote Control (you can
also use the PROG. or PROG. on the
Control Panel).
3 Then use the VOL+ or VOL- to select the first
channel you wish to find.
4 Use the CH+ or CH- buttons to highlight
BAND then press the VOL+ button to select
the UHF frequency band.
5 Use the CH+ or CH- buttons to highlight
SEARCH.
6 Check the TV schedule to find out what
program is showing for the selected channel
position for example, BBC1 in position 1.
7 Use the VOL+ and VOL- to manually search
up and down the frequency band until the
correct program for the channel number is
showing on the screen.
8 To set the remaining channels repeat steps 3 to 7.
9 To quit press the MENU button until the Menu
screen disappears from the screen.
Automatic tuning
1 Press the MENU button 5 times to bring up
the Main Menu and to select the PRESET
(tuning) menu. The Menus will automatically
disappear from the screen if no buttons are
pressed for 3 seconds.
2 Use the CH+ or CH- buttons on the Remote
Control (you can also use the PROG. or
PROG. on the Control Panel), to highlight
AUTO-SEARCH.
3 Press the VOL+ button to start the Automatic
Tuning process, this may take several minutes.
When your Television has found a channel, it is
automatically stored in the order that it is
found. After all the channels have been found
and saved the menu will disappear from the
Screen.
You can reorder the found channels by using the
EXCHANGE and COPY functions in the System
menu, see ‘System settings’ on page 13.
Fine tuning
If the automatic or manual search did not obtain a
satisfactory picture you can use the Fine Tune menu.
1 Press the MENU button 5 times to bring up
the Main Menu and to select the PRESET
(tuning) menu.
2 If POSITION is not highlighted, use the CH+ or
TV 10" CTF 101 D3 JN.qxd 8/23/05 1:20 PM Page 10
PRESET
POSITION 5
REMEMBER ON
BAND UHF
FINE
SEARCH
AUTO SEARCH
SELECT ADJUST
PRESET
POSITION 5
REMEMBER ON
BAND UHF
FINE
SEARCH
AUTO SEARCH
SELECT ADJUST
Page 11

11
CH- buttons on the Remote Control.
3 Use the VOL+ or VOL- to select the first
channel you wish to fine tune.
4 Then press the CH+ or CH- buttons on the
Remote Control to highlight FINE.
5 Use the VOL+ or VOL- to fine tune up or
down the frequency band, keep pressing the
buttons to adjust the quality of the sound and
picture.
6 To fine tune any other channel repeat steps 3
to 6.
7 To quit the PRESET menu press the MENU
button and the menu will disappear from the
screen.
Adjusting the picture
Improve the picture quality by varying the
brightness and contrast.
1 You can go directly to the PICTURE menu by
pressing PIC button on the Remote Control.
2 Use the CH+ or CH- buttons to highlight one
of the following:
Bright - to adjust the brightness of the
picture.
Cont - to adjust the contrast quality of the
picture.
Color - to adjust the intensity of colour of the
picture.
Sharpness - to adjust the colour definition of
objects on the picture.
3 Use the VOL+ or VOL- buttons to adjust the
levels.
4 To save your personal settings, press the PIC
button again and the menu will disappear from
the screen.
TUNING CONT... PICTURE MENU
Preset picture settings
Your Television comes with five preset picture
settings. One of the settings will be your Personal
settings, see ‘Adjusting the picture’ opposite, this
will initially be set by the manufacturer. The P.P
button on the Remote Control allows you to
change the current display settings. Press the
Picture button to cycle through the four preset
picture settings. Choose from one of the following;
Personal has the settings you have previously
changed and stored.
Standard which are the same as the factory
default settings.
Soft which reduces the brightness and the
sharpness of the picture.
Vivid which brightens and sharpens the picture.
Light which produces a brighter but softer
picture than Vivid.
The Picture mode is displayed on the screen and
then saved.
Option menu
Coring is a picture noise reduction function. If the
picture on your Television has interference select
ON which may help to reduce this.
1 You can go directly to the OPTION menu by
pressing MENU button twice.
2 Use the VOL+ to turn the CORING option on
or off.
TV 10" CTF 101 D3 JN.qxd 8/23/05 1:20 PM Page 11
PICTURE
BRIGHT
CONT.
COLOR
SHARP
SELECT ADJUST
50
75
88
70
Page 12

12
EVERYDAY SETTINGS MORE FEATURES
Adjusting the Volume
1 Use the VOL+ or VOL- on the Remote Control
or the VOL or VOL buttons on the
Control panel to increase or decrease the
volume, this setting is not saved when the TV is
turned off.
2 Press the MUTE button to temporarily turn off
the sound. Press the MUTE button again to
restore the sound.
Direct program selection
For programs between 1 and 9, press the number
buttons on the Remote Control.
For programs between 10 and 254 press the -/-button to toggle between single digits and double
digits and enter your channel number, the program
number will be displayed on the screen.
You can also scroll through the programs 1-9 using
the CH+ or CH- buttons on the Remote Control or
the PROG. or PROG. buttons on the Control
Panel. If a program appears to be missing when
scrolling through the channels see
‘TROUBLESHOOTING’, on page 15.
On Screen Display
Press the DISPLAY button on the Remote Control to
show the on Screen Display (OSD) information. This
information will automatically disappear from the
screen after approximately 5 seconds.
Swap programs
You can swap between the current program you
are watching and the previously selected program
by pressing the RECALL button.
Auxiliary Devices
Press the TV/AV button on your Remote Control or
on the Control Panel if you want to use the TV with
an auxiliary device such as a video recorder.
To return to normal television mode press the
TV/AV button again and normal television mode
will show on the screen.
For information on connecting auxiliary devices see
CONNECTIONS on page 14.
Clock Menu
You can program the Television to switch off after a
set period of time, come on and go off at set times;
set it to remind you to do other things and be
programmed to automatically turn to a channel at
a set time so that you do not miss a favourite
program. These settings will not be saved if the
Television is switched off.
Setting the sleep timer
You can set the sleep timer so that your Television
will go into standby mode after a period of between
15 minutes and two hours (120 minutes).
1 Press the MENU button three times to bring up
the CLOCK menu
2 Use the CH+ or CH- buttons to highlight SLEEP.
3 Use the VOL+ or VOL- to select the number of
minutes to set the timer for.
4 To cancel the Sleep timer once it has been set,
go back into the Sleep timer menu. Press the
TV 10" CTF 101 D3 JN.qxd 8/23/05 1:20 PM Page 12
CLOCK
SLEEP - - -
TIME - - : - ON-TIME - - : - OFF-TIME - - : - ATTENTION - - : - BESPOKE TIME - - : - POSITION -
SELECT ADJUST
Page 13

13
MORE FEATURES
VOL+ or VOL- buttons until SLEEP --appears again on your screen.
If you press the DISPLAY button the amount of time
left on the Sleep timer will be shown on the screen.
Setting the time
1 Press the MENU button three times to bring
up the CLOCK menu
2 Use the CH+ or CH- buttons to highlight TIME.
3 Use the VOL- button to set the current hour
(24 hour mode) and VOL+ to set the minutes.
4 To store your selection and to quit the Menus,
press the MENU button three times..
If you press the DISPLAY button the current time
will be shown on the screen.
Setting the on and off times
The current time must be set for the on timer
function to work, see ‘Setting the time’.
1 Press the MENU button three times to bring
up the CLOCK menu
2 Use the CH+ or CH- buttons to highlight
ON-TIME.
3 Use the VOL- button to set the hour and
VOL+ to set the minutes of the time you wish
the television to come on.
4 Use the CH+ or CH- buttons to highlight OFF-
TIME.
5 Use the VOL- button to set the hour and the
VOL+ to set the minutes of the time you wish
the television to go off.
6 Turn the television to standby by pressing the
POWER button on the Remote Control. Do not
use the On/Off button on the front of the
Television as this will reset the all the timers
to - - : - If you press the DISPLAY button after the on time the
current time and off time will be shown on the screen.
Setting the reminder
The current time must be set for the reminder
function to work, see ‘Setting the time’.
1 Press the MENU button three times to bring
up the CLOCK menu
2 Use the CH+ or CH- buttons to highlight
ATTENTION.
3 Use the VOL- button to set the hour and
VOL+ to set the minutes of the time you
would like to be reminded.
4 At the set time ATTENTION will flash on the
screen. You can press any button on the Remote
Control to remove the prompt from the screen.
Setting the program timer
The current time must be set for the program timer
to work, see ‘Setting the time’.
1 Press the MENU button three times to bring
up the CLOCK menu
2 Use the CH+ or CH- buttons to highlight
BESPOKE-TIME.
3 Use the VOL- button to set the hour and
VOL+ to set the minutes of the start time of
your selected program.
4 Use the CH+ or CH- buttons to highlight
POSITION.
5 Use the VOL+ or VOL- to select the channel
number of your selected program.
6 To store your selection and to quit the Menus,
press the MENU button three times..
System settings
The picture and sound systems on your Television
should be set correctly for viewing. To check that
the settings are correct press the Display button
AUTO or PAL and 6.0M should be shown.
To change the settings
1 Press the MENU button four times to select
the SYSTEM menu.
TV 10" CTF 101 D3 JN.qxd 8/23/05 1:20 PM Page 13
SYSTEM
COLOR - SYS AUTO
SOUND - SYS 6.0M
EXCHANGE 1 COPY 1 CLEAR ALL
SELECT ADJUST
Page 14

14
MORE FEATURES CONNECTIONS
2 Use the CH+ or CH- buttons on the Remote
Control and highlight one of the following:
COLOR-SYS - to set the picture system for
viewing.
SOUND-SYS.- to set the correct sound system.
EXCHANGE - swap a program position with
another. Use the numbers on the remote
Control to input the channel number you wish
to exchange with.and press VOL+.
COPY - copy a program number to another
position. Use the numbers on the remote
Control to input the channel number you wish
to copy to and press VOL+.
CLEAR ALL - this feature will reset the
REMEMBER status in in the PRESET menu to
off for all channels. Press either VOL+ or VOL-
for 3 or more seconds. The REMEMBER status
can be turned back on for selected channel in
the PRESET menu.
Connecting a video recorder
1 Read the user guide supplied with your video
recorder and ensure that the Television is
switched off.
2 Insert the aerial cable into the ANTENNA IN
socket on your video recorder.
3 Plug the video recorder lead from the RF OUT
socket to the aerial socket on the back of the
Television.
4 Turn the television on first and then the video
recorder. Tune your video recorder to a free
program position, refer ‘TUNING YOUR
TELEVISION’ on page 10 for more information.
5 Use the TV/AV button to put the Television into
AV mode.
Connecting a video camera
using an audio/video (phono)
cables
1 Read the user guide supplied with your video
camera and ensure that the Television is
switched off.
2 Connect the audio cables to the AUDIO (white)
socket at the back of the Television.
3 Connect the video cable to the Video In
(yellow) socket at the back of the Television.
4 Turn the Television on first and then your video
camera.
5 Use the TV/AV button to put the Television into
AV mode.
Earphones
(not included)
1 Insert the jack plug of your earphones into the
socket at the back of the Television. If your
earphone jack does not fit the Earphone Socket
you may need to use an adaptor. Press the Mute
button to silence the Television.
CAUTION: You should not expose yourself to continuous
play at loud volume levels while using your earphones,
you may damage your ears. If you experience ringing in
your ears, reduce the volume or stop using the
earphones. If symptoms persist, see your doctor.
TV 10" CTF 101 D3 JN.qxd 8/23/05 1:20 PM Page 14
Page 15

15
TROUBLESHOOTING
If your Television is not operating properly or as
you would expect, check the following before you
call a service engineer:
No power
• Make sure the mains socket has been switched
on and the plug is secured.
• Check that the socket is not faulty, you can do
this by plugging in another appliance.
• Check that the fuse in the plug is not faulty.
No picture or sound
• Check that the Television is plugged in and
that the power is turned on.
• Check that the Television has not been
switched to Standby mode.
• Check the aerial connections and position.
• Select a different channel. If this is OK then the
problem is probably with the television station
and not your Television.
Poor picture, sound OK
• Check the aerial connections and position.
• Adjust the fine tuning.
• Adjust the brightness.
• Adjust the contrast.
• Adjust the colour.
Sound and/or the picture is poor
• Check that the sound system on your
Television is set correctly, see SYSTEM SETTINGS
on page 14.
• Check the aerial connections and position.
No colour
• Adjust the colour.
• Adjust the fine tuning.
• Check the aerial connections and position.
• Check that the program is in colour.
Remote control does not work/is not
working properly
• Check the batteries in your Remote Control.
• Check that the signal from the Remote Control
to the Television is not being obscured.
• The Remote Control may be out of range from
the Television.
Interference
• This may be caused by other electrical devices
and should be a temporary problem. If it
persists then you should contact your dealer.
See ‘Adjusting the picture’ on page 10.
Ghost images
Multiple images, known as ghost images, can be
caused by the reflection of signals from mountains
or high buildings.
• Try repositioning your aerial or installing a new
one suited to your area.
• Unplug the Television from the mains supply.
• Clean the cabinet with a soft damp cloth, do
not apply liquid cleaners or aerosol cleaners
directly onto the Television.
Picture is distorted
The colour is distorted on a section of the screen.
This may be caused by other magnetic devices
being placed too close to the Television screen,
moving the television or atmospheric conditions.
• Press the Degaussing button at the back of the
Television and release it immediately. If the
problem has not been corrected, wait 2
minutes and try the button again. The picture
should return to normal. If the problem persists
you should contact your dealer.
Channels are missing
• Press the MENU button 5 times to access the
PRESET menu. If POSITION is not highlighted,
use the CH+ or CH- buttons on the Remote
Control. Press the VOL+ or VOL- buttons to
select the missing channel. Then press the CH-
to highlight REMEMBER, then use VOL+ to
turn this option ON.
TV 10" CTF 101 D3 JN.qxd 8/23/05 1:20 PM Page 15
Page 16

16
SAFETY MAINTENANCE
• Close supervision is necessary when the
Television is used near or by children or a
person suffering from any physical impairment.
• To avoid electrical shock, never touch the
Television or plug with wet hands.
• Do not place objects that could cause a fire
hazard on top of the Television such as candles.
• When transporting the Television always use
the original packaging.
• If you move the Television set to another
location, leave it to stand for at least an hour
to compensate for any temperature difference
and to allow the automatic degaussing circuit
to reset. If the temperature difference is too
high, condensation may occur and cause a
fault.
• Do not place anything on top of the Television
such as vases or potted plants.
• Do not use the Television set outdoors.
• To prevent electrical shock, never remove the
outer cabinet. If the Television is damaged it
must be repaired by a qualified Service Centre.
• Do not attempt to operate the Television with a
damaged power cord or if it is not working
correctly in any way. Never adjust or modify
the Television yourself, always take it to an
authorised service centre.
• Position the power cord so that it does not
cause a hazard and is not near any sharp
surfaces.
• The mains lead of this Television is not
replaceable by the user. If the supply cord of
the Television is damaged it must be replaced
by a qualified Service Centre.
• Do not use an extension lead.
• If the Television is not to be used for a long
period remove the plug from the mains socket.
• Do not insert objects or your fingers in the
slots or openings, as this may damage the
Television and cause an electrical shock.
• Do not place in or near water, or in damp
conditions.
• If water drops inside the air vent openings,
switch off the mains socket and remove the
Television plug immediately and take to an
authorised service centre.
• Do not use accessories that have not been
specifically designed for this Television.
• Unplug the Television from the mains or
battery supply.
• Clean the cabinet with a soft damp cloth, do
not apply liquid cleaners or aerosol cleaners
directly onto the Television.
TV 10" CTF 101 D3 JN.qxd 8/23/05 1:20 PM Page 16
Page 17

17
SPECIFICATIONS
Model Number CTF 101
Power supply AC (V) 120-240
Rated Frequency (Hz) 50/60
(Use ONLY supplied AC Adaptor
Model YC-1048SP832GP/AM149B)
DC (V) (DC connection for 12
a vehicle cigarette lighter)
Power Consumption
DC (DC 13.5V input) 38W
TV Broadcasting System PAL I
Receiving Channels VHF-L 2-4
VHF-H 5-12
UHF 21˜69
Program 254+ 1 AV
Channel Indicator On screen display
RF Aerial Input Impedance 75 Ohms
Audio Output Mono
Speakers 3” 1.0W
Audio Output Power 0.5 Watts RMS
@ 10%THD
Screen Size 10” (24cm)
Television Dimensions 285x225x335
(WxHxD) mm
Television Weight 5.0
(Kg)
The policy of Crown Corporation Ltd is one of
continuously seeking new ways of improving its
products. Therefore the Company reserves the right
to change the specification of items illustrated and
described, at any time
TV 10" CTF 101 D3 JN.qxd 8/23/05 1:20 PM Page 17
Page 18

18
ELECTRICAL CONNECTIONS
This appliance is fitted with a fused three pin plug
to BS 1363 which will be suitable for use in all
houses fitted with sockets to current specifications.
If the fitted plug is not suitable for your socket
outlets it should be cut off and carefully disposed
of. To avoid a possible shock hazard, do not insert
the discarded plug into a socket.
Fitting a new plug
If for any reason you need to fit a new plug, the
flexible mains lead must be connected as shown here.
The wires in the mains lead fitted to this appliance
are coloured in accordance with the following
code:
If the colours of the wires in the mains lead of this
appliance do not correspond with the coloured
markings identifying the terminals in your plug,
proceed as follows:
The wire which is coloured Blue MUST be connected
to the terminal which is marked with the letter N
or coloured Black. The wire which is coloured Brown
MUST be connected to the terminal which is
marked with the letter L or coloured Red. Before
refitting the plug cover, check that there are no cut
or stray strands of wire inside the plug.
Use a 3 Amp BS1362 fuse, only BSI or ASTA
approved fuses should be used. If you are in
anyway unsure which plug or fuse to use refer to
qualified service personnel.
Note: After replacing or changing a fuse on a
moulded plug which has a fuse cover, the fuse
cover must be refitted to the plug, the appliance
must not be used without a fuse cover. If lost,
replacement fuse covers can be obtained from an
electrical shop.
This appliance complies with the following EEC
Directives: 73/23 EEC (Low Voltage Directive),
89/336 EEC (EMC Directive).
CONNECT
BLUE TO
NEUTRAL (N)
MAKE SURE THE OUTER
SHEATH OF THE MAINS
LEAD IS SECURELY HELD
BY THE CLAMP
CONNECT
BROWN TO
LIVE (L)
This appliance is double insulated and must not be
connected to the earth terminal of the plug, which
maybe marked with the letter E or by the earth
symbol or coloured green and yellow.
3 AMP FUSE
TV 10" CTF 101 D3 JN.qxd 8/23/05 1:20 PM Page 18
Page 19

19
_
_
TV 10" CTF 101 D3 JN.qxd 8/23/05 1:20 PM Page 19
D onation Form
Yes I would like to support Morley for Thirukovil. Here is my cheque / postal order for:
Morley For Thirukovil
Registered Charity No. 1108832
£______________________ made payable to Morley for Thirukovil
Donors Name: ___________________________________________
Address:
___________________________________________________________________________________________________________________________
___________________________________________________________________________________________________________________________
Post Code: ___________________ Tel No: _________________
This section to be completed only if you wish to gift aid your donation
Gift Aid Declaration - Donor Details
Title …… Forename …….…………. Surname ...………………
Address
…………………………………………………………………………………………………...................................................................................
Signature …………………………………….. Post Code …………………
Notes
1. You must pay an amount of income tax and/or capital gains tax at least equal to the tax the charity reclaims on your donation
in the tax year (currently 28p for each pound you give)
2. If you pay tax at a higher rate you can claim further tax relief in your self -assessment income tax return.
Please return to Morley For Thirukovil, Halcyon, Parkway, Gildersome, Leeds LS27 7DZ
Page 20

CROWN CORPORATION (UK) LIMITED
Express Way, Whitwood,
Wakefield, WF10 5QJ
Tel: 01977 604111 Fax: 01977 603159
For further information please
contact the CROWN SERVICE
LINE on: 01422 203676.
V1 10/03
TV 10" CTF 101 D3 JN.qxd 8/23/05 1:20 PM Page 20
 Loading...