

Creek 5250, 5250-SE Owners manual
Thank you for purchasing the 5250 amplifier. You are now in possession of a State of the
Art Integrated Amplifier. The functions and operation of the 5250 and Special Edition are
exactly the same and are very simple. However, the following notes are provided to explain
all aspects of its design and use.
MAINS CONNECTION
When unpacking the amplifier please keep the packing
material in a safe place for possible future use. In the pack
there is a separate mains cable suitable for connecting to
the mains supply in the country of use. The IEC socket
end of the cable should be firmly inserted into the connector on the rear panel marked "Mains Input".
Remember, do not overload the mains wall socket with too
many plugs or adaptors. The high quality performance of
the amplifier will be impaired if the electrical supply to it is
in poor condition. If in doubt, consult a qualified electrician
or your dealer.
The "Mains Input" connection is also fitted with a fuse,
specifically suited to the supply voltage of the country of
use. The correct value is clearly marked on the rear panel
next to the Mains Input.
Should it be necessary to replace the fuse, ensure that you
use the same type as specified on the rear panel, i.e.
5 x 20mm cartridge type: T 3.15 A surge resisting for
220-240V 50Hz AC, T 6.3 A surge resisting for 110120V 60Hz AC or an T 8A surge resisting for 100V
(Japan).
Creek 5250
& 5250SE
OOppeerraattiinngg IInnssttrruuccttiioonnss
Creek Audio Ltd
2 Bellevue Road, Friern Barnet, London N11 3ER, England
Tel: 00 44 + (0)181-361 4133 Fax: 00 44 + (0)181-361 4136
E-mail: mcreek@ibm.net Internet: www.creekaudio.co.uk
CREEK 5250 & 5250SE SPECIFICATION
STANDARD SE
POWER OUTPUT (both channels) 50 Watts into 8
ΩΩ
60 Watts
POWER OUTPUT (one channel) 60 Watts into 8
ΩΩ
70 Watts
Not recommended for use into more than two pairs of 8 Ωloudspeakers.
OUTPUT CURRENT (auto current limited) > 20 Amps > 25 Amps
TOTAL HARMONIC DISTORTION < 0·05% < 0.05%
(20 Hz to 20 kHz)
FREQUENCY RESPONSE 3 Hz to 25 kHz - 1 dB
SLEW RATE > 50 V per µµS
INPUT SENSITIVITY 450 mV line input 470 mV
(with +3dB setting selected on pre-amp)
PRE-AMP OUTPUT LEVEL 600 mV 5 k
ΩΩ
660 mV 5 k
ΩΩ
SIGNAL TO NOISE RATIO (A weighted) > 105 dB
SEPARATION (line inputs) > 60 dB at 1 kHz
MM PHONO SENSITIVITY AND IMPEDANCE 3.5 mV 47 k
ΩΩ
(when fitted)
MC PHONO SENSITIVITY AND IMPEDANCE 0.75 mV 1 k
ΩΩ
(when fitted)
POWER CONSUMPTION (at idle) 45 W 65 W
POWER CONSUMPTION (full power 10% THD) 260 W 340 W
WEIGHT 7kgs, 15.5lbs
SIZE 420 x 60 x 280 mm,
16·5 x 2·4 x 11''
MAINS VOLTAGE @ 60Hz 100V Japan, 115V North America
@ 50Hz 230/240V Europe, Asia and UK
MAINS VOLTAGE AND FREQUENCY IS INTERNALLY SET FOR THE COUNTRY OF USE
Creek Audio Ltd reserve the right to change or modify the specification of its products without prior warning.
Designed and made in the UK.

LOUDSPEAKER CONNECTIONS
The loudspeakers should be connected using a suitable pair of cables designed specifically
for audio use. Two pairs of screw terminals marked A allow for either bare wire or spade
lug connectors to be passed through the hole or around the bush. Tighten the terminal fully
after fitting the speaker wire. Please consult your dealer for advice if you are unsure.
It is very important to connect the loudspeakers to the loudspeaker terminals in the correct
phase. Cables are normally polarised with a line or a raised bump on the positive side. If
one channel is not connected in the same fashion as the other, a severe loss of bass performance and a spreading of the stereo image will result.
A second set of terminals marked B allow the user to select from the rotary control in the
centre of the front panel, the option of having two pairs of speakers running separately, or
together. The options include speakers off, when using headphones, speakers A, speakers
B and speakers A and B together.
It is not recommended to use loudspeakers of less than 4
Ω
resistance or more than two
pairs of 8
Ω
speakers running from the amplifier at one time. However, bi-wiring of one pair
of speakers, using the four terminal posts, can improve the sound of your system (consult
your dealer for more details).
N.B.
It is VERY IMPORTANT not to short the loudspeaker cables together when the other
ends are still connected to the amplifier, otherwise permanent damage can result. If it is
necessary to move or change the location of your loudspeakers, make sure that you
switch off the amplifier from the mains first.
INPUT CONNECTION AND SWITCHING
On the 5250 all six line inputs, including the tape input, have some gain (active circuitry),
which can if required, be increased or decreased by changing the setting of the selector
switch on the internal plug-in gain PCB. Consult your dealer if you feel you need more
advice. It is also possible to make the pre-amp section passive by removing the gain PCB
and replacing it with a passive link PCB. A reduced sensitivity will result.
The tape input is in a loop with the tape output, enabling you to record anything you can
hear, or in other words, Monitor recordings without interrupting the signal. The rotary
selector switch on the left-hand side of the amplifier is used to select and listen to any of the
desired inputs. The second rotary selector switch on the 5250, marked Record, allows you
to record any input independent of the input you are listening to.
As all the line input levels are the same, it is not necessary to use the precise inputs as
designated. You may, for example, plug a CD player into the Tuner input and obtain exactly
the same result or performance as the dedicated CD input. However, for added flexibility,
the first input on the 5250 can be used either for vinyl Disc or Auxiliary Line.
An optional low noise MM or MC Phono Amplifier Module is available, which replaces the
standard passive Link pcb, internally. Check with your dealer for more details if required.
VOLUME LEVEL
The volume control, situated in the right hand side of the front panel, is used to alter the relative level of the sound output from the amplifier. It is important to realise that the volume
control only acts to reduce, or attenuate, the incoming signal to the power amplifier stage.
The maximum power of the amplifier is available only if the level of signal available from the
line level equipment is sufficient to drive it to clipping.
The volume control is necessary to adjust the level from one piece of equipment to another.
It does not increase the power of the amplifier and if it is found necessary to have the volume control set to a position which is considered to be high, before the desired level of volume is obtained, it does not necessarily mean that the amplifier is having to work "flat-out".
The selector switch on the gain board may need to be set to a different level setting to
increase the level as required (options include +3dB, +6dB and +10dB). Consult your dealer if you feel you need more advice.
OPERATING THE 5250
Make sure that the unit is on a suitable table, shelf or Hi-Fi equipment cabinet. It is important to
allow adequate ventilation to the heatsink in the centre of the unit. Avoid obstruction of the ventilation slots on the top and bottom of the amplifier. It may be necessary to place the amplifier
on the top of other equipment to allow for this.
Always have the volume control set at minimum (counter-clockwise) when switching on and
off, to avoid any sudden loud noises. Select the desired input on the rotary selector and
switch on the amplifier with the push button marked Power on the right hand side of the
front panel. Adjust the volume gently and settle down to listen.
Your 5250 amplifier is designed to give you years of reliable use. If you need more assistance, it is always advisable to go back to the supplying dealer for his expert help. If you are
unfortunate enough to need service work to be carried out on your amplifier, it should be
returned to your dealer in the original packing material if possible.
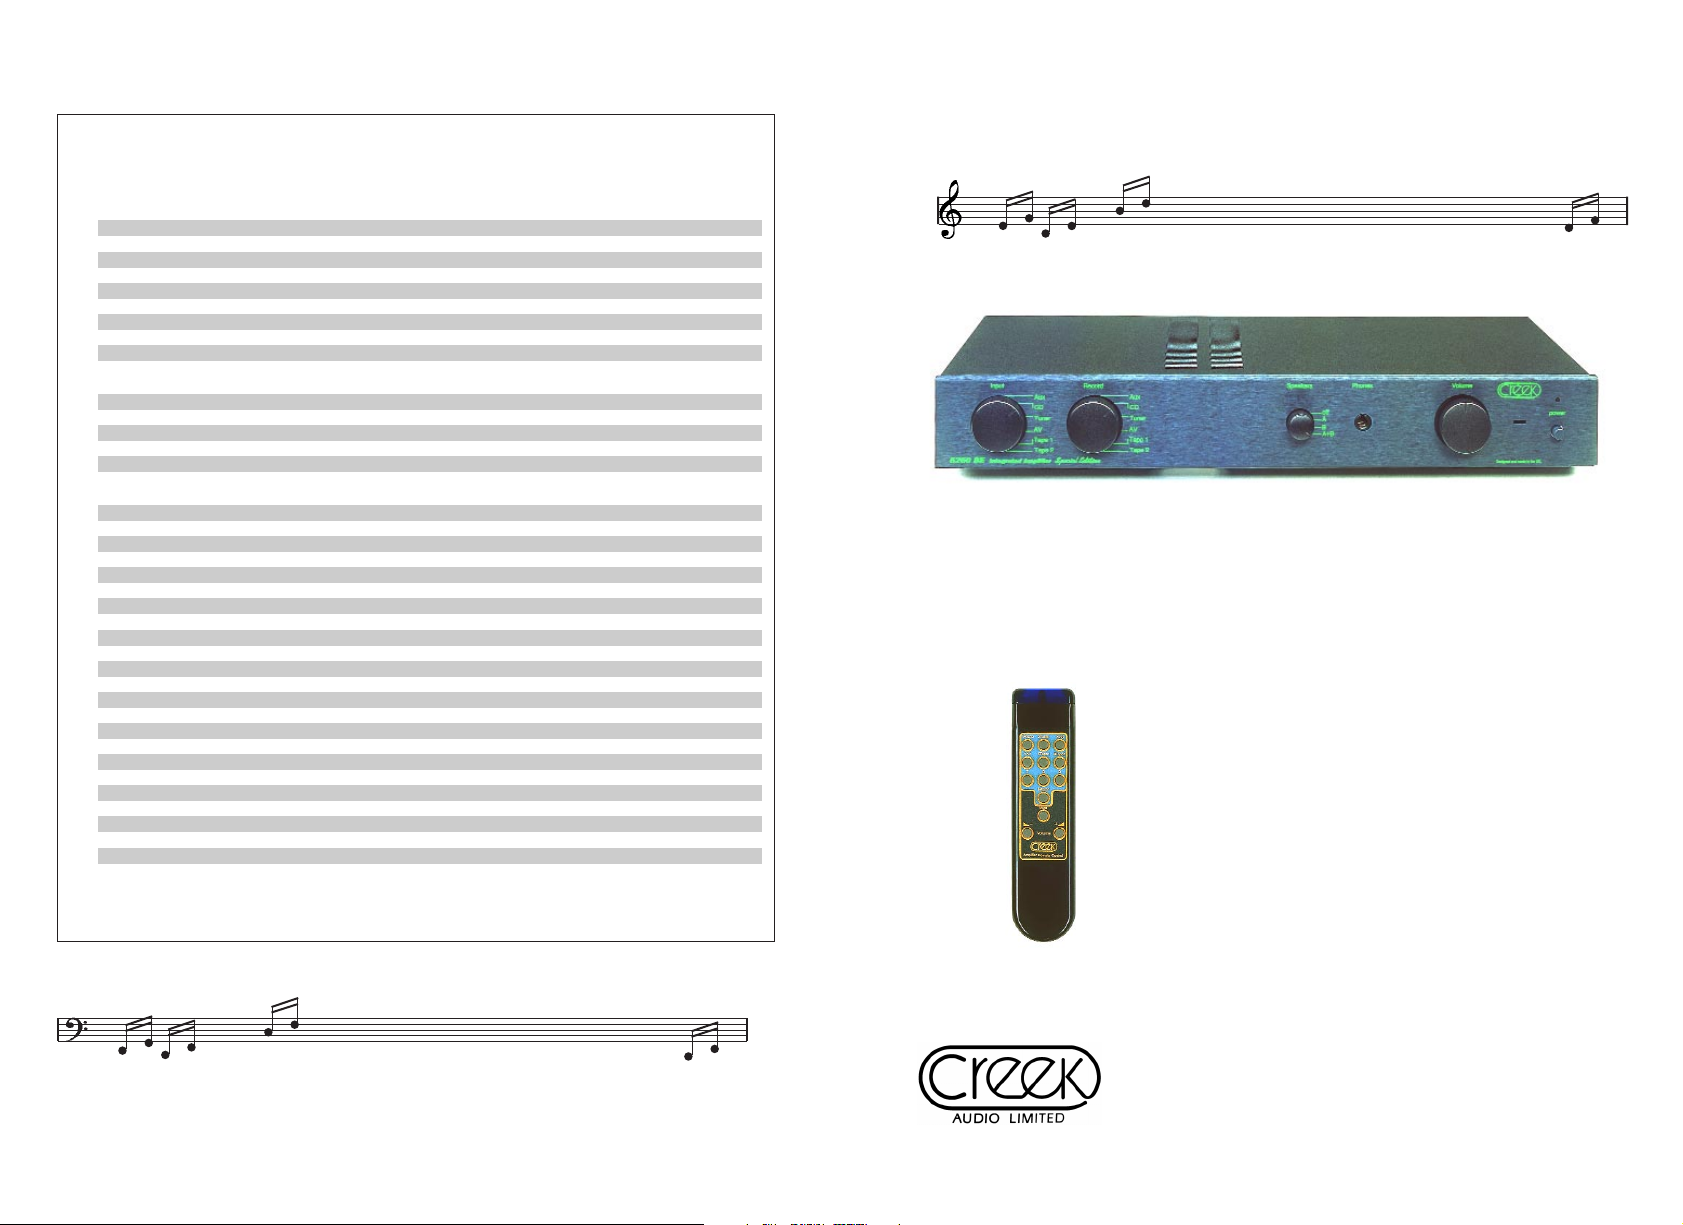
REMOTE CONTROLLED VERSION (5250R & 5250SE)
The 5250R and 5250SE front panel controls function in exactly the same way as the standard 5250. The Creek Amplifier Remote Control handset allows the user to operate the volume control, input selection and mute by an infra-red (RC5) link. The bottom three buttons
on the handset are for motorised volume up + down, plus mute functions. The buttons
marked 1 Phono to 6 Tape are for selecting the desired source via a motorised version of
the rotary input selector. Handset buttons 7, 8, 9 & 0 are not used on the 5250.
When the 5250R or the 5250SE are first switched on, the power LED will glow yellow until
the protection circuit confirms everything is OK. The LED will then turn green and, if selected, the loudspeaker relays will click on. Volume changes will cause the Power LED to
flash green. Pressing the mute button will cause the LED to turn yellow. Pressing the button again or increasing the volume will un-mute the amp and the LED will turn green again.
Adjusting the volume downwards by remote will not un-mute the amp. Please note, muting
can only be cleared by the remote handset or by pressing the amplifier power switch off for
10 seconds and on again. If the amplifier stops working and the Power LED turns red, it
indicates a fault. Return the amplifier to the supplying dealer for inspection.
N.B.
The 5250 is designed to work properly in normal domestic operating conditions.
However, the amplifiers performance may be seriously affected if sited near to, or in the
room with, a radio transmitter such as a mobile phone or CB radio rig, etc. Re-siting the
5250 or the radio will normalise the situation.
 Loading...