

Creative Xboard25, Xboard69 Owner's Manual
XBoard mini.book Page 3 Thursday, April 21, 2005 11:09 AM
Owner’s Manual
© 2005 E-MU Systems
All Rights Reserved
PN: 02EM770006000
Revision: A
E-MU World Headquarters
E-MU Systems
1500 Green Hills Road
Scotts Valley, CA
95067-0015
USA
Europe, Africa,
Middle East Creative Labs
Ballycoolin Business Park
Blanchardstown
Dublin 15
IRELAND
E-MU Japan
Creative Media K K
Kanda Eight Bldg., 3F
4-6-7 Soto-Kanda
Chiyoda-ku, Tokyo
101-0021
JAPAN
www.japan.creative.com
X Board 3
XBoard mini.book Page 4 Thursday, April 21, 2005 11:09 AM
Important!
The complete X Board manual is available in .pdf format on the included CD-ROM.
Important
Le manual français de l’ X Board est disponible au format .pdf, sur la CD-ROM
inclus.
Wichtig
Das deutsche Handbuch ist als .pdf Dokument vom enthaltenen CD-ROM
vorhanden.
E-MU Systems 4

XBoard mini.book Page 5 Thursday, April 21, 2005 11:09 AM
Table of Contents
Introduction .................................................................7
Requirements .......................................................................................................8
On a PC: ................................................................................................................... 8
On a Mac: ................................................................................................................. 8
Package Contents ................................................................................................. 8
Optional ................................................................................................................... 8
Hardware Installation ..........................................................................................8
Connecting the X Board to your Computer ........................................................ 9
USB Connection ...................................................................................................... 9
MIDI Connection ....................................................................................................9
MIDI Interface ........................................................................................................ 10
Software Installation .........................................................................................10
Macintosh OS X .....................................................................................................10
Windows 2000 ....................................................................................................... 10
Windows XP ........................................................................................................... 11
Uninstalling all Audio Drivers and Applications ................................................11
Troubleshooting ................................................................................................12
Main Panel Controls ....................................................16
Back Panel Description ...............................................19
Powering the X Board .................................................20
Inserting Batteries into the X-Board ......................................................................20
Basic Operations .........................................................21
Entering Data .....................................................................................................21
Selecting Patches ................................................................................................21
Storing Patches ..................................................................................................22
X Board 5
XBoard mini.book Page 6 Thursday, April 21, 2005 11:09 AM
Changing the MIDI Channel .............................................................................22
Transposing the Keyboard .................................................................................22
Editing Patches ..................................................................................................23
Scrolling Text Display ............................................................................................23
16 Channel Control Mode .................................................................................24
Note Latch Mode ................................................................................................25
Snap Shot ...........................................................................................................26
Bypass Mode ......................................................................................................26
Edit Parameters ..................................................................................................27
Semitone Transpose ...............................................................................................27
Velocity Curve Select ..............................................................................................27
16 Channel CC Number .......................................................................................27
Latch High/Low Note ............................................................................................28
Save CC Value in Patch ..........................................................................................28
CC Send On Recall ................................................................................................28
PGM Send on Recall ..............................................................................................28
Bank Send MSB ......................................................................................................28
Bank Send LSB .......................................................................................................28
Send Prog Change ..................................................................................................29
Aftertouch On/Off .................................................................................................29
Program Change (PGM) Browse Mode ................................................................29
X1 Functions ..........................................................................................................30
Index ......................................................................... 31
E-MU Systems 6
XBoard mini.book Page 7 Thursday, April 21, 2005 11:09 AM
Introduction
INTR
ODUCTION
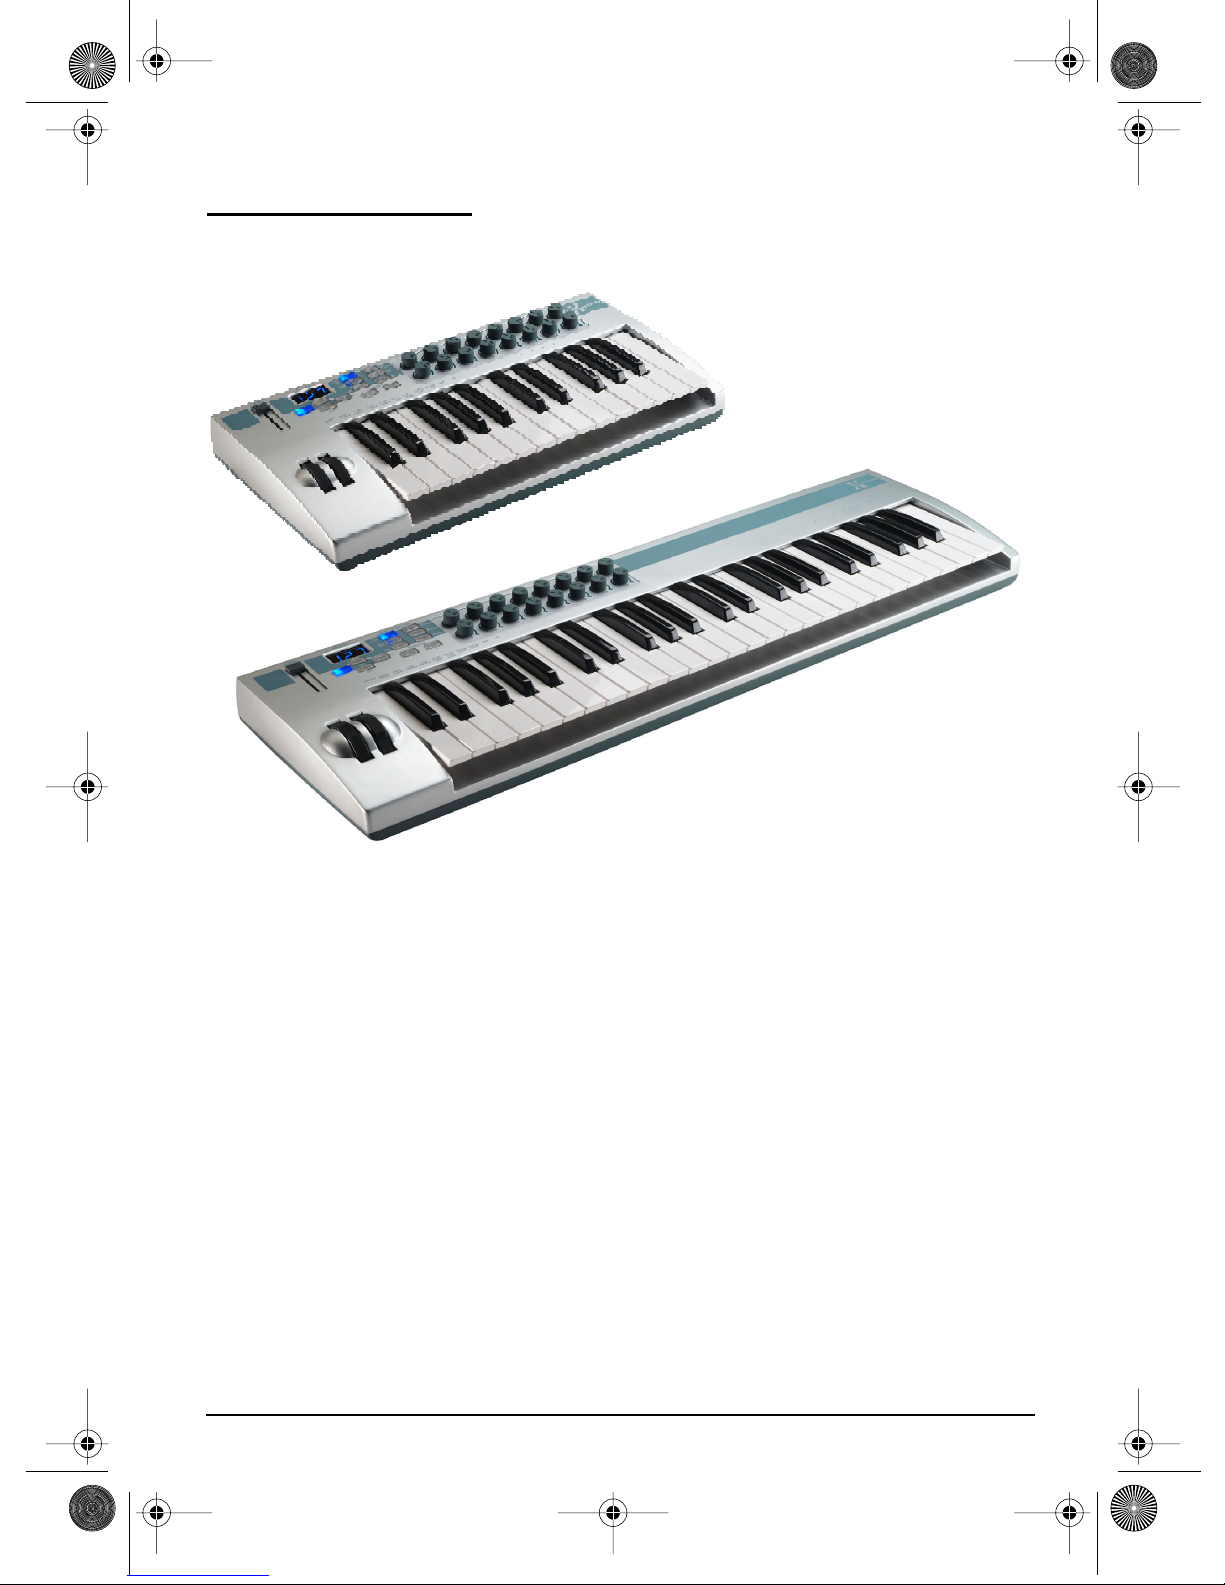
Congratulations on your purchase of the E-MU X Board 25 or X Board 49 USB/
MIDI controller. The X Board professional USB/MIDI controllers offer unmatched
playability, real-time control and programmability in portable 25 key or 49 key
packages. Both models feature full-size velocity-sensitive keys with aftertouch, pitch
and modulation wheels and 16 controller knobs. These keyboards are ideal for
either studio or stage use since they can be used as stand-alone MIDI controllers or
with a USB equipped PC or Macintosh computer. The X board MIDI output can
even be used as a MIDI interface for your computer when connected via USB. The X
Boards are ultra-portable and can be powered via USB, battery, or using the
optional 6 VDC power supply.
Each of the 16 controller knobs can be programmed to any controller number on
any MIDI channel. The keyboard can be transposed up or down ±4 octaves in order
to play in any key and any pitch.
Both X Boards contain a host of extra features. The “Snap Shot” feature lets you
send multiple program changes and controller values with a single button press.
The “XBoard Latch Mode” lets you define a section of the keyboard as On/Off
triggers—perfect for drum loops. Each of the 16 internal patches has a programmable footpedal/footswitch setting, can select one of eight velocity curves, and can
send program changes for up to 16 MIDI channels.
X Board 7
XBoard mini.book Page 8 Thursday, April 21, 2005 11:09 AM
Introduction
Requirements
The included X Board Control software provides an intuitive desktop interface that
makes it easy to create custom templates for all your favorite hardware and software
instruments.
On a PC:
You must be running Windows 2000 or XP, and your computer must support USB
to communicate with the X Board. The X Board can operate in MIDI Output mode
without a computer if 6VDC power is supplied via a DC adapter or batteries.
On a Mac:
You must be running Mac OS X to connect the X Board. The X Board can operate in
MIDI Output mode without a computer if 6VDC power is supplied via a DC
adapter or batteries.
Package Contents
•X Board Keyboard
• USB Cable
• CD-ROM containing the following software bundle
+ X Board USB Drivers
+ X Board Control software
+ Proteus X LE Desktop Sound Module
+ Ableton Live Lite 4 for E-MU
+ Adobe PDF Reader
+ PDF manual for X Board and X Board Control software
• This Owner’s Manual
Optional
• DC Power Adapter (contact E-MU Systems)
Hardware Installation
The connection diagrams on the following pages show how to connect the X Board
to your computer or to another MIDI device.
The supplied USB cable provides power and a two-way data link between the X
Board and your computer. The USB port on your computer is a small (1/8” x 3/8”)
rectangular opening. The connector is keyed so you cannot plug it in wrong. The
other end of the USB cable is square and plugs into the back of the X Board. This
end is also keyed to prevent incorrect insertion.
If the X Board is not connected to the computer via USB it requires a source of
power in the form of a 6VDC adapter (tip positive) or (3) AA batteries.
E-MU Systems 8
XBoard mini.book Page 9 Thursday, April 21, 2005 11:09 AM
Introduction
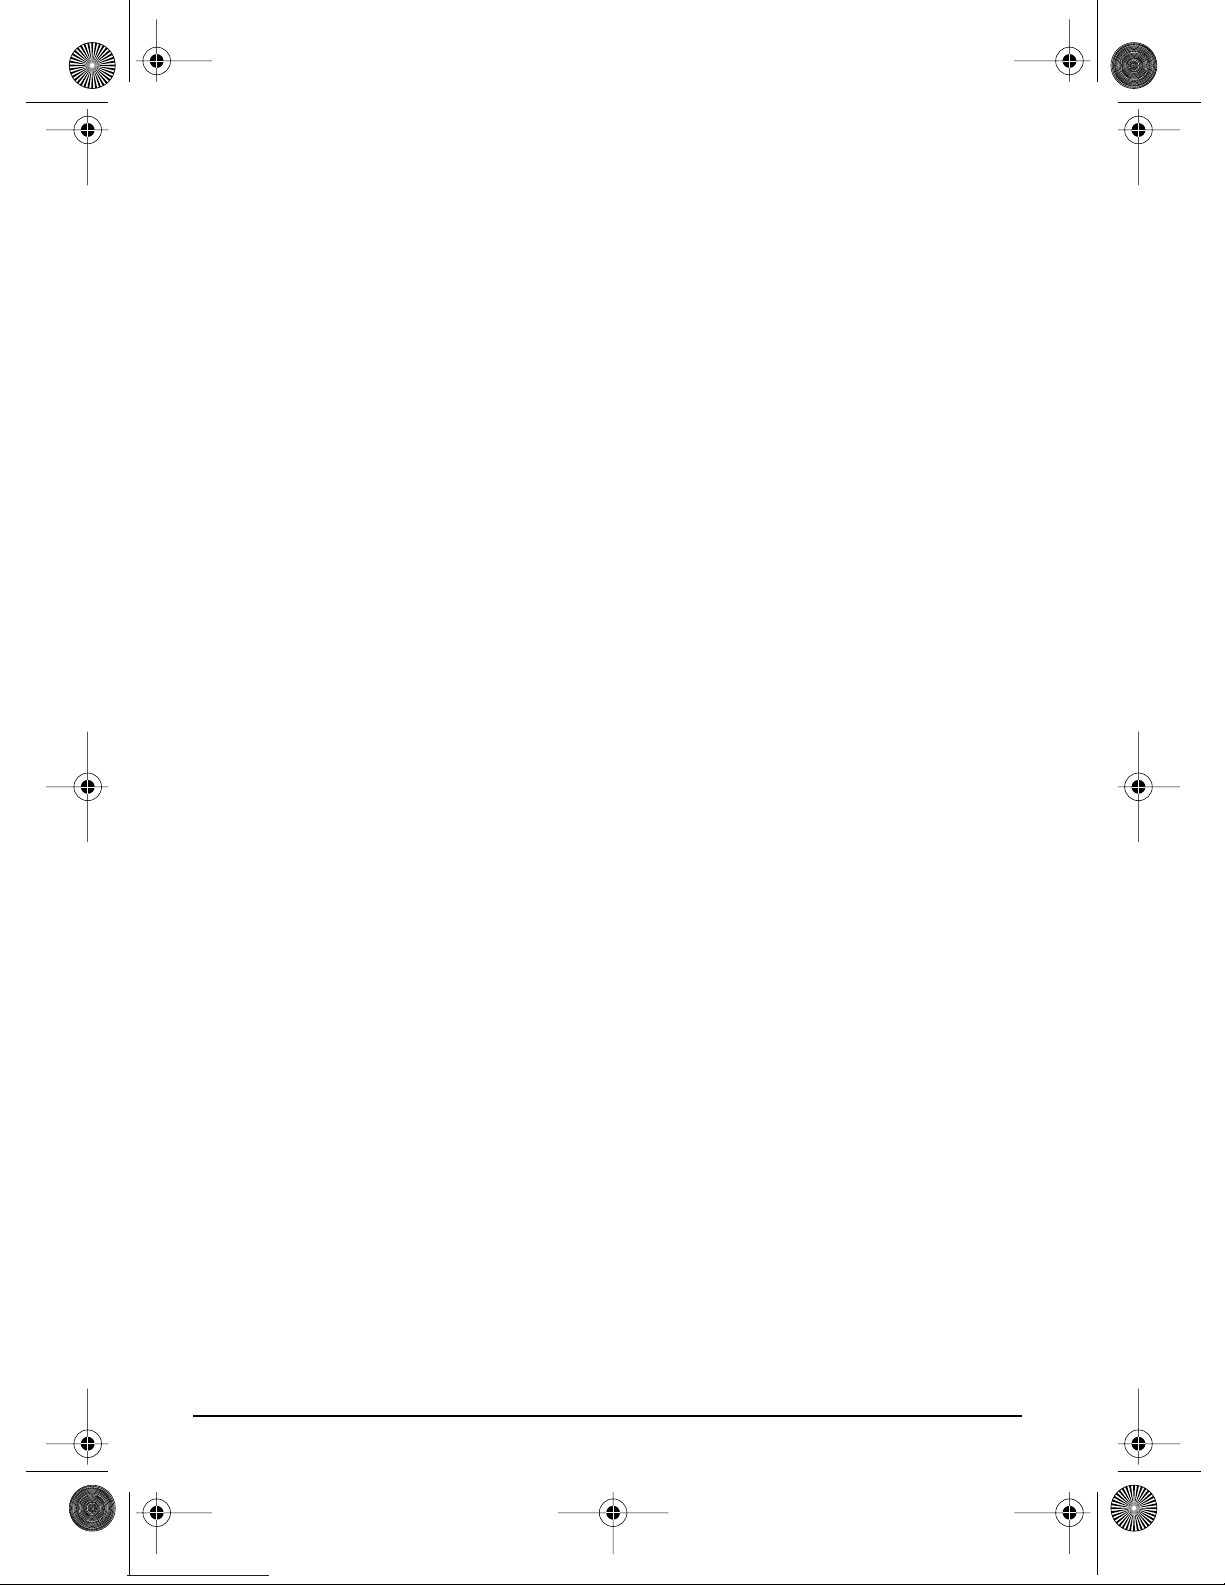
Connecting the X Board to your Computer
USB Connection
USB provides a two-way data link
between the X Board and your
computer and also supplies
power to the X Board. Always
connect to the USB port on the
computer itself—the USB port on
your computer keyboard will not
supply sufficient power.
U
S
B
C
a
b
l
e
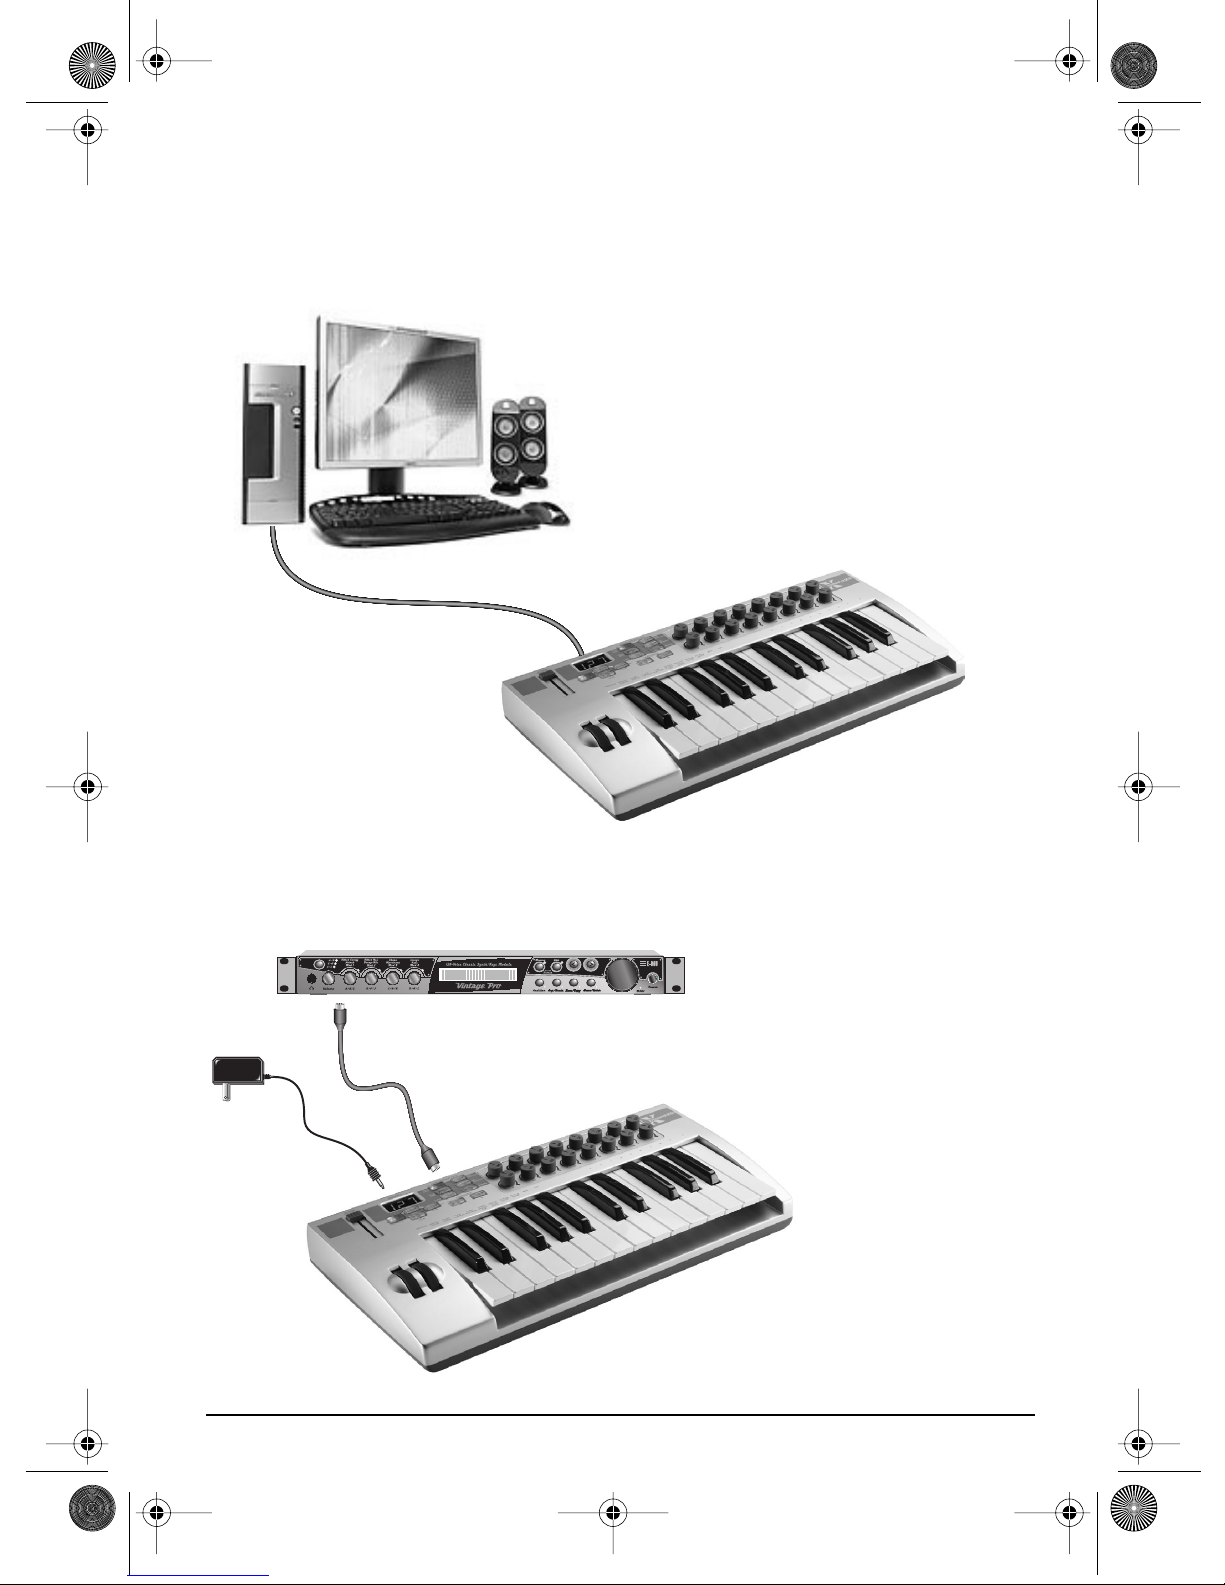
MIDI Connection
MIDI Sound Module
CO1 A V 12 7 P PA:01RNIVTG
3
022
trn:Mellotron tr S
In
MIDI
Cable
6 VDC
Adapter
Out
X Board 9
The X Board sends MIDI
performance data to another
MIDI device, such as a MIDI
sound module. The X Board
always transmits MIDI data
except when “Thru” mode is
enabled.
(See page 30.)

XBoard mini.book Page 10 Thursday, April 21, 2005 11:09 AM
Introduction
U
S
B
C
a
b
l
e
Out
MIDI Sound Module
In
MIDI
Cable
MIDI Interface
CO1A V12 7 P PA:01RNIVTG
3
trn:Mellotron tr S
022
The X Board can function as a MIDI interface when connected to your computer via
USB. Set the X Board MIDI port to “Thru”
(page 30)
to transmit MIDI from your
sequencing application to an external MIDI device.
Software Installation
Macintosh OS X
Follow these instructions to install the X Board USB drivers and editor/librarian
software on a Macintosh computer.
1. Double-click on the installer package.
2. Click on the lock icon and enter the administrator password you chose when
you installed OS X.
3. Follow the prompts to install the software.
Windows 2000
Follow these instructions to install the X Board USB drivers and editor/librarian
software on a Windows 2000 computer.
1. Make sure the X-Board is NOT CONNECTED to your computer.
2. Insert the E-MU software Installation CD into your CD-ROM drive. If Windows
AutoPlay mode is enabled for your CD-ROM drive, the CD starts running automatically. If not, from your Windows desktop, click
d:\setup.exe
also simply open the CD and double-click
(replace
d:\
with the drive letter of your CD-ROM drive). You can
Setup.exe
Start->Run
.
and type
E-MU Systems 10

XBoard mini.book Page 11 Thursday, April 21, 2005 11:09 AM
Introduction
3. The installation splash screen appears. Follow the instructions on the screen to
complete the installation. You will have the option to install:
•
E-MU X Board
•
Proteus X LE
•
Ableton Live Lite for E-MU
- USB Drivers and X Board Control Application
- A virtual sampling musical instrument (VSTi)
- A loop-based composition/improvisation tool.
•Adobe Acrobat Reader
4. Choose “Continue Anyway” when you encounter the “Windows Logo Testing”
warning screen. See the note on the following page.
5. When prompted, restart your computer.
6. Connect the X Board to your computer using the supplied USB cable.
Windows XP
Follow these instructions to install the X Board USB drivers and editor/librarian
software on a Windows XP computer.
1. First connect the X Board to your computer using the supplied USB cable. This
will allow Windows to install a USB Audio Device driver for the product. Wait
for this installation to complete.
2. Insert the E-MU software Installation CD into your CD-ROM drive. If Windows
AutoPlay mode is enabled for your CD-ROM drive, the CD starts running automatically. If not, from your Windows desktop, click
d:\setup.exe
also simply open the CD and double-click
(replace
d:\
with the drive letter of your CD-ROM drive). You can
Setup.exe
Start->Run
.
and type
3. The installation splash screen appears. Follow the instructions on the screen to
complete the installation. You will have the option to install:
•
E-MU X Board
•
Proteus X LE
•
Ableton Live Lite for E-MU
tool
(Windows only version at this time)
- USB Drivers and X Board Control Application
- A virtual sampling musical instrument (VSTi)
- A loop-based composition and improvisation
•Adobe Acrobat Reader
4. Choose “Continue Anyway” when you encounter the “Windows Logo Testing”
warning screen. See the note on the following page.
5. When prompted, restart your computer.
Uninstalling all Audio Drivers and Applications
At times you may need to uninstall or reinstall some or all of the X Board's applications and device drivers to correct problems, change configurations, or upgrade
outdated drivers or applications. Before you begin, close all X Board
applications. Applications running during the uninstallation will not be removed.
X Board 11
 Loading...