

Page 1
Multi.book Page 1 Friday, September 10, 2004 12:17 PM
Ta ble of Conten t s
EN
Getting Started ............................................................................... 2
Connecting Your Player to a TV (optional) ............................ 7
Your Player At A Glance ............................................................. 8
More Information ........................................................................13
Safety Advice .................................................................................14
Notice for Drivers .......................................................................15
1
Page 2
Multi.book Page 2 Friday, September 10, 2004 12:17 PM
Getting Started
Congratulations on your purchase of Creative Zen Portable Media Center! Follow the next
few steps to install your software and set up your player to enjoy a new level in portable
digital entertainment.
DO NOT connect your player to your computer before setting up the
software.
Step 1
Installing the software
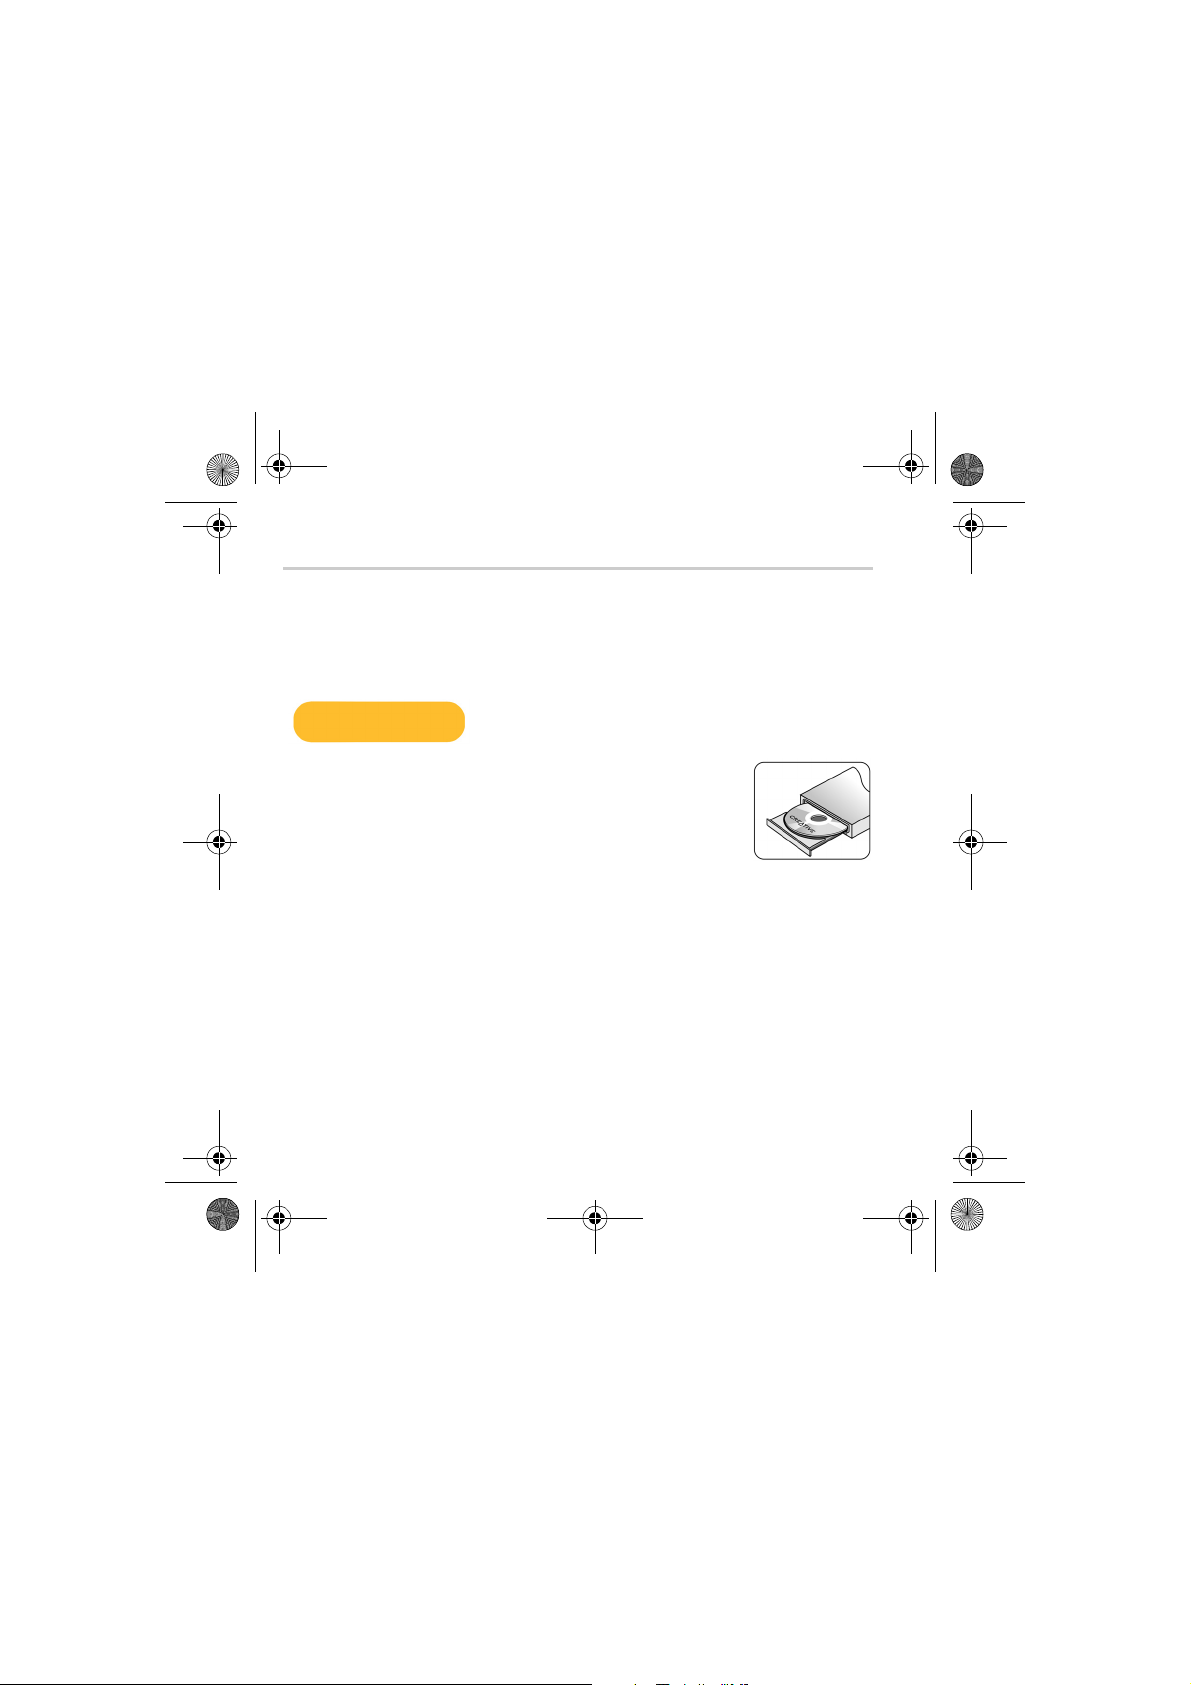
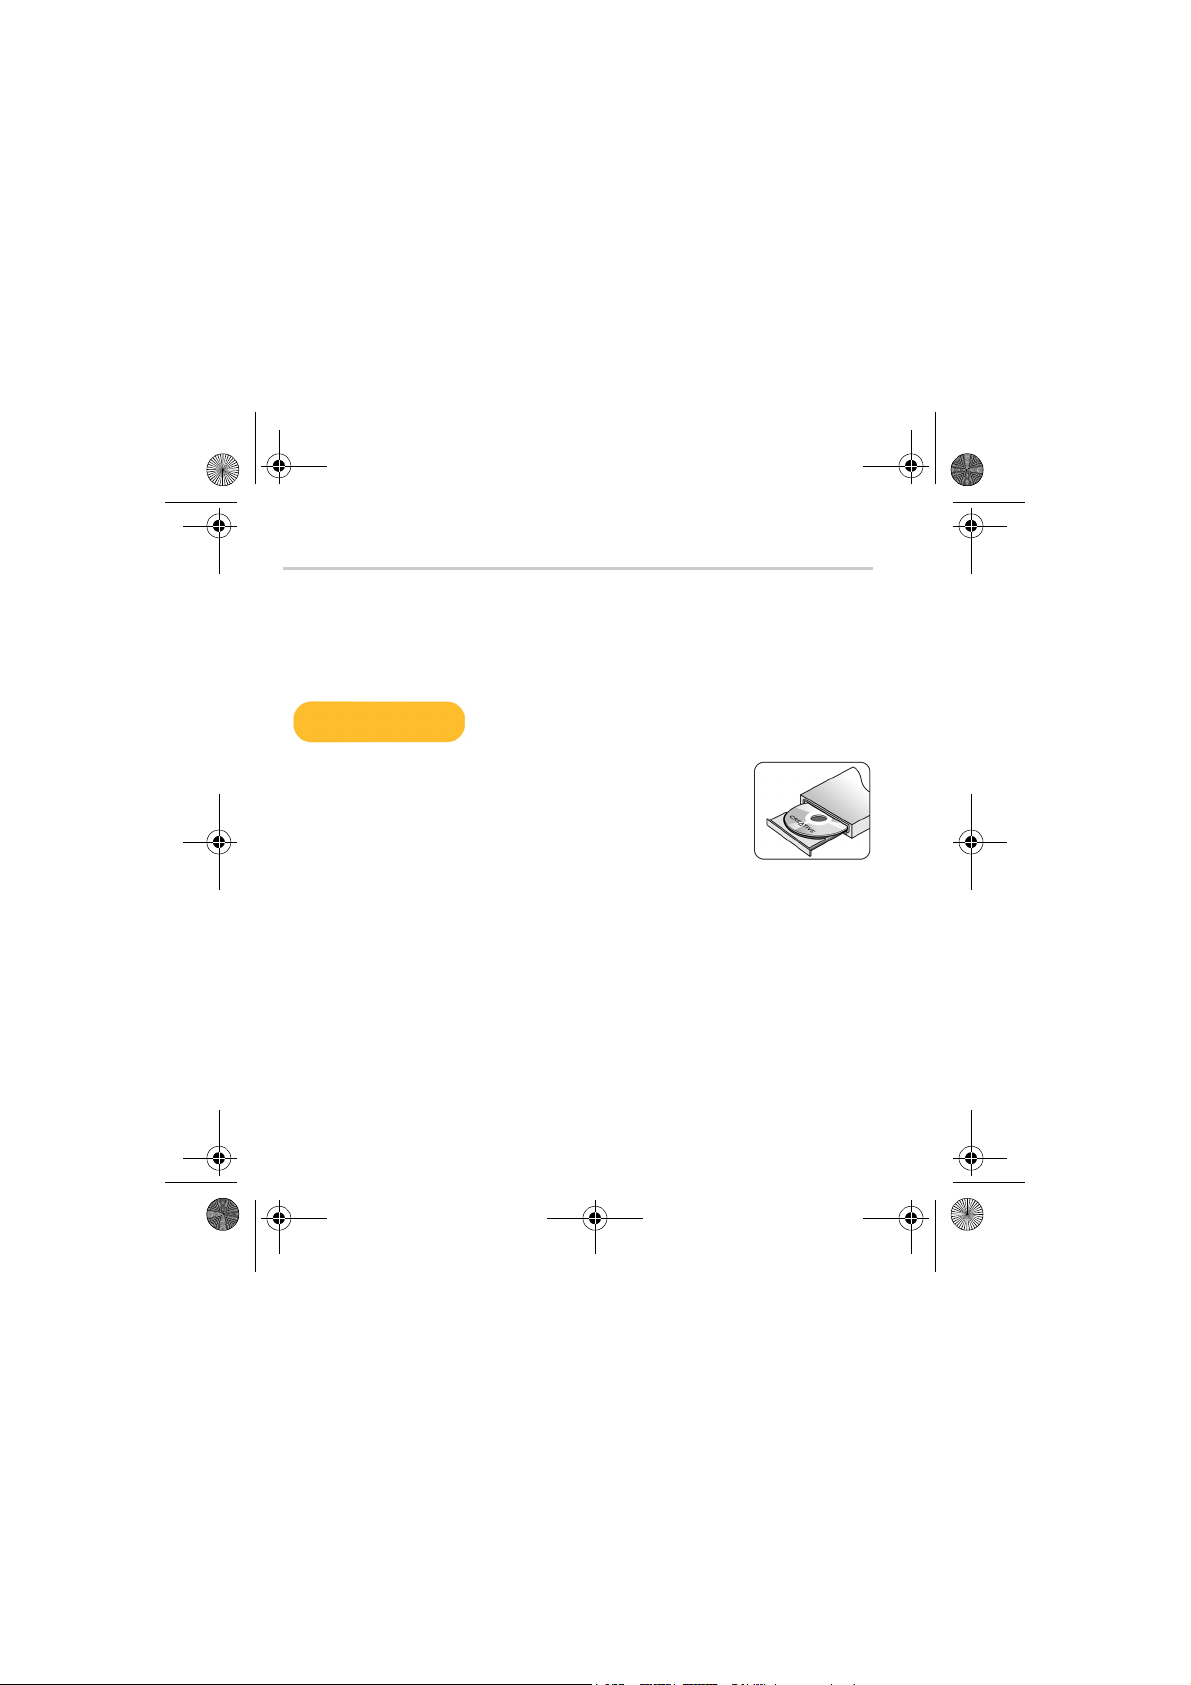
1. Insert the Installation CD into your CD-ROM/DVD-ROM drive.
Your CD should start automatically. If it does not, follow the steps
below:
i. Start Windows Explorer.
ii. On the left pane, click the My Computer icon.
iii. Right-click the CD-ROM/DVD-ROM drive icon, and then click AutoPlay.
2. Follow the instructions on the screen.
3. When prompted, restart your computer.
4. When your computer restarts, follow the instructions on the screen to register your
player and complete the setup.
2 Getting Started
Page 3

Multi.book Page 3 Friday, September 10, 2004 12:17 PM
Step 2
Inserting the battery
1 2 3
1. Open the battery compartment by pressing the silver button (1) and sliding the cover
off your player (2) in the direction of the arrows.
2. Insert the battery as shown, lining up the metal connectors on the battery to the
metal connectors in the battery compartment.
3. Close the battery compartment.
Getting Started 3
Page 4

Multi.book Page 4 Friday, September 10, 2004 12:17 PM
Step 3
Powering your player
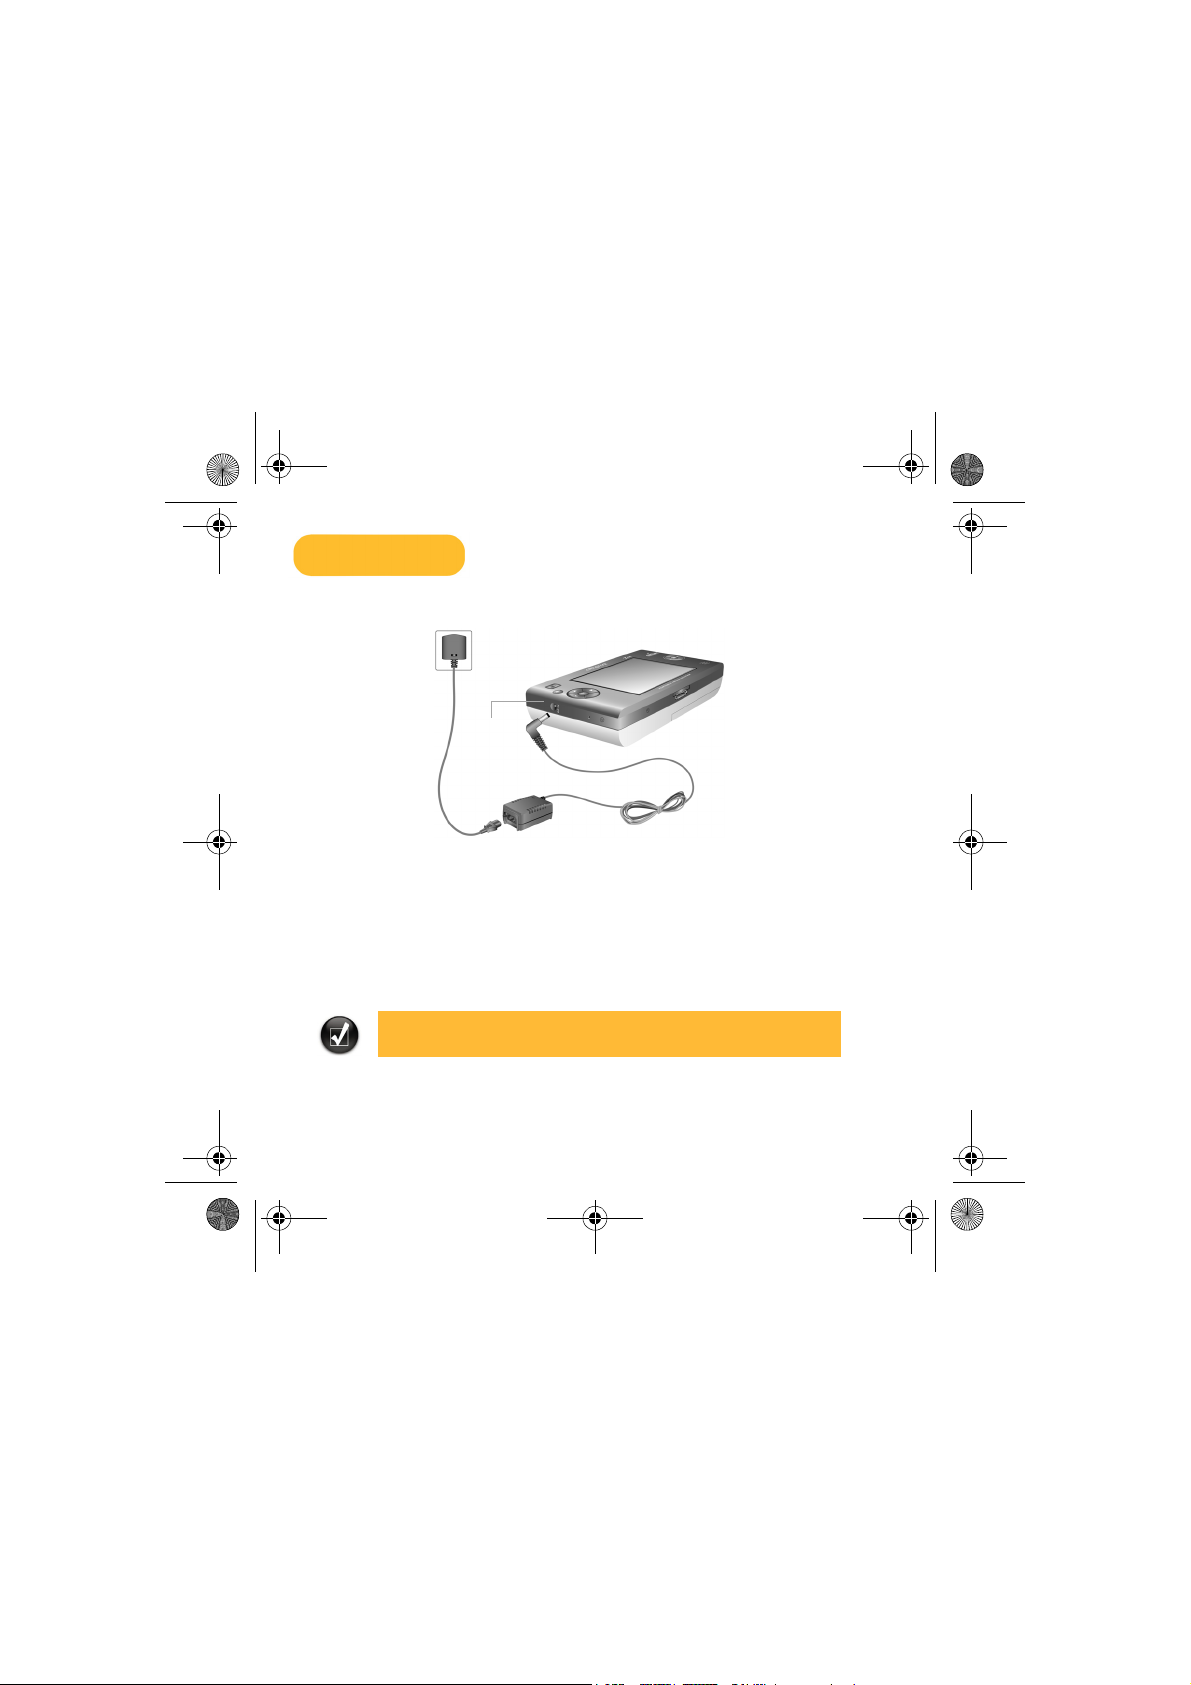
DC In 5V
Connect the power adapter as shown in the diagram. If necessary, turn on the power from
the power source.
Charging your player’s battery
The first time you charge your battery, the charge will take sixteen hours. After this initial
charge, the battery should fully charge within six hours.
The battery charging indicator lights up in amber when the battery is charging, and lights up
in green when the battery is fully charged.
While charging your player’s battery, you can use your player, for example, to
download, watch or listen to your digital media.
4 Getting Started
Page 5

Multi.book Page 5 Friday, September 10, 2004 12:17 PM
Step 4
Transferring content
After you have installed the software and registered your player, you can connect Zen
Portable Media Center to your computer.
®
Use Windows Media
into your Zen Portable Media Center
1. Connect your player to your computer as shown. Your computer’s USB port may be
located at the front, side or back of your computer.
Player 10 to transfer videos, programs, pictures and audio tracks
2. In Windows Media Player 10, click the Library tab.
3. In the library panel, right-click the content you want to add.
Getting Started 5
Page 6

Multi.book Page 6 Friday, September 10, 2004 12:17 PM
4. In the menu that appears, click the Add to option, then the Sync List option.
The content appears in the right panel.
5. Click the Sync tab.
6. In the right panel, be sure that your player is the selected device.
7. In the left panel, click the checkbox next to the media file to select it for
synchronization.
8. Click the Start Sync icon.
After transfer is complete, you can start playing back content. Press the Start button!
For more details on using your player, refer to the User’s Guide. Go to Start →
Programs/All Programs → Creative → Zen Portable Media Center → Zen
Portable Media Center User’s Guide.
6 Getting Started
Page 7

Multi.book Page 7 Friday, September 10, 2004 12:17 PM
Connecting Your Player to a TV
(optional)
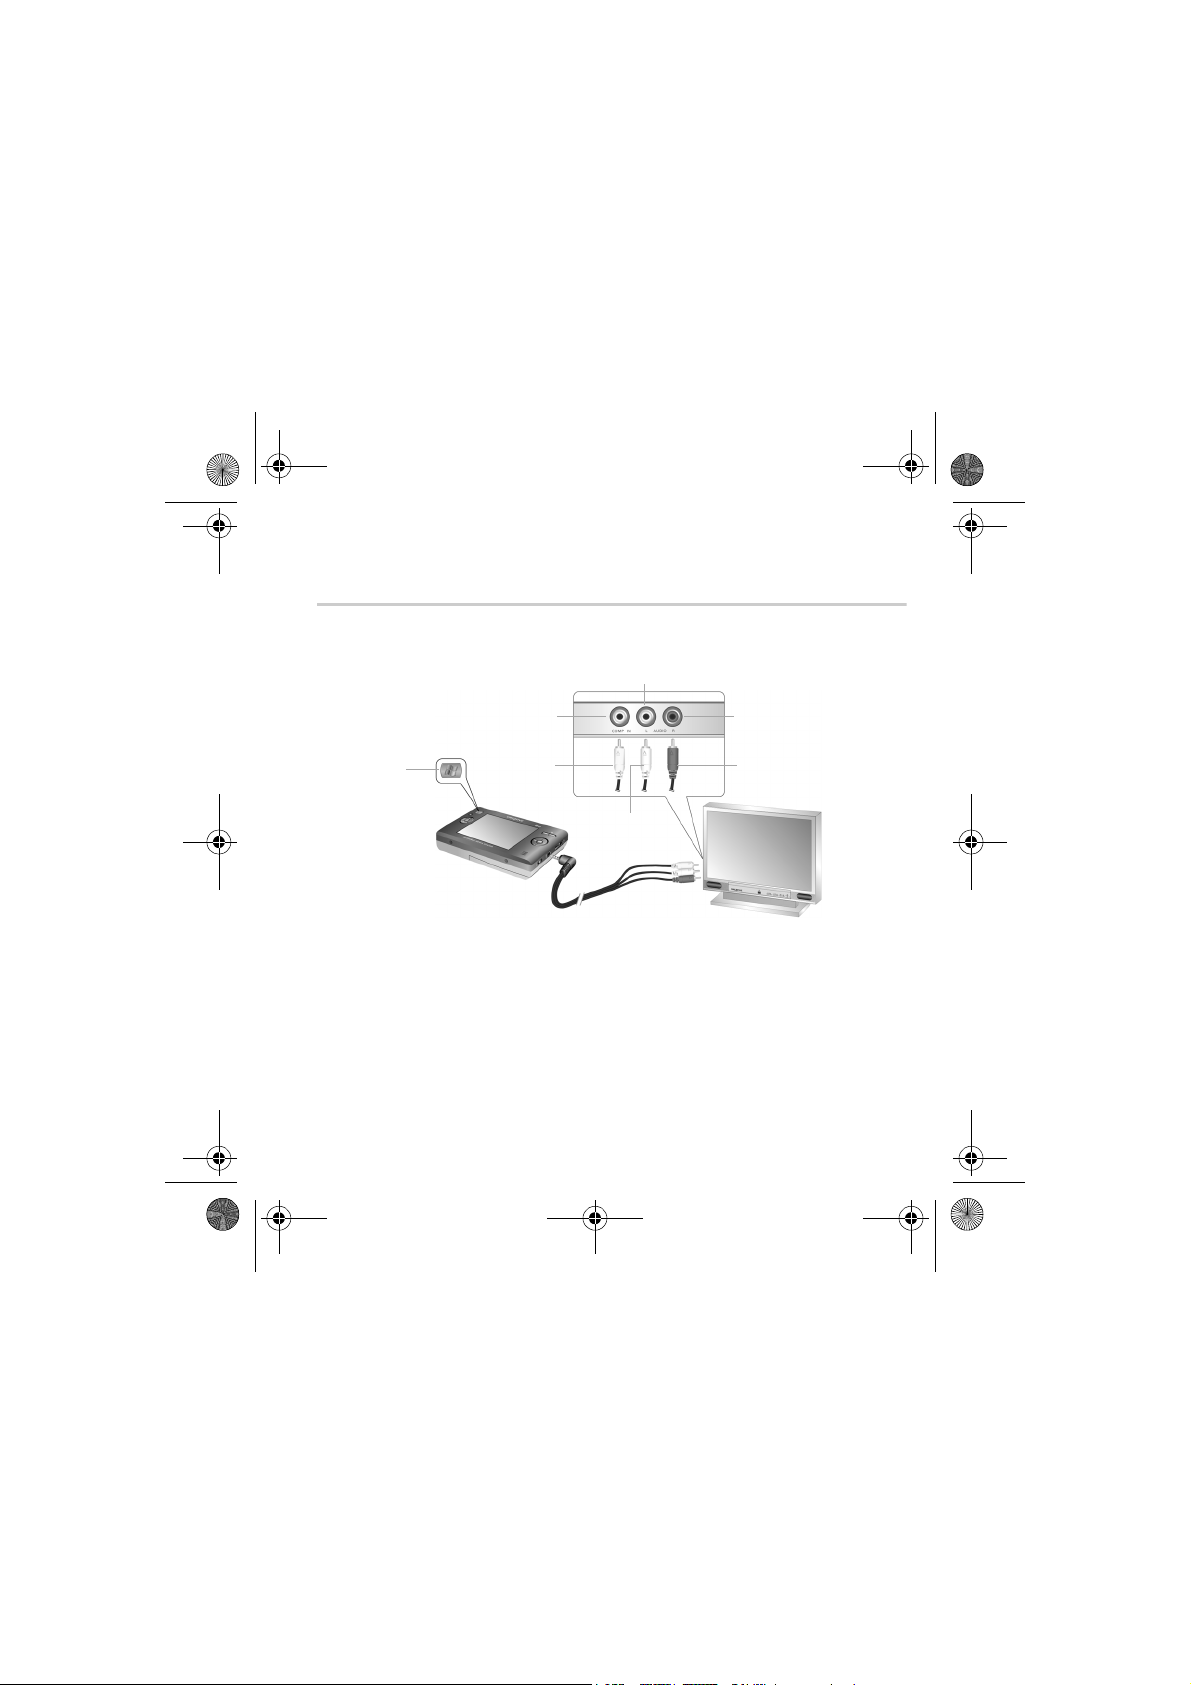
To share your player's content on a larger screen, you can connect your player to a TV. To
do this, you must use the supplied video cable. Do not use a standard video cable.
Audio In (Left)
Video In Audio In (Right)
Start
button
1. Connect your player to a TV with the supplied video cable, as shown above.
2. Press the Start button on your player
3. Select settings.
4. Select Display.
5. Select TV out and select TV Display: NTSC or TV display: PAL.
Be sure to choose the correct TV display format on your player, otherwise you will not be
able to watch programs or videos properly. See the User’s Guide for your TV if you are not
sure about your TV’s display format.
Yellow Red
White
Connecting Your Player to a TV (optional) 7
Page 8
Multi.book Page 8 Friday, September 10, 2004 12:17 PM
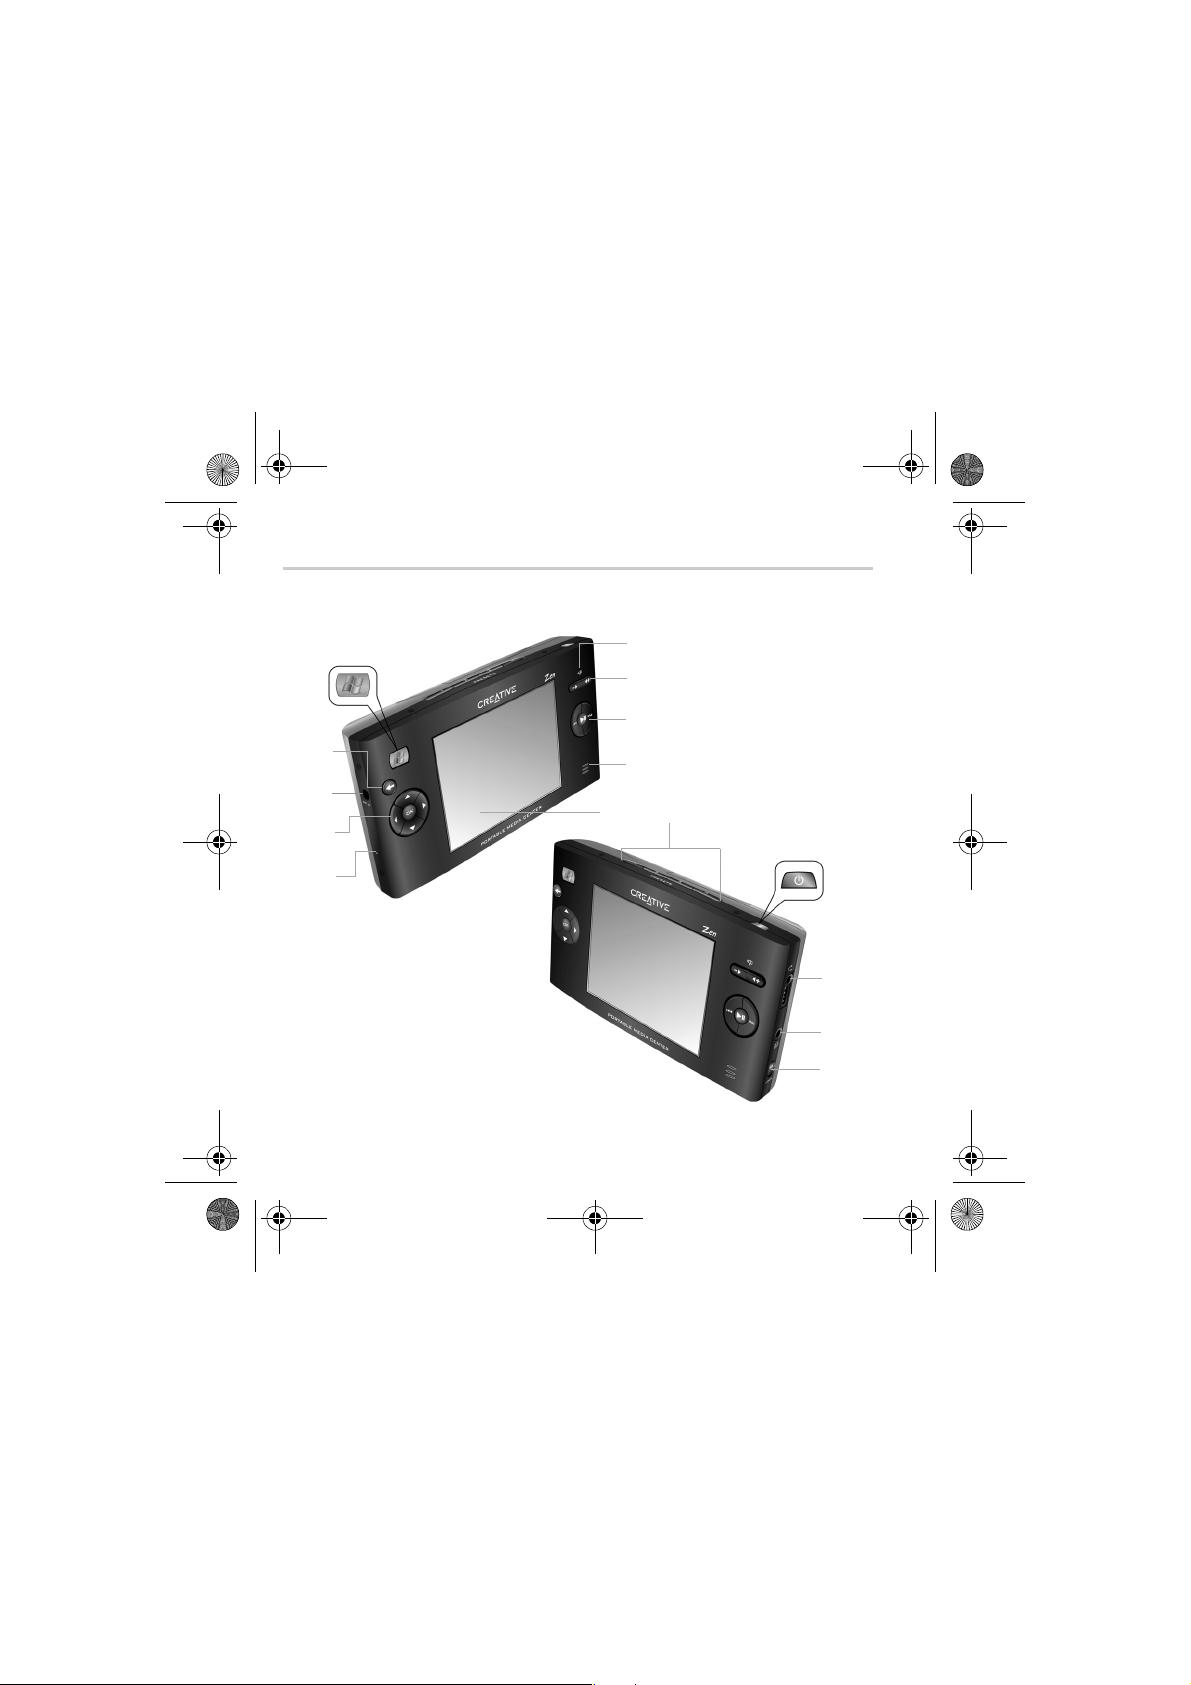
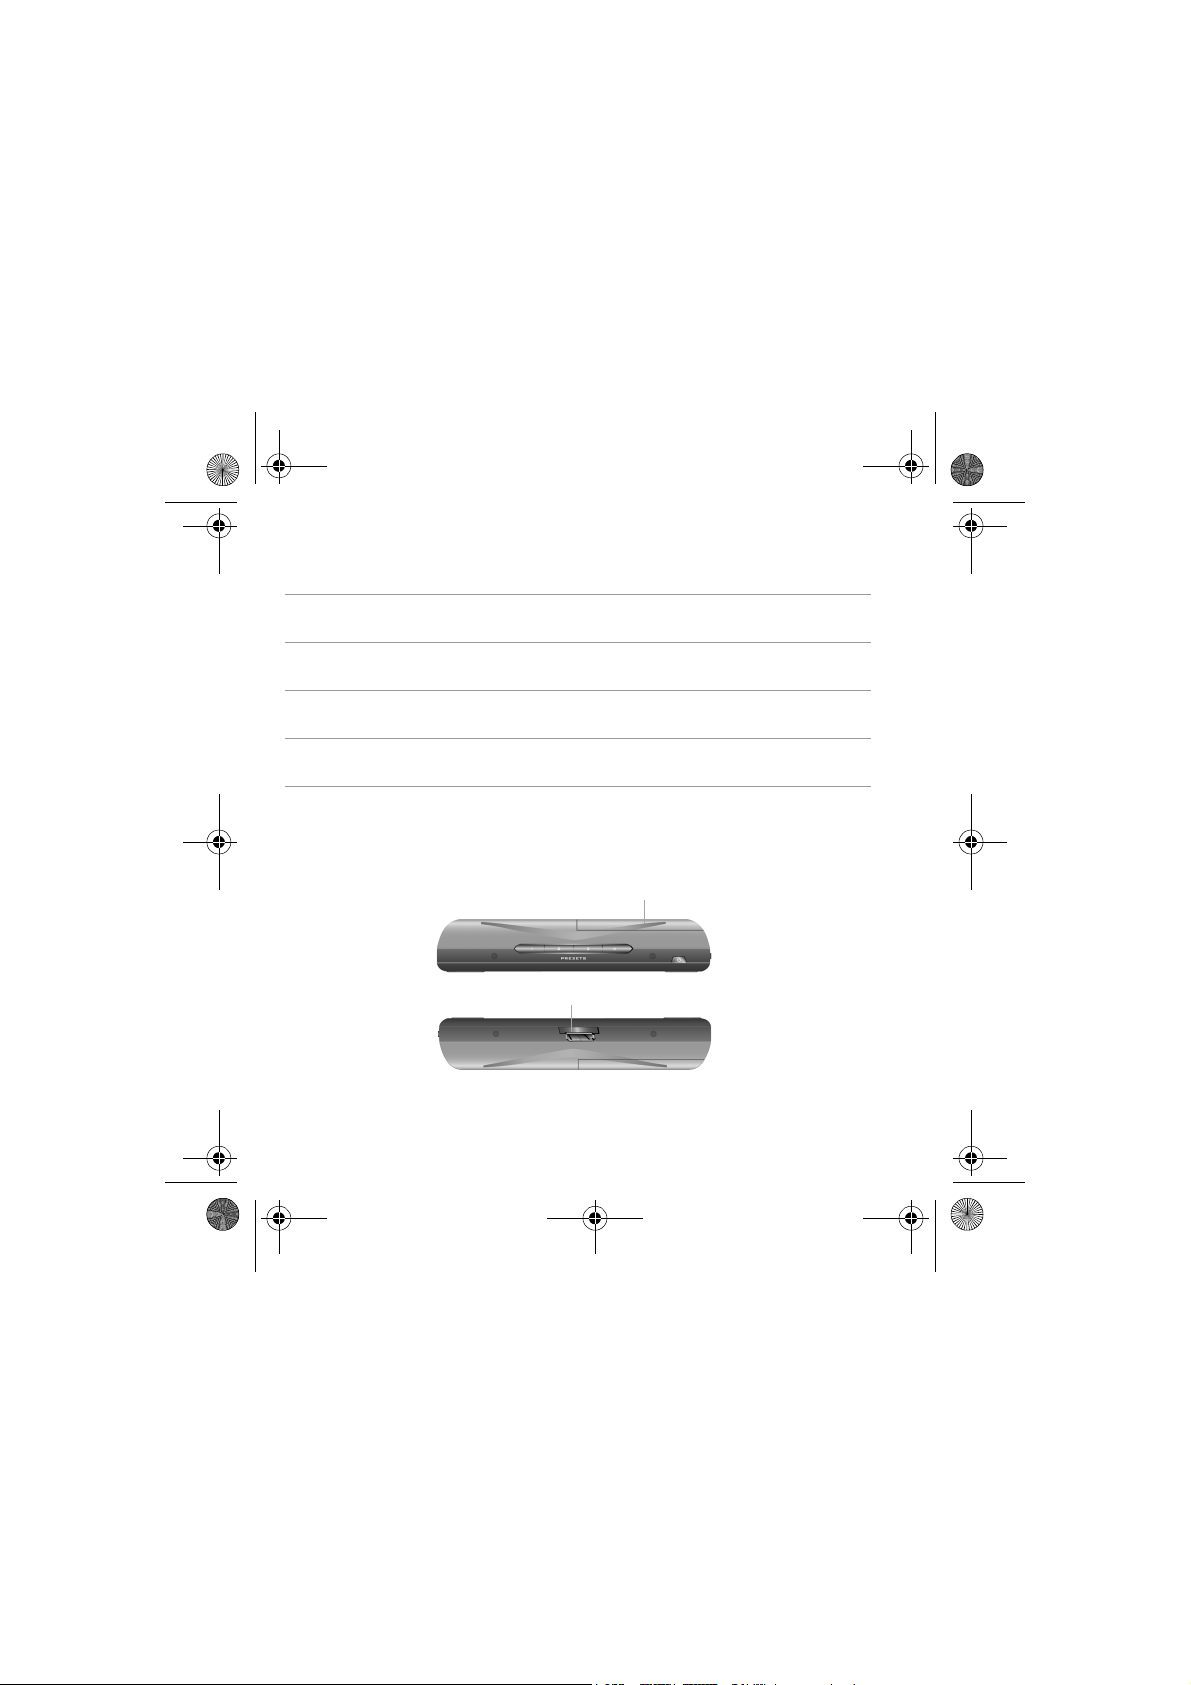
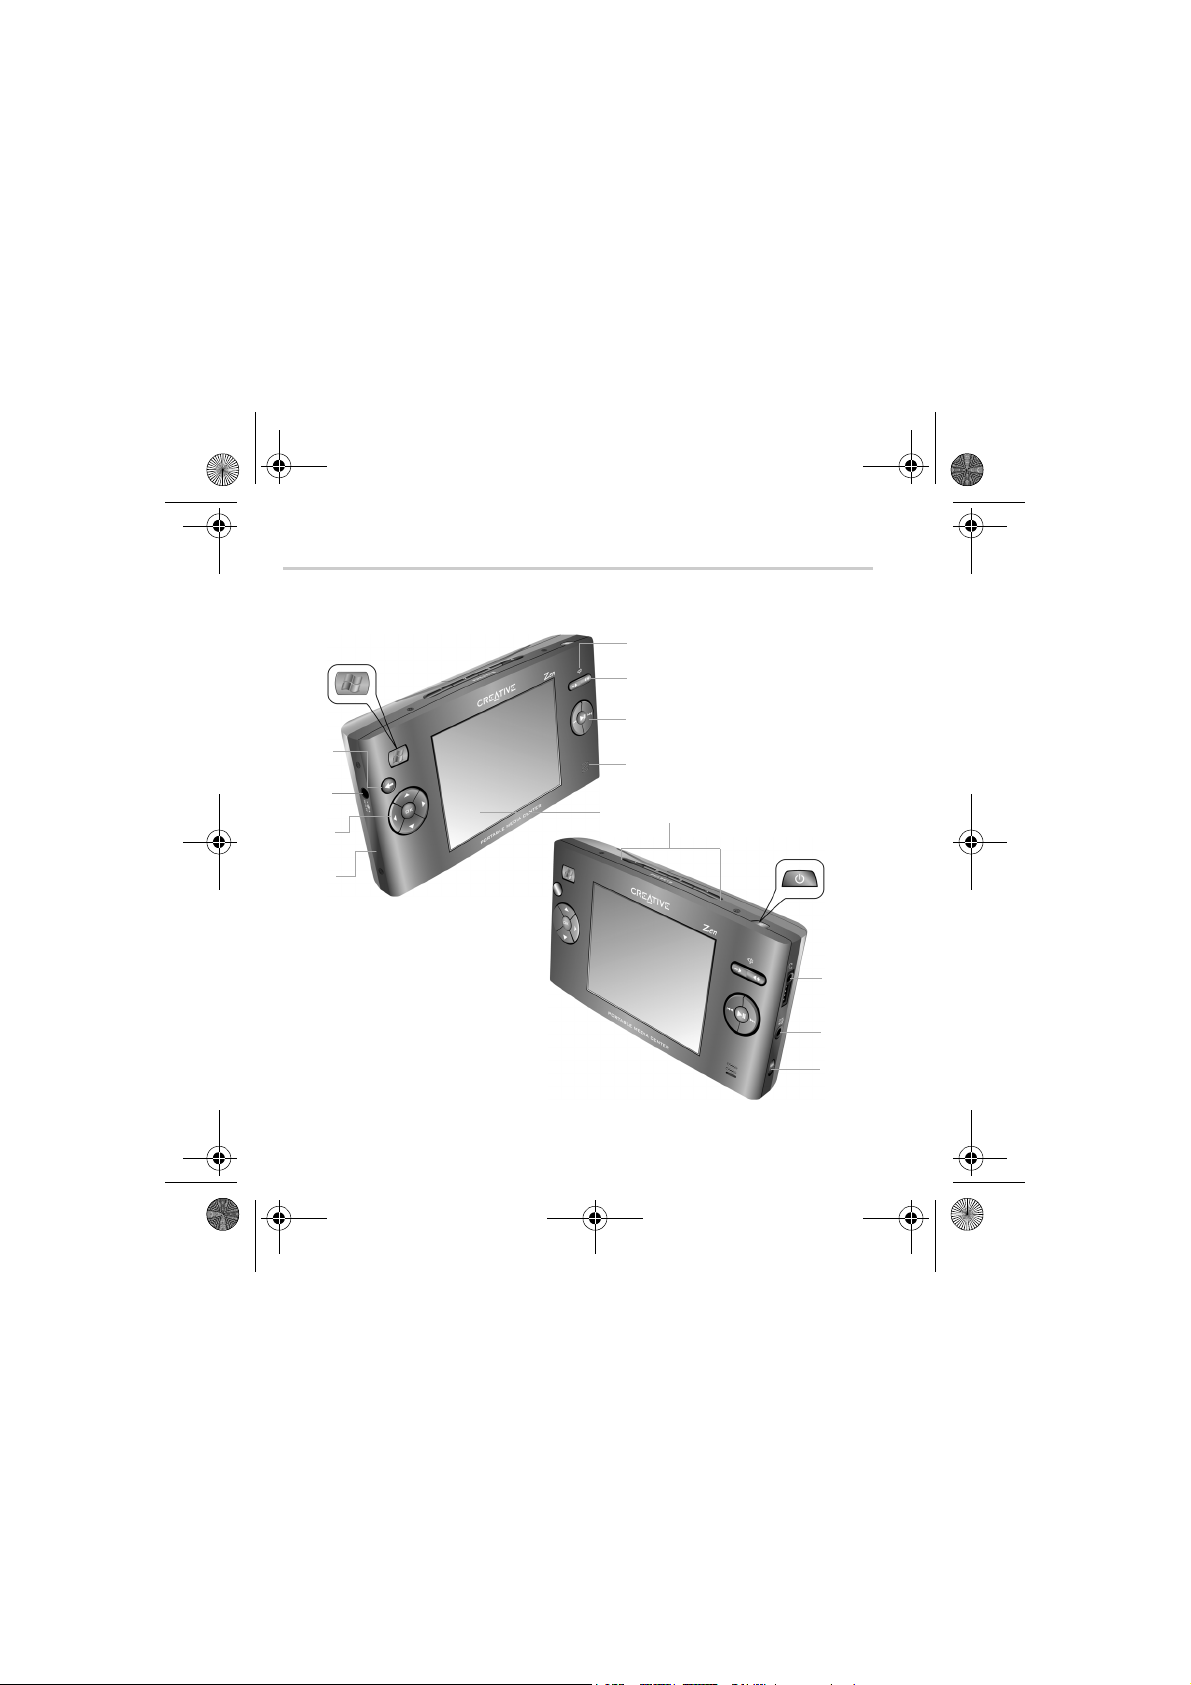
Your Player At A Glance
Front View
Start button
4
3
2
1
8 Your Player At A Glance
5
6
7
8
910
Power button
11
12
13
Page 9
Multi.book Page 9 Friday, September 10, 2004 12:17 PM
Player Buttons and Connectors
Start button
Press to display menu options on the LCD.
Press to switch between the main menu and the currently
active screen.
Power button
Reset button
1
Navigation
2
buttons
Power connector
3
Back button Press to return to the previous screen or menu.
4
Battery Charging
5
Indicator
Volume Up /
6
Down buttons
Play Control
7
buttons
Integrated
8
Speaker
Liquid Crystal
9
Display(LCD)
Press and hold briefly to turn your player on and off.
Resets your player when you press it with the end of a thin
object (like a straightened paperclip).
Enables you to select menu options.
Connect this to a power outlet using the supplied power
adapter.
Lights up in amber when the battery is charging.
Lights up in green when the battery is fully charged.
Press and hold to quickly change volume levels.
Enables you to control content playback.
Enables you to hear audio when you have no headphones or
speaker output.
Displays menus or content.
Your Player At A Glance 9
Page 10
Multi.book Page 10 Friday, September 10, 2004 12:17 PM
Press and hold Preset buttons 1, 2, 3 or 4 to bookmark
Preset buttons
10
Headphone
11
connector
Audio / Video
12
Out connector
Button Lock
13
switch
Battery
14
Compartment
Data connector Connect this to the USB cable or optional docking station.
15
content.
Press a button to go to the bookmark.
Connect your headphones or Wired Remote to this connector.
Connect this to your TV set to conveniently view videos,
recorded TV programs or pictures stored in your player.
Move the switch to lock or unlock your player.
Holds the high capacity battery.
Top and Bottom views
15
14
10 Your Player At A Glance
Page 11

Multi.book Page 11 Friday, September 10, 2004 12:17 PM
Navigation buttons
1
2
1
2
3
4
5
Up button
OK button
Right
button
Down
button
Left button
5
3
4
Press to go to the menu option or selection above the current
selection.
When viewing pictures, press to see the previous picture.
Press to select the highlighted menu option or selection on the
screen.
Press to go to the menu option or selection to the right of the
current selection.
When playing audio, press to see different views of the album,
genre, playlist or track.
Press to go to the menu option or selection below the current
selection.
When viewing pictures, press to see the next picture.
Press to go to the menu option or selection to the left of the current
selection.
When playing audio, press to see different views of the album,
genre, playlist or track.
Your Player At A Glance 11
Page 12
Multi.book Page 12 Friday, September 10, 2004 12:17 PM
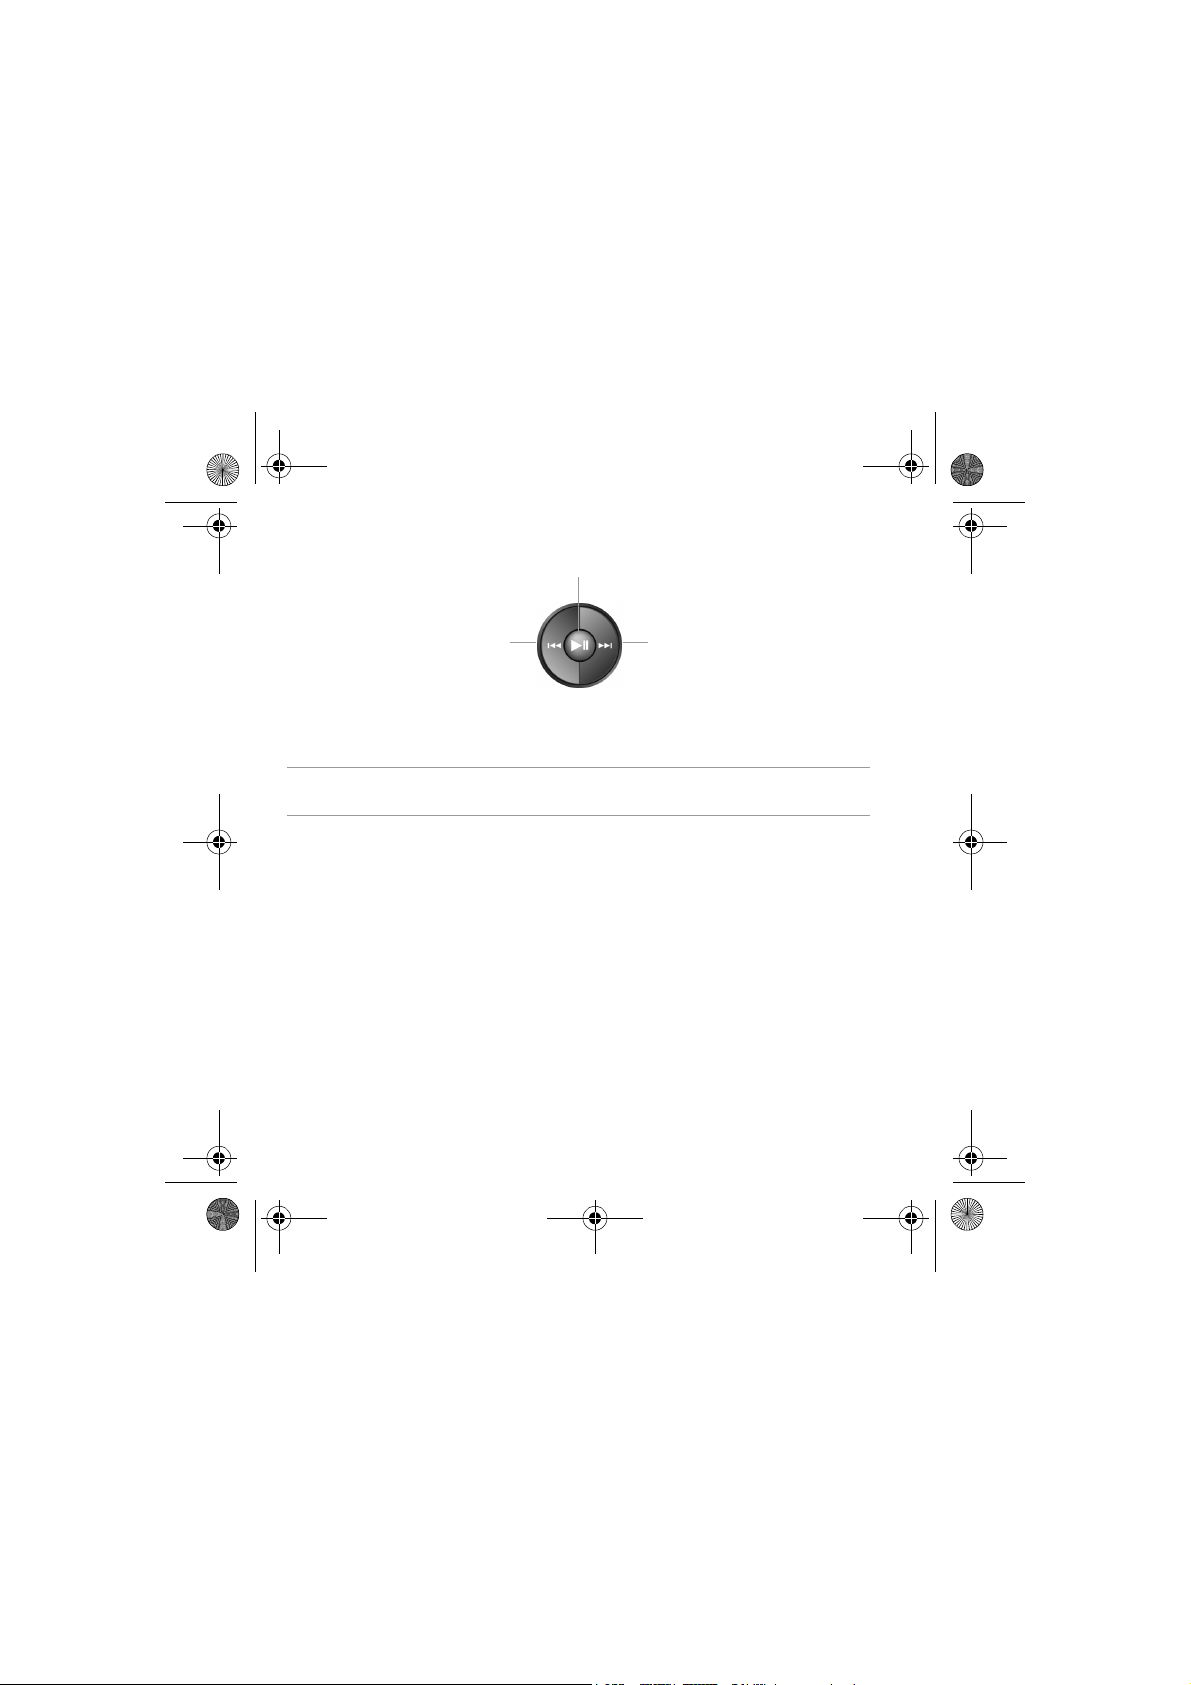
Play Control buttons
2
Press and hold to go backwards in an audio track, video or
1
2
3
Previous button
Play / Pause
button
Next button
program.
Press to go the previous content item.
Press to start, pause or resume playback.
Press and hold to go forwards in an audio track, video or
program.
Press to go to the next content item.
12 Your Player At A Glance
1
3
Page 13

Multi.book Page 13 Friday, September 10, 2004 12:17 PM
More Information
Creative Knowledge Base
Resolve and troubleshoot technical queries at Creative's 24-hour self-help
Knowledge Base. Go to www.creative.com and select your region.
Register your product!
Enjoy a host of benefits by registering your product during installation, or at
www.creative.com/register/portablemediacenter. Benefits include:
• Service and product support from Creative
• Exclusive updates on promotions and events.
Customer Support Services and Warranty
You can find Customer Support Services, Warranty and other information in the
Installation CD.
Customer Support Services d:\support\<language>\support.pdf
Warranty d:\warranty\<region>\<language>\warranty.pdf
Regulatory d:\fcc\<language>\doc.pdf
User’s Guide d:\manual\<language>\manual.pdf
(replace d:\ with the drive letter of your CD-ROM/DVD-ROM drive, <region> with the region that you
are in, and <language> with the language that your document is in)
Please keep your Proof of Purchase for the duration of the warranty
period.
More Information 13
Page 14
Multi.book Page 14 Friday, September 10, 2004 12:17 PM
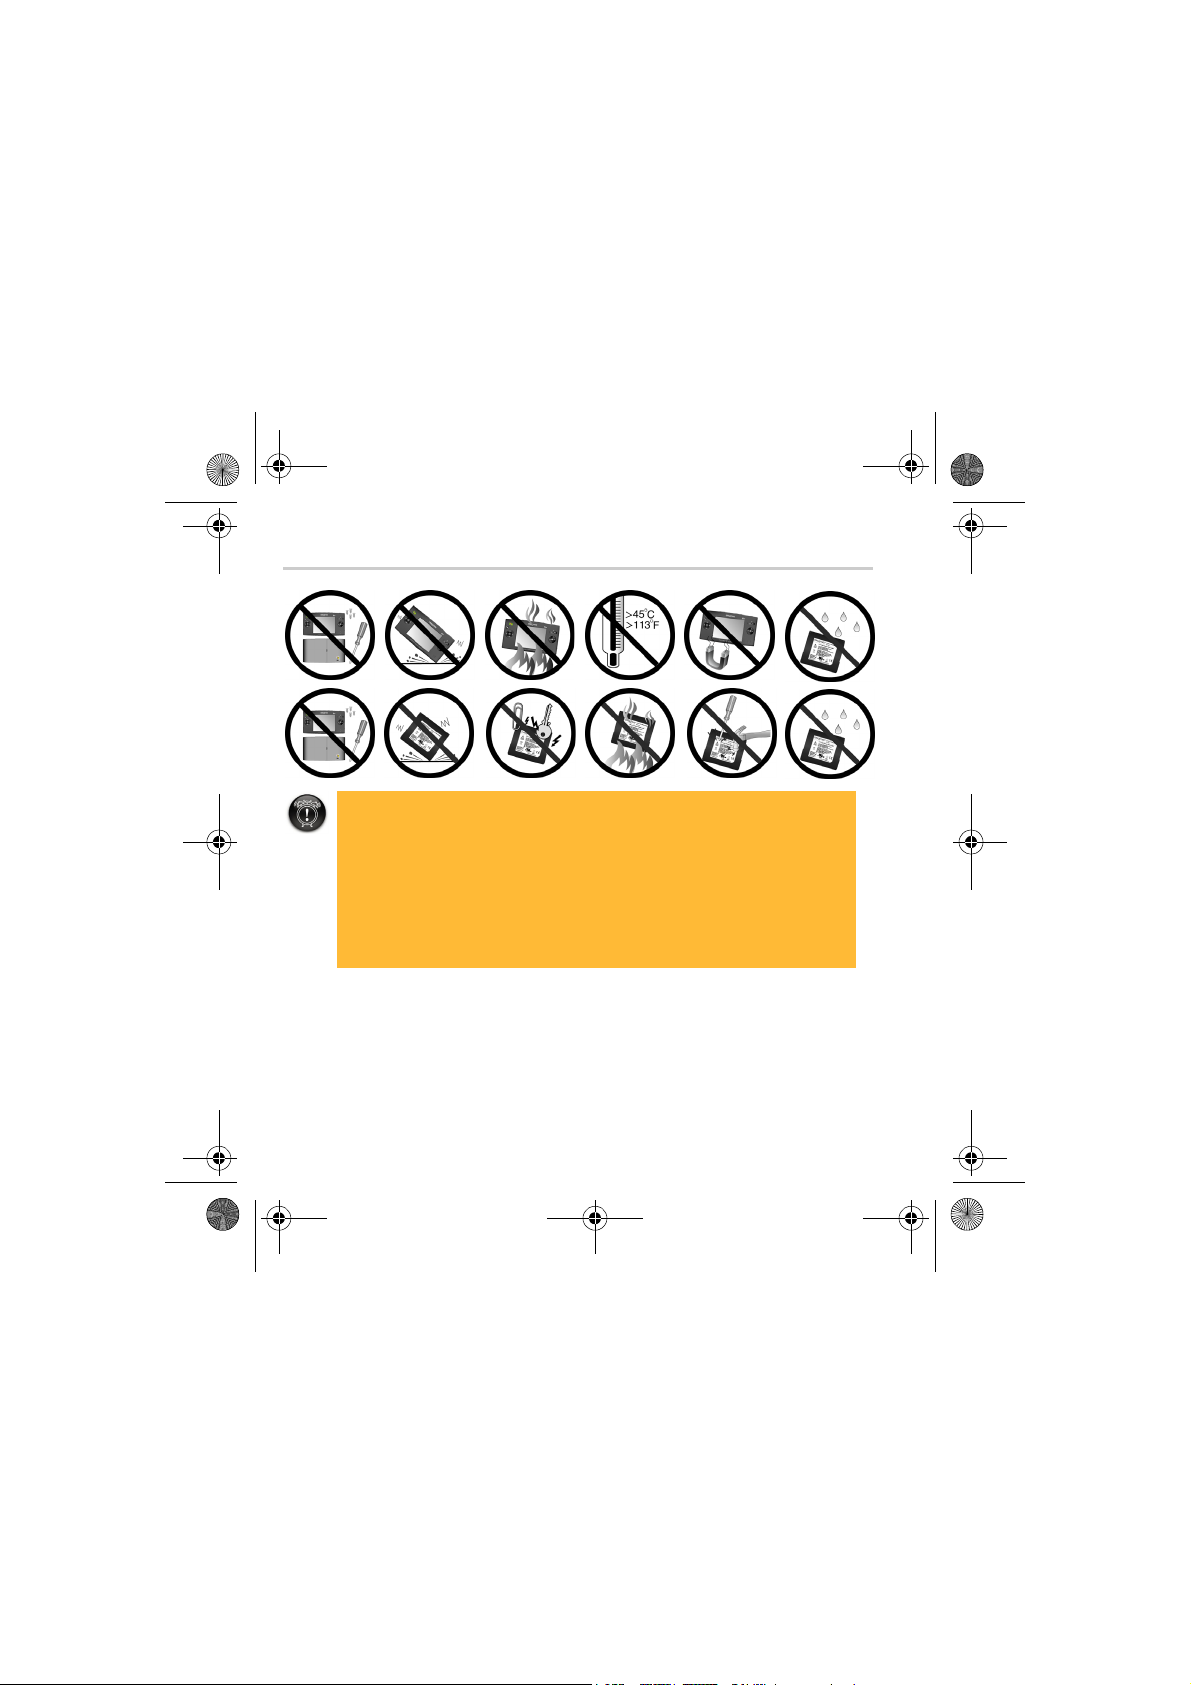
Safety Advice
As with any digital media-based storage device, data should be backed up regularly. We
strongly recommend that you observe the usage precautions laid out in this booklet, and
also back up the data in your player regularly. In no event will Creative be liable for any
indirect, incidental, special or consequential damages to any persons caused by Creative's
negligence, or for any lost profits, lost savings, loss of use, lost revenues or lost data
arising from or relating to this device, even if Creative has been advised of the possibility
of such damages. In no event will Creative’s liability or damages to you or any other
person ever exceed the amount paid by you for the device, regardless of the form of the
claim. Some countries/states do not allow the limitation or exclusion of liability for
incidental or consequential damages, so the above limitation or exclusion may not apply
to you.
14 Safety Advice
Page 15
Multi.book Page 15 Friday, September 10, 2004 12:17 PM
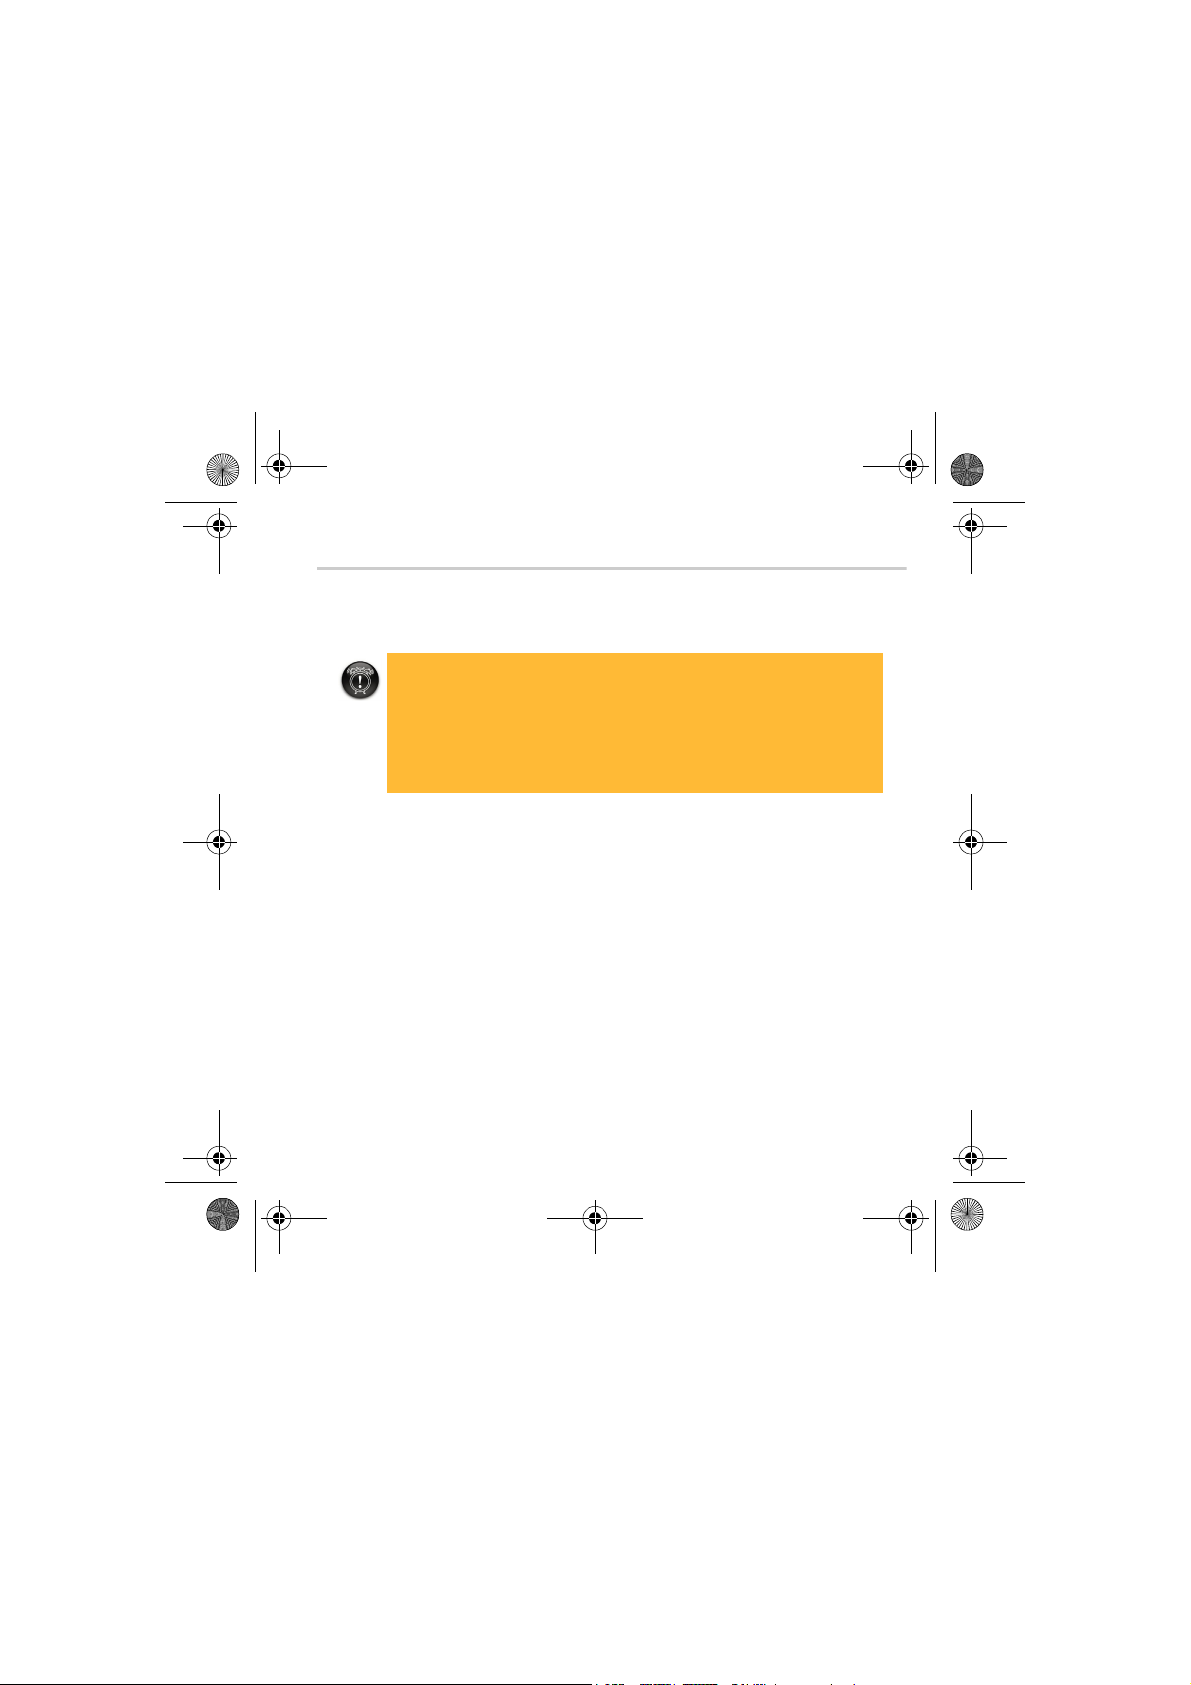
Notice for Drivers
Microsoft® Windows Mobile™ Software for Portable Media
Centers
Warning :
Operating certain parts of this device while driving can take your attention away
from the road, and possibly cause an accident or result in other serious
consequences. Do not change system settings while driving. While setting up or
changing some functions, you might be required to take your attention away from the
road and remove your hands from the wheel.
Stop your vehicle in a safe and legal manner before attempting these operations.
General Operation
Prolonged Views of Screen
If you are driving, do not access any function that requires a prolonged view of the screen.
Pull over in a safe and legal manner before attempting to access any system function
requiring your prolonged attention. Even occasional, brief glances to the screen may be
hazardous if your attention is taken away from your driving task at a critical time.
Volum e S etting
Do not raise the volume to excessive levels. Keep the volume low enough for you
to be able to hear outside traffic and emergency signals while driving. Driving
while being unable to hear these sounds could cause an accident.
Notice for Drivers 15
Page 16

Multi.book Page 16 Friday, September 10, 2004 12:17 PM
Copyright © 2004 Creative Technology Ltd. All rights reserved. The Creative logo is a of Creative Technology Ltd. in the
United States and/or other countries. Microsoft, Windows and the Windows logo are registered trademarks of Microsoft
Corporation. All other products are trademarks or registered trademarks of their respective owners and are hereby
recognized as such. All specifications are subject to change without prior notice. Actual contents may differ slightly from
those pictured.
16
Page 17

Multi.book Page 17 Friday, September 10, 2004 12:17 PM
Tables des matières
FR
Mise en route ................................................................................ 18
Connexion de votre lecteur à un téléviseur (facultatif) .....23
Votre lecteur en un coup d'œil ................................................24
Informations supplémentaires ...................................................29
Consigne de sécurité ..................................................................30
Remarque aux conducteurs ......................................................31
17
Page 18
Multi.book Page 18 Friday, September 10, 2004 12:17 PM
Mise en route
Félicitations ! Vous venez d'acheter le produit Creative Zen Portable Media Center. Suivez
les étapes suivantes pour installer votre logiciel et configurer votre lecteur afin de profiter
d'un niveau de qualité supérieur en matière de divertissement numérique portable.
NE connectez PAS votre lecteur à votre ordinateur avant d'installer le
logiciel.
Etape 1
Installation du logiciel
1. Insérez le CD d'installation dans votre lecteur de
CD-ROM/DVD-ROM.
Le CD démarre automatiquement. Dans le cas contraire, suivez
les étapes ci-dessous :
i. Démarrez l'Explorateur Windows.
ii. Dans le volet gauche, cliquez sur l'icône Poste de trav ail .
iii. Cliquez avec le bouton droit de la souris sur l'icône du lecteur de
CD-ROM/DVD-ROM, puis cliquez sur Exécution automatique.
2. Suivez les instructions à l'écran.
3. A l'invite, redémarrez votre ordinateur.
4. Lorsque votre ordinateur redémarre, suivez les instructions à l'écran pour enregistrer
votre lecteur et terminer la configuration.
18 Mise en route
Page 19

Multi.book Page 19 Friday, September 10, 2004 12:17 PM
Etape 2
Insertion de la batterie
1 2 3
1. Ouvrez le compartiment de la batterie en appuyant sur le bouton de couleur argent
(1) et en faisant glisser le couvercle du lecteur (2) dans le sens des flèches pour le
retirer.
2. Insérez la batterie comme indiqué, en alignant les connecteurs en métal de la batterie
avec ceux du compartiment de la batterie.
3. Refermez le compartiment de la batterie.
Mise en route 19
Page 20
Multi.book Page 20 Friday, September 10, 2004 12:17 PM
Etape 3
Mise sous tension du lecteur
CA 5V
Connectez l'adaptateur d'alimentation comme indiqué dans le diagramme. Si nécessaire,
mettez la source d'alimentation sous tension.
Chargement de la batterie du lecteur
La première fois que vous chargez la batterie, le chargement durera seize heures. Après le
premier chargement, la batterie se rechargera en six heures.
L'indicateur de chargement de la batterie est de couleur ambre lorsque la batterie est en
cours de rechargement, et de couleur verte lorsque la batterie est entièrement rechargée.
Lorsque la batterie du lecteur se recharge, vous pouvez utiliser votre lecteur
pour, par exemple, télécharger, regarder ou écouter du contenu numérique.
20 Mise en route
Page 21

Multi.book Page 21 Friday, September 10, 2004 12:17 PM
Etape 4
Transfert de contenu
Après avoir installé le logiciel et enregistré le lecteur, vous pouvez connecter le Zen
Portable Media Center à votre ordinateur.
®
Utilisez Windows Media
images et des pistes audio vers votre Zen Portable Media Center
1. Connectez votre lecteur à votre ordinateur comme indiqué. Le port USB de votre
ordinateur peut se trouver sur le devant, le côté ou l'arrière de l'ordinateur.
Player 10 pour transférer des vidéos, des programmes, des
2. Dans Windows Media Player 10, cliquez sur l'onglet Bibliothèque.
Mise en route 21
Page 22

Multi.book Page 22 Friday, September 10, 2004 12:17 PM
3. Dans le volet de la bibliothèque, cliquez avec le bouton droit de la souris sur le
contenu à ajouter.
4. Dans le menu qui apparaît, cliquez sur l'option Ajouter à, puis sur l'option Liste de
synchronisation.
Le contenu apparaît dans le volet droit.
5. Cliquez sur l'onglet Synchronisation.
6. Dans le volet droit, assurez-vous que votre lecteur est le périphérique sélectionné.
7. Dans le volet gauche, cochez la case à côté du fichier média pour le sélectionner pour
la synchronisation.
8. Cliquez sur l'icône Démarrer la synchronisation.
Une fois le transfert terminé, vous pouvez écoutez le contenu. Appuyez sur le bouton
Démarrer.
Pour plus de détails sur l'utilisation de votre lecteur, reportez-vous au guide de l'utilisateur.
Pointez sur Démarrer → Programmes/Tous les programmes → Creative → Zen
Portable Media Center → Zen Portable Media Center User’s Guide.
22 Mise en route
Page 23
Multi.book Page 23 Friday, September 10, 2004 12:17 PM
Connexion de votre lecteur à un
téléviseur (facultatif)
Pour partager le contenu de votre lecteur sur un écran plus grand, vous pouvez connecter
votre lecteur à un téléviseur. A cet effet, vous devez utiliser le câble vidéo fourni. N'utilisez
pas un câble vidéo standard.
Entrée vidéo Entrée audio (droite)
Entrée audio (gauche)
Bouton
Démarrer
1. Connectez votre lecteur à un téléviseur avec le câble vidéo fourni, comme indiqué
ci-dessus.
2. Appuyez sur le bouton Démarrer de votre lecteur.
3. Sélectionnez Paramètres.
4. Sélectionnez Affichage.
5. Sélectionnez
Assurez-vous de choisir le bon format d'affichage TV sur votre lecteur. Dans le cas
contraire, vous ne pourrez pas regarder les programmes et les vidéos correctement.
Reportez-vous au guide de l'utilisateur de votre téléviseur si vous n'êtes pas certain de son
format d'affichage.
Sortie TV
Jaune Rouge
Blanc
et sélectionnez
Affichage TV : NTSC
ou
Affichage TV : PAL
Connexion de votre lecteur à un téléviseur (facultatif) 23
.
Page 24
Multi.book Page 24 Friday, September 10, 2004 12:17 PM
Votre lecteur en un coup d'œil
Vue avant
Bouton Démarrer
4
3
2
1
24 Votre lecteur en un coup d'œil
5
6
7
8
910
Bouton
d'alimentation
11
12
13
Page 25

Multi.book Page 25 Friday, September 10, 2004 12:17 PM
Boutons et connecteurs du lecteur
Bouton
Démarrer
Bouton
d'alimentation
Appuyez pour afficher les options de menu sur l'écran LCD.
Appuyez pour passer du menu principal à l'écran actif en
cours.
Maintenez appuyé un court moment pour allumer ou éteindre
votre lecteur.
Bouton
1
Réinitialiser
Boutons de
2
navigation
Connecteur
3
d'alimentation
Bouton
4
Précédent
Indicateur de
chargement de
5
batterie
Boutons
d'augmentation/d
6
e diminution du
volume
Boutons de
contrôle de
7
lecture
Haut-parleur
8
intégré
Réinitialisez votre lecteur lorsque vous appuyez dessus avec
l'embout d'un objet fin (tel un trombone déplié).
Vous permet de sélectionner les options de menu.
Connectez-le à une prise de courant en utilisant l'adaptateur
d'alimentation fourni.
Appuyez pour revenir à l'écran ou le menu précédent.
S'allume de couleur ambre lorsque la batterie se recharge.
S'allume de couleur verte lorsque la batterie est rechargée.
Maintenez appuyé un court moment pour changer le niveau du
volume.
Vous permet de contrôler la lecture du contenu.
Vous permet d'écouter des fichiers audio lorsque vous n'avez
pas d'écouteurs ou de sortie hauts-parleurs.
Votre lecteur en un coup d'œil 25
Page 26

Multi.book Page 26 Friday, September 10, 2004 12:17 PM
9
10
11
12
13
14
15
LCD (Affichage à
cristaux liquides)
Boutons de
réinitialisation
Connecteur des
écouteurs
Connecteur de
sortie audio/vidéo
Bouton de
verrouillage
Compartiment de
la batterie
Connecteur de
données
Affiche les menus ou le contenu.
Maintenez appuyé les boutons 1, 2, 3 ou 4 pour mettre du
contenu en signet.
Appuyez sur un bouton pour aller au signet.
Branchez vos écouteurs ou votre télécommande câblée à ce
connecteur.
Connectez-le à votre téléviseur pour facilement regarder des
vidéos, programmes TV enregistrés ou images stockés sur
votre lecteur.
Utilisez ce bouton pour verrouiller ou déverrouiller votre
lecteur.
Comporte la batterie à haute capacité.
Connectez-le au câble USB ou à la station d'accueil facultative.
Vues avant et arrière
14
15
26 Votre lecteur en un coup d'œil
Page 27

Multi.book Page 27 Friday, September 10, 2004 12:17 PM
Boutons de navigation
1
2
1
2
3
4
5
Bouton
Haut
Bouton OK
Bouton
Droit
Bouton Bas
Bouton
Gauche
5
3
4
Appuyez pour accéder à l'option de menu ou à la sélection
précédant la sélection en cours.
Lors de la visualisation d'images, appuyez pour revenir à l'image
précédente.
Appuyez pour sélectionner l'option de menu ou la sélection mise en
surbrilliance à l'écran.
Appuyez pour accéder à l'option de menu ou à la sélection à droite
de la sélection en cours.
Lors de lecture audio, appuyez pour voir les différentes vues de
l'album, du genre, de la sélection ou piste.
Appuyez pour accéder à l'option de menu ou à la sélection après la
sélection en cours.
Lors de la visualisation d'images, appuyez pour passer à l'image
suivante.
Appuyez pour accéder à l'option de menu ou à la sélection à
gauche de la sélection en cours.
Lors de lecture audio, appuyez pour voir les différentes vues de
l'album, du genre, de la sélection ou piste.
Votre lecteur en un coup d'œil 27
Page 28

Multi.book Page 28 Friday, September 10, 2004 12:17 PM
Boutons de contrôle de lecture
2
1
Maintenez appuyé pour revenir en arrière dans une piste
Bouton Précédent
1
Bouton
2
Lecture/Pause
Bouton Suivant
3
audio, une vidéo ou un programme.
Appuyez pour revenir à l'élément du contenu précédent.
Appuyez pour démarrer, mettre sur pause ou reprendre la
lecture.
Maintenez appuyé pour avancer dans une piste audio, une
vidéo ou un programme.
Appuyez pour passer à l'élément du contenu précédent.
28 Votre lecteur en un coup d'œil
3
Page 29

Multi.book Page 29 Friday, September 10, 2004 12:17 PM
Informations supplémentaires
Base de connaissances Creative
Vous pouvez accéder, 24 heures sur 24, à la base de connaissances d'auto-consultation de
Creative pour obtenir un dépannage ou des solutions à vos requêtes techniques. Accédez
au site www.creative.com et sélectionnez votre région.
Enregistrez votre produit !
Profitez d'une multitude d'avantages en enregistrant votre produit pendant l'installation ou
sur le site www.creative.com/register/portablemediacenter. Les avantages sont les
suivants :
• Service et support technique de Creative
• Informations exclusives sur des promotions et événements.
Services de support client et garantie
Ces informations ainsi que d’autres se trouvent sur le CD d’installation.
Services d'assistance clientèle d:\support\<langue>\support.pdf
Garantie d:\warranty\<région>\<langue>\warranty.pdf
Réglementation d:\fcc\<langue>\doc.pdf
User’s Guide d:\manual\<langue>\manual.pdf
(remplacez d:\ par la lettre du lecteur de votre lecteur de CD-ROM/DVD-ROM, <région> par la région
dans laquelle vous vous trouvez et <langue> par la langue de rédaction du document)
Veuillez conserver votre preuve d’achat pendant la durée de la période
de garantie.
Informations supplémentaires 29
Page 30

Multi.book Page 30 Friday, September 10, 2004 12:17 PM
Consigne de sécurité
Comme pour tout appareil de stockage sur média numérique, les données doivent être
sauvegardées régulièrement. Il est fortement recommandé d'observer les
recommandations d'usage décrites dans ce livret et de régulièrement sauvegarder les
données de votre lecteur. En aucun cas Creative ne saurait être tenu responsable de tous
dommages accessoires, particuliers ou indirects causés par la négligence de Creative, ou
de dommages pour perte de bénéfices, perte d'économies, interruption d'activité ou
perte d'informations liés à l'utilisation de ce logiciel, même si Creative a été informé de la
possibilité de tels dommages. En aucun cas la responsabilité ou les dommages de Creative
envers vous ou toute autre personne ne saurait excéder le montant que vous avez payé
pour l'appareil, peu importe la forme de la plainte. Certains états/pays ne permettent pas
l'exclusion ou la limitation de responsabilité pour des dommages indirects ou particuliers.
La limitation ci-dessus ne s'applique peut-être donc pas à vous.
30 Consigne de sécurité
Page 31

Multi.book Page 31 Friday, September 10, 2004 12:17 PM
Remarque aux conducteurs
Logiciel Microsoft® Windows Mobile™ pour Portable Media
Centers
Avertissement:
La manipulation de certaines parties de cet appareil pendant que vous conduisez
peut vous déconcentrer, au risque d'entraîner un accident ou de résulter en d'autres
conséquences sérieuses. Ne changez pas les paramètres du système pendant que
vous conduisez. Lors de la configuration ou le changement de certaines fonctions,
vous risquez de vous déconcentrer et de retirer vos mains du volant.
Arrêtez votre véhicule en toute sécurité et dans un endroit autorisé avant
d'effectuer ces opérations.
Opération générale
Vues prolongées de l'écran
Si vous conduisez, n'accédez pas à une fonction qui requiert une vue prolongée de l'écran.
Garez-vous en toute sécurité et dans un endroit autorisé avant d'essayer d'accéder à toute
fonction du système requiérant votre attention de façon prolongée. Même de temps en
temps, des regards rapides vers l'écran peuvent être dangereux si vous n'êtes pas concentré
à un moment critique pendant que vous conduisez.
Réglage du volume
N'augmentez pas le volume à des niveaux excessifs. Pendant que vous conduisez,
conservez le volume suffisament bas pour que vous puissiez entendre les
véhicules sur la route ainsi que les sirènes d'urgence. Conduire sans être capable
d'entendre ces bruits peut entraîner un accident.
Remarque aux conducteurs 31
Page 32

Multi.book Page 32 Friday, September 10, 2004 12:17 PM
IMPORTANT — A LIRE AVEC ATTENTION:
Ecouter de manière prolongée, à un très haut volume sonore de la musique (au dessus de
80 decibels), au moyen d'un casque ou d'écouteurs, peut entraîner une détérioration
irreversible et définitive de vos facultés auditives.
L’usage répété et habituel d’un casque ou d’écouteurs à un niveau de volume sonore trop
élevé peut donner l'impression à l'utilisateur que le volume sonore émis par l’appareil n'est
pas suffisant. L’utilisateur sera tenté d’augmenter, petit à petit, son réglage habituel, risquant
ainsi d'atteindre un niveau dangereux pour ses oreilles.
Afin de protéger votre santé, et vos oreilles, veillez à maintenir le volume de la sortie
casque de votre Zen Portable Media Center à un niveau adapté et à interrompre son
utilisation régulièrement et particulièrement si des symptômes, comme des troubles de
l'ouïe, se manifestent.
Votre produit Creative accompagné des écouteurs fournis, est conforme à la
règlementation française concernant les baladeurs musicaux (Arrêté du 24 Juillet 1998). Les
caractéristiques techniques de ces écouteurs se trouvent dans le manuel en ligne et/ou sur
le site internet de Creative. Si vous choisissez d'utiliser un autre casque ou d'autres
écouteurs, veuillez vous assurer au préalable que leurs caractéristiques techniques soient
les mêmes.
Copyright © 2004 Creative Technology Ltd. Tous droits réservés. Le logo Creative est une marque déposée de Creative
Technology Ltd . aux Etats-Unis et/ou dans d'autres pays. Microsoft, Windows et le logo Windows sont des marques déposées
de Microsoft Corporation. Tous les autres produits sont des marques commerciales ou déposées de leurs propriétaires
respectifs et sont pas conséquent reconnus comme tels. Toutes les spécifications peuvent faire l'objet de modifications sans
préavis. Le contenu réel peut être légèrement différent de celui illustré dans ce document.
32 Remarque aux conducteurs
Page 33

Multi.book Page 33 Friday, September 10, 2004 12:17 PM
Inhaltsverzeichnis
DE
Erste Schritte ................................................................................34
Anschließen Ihres Players an einen Fernseher (optional) ..39
Ihr Player im Überblick ...............................................................40
Weitere Informationen ..............................................................45
Sicherheitshinweis .......................................................................46
Hinweis für Autofahrer ..............................................................47
33
Page 34

Multi.book Page 34 Friday, September 10, 2004 12:17 PM
Erste Schritte
Herzlichen Glückwunsch zu Ihrer Entscheidung für das Creative Zen Portable Media
Center! Im Folgenden wird erläutert, wie Sie in wenigen Schritten Ihre Software installieren
und Ihren Player für eine neue Dimension der portablen digitalen Unterhaltung einrichten.
Verbinden Sie Ihren Player NICHT mit Ihrem Computer, bevor Sie die
Software eingerichtet haben.
Schritt 1
Installieren der Software
1. Legen Sie die Installations-CD in Ihr
CD-ROM-/DVD-ROM-Laufwerk.
Die CD sollte automatisch starten. Gehen Sie wie folgt vor, wenn
dies nicht der Fall ist:
i. Starten Sie den Windows Explorer.
ii. Klicken Sie im linken Fensterbereich auf das Symbol Arbeitsplatz.
iii. Klicken Sie mit der rechten Maustaste auf das Symbol des
CD-ROM-/DVD-ROM-Laufwerks und anschließend auf AutoPlay.
2. Folgen Sie den Anweisungen auf dem Bildschirm.
3. Starten Sie, wenn Sie dazu aufgefordert werden, Ihren Computer neu.
4. Folgen Sie nach dem Neustart den Anweisungen auf dem Bildschirm, um Ihren Player
zu registrieren und das Setup abzuschließen.
34 Erste Schritte
Page 35

Multi.book Page 35 Friday, September 10, 2004 12:17 PM
Schritt 2
Einlegen des Akkus
1 2 3
1. Öffnen Sie das Akkufach, indem Sie auf den silbernen Knopf (1) drücken, und
schieben Sie die Abdeckung (2) in Pfeilrichtung.
2. Legen Sie den Akku wie abgebildet ein. Richten Sie die Metallverbindungen des Akkus
dabei mit den Metallverbindungen des Akkufachs aus.
3. Schließen Sie das Akkufach.
Erste Schritte 35
Page 36

Multi.book Page 36 Friday, September 10, 2004 12:17 PM
Schritt 3
Einschalten des Players
DC In 5V
Schließen Sie das Netzteil, wie in der Abbildung gezeigt, an. Schalten Sie, falls notwendig, die
Stromquelle ein.
Aufladen des Akkus
Wenn Sie Ihren Akku zum ersten Mal aufladen, dauert der Vorgang 16 Stunden.
Anschließend lädt sich der Akku in jeweils 6 Stunden auf seine volle Kapazität auf.
Die Ladeanzeige des Akkus leuchtet gelb, solange der Akku lädt. Sobald er vollständig
aufgeladen ist, leuchtet die Anzeige grün.
Während Sie Ihren Akku aufladen, können Sie Ihren Player beispielsweise dazu
verwenden, digitale Medien herunterzuladen, anzuzeigen oder abzuspielen.
36 Erste Schritte
Page 37

Multi.book Page 37 Friday, September 10, 2004 12:17 PM
Schritt 4
Übertragen von Inhalten
Sobald Sie Ihre Software installiert und Ihren Player registriert haben, können Sie das Zen
Portable Media Center an Ihren Computer anschließen.
®
Mit dem Windows Media
Audio-Titel auf Ihr Zen Portable Media Center.
1. Schließen Sie Ihren Player, wie in der Abbildung gezeigt, an Ihren Computer an. Der
USB-Port Ihres Computers kann sich vorne, seitlich oder auf der Rückseite befinden.
Player 10 übertragen Sie Videos, Programme, Bilder und
2. Klicken Sie im Windows Media Player 10 auf die Registerkarte Medienbibliothek.
Erste Schritte 37
Page 38

Multi.book Page 38 Friday, September 10, 2004 12:17 PM
3. Klicken Sie im Fensterbereich „Medienbibliothek“ auf den Inhalt, der hinzugefügt
werden soll.
4. Klicken Sie im folgenden Menü auf die Option Hinzufügen und wählen Sie
anschließend die Option Sync List.
Im rechten Fensterbereich wird der Inhalt angezeigt.
5. Klicken Sie auf die Registerkarte Sync.
6. Überprüfen Sie im rechten Fensterbereich, ob Ihr Player ausgewählt ist.
7. Klicken Sie im linken Bereich auf das Kontrollkästchen neben der Mediendatei, die
synchronisiert werden soll.
8. Klicken Sie auf das Symbol Start Sync.
Nach der Übertragung können Sie den Inhalt abspielen. Drücken Sie auf die Starttaste!
Weitere Einzelheiten zur Benutzung Ihres Players finden Sie im Benutzerhandbuch.
Wech seln Sie zu Start → Programme/Alle Programme→ Creative → Zen
Portable Media Center → Zen Portable Media Center Benutzerhandbuch.
38 Erste Schritte
Page 39

Multi.book Page 39 Friday, September 10, 2004 12:17 PM
Anschließen Ihres Players an einen
Fernseher (optional)
Um die Inhalte Ihres Players auch auf einem größeren Bildschirm anzuzeigen, können Sie
den Player mit einem TV-Gerät verbinden. Hierzu müssen Sie das mitgelieferte Videokabel
verwenden. Benutzen Sie kein Standardvideokabel.
Audioeingang (links)
Videoeingang Audioeingang
Starttaste
1. Schließen Sie Ihren Player, wie oben abgebildet, mit dem mitgelieferten Videokabel an
einen Fernseher an.
2. Drücken Sie auf Ihrem Player auf die Taste Start.
3. Wählen Sie Einstellungen.
4. Wählen Sie Anzeige.
5. Wählen Sie TV-Ausgang und TV-Anzeige: NTSC oder TV-Anzeige: PAL.
Beachten Sie, dass Sie auf Ihrem Player das richtige TV-Anzeigeformat auswählen müssen,
damit Programme und Videos richtig dargestellt werden. Wenn Sie nicht sicher sind,
welches Anzeigeformat Ihr TV-Gerät nutzt, finden Sie diese Informationen im
Benutzerhandbuch des TV-Geräts.
Gelb Rot
Weiß
(rechts)
Anschließen Ihres Players an einen Fernseher (optional) 39
Page 40

Multi.book Page 40 Friday, September 10, 2004 12:17 PM
Ihr Player im Überblick
Vorderansicht
Starttaste
4
3
2
1
40 Ihr Player im Überblick
5
6
7
8
910
Taste „Ein/Aus“
11
12
13
Page 41

Multi.book Page 41 Friday, September 10, 2004 12:17 PM
Tasten und Anschlüsse des Players
Starttaste
Ein/Aus-Taste
Drücken Sie die Taste, um die Menüoptionen auf dem
LCD-Schirm anzuzeigen.
Drücken Sie die Taste, um zwischen dem Hauptmenü und
dem gerade aktiven Bildschirm hin und her zu wechseln.
Halten Sie die Taste kurz gedrückt, um Ihren Player einund auszuschalten.
Reset-Taste
1
Navigationstasten Ermöglichen Ihnen die Auswahl der Menüoptionen.
2
Netzteilanschluss
3
Taste „Vorheriger“
4
Akkuladeanzeige
5
Lautstärketasten
6
„Lauter/Leiser“
Wiedergabesteuerung
7
stasten
Integrierter
8
Lautsprecher
LCD-Display (Liquid
9
Crystal Display)
Nimmt ein Reset Ihres Players vor. Dazu müssen Sie mit
einem feinen Gegenstand (wie einer gerade gebogenen
Büroklammer) auf die Taste drücken.
Verbinden Sie diesen über das mitgelieferte Netzteil mit
einer Steckdose.
Drücken Sie diese Taste, um zum vorherigen Bildschirm
oder Menü zurückzukehren.
Leuchtet gelb, während der Akku geladen wird.
Leuchtet grün, wenn der Akku vollständig aufgeladen ist.
Halten Sie die Tasten gedrückt, wenn Sie die Lautstärke
schnell verändern wollen.
Erlauben die Steuerung der Wiedergabe der Inhalte
Ermöglicht die Audiowiedergabe ohne Kopfhöher oder
Lautsprecheranschluss.
Zeigt Menüs oder Inhalte an.
Ihr Player im Überblick 41
Page 42

Multi.book Page 42 Friday, September 10, 2004 12:17 PM
Um einen Inhalt zu den Favoriten hinzuzufügen, drücken
Sie die Voreinstellungstaste 1, 2, 3 oder 4 und halten Sie
Voreinstellungstasten
10
Kopfhöreranschluss
11
Audio-/Video-Ausgang
12
Tastensperrschalter
13
Akkufach Nimmt den Hochleistungsakku auf.
14
sie gedrückt.
Wenn Sie auf eine Taste drücken, wird ein Favorit
aufgerufen.
Schließen Sie hier Ihren Kopfhörer oder die
Kabel-Fernbedienung an.
Schließen Sie hier Ihren Fernseher an, um Videos,
aufgezeichnete TV-Programme oder im Player
gespeicherte Bilder bequem anzusehen.
Mit diesem Schalter sperren oder entsperren Sie Ihren
Player.
15
Datenanschluss
Schließen Sie hier das USB-Kabel oder die optionale
Dockingstation an.
Ansicht von oben und von unten
15
42 Ihr Player im Überblick
14
Page 43

Multi.book Page 43 Friday, September 10, 2004 12:17 PM
Navigationstasten
1
2
1
2
3
4
5
Ta st e „Nach
oben“
OK-Taste
Ta st e
„Nach-Rechts“
Ta st e
„Nach-Unten“
Ta st e
„Nach-Links“
5
3
4
Damit gelangen Sie zu einer über der aktuellen Auswahl liegenden
Menüoption oder Auswahl.
Beim Anzeigen von Bildern gelangen Sie damit zum vorherigen
Bild.
Damit wählen Sie die auf dem Bildschirm markierte Menüoption
oder Auswahl aus.
Damit gelangen Sie zu einer rechts von der aktuellen Auswahl
liegenden Menüoption oder Auswahl.
Wenn Sie Audiodateien abspielen, erhalten Sie hierüber
verschiedene Anzeigen des Albums, des Genres, der
Wiedergabeliste oder des Titels.
Damit gelangen Sie zu einer unter der aktuellen Auswahl
liegenden Menüoption oder Auswahl.
Beim Anzeigen von Bildern gelangen Sie damit zum nächsten Bild.
Damit gelangen Sie zu einer links von der aktuellen Auswahl
liegenden Menüoption oder Auswahl.
Wenn Sie Audiodateien abspielen, erhalten Sie hierüber
verschiedene Anzeigen des Albums, des Genres, der
Wiedergabeliste oder des Titels.
Ihr Player im Überblick 43
Page 44

Multi.book Page 44 Friday, September 10, 2004 12:17 PM
Wiedergabesteuerungstasten
2
Taste „Vorheriger“
1
Ta st e
2
„Wiedergabe/Pause“
Taste „Weiter“
3
44 Ihr Player im Überblick
1
Halten Sie die Taste gedrückt, um sich in einem Audio-Titel,
Video oder Programm zurückzubewegen.
Drücken Sie die Taste, um zum vorherigen Inhaltselement
zu gelangen.
Startet die Wiedergabe, hält sie an und setzt sie fort.
Halten Sie die Taste gedrückt, um sich in einem Audio-Titel,
Video oder Programm vorwärts zu bewegen.
Drücken Sie die Taste, um zum nächsten Inhaltselement zu
gelangen.
3
Page 45

Multi.book Page 45 Friday, September 10, 2004 12:17 PM
Weitere Informationen
Creative Knowledge Base
Bei technischen Fragen und bei einem Fehler finden Sie eine Lösung in der rund um die Uhr
verfügbaren Creative Knowledgebase . Gehen Sie zu www.creative.com und wählen Sie
Ihre Region aus.
Registrieren Sie Ihr Produkt!
Sie können eine Unmenge Vorteile in Anspruch nehmen, wenn Sie Ihr Produkt während der
Installation oder unter www.creative.com/register/portablemediacenter
registrieren. Zu den Vorteilen gehören:
• Kundendienst und Produktsupport von Creative
• Exklusive Updates bei Aktionen und Werbeveranstaltungen.
Kundendienst und Gewährleistung
Informationen zum Kundendienst, der Gewährleistung und weitere Angaben finden Sie auf
der Installations-CD.
Kundendienst d:\support\<sprache>\support.pdf
Gewährleistung d:\warranty\<region>\<sprache>\warranty.pdf
Rechtliche Hinweise d:\fcc\<sprache>\doc.pdf
Benutzerhandbuch d:\manual\<sprache>\manual.pdf
(ersetzen Sie d:\ durch den Buchstaben Ihres CD-ROM-/DVD-ROM-Laufwerks, <region> durch die
Region, in der Sie sich befinden und <sprache> durch die Sprache Ihres Dokuments)
Bewahren Sie während des Garantiezeitraums bitte Ihren Kaufbeleg auf.
Wei tere Info rmationen 45
Page 46

Multi.book Page 46 Friday, September 10, 2004 12:17 PM
Sicherheitshinweis
Wie bei allen digitalen Speichergeräten sollten Sie Ihre Daten regelmäßig sichern.
Beachten Sie möglichst die in dieser Broschüre enthaltenen Nutzungshinweise und
sichern Sie regelmäßig die auf Ihrem Player gespeicherten Daten. Creative schließt jede
Haftung für mittelbare Schäden, Schadensersatz für Aufwendungen, spezielle oder
Folgeschäden an Personen aus, die sich aus einer Fahrlässigkeit von Creative ergeben.
Dies gilt auch für alle entgangenen Gewinne, entgangene Einsparungen, Nutzungsausfälle,
Einnahmeausfälle oder Datenverluste durch das Gerät oder im Zusammenhang mit dem
Gerät. Dies gilt auch dann, wenn Creative auf die Möglichkeit solcher Schäden
hingewiesen wurde. In keinem Fall übersteigt die Haftung von Creative für Schäden die
von Ihnen für das Gerät entrichtete Kaufsumme, und zwar unabhängig von der Art des
Anspruchs. Einige Länder/Staaten erlauben keine Beschränkung oder keinen Ausschluss
der Haftung für durch Fahrlässigkeit oder in Folge auftretende Schäden. In diesen Fällen
gilt der obige Ausschluss gegebenenfalls nicht für Sie.
46 Sicherheitshinweis
Page 47

Multi.book Page 47 Friday, September 10, 2004 12:17 PM
Hinweis für Autofahrer
Microsoft® Windows Mobile™ Software for Portable Media
Centers
Warnung:
Die Bedienung bestimmter Teile dieses Geräts während des Fahrens kann Ihre
Aufmerksamkeit vom Straßenverkehr ablenken und so einen Unfall verursachen oder
andere ernste Folgen haben. Nehmen Sie während des Fahrens keine Änderungen
der Systemeinstellungen vor. Das Einstellen oder Ändern einiger Funktionen kann
Ihre Aufmerksamkeit vom Straßenverkehr ablenken und Sie zwingen, das Lenkrad
loszulassen.
Halten Sie Ihr Fahrzeug regulär an, bevor Sie diese Bedienfunktionen durchführen.
Allgemeiner Betrieb
Längeres Betrachten des Bildschirms
Greifen Sie, während Sie ein Fahrzeug steuern, nicht auf Funktionen zu, die ein längeres
Betrachten des Bildschirms erfordern. Halten Sie regulär an, bevor Sie auf
Systemfunktionen zugreifen, die Ihre längere Aufmerksamkeit erfordern. Auch ein
gelegentlicher kurzer Blick auf den Bildschirm kann Ihre Aufmerksamkeit in einem
kritischen Augenblick vom Straßenverkehr ablenken.
Lautstärkeeinstellung
Stellen Sie die Lautstärke nicht übermäßig hoch ein. Stellen Sie eine Lautstärke
ein, bei der Sie während der Fahrt den umgebenden Verkehr und Sirenensignale
noch wahrnehmen können. Wenn Sie diese Geräusche beim Fahren nicht hören,
kann dies einen Unfall verursachen.
Hinweis für Autofahrer 47
Page 48

Multi.book Page 48 Friday, September 10, 2004 12:17 PM
Copyright © 2004 Creative Technology Ltd. Alle Rechte vorbehalten. Das Creative-Logo ist ein in den USA und/oder anderen
Ländern eingetragenes Markenzeichen von Creative Technology Ltd. Microsoft, Windows und das Windows-Logo sind
eingetragene Marken der Microsoft Corporation. Alle anderen Produkte sind Marken oder eingetragene Marken ihrer
jeweiligen Eigentümer und werden als solche anerkannt. Die Spezifikationen können ohne vorherige Ankündigung geändert
werden. Der tatsächliche Inhalt kann leicht vom dargestellten Inhalt abweichen.
48
Page 49

Multi.book Page 49 Friday, September 10, 2004 12:17 PM
Sommario
IT
Preparazione .................................................................................52
Collegamento del lettore ad un televisore (opzionale) ......57
Presentazione del lettore ...........................................................58
Altre fonti di informazione ........................................................63
Informazioni di sicurezza ............................................................64
Avviso per i conducenti ..............................................................65
49
Page 50

Multi.book Page 50 Friday, September 10, 2004 12:17 PM
Preparazione
Congratulazioni per l'acquisto di Creative Zen Portable Media Center! Le operazioni
descritte di seguito consentono di installare il software e configurare il lettore per
apprezzare questa nuova soluzione di intrattenimento digitale portatile.
NON collegare il lettore al computer prima di aver installato e
configurato il software.
Passo 1
Installazione del software
1. Inserire il CD d'installazione nell'unità CD-ROM/DVD-ROM.
Il CD dovrebbe essere eseguito automaticamente. In caso
contrario, adottare la seguente procedura.
i. Avviare Esplora risorse di Windows.
ii. Sul riquadro sinistro, fare doppio clic sull'icona Risorse del
computer.
iii. Fare clic con il pulsante destro del mouse sull'icona dell'unità
CD-ROM/DVD-ROM, quindi fare clic su AutoPlay.
2. Seguire le istruzioni riportate sullo schermo.
3. Quando verrà richiesto, riavviare il computer.
4. Una volta riavviato il computer, seguire le istruzioni visualizzate sullo schermo per
registrare il lettore e completare l'installazione.
50 Preparazione
Page 51

Multi.book Page 51 Friday, September 10, 2004 12:17 PM
Passo 2
Inserimento della batteria
1 2 3
1. Aprire lo scomparto della batteria premendo il pulsante color argento (1) e
rimuovere il coperchio dal lettore (2) facendolo scorrere verso l'esterno.
2. Inserire la batteria come mostrato in figura, allineando i connettori di metallo della
batteria ai connettori di metallo dello scomparto della batteria.
3. Chiudere lo scomparto della batteria.
Preparazione 51
Page 52

Multi.book Page 52 Friday, September 10, 2004 12:17 PM
Passo 3
Accensione del lettore
Ingresso
cc 5 V
Collegare l'alimentatore come mostrato in figura. Se necessario, accendere l'interruttore
della presa di alimentazione.
Caricamento della batteria del lettore
La prima volta che si carica la batteria, è necessario caricarla per sedici ore. Dopo la carica
iniziale, la batteria dovrebbe ricaricarsi completamente in sei ore.
L'indicatore di carica della batteria si illumina diventando giallo durante il caricamento della
batteria e diventa verde quando la batteria è completamente carica.
Durante il caricamento della batteria del lettore, è possibile utilizzare il lettore,
per esempio per scaricare file o visualizzare o ascoltare contenuto digitale.
52 Preparazione
Page 53

Multi.book Page 53 Friday, September 10, 2004 12:17 PM
Passo 4
Trasferimento di contenuto
Dopo l'installazione del software e la registrazione del lettore, è possibile collegare Zen
Portable Media Center al computer.
Per trasferire video, programmi, immagini e brani musicali su Zen Portable Media Center,
utilizzare Windows Media
1. Collegare il lettore al computer come mostrato in figura. La porta USB del computer
potrebbe essere situata sulla parte anteriore, posteriore o laterale del computer.
®
Player 10.
2. In Windows Media Player 10, fare clic sulla scheda Catalogo.
Preparazione 53
Page 54

Multi.book Page 54 Friday, September 10, 2004 12:17 PM
3. Nel riquadro della libreria, fare clic col pulsante destro del mouse sul contenuto che si
desidera aggiungere.
4. Nel menu visualizzato, fare clic sull'opzione Aggiungi a e quindi su Elenco
sincronizzazione.
Il contenuto viene visualizzato sul riquadro destro.
5. Fare clic sulla scheda Sincronizzazione.
6. Nel riquadro destro, verificare che il dispositivo selezionato corrisponda al proprio
lettore.
7. Nel riquadro sinistro, selezionare la sincronizzazione del file del contenuto facendo clic
sulla casella di controllo corrispondente.
8. Fare clic sull'icona Avvio sincronizzazione.
Una volta completato il trasferimento, è possibile ascoltare e/o visualizzare il contenuto.
Premere il pulsante Avvia!
Per maggiori informazioni sull'utilizzo del lettore, consultare il manuale dell'utente.
Selezionare Start → Programmi/Tutti i programmi → Creative → Zen Portable
Media Center → Zen Portable Media Center User’s Guide.
54 Preparazione
Page 55

Multi.book Page 55 Friday, September 10, 2004 12:17 PM
Collegamento del lettore ad un
televisore (opzionale)
Per visualizzare il contenuto del lettore su uno schermo di grandi dimensioni, è possibile
collegare il lettore a un televisore. A tale scopo, utilizzare il cavo video in dotazione. Non
utilizzare un cavo video normale.
Ingresso video
Ingresso audio (sinistra)
Ingresso audio
(destra)
Pulsante
Avvi a
1. Collegare il lettore al televisore utilizzando il cavo video in dotazione, come mostrato
in figura.
2. Premere il pulsante Avvia del lettore.
3. Selezionare impostazioni.
4. Selezionare Schermo.
5. Selezionare
Fare attenzione a selezionare il formato TV corretto sul lettore, altrimenti non sarà
possibile visualizzare correttamente i programmi o i video. In caso di dubbio sul formato TV
corretto, consultare il manuale dell'utente del televisore.
Uscita TV
Giallo Rosso
Bianco
quindi selezionare
Schermo TV: NTSC
o
Schermo TV: PAL
Collegamento del lettore ad un televisore (opzionale) 55
.
Page 56

Multi.book Page 56 Friday, September 10, 2004 12:17 PM
Presentazione del lettore
Vista anteriore
Pulsante Avvia
4
3
2
1
56 Presentazione del lettore
5
6
7
8
910
Pulsante di
alimentazione
11
12
13
Page 57

Multi.book Page 57 Friday, September 10, 2004 12:17 PM
Pulsanti e connettori del lettore
Pulsante Avvia
Pulsante di
alimentazione
Premere questo pulsante per visualizzare le opzioni di menu
sullo schermo LCD.
Premere questo pulsante per passare dal menu principale alla
visualizzazione del contenuto sullo schermo e viceversa.
Premere e tenere premuto brevemente questo pulsante per
accendere e spegnere il lettore.
Pulsante di
1
azzeramento
Pulsanti di
2
navigazione
Connettore di
3
alimentazione
Pulsante
4
Precedente
Indicatore di
carica della
5
batteria
Pulsanti di
regolazione del
6
volume
Pulsanti di
controllo della
7
riproduzione
Altoparlante
8
integrato
Se premuto con un oggetto appuntito (per esempio un
fermaglio o una graffetta opportunamente raddrizzati),
consente di azzerare il lettore.
Consentono di selezionare opzioni di menu.
Consente di collegare il lettore ad una presa di alimentazione
utilizzando l'apposito alimentatore.
Consente di ritornare alla schermata o al menu precedenti.
Si illumina e diventa giallo durante la carica della batteria.
Diventa verde quando la batteria è completamente carica.
Premere e tenere premuti questi pulsanti per regolare
rapidamente il volume.
Consentono di controllare la riproduzione del contenuto.
Consente di ascoltare l'audio quando non si utilizza una cuffia
o un altoparlante esterno.
Presentazione del lettore 57
Page 58

Multi.book Page 58 Friday, September 10, 2004 12:17 PM
Schermo LCD
(Liquid Crystal
9
Display)
Pulsanti di
10
selezione rapida
Connettore per
11
cuffia
Connettore di
uscita Audio /
12
Video
Interruttore di
bloccaggio dei
13
pulsanti
Scomparto
14
batteria
Connettore dati Collegare il cavo USB o una docking station.
15
Consente di visualizzare i menu o il contenuto.
Premere e tenere premuti i pulsanti di selezione rapida 1, 2, 3
o 4 per assegnare un segnalibro al contenuto.
Premere un pulsante per accedere al contenuto del
segnalibro.
Collegare la cuffia audio o il telecomando a filo.
Collegare il televisore per visualizzare video, programmi TV
registrati o immagini memorizzate sul lettore.
Consente di bloccare o sbloccare il pulsanti del lettore.
Contiene una batteria ad alta capacità.
Vista dall'alto e dal basso
14
58 Presentazione del lettore
15
Page 59

Multi.book Page 59 Friday, September 10, 2004 12:17 PM
Pulsanti di navigazione
1
2
1
2
3
4
5
Pulsante Su
Pulsante OK
Pulsante
Destra
Pulsante Giù
Pulsante
Sinistra
5
3
4
Premere questo pulsante per evidenziare l'opzione di menu o
l'oggetto visualizzati sopra.
Quando si visualizzano immagini, premere questo pulsante per
visualizzare l'immagine precedente.
Premere questo pulsante per selezionare l'opzione di menu o
l'oggetto evidenziati sullo schermo.
Premere questo pulsante per evidenziare l'opzione di menu o
l'oggetto visualizzati a destra.
Quando si ascoltano brani musicali, premendo questo pulsante è
possibile visualizzare diversamente l'album, i generi o la sequenza
dei brani.
Premere questo pulsante per evidenziare l'opzione di menu o
l'oggetto visualizzati sotto.
Quando si visualizzano immagini, premere questo pulsante per
visualizzare l'immagine successiva.
Premere questo pulsante per evidenziare l'opzione di menu o
l'oggetto visualizzati a sinistra.
Quando si ascoltano brani musicali, premendo questo pulsante è
possibile visualizzare diversamente l'album, i generi o la sequenza
dei brani.
Presentazione del lettore 59
Page 60

Multi.book Page 60 Friday, September 10, 2004 12:17 PM
Pulsanti di controllo della riproduzione
2
1
Premere e tenere premuto questo pulsante per tornare
indietro durante la riproduzione di un brano musicale, un
Pulsante Indietro
1
Pulsante
2
Riproduci/Pausa
Pulsante Avanti
3
video o un programma.
Premere questo pulsante per tornare alla voce di contenuto
precedente.
Premere questo pulsante per avviare, interrompere o
riprendere la riproduzione.
Premere e tenere premuto questo pulsante per andare
avanti durante la riproduzione di un brano musicale, un
video o un programma.
Premere questo pulsante per passare alla voce di
contenuto successiva.
60 Presentazione del lettore
3
Page 61

Multi.book Page 61 Friday, September 10, 2004 12:17 PM
Altre fonti di informazione
Knowledge Base Creative
Strumento di guida automatica, utile per l'individuazione e la risoluzione in linea dei
problemi tecnici, attivo 24 ore su 24. Visitare www.creative.com e selezionare il proprio
paese (o regione).
Registra il prodotto
È possibile beneficiare di innumerevoli vantaggi registrando il prodotto nel corso
dell'installazione o collegandosi alla pagina di registrazione all'indirizzo
www.creative.com/register/portablemediacenter. I vantaggi includono:
• Assistenza e supporto al prodotto Creative.
• Aggiornamenti esclusivi su promozioni ed eventi.
Assistenza clienti e informazioni sulla garanzia
Il CD di installazione contiene informazioni sull'assistenza ai clienti, sulla garanzia e su altri
argomenti.
Assistenza clienti d:\support\<lingua>\support.pdf
Garanzia d:\warranty\<regione>\<lingua>\warranty.pdf
Conformità alle normative d:\fcc\<lingua>\doc.pdf
Manuale dell'utente d:\manual\<lingua>\manual.pdf
(dove d:\ rappresenta la lettera dell'unità CD-ROM/DVD-ROM, <regione> l'area geografica e <lingua>
la lingua del documento).
Conservare la prova d’acquisto per tutta la durata del periodo di
garanzia.
Altre fonti di informazione 61
Page 62

Multi.book Page 62 Friday, September 10, 2004 12:17 PM
Informazioni di sicurezza
Come per tutti i dispositivi di memorizzazione di contenuto digitale, si raccomanda di
eseguire periodicamente un backup dei dati. È estremamente importante seguire le
precauzioni sull'uso del dispositivo riportate in questo opuscolo ed eseguire
regolarmente un backup dei dati memorizzati sul lettore. In nessuna circostanza Creative
sarà ritenuta responsabile per danni indiretti, incidentali, speciali o consequenziali arrecati
ad una qualsiasi persona dovuti a negligenza di Creative, o per perdita di guadagno,
perdita di risparmi, perdita d'uso, perdita di entrate o perdita di dati derivanti o associati
all'uso di questo dispositivo, anche nel caso in cui Creative sia stata informata della
possibilità di tali danni. In nessuna circostanza, la responsabilità di Creative o i risarcimenti
all'utente o a una qualsiasi altra persona potranno superare l'importo pagato dall'utente
per il dispositivo, indipendentemente dalla forma della rivendicazione. Poiché alcuni stati
o giurisdizioni non ammettono l'esclusione o la limitazione di responsabilità per danni
incidentali o consequenziali, la limitazione o esclusione di cui sopra potrebbe non essere
applicabile all'utente.
62 Informazioni di sicurezza
Page 63

Multi.book Page 63 Friday, September 10, 2004 12:17 PM
Avviso per i conducenti
Software Microsoft® Windows Mobile™ per Portable Media
Center
Avviso:
L'utilizzo di certe parti di questo dispositivo durante la guida di un veicolo potrebbe
distogliere l'attenzione del conducente dalla strada e potrebbe causare un incidente
o provocare gravi conseguenze. Non modificare le impostazioni del sistema durante
la guida. L'impostazione o la modifica di alcune funzioni del dispositivo potrebbero
distogliere l'attenzione del conducente dalla strada e richiedere l'allontanamento
delle mani dal volante.
Prima di eseguire queste operazioni, arrestare il veicolo in modo sicuro e in
conformità alla norme stradali.
Raccomandazioni generali sul funzionamento del dispositivo
Visione prolungata dello schermo
Quando si è alla guida di un veicolo, evitare di utilizzare funzioni che richiedono una visione
prolungata dello schermo. Arrestare il veicolo in modo sicuro e in conformità alle norme
stradali prima di tentare di utilizzare funzioni che richiedono una attenzione prolungata.
Anche sguardi brevi e occasionali allo schermo potrebbero essere pericolosi in quanto
potrebbero distrarre il conducente in momenti cruciali.
Regolazione del volume
Non alzare il volume a livelli eccessivi. Mantenere il volume del dispositivo ad un
livello relativamente basso che consenta al conducente di udire il rumore del
traffico ed eventuali segnali di emergenza durante la guida. Guidando senza poter
udire questi suoni e rumori potrebbe provocare incidenti.
Avviso per i conducenti 63
Page 64

Multi.book Page 64 Friday, September 10, 2004 12:17 PM
Copyright © 2004 Creative Technology Ltd. Tutti i diritti riservati. Il logo Creative è un marchio registrato di Creative
Technology Lt d. negli Stati Uniti e/o in altri paesi. Microsoft, Windows e il logo Windows sono marchi registrati di Microsoft
Corporation. Tutti gli altri prodotti sono marchi o marchi registrati dei rispettivi proprietari e come tali riconosciuti. Tutte
le specifiche sono soggette a modifiche senza preavviso. Il contenuto della confezione potrebbe risultare leggermente diverso
da quanto raffigurato.
64
Page 65

Multi.book Page 65 Friday, September 10, 2004 12:17 PM
Contenido
ES
Introducción ..................................................................................68
Conexión del reproductor a la televisión (opcional) ..........73
El reproductor en resumen .......................................................74
Información adicional ..................................................................79
Anuncio de seguridad .................................................................80
Anuncio para conductores ........................................................81
65
Page 66

Multi.book Page 66 Friday, September 10, 2004 12:17 PM
Introducción
Le felicitamos por haber comprado Creative Zen Portable Media Center. Realice los pasos
siguientes de instalación del software y configuración del reproductor para poder disfrutar
de lo más nuevo en entretenimiento digital portátil.
NO conecte el reproductor al ordenador antes de configurar el
software.
Paso 1
Instalación del software
1. Inserte el CD de instalación en la unidad de CD-ROM/DVD-ROM.
El CD debería iniciarse de manera automática. Si no es así, realice
los pasos siguientes:
i. Inicie el Explorador de Windows.
ii. En la parte izquierda, haga clic en el icono Mi PC.
iii. Haga clic con el botón secundario en el icono de la unidad de
CD-ROM/DVD-ROM y, a continuación, haga clic en Ejecución automática.
2. Siga las instrucciones que aparecen en pantalla.
3. Cuando se le pida, reinicie el ordenador.
4. Al reiniciarse el equipo, siga las instrucciones que aparecen en pantalla para registrar el
reproductor y completar la instalación.
66 Introducción
Page 67

Multi.book Page 67 Friday, September 10, 2004 12:17 PM
Paso 2
Inserción de la batería
1 2 3
1. Abra el compartimento de la batería pulsando el botón plateado (1) y deslizando la
cubierta en el reproductor (2) en la dirección de las flechas.
2. Inserte la batería como se muestra en la imagen, alineando los conectores de metal
de la batería con los conectores de metal del compartimento.
3. Cierre el compartimento de la batería.
Introducción 67
Page 68

Multi.book Page 68 Friday, September 10, 2004 12:17 PM
Paso 3
Alimentación del reproductor
Entrada
de CC de
5V
Conecte el adaptador de alimentación como se muestra en el diagrama. Si es necesario,
encienda el dispositivo desde la fuente de alimentación.
Carga de la batería del reproductor
La primera vez que cargue la batería, la carga tardará dieciséis horas. Tras esta carga inicial,
la batería se cargará por completo en unas seis horas.
El indicador de carga de la batería se pone en ámbar cuando la batería está siendo cargada
y se cambiará a verde cuando la carga haya finalizado.
Durante la carga de la batería, podrá utilizar el reproductor, por ejemplo, para
descargar, mirar o escuchar elementos de contenido digital.
68 Introducción
Page 69

Multi.book Page 69 Friday, September 10, 2004 12:17 PM
Paso 4
Transferencia de contenido
Una vez instalado el software y registrado el reproductor, puede conectar Zen Portable
Media Center a su ordenador.
®
Utilice Windows Media
audio al Zen Portable Media Center
1. Conecte el reproductor al equipo como se ilustra en la imagen. El puerto USB de su
ordenador puede estar situado en la parte frontal, lateral o trasera del equipo.
Player 10 para transferir vídeos, programas, imágenes y pistas de
2. En Windows Media Player 10, haga clic en la ficha Biblioteca.
Introducción 69
Page 70

Multi.book Page 70 Friday, September 10, 2004 12:17 PM
3. En el panel de la biblioteca, haga clic con el botón secundario en el contenido que
desee agregar.
4. En el menú que aparece, haga clic en la opción Agregar a y, a continuación, en la
opción Sincronizar lista.
El contenido aparecerá en el panel derecho.
5. Haga clic en la ficha Sincronización.
6. En el panel derecho, asegúrese de que el reproductor está seleccionado.
7. En el panel izquierdo, haga clic en la casilla de verificación situada al lado del archivo del
disco para seleccionarlo y comenzar la sincronización.
8. Haga clic en el icono Iniciar sincronización.
Cuando haya terminado la transferencia, ya puede reproducir el contenido transferido.
Pulse el botón Iniciar.
Para obtener más información sobre la utilización del reproductor, consulte la guía del
usuario en inglés (User’s Guide). Vaya a Inicio → Programas/Todos los programas →
Creative → Zen Portable Media Center → User’s Guide de Zen Portable Media
Center.
70 Introducción
Page 71

Multi.book Page 71 Friday, September 10, 2004 12:17 PM
Conexión del reproductor a la
televisión (opcional)
Para compartir el contenido del reproductor en una pantalla grande, puede conectar éste a un
televisor. Para ello, deberá utilizar el cable de vídeo suministrado. No utilice un cable de vídeo
estándar.
Entrada de audio (izquierda)
Entrada de vídeo Entrada de audio
Botón de
inicio
1. Conecte el reproductor a la TV con el cable de vídeo suministrado, como se muestra
en la imagen.
2. Pulse el botón Inicio del reproductor
3. Seleccione configuración.
4. Seleccione Pantalla.
5. Seleccione Salida TV y Visualizácion de TV: NTSC o Visualizácion de TV: PAL.
Asegúrese de que selecciona el formato de presentación de TV correcto; de lo contrario
no podrá ver los programas o vídeos de manera adecuada. Consulte el manual de usuario
de su televisor si no está seguro del formato de presentación de su televisión.
Amarillo Rojo
Blanco
(derecha)
Conexión del reproductor a la televisión (opcional) 71
Page 72

Multi.book Page 72 Friday, September 10, 2004 12:17 PM
El reproductor en resumen
Vista frontal
Botón de inicio
4
3
2
1
72 El reproductor en resumen
5
6
7
8
910
Botón de
alimentación
11
12
13
Page 73

Multi.book Page 73 Friday, September 10, 2004 12:17 PM
Botones y conectores del reproductor
Botón de inicio
Botón de
alimentación
Púlselo para ver las opciones del menú en la pantalla LCD.
Púlselo para cambiar el menú principal por la pantalla activa
actual y viceversa.
Púlselo y manténgalo pulsado brevemente para encender y
apagar el reproductor.
Botón de reinicio
1
Botones de
2
navegación
Conector de
3
alimentación
Botón de atrás Púlselo para volver a la pantalla o al menú anterior.
4
Indicador de
carga de la
5
batería
Botones de subir
6
y bajar volumen
Botones de
control de
7
reproducción
Altavoz integrado
8
Pantalla de cristal
9
líquido (LCD)
Reinicia el reproductor al pulsarlo con el extremo de un objeto
fino (como un clip extendido).
Le permiten seleccionar las opciones del menú.
Conecta éste a una toma de alimentación gracias al adaptador
de alimentación suministrado.
Se pone en ámbar cuando la batería se está cargando.
Cambia a verde cuando la carga de la batería ha finalizado.
Púlselos y manténgalos pulsados para ajustar el volumen.
Le permiten controlar la reproducción del contenido.
Le permite escuchar audio cuando no tiene auriculares o
salida de altavoces.
Muestra menús o contenido.
El reproductor en resumen 73
Page 74

Multi.book Page 74 Friday, September 10, 2004 12:17 PM
10
11
12
13
14
15
Botones
predeterminados
Conector de
auriculares
Conector de
salida de audio /
vídeo
Botón del
interruptor de
bloqueo
Compartimento
de batería
Conector de
datos
Pulse y mantenga pulsados los botones predeterminados 1, 2,
3 o 4 para marcar el contenido.
Pulse un botón para ir al marcador.
Conecte los auriculares o control remoto cableado al conector.
Conéctelo a su aparato de televisión para ver vídeos,
programas o imágenes almacenados en el reproductor de
manera cómoda.
Mueva el interruptor para bloquear o desbloquear el
reproductor.
Para la batería de gran capacidad.
Conecte éste al cable USB I o al módulo de interconexión
opcional.
Vista superior y vista de botones
15
14
74 El reproductor en resumen
Page 75

Multi.book Page 75 Friday, September 10, 2004 12:17 PM
Botones de navegación
1
2
1
2
3
4
5
Botón de
arriba
Botón OK
Botón de la
derecha
Botón de
abajo
Botón de la
izquierda
5
3
4
Púlselo para ir a la opción del menú o selección situada encima de
la selección actual.
Para ver imágenes, púlselo si desea ir a la imagen anterior.
Púlselo para seleccionar la opción del menú o selección
seleccionada en la pantalla.
Púlselo para ir a la opción del menú o selección situada a la
derecha de la selección actual.
Al reproducir audio, púlselo para ver las diferentes vistas del
álbum, género, lista de canciones o pistas.
Púlselo para ir a la opción del menú o selección situada debajo de
la selección actual.
Para ver imágenes, púlselo si desea ir a la imagen siguiente.
Púlselo para ir a la opción del menú o selección situada a la
izquierda de la selección actual.
Al reproducir audio, púlselo para ver las diferentes vistas del
álbum, género, lista de canciones o pistas.
El reproductor en resumen 75
Page 76

Multi.book Page 76 Friday, September 10, 2004 12:17 PM
Botones de control de reproducción
2
1
Púlselo y manténgalo pulsado para ir hacia atrás en una
Botón de anterior
1
Botón de
reproducir o poner
2
en pausa
Botón de siguiente
3
pista de audio, vídeo o programa.
Púlselo para ir al elemento de contenido anterior.
Púlselo para iniciar, poner en pausa o reanudar la
reproducción.
Púlselo y manténgalo pulsado para ir hacia adelante en una
pista de audio, vídeo o programa.
Púlselo para ir al elemento de contenido siguiente.
76 El reproductor en resumen
3
Page 77

Multi.book Page 77 Friday, September 10, 2004 12:17 PM
Información adicional
Base de conocimientos de Creative
Puede encontrar información y solucionar problemas técnicos en la Base de
conocimientos de búsqueda personal de Creative, disponible las 24 horas del día. Vaya a
www.creative.com y seleccione su área.
Registre el producto.
Si registra el producto durante la instalación o a través de la página Web
www.creative.com/register/portablemediacenter, podrá disfrutar de múltiples
ventajas. Éstas incluyen:
• Asistencia técnica de productos y servicios de Creative
• Actualizaciones exclusivas sobre promociones y celebraciones.
Servicios de asistencia al cliente y garantía
En el CD de instalación, se incluye información acerca de los servicios de asistencia al
cliente, la garantía e información de otro tipo.
Servicios de asistencia técnica d:\support\<idioma>\asistencia.pdf
Garantía d:\warranty\<región>\<idioma>\garantía.pdf
Normas d:\fcc\<idioma>\doc.pdf
User’s Guide d:\manual\<idioma>\manual.pdf
(reemplace d:\ por la letra de la unidad de CD-ROM/DVD-ROM, <región> por la zona donde se
encuentre e <idioma> por el idioma en que está el documento).
Conserve el certificado de compra durante el período de garantía.
Información adicional 77
Page 78

Multi.book Page 78 Friday, September 10, 2004 12:17 PM
Anuncio de seguridad
Como en cualquier otro dispositivo de almacenamiento de medios digitales, se deben
realizar copias de seguridad de los datos con regularidad. Le recomendamos
encarecidamente que respete las precauciones de uso que se explican en este folleto y
que realice copias de seguridad de los datos con regularidad. Creative no será
responsable en ningún caso de ningún daño indirecto, incidental, especial o consecuente,
causado a personas debido a la negligencia de Creative, ni de ninguna pérdida en los
beneficios, en los ahorros, pérdida de ingresos o de datos resultantes o relacionados con
este dispositivo, incluso si Creative ha sido avisado de la posibilidad de dichos daños. En
ningún caso la responsabilidad de Creative o la reparación por daños en su persona u
otra serán superiores al importe pagado por el dispositivo, con independencia del tipo de
demanda. Dado que algunos países o estados no permiten la limitación o exclusión de
responsabilidades por daños incidentales o consecuentes, la limitación o exclusión arriba
mencionada no se aplicará en dichos países.
78 Anuncio de seguridad
Page 79

Multi.book Page 79 Friday, September 10, 2004 12:17 PM
Anuncio para conductores
Microsoft® Windows Mobile™ Software para Portable Media
Centers
Advertencia:
Utilizar ciertas partes del dispositivo mientras conduce puede distraerlo y ser una
causa posible de accidente o resultar en otras consecuencias serias. No cambie la
configuración del sistema mientras conduce. Durante la configuración o el cambio de
algunas funciones, quizás deba desviar la vista de la carretera o levantar las manos del
volante.
Detenga el vehículo de manera segura y legal antes de intentar estas operaciones.
Funcionamiento general
Vista prolongada de la pantalla
Si está conduciendo, no acceda a ninguna función que requiera ver la pantalla de manera
prolongada. Deténgase de manera segura y legal para acceder a toda función del sistema
que requiera una atención prolongada. Incluso los vistazos breves y ocasionales a la pantalla
pueden ser peligrosos si se distrae mientras conduce en un momento crítico.
Configuración del volumen
No suba el volumen excesivamente. Mantenga el volumen lo suficientemente bajo
para escuchar el tráfico exterior y las señales de emergencia mientras conduce.
Conducir sin poder escuchar estos sonidos puede ser la causa de un accidente.
Anuncio para conductores 79
Page 80

Multi.book Page 80 Friday, September 10, 2004 12:17 PM
Copyright © 2004 Creative Technology Ltd. Reservados todos los derechos. El logotipo de Creative es una marca comercial
registrada de Creative Technology Ltd. en los EE. UU. y en otros países. Microsoft, Windows y el logotipo de Windows
son marcas comerciales registradas de Microsoft Corporatio n. Todos los otros productos son marcas comerciales o marcas
comerciales registradas de sus propietarios respectivos y se reconocen como tal. To das las especificaciones podrán ser objeto
de modificaciones sin previo aviso. El contenido real puede variar ligeramente del que aparece en las ilustraciones.
80
 Loading...