

Craftsman 48624320 Owner’s Manual
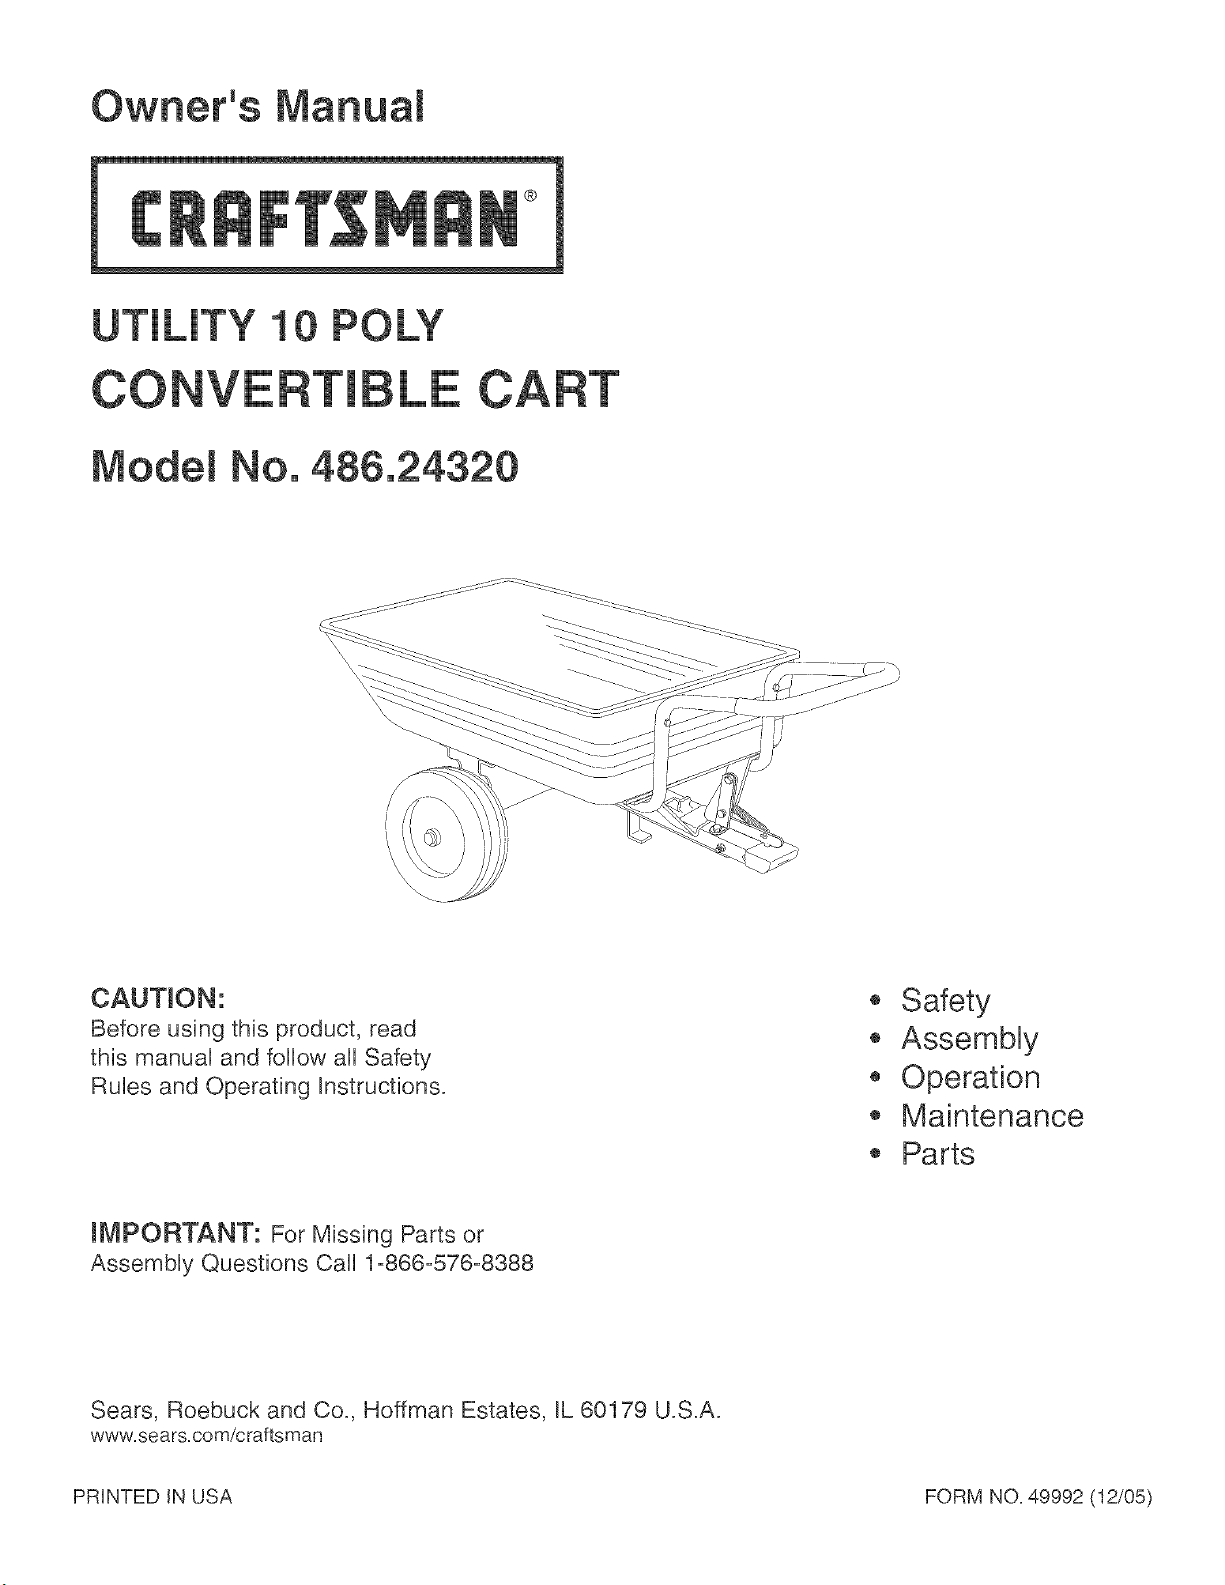
Owner's Manua_
UTiLiTY 10 POLY
CO
Modem No. 486.24320
®
CAUTION:
Before using this product, read
this manuaU and follow aH Safety
RuUes and Operating Instructions.
• Safety
• Assembly
• Operation
• Maintenance
• Parts
mMPORTANT: For Missing Parts or
AssembUy Questions Call 1-866-576-8388
Sears, Roebuck and Co., Hoffman Estates, IL 60179 U.S.A.
www, sears,com/c raftsman
PRINTED iN USA FORM NO, 49992 (12/05)
Anypowerequipmentcancauseinjuryifoperatedimproperlyorifthe
Exercisecautionatalltimes,whenusingpowerequipment.
userdoesnotunderstandhowtooperatetheequipment.
Readthisownersmanuaibeforeattemptingto
assembleoroperatethecart.
Readthevehicleownersmanualandknowhowto
operateyourtractorbeforeusingthecartattachment.
Donotatanytimecarrypassengersinthiscart.it has
notbeendesignedtocarrypassengers.
Neverallowchildrentooperatethetractororthecart
attachment.
Donotallowadultstooperatethetractororcart
attachmentwithoutproperinstructions.
Alwaysbeginwiththetransmissioninfirst(low)and
graduallyincreasespeedasconditionspermit.
Towthecartatreducedspeedoverroughterrainand
hillsidesornearcreeksandditchestopreventtipping
overandlossofcontrol.Donotdrivetooclosetoa
creekorditch.
Lookforthissymboltopointoutimportantsafetyprecautions,itmeans-- Attention!!
Becomealert!!Yoursafetyisinvolved.
Vehiclebrakingandstabilitymaybeaffectedwiththe
attachmentofthiscart.Donotfillcarttomaximum
weightcapacitywithoutcheckingthecapabilityofthe
towingvehicletosafelypullandstopwiththecart
attached.
Beforeoperatingvehicleonanygrade(hil!)referto
safetyrulesinthevehicleowner'smanualconcerning
safeoperationonslopes.Referalsototheslopeguide
onpage11ofthismanual.Beawareofchanging
conditionsonslopes.Stayoffsteepslopes!
Donottowthiscartonhighwaysorpublic
thoroughfares.
Maximumtowingspeedis10m.p.h.
Donotloadmoreweightintothepushcartthanyou
canhandleandcontrolcomfortably.
Followmaintenanceandlubricationinstructionsas
outlinedinthismanual.
ONE YEAR FULL WARRANTY
When operated and maintained according to the instructions supplied with it, if this Convertible Cart fails due to a defect in
materia! or workmanship within one year from the date of purchase, call 1-800-4-MyoHOME® to arrange for free repair (or
replacement if repair proves impossible).
If this product is used for commercia! or rental purposes, this warranty applies for only 90 days from the date of purchase
This warranty gives you specific legal rights, and you may also have other rights which vary from state to state.
Sears, Roebuck and Co, D817WA, Hoffman Estates, JL60179
The model number and serial numbers will be found on a
decal attached to the cart.
You should record both the serial number and the date of
purchase and keep in a safe place for future reference.
MODEL NUMBER:
SERIAL NUMBER:
DATE OF PURCHASE:
486.24320
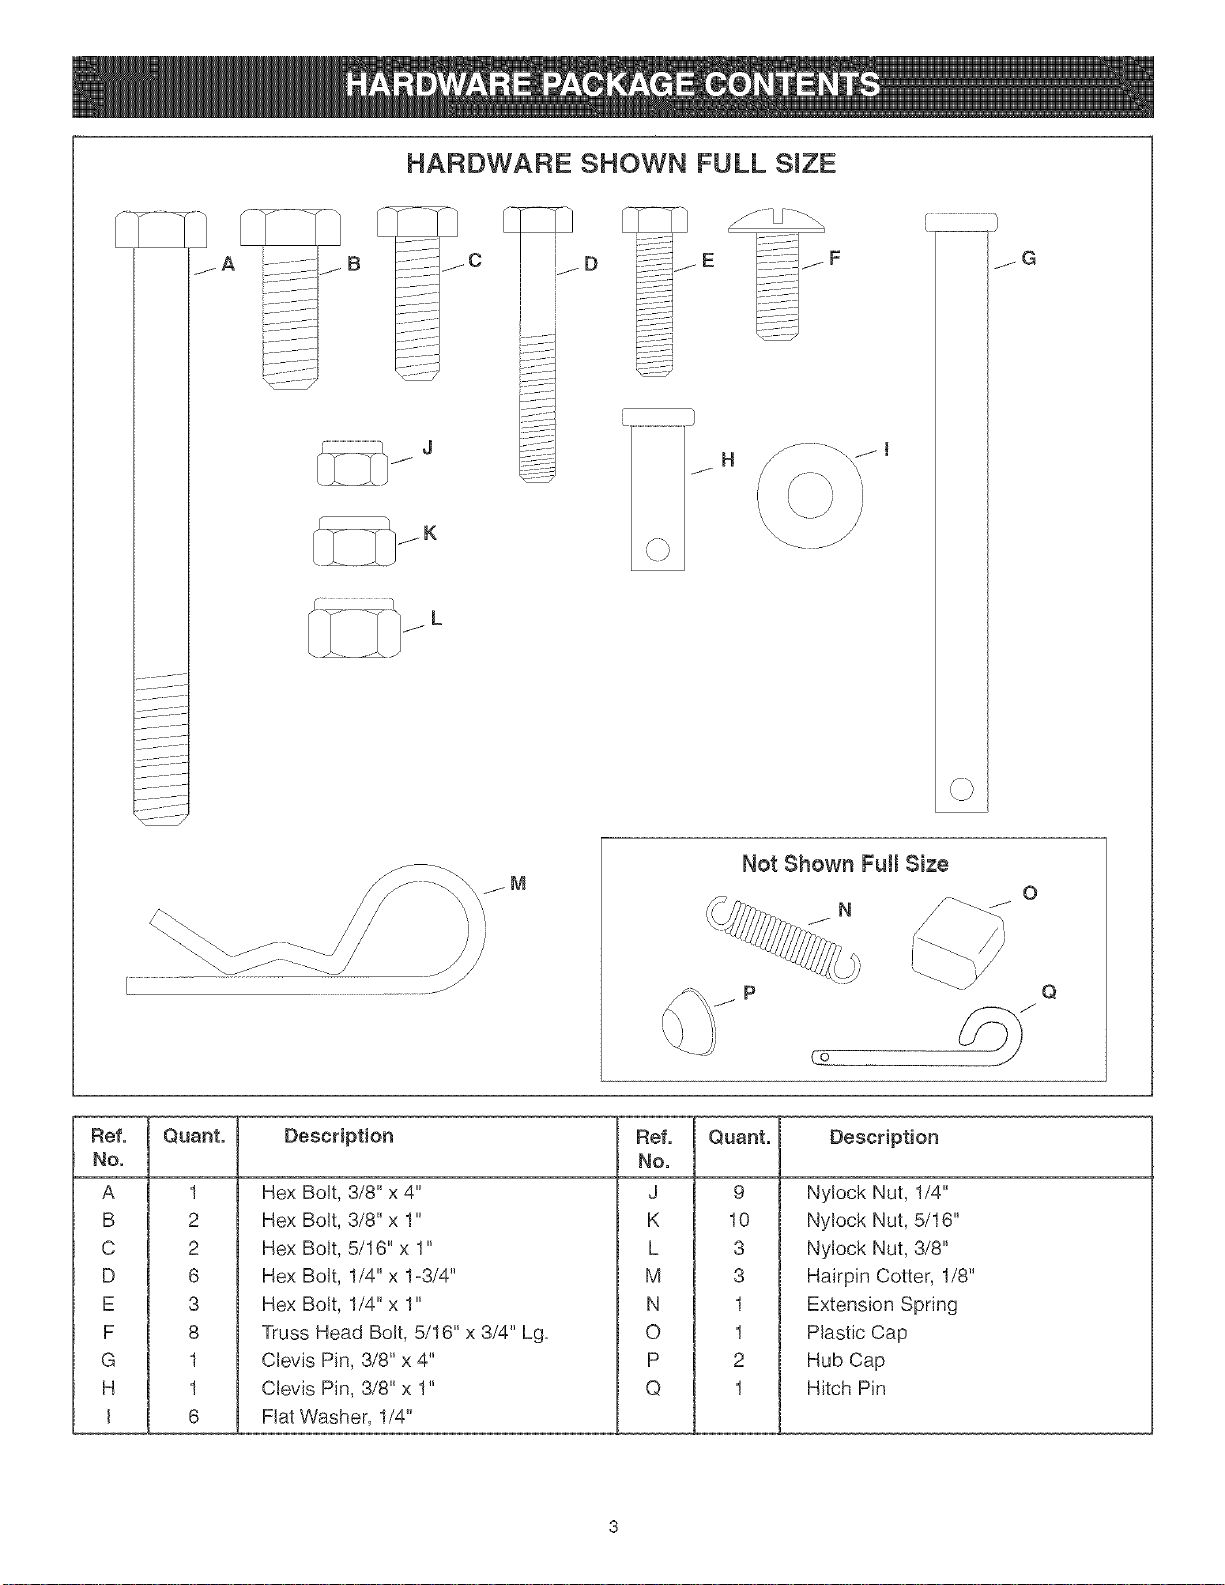
HARDWARE SHOWN FULL SIZE
A
E F
_G
IR_-I Quanto
O,
i
/-
Description Ref. Quento
No.
Hex Bolt, 3/8" x 4" J 9
Hex Bolt, 3/8" x 1" K 10
Hex Bolt, 5/16" x 1" L 3
Hex Bolt, 1/4" x 1o3/4" M 3
Hex Bolt, 1/4" x 1" N 1
Truss Head Bolt, 5/16" x 3/4" Lg. O 1
Clevis Pin, 3/8" x 4" P 2
Clevis Pin, 3/8" x 1" Q 1
Flat Washer, 1/4
Not Shown Full Size
O
P
Description
Nylock Nut, 1/4"
Nylock Nut, 5/16"
Nylock Nut, 3/8"
Hairpin Cotter, 1/8"
Extension Spring
Plastic Cap
Hub Cap
Hitch Pin
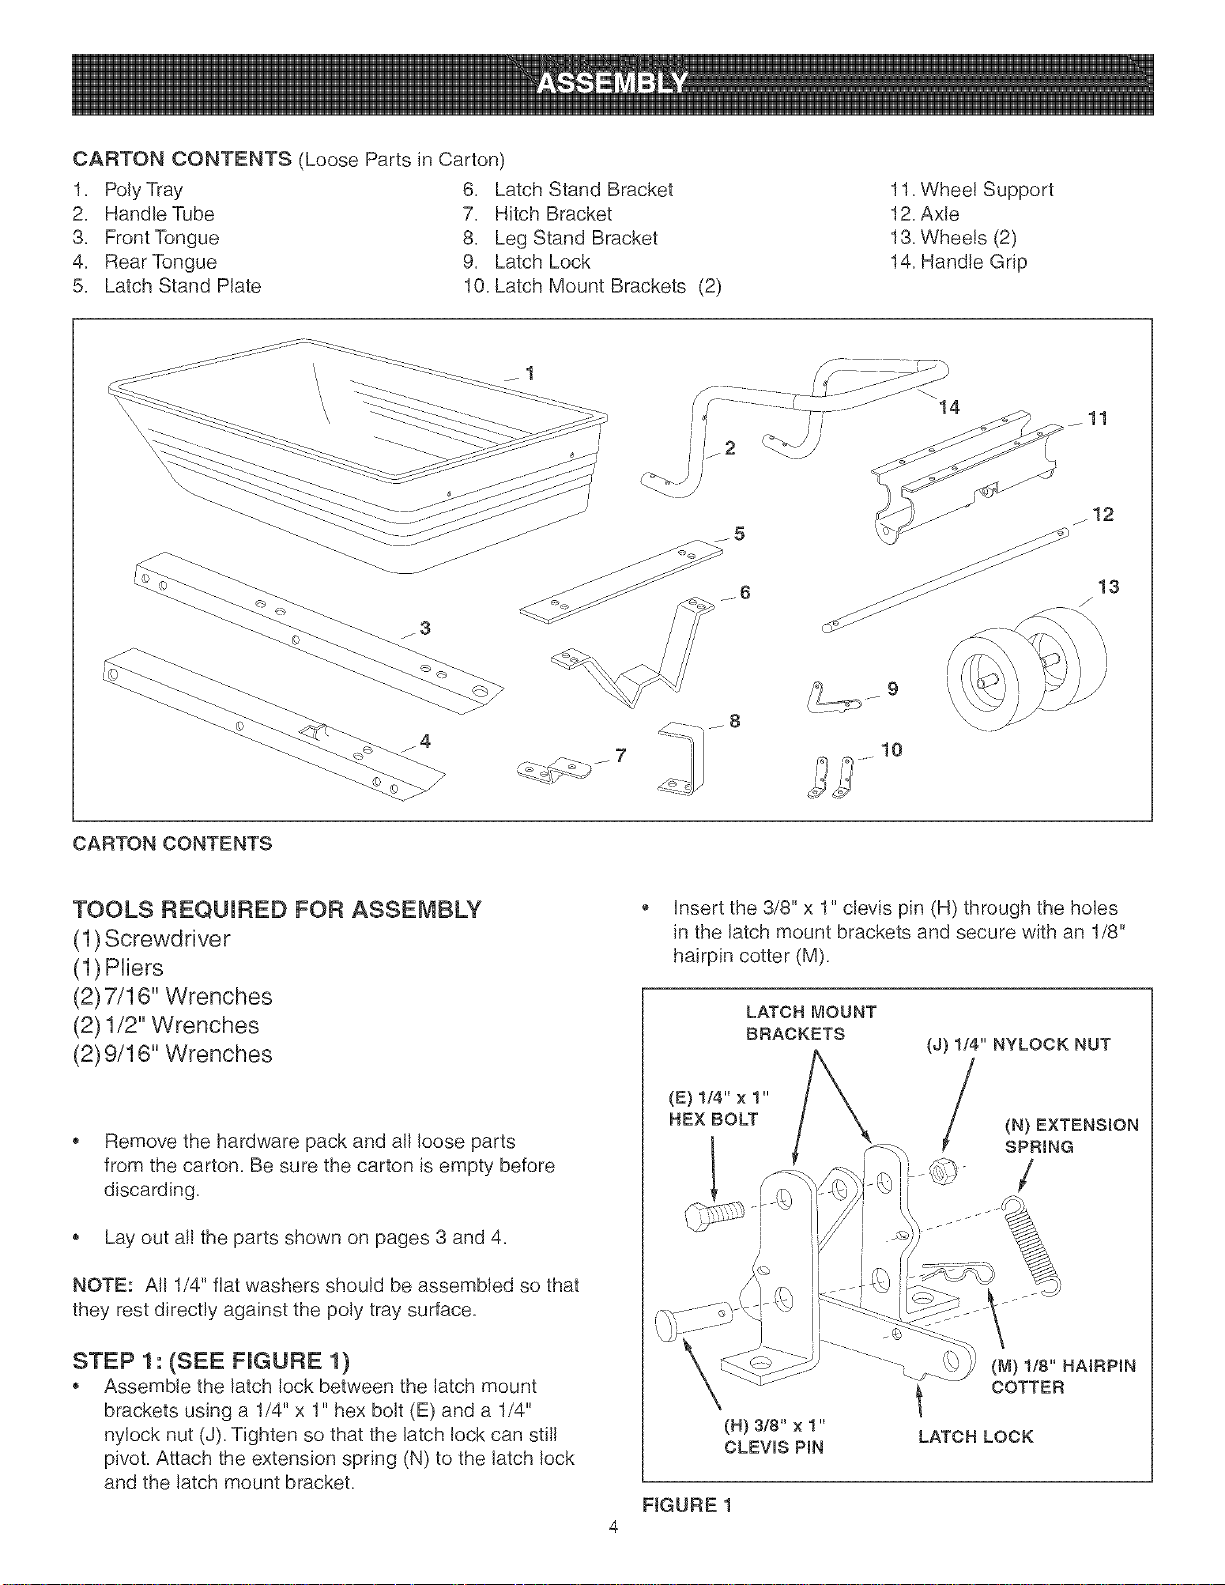
CARTONCONTENTS(LoosePartsinCarton)
1, PolyTray 6, LatchStandBracket
2, HandleTube 7, HitchBracket
3, FrontTongue 8, LegStandBracket
4. RearTongue 9. LatchLock
5, LatchStandPlate 10.LatchMountBrackets(2)
11.WheelSupport
12.Axle
13.Wheels(2)
14.HandleGrip
11
CARTON CONTENTS
TOOLS REQUIRED FOR ASSEMBLY
(1) Screwdriver
(1) PUiers
(2) 7/16" Wrenches
(2) 1/2" Wrenches
(2) 9/16" Wrenches
Remove the hardware pack and all loose parts
from the carton. Be sure the carton is empty before
discarding.
Lay out all the parts shown on pages 3 and 4.
NOTE: All 1/4" fiat washers should be assembled so that
they rest directly against the poly tray surface.
i j j Ji
j # J
uU
insert the 3/8" x 1" clevis pin (H) through the holes
in the latch mount brackets and secure with an 1/8"
hairpin cotter (M).
LATCH MOUNT
BRACKETS
(E) 114"x 1"
HEX BOLT
(J) 1/4" NYLOCK NUT
(N) EXTENSmON
SPR{NG
/
STEP 1 : (SEE FIGURE 1)
Assemble the latch lock between the latch mount
brackets using a 1/4" x 1" hex bolt (E) and a 1/4"
nylock nut (J), Tighten so that the latch lock can still
pivot. Attach the extension spring (N) to the latch lock
and the latch mount bracket.
FIGURE 1
4
(H) 3/8" x 1"
CLEVmS PIN
(M) 118" HAIRPmN
l COTTER
LATCH LOCK
 Loading...