

Craftsman 41A638-1 Instructions Manual
II:RRFI"$1UlRN'ILASER PARKER LOCATOR
COMPLETE KIT CONTENTS (41A638) (1) Laser Parking Locator Swivel Mount (1) Power Pack
(1) Craftsman Control Module (1) Ceiling mount screw (2) Twist Ties (2) Caution Labels (1) Instructions
You will have 1 Laser Swivel Mount when purchasing the 139.53989 Garage Door Opener,
LASER ACCESSORY CONTENTS (41A638-1) (1)LaserParkingLocator Swivel Mount
(1) Ceiling Mount Screw (1) Twist Tie (2) Caution Labels (1) Instructions
The Laser Accessory must be used in conjunction with the Complete Kit
BEFORE YOU BEGIN Open your garage door, park your car(s) outside the garage and follow the
instructions below. The Power Pack, Control Module and Laser Parker Locator Swivel Mount require
connection by you.
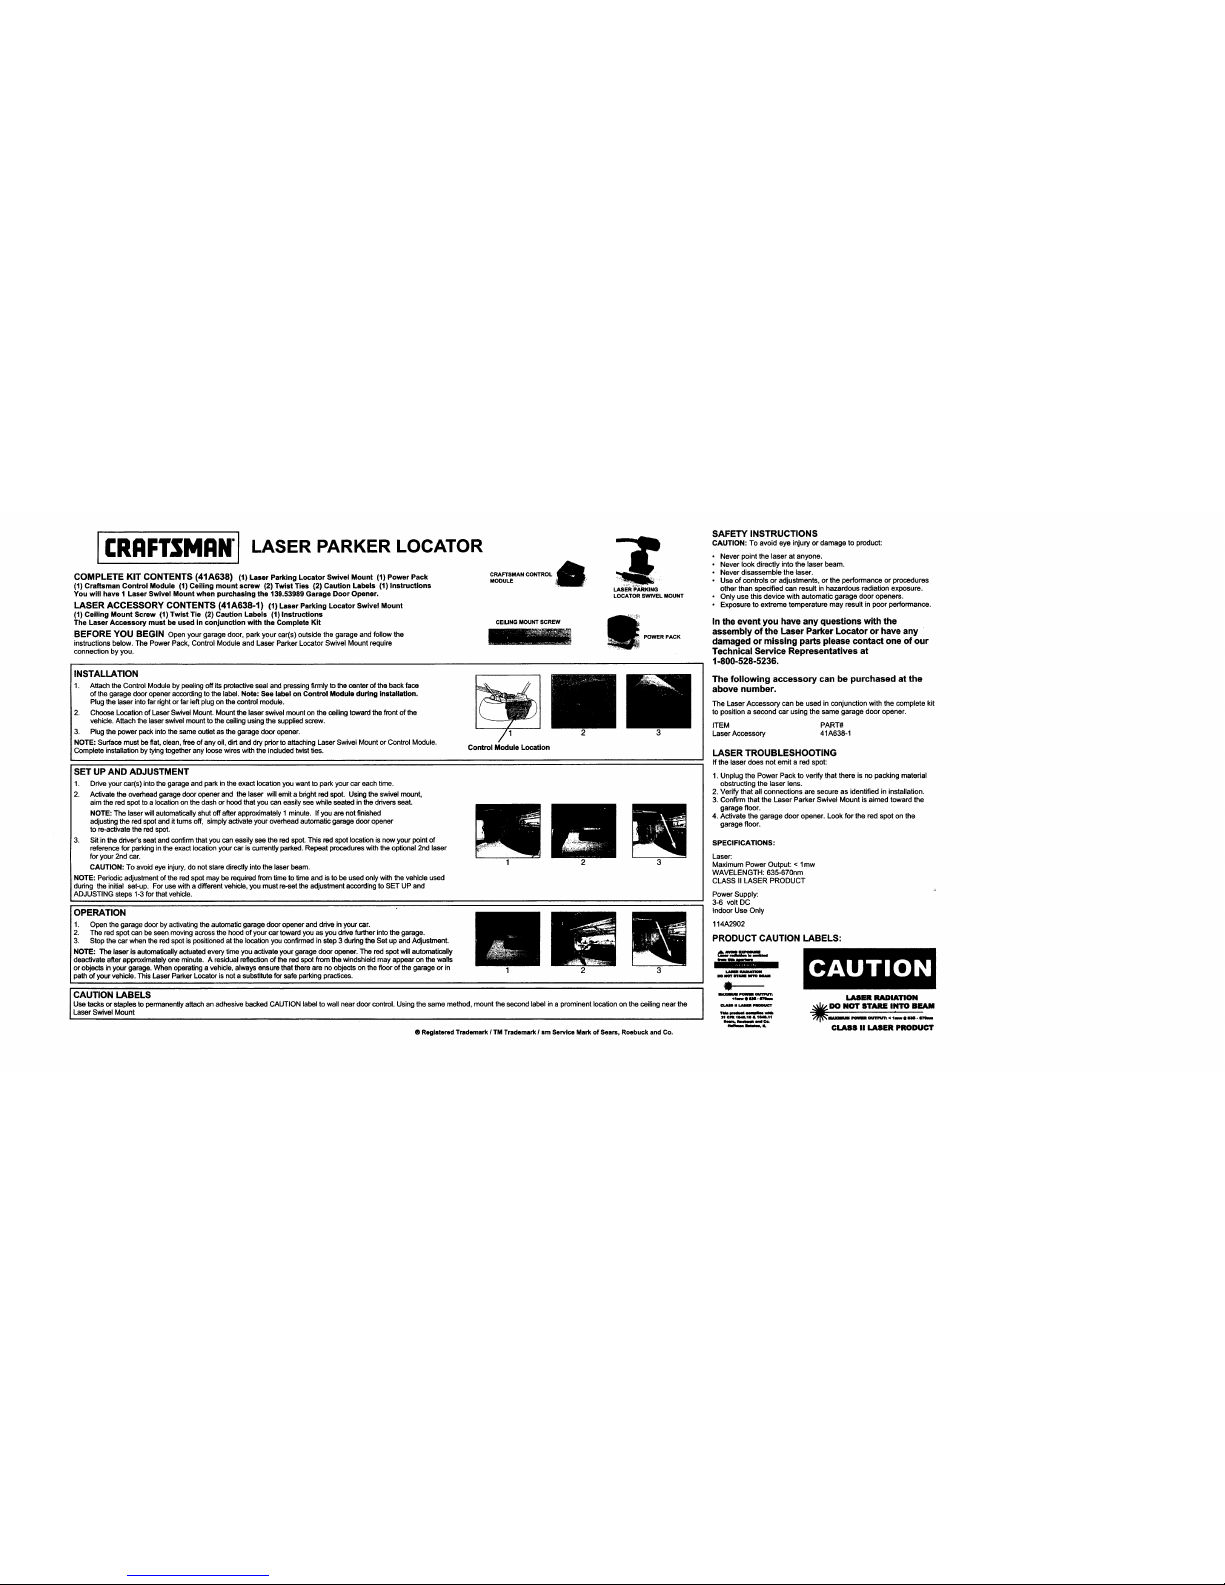
CRAFTSMAN CONTROL i_;
MODULE
CEILING MOUNT SCREW
LASER PARKING
LOCATOR SWIVEL MOUNT
POWER PACK
INSTALLATION
1. Attachthe Control Module by peeling offits protective seal and pressing firmly to the center of the back face
of the garage door opener according tothe label. Note: See label on Control Module during installation.
Plug the laser into far rightor far left plug on the control module.
2. Choose Location ofLaser Swivel Mount. Mount the laser swivel mount on the ceiling toward the frontof the
vehicle. Attach the laser swivel mount to the ceilingusing the suppliedscrew.
3. Plug the power pack into the same outletas the garage door opener.
NOTE: Surface must be fiat, clean, free of any oil, dirt and dry priorto attaching Laser Swivel Mount or Control Module.
Complete installationby tying together any loose wireswith the includedtwist ties.
1
ControlModuleLocation
SET UP AND ADJUSTMENT
1. Drive your car(s) intothe garage and park in the exact location you want to park your car each time.
2. Activate the overhead garage door opener and the laser will emit a bright red spot. Using the swivel mount,
aim the red spot to a locationon the dash or hood that you can easily see while seated in the ddvers seat.
NOTE: The laser will automatically shut off after approximately 1 minute. Ifyou are not finished
adjusting the red spot and it turns off, simply activate your overhead automatic garage door opener
to re-activate the red spot.
3. Sit inthe ddver's seat and confirm that you can easily see the red spot. This red spot location is now your point of
reference for parking inthe exact location your car is currently parked. Repeat procedures with the optional 2nd laser
for your 2nd car.
CAUTION: To avoid eye injury, do not stare directly into the laser beam.
NOTE: Periodic adjustment of the red spot may be required from time to time and is to be used only with the vehicle used
dunng the initial set-up. For use with a different vehicle, you must re-set the adjustment according to SET UP and
ADJUSTING steps 1-3 for that vehicle.
OPERATION
1. Open the garagedoorbyactivatingthe automaticgaragedooropeneranddrive inyourcar.
2. Thered spotcan beseenmovingacrossthe hoodofyour car towardyouasyouddve furtherintothegarage.
3. Stopthecar whenthe redspotispositionedatthelocationyouconfirmedinstep3 duringtheSet up andAdjustment.
NOTE: The laseris automaticallyactuatedeverytimeyouactivateyourgaragedooropener.Theredspotwillautomatically
deactivateafterapproximatelyone minute.A residualreflectionofthe redspotfrom thewindshieldmay appearonthe walls
orobjectsinyourgarage.Whenoperatingavehicle,alwaysensurethatthere are noobjectsonthefloorofthe garageorin
pathofyourvehicle.ThisLaserParkerLocatoris notasubstituteforsafeparkingpractices.
2
2
3
CAUTION LABELS
Use tacks or staples to permanently attach anadhesive backed CAUTION label towall near door control. Using the same method, mount the second label in a prominent location on the ceiling near the
Laser Swivel Mount
® Registered Trademark I TM Trademark I sm Service Mark of Sears, Roebuck and Co.
SAFETY INSTRUCTIONS
CAUTION:Toavoideyeinjuryordamagetoproduct:
• Never point the laser at anyone.
• Never look directly into the laser beam.
• Never disassemble the laser.
• Use of controls or adjustments, or the performance or procedures
other than specified can result in hazardous radiation exposure.
• Only use this device with automatic garage door openers.
• Exposure to extreme temperature may result in poor performance.
In the event you have any questions with the
assembly of the Laser Parker Locator or have any
damaged or missing parts please contact one of our
Technical Service Representatives at
1-800-528-5236.
The following accessory can be purchased at the
above number.
The LaserAccessory can beusedinconjunctionwiththe completekit
to positionasecond carusingthe samegarage dooropener.
ITEM PART#
LaserAccessory 41A638-1
LASER TROUBLESHOOTING
If the laser does not emit a red spot:
1. Unplugthe PowerPack toverifythat there isno packingmaterial
obstructingthelaserlens.
2. Verifythatall connections aresecureas identifiedininstallation.
3. Confirmthatthe LaserParkerSwivelMountis aimedtoward the
garagefloor.
4. Activatethe garagedoor opener.Lookfor the red spoton the
garagefloor.
SPECIFICATIONS:
Laser:
Maximum Power Output: < lmw
WAVELENGTH: 635-670nm
CLASS II LASER PRODUCT
Power Supply:
3-6 volt DC
Indoor Use Only
114A2902
PRODUCT CAUTION LABELS:
t.AImt RAmA_mU
lie JmT m lift1 _
I.AIIEII RADIATION
DO NOT STARE INTO BEAM
IIIAEIIItlM I_WRN Qg31_31 < Imw IIliall -Irnlmll
CLASS II LASER PRODUCT
I[RRFTSMRN'IGU[A SER PARA ESTACIONAMIENTO
CONTENIDO DEL JUEGO COMPLETO (41A638) (1) Base glratorla de la gula ktser (1) Fuente de alimentacibn
(1) Mbdulo de control Craftsman (1) Tornillo para montaje an techo (2) Tiras de sujecibn (2) Etlquetas de advertencta
(1) Instrucciones
Con la compra de un abre-puertas de garaje 139.53989, obtendr6 una base giratorla para montaje de la gu|a laser
CONTENIDO DEL JUEGO DE ACCESORIOS (41A638-1) (1)Base giratoriade la gulaliser
(1) Tornillo para montaje en techo (1) Tira de sujeci6n (2) Eti_luetas de advertencia (1) Instrucciones
El juego de accesorios se debe usar con el juego completo de gula Idser
ANTES DE EMPEZAR Abra la puerta del garaje, estacion_ el vehfculo afuera y siga las instrucciones que se
ofrecen a continuaci6n. La instalacibn de lafuente de alimentaci6n, el mbdulo de control y ta base giratoda astardn
a cargo del usuario, i
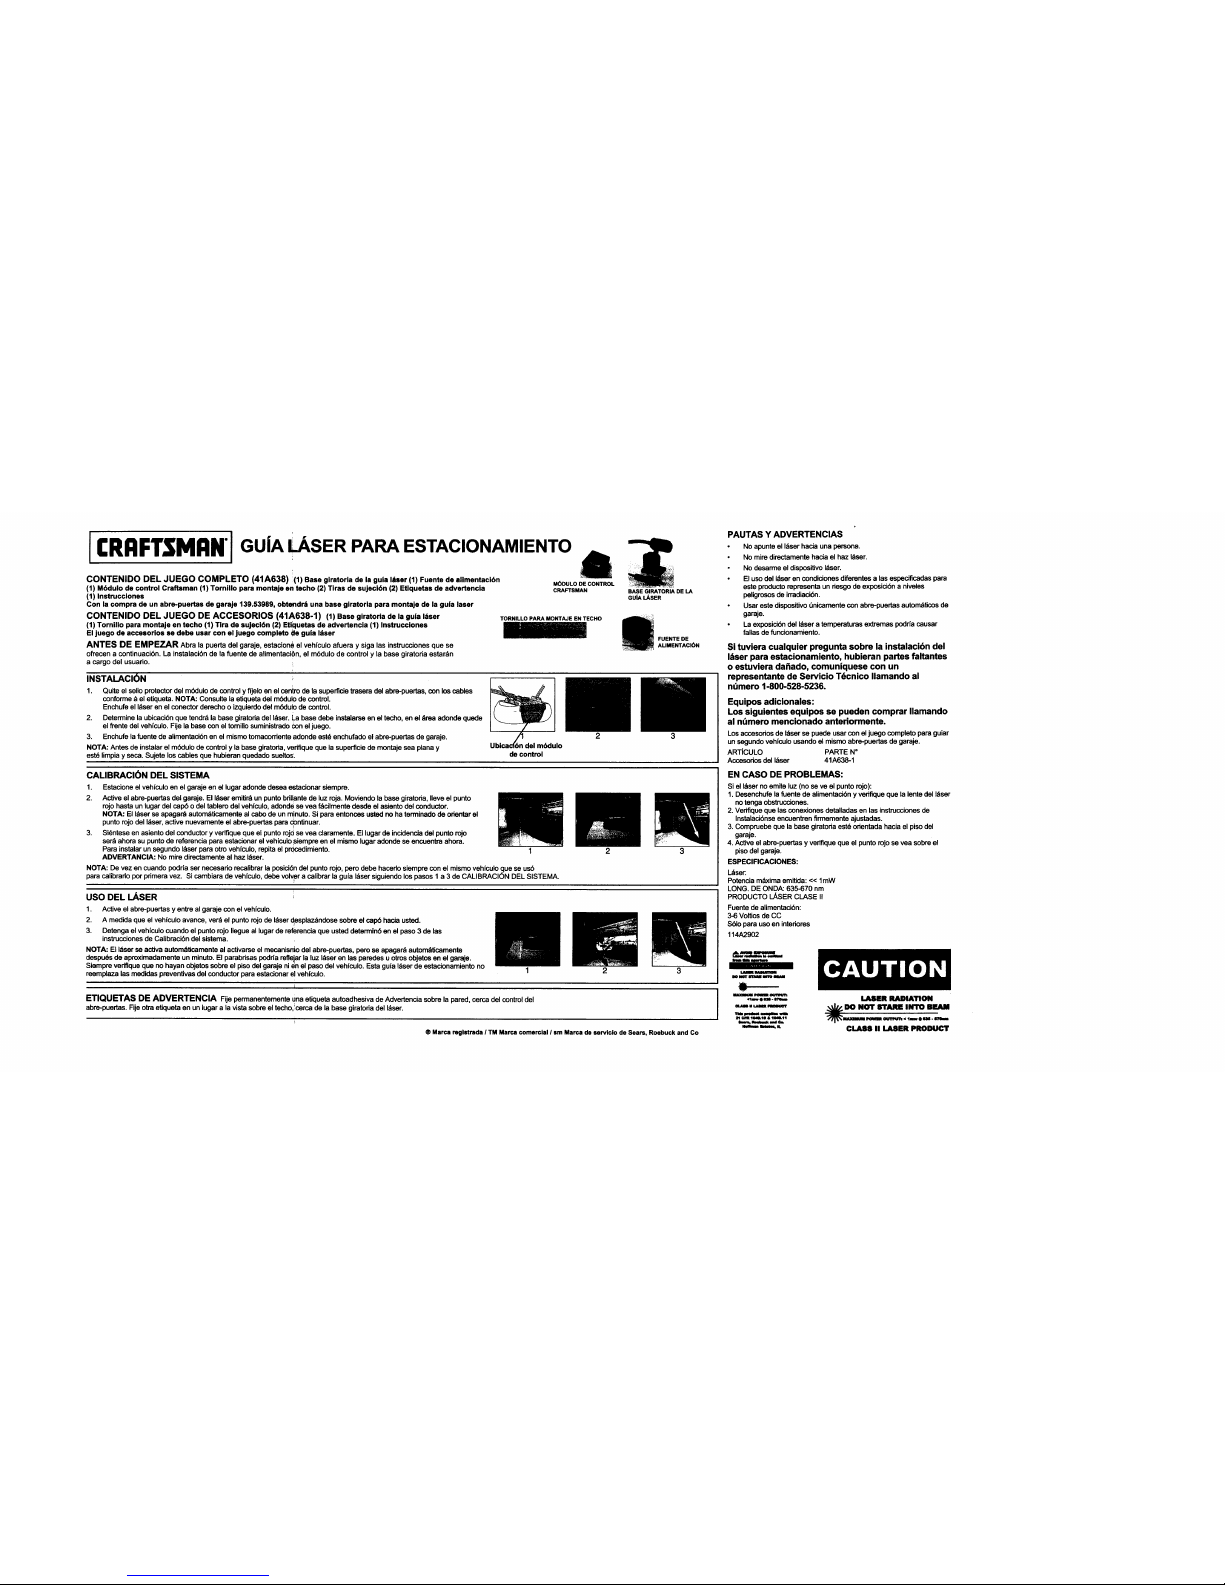
M6DULO DE CONTROL
CRAFTSMAN
TORNILLO PARA MONTAJE EN TECHO
INSTALACION i
1. Quite el selloprotector del m(_lulo de control y fljelo en el centro de la superficie trasera del abre-puertas, conlos cables
conforme _ el etiqueta. NOTA: Consulte laetiqueta del mbdulode control.
Enchufe el I_ser en el conector derecho o izquierdodel mddutode control.
2. Determine la ubicacibn que tendrd la base giratoria del I&ser.[.a base debe instalarse en el techo, en el,_rea adonde quede
el fTente del vehfculo. Fije la base con el tomillosuministrado con eljuego.
3. Enchufe tafuente de alimentaci6n en el mismo tomacordente adonde estd enchufado el abre-puertas de garaje.
NOTA: Antes de instalarel mbdulo de control y la base giratoria, verifique que lasuperficie de montaje sea plana y
estd limpia y seca. Sujete los cables que hubieran quedado sueltos.
del mddulo
de control
BASE GIRATORIA DE LA
GUIA LASER
FUENTE DE
ALIMENTACION
CALIBRACION DEL SISTEMA
1. Estacione el vehtculo en el garaje en el lugar adonde desea estacionar siempre.
2. Active el abre-puertas del garaje. ElI_ser emitir_ un punto bdllante de luz roja. Moviendo la base giratoria, Ileve el punto
rojo hasta un tugar del capb odel tablero del vehlculo, adonde se yea fdcilmente desde el asiento del conductor.
NOTA: El Idser seapagar_ autom_ticamente al cabo de un minuto. Si para entonces usted no ha terminado de orientar el
punto rojodel I_ser, active nuevamente el abre-puertas para cbntinuar.
3. Si6ntese en asiento del conductor y verifique que el puntorojo se yea claramente. El lugar de incidencia del punto rojo
set& ahora su punto de referencia para estacionarel vehiculo siempre en elmismo lugaradonde se encuentra ahora.
Para instalar unsegundo I_ser para otto vehlculo, repita el pr0cedimiento.
ADVERTANClA: No mire directamente al haz I_ser.
NOTA: Devez en cuandopodriasernecesadorecalibrarlaposici6ndelpuntorojo, perodebe hacedosiempreconelmismovehiculo clueseusb
paracalibradoperprimeravez. Si cambiaradevehiculo,debevolvera calibrarlagula I&sersiguiendolospasos1 a 3 de CALIBRACI6NDEL SISTEMA.
USO DEL LASER
1. Active el abre-puertas y entre al garaje con elvehfculo.
2. A medida que el vehiculo avance, verd el punto rojo de Idser _esplazdndose sobre el cap6 hacia usted.
3. Detenga elvehiculo cuando el punto rojo Ilegue al lugarde referencia que usted detarmin6 en el paso 3 de las
instruccionesde Calibracibn del sistema.
NOTA: Et laser se activa automdticamente al activarse el mecanis_o del abre-puertas, pero se apagar_ autom_tticamente
despu6s de aproximadamente un minuto.El parabrisas podda refleiar la luz I&ser en lasparedes u otros objetos en el garaje.
Siempre vedfique que no hayan objetos sobre el piso del garaje ni en el paso del vehlculo. Esta guia I_ser de estacionamiento no
reemplaza las medidas preventivas del conductor para estacionar elvehlculo.
ETIQUETAS DE ADVERTENCIA Fije permanentemente Una eUqueta autoadhesiva de Advertencia sobre la pared, cerca del control del
abre-puertas. Fijeotra etiqueta en un lugar ala vista sobre el techo,lcerca de la base giratoria del Idser.
® Marc;= regletrada I TM Marca comercial I sm Marca de servicio de Sears, Roebuck and Co
PAUTAS Y ADVERTENClAS
• No apunte elIdser hacia una persona.
• No mire directamente hacia el haz Ibser.
• No desarme el dispositivoI_,ser.
• El uso del Idser en condiciones diferentes alas especificadas para
este producto representa un riesgo de exposicibn a niveles
peligrosos de irradiacibn.
• Usar este dispositivo 0nicamente con abre-puertas autom_ticos de
garaje.
• La exposicibn del Idser a temperaturas extremas podda causar
fallas de funcionamiento.
Si tuviera cualquier pregunta sobre la instalacibn del
I;_serpara estacionamiento, hubieran partes faltantes
o estuvlera dai_ado, comuniquese con un
representante de Servicio T6cnico Ilamando al
ndmero 1-800-528-5236.
Equipos adicionales:
Los siguientes equipos se pueden comprar Ilamando
al m_mero mencionado anteriormente.
Los accesorios de I_,serse puede usarcon el juego completo para guiar
unsegundo vehiculo usando el mismoabre-puertas de garaje.
ARTJCULO PARTE N°
Accesodos del I&ser 41A638-1
EN CASO DE PROBLEMAS:
Si el Idser noemite luz (no se ve el punto rojo):
1. Desenchufe lafuente de alimentacibn y vedfique que la lente del I=_ser
no tenga obstrucciones.
2. Verifique que lasconexiones detalladas en las instrucciones de
Instalacibnse encuentren firmemente ajustadas.
3. Compruebe que la base giratoria est6 odentada hacia el pisodel
garaje.
4. Active el abre-puertas y verifique que elpunto rojose yea sobre el
piso del garaje.
ESPEClFICAClONES:
L&ser:
Potenciamdximaemitida:<< lmW
LONG.DE ONDA:635-670 nm
PRODUCTOI_/t,SER CLASEII
Fuentedealimentacibn:
3-6Voltios de CC
Sbloparausoen intedores
114A2902
P..._..,."==_
ml
IIoN_r nu m
aIR
1IF
mlm
,=tm e m. II_llam
_ tl l.aaEI l
It _ 'NI_I.IB & le4Lll
lASER RADIArION
N Nor lrrARE INTO BEAIN
MAXISlIUM I1_1_ OU1111q_h_=I m O m - r/llam
C1.A85 II LASER PRODUCT
 Loading...