

Page 1
liyiPORTANT MANUAL
Operator’s
Manual
Model No.
Do Not Throw Away
358.798340
CUSTOMER
4c: ASSISTANCE
1-800-235-5878
HOURS (CST)
Mon, - Sat. 7 a.m. - 7 p.m.
Sun. 10 a.m. - 7 p.m.
WARNING
6k
READ THE OPERATOR’S
MANUAL AND FOLLOW ALL
WARNINOS AND SAFETY
INSTRUCTIONS. FAILURE
TO DO SO CAN RESULT IN
SERIOUS INJURY.
Mways Wear Eye Protection
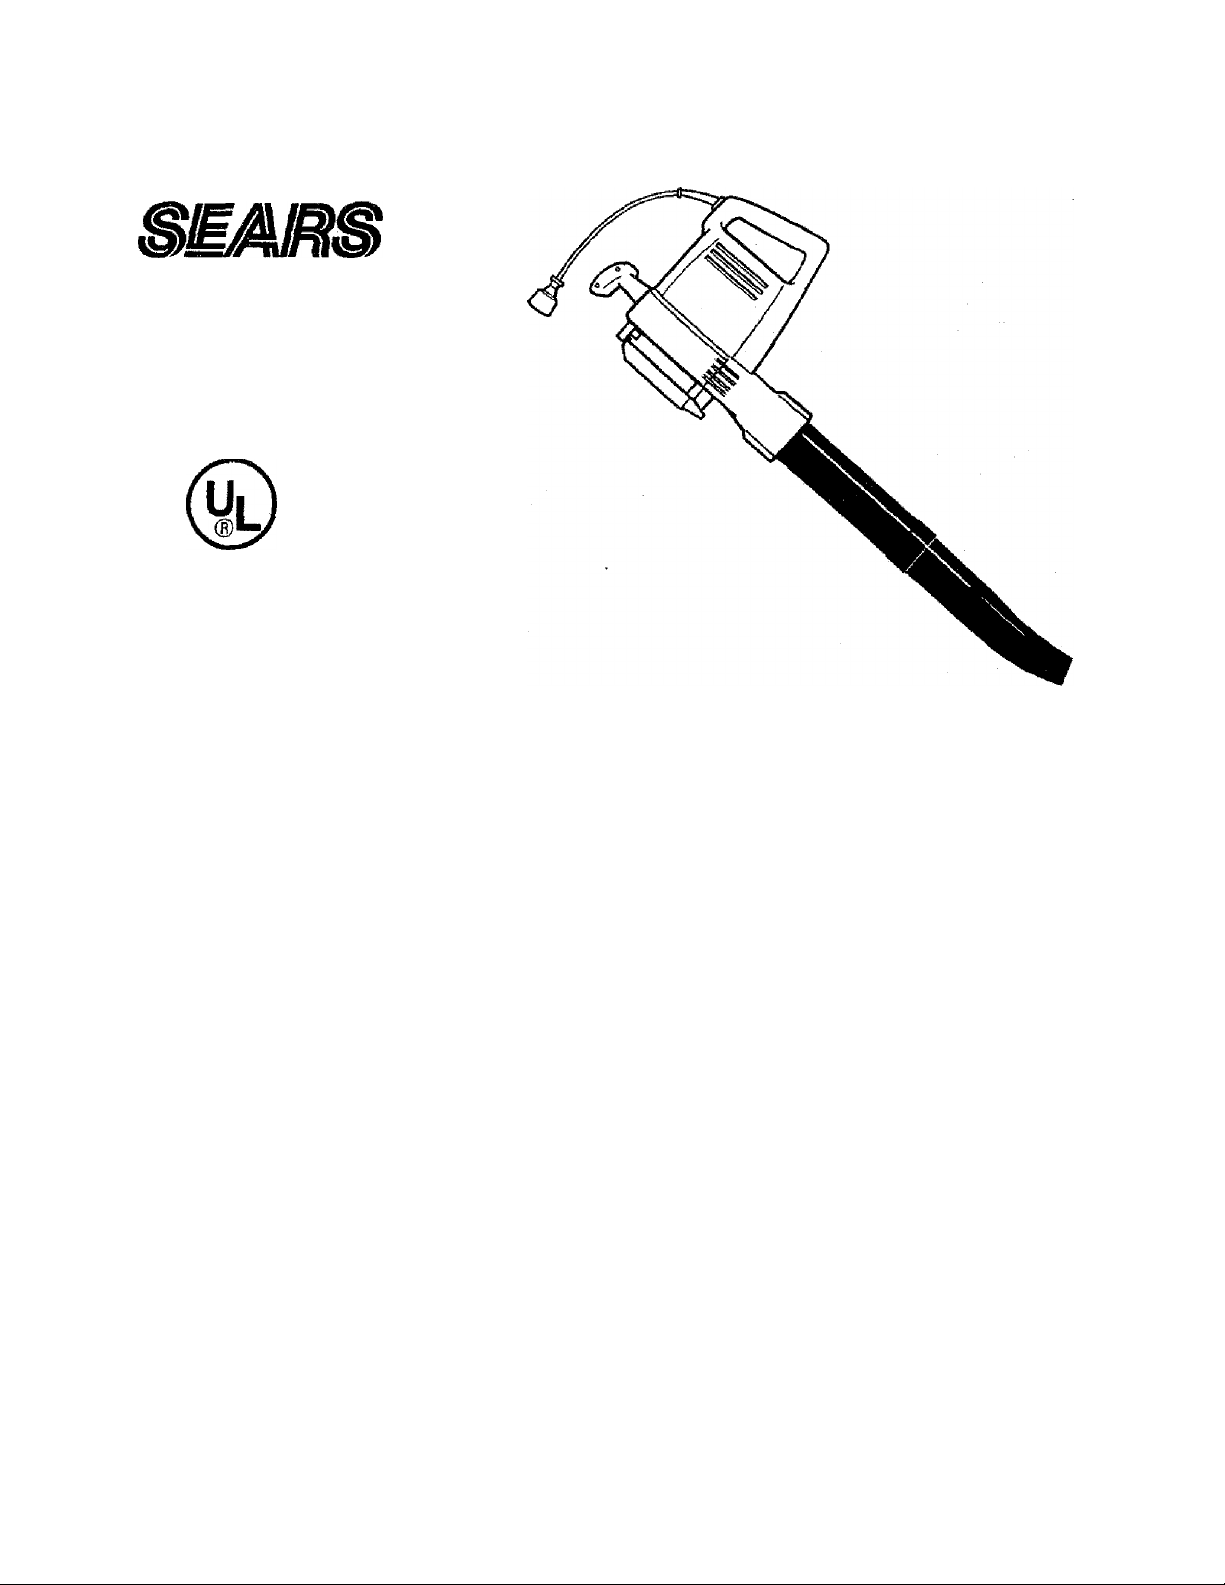
CRflFTSMRN^
8.5 AMP MOTOR 150 MPH Air Velocity ELECTRIC BLOWER/VAC
nnilRI F INQIll ДТСП
• Assembly
• Operation
• Customer Responsibilities
• Storage
530-083121-06/28/95
FOR HOUSEHOLD USE ONLY
Sears, Roebuck and Co., Hoffman Estates, IL 60179 USA
Page 2

A IMPORTANT WARNINGS & SAFETY INSTRUCTIONS
WARNING
The warnings and safety instructions in this manual must be followed to reduce the risk of fire, electric
A
OPERATOR SAFETY
• Always wear safety glasses or similar eye
protection when operating, servicing, or performing
maintenance on your unit. Wearing eye protection can
help to prevent rocks or debris from being blown or
ricocheting into eyes and face which can result in
blindness or serious injury.
• Always wear a respirator or faoemask when work
ing with the unit in dusty environments.
• Dress safely in long pants. Do not go barefoot or
wear short pants, sandals, jewelry, loose clothing, or
clothing with loosely hanging straps, ties, tassels, etc.;
they can be caught in moving parts. Secure hair so it is
above shoulder length.
• Do not operate the unit when you are tired, ill, upset,
or if you are under the influence of alcohol, drugs, or
medication.
• Keep loose hair, loose clothing, fingers, and all
other parts of the body away from openings and
moving parts.
• Inspect the area before using the unit. Remove all
debris and hard objects such as rocks, glass, wire, etc.
that can ricochet, be thrown, or otherwise cause injury
or damage during operation.
• Restrict the use of this unit to persons who read, un
derstand, and follow the warnings and instructions in
this manual and on the unit. Never allow children to use
this unit.
• When using the vacuum attachment kit, the unit Is
designed to pick up dry material such as leaves, grass,
smai! twigs, and bits of paper. Do not vacuum stones,
gravel, metal, broken glass, etc., to avoid severe dam
age to the Impeller. To avoid the possibility of electrical
shock, do not attempt to vacuum water or other liquids.
ELECTRICAL SAFETY
• Use only a voltage supply as shown on the name
plate of the unit.
• Avoid dangerous situations. Do not use in pres
ence of flammable liquids or gases to avoid creating a
fire or explosion and/or causing damage to unit.
• WARNING—TO REDUCE THE RISK OF
ELECTRICAL SHOCK—Do not use in damp or wet
locations or around swimming pools, hot tubs. etc. Do
not expose to snow, rain, or water. Do not handle
extension cord plug or unit with wet hands.
• WARNING—^To reduce the risk of electrical shock,
use extension cords specifically marked as suitable for
outdoor appliances having electrical rating not less
than the rating of the unit. The cord must be marked
shock, or injury, and to provide reasonable safety and efficiency in using this unit. The operator is
responsible for following the warnings and instructions in this manual and on the unit. Read the
entire Operator's Manual before assembling and using the unitl Restrict the use of this unit to persons
who read, understand, and follow the warnings and instructions In this manual and on the unit.
with the suffix "W-A” (in Canada “W”). Use a polarized
cord. Make sure your extension cord is in good condi
tion. if damaged have the cord replaced. Keep cord
from heat, oil, and sharp edges. An undersized exten
sion cord will cause a drop in line voltage resulting In
lossof power and overheating. If indoubt, usethenext
heavier gauge. The smaller the gauge number, the
heavier the cord. (NOTE: See the Extension Cord At
tachment section (page 8) for the correct size to be
used depending on the cord length).
Inspect the insulation and connectors on the unit
and extension cord before each use. If there is any
damage, do not use until damage is repaired by a
Sears Service Center.
Do not pull or carry by cord; do not use cord as a
handle, dose a door on cord, or pull cord around sharp
edges or comers. Keep cord away from heated sur
faces. Do not unplug by pulling on cord. To unplug,
grasp the plug, not the cord.
To reduce the possibility of the extension cord
disconnecting from the unit during operation, se
cure extension cord to the unit as shown in the Exten
sion Cord Attachment section (page 8).
Do not use the unit if the switch does not turn the
unit on and off properly. Have the unit repaired by a
Sears Service Center.
Keep the extension cord clear of operator and ob
stacles at all times. Do not expose cords to heal, oil,
water, or sharp edges.
Avoid any body contact with any grounded con
ductor, such as metal pipes or wire fences, to avoid
the possibility of electric shock.
Do not use with damaged cord or plug. If unit is not
working as it should, has been dropped, damaged, left
outdoors, or dropped into water, return it to a Sears
Sen/ice Center.
Ground fault Circuit Interrupter (GFCI) protection
should be provided on the circuit or outlet to be used for
this unit. Receptacles are available having built-in
GFC! protection and may be used for this measure of
safety.
To reduce the risk of electrical shock this equip
ment has a polarized plug. This plug will fit in a polar
ized outlet or extension cord only one way. (One blade
is wider than the other.) If the plug does not fit fully in
the outfet, reverse the plug. If it stiiidoes not fit, contact
a qualified electrician to install the proper outlet. Do not
change the plug in any way.
A
LOOK FOR THIS SYMBOL TO POINT OUT IMPORTANT SAFETY PRECAUTIONS. IT MEANS
ATTENTIONin BECOME ALERTill YOUR SAFETY IS INVOLVED.
Page 3

A IMPORTANT WARNINGS & SAFETY INSTRUCTIONS
UNIT SAFETY
1 Inspect the entire unit before each use for worn,
ioose, missing, or damaged parts. Do not use until the
unit is in proper working order.
• Have alt internal service performed by qualified ser
vice repair personnel to avoid creating a hazard or
voiding your warranty.
> Never run the unit without the proper equipment
attached. When used as a blower, always install a
blower tube. When used as a vacuum, always install
vacuum tubes and collection bag assembly.
• Do not use any accessory or attachment other than
those recommended by the manufacturer for use with
your unit,
» Use only in daylight or in good artificial light.
OPERATION SAFETY
• Keep others including children, animals, hystanders, and helpers a minimum of 30 feet (10 meters)
away. Stop the motor immediately if you are ap
proached.
• Stop the motor and disconnect the power source
before opening the air inlet door or attempting to insert
or remove the vacuum tubes. The motor must be
stopped and the impeller blades no longer turning to
avoid serious injury from the rotating blades.
• Inspect the area before using the unit. Remove all
debris and hard objects such as rocks, glass, wire, etc.
that can ricochet, be thrown, or otherwise cause injury
or damage during operation.
• When using the vacuum attachment kit, the unit is
designed to pick up dry material such as leaves, grass,
small twigs, and bits of paper. Do not vacuum stones,
gravel, metal, broken glass, etc. to avoid severe dam
age to the impeller. Do not aUempt to vacuum water or
other liquids to avoid electrocution.
• Avoid accidental starting. Be sure the switch is in
the “ofT position and keep your hand and fingers away
from the switch while connecting the unit to the power
source or when carrying a unit connected to the power
source,
• Turn off all controls and allow the motor to stop
before disconnecting the unit from the power
source.
• Disconnect the unit from the power source when
not in use. Do not leave the unit when it is plugged info
an outlet.
• Avoid dangerous environments. Do not use in un
ventilated areas orwhere dust or explosive vapors can
buiid up.
• Do not set the unit on any surface except a clean,
hard area while the unit is running. Debris such as
gravel, sand, dust, grass, etc. could be picked up by
the air intake and thrown out through the discharge
opening, damaging the unit, property, or causing seri
ous injury to bystanders or operator.
• Do not overreach or use from unstable surfaces
such as ladders, trees, steep slopes, rooftops, etc.
Use extra care when cleaning on stairways. Keep firm
footing and balance at all times.
• Never place objects inside the blower tubes
ways direct the blowing debris away from people, ani-
. ^ al
If situations occur which are not covered in this manual, use care and good judgment.
If you need assistance, contact your SEARS Service Center/Department or cat! ffte
CUSTOMER ASSISTANCE HOTLINE at 1-800-233-5878.
mais, glass, and solid objects such as trees, automo
biles, wails, etc. The force of air can cause rocks, dirt,
or sticks to be thrown or to ricochet which can hurt
people or animals, break glass, or cause other dam
age. Do not allow the unit to be used as a toy.
• Never place any object in the air intake opening as
this could restrict proper air flow and cause damage to
the unit.
> Never run the unit without the proper equipment
attached. When used as a blower, always install a
blower tube. When used as a vacuum, always install
vacuum tubes and collection bag assembly. Make
sure the collection bag assembly is completely zipped
when unit is running to avoid flying debris.
• Never use for spreading chemicals, fertilizers, or
any other substances which may contain toxic materi
als.
• Avoid situations which could set the collection
bag on fire. Do not vacuum discarded matches, ci
gars, cigarettes, or ash from fireplaces, barbecue pits,
brush piles, etc. To avoid spreading fire, do not use
blower near leaf or brush fires, fireplaces, barbecue
pits, ashtrays, etc.
■ Always use the collection bag shoulder strap
when vacuuming to avoid loss of control.
• Use only for Jobs explained in this manual.
MAINTENANCE SAFETY
• Maintain the unit according to recommended pro
cedures.
• This unit is Double Insulated. See the “DOUBLE
INSULATION” section. Have all service and mainte
nance not explained In your operator’s manual
performed by a Sears Service Center to avoid creat
ing a hazard and/or voiding your warranty.
• Disconnect from power source before servicing,
cleaning, performing maintenance, or storing the unit.
• Use only genuine replacement parts as recom
mended by the manufacturer to avoid creating a haz
ard and/or voiding your warranty.
• Never douse the unit with water or other liquids or
squirt with a water hose. Clean with a damp sponge
and mild soap. See “STORAGE”.
• Check air Intake openings, blower tubes, elbow
tube, and vacuum tubes frequently, a/ways with the
unit stopped and the power source disconnected.
Keep vents and tubes free of debris which can accu
mulate and restrict proper air flow.
• Do not attempt to repair unit. Repairs must be per
formed by a Sears Service Center. Have all mainte
nance other than the recommended procedures de
scribed in the Operator’s Manual performed by a
Sears Service Center.
• Always have your Sears Service Center replace a
damaged Impeller. Parts that are chipped, cracked,
broken, or damaged In any other way can fly apart and
cause serious injury. Have damaged parts replaced
before using the unit.
• Donotburn, incinerate, or expose this unit to extreme
heat.
Store the unit unplugged in a high, cool, dry, in
doors area out of the reach of children.
SAVE THESE INSTRUCTIONS
-3-
Page 4

CONGRATULATIONS on your purchase of a Sears
Craftsman Electric Biower/vac. It has been designed,
engineered and manufactured to give you the best
possible dependability and performance.
Should you experience any problems you cannot easily
remedy, please contact your nearest Sears Service
Center/Department. Sears has competent, well trained
technicians and the proper tools to service or repair this
unit.
Please read and retain this manual. The instructions will
enable you to assemble and maintain your unit properly.
Always observe the “SAFETY RULES.”
PRODUCT SPEClFiCATIONS
VOLTAGE;
AMPS........................
AIR VOLUME
AIR VELOCITY;
WEIGHT..................... ... 6.5 Pounds
............
.... 120 Volts A.C.
.... 8.5
.. . 300 c.f.m.
.........
... 150 mph
MODEL NUMBER:
SERIAL NUMBER:
DATE OF PURCHASE:
THE MODEL AND SERIAL NUMBER WILL BE FOUND
ON A DECAL ATTACHED TO THE PRODUCT.
YOU SHOULD RECORD BOTH SERIAL NUMBER AND
DATE OF PURCHASE AND KEEP IN A SAFE PLACE
FOR FUTURE REFERENCE.
358.798340
Manufactured under one or more of the following U.S.
Patents; 5,269,665; 5,211,144; 5,174,255; 5,035,586;
4,940,028; 4,846,123; 4,674,146; 4,474,327;
4,413,371; 4,404,706; 4,402,106; 4,387,852;
4,325,163; 4,286,675; Re.33,050; 0349,983;
D322,97t; 0304,510; D299,074; 0266,355; 0263,547.
Other U.S. and Foreign Patents Pending."
CUSTOMER RESPONSIBILITIES
• Read and observe the safety rules.
• Follow a regular schedule in maintaining, caring for,
and using your unit.
• Follow the instructions under "Customer
Responsibilities” and “Storage” sections of this Oper
ator’s Manual.
FULL ONE YEAR WARRANTY ON
CRAFTSMAN ELECTRIC BLOWER
If this Craftsman Electric Blower fails to perform properly due to a defect in material or workmanship within (1) one
year from the date of purchase, Sears will repair or replace it, free of charge.
WARRANTY SERVICE IS AVAILABLE BY RETURNING THE CRAFTSMAN ELECTRIC BLOWER TO THE NEAREST
SEARS STORE IN THE UNITED STATES.
This warranty gives you specific legal rights, and you may also have other rights which vary from state to state.
SEARS, ROEBUCK AND CO., D/817 WA, Hoffman Estates, IL 60179
Page 5
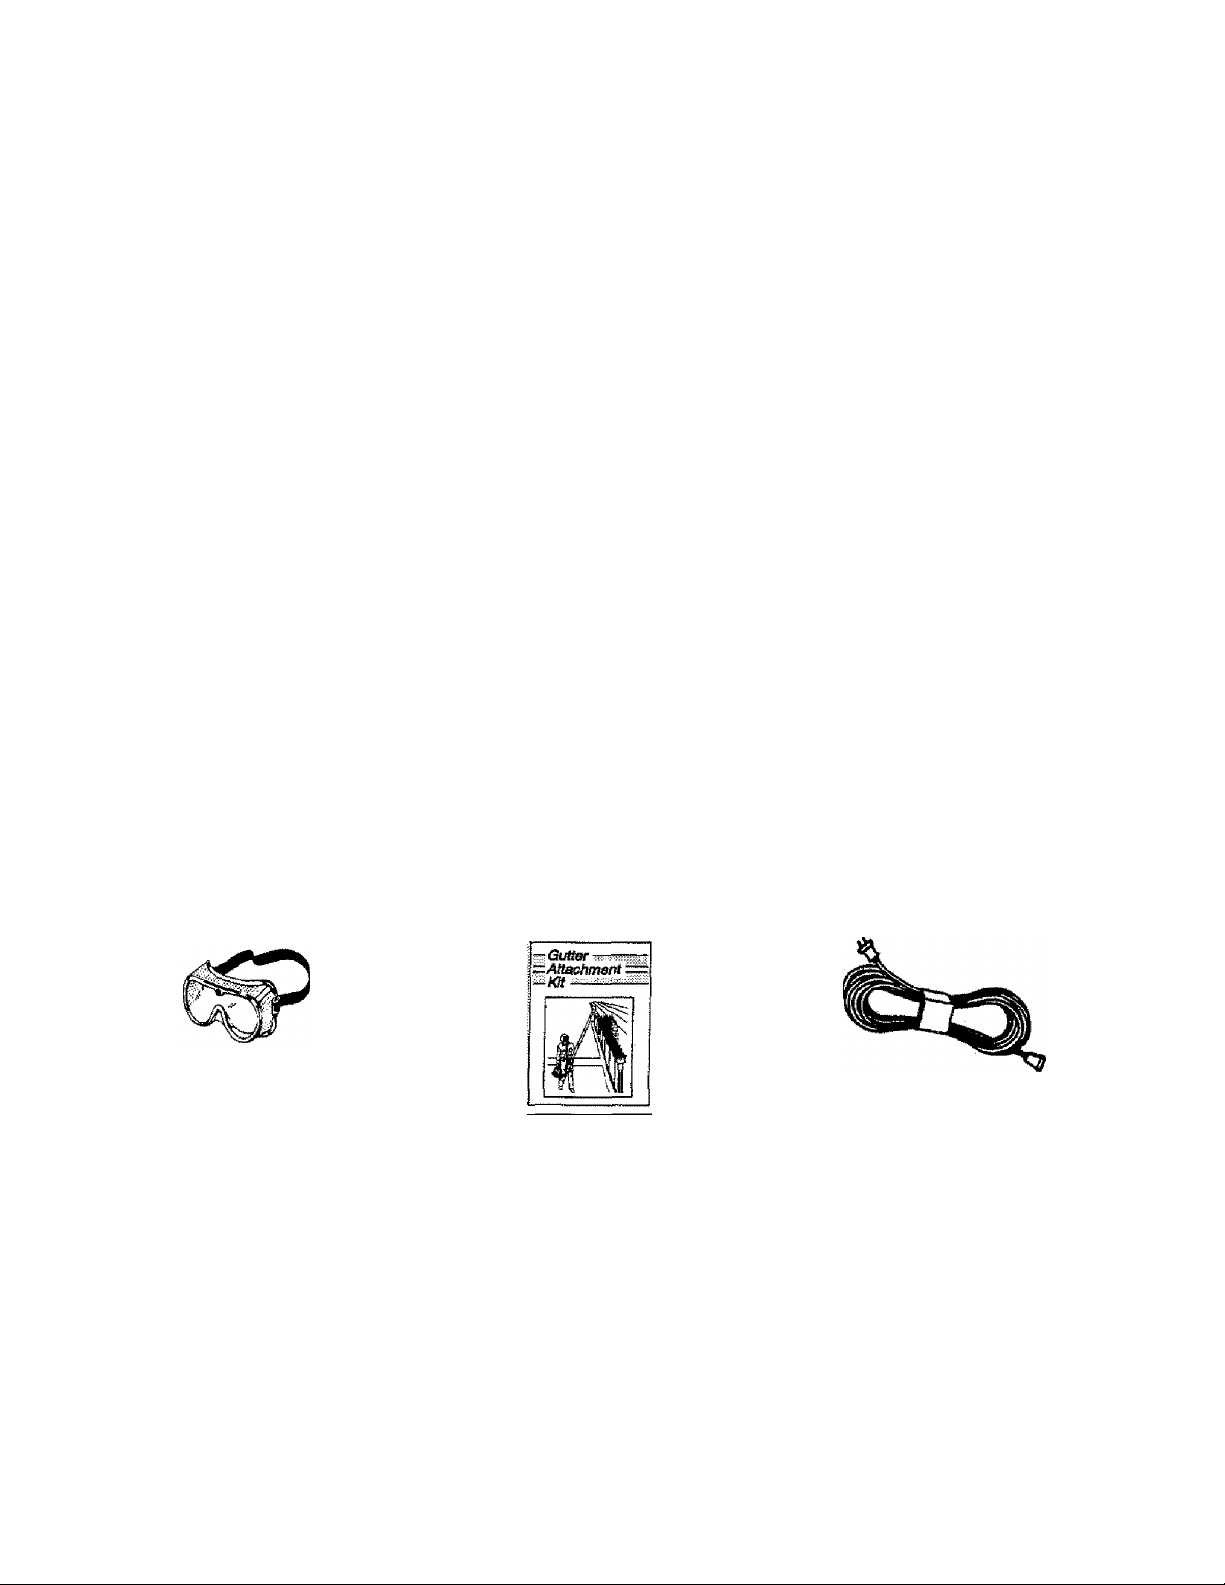
TABLE OF CONTENTS
Safety Instructions ...................................................... 2
Product Specifications................................................ 4
Customer Responsibilities..................................... 4,13
Warranty
Accessories....................................................................5
......................................................................
4
Assembly
Operation
Storage.................................
Trouble Shooting...................
Repair Parts Ordsring/Service
..................................
...................................
...
...............
..............
..............
.
............
Back Cover
6
10
14
.14
INDEX
Accessories
Assembly ..
Customer Assistance Hotline .
Customer Responsibilities ....
H
Hardware Contents .................
K
Know Your Electric Blower/vac
M
Maintenance Schedule
Model Number —
.....
.................
............
....... 5
6, 7, 8, 9
Back Cover
........
4.13
. 6
10
..13
,...4
Operation .....................
Ordering Repair Parts
Safety Instructions .................
Specifications .........................
Stopping & Starting your Unit
Storage
Trouble Shooting
....................................
T
w
Warranty
.............
,. .10,11,12
Back Cover
2,3
..4
. 12
. 14
.14
..4
ACCESSORIES
These accessories and attachments were available when the unit was originally purchased. They are also available at
most Sears retail outlets and service centers. Most Sears stores can order these items for you when you provide the model
number of your unit.
ACCESSORIES
Safely Goggles
Gutter Attachment Kit Extension Cord
5-
Page 6

HARDWARE CONTENTS
ASSEMBLY
REMOVE BLOWER FROM CARTON
• Remove loose parts included with Blower/vac.
• Remove all packing material.
• Check carton thoroughly tor additional loose parts.
ASSEMBLE YOUR UNIT INTO A
BLOWER OR VACUUM MODE
You can assemble your unit as a blower or a vacuum. Later
you can refer to these instructions and reconfigure your unit
into a different mode. The instructions below provide
information on how to assemble your unit for both
configurations.
HOW TO ASSEMBLE YOUR UNIT AS A BLOWER (Fig. 1 )
ATTACHING THE BLOWER TUBE & NOZZLE
(Fig.2&3)
Remove the vacuum tubes and collection bag, if assembled
to the unit.
• Insert the blower tube into the blower outlet.
• Turrt the blower tube clockwise until it is firmly seated in
the blower outlet.
• With a slight twisting motion, slide nozzle firmly into the
end of the blower tube.
If your unit is configured in the vacuum mode, turn the unit off
and disconnect it from the power source. Remove the
vacuum tubes and collection bag. Be sure to latch the inlet
cover closed.
Page 7

ASSEMBLY
HOW TO ASSEMBLE YOUR UNIT AS A
Figure 4
If your unit is configured in the blower mode, stop the unit,
and remove the blower tubes and nozzle.
REMOVING THE INLET RESTRICTOR fFig. 5 )
WARNING
STOP THE UNIT AND DISCONNECT IT FROM
A
THE POWER SOURCE BEFORE OPENING THE
INLETCOVEROR ATTEMPTING TO INSERTOR
REMOVE THE INLET RESTRICTOR OR
VACUUM TUBES. THE MOTOR MUST BE
STOPPED AND THE IMPELLER BLADES NO
LONGER TURNING TO AVOID SERIOUS
INJURY FROM THE ROTATING BLADES.
VACUUM TUBE ASSEMBLY (Fig. 6,7 , & 8 )
Before installing the vacuum tubes, you must first identify
the upper vacuum tube. The uppertube is the one that is cut
straight on both ends and does not have one end cut at an
angle.
Figure 6
Locate the arrows on the upper vacuum tube and on the
vacuum inlet area of the unit.
While holding the inlet cover open, align the arrows and
insert the vacuum tube Into the opening. Twist the vacu
um tube clockwise until the tube is seated. A second ar
row on the vacuum tube will align with the arrow on the
unit once the tube is completely seated.
An irtlet restrictor is located inside your unit and is used when
your unit is used in the blower mode. Before using your unit
as a vacuum, it is necessary to remove the inlet restrictor.
NOTE: Be sure to keep the inlet restrictorfor use later when
you are using your unit as a blower,
• Open the inlet cover by inserting the tip of a screwdriver
into the inlet cover latch area, and twisting the screwdriv
er while pulling the inlet cover open. See illustration be
low.
• Rotate the inlet restrictor counterclockwise,
• Pull up on the infet restrictor to remove from the unit.
Do not close the inlet cover. You will next attach the vacuum
tubes.
Figure 7
Attach the lower vacuum tube to the upper vacuum tube
by aligning the arrows on the two tubes. Press the tubes
together until the lower tube Is fully seated in the upper
tube. You will know the tubes are fully seated when the
lower tube will no longer go into the upper tube. (About 3
inches).
Attach Upper & Lower Tubes
Figure 8
-7-
Page 8

ASSEMBLY
ATTACHING COLLECTION BAG {Fig. 9)
• Sifde the opening of the collection bag over the blower
outlet. Puli the strap with Velcro tightly through the buckle
and secure the Velcro tabs.
NOTE: Make sure the strap with Velcro is located on the
ADJUSTING THE SHOULDER STRAP ON THE
COLLECTION BAG (Fig. 10 & 11 )
• Carefully loop the shoulder strap through the buckle as
shown in the illustration. Notice the first in and last in is
the same opening.
• With your left hand hold the unit in an upright position.
Support the lower vacuum tube on the ground. Make
sure the blower outlet and collection bag are positioned
on your right-hand side,
• Place the shoulder strap over your left shoulder.
• Adjust the shoulder strap to allow a free flow of air from
the blower outlet. If the collection bag is kinked, the unit
will not operate properly.
NOTE: The shoulder strap Is designed to position the collec
tion bag on your shoulder without kinks. The strap is not in
tended to support the weight of the unit.
BLOWER CONVERSION
• Stop unit and disconnect from power source.
• Remove the vacuum tubes and collection bag.
• Install the inlet restrictor.
NOTE: The inlet restrictor is for blower enhancement only.
The unit may still be used if the inlet restrictor is lost or
misplaced.
• Secure the inlet cover making sure that the latch is se
curely fastened,
• Reinstall the blower tubes. Refer to “Blower Tube
Assembly” section.
EXTENSION CORD ATTACHMENT
(Fig, 12 & 13)
• Use only an A.C. voltage supply as shown on the name
plate of the unit,
• The extension cord used to reach power source must be:
- Polarized and specifically marked as suitable for out
door use. The cord must be marked with the suffix
“W-A” (“W" in Canada).
- Heavy enough to carry the current from the power
source the full length of the extension cord to the unit.
Otherwise, loss of power and overheating can occur
causing damage to the unit. Refer to the “Minimum
Wire Gauge Recommendation Chart" for minimum
wire gauge recommendations. The cord must be
marked with the proper wire gauge. {Appropriate ex
tension cords are available.)
- In good condition. Cord Insulation must be intact with
no cracks or deterioration; plug connectors must be
undamaged. Replace damaged cord.
• Secure extension cord to the unit as shown.
• Plug extension cord into the unit.
To reduce the risk of electric shock, this unit has a polarized
plug (on© blade is wider than the other). This plug will fit into
a polarized extension cord only one way. If the plug does not
fit fully into the extension cord, reverse the cord. If it still
does not fit, make sure you have a polarized extension cord.
If the extension cord does not fit into the outlet, reverse the
cord. If it still does not fit into the outlet, contact a qualified
electrician to install the proper outlet. Do not change the
Figure 10
-8'
MINIMUM WIRE GAUGE RECOMMENDATION
VOLTS
120
'American Wirs Gauge Figure 12
25 FT. 50 FT.
18
A.W.G.*
CHART
16
A.WG.*
100 FT. 150 FT.
14
A.W.G.*12A.W.G.*
Page 9

ASSEMBLY
CHECK LIST
• Check all fasteners. Make sure they are tight and there
are no loose parts.
• Make sure the blower tube is firmly seated in the blower
outlet.
» If you are using the unit as a blower, make sure the inlet
cover is latched.
• In blower mode, check to insure the nozzle is securely
seated
• If you are using your unit as a vacuum, make sure the
vacuum tubes are firmly connected, and positioned as
shown in the assembly illustrations.
• Make sure the collection bag is correctly adjusted with
the shoulder strap on your right shoulder.
• Make sure your extension cord is marked with a suffix of
“W-A”. fW” in Canada).
I n
the blower tube.
9-
Page 10

OPERATION
KNOW YOUR ELECTRIC BLOWER
READ THIS OPERATOR’S MANUAL AND SAFETY
RULES BEFORE OPERATING YOUR ELECTRIC
BLOWER. Compare the illustrations with your unit to
familiarize yourself with the location of the various controls
and adjustments. Save this manual for future reference.
CONCENTRATOR NOZZLE
\
VACUUM TUBES
VACUUM BAG
The ON/OFF SWITCH is used to turn on the unit.
The INLET COVER LATCH is used to open the inlet cover
for attaching Upper Vacuum Tube.
The TOP HANDLE is used to hold the unit during the Blower
and Vacuum mode,
DOUBLE INSULATION CONSTRUCTION
WARNING
ALL ELECTRICAL REPAIRS TO THIS
A
UNIT, INCLUDING HOUSING, SWITCH,
MOTOR, ETC., MUST BE DIAGNOSED
AND REPAIRED BY QUALIFIED SER
VICE PERSONNEL. REPLACEMENT
PARTS FOR A DOUBLE INSULATED AP
PLIANCE MUST BE IDENTICAL TO THE
PARTS THEY REPLACE. A DOUBLE IN
SULATED APPLIANCE IS MARKED
WITH THE WORDS “DOUBLE INSULA
TION” OR “DOUBLE INSULATED”. THE
^MBOL (SQUARE WITHIN A SQUARE)
Q MAY ALSO BE MARKED ON THE AP
PLIANCE. FAILURE TO HAVE THE UNIT
REPAIRED BY QUAUFIED SERVICE
PERSONNEL CAN CAUSE THE
DOUBLE INSULATION CONSTRUCTION
TO BECOME INEFFECTIVE AND RE
SULT IN SERIOUS INJURY.
The REAR HANDLE is used to hold the unit during Vacuum
mode.
The CONCENTRATOR NOZZLE is use to direct the flow of
air into a concentrated area.
This unit is Dout>le Insulated to help protect against
electric shock. Double insulation construction consists of
two separate layers” of electrical insulation instead of
grounding.
Tools and appliances built with a double insulation system
are not intended to be grounded. No grounding means is
provided on this unit, nor should a means of grounding be
added to this unit. As a result, the extension cord used with
your unit can be plugged Into any standard 120 voft electrical
outlet
Safety precautions must be observed when operating
any eiectrical tool. The double insulation system only
provides added protection against injury resulting from an
internal electrical insulation failure.
10
Page 11

OPERATION - SAFETY
OPERATOR SAFETY (Fig. 14 )
WARNING
DO NOT ASSEMBLE OR DISASSEMBLE THE
A
As a blower, the unit is designed to sweep debris, grass,
straw, leaves, or small twigs. Never use for spreading or
misting chemicals, fertilizers, or any other materials which
may contain toxic substances. As a vacuum, the unit is
designed to pick up dry materia! such as leaves, grass, small
twigs, and bits of paper. Do not attempt to vacuum stones,
gravel, metal, broken glass, or any other debris which may
cause damage to the impeller. Do not attempt to vacuum
snow, water, or any other ¡¡quids: vacuuming water or other
liquids will cause damage to the unit. Avoid situations that
could catch the collection bag on fire. Do not operate near an
open flame. Do not vacuum discaided matches, cigars, or
cigarettes, or ash from fireplaces, barbecue pits, brush
piles, etc.
• Read your Operator’s Manual. Make sure you com
pletely understand and can follow all warnings and safety
instructions in the manual before operating the unit.
• Always wear eye protection when operating, servicing,
or performing maintenance to prevent rocks or debris
from being blown or ricocheting into eyes and face which
can result in blindness or other serious injury.
• Always wear a respirator or face mask when working
in dusty environments.
VACUUM TUBES WHILE THE UNIT IS
RUNNING. INSERTING OR REMOVING THE
VACUUM TUBES WHILE THE UNIT IS
RUNNING CAN RESULT IN SERIOUS INJURY.
ALWAYS STOP THE UNIT AND DISCONNECT
THE POWER SOURCE BEFORE
UNCLOGGING THE UNIT OR PERFORMING
ANY MAINTENANCE ON THE COLLECTION
BAG.
00 fjOT USE THE UNIT WITHOUT THE
BLOWER TUBES prqpeRLY ATTACHED TO
AVOID FLYING DEBRIS AND/OR IMPELLER
CONTACT WHICH CAN CAUSE SERIOUS
INJURY.
ALWAYS WEAR EYE PROTECTION TO
PREVENT ROCKS OR DEBRIS FROM BEING
BLOWN OR RICOCHETING INTO THE EYES
AND FACE WHICH CAN RESULT IN
BLINDNESS OR SERIOUS INJURY.
DO NOT USE THE UNIT AS A VACUUM
WITHOUT THE VACUUM TUBES AND
COLLECTION BAG PROPERLY ATTACHED TO
AVOID FLYING DEBRIS AND/OR IMPELLER
CONTACT WHICH CAN CAUSE SERIOUS
INJURY. ALWAYS MAKE SURE THE
COLLECTION BAG IS COMPLETELY ZIPPED
BEFORE THE UNIT IS STARTED.
DO NOT ATTEMPT TO VACUUM WATER OR
OTHER LIQUIDS TO AVOID ELECTROCUTION.
► Dress safely in long pants. Do not go barefoot or wear
short pants, sandals, jewelry, loose clothing, or clothing
with loosely hanging straps, ties, tassels, etc.; they can
be caught in moving parts. Secure hair so it is above
shoulder length. Use of rubber gloves is recommended.
■ Check the unit before each operation. Look for worn,
loose, missing, or damaged parts. Do not use the unit un
til it is in proper working order.
Inspect area before operating unit. Remove all debris
and objects such as rocks, glass, wire, large sticks, etc,
that can cause damage during operation.
Keep children, bystanders, and animals safely away.
Before starting the unit and during operation, make
certain children, people, and animals are a minimum of
30 feet away from the work area.
Check air Intake opening, blower tubes, and vacuum
tubes frequently, always with the motor stopped and the
power source disconnected. Keep vents and discharge
tubes free from debris which can accumulate and restrict
proper air flow.
Do not plug unit into any receptacle other than a normal
120 volt household outlet.
Never immerse any part of the unit into any liquid.
Use the correct operating position. See Illustration
below. Do not overreach or use from unstable surfaces
such as ladders, trees, steep slopes, rooftops, etc. Keep
firm footing and balance at all times.
Never place objects inside the blower tubes; always
direct blowing debris away from people, animals, glass,
and solid objects such as trees, automobiles, walls, etc.
The force of air can cause rocks, dirt, or sticks to be
thrown or to ricochet which may hurt people or animals,
break glass, or cause other damage.
When using your unit as a vacuum, always use collec
tion bag shoulder strap to avoid loss of control.
Never run the unit without the proper equipment
attached. When using your unit as a blower, always
install blower tubes. When using your unit with the
optional vacuum attachment, always install vacuum
tubes and collection bag assembly. Make sure collection
bag assembly is completely zipped.
Adjust shoulder strap to fit securely before operation of
unit.
OPERATING
POSITIONS ^
VACUUM
i/ i BLOWER
Figure 14
Page 12

OPERATION
STOPPING YOUR UNIT
• Slide the switch to the OFF position.
STARTING YOUR UNIT
• Slide the switch to the LOW or HIGH position.
OPERATING YOUR UNIT
WARNING
DO NOT USE THE UNIT WITHOUT THE
A
BLOWER TUBES PROPERLY AT
TACHED TO AVOID FLYING DEBRIS
AND/OR IMPELLER CONTACT WHICH
CAN CAUSE SERIOUS INJURY.
ALWAYS WEAR EYE PROTECTION TO
PREVENT ROCKS OR DEBRIS FROM
BEING BLOWN OR RICOCHETING
INTO THE EYES AND FACE WHICH CAN
RESULT IN BLINDNESS OR SERIOUS
INJURY.
USING YOUR UNIT AS A BLOWER (Fig. 15 )
Use your unit as a blower for sweeping debris or grass
clippings from driveways, sidewalks, patios, etc.
Use your unit as a blower for blowing grass clippings, straw,
or leaves into piles, or removing debris from corners, around
joints, and between bricks.
• Direct air flow by directing the nozzle down orto one side.
Always work away from solid objects such as walks,
large stones, automobiles, and fences.
• Clean comers by starting in corners and moving outward
to straight areas to prevent an accumulation of debris
which could fly into face.
• Be careful when working near plants. The force of the air
could damage tender plants.
USING YOUR UNIT AS A VACUUM (Fig. 16 )
Use your unit as a vacuum to pick up dry material such as
leaves, grass, small twigs, and bits of paper.
• For best resuils operate your unit at high speed, while us
ing as a vacuum.
• Move the unit siowly back and forth over debris to be vac
uumed. Avoid forcing the vacuum tubes into a pile of
debris as this can clog the unit.
• Keep the vacuum tube about an Inch above the ground.
NOTE: If the unit becomes dogged:
• Stop the unit and disconnect the power source.
• Wait until the impelier has completely stopped turning,
then remove the vacuum tubes.
• Carefully reach into the vacuum opening and clear out
debris.
IMPORTANT: THE COLLECTION BAG MUST BE PROP
ERLY EMPTIED.
• You must propetly empty and maintain the collection bag
to avoid deterioration and obstruction of air flow.
• Remove the collection bag from the unit and empty after
each use. Do not store collection bag containing leaves,
grass, etc.
• Wash the collection bag once a year. Remove the bag
from the blower and turn the bag inside out. Wash the
bag with a water hose. Allow the bag to hang and dry
before you reuse the bag.
Figure 15
12-
Page 13

CUSTOMER RESPONSIBILITIES
MAINTENANCE SCHEDULE
Fill in dates as you complete regular service.
Check for damaged or worn parts.
Clean unit and labels.
Check for ioose fasteners and parts.
Clean collection bag.
Before Use After Use
GENERAL RECOMMENDATIONS
The warranty on this unit does not cover items that have
been subjected to operator abuse or negligence. To receive
full value from the warranty, the operator must maintain unit
as instructed in this manual.
Some adjustments will need to be made periodically to
properly maintain your unit.
All adjustments in the “Service and Adjustments” section of
this manual should be checked at lease once each season.
Follow the maintenance schedule in this manual.
WARNING
THIS BLOWER IS PROVIDED WITH
A
DOUBLE INSULATION, USE ONLY IDEN
TICAL REPLACEMENT PARTS. ALL
ELECTRICAL REPAIRS TO THE UNIT, IN
CLUDING ON/OFF SWITCH, MOTOR,
ETC., MUST BE DIAGNOSED AND RE
PAIRED BY YOUR SEARS SERVICE
CENTER. FAILURE TO DO SO CAN
CAUSE THE DOUBLE INSULATION
CONSTRUCTION TO BECOME INEFFEC
TIVE AND RESULT IN SERIOUS INJURY
TO THE OPERATOR.
Yearly
y
y
y ,
Service Dates
YEARLY
CLEAN THE COLLECTION BAG
The collection bag must be properly emptied and maintained
to avoid deterioration and obstruction of air flow which will
reduce the performance of your unit.
• Remove the bag and empty after each use. DO NOT
store the bag without emptying it of all leaves, grass, or
debris.
• Wash the bag once a year by turning inside out and
washing with a water hose. Be sure to let bag dry com
pletely before re-using the unit.
BEFORE EACH USE
CHECK FOR DAMAGED/WORN PARTS
• Replace blower nozzles that are bent, warped, cracked,
or damaged in any way.
• Replace vacuum tubes that are bent, warped, cracked,
or damaged in any way.
• Inspect impeller for cracks.
CLEAN UNIT AND LABELS
• Clean the unit using a damp cloth with a mild detergent
• Wipe off the unit with a dean dry cloth.
• Keep air vents and air intake free from debris at all times.
AFTER EACH USE
CHECK FOR LOOSE FASTENERS/PARTS
• Inspect blower tube. Make sure tube is secure to the
blower outlet.
13
Page 14

SERVICE AND ADJUSTMENTS
HOW TO REMOVE AN OBJECT FROM THE AIR
INTAKE (Fig. 17 )
If an object is drawn into the unit through the air intake, do
the following:
• Push the switch to the OFF position and disconnect cord
from the power source.
• Remove the vacuum tubes.
• Locate and remove the object{s).
• Inspect the impeller for cracks. If cracked or damaged,
DO NOT use the unit. Have impeller replaced by your
Sears Service Center. DO NOT attempt to replace it
yourself.
STORAGE
Immediately prepare your unit for storage at the end of the
season.
STORAGE INSTRUCTIONS
If your blower Is to be stored for a period of time, clean it
thoroughly before storage. Remove any dirt, leaves, debris,
etc. Store in a clean dry area.
• Discon nect from the power sou rce.
• Clean the entire unit.
• Open Inlet cover and clean any dirt, grass, or debris that
has collected, inspect the blower and vacuum tubes.
Close and make sure cover is latched securely.
TROUBLESHOOTING POINTS
TROUBLESHOOTING CHART
SYMPTOM
Unit fails to operate.
• Switch in the OFF position.
• Disconnected from power source.
• Circuit breaker tripped, or fuse
blown.
• Mechanical failure.
CAUSE REMEDY
Clean afr vents and air Inlet of debris.
Store your unit In a well ventilated area and covered, if
possible, to prevent dust and dirt accumulation. Do not
cover with plastic. Plastic cannot breathe and will induce
condensation and eventual rust or corrosion.
Do not store cord with objects having sharp edges or cor
ners. Keep cord away from heated surfaces.
Store unit and cord unplugged in a high, cool, dry, indoors
area out of the reach of children.
• Push switch to the ON position.
• Reconnect unit to power source.
• Reset circuit breaker, or replace fuse.
• Contact your Sears Service/Dept.
Unit vibrates abnormally.
Impeller will not turn freely.
ff situations occur which are not covered in this manual, use care and good judgement.
If you need assistance, contact your Sears Service CenterAyepartment or the
• Mechanical failure.
• Debris in air intake area.
• Mechanical failure.
CUSTOMER ASSISTANCE HOTLINE at 1-800-236-6878
14
• Contact your Sears Service/Dept.
• Clean unit. Remove any debris.
• Co ntact yo u r Sears Service/Dept.
Page 15

NOTES
Page 16

CRAFTSMAN
Operator’s
Manual
Model No.
358.798340
IF YOU NEED REPAIR
SERVICE OR PARTS:
REPAIR SERVICE
1-800-4-REPAIR
(1-800-473-7247)
8.5 AMP MOTOR
150 MPH Air Velocity
ELECTRIC BLOWER/VAC
Each Electric BlowerA/ac has its own model number. The model
number for your unit will be found on a decal attached to the unit.
All parts listed herein may be ordered through Sears, Roebuck and
Co. Service Centers and most Retail Stores.
WHEN ORDERING REPAIR PARTS, ALWAYS GIVE THE
FOLLOWING INFORMATION
• PRODUCT-"ELECTRIC BLOWERA/AC”
• MODEL NUMBER ~ 358.798340
• PART NUMBER
ORDERING PARTS
1-800-FON-PART
(1-800-366-7278)
HOURS (CST)
Mon, - Sat. 7 a.m. - 7 p,m.
Sun. 10 a.m. -7 p.m.
Sears, Roebuck and Co., Hoffman Estates, iL 60179 USA
• PART DESCRIPTION
Your Sears merchandise has added value when you consider that
Sears has service units nationwide staffed with Sears trained techni
cians... professional technicians specifically trained on Sears prod
ucts, having the parts, tools and the equipment to insure that we meet
our pledge to you, we service what we sell.
 Loading...